#furby customization
Explore tagged Tumblr posts
Text


i'm making a zine about furby fashion!
inspired by the stylish furby (jpn) (eng) magazine that was released by tomy in 1999, but this time featuring the energy of what the modern furby fandom has become in 2025 (anarchic/queer/DIY/subversive/surreal/filtered through several layers of internet brain).
you can let me know if you're interested in contributing here! i'll do my best to reply to everyone ASAP, deadline for this volume is March 1st, but if there's enough interest i may publish more in the future?
also i do most of my Furbyposting on my instagram if you wanna follow me there.
please note that this is for artists 18 & over, just because i want to be wary of different legislation around collecting & sharing folks' information - but you can always make your own zine!
#furby#custom furby#furby community#furblr#furby 1998#furby fashion#furby outfit#furby fandom#furby custom#furby customization#zine#fandom zine#fan zine#art zine#craft zine#DIY
182 notes
·
View notes
Text
My custom furbys
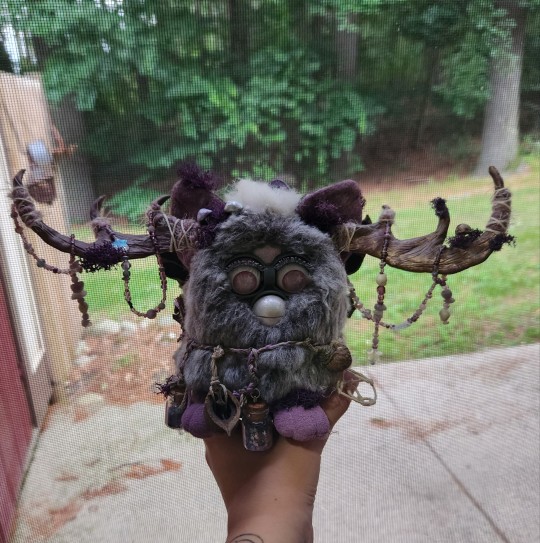

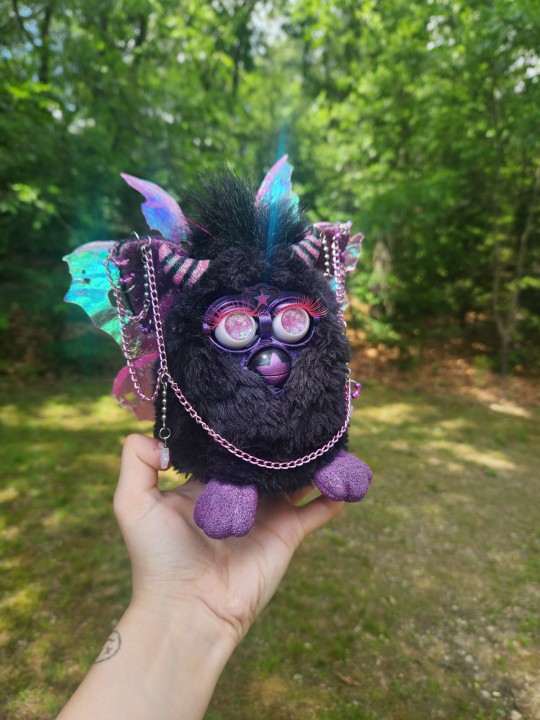
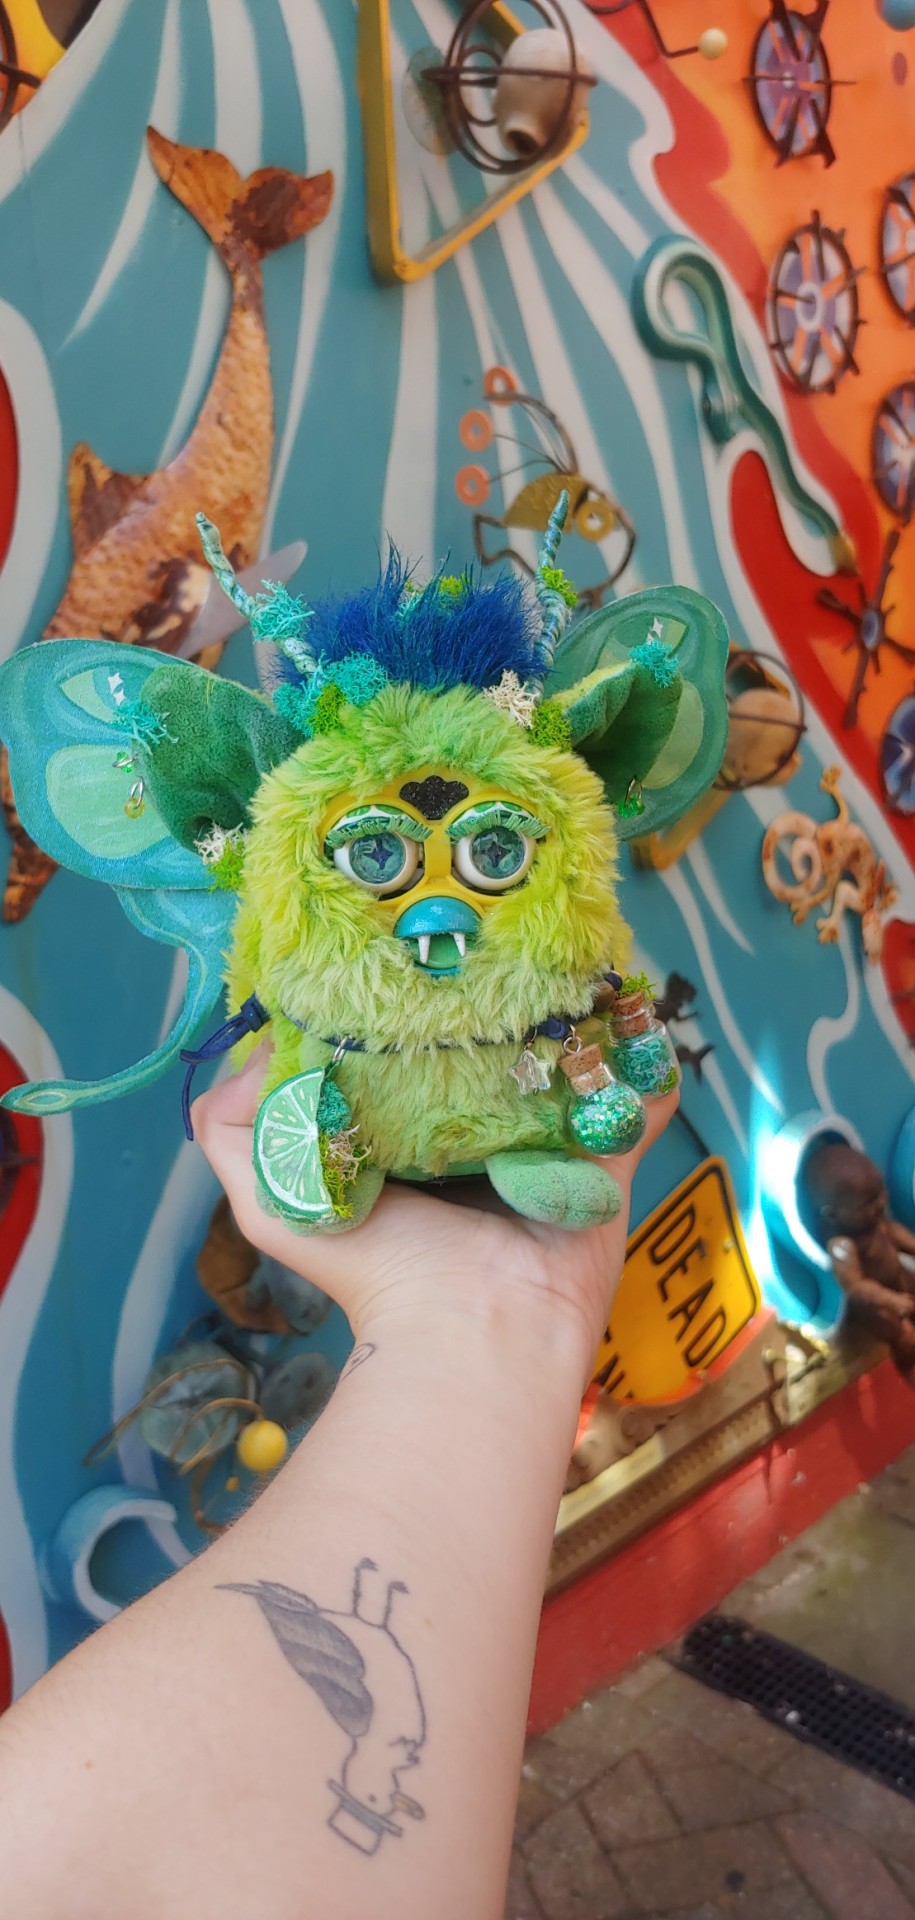
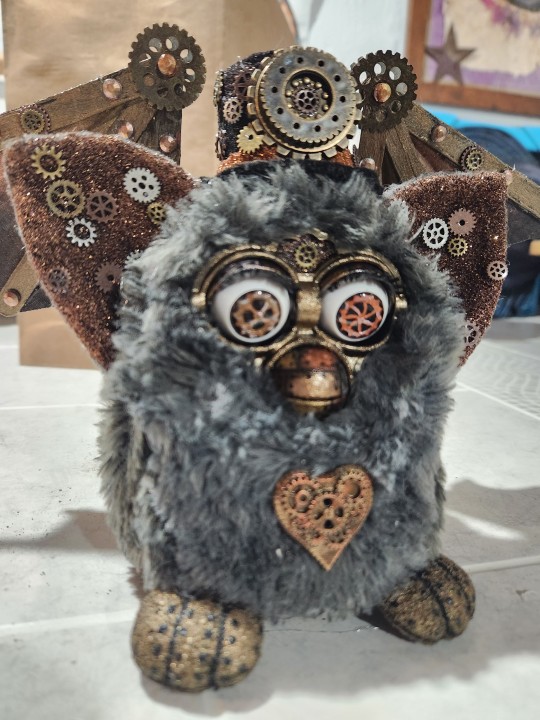
Wormigear is the only one not in the the wings+horns club!
I couldn't make a steampunk furby without a top hat that would be wrong
#furby#furblr#furby fandom#safe furby#furby community#custom furby#furbies#furby custom#furby customization#furby 1998#1999 furby
403 notes
·
View notes
Text
POTENTIALLY UNPOPULAR OPINION
(IM SORRY BUT I JUST HAVE TO GET THIS OFF MY CHEST!!)
People who customize Furbies purely to sell them make me a little sad, but truly I don't take much issue with it as long as they are skilled and have put in a lot of time, effort, and thought. (And just to be clear I don't take as much issue with commissions because they are made for someone to love and idk it's just not as sad to me...)
BUT, when someone who doesn't care about the outcome, or is maybe not experienced really at all, or kind of just didn't do a good job of customizing does it for the sole purpose of selling (just to be extra clear, you can do a bad job and be extremely inexperienced with Furby customization, and keep the Furby. I don't have an issue with that at all!! It's when they're poorly made and meant to be sold that I take a bit of issue with,,) then I get a little irked...
Like I'm happy you're being creative and doing something that makes you happy, BUT, maybe just wait to sell the things you create until you are more experienced??
TLDR: PUT DOWN THE HOT GLUE GUN & RIT DYE AND STEP AWAY FROM THE FURBY!!! D;
20 notes
·
View notes
Text

MY EYES!!
#furblr#cute furby#furby blog#my furby#furby 1998#furby love#furby fandom#furby#1998 furby#furby community#furby memes#furby custom#custom 1998 furby#furby customization#custom furby#customfurby
32 notes
·
View notes
Text

Idk what I'm doing, but I've made some blueprints for a new long furby with a knitted body, inspired by @spooky-nyx 's Soapy Bathwater (crocheting the body was an absolutely genius move there)
I think the color scheme is going to be a periwinkle type color, but I'm not settled on anything so suggestions are welcome and ultimately is comes down to what is available at Joann fabrics
#crafting#yarn crafts#furby#long furby#furby customization#crafting polls#tumblr polls#my polls#knitting ideas
33 notes
·
View notes
Text
What type of paints people are using to customize their furby's plastic parts? Is spray paint for plastic good? Does it need a primer before you spray the plastic with the color of your choice?
I'm considering to use spray paint to cover up the sun damage that my two furbies have, and I would prefer a really smooth outcome.
35 notes
·
View notes
Text
There are so many good choices for eye chips, how do I choose??? I'm gonna wind up with 10 sets for each furby at this rate
#sunnie thoughts#furblr#furby#furby community#furby fandom#furby customization#eye chips#furby eye chips#i like different styles and cant decide if i do or dont want pupils#i want options but this is too many LOL
4 notes
·
View notes
Text
Meet Sweetums (Pt. 2)
As promised, this is my process post for the craft adventure I went on with my very first customized Furby ever!
Of course it started with skinning. As a first timer I was nervous about this first step but I quickly came to see how sturdy these things are. The screws toward the top were hard to get to but once I got it, I was able to remove the pelt!
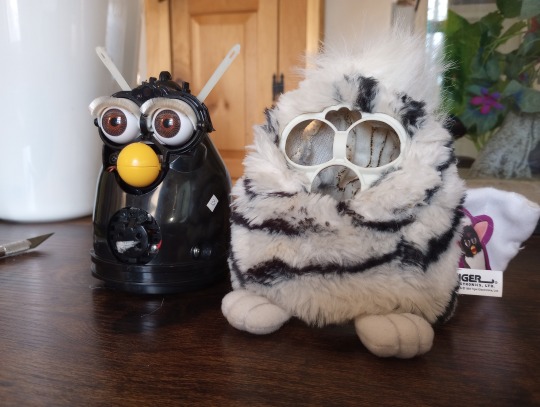
Not pictured: I washed the pelt in lukewarm water and unscented Eucalan (a great soap for delicate things like vintage or natural fibers).
I knew I wanted to experiment with dye, and my research showed me that it would be a massive challenge. Synthetic fur is usually a polyester and acrylic blend, which is plastic. When faux fur gets colored, it’s done when the plastic is still in its liquid stage. Once it becomes the dry soft fur, it can no longer accept much color. Rit makes a great line of dyes for synthetics that are specially formulated for this, but I knew going in that I would still get limited results. This dye needs to be used on the stovetop with hot water. Faux fur can’t be exposed to that kind of heat because it will damage or even melt the fibers. Furby pelts also still have the plastic mask attached which could melt. Because of this, I would be using the dye in warm water, not hot - hence the limited results
Here’s the Rit I used. I mixed these three colors to attempt to get a reddish orange autumn-like color.


I actually had to dye the pelt twice because 24 hours in the mixture did almost nothing. The second time I only soaked it for 4 hours but I diluted the dye way less. In the photo below you can see how the fur is rejecting the dye.

While the pelt was soaking in the dye, I got to work on removing the beak. You’re supposed to just be able to slide that metal bar in their face out, but mine wouldn’t budge no matter what I did. I even removed the outer shell to try to get at pieces around it, but no such luck (this is why everything is open in the next few pictures). I had a custom beak I wanted to use, so the original had to come off one way or another. It took forever, but I sawed away at it with an X-Acto knife until I was able to get the beak off in pieces.
Next came the eyes. I used the well known hot glue trick where you melt the ends of glue gun sticks with a lighter, attach them to the eyes, freeze it for a little while, and then yank the eye chips out. This process worked beautifully first try and got me some of my favorite Furby pictures I’ve ever taken:


I had lots of time while the pelt was being dyed so I finished up my custom eyes. There were some really cool options on Etsy but ultimately I decided that I wanted to make my own. I traced the old eye chips onto thick mixed media paper and painted my own design with acrylic paint. Then I coated it with resin and cured it with UV light. I had a UV resin pen that I used for this. It actually didn’t work super well, the pre-mixed resin in the pen wasn’t blended well at manufacturing (is the conclusion I came to after some research) so it didn’t cure properly. It had this tacky feel to it. I had this problem all over this project, which I solved by giving everything I had painted (eye chips, eye lids, mask, beak, and tongue) a top coat of clear nail polish lol.
I also used my own waterproof mascara on her lashes. Slay.


I cut the eyes out with scissors and you can see it’s not quite perfect. Not horrible for being done by hand though! It doesn’t bother me on the finished Furby.
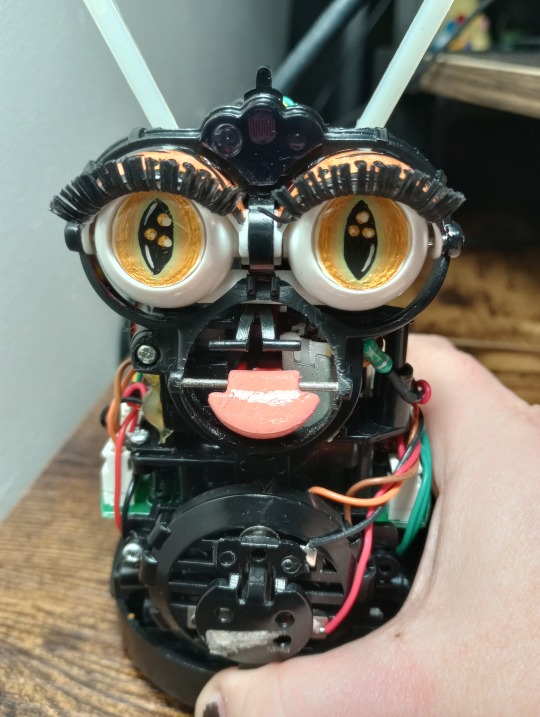
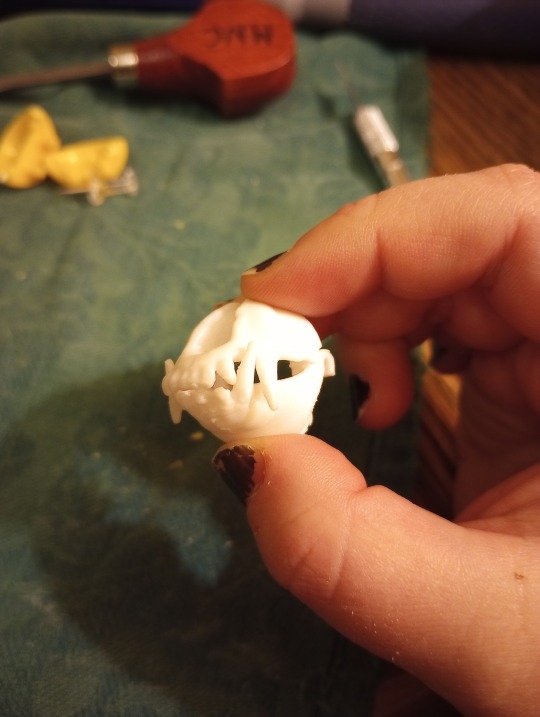
I painted the custom beak too. I linked it in my previous post, but I’m going to again because I can’t praise this beak from DuctTapeStuck on Etsy enough. Besides the really cool skull design, the best thing about this beak is how it has open hooks in the back. The original Furby beak has plastic that surrounds that metal bar as a closed ring, meaning that the bar has to be able to come out in order for it go on at all. Like I mentioned before, the bar on my Furby was not moving. But because DuctTapeStuck’s beak has open hooks in the back, I was able to get it onto that bar with it still on the Furby. It was a very tight fit, especially because I still had the tongue on the bar, but it was possible and that’s what matters!

By this time, the pelt was as dyed as it was ever going to get. I definitely lost control of the color but considering I was dying a synthetic under the wrong conditions, I decided that any change at all would be a good change. After I rinsed it, the body was a brownish purple and the mane was a light pink.
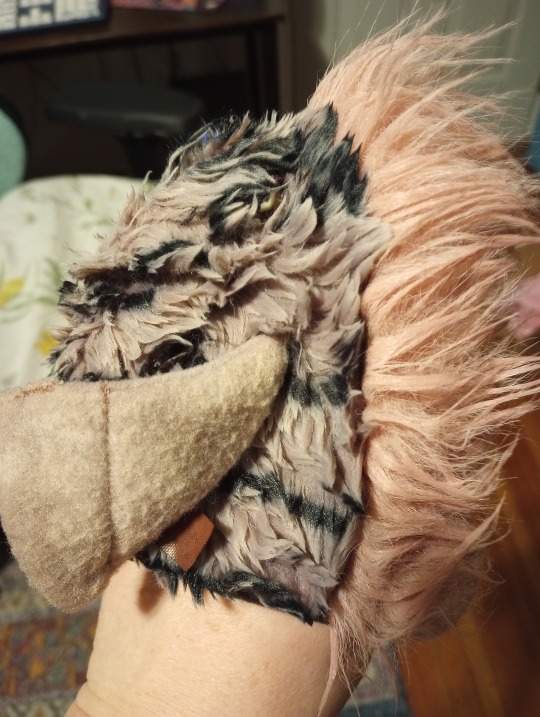
I pressed all the water out of the pelt with a towel and air dried it outdoors. After that, the shell and the pelt went back on and Sweetums was complete!

The earrings were some old things I found my jewelry box that I never really open. I’m glad someone is getting use out of my old stuff haha!
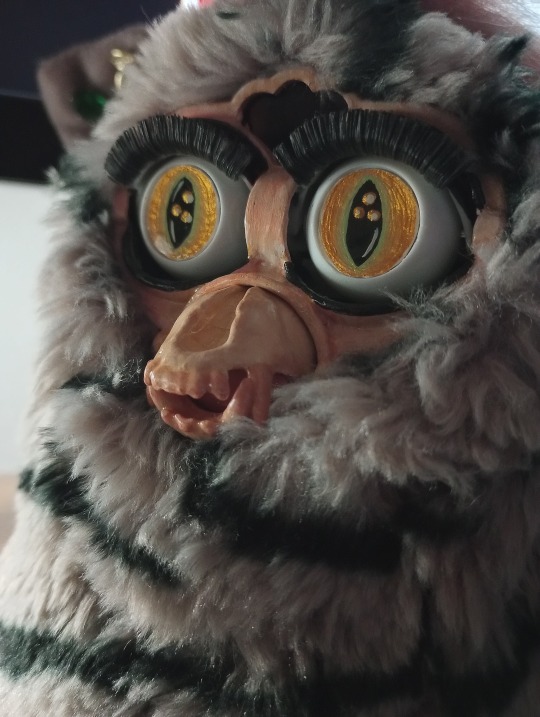
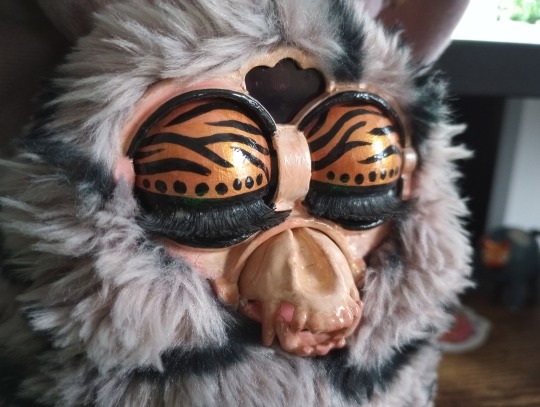
And that’s Sweetums! I had some challenges along the way but it was really fun solving the problems I came across. I’d really love to do more of these in the future!
27 notes
·
View notes
Text
I have sewing and sculpting skills, but also I've never plush-ified a furb before (let alone an 05). I'm not sure if I should plush him up, or get a cheaper color to try turning into plush. This is my favorite color of 05, and I'd love to be able to squeeze him - but I'm worried abt messing up.
He is non-working, in good physical condition besides the beak. The rubber on it is torn.
thanks yall :)


#also if anyone has naming suggestions that would be pog#furby#allfurby#safe furby#furby customization#2005 furby#custom furby#vannys posts#f: benjamin the meatball#05
3 notes
·
View notes
Photo
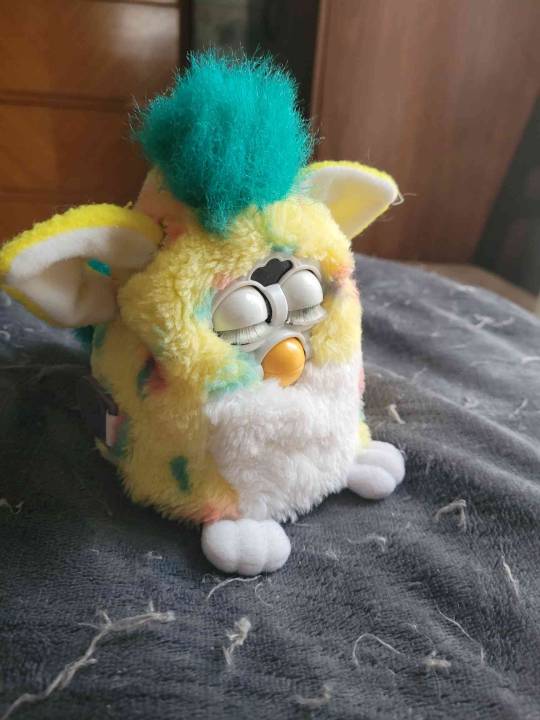
lulu, the furby who started my journey, is photo-ready again!
tl;dr i fucked up my first customization so bad and had to use a risky method to get paint off my first ever furby. but it worked! be careful kiddos!
5 years ago with no customizing knowledge, i painted her eyelids a bright blue. to my dismay, paint would not stay on a huge patch of her right eye.it was super noticable, and i futilely tried to paint over it again and again with no luck. i hadnt prepared anything to remove her paint, so it dried like that.
ever since, ive been chipping away at the paint best i could. with rubbing alcohol and paper towel. with my nails. some progress was made but around 75% of her eye still had paint on it. she looked even worse now with chipped bits all over.
i was about to give up and give her body away for parts or repair to whoever wanted it... but as i remembered her horrifically loud voice and charming personality, and the fact she was my first furby, i couldnt do it.
i asked my dad for help. i told him acetone and most paint strippers arent great for furby plastic. he agreed to try out something. first he tried chipping it off with a knife. then paint thinner. finally, he tried pvc pipe cleaner- not sure how he got this idea, but it WORKED! (its a pipe cleaner you use before you glue two pvc pipes together)
he did say the chemical did impact the plastic, so he had to work fast and rub it off once itd taken the paint off and do so very carefully. however it looks fantastic imo
basically, this is a cautionary tale lol. be prepared to take paint off if you dont like a color or something goes wrong during a custom. ive heard soapy water and a paper towel is enough
13 notes
·
View notes
Text
✨🦞lobster glow up🦞✨
Before

✨After✨

10 notes
·
View notes
Text
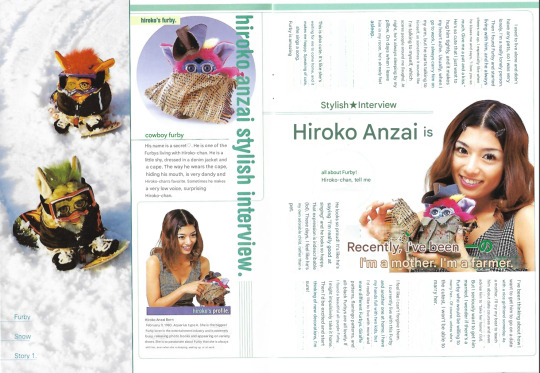
translated interview with Anzai Hiroko from 'Stylish Furby', which was an official (?) magazine released in 1999. Full scan of the magazine (Japanese text) is here - would anyone like me to post more translated scans?
There are a few tutorials for Furby outfits in this magazine that I think are super cute - might also include some measurement conversions since the original ones are all in metric.
Also I'd love to make a fanzine at some point with interviews like this.
#furby#furby community#furblr#furby fashion#furby 1998#furby fandom#furby custom#furby outfit#custom furby#furby customization
141 notes
·
View notes
Text
Bxby Goblin: A custom for my sister is finished!
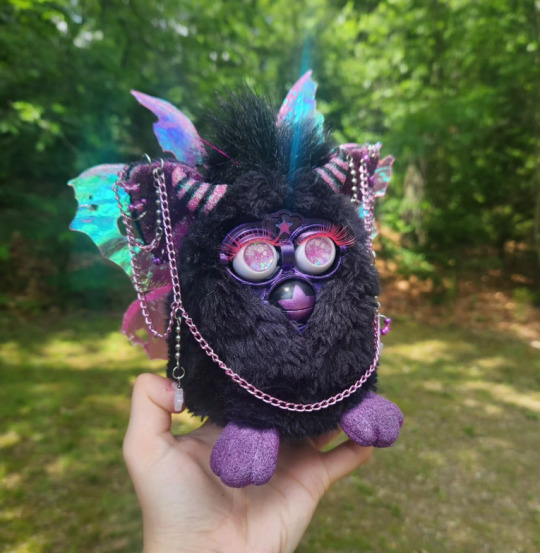
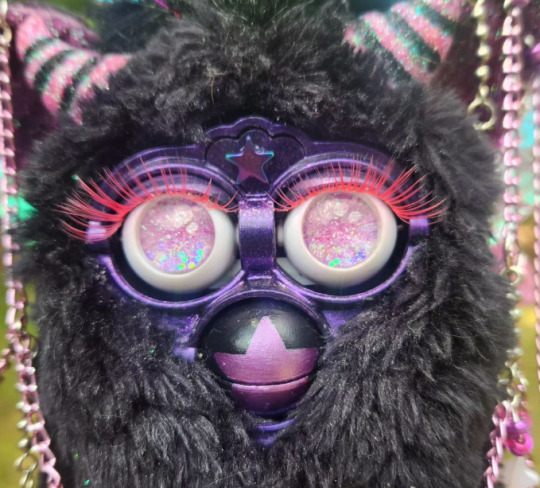
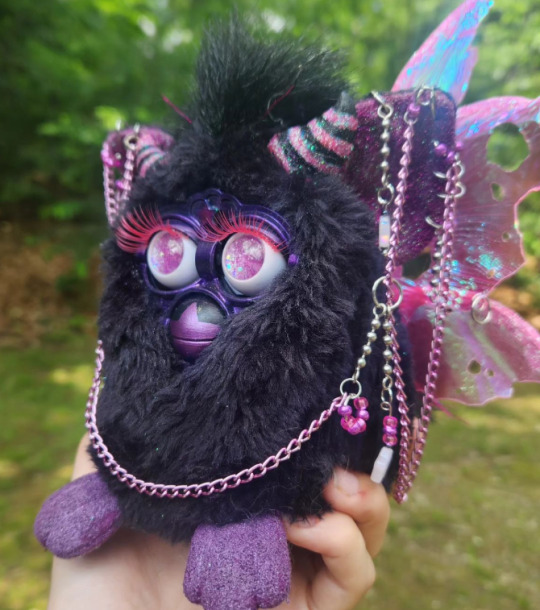
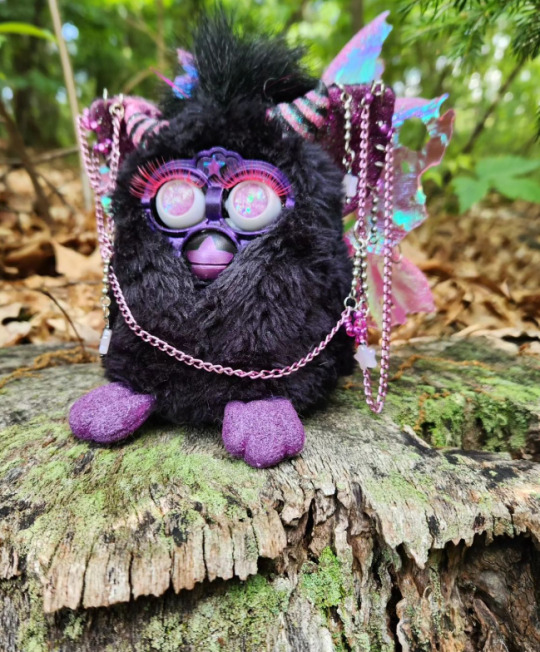
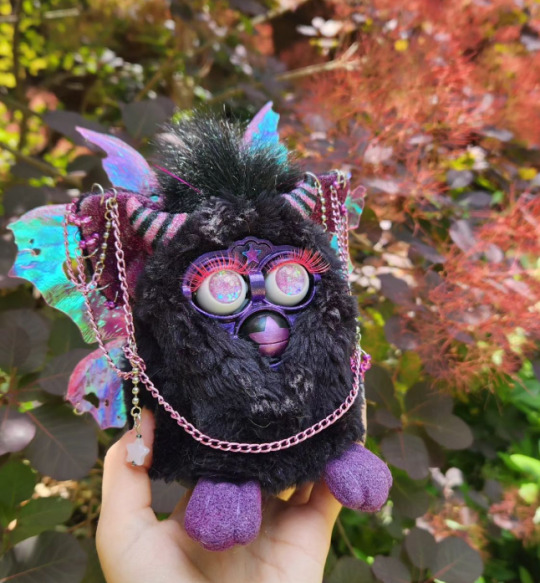
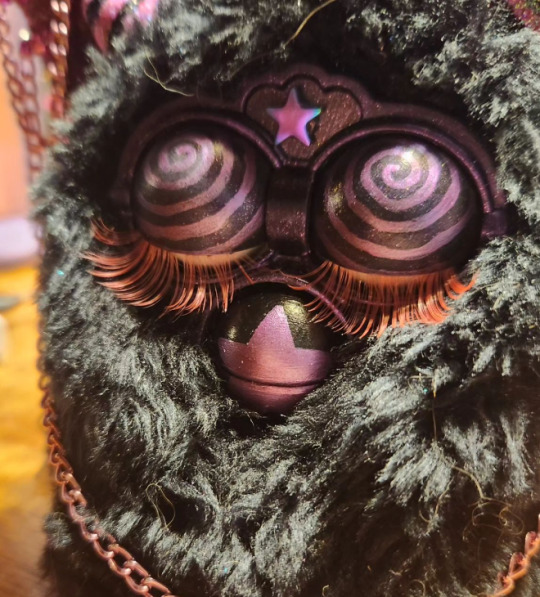
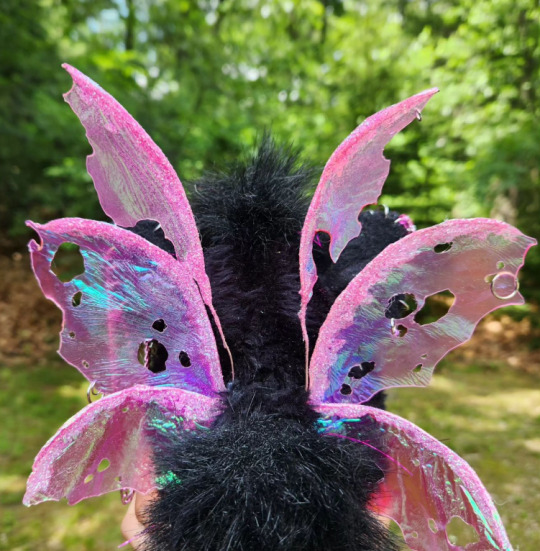
#furby#furby 1998#furby 1999#furblr#custom furby#furbies#furby custom#Furby customization#furby mod#furby mods#furby modification#safe furby#Furby community#furby fandom
354 notes
·
View notes
Text
Snow photoshoot with Lait Fraise (featuring me and my dog Dexter)! Might do one with other furbs later!


#furby#furby fandom#hehe fubby#safe furby#my furby#furblr#kidcore#kids toys#furbycore#furby community#furby customization#customfurby#furby customizing#custom furby#furby custom#snow#snow pictures#photoshoot#nature
16 notes
·
View notes
Text
did some more stuff today.. been busy..

painted the eye chips today
#furby blog#punk furby#my furby#furby fandom#cute furby#furby collection#1998 furby custom#custom 1998 furby#furby customization#customfurby#furby custom#custom furby#furbies#furby#1998 furby#furby 1998#all furby#safe furby#furby community#diy furby
20 notes
·
View notes
Text
I got a small shelf and oh my god he’s so stupid 😂😂😂😭😭😭
Grass’ new home


864 notes
·
View notes