#curvelinear
Explore tagged Tumblr posts
Photo
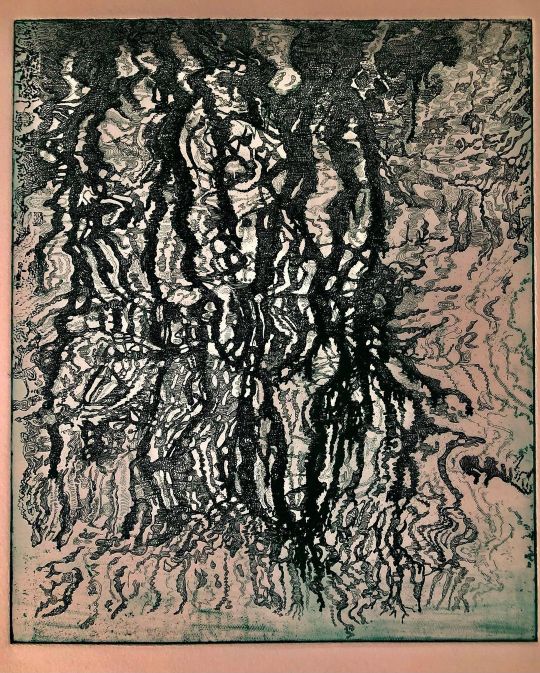
“Reflections; Winter Trees”, my latest #etching print pressing which is purely linear. The descriptive and gestural lines, the density of the #crosshatching and the copper plate’s exposure to the acid form the variations in tone of this particular etching emulating a fluid and watery feel #water #nature #curvelinear #crosshatchingart #contours #contourshapes #printmaking #printmaker #intaglioprintmaking #intaglioprint #intaglio #engraving #intaglioetching #intaglioprocess https://www.instagram.com/p/Cgyf5Sxj6im/?igshid=NGJjMDIxMWI=
#etching#crosshatching#water#nature#curvelinear#crosshatchingart#contours#contourshapes#printmaking#printmaker#intaglioprintmaking#intaglioprint#intaglio#engraving#intaglioetching#intaglioprocess
0 notes
Photo

Borealis Studio
#Built Beauty
#glass#color#vessel#vessels#vase#shape#modern#design#curve#curvelinear#elongated#dramatic#bold#mcm#contemporary#interior#accessory#beauty#translucent#builtbeauty#built beauty
1K notes
·
View notes
Photo
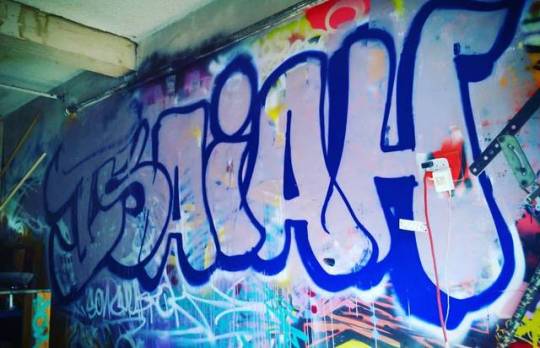
#SonChubrok #Isaiah #typography #UrbanTypography #LetterForms #paint #curvelinear #fluid #softies #practice #flow
#curvelinear#fluid#typography#letterforms#urbantypography#paint#softies#flow#practice#sonchubrok#isaiah
1 note
·
View note
Photo
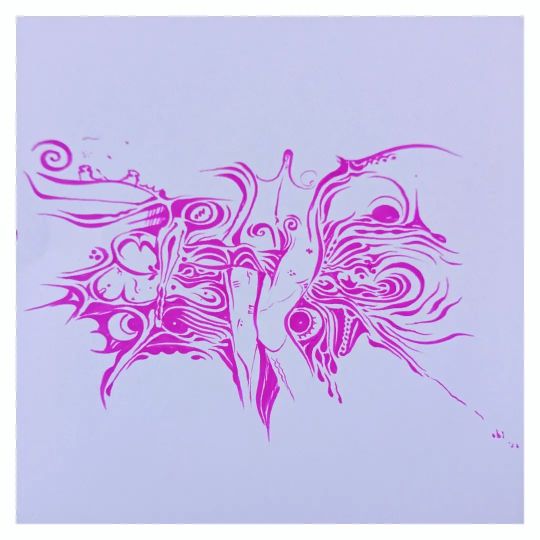
¶Lines in Poetry Uli is the name it's called From the mothers of the land On their bodies and the walls Nsuka' became the confluence- we survived And after the war Uli was revived Studied, experiments synthesized It was the genius of Uche Okeke It was the gift from Ndi nne To generations from the epochs of times Lyrical flows of abstract summaries in lines Space, moving dots, spontaneity Designs so curvelinear, sharp and asymmetrical in brevity Truly the seeds fell and Nsuka was the soil- the mat. Uli the oil with which we ate our Art •Brushpen on paper . . . #igbobinna #nsukaseries #igbo #art #uli #Nsibidi #asusuobi #gold #storytelling #vintage #brushpen #lineart #drawing #contemporaryart #igbo #nsukka #minimalism #africanart #igboart #biafra #stories #africantattoo #Nsukkaschool #althestars #biafranwar #chief #lineart https://www.instagram.com/p/CgSNXNJDw8Z/?igshid=NGJjMDIxMWI=
#igbobinna#nsukaseries#igbo#art#uli#nsibidi#asusuobi#gold#storytelling#vintage#brushpen#lineart#drawing#contemporaryart#nsukka#minimalism#africanart#igboart#biafra#stories#africantattoo#nsukkaschool#althestars#biafranwar#chief
1 note
·
View note
Text
HELVETICA- WK 1
My next work was inspired by helvetica I loved how distorted or quite curvelinear they were so I tried to apply that into my work.
0 notes
Photo
There is something special about curated travel trails. They literally bring a bus load of people from different walks of life bound by a common passion together and leave them with endearing memories from an unforgettable journey. In a week, strangers become friends as their passion for travel brings them closer. And that to me is the very essence of the Times Passion Trails who translate the tag line, Live what you love into memorable journeys. As a traveller, I am constantly travelling, but my trip to explore the cultural heritage of Odisha with Times Passion Trails, an initiative of the Times of India was special.
I had been to Odisha before but on this trip, I evolved into a knowledge traveller as our Experience Architect was none other than noted cultural historian and dancer, Navina Jafa. I travelled with real travellers who were dancers to doctors, homemakers to entrepreneurs, artists to engineers and was inspired by their love for heritage and culture. But it was the cultural heritage of Odisha that overwhelmed me – with its rich tapestry of culture, the influence of indigenous communities, its ancient Buddhist roots and the Jain connection.
And Lord Jagannath with his siblings is all pervasive. It is not just about faith and devotion, but an entire economy has flourished around the deity – in art, crafts, architecture , paintings, sarees and even food. Looking back on my trip to Odisha with Times Passion Trails, I realized that travel is more about moments than just sights and sounds. And there are fifteen memorable moments from my tryst with Odisha’s traditional and cultural heritage.
A spiritual moment at Puri Jagannath temple
There can be nothing more serene and spiritual than the darshan of the larger than life deities of Jagannath and Balabhadra flanking Subadra in the Puri Jagannath Temple. The wooden deities carved out of logs of Neem tree stand there, dressed in bright orange and red hues. Our darshan here was arranged by the Times Passion Trail and we got a few seconds only with the deity but it felt like an eternity. After all, these deities are believed to be chiseled by none other than Lord Vishnu himself. I was just overwhelmed.
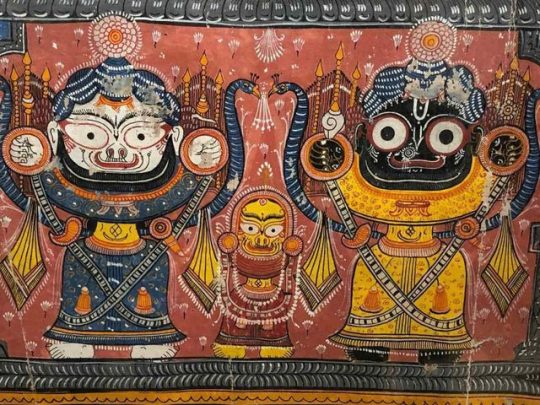
Pathachitra of the Puri deities
But it is not just the religious fervour alone that lures me to temples. The architecture, the history, the legends, the myths, the traditions and the quintessential “Indianness’ of these sacred shrines fascinate me. Spread over 400,000 sq feet, it was built on the ruins of an earlier temple by King Anantavarman Chodaganga Deva of the Eastern Ganga Dynasty. But legends say that the original temple was built by none other than Vishwakarma himself. After the darshan we had a tour of the kitchen as the deities love their Bhog. It is believed that 58 different food items are prepared for the deities and they have their favourites.
Gotipua dance at Raghurajpur
The entire atmosphere became colourful as soon as I entered the Heritage Crafts Village of Raghurajpur , one of the places to see in Odisha. A short drive of just 15 kms from Puri, I felt like I had stepped into a virtual art gallery. Every house was a museum and every person living here was an artist. Raghurajpur, is synonymous with the Patachitra – pata means cloth and chitra means painting. Almost every artist here is a Chitrakaar who has been learning the craft since he or she is a child. Raghurajpur is one of the destinations that represents the cultural heritage of Odisha
A patachitra in progress
But talking about children, I was fascinated by the Gotipua dance, one of the traditional dances of Odisha. However it is performed by young boys and not girls. Most of these boys are trained in a Gurukul and they stay here until they reach adolescence. Jagannath and Krishna inspire the dancers. Gotipua was a precursor to the Odissi dance and even the maestro, Kelucharan Mohapatra , who is from Raghurajpur was a Gotipua dancer . The dance with so many acrobatic postures literally took my breath away.
Meeting sand artist, Padma Shri Sudarshan Pattnaik
The heart of Odisha lies in its crafts and sand art is one of them. Meeting Padma Shri Sudarshan Pattanaik was a personal high . When I visited Puri last time, the Sand Art Festival had just got over and I was lucky to see a few of the sand sculptures on the beach. However this time I am grateful to have gotten an opportunity to meet the artist himself.
He had even carved a beautiful depiction of the beauty of Odisha for us on the beaches of Puri. When we spoke to him about his life, he said that he owed everything to Lord Jagannath as he used to work near the temple as a young boy.
Colours of Pipli
It was a kaleidoscope of colours at Pipli, one of the destinations on the cultural hertage of Odisha, where large radiant umbrellas greeted us as soon as we entered Pipli. The artists referred to as tailors or “Darjis” here are known for their applique work where they stitch colourful pieces of cloth together and create beautiful designs. Wall hangings, lamp shades, garden umbrellas, bags and purses are created with colourful fabrics and pieced together with mirrors and embellished with embroidery. Walking around I saw shops filled with these alluring crafts as some of the girls working in them told me that there were over 100 families who created magic with their fingers. As all arts and crafts of Odisha, the applique work started as a part of the traditions associated with Puri Jagannath Temple.
The Pahala Rasgulla – a Bhog for the gods
You dont visit Odisha and not try the famous Pahala Rasgulla. Located on the Bhubaneshwar – Cuttack highway ,Pahala is a small village on the outskirts of the capital and is known for the sweet shops that line up the highway and is one of the places to see in Odisha.
Odisha and West Bengal have been in a tug of war as to who has the original bragging rights for the Rasgulla. Odisha claimed that their version had existed for over 600 years as “kheer mohana” in Puri when it was offered as “Bhog” to the deities in the Jagannath temple. It later on apparently evolved into the “Pahala Rasgulla”, which is creamier than the Bengali white spongy delicacy. The colours were in shades of beige to ochre. According to the legends, a priest from the Jagannath temple saw the villagers from Pahala throwing away the excess milk from their cows. He taught them the recipes of many sweets including the rasgullas. Besides rasgullas, you can also find different sweets made from “chhena” which is similar to panneer called the chhena poda, which is Lord Jagannath’s favourite dish as well.
A date with the sun at Konark
One of the UNESCO World Heritage Sites in Odisha, the magnificent Konark Temple is an ode to time. Dedicated to Surya, the Sun God, the 13th century shrine was designed like a massive chariot but it was the ornately carved twenty four wheels that caught my attention. The Puri Jagannath temple was referred to as the White Pagoda by the Europeans but the Sun Temple at Konark earned the title of Black Pagoda. The temple has several legends associated with it and for me, the Sound and Light Show narrated them beautifully. There is also an interpretation centre here which gives you an insight into some of the architectural aspect of the temple . While there are several erotic sculptures here , I was most curious by the sculpture of the giraffee – which was apparently an indication of the trade between Odisha and parts of Africa.
Temples of Bhubaneshwar
One of the prettiest temples in Bhubaneshwar
Think Odisha and you think of the Jagannath Temple in Puri and the Sun Temple at Konark, but the old town of Bhubaneshwar has several old temples which are all architectural marvels. The city takes its name from Tribhuneshwar, a form of Shiva and most of the old temples of Bhubaneshwar are dedicated to him. The 1000 year old Lingaraja temple dedicated to Harihara is at the centre of the town. The largest temple in the city, the architecture is typical of the Kalinga style with a curvelinear tower. My personal favourites are the Mukteshwar temple, the Raja Rani or the Indreshwar temple and the Brahmeshwara temple.
An introduction to Odisha’s 62 tribes at The Tribal Museum
Odisha’s indigenous communities are a story by themselves but we had a brief glimpse of their traditions and culture in The Tribal Museum in Bhubaneshwar. The cultural heritage of Odisha actually evolved from their traditions. From jewellery to paintings, there are five galleries here, which showcase their personal belongings, their hunting weapons, their fishing techniques, their agricultural tools among others. I was fascinated by a beautiful anklet with spikes worn by women which also doubled as a defense mechanism to protect them from any attack.
Arts and crafts, music and dance find expression here as well. Besides the Tribal Museum, we also stopped at Kala Bhoomi which showcases the folk and traditional crafts of the artisans of Odisha. This was one of my favourite experiences on the Times Passion Trails as it represented the very cultural ethos of Odisha. And while these museums were just a tiny peep into the lifestyle of the different indigenous communities, I would one day like to meet them and delve deep into their traditions.
The Sound and Light Show at Dhauli
The story of Samrat Ashoka, his bitter and bloody battle with Kalinga may have been etched in history but the hills of Dhauli surrounded by the River Daya were witness to the bloodbath and atop them, stood the serene Vishwa Shanti Stupa with a glittering dome, which was built by the Japanese. As we sat in the open on a starry night, the story was narrated to us as we watched a beautifully choreographed Sound and Light show. Dhauli is also famous for Ashoka’s edicts which were imprinted on rock faces here, especially on one of them which was carved like an elephant. This is believed to be the earliest rock cut architecture in India. There were also two edicts here which referred to the Kalinga War.
The Diamond Triangle – Ratnagiri, Udayagiri and Lalitgiri
In Ratnagiri monastery
With Ashoka’s patronage of Buddhism, Odisha slowly became one of the main centres of Buddhism in ancient and medieval times. Recent excavations have shown that three sites popularly known as the Buddhist triangle of Odisha – Ratnagiri, Lalitgiri and Udayagiri were once home to several ancient stupas and monasteries and monks used to live and study here as well. Lalitgiri even had a relic of Buddha in one of the stupas, which you can see in the museum. However what really fascinated me were the insights shared by Preethi Karwa who was one of the participants on the tour and is a post graduate in Ancient Indian Culture , History and Archaeology. She told us that Guru Padmasambhava , the founder of the Vajrayana sect of Buddhism, popular in Tibet and Ladakh would have probably been from here. As their sect of Buddhism takes the form of a diamond, these three sites are known as the Diamond Triangle. Personally for me, this was one of the key highlights of the Times Passion Trails and it truly represents the cultural heritage of Odisha.
Excavations in Udayagiri
The Jain Heritage
While Buddhism and Odisha have become rather synonymous because of Ashoka and Kalinga, very little is known of the Jain heritage in Odisha. However there are rock cut caves in Udayagiri and Khandagiri on the outskirts of Bhubaneshwar, which have inscriptions that date back to even 1st -2nd century .One of them is referred to as the Hathigumpha inscription which speaks of King Kharavela who was a patron of Jainism. The caves were probably rock shelters for Jaina monks for lived here at one time. Every sculpture here tells a story and sometimes we just need to sit there and listen to them.
Being inspired by Padma Shri Sudarshan Sahoo
It was almost late evening when we walked into the gallery of sculptures chiselled by Padma Shri, Sudarshan Sahoo, a doyen among sculptors who has created the Sudarshan Crafts Museum. Even at the late hour, the sculptors were chipping away at statues of deities in the open. Inside the gallery, every sculpture seemed to be breathing life. He told us that it was a meditative process as he closed his eyes and said a little prayer before starting his work. It was humbling to listen to him speak about his work with so much passion and I am grateful to the team at Times Passion Trails and specifically to Navina Jafa, our Experience Architect who was keen that we interact with all the craftsmen .
Watching a slice of Ramayana with shadow puppets
It was a surprise awaiting all of us at the Maritime Museum in Cuttack. As we explored the maritime history of Odisha, we were ushered into a small room. And in a few moments, we were treated to one of the spectacular craft of story telling. A snippet of the Ramayan called Ravana Chhaya is narrated by shadow puppets accompanied by music . The master craftsman is Gouranga Charan Dash and his team who have been working hard to keep the craft of shadow puppetry alive. The Srirama Institute of Shadow Theatre is one of the few groups who are trying to revive and promote the art. Crafts and craftsmen define the very cultural heritage of Odisha and this was a memorable experience.
Street photography and silver filigree
There is nothing like an impromptu heritage walk and getting lost in lanes and by-lanes. While we were in Cuttack, we went looking for some artisans who were adept in silver and gold filigree work. And while we did visit some of the workshops, the highlight for me was walking around the lanes and admiring the architecture. The narrow lanes were picturesque in their own way, but personally the people made it all the more special .
Subash Chandra Bose’s birth place
This was one of the many surprises that were in store for us. For many years I had always assumed that Subash Chandra Bose was synonymous with West Bengal but I was fascinated to know that he was actually born in Odisha. His ancestral house in Cuttack is now a museum called Janakinath Bhawan , a serene edifice in white surrounded by a colourful garden. As we climbed the narrow wooden steps and peeped into his room, I was feeling humbled by the sacrifice that he had made and wondered about the many mysteries that shrouded his death. A wave of gratitude overwhelmed me as I walked away in silence.
The one week in Odisha culminated in so many wonderful experiences where we were overwhelmed with stories and snippets from history. The trails were very well organised and were at an easy pace, giving us enough time to soak in the atmosphere and lose ourselves in the cultural odyssey. Personally it left me wanting more as I wanted to explore the wild and natural heritage of Odisha, visit the national parks and say hello to the birds at Mangalajodi at Chilika Lake. But there is always the next time. I leave you with two beautiful paintings of Odisha, created by artist Kirthi Shetty, one of the participants in the trail. I loved her perspective of Odisha as she has painted with such delicate and yet bold strokes . I am no expert of art but these evocative paintings appealed to me .
The post Times Passion Trails – Fifteen favourite experiences in Odisha appeared first on Lakshmi Sharath.
0 notes
Link
Operators in Curvelinear Coordinates Besides ordinary Cartesian coordinates, spherical as well as cylindrical coordi- nates play an important role. They can make life a lot easier in situations which are spherically or cylindrically symmetric. C.1 Operators in Spherical Coordinates Spherical coordin via Lakhasly.com Rss Feed
0 notes
Text
tim hortons; a great place to talk about neil armstrong.
Two old men sitting near me
talking about neil armstrong and dominos
while i’m hiding away at a sketchy timmies
drawing subtractions and additions in my notebook.
Maybe I can include this in my folly
A hideway
My space is a hideway, curvelinear.
0 notes
Photo

Soho Galaxy Zaha Hadid Architects
The great interior courts of the project are a reflection of traditional Chinese architecture where courtyards create an internal world of continuous open spaces. Here, the architecture is no longer composed of rigid blocks, but instead comprised of volumes which coalesce to create a world of continuous mutual adaptation and fluid movement between each building. Shifting plateaus within the design impact upon each other to generate a deep sense of immersion and envelopment. As users enter deeper into the building, they discover intimate spaces that follow the same coherent formal logic of continuous curvelinearity.
https://www.archdaily.com/287571/galaxy-soho-zaha-hadid-architects
0 notes
Text
Basic UIView Animation Tutorial: Getting Started
Update note: Ehab Amer updated this tutorial for Xcode 10 and iOS 12. Bjørn Ruud wrote the original.
One of the coolest things about iOS apps is how animated they are. Views can nimbly fly across the screen, gracefully fade in and out, cleverly rotate around and rescale, and much, much more! UIView animation is everywhere in iOS, and it’s a big part of what makes iOS apps so much fun.
Thoughtfully chosen animations look great, and they can really bring your own iOS app to life. Better still, they’re also a great way to draw a user’s attention any time new or additional information becomes available in your app.
But maybe the best part about UIView animation is that it’s incredibly easy to implement. All it takes is a few lines of code, and you’re up and running!
In this tutorial, you’ll get a chance to go hands-on with UIView animation! You’ll create a simple app with a picnic theme: You’ll use animation to open the picnic basket, animate an interloping bug that’s snuck into the basket, then take decisive action, so your tasty picnic goodies stay bug-free!
As you’re doing this, you’ll learn to use the basic UIView animation APIs and to chain animations together for even more satisfying effects.
So grab your picnic basket; it’s time to get started!
Swift loves an animated picnic!
What UIView Animation Does For You
To help you appreciate how nice and easy native UIView animation is, first review some of the steps you’d need to take if iOS didn’t provide built-in animation tools and you wanted to animate a view moving across the screen on your own:
Schedule a method to be called in your app, once for every frame drawn.
Determine the number of frames your animation should run based on its duration and then, for each frame:
Calculate the new position of the view based on the view’s beginning and desired final destination, the time your animation will run, and how long it’s run so far.
Update the view’s position, either by directly setting it or by updating the AutoLayout constraints that determine its position.
When your animation has completed, or if it’s interrupted, clean up and make sure the final state of the view is correct.
That’s all possible to do, but you’d likely think hard before implementing even a simple animation this way. And homegrown animations like this would get more complex as you added animations of different types, durations, and delays. Your code would become more complicated still as animations interacted. You’d end up micro-managing animation implementation details rather than working on meaningful code.
Let iOS sweat the animation details for you!
The great news is that UIView animations are extremely easy to use. Many view properties, such as a view’s frame (its size and position), its alpha (transparency), and its transform (scale, rotation, etc.), have built-in animation support. And best of all, instead of having to sweat all the frame-by-frame steps listed, using UIView animation, all you do is:
Call one of the UIView animation methods and tell it how long your animation should run, along with some other simple parameters.
Set up an animation block where you let UIKit know the final values of any properties you’d like to animate.
There is no Step 3! :]
Once you’ve completed these 2 simple steps, UIView animation will manage all the fine details and complexities to deliver silky smooth animations on your behalf. Time to dive right in and see how to make this magic happen in code!
Getting Started
Use the Download Materials button at the top or bottom of this tutorial to download the starter project. Unzip the downloaded project, open the starter project, and take a look around: You’ll see that the starter project contains a view controller and a main storyboard pre-populated with the elements you’ll need. The outlets for each elements are already connected, so you can get right to work on the good stuff. You might also notice a sound file, which you’ll use for some extra fun at the end of this tutorial!
Picnic Starter Project
Open Main.storyboard, and check that the Document Outline is visible and expanded as shown below. If you don’t see this, either click the Show Document outline button, or choose Editor ▸ Show Document Outline to display it.
In the Document Outline, you’ll see the views you’ll be animating: The doors of your fancy picnic basket, a spiffy set of fabric napkins, a plate of tasty cheese, and a sneaky, picnic-crashing bug.
Build and run your app. After a moment, you’ll see the starter project showing your picnic basket with its lid closed:
Opening the Picnic Basket
Note: You’ll learn to animate objects both with and without Auto Layout constraints. The basket views have constraints anchoring them to their parent view, while the fabric views are directly positioned. If you’d like to learn more about how to use Auto Layout and constraints on your own, check out Auto Layout Tutorial: Getting Started.
You’re going to teach your picnic basket to open up in a nifty animated way. You’ll do this in two steps:
Open up the picnic basket’s doors.
Move aside the fabric napkins inside the picnic box. :]
Open ViewController.swift. After viewDidAppear(_:), add stubs for the methods you’ll use to perform these two steps:
func openBasket() { } func openNapkins() { }
And then call both methods inside viewDidAppear(_:):
openBasket() openNapkins()
Next, you’ll flesh out these methods, starting with the napkins. You’ll start here because it’s a bit simpler to animate views without constraints.
Open Main.storyboard and select the Basket Top and Basket Bottom views. Open the Attribute inspector and, in the Drawing section, tick the Hidden attribute checkbox. This will temporarily hide basket’s doors so they won’t block your view of the animating napkins.
Build and run your app once again. This time, you’ll see the fabric napkins inside the basket.
Now, open ViewController.swift again and add this code to openNapkins():
UIView.animate(withDuration: 1.0, delay: 1.2, options: .curveEaseOut, animations: { var fabricTopFrame = self.fabricTop.frame fabricTopFrame.origin.y -= fabricTopFrame.size.height var fabricBottomFrame = self.fabricBottom.frame fabricBottomFrame.origin.y += fabricBottomFrame.size.height self.fabricTop.frame = fabricTopFrame self.fabricBottom.frame = fabricBottomFrame }, completion: { finished in print("Napkins opened!") })
Here’s what this does:
animate(withDuration:delay:options:animations:completion:) defines an animation with a duration of 1 second, beginning after a delay of 1.2 seconds. You selected an “ease out” option, which produces an animation that progresses linearly through each frame until it approaches completion, at which point it slows down to give a more natural, less jarring effect. In other words, the napkins don’t “slam” open.
You use the animation block to specify which views and properties to animate. Notice that instead of having to deal with any details of how this animation will be rendered frame-by-frame, you simply declare the final value each animatable property will have when your animation is complete. Armed with these high-level instructions, UIView animation takes charge of all the low-level implementation details on your behalf: It handles all the frame-by-frame calculations, applies any easing, and even handles any interruptions that might occur. Hooray!
Finally, the completion block runs after the animation either completes naturally or is interrupted, giving you a chance to do any final clean up that might be needed. The completion block receives a boolean parameter, finished, that tells you whether the animation completed or not.
Before moving on, take a quick look at the different easing options UIView animation provides out of the box:
curveEaseInOut: Property changes are slow at the beginning and at the end of the animation.
curveEaseIn: Property changes are slow at the beginning of the animation only.
curveEaseOut: Property changes are slow at the end of the animation only.
curveLinear: Property changes are equal during the whole animation.
Build and run again:
Sweet! Now when your app launches, the napkins animate to reveal the yummy picnic goodies in your basket (well, that plus an unwanted buggy… for now).
Well-chosen easing takes your animations to Ninja level.
Open the Flood Gates! (Er, I mean, the Picnic Gates)
Next, you’ll animate opening the picnic basket doors. Because the picnic basket’s doors have Auto Layout constraints anchoring them to their superview, you’ll use a different technique to animate them. Rather than setting the doors’ positions, you’ll change the constraints that hold the doors in place, then let UIKit animate this change for you. Here’s how this type of animation works:
Whenever UIKit needs to calculate the position of constrained views, it uses the view’s Auto Layout constraints to calculate 4 core values of the frame: origin.x, origin.y, size.width and size.height. When you add a leading constraint to a view in relation to its superview, its origin.x is set to equal the x position of its superview, plus the constraint constant (which defaults to 0) times the constraint multiplier (this defaults to 1).
Note: To learn more about Auto Layout and constraints, check out Auto Layout Tutorial: Getting Started.
There’s an important catch when animating constraints: If you only set new constraint values, UIView animation doesn’t update the view’s frame. After you update a constraint, you also must instruct either the view itself, or its superview, to reset its layout. This lets UIKit know that it should visually update the frame property of this view. Since you want to animate your constraint change, you need to place the instruction to reset the layout inside the animation block. It doesn’t actually matter whether you set the new constraint values inside or outside the animation block, so long as you put your layout reset instruction within this block.
Open Main.storyboard, select the Basket Top and Basket Bottom views, and uncheck the Hidden property you enabled earlier.
Now open ViewController.swift and replace openBasket() with the following:
func openBasket() { basketTopConstraint.constant -= basketTop.frame.size.height basketBottomConstraint.constant -= basketBottom.frame.size.height UIView.animate(withDuration: 0.7, delay: 1.0, options: .curveEaseOut, animations: { self.view.layoutIfNeeded() }, completion: { finished in print("Basket doors opened!") }) }
This is very similar to openNapkins() in how it works. The only difference is that it adjusts the Auto Layout contraints instead of the directly modifying the frames.
Build and run to see your animation.
Cool! Now the basket doors and the napkins both animate out, each with different phasing and offsets. Technically, you’ve just combined two different animation techniques, and UIView animation has made it all look smooth and effortless. By the way: If you’d animated the constrained basket doors by directly setting their position, they would indeed animate. But as soon as these views or their superview recalculated their layouts, their constraints would suddenly slam them back to their original positions. Animating the constraints instead ensures that once your doors open, they’ll stay that way.
How To Chain Animations
Your basket now opens nicely, but there’s a bug in your project — a literal one, instead of the code variety! You’ll soon e-squish this buggy (this is a humane tutorial, so no actual bugs get harmed). First, though, you’ll teach your bug to move back and forth, so it has a sporting chance. :]
Open ViewController.swift, and add these four methods to ViewController, right after openNapkins():
func moveBugLeft() { UIView.animate(withDuration: 1.0, delay: 2.0, options: [.curveEaseInOut , .allowUserInteraction], animations: { self.bug.center = CGPoint(x: 75, y: 200) }, completion: { finished in print("Bug moved left!") }) } func faceBugRight() { UIView.animate(withDuration: 1.0, delay: 0.0, options: [.curveEaseInOut , .allowUserInteraction], animations: { self.bug.transform = CGAffineTransform(rotationAngle: .pi) }, completion: { finished in print("Bug faced right!") }) } func moveBugRight() { UIView.animate(withDuration: 1.0, delay: 2.0, options: [.curveEaseInOut , .allowUserInteraction], animations: { self.bug.center = CGPoint(x: self.view.frame.width - 75, y: 250) }, completion: { finished in print("Bug moved right!") }) } func faceBugLeft() { UIView.animate(withDuration: 1.0, delay: 0.0, options: [.curveEaseInOut , .allowUserInteraction], animations: { self.bug.transform = CGAffineTransform(rotationAngle: 0.0) }, completion: { finished in print("Bug faced left!") }) }
Each of these new methods is an animation step. When chained together, they make up the complete motion of the bug. Your bug starts out facing left, and the first step is to move it in that direction. Next, you’ll turn it around to face right, then move it back in that direction. Last, you’ll bring the buggy full circle, turning it back around to face left, as it did initially.
To chain these individual steps in a sequence, you’ll just call the next step you’d like to execute in the completion block of each step. It’s as simple as that.
In the completion block of moveBugLeft(), right after the print() statement, add:
self.faceBugRight()
Then, in the completion block of faceBugRight(), add:
self.moveBugRight()
Next, in the completion block of moveBugRight(), add:
self.faceBugLeft()
And last, to make the sequence a repeated one, in the completion block of faceBugLeft(), add:
self.moveBugLeft()
Great! Now you just need to set all this in motion. At the end of viewDidAppear(_:), add a call to trigger the first step in your “buggy” animation sequence. :]
moveBugLeft()
Build and run. You should see the bug moving from right to left in a repeating loop — exactly what you wanted (well, for the moment). Huzzah!
Bug Off, Bug!
The moment you’ve been waiting for has arrived: It’s time to squish that bug!
In ViewController.swift, add two new properties to ViewController, right after the @IBOutlet declarations:
var isBugDead = false var tap: UITapGestureRecognizer!
Now, add this line of code at the top of each of the four bug animation methods you added in the previous section. Make sure to place this above each method’s call to animate(withDuration:delay:options:animations:completion:):
if isBugDead { return }
This makes sure that when you squish that bug, it will stop crawling around. Now it’s time to set up a UITapGestureRecognizer so you can do some serious power squashing. :]
Add the following method at the bottom of ViewController.swift
@objc func handleTap(_ gesture: UITapGestureRecognizer) { let tapLocation = gesture.location(in: bug.superview) if (bug.layer.presentation()?.frame.contains(tapLocation))! { print("Bug tapped!") } else { print("Bug not tapped!") } }
Here’s what this code does:
When responding to a tap, you need to check whether the user actually tapped on your bug. Typically, you’d simply compare the tapLocation to the bug view’s frame. But here, you’re using the view’s presentation layer frame, bug.layer.presentation().frame, instead. What gives?
This is an important distinction and a very common source of confusion. UIView animation updates a view’s “presentation layer”, which represents what will be displayed on screen at any given moment. This contrasts with the view’s underlying frame itself, which does not change during animations. As your bug scoots back and forth, its underlying frame has already moved to its final position for that animation. All the in-between animation orientation and positioning details are handled in the presentation layer. This means that when you’re checking if a user has tapped on your bug, what you really want to know is whether that tap was within the presentation layer’s frame.
Now where is that picnic bug hiding?
OK! It’s time to get squishy! In ViewController.swift, find init(coder:), and immediately below the line super.init(coder: aDecoder) add:
tap = UITapGestureRecognizer(target: self, action: #selector(ViewController.handleTap(_:)))
This creates a gesture recognizer to detect your taps on the screen. Next, add this to the end of viewDidAppear(_:) to add the gesture recognizer to the view:
view.addGestureRecognizer(tap)
Build and run. Wait for the bug to start moving around and then tap on the screen. Depending on whether you tapped on the bug or not, you’ll either see “Bug tapped!” or “Bug not tapped!” in the Xcode console.
That’s good, but how about adding some squishy satisfaction. Locate handleTap() and add the following code inside its if block:
if isBugDead { return } view.removeGestureRecognizer(tap) isBugDead = true UIView.animate(withDuration: 0.7, delay: 0.0, options: [.curveEaseOut , .beginFromCurrentState], animations: { self.bug.transform = CGAffineTransform(scaleX: 1.25, y: 0.75) }, completion: { finished in UIView.animate(withDuration: 2.0, delay: 2.0, options: [], animations: { self.bug.alpha = 0.0 }, completion: { finished in self.bug.removeFromSuperview() }) })
Here’s what this does:
Once the bug is tapped, you first set isBugDead to true so the animation chain will stop.
Next, you remove the tap gesture recognizer from the view so that no more interaction can happen.
Then, you start a new chain of animations:
The bug gets flattened by applying a scale transform.
It fades to nothingness by setting its alpha to 0 after a delay.
Finally, you remove the bug from the superview.
Build and run: This time when you squish your bug, it gets well and truly squished!
Buggy be squished!
Gratuitous Sound Effect
To round things out, you’ll add a satisfying bug-squashing sound effect. It’s completely unnecessary but totally fun! You’ll use the sound file already in the project to do this.
Back in ViewController.swift, add the following at the top of the file:
import AVFoundation
Next, add a property to the class declaration to hold an audio player instance with your sound file:
let squishPlayer: AVAudioPlayer
Now, add the following in init(coder:), before super.init(coder: aDecoder), so that your AVAudioPlayer instance is set up before you initialize the view controller. Swift requires this in order to satisfy its initialization rules.
let squishURL = Bundle.main.url(forResource: "squish", withExtension: "caf")! squishPlayer = try! AVAudioPlayer(contentsOf: squishURL) squishPlayer.prepareToPlay()
Finally, add the following line to handleTap() after you set isBugDead to true:
squishPlayer.play()
This plays the sound at just the right moment. And that’s it! Build and run your code. Crank up the volume, tap on that bug, and bask in satisfaction as your bug squishes in glorious, gratuitously stereophonic sound!
Where to Go From Here?
You can download the completed version of the project using the Download Materials button at the top or bottom of this tutorial.
You can probably think of more animations to apply to this projec, based on what you’ve just learned. You might like to close the picnic basket after you’ve squashed the bug. Or you might prefer that the picnic basket doors and napkins don’t open once the app launches and open them instead with a tap. Give it a try!
Throughout this tutorial, you’ve used animate(withDuration:delay:options:animations:completion:). UIView animation also offers several more highly useful methods:
animate(withDuration:animations:)
animate(withDuration:animations:completion:)
animateKeyframes(withDuration:delay:options:animations:completion:)
performSystemAnimation(animation:onViews:options:animations:completion:)
animate(withDuration:delay:usingSpringWithDamping:initialSpringVelocity:options:animations:completion)
The first two methods in this list are siblings of the animation method you used in this tutorial, minus the delay and options parameters. The third method provides keyframe-based animation, giving you the ability to orchestrate highly complex animation sequences with fine-grained control. The fourth method runs system-provided animations. The last method creates an animation using a spring-based motion curve. In other words, the animated view bounces back and forth around its destination as if it’s on a spring.
If you’d like to take a deeper dive into the full power of iOS animations, you might enjoy iOS Animations by Tutorials.
How do you use UIView animation or Core Animation in your projects? I’d love to hear from you in the forum discussion below!
The post Basic UIView Animation Tutorial: Getting Started appeared first on Ray Wenderlich.
Basic UIView Animation Tutorial: Getting Started published first on https://medium.com/@koresol
0 notes
Photo
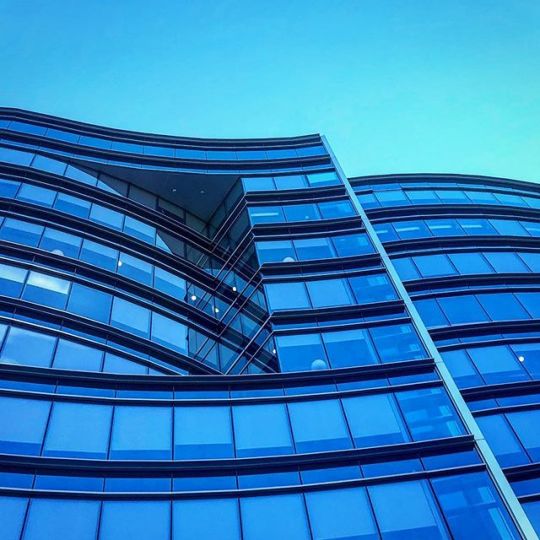
curvelinear — view on Instagram http://j.mp/2oRvaMz
0 notes
Photo
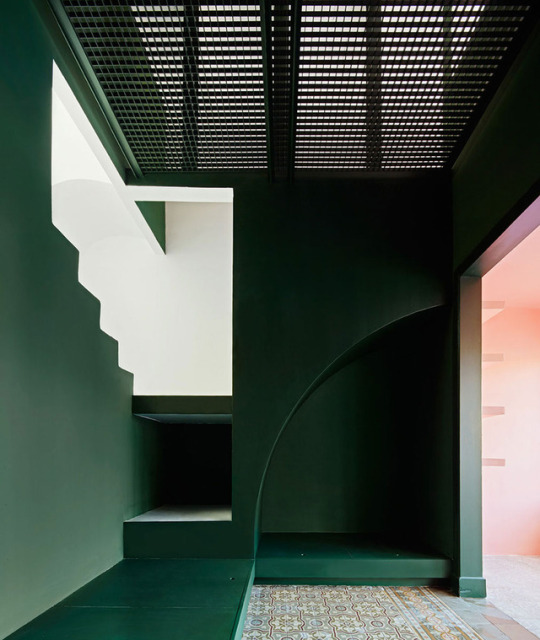
A home in Barcelona designed by Santomà Guillermo.
#Built Beauty
#green#architecture#contemporary#modern#design#arch#zig zag#curve#curvelinear#angle#home#house#residence#residential#interior#color#colour#colores#peach#pink#barcelona#classic interior#vernacular#built beauty#builtbeauty#architect#Santoma guillermo
1K notes
·
View notes
Photo
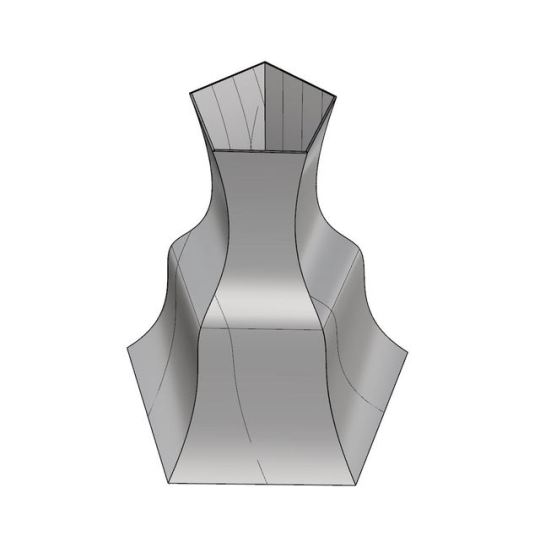
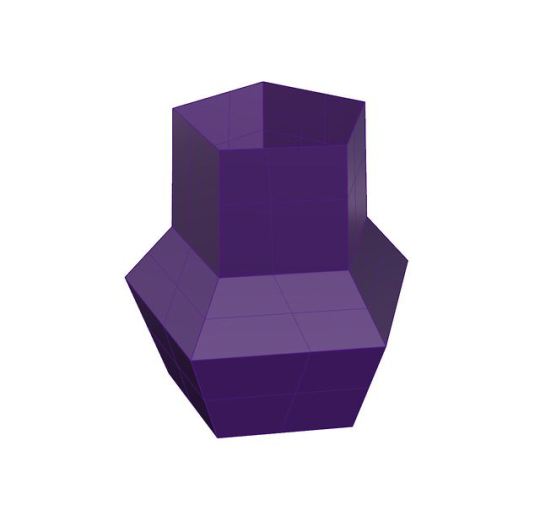
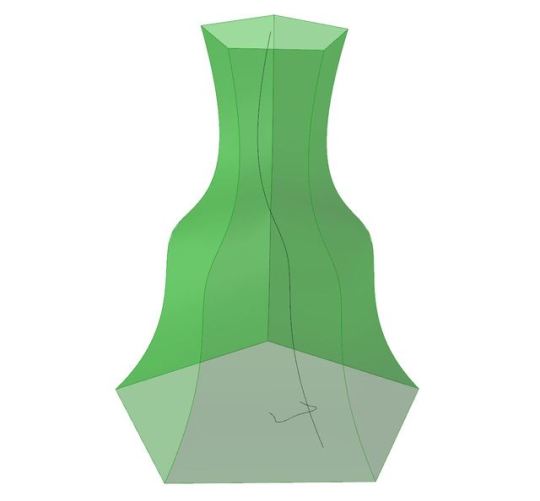
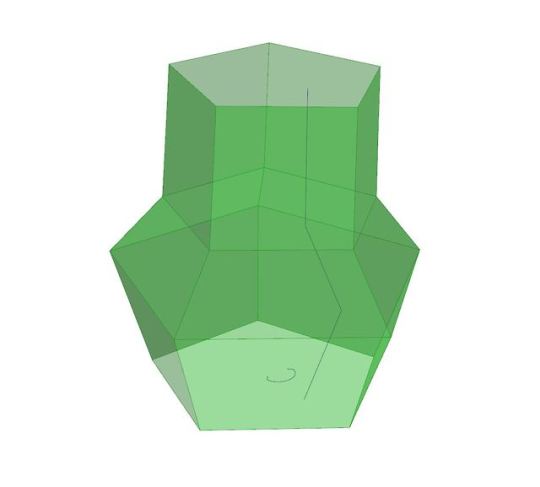
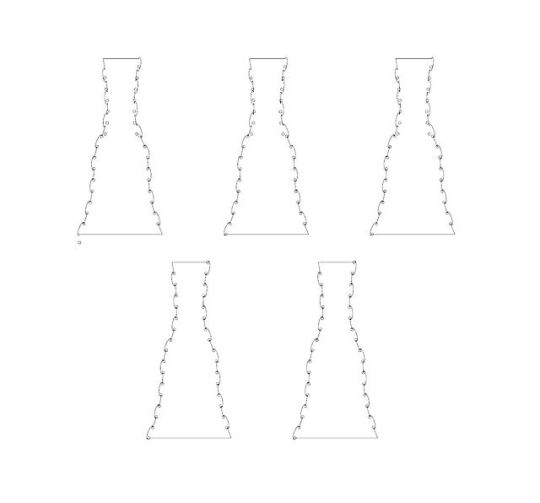
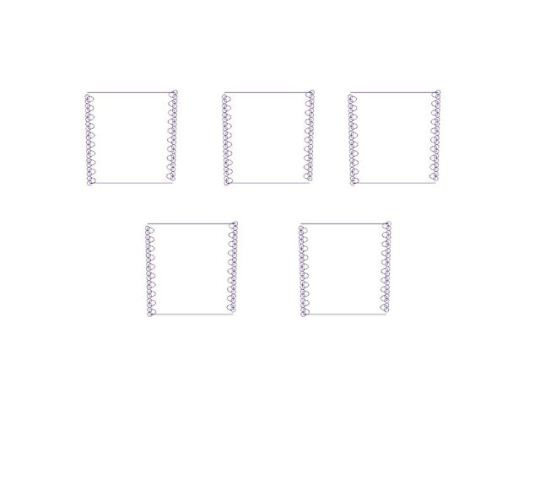
Exercise 4 - Volumetric Assembly
I am interested in how two types of curve would result in the shape of the vase. The curvelinear one creates a smooth and fluid sense.
0 notes
Photo
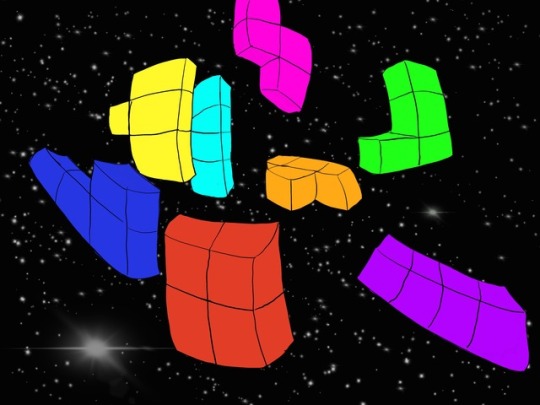
tetris first attempt at curvelinear perspective ever. omg so difficult!
0 notes
Photo

Ezra Stoller, Hirshhorn Museum, Skidmore, Owings & Merrill, Washington, D.C., 1974
#architecture#museum#shape#Form#curvelinear#washington dc#scale#som#modern#contemporary#built beauty#building#civic
201 notes
·
View notes