#cornice box
Explore tagged Tumblr posts
Visit Tumblr Blog
Explore Tumblr blogs with no restrictions, modern design and the best experience.
Last Seen Tumblr Blogs


Fun Fact
Tumblr Inc. is using 66 technologies for its website.
Photo

Built-In Los Angeles Mid-sized transitional study room with built-in desk and carpet, gray walls, a regular fireplace, and a stone fireplace.
0 notes
Photo

San Diego Bedroom Master Bedroom - mid-sized modern master limestone floor and gray floor bedroom idea with white walls, a standard fireplace and a stone fireplace
#tv over fireplace ideas#modern fireplace#custom-made#floating shelves#contemporary#cornice box#bedroom
0 notes
Text
Peter starts calling Tony “daddy” as a goof. He means nothing by it (at first) because as Tony gets older, his concern towards the boy doubles (triples?). Checks in on Peter regularly during his first year in college and there’s this one time where Peter thinks he must have sounded so painfully homesick that Tony makes the trip down.
It’s sweet, even if Tony spends half the time bitching about the boy’s living conditions (really, it’s not that bad, Tony. You’re just bougie as hell). A week later, he comes back to his dorm to a couple of packages. There’s a bunch of fancy-sounding shit Peter can’t pronounce even if he wants to. Like, why the hell would he need a shaver that costs $500???? Or a complete set of toiletries that costs more than his Molecular Biophysics textbook? Or bedsheets that are so ridiculously soft and cool to the touch that it makes waking up for his 8am classes somewhat impossible?
There’s also a box that’s basically just snacks. Lots of it. Because Peter had complained about how the vending machine was always spoilt and the options meager.
So yeah, he thinks Tony’s got quite the soft spot for him even if he hides it behind his “yeah, yeah, whatever you say, Pete”.
He doesn’t think much of it when he sends the text: lol, a bit overboard, but thank you daddy 😉
Again, Peter had meant it as a goof because he knows Tony can get a little dramatic about his age.
Tony: What are they teaching you in college
Peter: What? I’m just expressing my thanks to an older man whom has posed to be quite the paternal figure in my life.
Peter: But yeah, seriously, thank you. The snacks are godsent. So is the new puffer jacket. But like, winter break isn’t for a couple of months yet?? And I don’t really need like, new pillows, but they’re really, really nice.
Tony: Daddy aims to please.
Peter laughs at the message, glad that the older male was playing along at least. He keeps it up for the next couple of months, Tony doesn’t tell him to stop.
Tony: What do you think about cornice ceiling designs?
Peter: what?? what’s a cornice
Tony: you know what, it’s probably a no for you.
Peter: okay. just googled it. why are you looking at ceiling designs?
Peter: are you renovating stark tower? again?
Peter: it’s rude not to reply because I can see that you’re online.
Tony: daddy’s in a meeting, baby. hush and I’ll text you later.
And Peter is…
floored.
Because baby? BABY? Was Tony confusing him for someone else? He rereads the message again, ignoring the tiny spark of heat at the endearment. He wonders if this is Tony’s way of fucking with him after all these months. He wouldn’t be surprised actually.
Peter: ok, no to the cornice btw.
He comes home for winter break and maybe he has missed Tony more than usual. It feels like they’re closer than usual, and if the rest of the Avengers notice that they’re chummier than usual, or how Tony is always in a visibly better mood whenever the boy’s around, no one’s saying anything (yet).
It’s chaotic when the team gets together and Peter’s trying to excitedly talk over Tony about something, cutting the older male off. Tony just clamps a hand over Peter’s mouth, and chides him playfully,
“Okay, baby, don’t interrupt when the adults are talking. Daddy taught you better than that.”
Peter’s words comes out muffled as he protests, not realizing that Steve and Scott are straight up gawking at them. Natasha doesn’t even seem fazed, holding her right palm up towards Clint and mouthing, “pay up, loser.”
Bucky basically goes, “Oh shit, so it’s like that, huh?”
“Well, considering the age gap and how they’ve always interacted, is it really that surprising?” Bruce muses out loud.
Peter peels Tony’s fingers away from his mouth, “Guys, what, no - we’re not-“ He glances at Tony for some help.
“Aw, cute. He’s looking at his daddy for help.” Natasha teases.
“So we’ve upgraded from “kid” to “baby”, huh?”
832 notes
·
View notes
Note
I have a few questions for the gang!(Lidija, Anemone, Myr and Tristam)
1. What's their favourire place to eat out, do they have a specific cuisine they burn for whennthey eat out or do they very loyaly hold to italian food?
2. Hot and-or cold? What's their favourite cold and or hot baverage?
3. How screwed would they be if they had suddenly bodyswapped with their crush/love interest and had to pretend to be them for a day? if they dont have one- how screwed would they be if they suddenly bodyswapped with TSUNA?
Thank you for passing by again Lou!! I'm planning to attack your ask box soon in return stay tuned 👀 assuming my burnout doesn't take me first
1. Unfortunately, Myr and Lidija never experienced eating at a nice local restaurant outside the Cavalieri grounds, so their experience is very limited. The most daring thing would be the annual Cavalieri Christmas party, but even there it's just their typical Italian cuisine with a couple more dishes than normal.
Anemone, being a member of the administration council called Cornice, did have a few occasions where she could leave the Cavalieri grounds for parties with other mafia families. However, being a vegetarian in high-class Italy is harder than finding a needle in a haystack, so whenever she can she resorts to Indian food! From my research I saw it's one of the most veg-friendly cuisines so I can imagine Anemone enjoying Indian dishes like vangi bath, lentil curry, tofu tikka masala and so on.
If I had to assign a favourite cuisine to Myr and Lidija... Myr likes spicy food but in general she likes dishes with many different tastes, so I think Thai food would suit her greatly. Lidija is a little more sensitive to spice but would still like the variety of tastes, so Vietnamese? Japanese too for the milder flavours and pretty visuals. Honestly I'm not too versed on food so hopefully I got things right-
Oh shit I almost forgot Tristam- I don't see him being *too* adventurous with food. Perhaps he's the only one of the main 4 who would stick to Italian cuisine if given the choice. Given his fine tastes though, I think he'd enjoy Japanese food too.
2. Favorite beverages~
[Myr] - plain hot milk (occasionally choccy milk)
[Lidija] - Blue Lagoon, peach juice, pink grapefruit juice, cappuccino
[Anemone] - Franciacorta, vin brulé
[Tristam] - Espresso Martini mocktail, lemonade when absolutely NO ONE is looking
3. Myr and Anemone will both scratch and bite begging to be let out. Especially Anemone since ...yeah. And Myr trapped in a small frail boy's limbs... nightmare fuel. Lidija would swap with Teodoro atm though which would make her feel very handsome hehe, she'd be very good at imitating him since she spies on him at any given occasion 👀
#khr oc#khr killer whale#khr fanfic#ask answered#ask the myell#myr killer whale#lidija killer whale#anemone killer whale#tristam killer whale
7 notes
·
View notes
Text


How to change the hand shape and keep the strength, you must know the "mother of hand shapes" of Chen Style Tai Chi
Walong hand, also called Walong palm, is the basic hand shape of Chen style Tai Chi. It is named after the whole palm arching up in a ridge shape vertically. This hand shape can naturally lead to the smooth and reverse silk-winding changes of the tip joints during the boxing process, and is one of the sources of Tai Chi's silk-winding power. Therefore, the Walong hand is the mother of Tai Chi hand styles. Changing fists, palms, and hooks in the boxing frame are all based on this hand shape and the changes in silk wrapping, so that the hand shape can be changed and the strength can be continued.
Action description
Inside the palm, the fingertips of the index finger, middle finger, ring finger, and little finger lead the strength, extend forward and slightly upward, forming an anti-arch shape. Extend your thumb straight, and fully round the tiger's mouth so that the surface of your thumb and middle finger face each other.
Press the middle finger down slightly to match the thumb. The tip of the little finger is slightly raised to fully stretch the tendons from the hypothenar side of the forearm to the elbow.
Essentials and physical and mental feelings
Inside the palm, the fingertips of the index finger, middle finger, ring finger, and little finger lead the strength, extend forward and slightly upward, forming an anti-arch shape. Extend your thumb straight, and fully round the tiger's mouth so that the surface of your thumb and middle finger face each other. Press the middle finger down slightly to match the thumb. The tip of the little finger is slightly raised to fully stretch the tendons from the hypothenar side of the forearm to the elbow. On the basis of maintaining the essentials of the shape of the tile hand, relax the excess strength, that is, maintain the flexibility of the joints of the hand.
This hand pattern is not easy for beginners to do. So, why do you want to make such a hand shape?
When practicing Tai Chi, all parts are required to receive even force. As we all know, among the requirements for various parts of the body shape, there is a very important requirement, that is, "round crotch and open hips."
Round crotch and open hips are necessary to maintain the tension and toughness of the muscles around the crotch and hip joints. This requirement seems to be taken for granted by most people. However, when it comes to the essentials of the Walong Hand, many people think that it is unnecessary for the handle to become stiff.
Now we regard the joints, tendons, and muscles between the roots of each finger as small crotches and crotches. So, does the requirement of rounding the crotch and crotch also apply to the spaces between the fingers? Only when the hand shape is arched can the elastic connection of the root joints of each finger be reflected. The anti-arch angle of the other four fingers except the thumb is the key to extending this elasticity to each finger tip, which is also the key to delivering Qi and blood to the Shixuan acupoints on each finger tip.
Extending the thumb straight, and embracing the outside of the thumb and the outside of the little finger are the basis for maintaining the elastic opening of the Hukou acupoint; and the thumb cannot be opened backward, which also ensures that the energy path can extend smoothly to the tip of the thumb. The anti-tension of the four fingers is just like the cornices at the end of the brackets of ancient buildings. It is the anti-tension of the tip of the bow. Like the top of the head, it directs the imaginary changes in the whole body.
19 notes
·
View notes
Text
Surprises and the Unexpected
Everyday each of us encounter the unexpected or a flat out surprise. The weather report suggests rain but the sun didn't get the memo and the day is gorgeous. My phone messages me that someone from my past is trying to reach me or I think I can only do this but am surprised by doing so much more. Imagine that! Surprises and the unexpected...
Over all of the years I have been walking the PCT there have been more surprises and unexpected outcomes than I can completely cover here. Here are a couple of the more notable.
My earliest surprise on the PCT took place south of Snoqualmie Pass back in the summer of 1981. My hiking companions and I had seen the weather turn from summer like to what seemed early winter like. A fog rolled in and got so heavy that it was more a light rain. Visibility deteriorated. We were hiking in snow and in the foggy whiteout conditions we had lost the trail. We split up in search of our route. Here is where the surprise occurred. I took a step on what I thought was more or less solid snow and suddenly was on my back sliding downhill. I went over a cornice and continued a short distance before I stopped by digging my heels into the softer snow. Once I stopped I went through a silent checklist of my body. All appeared fine much to my delight. Jim and Rees must have heard me as I sailed down. I was likely uttering something close to a scream. They called out, "Are you alright?" I called back, "I am okay, but don't come this way!" Later and ever since we have had some real laughs over that call and response.
Fast forward several decades and I am still chipping away at the PCT with the hope to finally complete all the sections. My friend Billie had joined me in Tehachapi to walk to Walker Pass. Along the way our first surprise was getting snowed on May 1st...an honest to goodness May Day! As in "we might be in trouble here". We weren't but we were cold, wet, and used up a lot of calories staying warm. We overcame the challenge and carried on down the trail. That was a kind of pleasant surprise.
The real surprises happened as we arrived at Walker Pass and afterward when we got to Bakersfield to eventually go home. At the pass some trail angels had set up a classic reception for PCT hikers. It was fun to get in on that and share the experience with Billie. We even snagged a ride from one of the angels to where we could catch a bus to Bakersfield. A series of surprises unfolded before us.
Bakersfield gets a lot of bad press. In this case it won me over. Once we got settled in our accommodation, showered, did some laundry and had some food we were ready to wander around town. Off in the distance was a notable landmark of a tallish tower sticking up with the word FOX on it. Our curiosity led us in that direction. The tower belonged to the historic Fox theater. There were at least two big busses parked in the street outside along with a crowd of milling people. We couldn't quite make out what was going on.

Fox Theater Bakersfield
We noticed stenciling on some packing boxes with NYCH written on them. Asking around we soon realized NYCH was Neil Young Crazy Horse. Young is one of my favorite musicians and Crazy Horse is his long time back up band who are equally incredible. We were feeling like we were so close but so far away from getting in on what was a unique and totally unexpected concert. Surprisingly two tickets became available for a reasonable price. We jumped at the chance and the rest is history.

NYCH...
Surprises happen. Some say "expect the unexpected" and those are good words to live by. The Pacific Crest Trail is full of surprises no matter how much pre-planning one does. Anyone you talk to who has spent any time on the trail will likely share a surprise or two of theirs with you. Surprises come at unlikely moments and from unlikely places. If they were expected they wouldn't be surprises and it is those experiences that help punctuate the time we spend on the trail. I have a few more surprises to share in future posts and maybe you have a few of your own. Please share them with us so we can post them here. You can contact us at: [email protected]
3 notes
·
View notes
Text
Red, White & True: Brooklyn - Pre-Interview [7/17]

Characters/Pairings: Steve Rogers x curvy Millennial Female!Reader Word Count: 5.8k Summary: After a week apart on the campaign trail, you're reunited with Steve to get ready for the biggest interview of your life.
Content/Warnings: marriage of political convenience, slow burn
Notes: People have been asking about the wedding since chapter one, and you won't get EVERYTHING here, but you will learn a little about how those days went. This takes place in a post-Endgame scenario where Steve stays and generally most of TFATWS happened.
Previous Chapter | Series ↠ Main Masterlist | Aspen's Ask Box | Field Guide to the Forest

[OCTOBER 5 - EARLY AFTERNOON - BROOKLYN, NEW YORK]
As the car pulls up to the brownstone, your heart begins to race. The familiar facade of red brick and ornate cornices looms before you, a blend of historic charm and modern restoration. The wrought-iron fence that lines the front garden is exactly as you remember it, its intricate patterns casting delicate shadows on the sidewalk in the early afternoon sun. The trees that line the street are ablaze with color - brilliant golds, fiery oranges, and deep crimsons - a stark contrast to the evergreen palms you left behind in California just hours ago.
As you step out of the vehicle, the cool air nips at your cheeks. You gaze up at the four-story building, and the sight of it all brings a flood of memories from those two nights in June - the nervous energy of the night before your wedding, the surreal feeling of returning here as newlyweds though you were still virtually strangers. The first night Steve had been detained in New Hampshire, so you’d stayed in the house alone. The second night you had politely slept in separate bedrooms.
There had been no honeymoon. Instead the two of you had traveled to the Stark corporate retreat facilities two miles up the road from the rustic mansion Tony and Pepper had designed and built together for their family life in upstate New York, and the preparation for the presidential run had moved into the final phases of coaching, strategy, styling consultations, wardrobe outfitting, public address exercises and the like now that you had officially joined the team.
Thinking back on it now, you wonder how either of you managed to make it through the blend of politeness and awkwardness, the concerted efforts to be warm even though both of you were keeping your distance and taking turns testing the waters.
It would be laughable if it wasn’t your life.
One day you will probably laugh about it. Whether or not it will be with Steve by your side… that’s still not clear.
Though it does feel like that longterm reality becomes more of a possibility every day.
As you climb the steps to the front door, you hear a bevy of movement inside. Your pulse quickens, knowing Steve is already here. You've spoken every day this past week, but phone calls and video chats can't compare to being in the same room.
The week apart had been good for you. Instead of closeness by virtue of proximity, the two of you had had to connect purely through conversation; and without sun-up-to-sundown schedules that orbited around each other, the thirty guaranteed minutes became treasured, guarded, and looked forward to.
Sophia is rushing in ahead of you, and you pause for just a moment before stepping over the threshold, taking a deep breath to calm the skittering of your heart.
The entryway is warm and inviting, filled with the soft glow of late afternoon sunlight streaming through the windows. There’s a thriving buzz of energy and discussion going on as campaign staff fill the living room and are filtering in and out. The scent of fresh coffee wafts through the air, mingling with the faint aroma of old books and polished wood that seems to permeate the brownstone.
There are many hello’s and greetings for you and Sophia, and you ask, “Where’s Steve?
"In here!" Steve's voice calls out from the direction of the kitchen.
You make your way through the bustling living room, nodding more greetings to staff members as you pass. The kitchen doorway comes into view, and your breath catches as you see Steve for the first time in a week.
You round the corner into the spacious kitchen and there he is, leaning against the counter in conversation with Bucky and Jake, a mug of coffee in his hand. The late afternoon sun streaming through the window casts a warm glow on his profile, highlighting the strong line of his jaw and the golden hues in his hair. He looks relaxed, at ease in a way you rarely see him on the campaign trail.
His eyes light up when he sees you, a warm smile spreading across his face.
"Hey," he says softly, setting down his coffee and taking a step towards you.
"Hey yourself," you reply, your own smile matching his. The kitchen suddenly feels very crowded - most of your life with Steve was surrounded by other people.
Diplomatically, Jake and Bucky begin conversing with each other, giving you a bit of privacy, and Steve closes the distance between you in a few strides. There's a moment of hesitation, both of you unsure how to greet each other after a week apart. But before you can say anything else, he wraps you in a tight embrace. The hug is warm and comforting, Steve's strong arms wrapping around you securely. You breathe in his familiar scent, a mix of soap and something uniquely him. Briefly the bustle of the campaign fades away, and it's just the two of you. A tension you didn't even realize you were carrying in your shoulders begins to dissipate.
"Welcome home," he murmurs into your hair.
You pull back slightly, looking into his familiar face. "Home," you repeat softly, testing the word. It feels right, somehow, in a way it didn't before.
Steve's eyes search your face, as if trying to memorize every detail. "How was your flight?"
"Long," you admit with a small laugh. "But productive. Sophia and I went over the schedule for the next few days."
"I'm glad you made it back safely," Steve says, his hand warm on your lower back as he guides you further into the kitchen. "I know the West Coast tour was grueling."
You nod, feeling the exhaustion of the past week in your bones, not that either of you are strangers to exhaustion these past months. "It was intense, but I think we made some real progress out there. The response at the events with Helen Santos was incredible."
Now that you’re at the counter, Jake and Bucky tune into the conversation with you. "I saw some of the coverage,” Bucky said, his eyes lighting up with interest. “You two seemed to really connect with the crowds."
"She's amazing," you say, a note of admiration in your voice. "The way she can command a room, inspire people... I learned so much just watching her."
"I'm sure you held your own," Steve says with a soft smile. "I heard great things about your speeches."
A warmth spreads through your chest at his words.
“Of course she held her own,” Jake interjects, looking like a proud dad, and you can’t help but glow at his proclamation - he’s the political aficionado and has no reason to give false praise. “We’ve got great polling and social media engagement surges we can tie right back to your work with Zoey over the last week.
“Now, we've got a lot to cover," Jake continues, his tone businesslike but with a hint of eagerness. "The interview is tomorrow, and we need to make sure we're all on the same page."
You nod, grateful for the shift to campaign matters. It gives you a moment to collect yourself, to process the warmth of Steve's greeting and the conflicting emotions it stirs within you.
"Right," you say, slipping into professional mode. "What's our game plan?"
Jake launches into a detailed rundown of the schedule leading up to the interview, outlining prep sessions and strategy meetings. As he speaks, you're acutely aware of Steve's presence beside you, his hand still resting lightly on your lower back. It's a casual touch, one that would look natural to anyone observing, but it sends a small thrill through you.
"We've got a mock interview scheduled for tonight after dinner, and we’ll try to wrap up between nine and ten-”
You and Steve exchange a surprised glance, both of your eyebrows raised in disbelief.
"I'm sorry, did you say we'd be wrapping up at nine or ten?" Steve asks, a hint of amusement in his voice.
Jake nods, a slight smirk playing at the corners of his mouth. "That's right. You two marvel and joke all you want, but tomorrow isn’t just another game day, it’s the Super Bowl of interviews. You’ll need proper rest."
You can't help but chuckle, the sound bubbling up from your chest. After months of grueling 18-hour days that often stretched well past midnight, the idea of having an evening to yourselves seems almost decadent, a luxury you'd forgotten existed.
"I'm not sure I even remember what to do with free time," you joke, looking up at Steve.
“Alright, alright,” Jake says. “You get some lunch, Mrs. Rogers, and we’ll get going in about forty-five minutes.”
[OCTOBER 5 - EVENING - BROOKLYN BROWNSTONE]
The mock interview had gone well, all things considered. Lisa, always poised and professional in her role as campaign spokesperson, has taken on the role of faux-Oprah for the mock interview. She had been practicing for days, studying her posture, mannerisms, and way of speaking in order to mimic Oprah's signature warmth and openness.
Because Oprah was the one who had scooped in and taken the chance to interview Captain America and Mrs. Rogers.
Oprah.
Oprah would be in your home.
Talking to you.
Lisa had thrown many curveballs at you and Steve, probing for weak spots in your narrative and testing your ability to present a united front. For as many public addresses and press appearances as you had done, none of them had been jointly even if you and Steve had been at them together. This was the first time focusing on you and Steve as a married couple, side by side. By the end, you were mentally exhausted but reasonably confident. The real interview would be challenging, but you and Steve had a firm grasp on your rhythm and you felt prepared.
Now, as promised, you find yourself with an unexpected evening of freedom stretching out before you. The house is quiet, the campaign staff having departed for their hotels or to work on other projects. It's just you and Steve, alone in the brownstone for the first time since the awkward night after your wedding.
For a moment, neither of you moves. The quiet is almost deafening after the constant buzz of activity that's surrounded you both for so long. You can hear the tick of the antique clock in the foyer, the soft hum of the refrigerator in the kitchen, the distant sound of traffic outside. It's strange, almost unsettling, to be surrounded by such stillness.
You glance at Steve, catching his eye. He looks as uncertain as you feel, standing there in the living room, hands in his pockets. The conversations over the phone while you had been apart had grown so natural, but now that you are physically together, alone as you so rarely had ever been, the question of what now? hangs in the air.
Just as you open your mouth to speak, both of your phones buzz simultaneously. You exchange a curious glance before reaching for your devices.
It's a text from Sophie.
Check the kitchen. Enjoy your evening off!
Intrigued, you and Steve make your way to the kitchen, your footsteps echoing on the hardwood floors. The warm glow of the pendant lights above the island casts a cozy ambiance as you enter the room.
On the granite countertop, you find an array of options laid out before you. There's a mixing bowl, surrounded by ingredients; a package of cookie dough; a box from a bakery; and a card propped up in front.
You reach for the card, your fingers brushing against the thick cardstock. As you open it, you can't help but smile at the message inside.
Choose Your Own Cookie Adventure!
Option 1: Mix it up! All the ingredients are here for chocolate chip cookies from scratch. Recipe card included.
Option 2: Easy Bake! Pre-made dough ready to pop in the oven.
Option 3: Instant Gratification! Gourmet cookies from Levain Bakery.
Enjoy your evening off and indulge in something sweet together.
You look up at Steve, a mix of amusement and warmth spreading through your chest. "Well," you say, gesturing to the spread before you and handing him the card, "what'll it be, Captain?"
Steve's eyes crinkle at the corners as he smiles, skimming the message and taking in the options. "I'm tempted by the instant gratification," he admits with a chuckle, "but there's something to be said for the satisfaction of making something from scratch."
You nod, excited at the prospect of doing something so normal. "I agree. So option one together?"
"Sounds perfect," Steve says, already rolling up his sleeves. "I have to warn you, though, I'm not exactly known for my baking skills."
You laugh, the sound light and genuine. "Mine are rusty, so this should be interesting."
As you set to work, there's a comfortable ease between you that wasn't there before. The week apart seems to have reset something, allowing you to just be yourselves without the constant pressure of the campaign surrounding you.
Steve measures out the flour while you cream the butter and sugar together in the mixing bowl. The familiar motions of baking bring back memories of childhood, of lazy weekend afternoons spent in the kitchen with your mother.
"You know," you say, glancing over at Steve as he carefully levels off a cup of flour, "I used to bake cookies with my mom all the time when I was little. It was our Sunday afternoon ritual."
Steve looks up, a soft smile playing at his lips. "That sounds nice. What kind did you make?"
"Oh, all kinds," you reply, whisking the eggs into the butter mixture. "Chocolate chip was a staple, of course. But we baked through most of Martha Stewart’s cookie cookbook.”
“Sweets of any kind were a luxury when I was growing up,” Steve explains, carefully adding the flour to your mixture.
As he says it, you remember that his formative years took place against the landscape of the Great Depression.
His voice takes on a wistful tone as he continues. "My mom would save up sometimes to make oatmeal cookies for special occasions. I remember the smell filling our tiny apartment."
You pause in your mixing, touched by the image of a young Steve eagerly anticipating his mother's rare treat. "That sounds lovely," you say softly. "I bet those were the best cookies in the world to you."
Steve nods, a faraway look in his eyes. "They really were. I've never tasted anything quite like them since."
There's a moment of comfortable silence as you both work, lost in your own thoughts and memories.
"You know," you say after a while, "I think there's something special about baking. It's not just about the end result, but the process itself. The measuring, the mixing, the way the kitchen fills with warmth and sweet aromas. It's methodical and therapeutic, in a way."
Steve nods thoughtfully as he folds chocolate chips into the dough. "I can see that. Following the steps, creating something with your hands."
You smile, watching him work. There's something endearing about seeing Captain America, the legendary super-soldier, carefully folding chocolate chips into cookie dough. "Exactly. It's a nice change of pace from the constant strategizing and speechwriting we've been doing."
As you work together to scoop the dough onto baking sheets, you find yourself relaxing more and more. The conversation flows easily, punctuated by laughter as you trade stories about kitchen mishaps and childhood memories.
Steve carefully slides the first tray of cookies into the oven, and your inner child buzzes with excellent knowing soon the kitchen will be filled with the warm, sweet aroma of chocolate and vanilla.
You lean against the counter, watching Steve as he sets the timer. There's a domesticity to this moment that catches you off guard, a glimpse of what a normal life with him might look like. It's both thrilling and terrifying. Nothing you’ve done together yet has been conventional in any way, but this is.
You grab a spoon and carve out a scoop of dough to enjoy while you wait. With this kitchen having multiple ovens, all your trays will be done at the same time.
"So, tell me more about your week," you say. "I know we talked every day, but it's not the same as being there."
Steve leans against the counter opposite you, his eyes warm as he considers your question while you savor the sweet, buttery flavor of the raw cookie dough.
"It was...different," he says thoughtfully. "Good in some ways, challenging in others. After everything that happened around Athens and Miami, I felt off-balance for the first couple of days. But the work helped ground me."
You nod, understanding exactly what he means. The campaign trail has a way of demanding your full attention, leaving little room for personal introspection.
"The rallies were energizing," Steve says, a hint of excitement creeping into his voice. "There's something incredible about connecting with people face-to-face, hearing their stories, their hopes for the future." He pauses, his brow furrowing slightly. "But I missed having you there beside me. It felt incomplete."
Your heart flutters at his words, and you try to keep your voice steady as you respond. "I know what you mean. The events with Helen and Zoey were amazing, but I kept turning to share something with you, only to remember you weren't there.”
Steve's eyes soften as he meets your gaze. "I'm glad we're back together now," he says quietly. "It feels right, having you here."
A comfortable silence falls between you, filled with the warm scent of baking cookies. You're acutely aware of Steve's presence across from you, the way his eyes linger on your face. There's an intensity to his gaze that sends a shiver down your spine.
The timer dings, breaking the moment. Steve moves to check the cookies, and you can't help but admire the way he moves, graceful despite his size. He pulls out the trays, the smell of freshly baked cookies filling the kitchen.
"They look perfect," you say, peering over his shoulder. The cookies are golden brown, with melted chocolate chips peeking through.
Steve grins, looking pleased. "Not bad for a couple of amateurs.”
You gather a plate and some glasses from one of the cupboards. Steve fills the plate with cookies while you pour some (your preference) milk, and then the two of you gravitate to the living room and land on the couch, diving into the cookies and more conversation.
As you settle in, the warmth of the freshly baked cookies and the comfort of Steve's presence beside you create a cozy atmosphere. The living room, usually a hub of campaign activity, feels different now - intimate and personal. Like it could really be a home you and Steve could live in.
"These are actually pretty good," Steve says, taking a bite of a cookie. "Maybe we missed our calling as bakers."
You laugh, reaching for your own cookie. "I don't know about that. I think the country might have something to say if we suddenly abandoned the campaign to open a bakery."
"True," Steve chuckles, his eyes crinkling at the corners. "Guess we have a back up plan.”
You laugh, and reach for another cookie.
“I have to admit, some days the idea of pulling the chute and bailing for a simpler life is too tempting."
You nod, understanding exactly what he means. "It's funny, isn't it? How something as simple as baking cookies can feel so... normal. So far removed from the craziness of our lives right now."
Steve nods, his expression thoughtful. "It's moments like these that remind me why we're doing all of this. For a future where people can just live. Bake cookies. Spend time with their families without worrying about the next crisis."
You feel a surge of warmth at his words, at the reminder of the man you married - the one who sees beyond himself, who wants to make the world better for everyone. It’s key to why you were willing to leap blindly into the partnership. "You're right," you say softly. "It's easy to get caught up in the day-to-day chaos of the campaign and forget the bigger picture."
There's a comfortable silence as you both munch on cookies, lost in thought. The ticking of the clock and the distant hum of traffic outside continuing their soothing background noise.
"You know," Steve says after a while, turning to face you more fully on the couch, "If we win, if we don't, either way, things will never be quite 'normal', but..."
He trails off, and you find yourself holding your breath, waiting for him to continue. It's the first time either of you has really broached the subject of your future together beyond the campaign.
"But?" you prompt gently, your heart racing.
Steve meets your eyes, his gaze intense and sincere. "But I'd like to think we could have more moments like this. Quiet evenings, doing ordinary things together. Building a life that's ours, not just the one the public sees."
Your breath catches in your throat at his words. It's a beautiful picture he's painting, one that you've wondered over yourself.
You feel a warmth spreading through your chest at Steve's words. The idea of building a life together, of having more quiet moments like this, is both thrilling and terrifying. You've spent so much time focusing on the campaign, on presenting the perfect image to the public, that you've barely allowed yourself to imagine what comes after. You’re married, but how married are you? How married will you be?
"I'd like that too," you admit softly, your voice barely above a whisper. "It's strange, isn't it? We jumped into this marriage, into this campaign, without really knowing each other. And now..."
"And now?" Steve prompts, his eyes searching yours.
Now I can't imagine my life without you in it you think, but you don’t know if you are ready to say it.
You take a deep breath, mustering up at least some of your courage. "Now whether we're in the White House or not, I want us to keep building this."
Steve's hand finds yours, his fingers intertwining with yours. His touch is warm and comforting, grounding you in the moment.
"I want that too," he says softly, his thumb tracing small circles on the back of your hand. "When I first agreed to this arrangement, I never imagined..." He trails off, shaking his head slightly.
"What?" you ask, your voice barely above a whisper.
Steve's eyes meet yours, filled with an intensity that takes your breath away. "I never imagined I'd feel this way. That we'd fit together so well, not just as partners in the campaign, but as..." He pauses, searching for the right words. "As us."
Your heart races at his admission. It mirrors your own feelings so closely - the surprise at how naturally you've fallen into step with each other, the growing depth of your connection. You've both danced around this topic for months, especially the last weeks as neither of you can help but acknowledge the growing connection between you, but never quite putting it into words until now.
"I know what you mean," you say softly, squeezing his hand. "It's been unexpected, but in the best way possible."
Steve's eyes soften, a mix of relief and joy flickering across his face. His hand tightens around yours. "I'm glad I'm not alone in feeling that way," he says, his voice low and intimate.
The air between you feels charged, thick with unspoken emotions and possibilities. You're acutely aware of how close Steve is sitting, of the warmth of his hand in yours, of the way his eyes keep flickering to your lips.
"Steve," you whisper, your heart pounding.
He leans in slowly, giving you plenty of time to pull away if you want to. But you don't. Instead, you find yourself meeting him halfway.
The kiss is soft and tentative at first, a
gentle press of lips that sends a shiver down your spine. It's nothing like the chaste, public kisses you've shared for the cameras or at your wedding. It’s not even like the rushed spontaneous kiss when you got news of the Santos endorsement.
This is real, intimate, just for the two of you.
Steve's free hand comes up to cup your cheek, his thumb brushing softly against your skin. You lean into his touch, your own hand moving to rest on his chest, feeling the steady thump of his heartbeat beneath your palm.
The kiss deepens, slow and exploratory. There's no rush, no urgency - just the two of you, finally allowing yourselves this moment of connection. It feels both thrilling and familiar, like coming home to a place you've never been before.
When you finally pull apart, you're both slightly breathless. Steve rests his forehead against yours. His eyes are closed, a look of contentment on his face that makes your heart swell. You take a shaky breath, overwhelmed by the intensity of your feelings and the moment you just experienced.
“I’ve been wanting to do that since we left Miami. Or longer.”
“Me, too,” you admit.
You and Steve shift back slightly, creating a small space between you, but your hands remain intertwined. The tension that had been building for weeks has eased, replaced by a warm, comfortable closeness. You both reach for another cookie, exchanging shy smiles.
"These really are good," you say, savoring the rich chocolate flavor. "We make a pretty good team in the kitchen."
Steve chuckles, his thumb absently stroking the back of your hand. "We make a good team everywhere, I think."
You nod, feeling a surge of affection for this man who has become such an integral part of your life. The living room, bathed in the soft glow of the lamps, feels like a cocoon of warmth and safety.
"I think we might need more milk," you say with a soft laugh, reaching for another cookie. The plate between you is already half empty, a testament to your shared sweet tooth and the quality of your baking.
Steve chuckles, the sound rumbling through his chest. "I'll get it," he says, but makes no move to get up, instead pulling you closer.
You sigh contentedly, resting your head on his shoulder.
As the night goes on, the conversation continues to become more intimate, more easy, more comfortable on the couch. Steve eats far too many cookies. You fight the exhaustion that’s been creeping up more insistently, especially as you feel more and more cozy on the couch and nestled against him. But at some point you lose the fight and drift off to sleep and your next moment of awareness is waking up the next morning in a plush king-sized bed, surrounded by luxurious sheets and pillows.
Steve must have carried you upstairs while you were sleeping, and you shift around to see if he’s there, only to find the other side of the bed empty and clearly untouched.
[OCTOBER 6 - MORNING - BROOKLYN BROWNSTONE]
You sigh, more than a little disappointed. But the sweetness of the time you did spend awake together eases the pain, and you have to admit that you would prefer to be alert and aware to appreciate going to bed with your husband for the first time.
You stretch, feeling the soft sheets against your skin. The morning light filters through the curtains, casting a warm glow across the room. For a moment, you allow yourself to imagine waking up next to Steve, his strong arm draped over your waist, his breath warm on your neck.
Shaking off the reverie, you swing your legs over the side of the bed to begin your day. You quickly shower in the en suite bathroom and get ready for the day. This isn’t a familiar space yet, but it is your new home, outfitted with a mix of new and familiar things for you from hair and skincare products to clothes in the closet. As you dress, you catch the faint aroma of coffee wafting up from downstairs along with the bustling noises of other people. The campaign work is already underway for the day, and you give yourself one more quick look before heading down.
Following the scent, you make your way to the kitchen. Steve is there, his back to you as he stands at the counter, pouring coffee into a mug and talking with Jake and Elsa. They immediately clock you coming in and look your way. Steve notices the shift in their attention and looks over his shoulder.
"Good morning," he says, turning to greet you with a warm smile. He looks sharp in a crisp button-down and slacks. "I hope you slept well."
"I did, thank you," you reply, padding over to the coffee maker.
Steve reaches into the cupboard to retrieve a mug and passes it to you.
"Thanks," you say, accepting the mug from Steve with a smile. As you pour your coffee, you can't help but notice how seamlessly he anticipated your needs. It's a small gesture, but it speaks to how in tune you're becoming with each other.
"Just in time to hear the final anticipated schedule for today," Jake says, his tablet in hand.
You nod, taking a sip of your coffee. "Of course. What's first on the agenda?"
As Jake begins to outline the day's activities, you and Steve stand closer to each other, your arm pressed lightly against his - or his arm pressed against yours. Either way, it’s another subtle but normal moment of intimacy.
Oprah and her team will show up around eight for breakfast and introductions. After breakfast, you’ll speak with her people while the do some initial exploration of topics and background stories to give Oprah notes and options to work from. Elsa reiterates - as she explained during the afternoon prep the day before - that this is the approach because Oprah wants her own context but to be able to have conversation within the interview for the first time, not recreating an exchange.
Lunch will be just you and Steve, Bucky and Sam, Oprah, her partner Stedman, and Oprah’s best friend Gayle. While the breakfast is for introductions, lunch is to relax and build rapport before the cameras are set up and you go into the interview.
As Jake finishes outlining the schedule, you can't help but feel a mix of excitement and nervousness about the day ahead. Though you’ve developed relationships with Steve, Bucky, Sam, and many of the campaign staff, including Jake and Sophia, you can’t help wishing someone from your past was here today to be part of it all. The prospect of spending time with Oprah, one of the most influential figures in media, is both thrilling and daunting.
The house starts to buzz with even more activity. Stylists arrive to help you and Steve prepare for the day, and a catering team begins setting up for the breakfast.
You and Steve move to the living room, where Bucky and Sam are already seated, deep in conversation. As you approach, Sam looks up with a grin.
"Morning, lovebirds," he teases, his eyes twinkling with mischief. "Ready for the big day?"
You roll your eyes good-naturedly as you settle onto the couch next to Steve. "As ready as we'll ever be, I suppose."
"You've got this," Bucky reassures you, his eyes warm and supportive.
"Remember," Sam adds, leaning forward with a grin, "if all else fails, just flash that million-dollar smile and charm Oprah like you charmed us."
You nod, grateful for his encouragement, and Steve takes your hand - which fels as much for him as for you.
Sam launches into a story about a particularly disastrous interview he once had, his animated gestures and spot-on impressions soon having all of you in stitches. Over the past few months, you've grown close to both Bucky and Sam. They've become more than just Steve's friends; they're your friends too. Bucky's quiet strength and dry humor have become a source of comfort, while Sam's infectious optimism and quick wit never fail to lift your spirits during the most stressful moments of the campaign.
There’s a stir of commotion, and you assume Oprah and her camp have arrived, but the face that comes around the corner and into the living room isn’t Oprah.
It’s Pepper Potts, CEO of Stark Industries, architect of this presidential plan, and your friend-sister-mentor, impeccably put together as always, in a crisp white blouse and tailored pants, her strawberry blonde hair falling softly over her shoulders.
Your heart leaps at the sight of her, a wave of relief and joy washing over you. Without hesitation, you jump up from the couch and rush to embrace her.
"Pepper!" you exclaim, wrapping your arms around her. "What are you doing here? I had no idea you were coming!"
"Did you really think I'd miss this? This is a huge day for both of you."
As you pull back from the hug, you can feel the sting of tears in your eyes. You had felt it, but hadn't realized how much you had craved an old familiar face, someone who knew you before all of this began.
Pepper smiles warmly, her eyes sparkling with affection. "I couldn't let you face Oprah without some moral support. Plus, I have a bit of experience with high-profile interviews myself."
You laugh, wiping away a stray tear. "You have no idea how glad I am to see you."
Steve approaches, greeting Pepper with a hug as well. "It's great to have you here, Pepper. Thank you for coming."
"Of course," Pepper says, looking between the two of you with a knowing smile. "How are you both holding up?"
"Nervous," you admit. "But more secure now that you're here."
Pepper nods understandingly. "That's perfectly normal. Just remember, Oprah is incredibly skilled at making people feel comfortable. She doesn’t look to trap people or back them into a corner, she’s looking for the heart of the things that are important. Be yourselves, and you'll do great."
As if on cue, there's another commotion at the front door. This time, it's unmistakably Oprah's arrival. The energy in the house shifts instantly, a palpable excitement filling the air.
You take a deep breath, reaching for Steve's hand once more. Pepper gives you both an encouraging nod as you move towards the entryway to greet your guest.
And there she is - Oprah Winfrey, larger than life and yet somehow exactly as warm and approachable as she appears on screen. Her presence fills the room, commanding attention without even trying.
"Good morning!" Oprah greets you both with a dazzling smile, extending her hand. "It's wonderful to finally meet you in person."
Steve steps forward first, extending his hand. "Ms. Winfrey, it's an honor. Thank you for coming."
"Please, call me Oprah," she says, shaking Steve's hand warmly before turning to you. "And you must be Mrs. Rogers. I've been looking forward to getting to know you."

next part: BROOKLYN - THE INTERVIEW
I am sure we didn't find out everything you wanted to about your wedding, but... I had to leave something for Oprah! 🤭
THE UNSUNG HERO OF THIS CHAPTER IS @stargazingfangirl18!!! I was feeling very strung up with some of the ideas that I had intended for this story's plot coming up against some of the ideas that have developed as the chapters have been written, and she helped me get things sorted and to a place where I'm incredibly excited again!
↠ Main Masterlist | Aspen's Ask Box | Field Guide to the Forest
I do not do tag lists, but FOLLOW @buckets-and-stories and TURN ON NOTIFICATIONS to be updated any time I publish a new work!
#steve rogers#steve rogers x reader#steve rogers x you#steve rogers x y/n#steve rogers x yn#red white & true#aspen wrote something
168 notes
·
View notes
Text
How to Install Cornices: Simple Steps for Beginners

Adding cornices to your walls can make any room look polished and stylish. Cornices, called crown mouldings, create a smooth transition between the wall and ceiling, giving your space a finished look. Many people think you need a professional to install cornices, but this is a project you can do yourself! This guide will walk you through each step to make installing cornices easy and rewarding.
What Is a Cornice and Why Add It to Your Home?
A cornice is a decorative strip or moulding along the top of your walls, right where they meet the ceiling. They can make a room feel more elegant, hide gaps or flaws at the ceiling’s edge, and even increase your home’s value. Plus, they come in many styles and materials, so you can find one that suits your taste.
Step-By-Step Guide to Installing Cornices
Step 1: Measure and Plan
Measure the Wall Lengths: Use your measuring tape to check the length of each wall where you’ll install the cornice.
Buy a Little Extra: Having more cornice than you think you’ll need is always a good idea. Mistakes happen!
Mark the Placement: Use a pencil to lightly mark where the cornice will go along each wall.
Step 2: Cut the Cornice
Use the Miter Box: This tool helps you cut at an angle. You’ll want a 45-degree angle for corners so the cornices meet nicely.
Smooth the Edges: Use sandpaper to smooth out rough spots after cutting the cornice.
Tip: Double-check your measurements before cutting!
Step 3: Apply the Adhesive
Prepare the Adhesive or Cement: Follow the instructions on the adhesive. Most cornices can be installed with a cornice cement or adhesive.
Apply Along the Edge: Spread the adhesive along the back of the cornice, focusing on the edges for a stronghold.
Step 4: Place the Cornice on the Wall
Align with Your Marks: Press the cornice firmly along the lines you marked on the wall.
Hold in Place: Hold the cornice briefly to allow the adhesive to stick.
Use Supports if Necessary: For heavier cornices, you might need temporary supports to keep them in place while the adhesive dries.
Step 5: Fill Any Gaps
Apply Caulk Along the Edges: After securing the cornice, run a line along the top and bottom edges to fill gaps.
Smooth with a Putty Knife: Use a putty knife to spread the Caulk evenly for a clean look.
Let It Dry: Wait for the Caulk to dry completely before moving on to the next step.
Step 6: Paint the Cornice (Optional)
Prime the Surface: If your cornice material needs it, apply a coat of primer.
Apply Paint: Choose a colour that matches your ceiling or walls for a seamless look, or pick a contrasting shade to make the cornice stand out.
Add a Second Coat: Once the first coat is dry, apply a second coat for a durable finish.
Tips for a Smooth Installation
Practice Cutting: If you’re new to using a mitre box, practice on a spare piece before cutting your cornice.
Watch for Gaps: In older homes, walls or ceilings can be slightly uneven, leading to small gaps. Use extra Caulk to fill these.
Get Help with Heavy Pieces: If the cornices are heavy, ask a friend for help, especially during placement.
FAQs About Installing Cornice
Q1: Do I need a professional to install a cornice?
No! With some patience and the right tools, you can do it yourself.
Q2: Can I install cornices on uneven walls or ceilings?
Yes, just be prepared to use a bit more Caulk or filler to hide any gaps.
Q3: What type of cornice should I choose?
Consider your room’s style and size. Large rooms can handle wider, more ornate cornices, while small rooms look best with simpler designs.
Q4: Do I need to paint the cornice?
Painting is optional but recommended. It can protect the material and create a seamless look.
Q5: Can I install cornices independently, or do I need help?
Light cornices, like polystyrene, are easy to install solo. For heavier materials, a helping hand is useful.
Conclusion
Installing cornices can be a satisfying DIY project that adds style and value to your home. By following these steps, you’ll be able to install cornices with confidence. Whether you choose a sleek modern look or a classic design, a well-installed cornice will make any room look polished and complete. So gather your materials, take your time, and enjoy the results of your handiwork!
#installingCornice#corniceInstallation#installCornices#installCornicesService#installCornicesInPerth#installCornicesPerth
0 notes
Text
Federal Crimes Lawyer
A federal crime lawyer or fraud defense lawyer is essential if you're facing federal charges related to fraud, embezzlement, or other white-collar crimes. Perlman Defense Federal Criminal Lawyers is the legal professionals who have the expertise to navigate the complex federal laws and regulations. With their help, they can build strong defenses, challenge evidence, and negotiate favorable plea deals. Given the serious nature of these charges, which may include significant fines and imprisonment, seeking legal counsel is indeed crucial. Seek help from Perlman Defense Federal Criminal Lawyers, the best federal crime lawyer or fraud defense lawyer. They specialize in various areas. Let them help you, call (866) 839 4497.
Los Angeles, CA - A Hollywood Land
Los Angeles, CA, originally known as the Hollywood land is a melting pot of the diverse population of Americans, Asians, Hispanics, and other young people ethnicities. With almost 20% under 18, it's a popular destination for families. The city also boasts one of the most diverse Buddhist sects in the world, with 184 Buddhist centers. The Pacific Wheel in Santa Monica is the only solar-powered Ferris wheel in the world. Most famous palm trees in Los Angeles originated in Mexico, imported in the early 1930s. In the coming 2028, the city will host the Summer Olympics, marking the third time it has hosted the event.
Walt Disney Concert Hall
This Walt Disney Concert Hall was designed by Frank Gehry. It's the latest addition to the Music Center's four venues. It was built after Lillian B. Disney donated $50 million to build additional performance space to honor her late husband, Walt Disney. The concert hall is a sophisticated concert hall in the world that offers both visual and aural intimacy. The exterior features over 6,000 panels, creating a curving stainless steel skin that plays off the Dorothy Chandler Pavilion's bowed cornice. The interior uses natural materials and skylights, with massive columns clad in vertical grain Douglas fir. The 2,265-seat auditorium is a concrete box with walls made of Douglas fir and red oak floors.
Goldfish, Changed of Brand
I read from the news that Goldfish, a popular cracker brand, is changing its name to "Chilean Sea Bass" to appeal to adults. The change is a playful nod to the snack's appeal to grown-up tastes. Fans can purchase two bags of Chilean Sea Bass daily from 9 a.m. to 10 p.m. on ChileanSeaBassCrackers.com for $7.38. Traditional Goldfish can still be purchased at most retailers. According to the company, this temporary name change follows other brands like The Campbell Soup Company, Mountain Dew, Kraft Foods, and IHOP, which have tried to change their branding to reach new audiences.
Link to Map Driving Direction
Walt Disney Concert Hall 111 S Grand Ave, Los Angeles, CA 90012, United States
Head northeast on S Grand Ave toward W 1st St 0.4 mi
Turn left onto the US-101 N ramp 138 ft
Use the left 2 lanes to turn slightly left to merge onto US-101 N 5.5 mi
Take exit 8C for Gower St 0.1 mi
Turn left onto N Gower St 0.3 mi
Turn right onto Selma Ave Destination will be on the right 0.3 mi
2 min (0.3 mi) Perlman Defense Federal Criminal Lawyers 1601 Vine St Suite 747, Los Angeles, CA 90028, United States
1 note
·
View note
Text
“AL DI LÀ DEL MARE”, ecco il nuovo singolo di DANIEL MEGUELA

Da venerdì 6 settembre 2024 sarà disponibile in rotazione radiofonica e su tutte le piattaforme di streaming digitale "AL DI LÀ DEL MARE", il nuovo singolo di DANIEL MEGUELA.
"Al di là del mare" è un brano che si immerge nelle rapite debolezze dell'anima e del nostro essere. Le incertezze esistenziali che noi tutti viviamo e la paura del futuro visto attraverso la metafora del mare, dei sui profondi e abissali misteri. La canzone ha un sound di movimento come le stesse eterne onde del mare che contemplate portano ad interrogarsi sulle dinamiche di quel dolore intimo e personale che noi tutti chiamiamo depressione. Tutto questo però viene raccontato da un testo all'apparenza semplice che abbraccia il suono piacevole della canzone stessa ma che tra le sue righe nasconde un malessere più profondo.
Daniel Meguela ha scritto testo e musica del brano con la produzione artistica di David Gionfriddo, mentre il mix e mastering sono stati fatti da Andrea Corvo presso Synthesis Studios. La produzione esecutiva del brano e del videoclip è stata curata dalla 90.01 Evolution di Giusi Ferraro.
Spiega l'artista a proposito del brano: «Nudo di libertà e schiavo di questa realtà. Il momento in cui un uomo si interroga sul significato e sul valore della vita, e lo fa rivolgendosi attraverso il mare, che riflette come uno specchio lo stato d'animo e l'interiorità emotiva. Ho scritto, Al di là del mare nel modo più semplice possibile ma cercando la profondità del mio essere, chiedendomi cosa ancora il futuro ha in servo per me, dove mi porterà questo mio navigare, ora che le mie paure stanno cedendo il passo alle certezze».
Il videoclip di "Al di là del mare", diretto da Valentino Canale, vede Daniel Meguela come protagonista assoluto che interagisce con il mare, interrogandosi sul futuro e sulla paura di vivere. Il mare come uno specchio riflette lo stato d'animo di ognuno di noi e in questo caso è li eterno ad ascoltare i dubbi e il dolore esistenziale dello stesso, regalandogli un tramonto mozzafiato che fa da cornice alla canzone, che però ci dona un sound energico e spensierato che da vita ad una libera interpretazione di chi guarda.
Guarda il videoclip su YouTube: https://www.youtube.com/watch?v=ba7iwKLMAAo
Biografia
Daniel Meguela, classe 1976, già nella primissima infanzia rivela una personalità brillante, eclettica e polivalente. La sua spiccata sensibilità lo porta ben presto a creare un suo mondo melodico fatto di emozioni e musica, tradotte con grande semplicità ed immediatezza.
Inizia fin da subito a comporre i suoi brani, curando personalmente la stesura del testo e della musica. Infatti, nel 1987, a soli 11 anni, si classifica in prima posizione in un festival canoro in occasione di El Clásico a Barcellona, con il brano Se fosse amore.
Negli anni '90 si dedica anche alla danza moderna, passione parallela alla musica, tanto da far parte del corpo di ballo della trasmissione musicale Mio Capitano di RAI2 del 1996.
Nel 1998 partecipa al Contest Live Studio Aperto creato da Claudio Baglioni in occasione del suo concerto "da me a te" presso lo Stadio Olimpico di Roma. Inizia da qui un vigoroso percorso formativo che lo aiuterà a perfezionare la sua vena creativa, con l'ausilio di importanti musicisti e arrangiatori. Questa formazione confluisce naturalmente nella produzione di una grande quantità di brani, anche con lo pseudonimo di Daniel Ventura.
Nel 2006 il brano Saró Qui viene inserito nella compilation Hit Mania Champions.
Dallo stesso anno fino al 2011 inizia a collaborare nell'entourage di Paolo Carta musicista e produttore di Laura Pausini.
Nel contempo siamo nel 2008 esce un suo nuovo lavoro. Un progetto artistico che comprende tra gli altri, due brani: In 8 minuti e Madre Terra, con i quali Daniel inizia a scalare i vertici delle classifiche di Music Box Italia.
Nel 2009 l'attività di studio ricerca musicale, unitamente a quella di scrittura, prosegue in abbinamento a vari tour di promozione radiofonica, come quello di Radio105. Nel corso dell'anno viene realizzato il video del brano Madre Terra che vede la partecipazione professionale di un'intensa Martina Colombari, premiato nella VII edizione del Premio Roma Videoclip La promozione su scala nazionale porta Daniel in varie manifestazioni; partecipa in qualità di ospite: al Premio Pigro dedicato al grande Ivan Graziani, al programma tv di RAI1 FESTA ITALIANA condotta da Caterina Balivo, al TG1 Note ed infine alle presentazioni sala stampa di SANREMO 2010.
II 2015 si apre con l'incontro fortunato tra Daniel e la 90.01 Records, una giovane etichetta discografica, che crede nel suo talento genuino e senza "fumo negli occhi". Inizia così un'intensa collaborazione professionale.
Il 2017 è l'anno della conferma. In un tempo falso sarò vero, trasformerò con te gli ostacoli in pianura, vedrai... è la chiave rivelatrice del singolo Voglio Respirarne uscito il 24 Novembre dello stesso anno, brano che ha anticipato il suo nuovo album dal titolo COMPOSTOUNICO, ovvero una sintesi musicale di esperienze, persone e vita vissuta.
Nel 2018, esce il suo secondo singolo Sei Come Sei la semplicità di un pop melodico, elegante e diretto, che si piazza in alto nelle classifiche YouTube.
Ma è ad Ottobre 2018 che Daniel svela la sua vena sportiva per la sua squadra calcistica del cuore, la S.S.Lazio, incidendo per lei il nuovo inno Più In Alto Degli uomini, di cui è ovviamente autore, ed anch'esso raggiunge subito ottimi risultati di visualizzazioni. L'inno diventa anche sigla di chiusura del noto programma radiofonico QUELLI CHE HANNO PORTATO IL CALCIO A ROMA condotto dal famoso telecronista sportivo Guido De Angelis.
Dopo un periodo di nuove sperimentazioni che lo porta a girare ancora per le più importanti città Europee, Daniel inizia nel 2021 anche a collaborare come ghostwriter per alcune case editoriali.
Nel gennaio del 2024 torna a lavorare al suo terzo album dal titolo, L'Amore mi trattiene. Scritto nei testi e nella musica per l'estremo bisogno di raccontare il mondo sociale e impegnato che ha vissuto con mano, il quale, contiene ben 13 tracce da un sound attraente, calamitato ai suoni dei nuovi artisti del panorama musicale attuale, per competere tranquillamente con le nuove generazioni in grande ascesa, e in collaborazione con il produttore artistico e arrangiatore David Gionfriddo, riesce a dargli un suono unico.
Il 3 maggio 2024 Daniel viene onorato di un riconoscimento importantissimo dalla commissione Medea Odv. La cerimonia, che si è tenuta a Roma a Palazzo Montecitorio, ha visto la partecipazione di numerosi artisti, intellettuali e attivisti impegnati nella promozione della cultura e dei diritti umani attraverso l'arte e la musica. Daniel Meguela è stato riconosciuto per il suo impegno nella produzione di opere musicali che non solo intrattengono, ma sensibilizzano su tematiche di rilevanza sociale e umanitaria.
Il 5 luglio 2024 uscito il suo nuovo singolo "Fuori" accompagnato da un videoclip che vede la partecipazione come attore protagonista il bravissimo attore Jonis Bascir e che viene candidato ai maggiori Short Film Festival del mondo riscuotendo un grande successo: al Rome International Movie Awards ottiene il premio per Miglior Video Musicale, Miglior Regia, Miglior Attore,Miglior Colonna Sonora Originale; al London Indipendent Film Awards vince come Miglior Video Musicale; al Los Angeles Movie and Music Video Awards ottiene il premio come Miglior Attore Video Musicale, Miglior attore non protagonista, Miglior attrice non protagonista, Miglior Video Musicale Europeo; al Castle Film & Media Awards (Bracciano) è stato premiato come Miglior Attore, Miglior Video Musicale e Miglior Colonna Sonora, Lungometraggio; all'Indipendent Shorts Awards Los Angeles; al Berlin Shorts Award. Attualmente finalista del prestigiosissimo Remember the Future Word Film Festival in Cannes.
"Al di là del mare" è il nuovo singolo di Daniel Meguela disponibile sulle piattaforme digitali di streaming e in rotazione radiofonica da venerdì 6 settembre 2024.
Facebook | Instagram
0 notes
Text
Modern Rear Extensions in London: Design Trends and Inspirations

London's evolving architecture is a testament to its rich history and progressive design ethos. Rear extensions are among the most popular home improvement projects, and they transform living spaces. Whether you reside in a Victorian or Georgian house, the possibilities for modern rear extensions are endless. This blog explores design trends and inspirations catering to various tastes and budgets.
Modern or Traditional?
The first decision homeowners often face when planning a rear extension is choosing between a modern or traditional design. This choice significantly impacts the overall aesthetic and functionality of the extension.
Modern Design
Modern rear extensions are characterized by their clean lines, open spaces, and use of contemporary materials such as glass, steel, and concrete. These designs often maximize natural Light and create a seamless transition between indoor and outdoor spaces. Features like floor-to-ceiling windows, minimalist interiors, and flat roofs are standard in modern extensions.
Traditional Design
For those who prefer a more classic look, traditional rear extensions maintain the charm and character of the original structure. These designs often incorporate period-appropriate materials and architectural details such as sash windows, pitched roofs, and brick facades. Traditional extensions blend seamlessly with the existing property, preserving the historical essence while adding valuable space.
Contrasting or In Keeping?
Another critical consideration is creating a contrasting extension that stands out or is in keeping with the existing architecture.
Contrasting Extensions
Contrasting extensions are bold and make a clear statement. Using modern materials and design elements, these extensions create a striking juxtaposition against the traditional structure. For example, a sleek glass box extension attached to a brick Victorian house creates an eye-catching contrast. This approach is ideal for homeowners who want their extension to be a focal point and showcase contemporary design.
In Keeping Extensions
Extensions that match the existing architecture offer a more harmonious and cohesive look. These designs blend the original structure with similar materials, colours, and architectural details. An in-keeping extension is less likely to date and can enhance the property's overall value. This approach is often preferred in conservation areas or listed buildings where maintaining historical integrity is crucial.
Victorian or Georgian House?
Your property type can significantly influence the design of your rear extension. Victorian and Georgian houses are typical in London, each with distinct architectural features that should be considered when planning an extension.
Victorian Houses
Victorian houses, built between 1837 and 1901, are known for their ornate detailing, high ceilings, and bay windows. When extending a Victorian house, it's essential to respect these characteristics. Traditional design elements such as brickwork, timber sash windows, and decorative cornices can be incorporated into the extension to maintain the period charm. For a modern twist, incorporating contemporary materials like glass and steel can create a stylish contrast without compromising the original features.
Georgian Houses
Georgian houses, dating from 1714 to 1830, are characterized by their symmetrical facades, sash windows, and classical proportions. Extensions to Georgian houses should consider these attributes to ensure a seamless integration. Traditional materials like brick and stone, along with features such as pilasters and cornices, can be used to complement the existing architecture. Modern extensions to Georgian houses can also include glass elements to create a light-filled, contemporary space that respects the historical context.
Glass Box Extensions
The glass box extension is one of the most popular trends in modern rear extensions. These extensions are celebrated for creating a seamless connection between the interior and exterior spaces, flooding the home with natural Light.
Advantages of Glass Box Extensions
Natural Light: Glass box extensions allow maximum light penetration, creating bright, airy spaces that feel more extensive and open.
Views: These extensions offer unobstructed views of the garden, bringing the outdoors in and creating a tranquil, natural ambience.
Modern Aesthetic: The sleek, minimalist design of glass box extensions complements contemporary interiors and can contrast sharply with traditional architecture.
Versatility: Glass box extensions can be tailored to fit various architectural styles and personal preferences, making them a versatile choice for homeowners.
Design Considerations
When planning a glass box extension, factors such as privacy, energy efficiency, and structural integrity must be considered. High-performance glazing can help with insulation and energy savings, while thoughtful placement of blinds or curtains can address privacy concerns. Working with an experienced architect and builder also ensures the extension is structurally sound and meets all building regulations.
Garden Design and Planting
A rear extension project often goes hand-in-hand with garden redesign. Integrating the extension with the garden creates a cohesive and enjoyable outdoor living space.
Integrating Garden Design with Extensions
Continuity: Using similar materials and design elements in the extension and the garden can create a sense of continuity. For example, extending the same flooring from the interior to the patio area blurs the line between indoor and outdoor spaces.
Landscaping: Thoughtful landscaping enhances the view from the extension and creates a pleasant outdoor environment. Consider incorporating features such as raised beds, water features, and outdoor seating areas.
Planting: The choice of plants can significantly impact the ambience of the garden. Native plants and perennials provide low-maintenance options that thrive in the local climate. Incorporating seasonal plants adds colour and interest throughout the year.
Lighting: Outdoor lighting extends the garden's usability into the evening and highlights key features of the landscaping. Solar-powered lights, LED strips, and strategically placed spotlights can create a magical atmosphere.
Affordable House Extension Ideas
Not all rear extensions require a substantial budget. Several cost-effective strategies exist to create a functional and attractive extension without breaking the bank.
Budget-Friendly Extension Tips
Simple Design: Opt for a straightforward design with minimal structural changes. A single-storey extension with a flat roof is often more affordable than complex multi-level designs.
Cost-Effective Materials: Cost-effective materials such as timber cladding, standard bricks, and uPVC windows can reduce expenses without compromising quality.
DIY Elements: For those with a knack for DIY, taking on some aspects of the project, such as painting or landscaping, can save on labour costs.
Repurposed Materials: Using reclaimed or repurposed materials adds character and sustainability to the project. Salvaged bricks, reclaimed wood, and vintage fixtures can create a unique, budget-friendly look.
Modular Extensions: Prefabricated or modular extensions are becoming increasingly popular as they offer a quicker and often more affordable alternative to traditional builds.
Case Studies: Inspirations from Real Projects
Victorian House with a Modern Twist
A homeowner in North London wanted to extend their Victorian terraced house to create a larger kitchen and dining area. They opted for a modern glass box extension contrasting beautifully with the original brickwork. Exposed steel beams and polished concrete flooring added an industrial edge, while large bi-fold doors opened onto a landscaped garden. The result was a light-filled, contemporary space that respected the Victorian heritage of the property.
Georgian House with a Traditional Extension
In West London, the owners of a Georgian townhouse sought to create additional living space without detracting from the historical character. They chose a traditional design for their rear extension, using matching brickwork, timber sash windows, and a pitched roof. Inside, the extension featured a classic kitchen with shaker-style cabinets and a cosy family room. The careful attention to period details ensured the extension blended seamlessly with the existing structure.
Affordable Extension for a Mid-Terrace House
A young family in South London needed more space but had a limited budget. They opted for a single-storey rear extension with a flat roof, using cost-effective materials like uPVC windows and standard bricks. The interior was kept simple, with an open-plan kitchen and dining area. By doing some of the finishing work themselves, such as painting and tiling, they managed to keep costs down. The extension provided the much-needed space without overstretching their finances.
Glass Box Extension in a Conservation Area
In a conservation area of East London, a homeowner wanted to create a contemporary living space while adhering to strict planning regulations. They chose a glass box extension that provided a modern contrast to their Victorian home. The extension featured energy-efficient glazing, underfloor heating, and minimalist interiors. They used frosted glass panels on the sides to ensure privacy while keeping the rear wall clear for uninterrupted garden views. The project successfully combined modern design with conservation requirements.
Final Thoughts
Modern rear extensions in London offer endless possibilities to enhance your living space, whether you prefer a sleek contemporary design or a more traditional approach. By considering factors such as your property's architectural style, budget, and personal preferences, you can create an extension that meets your needs and adds value and charm to your home.
Whether you dream of a light-filled glass box extension, a garden oasis, or an affordable space-saving solution, the key is to plan carefully and work with experienced professionals. With the right design and execution, a rear extension can transform your home and improve your quality of life, making it a worthy investment for any London homeowner.
FAQ
What are the main differences between modern and traditional rear extensions?
Modern rear extensions typically feature clean lines, open spaces, and contemporary materials such as glass, steel, and concrete. They emphasize natural Light and seamless indoor-outdoor transitions. On the other hand, traditional rear extensions maintain the original structure's historical charm with period-appropriate materials and architectural details like sash windows, pitched roofs, and brick facades. The choice between modern and traditional depends on the homeowner's aesthetic preferences and the architectural style of the existing property.
How can I decide between a contrasting extension and one that is in keeping with the existing architecture?
The decision between a contrasting extension and one that is in keeping with the existing architecture depends on your taste and the desired impact. Contrasting extensions create a bold statement using modern materials and designs that stand out against the traditional structure. In keeping extensions, they blend seamlessly with the existing architecture, using similar materials and design elements to maintain a harmonious look. Consider the architectural style of your home, local planning regulations, and your long-term goals when making this decision.
What are the benefits of a glass box extension?
Glass box extensions offer several benefits, including:
Natural Light allows maximum light penetration, creating bright and airy spaces.
Views: They provide unobstructed views of the garden, enhancing the connection between indoor and outdoor areas.
Modern Aesthetic: Their sleek, minimalist design complements contemporary interiors and can contrast sharply with traditional architecture.
Versatility: They can be tailored to fit various architectural styles and personal preferences.
How can I integrate my garden design with my rear extension?
Integrating garden design with your rear extension can create a cohesive and enjoyable outdoor living space. For continuity, consider using similar materials and design elements in the extension and the garden. Thoughtful landscaping, such as raised beds, water features, and outdoor seating areas, enhances the view from the extension. Choose plants that thrive in the local climate and incorporate seasonal varieties for year-round interest. Additionally, outdoor lighting can extend the usability of the garden into the evening and highlight key features.
What are some affordable house extension ideas?
There are several cost-effective strategies for creating an affordable house extension:
Simple Design: Opt for a straightforward design with minimal structural changes, such as a single-storey extension with a flat roof.
Cost-Effective Materials: Use timber cladding, standard bricks, and uPVC windows to reduce expenses without compromising quality.
DIY Elements: To save on labour costs, you can take on some aspects of the project, such as painting or landscaping.
Repurposed Materials: Incorporate reclaimed or repurposed materials to add character and sustainability while keeping costs down.
Modular Extensions: Consider prefabricated or modular extensions for a quicker and often more affordable alternative to traditional builds.
#home refurbishments london#house refurbishment london#house refurbishment in london#loft conversions#loft extension london#interiors
1 note
·
View note
Text
A Season of Spring Skiing in the San Juan Mountains
Or, my test-drive blog post.
I started skiing when I was 2. My approach to skiing has gone through a lot of different phases over all that time - from not really enjoying it at all, to being a wannabe racer, to just wanting to ski the backcountry, to being a park rat, a wannabe freerider, a Baker bro, a turns-all-year acolyte, to someone whose ski season doesn't really start till April. I'm still adjusting to the continental snowpack after moving to Colorado from the PNW four years ago. Ice climbing tends to fill my winters, though I did ski more powder in 2024 than other recent years, but those six weeks from the middle of April to the end of May are still my favorite six of the year.
After a month on a work assignment in Baja, my ski season began with a series of epic powder days on the Trout-to-Ophir tour, a popular shuttle mission in the NW San Juans.


Yours truly in Gemini (top). The Himalayan Face, always calling (lower).

After one T-to-O day, Dani made me take a picture with my photo of her in Backcountry Mag, and I'm quite glad she did.
One day skiing Gemini with Dani, I brought the drone along. Check out the video here.
Shortly thereafter, stuck again yearning for someone else to get into the mountains with, I did a solo mission, Trout-to-Ophir-and-back-to-Trout (nixing the shuttle option in favor of my own legs: the hermit's choice, not the smart one). I skied the Big O, one of the more prominent couloirs in Waterfall Canyon, made some GS turns through hero hippy pow into the bottom of the canyon, and upon realizing it was too warm to stick with my original plan of climbing back up an adjacent couloir to regain the ridge and descend back to my car, I took the long way out, tracing Waterfall Creek through low angle but consistent terrain, safe from the warming slabs and cornices that would haunt me otherwise. Not safe from dehydration and sleep deprivation, which always hit me like a train those first couple warm spring days.

Hero turns upon exiting the Big O.
I regained the ridge at a new-to-me location on the west shoulder of Pilot Knob, with a steep, exposed, unknown face between me and my car. My "safer exit" suddenly was feeling much less safe. I had a lot of words that day to describe the position I found myself in, dropping in blind on a face that I knew deadends in cliffs for 95% of it's width. Today, 3 months later in the middle of a record setting July heatwave, I don't seem to have as many. I trusted my intuition, ski cut a windslab, and followed my gut down towards what I hoped would be a sneak line through the cliff band. It went, but barely - just a couple centimeters wider than my 184cm skis through it's gut, I made almost 1000 feet of hop turns before exiting onto familiar below-treeline terrain and lovely cruise back to the car.

Is it gonna go?

It goes! We got lucky. The 'Pilot Pinner' is a couloir I would actually welcome skiing again.
Next stop, The Coors Face, on Shandoka (Wilson Peak). This line needs no introduction. For me, it had been the only line in the San Juans to ever turn me back, having attempted it 3 times in the previous year (wind slab, a late start, and a rocky, not-filled-in crux being the 3 reasons I bailed).
Three previous bails left me feeling stubborn, I guess, and Nick and I skied it in mediocre conditions that I would not repeat again. Of all the '50 Classics' I've skied, this was by far the worst in the given conditions. An inch of sugar snow often covered large, lurking sharks. I blew out an edge on one of them. It was kinda scary, and not really in the calculated, controlled sort of way, more of the 'this is stupid' kind of way. The crux was largely rock, and I booted a small section. I'm glad I did it, but it truly felt like checking a box, which is not the way I want any of my mountain experiences to feel. I would need a record setting snowpack to come back.


Nick on the thin face. Shark attack!
Once through the choke, the lower couloir and apron was phenomenal. I would ski that section any day.

Photo by Gus Bosch, who skied the line a couple days later. You can see my and Nick's tracks in the central couloir, lower on the face.
After that, I racked up 30000 feet of vert in a week of skiing in the Elk Mountains. I skied a couple more San Juan classics too, such as the Naked Lady.
The last Colorado ski mission of the season was in the La Plata Mountains, whose western facade presides over Montezuma County and is a never ending source of beautiful sunset landscapes from the mesa above my house in Dolores. The small sub range of the San Juans offers incredible powder skiing in the winter (often receiving greater and wetter snow than other parts of the range, comparable in some ways to Wolf Creek Pass or Marble) and plethora of fantastic couloir descents, complicated only by long and difficult access. A sled helps. On this day we chose mountain bikes to cover 5 or 6 miles of singletrack before reaching snowline.
We skied a perfect north-facing couloir off of Spiller Peak, which I have heard referred to as Ray's Couloir, though I'm also partial to 'The Spillway'. Owen Basin, the headwaters of the not-so-mighty yet vital Mancos River, was criss-crossed with bear tracks and packed with fun-looking ice climbs, and one incredibly good looking quartzite boulder. An inspiring amphitheater indeed.

Bear report, above treeline, all aspects: active.

Nick climbing the couloir. Dibe Ntsaa (Hesperus) and Lavendar Peaks behind. An inspiring mountain venue indeed, if only it were easier to get to.

3, 2, 1....
#alpinism#skimountaineering#colorado#san juan mountains#skiing#southwest#matthew tangeman#photography
0 notes
Video
El Ateneo Grand Splendid Por Flickr: El Ateneo Grand Splendid is one of the most well-known bookshops in Buenos Aires. Situated at 1860 Santa Fe Avenue in Barrio Norte, the building was designed by the architects Peró and Torres Armengol for the empresario Max Glücksman (1875-1946), and opened as a theatre named Teatro Gran Splendid in May 1919. The ecleticist building features ceiling frescoespainted by the Italian artist Nazareno Orlandi, and caryatids sculpted by Troiano Troiani (whose work also graces the cornice along the Buenos Aires City Legislature. The ornate former theatre was leased by Grupo Ilhsa in February 2000. Ilhsa, through Tematika, owns El Ateneo and Yenny booksellers (totaling over 40 stores), as well as the El Ateneo publishing house. The building was subsequently renovated and converted into a book and music shop under the direction of the architect Fernando Manzone; the cinema seating was removed and in its place book shelves were installed. Following refurbishment works, the 2,000 m² (21,000 ft²) El Ateneo Grand Splendid became the group's flagship store, and in 2007 sold over 700,000 books; over a million people walk through its doors annually.Chairs are provided throughout the building, including the still-intact theatre boxes, where customers can dip into books before purchase, and there is now a café on the back of what was once the stage. The ceiling, the ornate carvings, the crimson stage curtains, the auditorium lighting and many architectural details remain. Despite the changes, the building still retains the feeling of the grand theatre it once was. The Guardian, a prominent British periodical, named El Ateneo second in its 2008 list of the World's Ten Best Bookshops [Wikipedia.org]
1 note
·
View note
Text
Milano, due locali con terrazzo in vendita
La soluzione che vi proponiamo in vendita e un recentissimo bilocale su due livelli oltre ad un terrazzo, a due passi dalla splendida cornice del Naviglio della Martesana, in una signorile e piccola palazzina di soli due piani, edificata nel 2018 in classe energetica B. L’appartamento e composto da; ingresso su soggiorno con angolo cottura, comoda scala a vista che conduce al piano superiore dove troviamo la camera da letto matrimoniale con cabina armadio e ripostiglio, oltre ad un ampio bagno con box doccia. Al comodo terrazzo si accede tramite scaletta interna situata nel disimpegno. La proprieta e completata da una cantina di pertinenza al piano seminterrato. L’immobile viene venduto parzialmente arredato ed in perfette condizioni. I punti di forza di questo appartamento sono sicuramente la luminosita, la razionalita degli spazi e la collocazione in una tranquilla via residenziale, a pochi passi dalla fermata della metropolitana MM2 Cimiano e da tutti i servizi e dalle comodita quali supermercati, farmacie, poste, asili nido e scuole. Finiture: riscaldamento autonomo, serramenti in triplo vetro/pvc con veneziane interne ed apertura a vasistas, pannelli solari per la gestione dell’acqua calda, pavimentazione in gres porcellanato effetto parquet ovunque, impianto di aria condizionata con pompa di calore, porta blindata e videocitofono. Ideale sia per un single o una giovane coppia o anche come investimento. Nelle vicinanze ampi spazi verdi, Ospedale San Raffaele e le sedi di importanti aziende come Rizzoli, Corriere della Sera, RCS, Sony Europe. Prezzo richiesto: € 228.000. Classe ''B'' 32,30 kWh/mq.a Per informazioni o per fissare un appuntamento contattateci al nr. 02. 92.35.365 o scrivere a [email protected] Per la vostra tutela pubblichiamo solo annunci con incarichi in esclusiva.
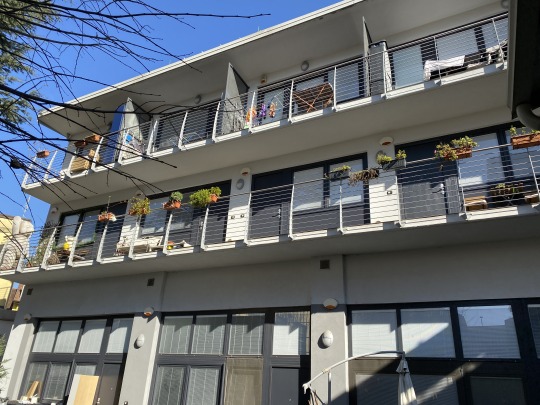
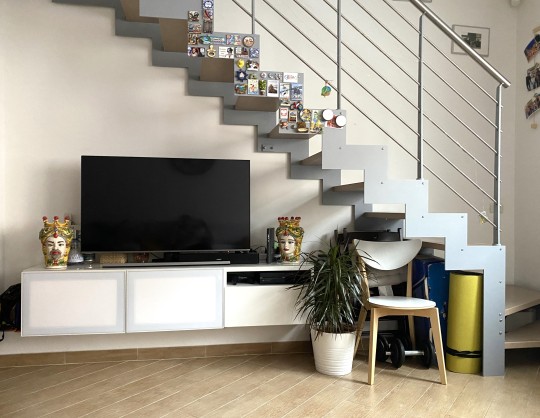
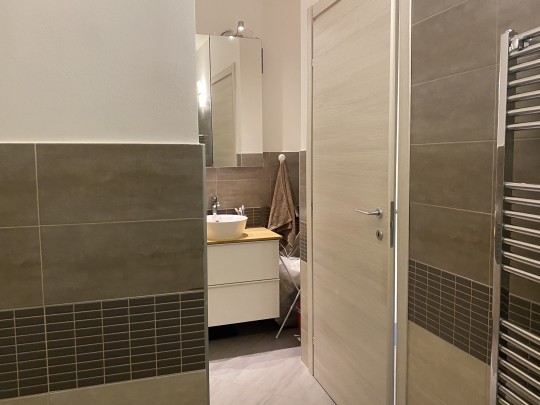
#due locali vendita milano#appartamento con terrazzo vendita milano#due locali con terrazzo vendita milano
0 notes
Text
How to Cut Miter Joints: Master the Perfect Angles Effortlessly
To cut miter joints, measure and mark the desired angle on the workpiece, then use a miter saw or a miter box and handsaw to make the cuts. When it comes to cutting miter joints, having accurate and precise cuts is essential for a professional finish. Miter joints are commonly used in woodworking for creating clean and seamless corners, such as in picture frames, molding, or furniture. By following a few simple steps, you can easily achieve perfect miter joints. Start by measuring and marking the desired angle on the workpiece. Then, using a miter saw or a miter box and handsaw, carefully make the cuts. Taking your time and ensuring accuracy will result in tight-fitting joints that are both visually appealing and structurally sound. Mastering the art of cutting miter joints will open up endless possibilities for your woodworking projects.
Basics Of Miter Joints
Miter joints are created by cutting two pieces of material at an angle to form a corner. To cut miter joints, use a miter saw or a miter box with a handsaw. Always measure accurately and set the cutting angle correctly for a precise fit. What Are Miter Joints? A miter joint is a type of joint where two pieces of material are cut at an angle and joined together to form a seamless 90-degree corner. This joint is commonly used in woodworking, especially for projects that require precise angles and clean finishes. Miter joints are often used in the construction of frames, molding, and furniture. Common Uses Miter joints are widely used in various woodworking projects due to their versatility and aesthetic appeal. Some common uses of miter joints include: - Picture frames: Miter joints are commonly used to create clean and seamless corners in picture frames. This adds a professional touch to the finished piece. - Trim and molding: Miter joints are essential in achieving seamless corners and tight joints in trim work and molding installation. - Furniture making: Miter joints are often used in furniture making, particularly for constructing corners in cabinets, tables, and other pieces of furniture with angled edges. - Decorative accents: Miter joints are also employed in creating decorative accents such as cornices, crown moldings, and baseboards, where clean and precise angles are desired. By understanding the basics of miter joints and their common uses, you can confidently incorporate this technique into your woodworking projects. Whether you're building your own picture frames, adding elegant trim to your home, or constructing custom furniture, miter joints offer a versatile and visually appealing solution.
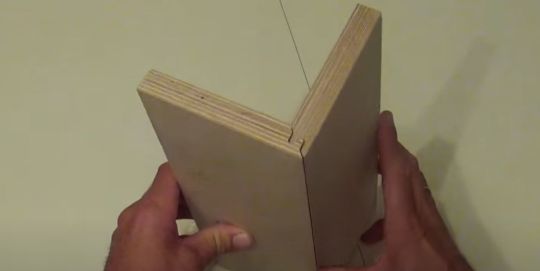
Tools And Materials
Cutting miter joints requires the use of specialized tools and materials like a miter saw, measuring tape, and clamps. Proper techniques and careful measurements are essential for achieving precise and seamless joints in woodworking projects. Cutting miter joints with precision requires the right tools and materials. Whether you're a beginner or a seasoned woodworker, having the essential tools for the job is crucial. Additionally, using quality materials will ensure a strong and durable joint that stands the test of time. Essential Tools To achieve accurate miter joints, you'll need the following essential tools: - A miter saw: This power tool is the cornerstone of any miter joint cutting project. It allows you to make precise angled cuts effortlessly. - A miter box and backsaw: If you don't have access to a miter saw, a miter box and backsaw combination can do the job. The miter box guides the saw to ensure accurate cuts. - A measuring tape: Accurate measurements are crucial when cutting miter joints. Using a measuring tape enables you to mark the correct angles and lengths for a seamless fit. - A drafting square: This tool helps ensure your miter cuts are perfectly square, resulting in tight and seamless joints. - A pencil or marking knife: Marking the angles and lengths on your workpieces is essential for precise miter cuts. - A clamp: A clamp is useful to hold your workpieces securely in place while cutting the miter joints. - Safety equipment: Always prioritize safety when working with power tools. Wear safety goggles, ear protection, and a dust mask to protect yourself from any possible harm. Recommended Materials Choosing the right materials for your miter joints can significantly impact the overall quality and longevity of your project. Here are some recommended materials to consider: - Wood: Selecting high-quality wood is paramount for achieving strong and durable miter joints. Hardwoods like oak, maple, and walnut are often preferred for their stability and strength. - Wood glue: Using wood glue in combination with your miter joints provides additional strength and stability to the joint. Look for a reliable wood glue that is designed for furniture and woodworking projects. - Screws or nails: Depending on the project, you may choose to reinforce your miter joints with screws or nails. Ensure they are the appropriate size and type for the wood you're working with. - Sanding materials: After cutting your miter joints, sanding the edges and surfaces will give your project a smooth and professional finish. Use sandpaper or a sanding block to achieve the desired result. - Finish: Applying a finish to your miter joint project not only enhances its appearance but also adds another layer of protection. Consider using varnish, stain, or paint to suit your desired aesthetic. With the right tools and materials on hand, you're well-equipped to embark on your miter joint cutting journey. Remember to prioritize accuracy, take your time, and enjoy the process of creating beautiful and structurally sound miter joints.
Understanding Angles
Understanding angles is crucial when it comes to cutting miter joints. To achieve a precise fit, it's essential to grasp the concept of angles and how it applies to this woodworking technique. Let's explore the importance of accuracy and how to calculate angles for immaculate miter joints. Importance Of Accuracy In woodworking, precision is paramount. Miter joints demand exactness to ensure a seamless connection. Even the slightest inaccuracy can lead to gaps or misalignments, compromising the joint's strength and aesthetic appeal. Calculating Angles When cutting miter joints, understanding how to calculate angles is pivotal. It's crucial to measure and cut the angles accurately to achieve a perfect fit. Here's a simplified process to calculate miter angles: - Measure the angle for the joint. - Divide the angle by 2 to determine the miter angle for each piece. - Set your miter saw to the calculated angle and make your cuts.
Cutting Techniques
When it comes to cutting miter joints, there are a few different techniques you can use. The method you choose will depend on your tools and personal preference. In this section, we will explore two popular techniques: using a miter saw and hand-cutting methods. Using A Miter Saw If you have access to a miter saw, it can be a quick and efficient way to cut miter joints. Here's how to do it: - Measure and mark: First, measure and mark the angles of your miter joint using a protractor or a miter gauge. Make sure to mark the correct angles on both pieces of wood. - Set up the saw: Set the miter saw to the desired angle. Most miter saws have pre-set stops for common angles like 45 degrees. - Position the wood: Place the first piece of wood flat on the saw's base against the fence, making sure the marked angle aligns with the blade. - Make the cut: Lower the saw's blade and make a smooth, steady cut through the wood. Repeat this step for the second piece of wood, making sure the angles align correctly. - Check the fit: Once you have made the cuts, test the fit of the two pieces together. They should create a tight, seamless joint. Hand-cutting Methods If you don't have a miter saw or prefer a more traditional approach, there are hand-cutting methods you can use to achieve miter joints. Here are a couple of techniques: - Backsaw and miter box: A backsaw and miter box is a simple and precise way to cut miter joints by hand. The miter box holds the wood securely while the backsaw cuts at the desired angle. - Hand plane and shooting board: If you are skilled with a hand plane, you can use a shooting board to achieve perfectly square and accurate miter cuts. This method requires patience and practice. These hand-cutting methods may take more time and practice to perfect, but they can yield excellent results. Whichever technique you choose, remember to measure carefully, use sharp tools, and practice on scrap wood before cutting your final pieces.
Troubleshooting And Tips
While cutting miter joints may seem challenging at first, with practice and the right techniques, you can achieve excellent results. However, it's not uncommon to encounter some issues along the way. In this section, we will address common mistakes and provide pro tips for achieving perfection in your miter joints. Common Mistakes Creating flawless miter joints requires precision and attention to detail. Here are some common mistakes beginners may encounter and ways to avoid them: - Not properly measuring the angles: Ensure that you accurately measure the angles for the miter joint. A slight deviation can lead to misaligned joints. - Incorrect blade tilt: Make sure to set your saw blade at the correct angle before making any cuts. A misplaced tilt can result in uneven joints. - Poor-quality blades: Investing in high-quality, sharp blades is essential for achieving clean, precise cuts. Dull blades can cause tear-out or uneven edges in your miter joints. - Inadequate clamping: Failing to secure the pieces tightly together during cutting can result in distorted joints. Use clamps to hold the material firmly in place. - Not checking for squareness: Before making your cuts, verify that your saw and workbench are properly squared. Ignoring squareness can lead to inaccurate angles and ill-fitting joints. Pro Tips For Perfection To ensure impeccable miter joints, consider the following expert tips: - Double-check your measurements: Take the time to measure twice and cut once. Double-checking your angles and dimensions will save you from costly mistakes. - Use a miter sled: A miter sled is a valuable tool that helps stabilize your workpiece and provides additional support during cutting. This reduces the chance of errors and produces better results. - Use a zero-clearance insert: When cutting delicate materials, incorporating a zero-clearance insert on your saw table can minimize tear-out, resulting in neater miter joints. - Practice on scrap pieces: Before tackling your actual project, practice cutting miter joints on scraps of the same material. This allows you to perfect your technique and make any necessary adjustments before moving to the final work. - Perform test cuts: When adjusting your saw's settings or trying out a new blade, always perform test cuts on sacrificial pieces. This ensures that you have the right setup and prevents mistakes on your final work. By avoiding common mistakes and following these pro tips, you'll be well on your way to creating impeccable miter joints. Remember to always prioritize accuracy and practice regularly to refine your skills.
Frequently Asked Questions For How To Cut Miter Joints
How Do You Cut A Mitre Joint? To cut a mitre joint, follow these steps: 1. Measure and mark the angle you want on the workpiece. 2. Set your miter saw or table saw to the corresponding angle. 3. Position the workpiece against the saw fence and hold it securely. 4. Make the cut, ensuring a straight and clean edge. 5. Repeat the process for the second piece, ensuring a precise fit when joining the two together. How Do You Cut A Perfect 45 Degree Angle? To cut a perfect 45-degree angle, use a miter saw and adjust the angle to 45 degrees. Secure the board, make the cut, and double-check the angle for precision. How Do You Find The Angle Of A Miter Cut? To find the angle of a miter cut, measure the length of the piece you're cutting and the width of the surface you're joining it to. Use a miter saw or protractor to determine the angle that will create a tight joint between the two pieces. How Do You Cut A Perfect Miter Joint On A Table Saw? To cut a perfect miter joint on a table saw, follow these steps: 1. Set the miter gauge to the desired angle. 2. Position the workpiece securely against the fence. 3. Make sure the blade is aligned with the desired angle. 4. Slowly push the workpiece through the blade, keeping a steady hand. 5. Double-check for accuracy before removing the cut piece.
Conclusion
Mastering the art of cutting miter joints requires practice and patience. By following the proper steps and using the right tools, you can achieve seamless and precise miter joints for your woodworking projects. Incorporating these techniques will elevate the quality of your craftsmanship and bring your projects to the next level. Practice, dedication, and attention to detail are key in perfecting this essential woodworking skill. Read the full article
0 notes
Text
Redback Pest Control Brisbane

The perfect weather conditions have paved the way for an infestation of redback spiders in Brisbane homes. These deadly spiders have been found in outdoor furniture, sheds and mailboxes.
These black spiders with a distinct red/orange stripe on their abdomen pack a lethal punch. Their bites can cause vomiting, sweating and muscle weakness. To know more about Redback Pest Control , visit the Bug Out Pest Solutions website or call 0426263320.
There are several early warning signs that a pest infestation is in progress. One of the most obvious is droppings, which are usually sticky or greasy. Another sign is footprints, which tend to resemble smears rather than defined lines. If you notice any of these in a work area, it’s important to react promptly.
Redback spiders are opportunistic predators that eat insects, lizards, and other small animals that become trapped in their webs. They are also fond of eating flies, mosquitoes, and other blood-sucking creatures. Their bites are painful and may lead to nausea, vomiting, abdominal pain, and sweating.
While no one has died from a redback spider bite since 1979, they do pose a threat to humans and should be treated with care. The best way to identify a redback spider is to look for a distinctive black body with a red stripe on the back of its abdomen. These spiders prefer to hide in outdoor furniture, crevices, and playground equipment.
Redback spiders have become common in urban areas due to the shelter provided by sheds, garden furniture and other debris. Their venom is highly dangerous and although no one has died of a Redback bite since 1956 when antivenom became available, it can still cause serious health problems.
Bites from these venomous spiders can cause nausea, vomiting and abdominal pain. If you see any redbacks on your property, it is important to contact a Brisbane pest control company right away.
Eliminating hiding spots is the best way to prevent an infestation. Make sure to clear any piles of sticks or leaves on your property and that you regularly clean out sheds, toilets and letterboxes. You can also install flyscreens and weather stripping on doors to minimise their entry into your home. If you do get bitten by a Redback spider, never try to suck out the venom as this can increase its spread to other parts of the body. Instead, use an ice pack on the affected area to reduce pain and blood flow.
If you are not careful, pests can cause structural damage to your property and pose serious health risks for the occupants. Regular inspections and timely pest control interventions can help prevent such problems before they escalate.
Redback spiders are dangerous because of their venom. They are able to ambush and overpower prey much larger than themselves, including humans. However, no one has ever died from a redback bite because anti-venom exists.
They can be easily recognised because they have a bright red stripe on their upper abdomen. They live in sheltered, dry places such as sheds, toilets and meter boxes.
You can prevent them from entering your home by regularly cleaning up outdoor areas, removing clutter and keeping vegetation and grass trimmed back. You should also check for any potential entry points and fix them immediately. In addition, you should eliminate any hiding spots for them like under garden beds, in outdoor furniture or under cornices and weepholes.
The redback spider is a dangerous venomous spider native to Australia. It is typically black or brown and has a distinctive red stripe on the back of its abdomen. If bitten, it can cause severe pain, muscle weakness and even death in rare cases. It is important to get medical attention immediately if bitten by this spider.
These spiders thrive in warmer climates and often move from outdoor spaces to indoor ones for shelter. They love dark, quiet and secluded places like sheds, garages, closets and basements. In order to prevent these spiders from moving indoors, Mr Yehia suggests cleaning gutters regularly and switching white outdoor lights for fluorescent ones. To know more about Redback Pest Control , visit the Bug Out Pest Solutions website or call 0426263320.
It is also a good idea to clear webs as soon as they form. This will stop the spiders from building their nests there and may even deter them from entering your home. If bitten by a redback spider, do not try to suck the bite out as this can increase the spread of the venom. Instead, a quick and effective way to deal with the bite is by applying an ice pack on the affected area.
#termite control brisbane#pest control brisbane#termite control solutions#cockroach control solutions#bug control services#pest control services#pest control#termite inspection#cockroach termination services#cockroach control solutions in brisbane#pest control brisbane cost#pest control brisbane north side#redback pest control#redback pest control redcliffe#brisbane termite and pest control
0 notes