#clip studio paint here i come!!!!
Explore tagged Tumblr posts
Visit Tumblr Blog
Explore Tumblr blogs with no restrictions, modern design and the best experience.
Last Seen Tumblr Blogs


Fun Fact
Tumblr has 4 main sources of revenue.
Text
before i start the dice arisugawa grind on digital art i offer everyone ramuda on whiteboard 🙏
i kinda forgot what he looked like halfway thru

no repost or ramuda will get you 🍭( ╹▽╹ )
#xuilart#hypmic#hypnosis mic#ramuda amemura#hypnosis mic ramuda#clip studio paint here i come!!!!#csp best art program best purchase of my life#bc i bought it on sale for half the price ofcourse
25 notes
·
View notes
Text
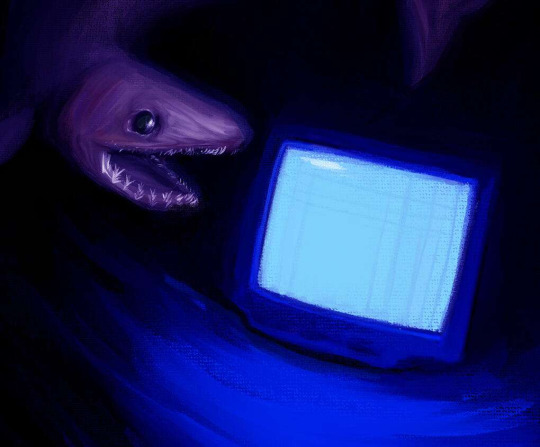
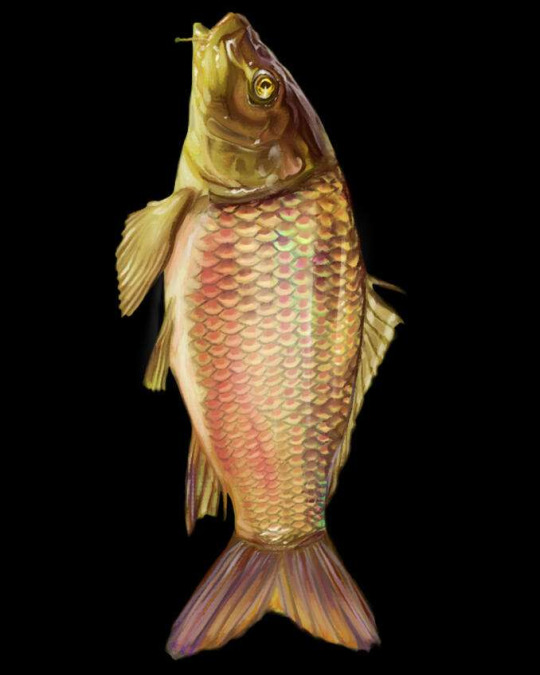
some fish ive painted
#snag.art#fishblr#fish#fish art#rainbow trout#frilled shark#sharks#painting#clip studio paint#artists of tumblr#Hello . sorry i died#im taking online summer classes at my uni and theyre insane#full length classes squished into a few months time#im doing . ok . im alive . havent drawn in awhile tho#in a major block rn#so heres some old fish paintings for you guys#i actually sold the second fish as a print at a festival once a few summers ago#if anyone has interest in buying prints of these ? lmk and ill upload them to etsy#cause ive got a few more left#nice frames included#anyways. im alive i swear! more fallout stuff coming soon#ive been slowlychipping away at a hardcore one#and slowly getting achivements on my all genocide/true evil run
45 notes
·
View notes
Text
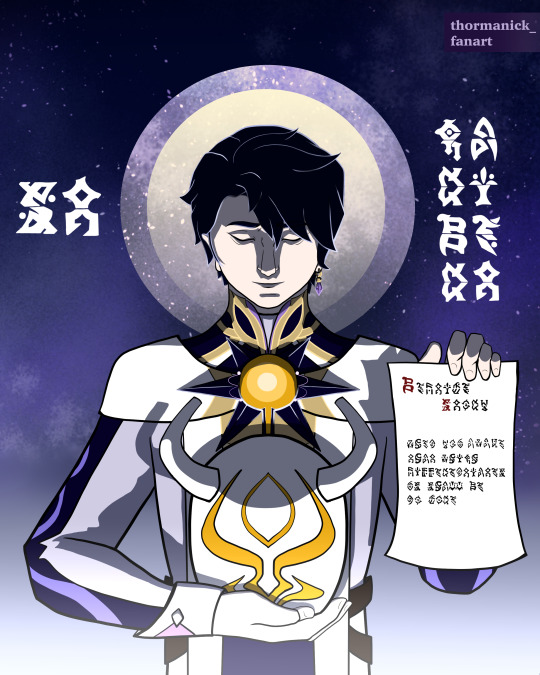
After the Bedtime Story, I think Abyss Order should have their own Saints.
Caribert would be the first one - the protector of wicked, cursed and abandoned.
[please click the image for better quality!]
#genshin impact#genshin impact caribert#genshin impact bedtime story#genshin impact 4.7#genshin impact fanart#no like. i'm so serious i kinda scare myself#sometimes you want to draw silly fanart next thing you know it's the depth of the night and the religious motives entered the chat#i'm sorry if i come off a bit unhinged here i'm just. extremely happy with what i've done here#like i figured out some symmetry tool! and clip layers! and fill tool! and even some anatomy even though i messed up a bit but it's ok!#and like. i'm very happy#once again if you can translate the writings i'll give you an abstract non-existent conceptual digital 🍪#digital art#clip studio paint#illustration#from thormanick's to do list#artists on tumblr
21 notes
·
View notes
Text

If there was some amazing force outside of time
To take us back to where we were
And hang each moment up like pictures on the wall
Inside a billion tiny frames so that we could see it all, all, all
Its been just over a year (25th august 2023) since I had to say goodbye to Atari and there’s not a day that goes by without me thinking of him. He was a wonderful part of my life so I can’t believe a year has gone by without him. Still thinking of you buddy, wherever you are. I wanted to draw something to memorialise him.
#illustration#clip studio paint#digitalart#artists on tumblr#ferrets#pet loss#pet illustration#pet memorial#animal art#illustrator#the flowers are forget me nots#I’ve come to peace with his loss but god I still wish he was here
11 notes
·
View notes
Text

It's the (fish) Guy
#here comes the sun#my art#artists on tumblr#clip studio illustration#clip studio paint#digital art#fish head goes hard#sun fish#would this be considered furry#who knows#alternative art#how do i tag this#fish art#fish aesthetic#artist on tumblr
6 notes
·
View notes
Text
made a personal pfp featuring none other than the most! wally darling!


yes i animated it, it was too cute not to! i just had the urge one day to make myself a profile picture of this cutie! and i did!
figuring out the parts to be tweened was probably the longest because i'm insanely a dumdum! but i pushed through!
[cw/tw for scopophobia]
of course i had to make a spooky ver, although i don't think they're too spooky compared to the drawings others have made of him but alas! i tried!


#welcome home#art#artists on tumblr#digital art#fanart#here comes the boy#i love him dearly#wally darling#wally fanart#welcome home wally#wh wally#the silly#wally darling wh#wally my dearest!#spooky#i tried to be spooky but it did not work :(#maybe someone out there will think its spooky? perhaps!#clip studio art#clip studio paint
73 notes
·
View notes
Text
A lot of things that happened weren't in her control.
Original: Oh Baby, Aw Man Meme
#warrior cats oc#animation meme#capcut#clip studio paint#solarpaw#If I see a single Steven Universe joke I'll personally come and steal your kneecaps /j#warrior cats#The AtroCITY: Totalling Eclipse#Remember this girl? Did I ever show her? If I didn't then here she is. Solarpaw my 7 year old warrior cats OC with powers#she used to be a villain but now she's a hero and on a journey to end a prophecy#retro aesthetic#this meme should be done with Chirin from Ringing Bell it'd fit really well
23 notes
·
View notes
Text

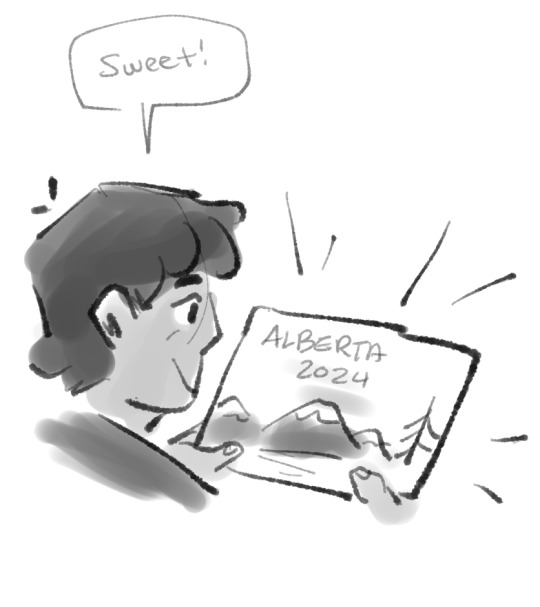
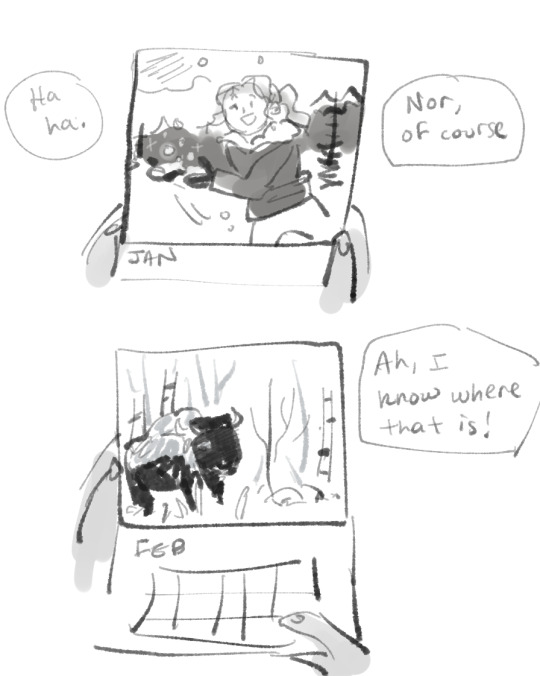
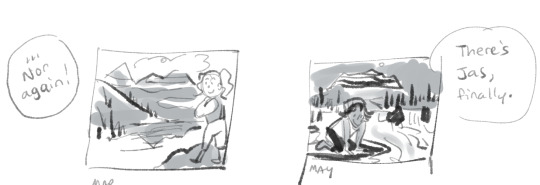
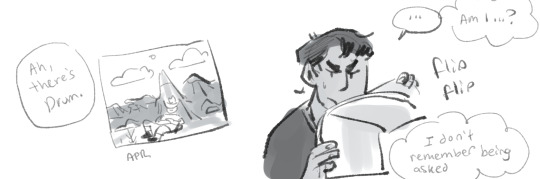
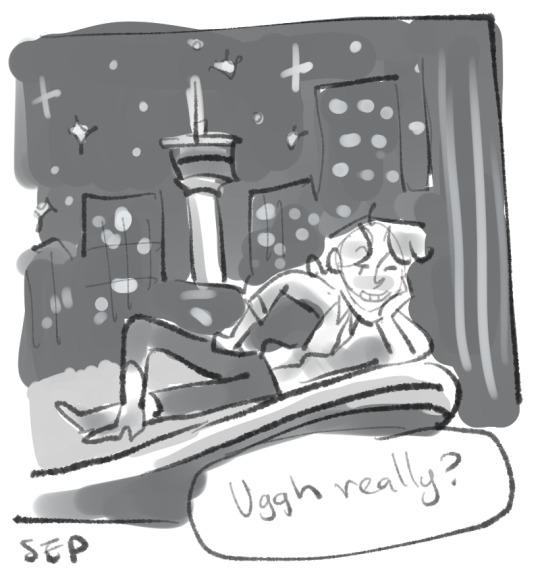
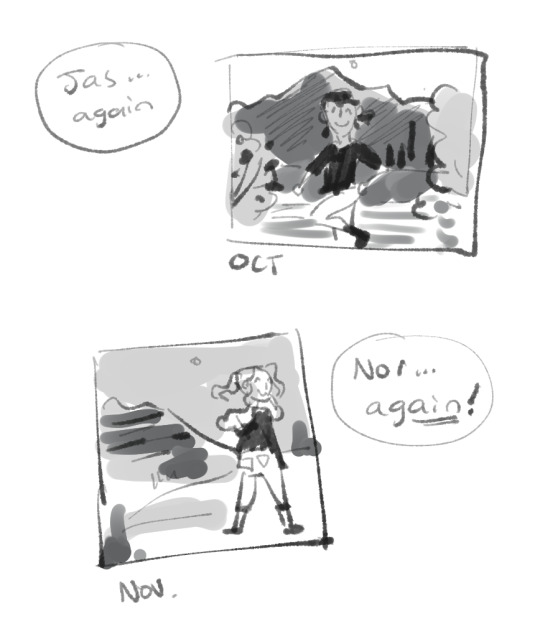

based on a True Story of just yesterday. I say ok i won't be mean to ed and then suddenly he's sobbing on the pharmacy floor I can't help it!! he looks like a sop but he is a sop with a background in theatre, okay.
do you ever notice that Banff and Jasper kind of take up a Lot of Space in calendars, lol... this is an issue that Ed pretends he's not sensitive about but considering these things keep happening to him, i mean, actually more than once. (Who do they think we are??? Calgary??????). All this on top of his battle with google to change his profile pic too.
anyway have some nice photos of edmonton i took these past few months that are by no means professional but i like them
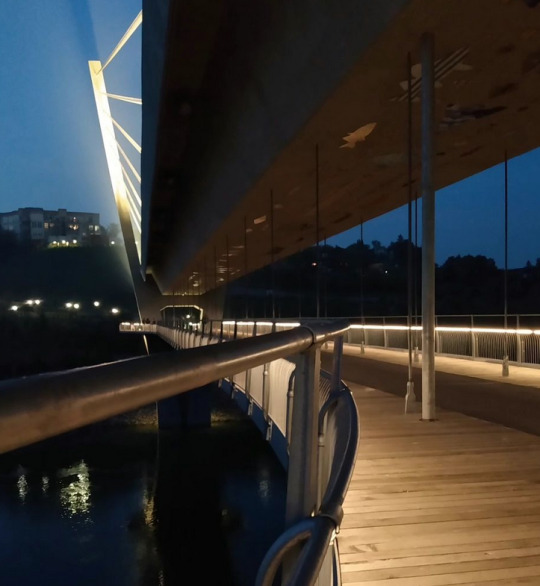


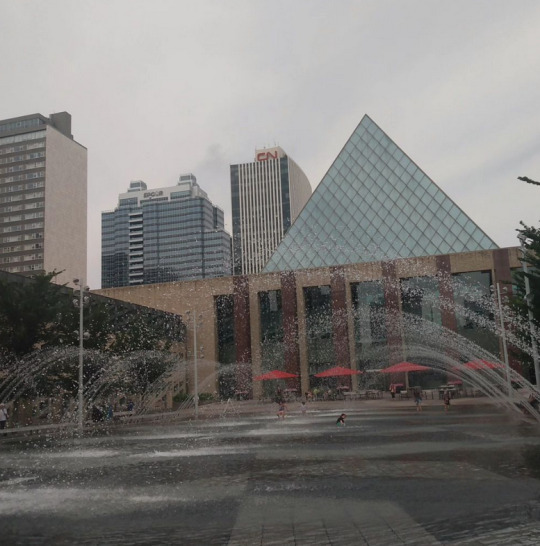

edmonton :) yeah.
#projectcanada cities#pc: edmonton#pc: calgary#pc: banff#pc: jasper#pc: drumheller#hapo doodles#digital art#clip studio paint#boab omake#my drawing is still a bit woobly because my arms are sore#its funny because i think its only been in the last 5 or 10 years or so#that edmontonians have been really leaning into Authenticity tm as an identity#and its actually working slowly because people come here for the unpretentious and gritty but honest vibe now??? which is nice#its something that visiting friends have told me and i laugh it off because im like well you have me as a tour guide and im very biased#but it seems to be something that is true for people more generally now too?? so thats great#its always OTHER PEOPLE pasting the mountains on us and not us doing it ourselves#you ask edmontonians about highlights of edmonton and we all get misty eyed over the river valley not the mountains
25 notes
·
View notes
Text

Warm up Ben doodle while I wait for food 😌💕 as per my victim belongs to @karathraces
4 notes
·
View notes
Text
Mia day!!
🧸🪻🐇
(Happy borfday to my sweet bean who is trying her darndest ヾ( ・`���´・)ノ゙)

#lilakwiioc variety4tet#oc artist#original character#original art#the art was arting with this one boys B)#I swear I dont have favorite oc's- my inspiration comes and goes with each drawing;;#drawing poses#background art#ocs#2024#i put little easter eggs in here hehe#clip studio paint#csp#csp art
3 notes
·
View notes
Text

i got silly and decided to draw in 4 programs at the same time
#who said you need to choose#neil actually looks decent here wow#got creative with programs xD#drawing of naoki in paint was done by mouse btw#these are from top left: clip studio; openCanvas; firealpaca and sai 1#artists on tumblr#my art#digital art#original character#my ocs#art#they silly i like them#if you did not know openCanvas license comes with xp-pen tablets
2 notes
·
View notes
Text

congratulations to the newly wed couple
thank you to everyone who has not only purchased the comic, but also had kind words to say in tags and through asks!! I am away for holiday for most of this month, and I have been/will be largely offline on account of this*-- but please know that my heart is incredibly full to know people like this story!!
(*any posts that go up here have been scheduled before I left)
A few recurring questions I'll answer here real quick:
Will Sacred Bodies have a physical print? Yes! I would like to self-publish this book after the fair is concluded and sell it at conventions and through my online store.
What are the Ba'It based off of? Their body/limb plan is based on pteradons!! with some bat and bird anatomy thrown in. Garaang are semi-bipedal so that makes the silhouette even weirder, but you see some quadrupedal stances in the comic and it might make more sense then. I don't want to post or talk too much about some of the minutae of their design, as it is part of the story itself. :}
What medium did you use for the comic? It's all digital; I used Clip Studio Paint to draw the entire thing. I use the base watercolour and design pencil brushes that come with the programme. How long did it take you to make the comic? It's a little hard to estimate-- initial ideas, visdev and writing drafts were intermitent at the start of the year; once I landed on the story, finalising the script would've taken no longer than a week of recurring writing and editing. It's the actual drawing that takes forever, unfortunately. I started thumbnailing around April, and pencilling, colours and painting were a 10-11 hour work-day commitment for most of June and July. (I lost a lot of work-time in May cause I fell ill, womp womp). I'd probably say it was 4 - 5 months of labour. Are you going to write more stories in this world? I would really like to! I have a lot of ideas rattling in my head for the Valley of the World-- the place that the folk of the Spire have escaped. That being said, I have a whole graphic novel to finish first! It has been pushed back on account (but not exclusively because) of me working on my SBCF entries the last couple years, and I don't want to neglect it any further!! (it's 350+ full colour pages though so it was always going to be a huge undertaking)
Thank you again for the outpouring of enthusiasm and support; it means the world!
#art#sbcf#scrb#monster#I'm basically on the first ever holiday I've gotten to take in my entire adult life#so these two things happening at the same time is supercharging me with happiness#I'm really sorry that I won't be able to address any of the lovely messages until I am back!
2K notes
·
View notes
Photo


Here is a round-up of all eight of the free digital brush packs that I’ve released so far for Photoshop CC, Clip Studio Paint, and Procreate!
You can download them on this page (click) Type in “0″ for a free download or tip any amount you so desire!
All my brush packs are totally free (tips optional but always very appreciated!) and can be used freely in any work, including commercial work that you profit off of, with no license or credit required. My goal with these brush packs is to make digital painting feel more achievable and accessible - especially painting environments, something I now LOVE but that used to intimidate me, & felt much more approachable with the right tools! Many of the packs also come with tutorial video content. I hope you enjoy!
#digital art brushes#digital painting#photoshop brushes#photoshop#ps#procreate brushes#procreate#clip studio paint brushes#csp brushes#clip studio brushes#grass brushes#city brushes#window brushes#fur brushes#book brushes#tree brushes#leaf brushes#leaf brush#grass brush
26K notes
·
View notes
Text
My Favorite Cheap Art Trick: Gradient Maps and Blending Modes
i get questions on occasion regarding my coloring process, so i thought i would do a bit of a write up on my "secret technique." i don't think it really is that much of a secret, but i hope it can be helpful to someone. to that end:

this is one of my favorite tags ive ever gotten on my art. i think of it often. the pieces in question are all monochrome - sort of.

the left version is the final version, the right version is technically the original. in the final version, to me, the blues are pretty stark, while the greens and magentas are less so. there is some color theory thing going on here that i dont have a good cerebral understanding of and i wont pretend otherwise. i think i watched a youtube video on it once but it went in one ear and out the other. i just pick whatever colors look nicest based on whatever vibe im going for.

this one is more subtle, i think. can you tell the difference? there's nothing wrong with 100% greyscale art, but i like the depth that adding just a hint of color can bring.
i'll note that the examples i'll be using in this post all began as purely greyscale, but this is a process i use for just about every piece of art i make, including the full color ones. i'll use the recent mithrun art i made to demonstrate. additionally, i use clip studio paint, but the general concept should be transferable to other art programs.


for fun let's just start with Making The Picture. i've been thinking of making this writeup for a while and had it in mind while drawing this piece. beyond that, i didn't really have much of a plan for this outside of "mithrun looks down and hair goes woosh." i also really like all of the vertical lines in the canary uniform so i wanted to include those too but like. gone a little hog wild. that is the extent of my "concept." i do not remember why i had the thought of integrating a shattered mirror type of theme. i think i wanted to distract a bit from the awkward pose and cover it up some LOL but anyway. this lack of planning or thought will come into play later.
note 1: the textured marker brush i specifically use is the "bordered light marker" from daub. it is one of my favorite brushes in the history of forever and the daub mega brush pack is one of the best purchases ive ever made. highly recommend!!!
note 2: "what do you mean by exclusion and difference?" they are layer blending modes and not important to the overall lesson of this post but for transparency i wanted to say how i got these "effects." anyway!
with the background figured out, this is the point at which i generally merge all of my layers, duplicate said merged layer, and Then i begin experimenting with gradient maps. what are gradient maps?
the basic gist is that gradient maps replace the colors of an image based on their value.

so, with this particular gradient map, black will be replaced with that orangey red tone, white will be replaced with the seafoamy green tone, etc. this particular gradient map i'm using as an example is very bright and saturated, but the colors can be literally anything.

these two sets are the ones i use most. they can be downloaded for free here and here if you have csp. there are many gradient map sets out there. and you can make your own!
you can apply a gradient map directly onto a specific layer in csp by going to edit>tonal correction>gradient map. to apply one indirectly, you can use a correction layer through layer>new correction layer>gradient map. honestly, correction layers are probably the better way to go, because you can adjust your gradient map whenever you want after creating the layer, whereas if you directly apply a gradient map to a layer thats like. it. it's done. if you want to make changes to the applied gradient map, you have to undo it and then reapply it. i don't use correction layers because i am old and stuck in my ways, but it's good to know what your options are.

this is what a correction layer looks like. it sits on top and applies the gradient map to the layers underneath it, so you can also change the layers beneath however and whenever you want. you can adjust the gradient map by double clicking the layer. there are also correction layers for tone curves, brightness/contrast, etc. many such useful things in this program.
let's see how mithrun looks when we apply that first gradient map we looked at.

gadzooks. apologies for eyestrain. we have turned mithrun into a neon hellscape, which might work for some pieces, but not this one. we can fix that by changing the layer blending mode, aka this laundry list of words:

some of them are self explanatory, like darken and lighten, while some of them i genuinely don't understand how they are meant to work and couldn't explain them to you, even if i do use them. i'm sure someone out there has written out an explanation for each and every one of them, but i've learned primarily by clicking on them to see what they do.
for the topic of this post, the blending mode of interest is soft light. so let's take hotline miamithrun and change the layer blending mode to soft light.

here it is at 100% opacity. this is the point at which i'd like to explain why i like using textured brushes so much - it makes it very easy to get subtle color variation when i use this Secret Technique. look at the striation in the upper right background! so tasty. however, to me, these colors are still a bit "much." so let's lower the opacity.

i think thats a lot nicer to look at, personally, but i dont really like these colors together. how about we try some other ones?

i like both of these a lot more. the palettes give the piece different vibes, at which point i have to ask myself: What Are The Vibes, Actually? well, to be honest i didn't really have a great answer because again, i didn't plan this out very much at all. however. i knew in my heart that there was too much color contrast going on and it was detracting from the two other contrasts in here: the light and dark values and the sharp and soft shapes. i wanted mithrun's head to be the main focal point. for a different illustration, colors like this might work great, but this is not that hypothetical illustration, so let's bring the opacity down again.

yippee!! that's getting closer to what my heart wants. for fun, let's see what this looks like if we change the blending mode to color.

i do like how these look but in the end they do not align with my heart. oh well. fun to experiment with though! good to keep in mind for a different piece, maybe! i often change blending modes just to see what happens, and sometimes it works, sometimes it doesn't. i very much cannot stress enough that much of my artistic process is clicking buttons i only sort of understand. for fun.
i ended up choosing the gradient map on the right because i liked that it was close to the actual canary uniform colors (sorta). it's at an even lower opacity though because there was Still too much color for my dear heart.

the actual process for this looks like me setting my merged layer to soft light at around 20% opacity and then clicking every single gradient map in my collection and seeing which one Works. sometimes i will do this multiple times and have multiple soft light and/or color layers combined.
typically at this point i merge everything again and do minor contrast adjustments using tone curves, which is another tool i find very fun to play around with. then for this piece in particular i did some finishing touches and decided that the white border was distracting so i cropped it. and then it's done!!! yay!!!!!
this process is a very simple and "fast" way to add more depth and visual interest to a piece without being overbearing. well, it's fast if you aren't indecisive like me, or if you are better at planning.

let's do another comparison. personally i feel that the hint of color on the left version makes mithrun look just a bit more unwell (this is a positive thing) and it makes the contrast on his arm a lot more pleasing to look at. someone who understands color theory better than i do might have more to say on the specifics, but that's honestly all i got.

just dont look at my layers too hard. ok?
2K notes
·
View notes
Text
How Do I Do Stuff
The question was phrased a little strangely, and I don't want to embarrass the person by posting exactly what was said, but I'll answer it and hope this clears everything up.
I do almost all of my drawing by hand. No, I don't trace in Photoshop. Not a judgment on those who do, but I come from a generation of artists who did not use Poser programs or other digital tools. We learned to draw using a technique called the Sight Size method. I know a lot of people assume everyone - including the old masters - traced everything using optical tools, but while it is true some people did, it is just as true that most didn't, and you can draw with great accuracy if you learned how to draw the old fashioned way.
Sight Size breaks everything down into its barest components of geometric shapes and you build from there. Once you learn it, you never forget, and it applies to everything you will ever draw.
I learned it using a set of Famous Artist Course books my mom had since she was a kid, and they are still the gold standard. They're often on ebay. If I were you, I'd buy them.
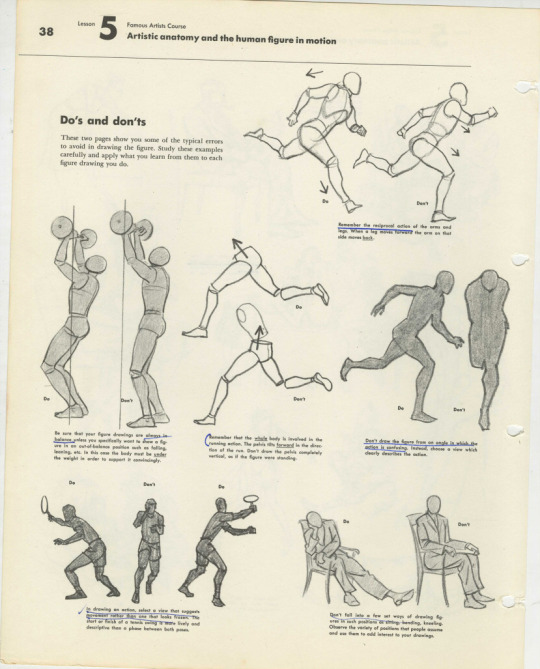
I actually find using figure reference really annoying because I like exaggerations and modifications from reality in my final work.
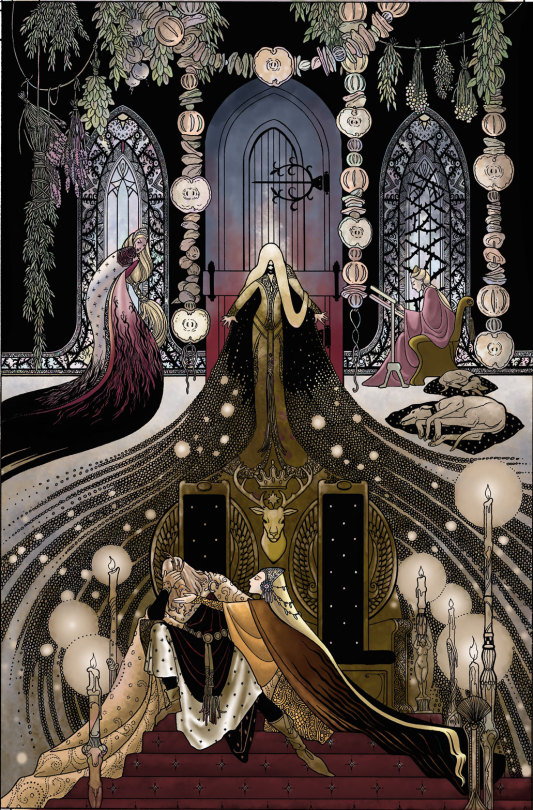
This page from Neil Gaiman's Chivalry was drawn and painted without figure reference of any kind.
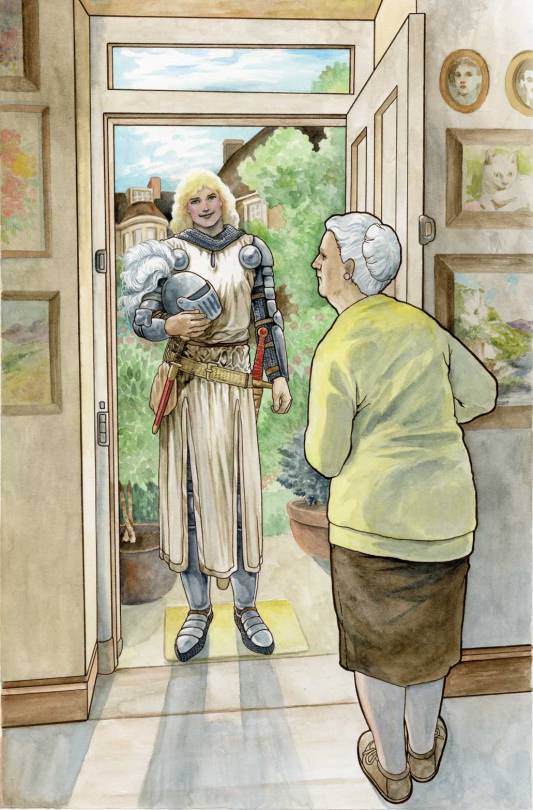
I don't know why people assume I trace all the time. If you were to try to use photographs to replicate these figures, you would find they are slightly off. There is no tracing here.
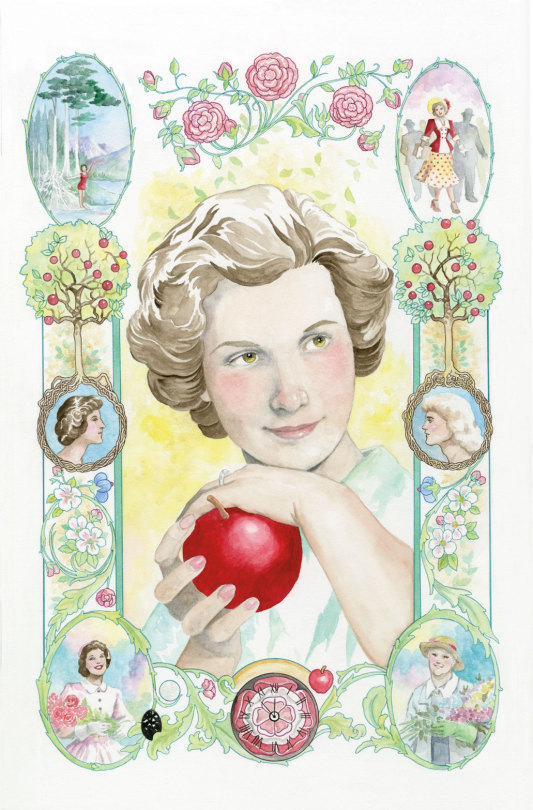
This is not to say I never use reference. This page, for example, was referenced from a photo of my mother. Isn't she pretty.
But this page of Sir Galaad was drawn and painted without reference.
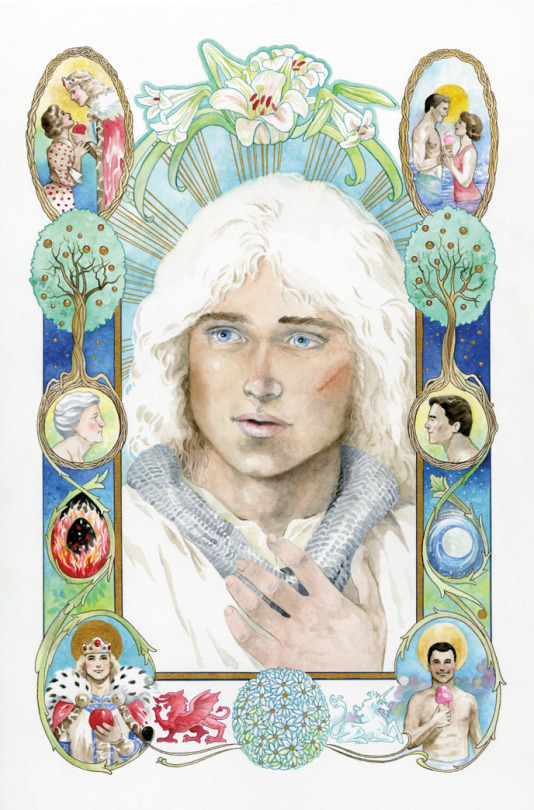
He's pretty, too.
If he were real, I'm sure a lot of people would be very happy about it. But he's not. And had I reference, the art would have gone a lot faster. I had a time trying to nail this face that is very alive in my head but doesn't really exist.
Back in the ancient days, all cartoonists had to learn to draw and paint extemporaneously because reference was limited and digital tools didn't exist. While some high end artists had photography studios and professional models with costume and sets on hand, small fry like me were limited to what was in the house or available at my small local library, which was no bigger than a few rooms of my current house.
Artists kept extensive "morgue files" or "swipe files" which were collected from magazine clippings and photographs so we would have as much of what we might need on hand for quick reference. These ephemera collections could get unwieldy. I have thousands of photographs I've simply never sorted. I finally dumped most of my files this past year.
Have I ever traced anything? Of course, especially if I have to re-use a shot or setting over and over. Making extra work for myself is just silly. It's my job to make pictures, not to perform magical feats, like copying one shot after another over and over without making a mistake.
However, for almost 15 years of my career, I refused to copy or trace anything, and did not even own a lightbox. On the one hand, that forced me to learn to carefully examine what I saw. On the other hand, it was a stupid hill on which many deadlines died.
Only after I realized many professional artists had lightboxes and overhead projectors did I finally break down and get one.
The one thing I use my lightbox for more than anything is for tracing my thumbnail sketches to the final drawing paper. Instead of trying to capture the liveliness of the original sketch by copying what I see - only bigger - I blow the thumbnail up to the size I want the final art to be, then I trace over the thumbnail using a lightbox onto the final drawing paper.
Here's a look at thumbnails from the graphic novel Neil Gaiman's Snow, Glass, Apples.
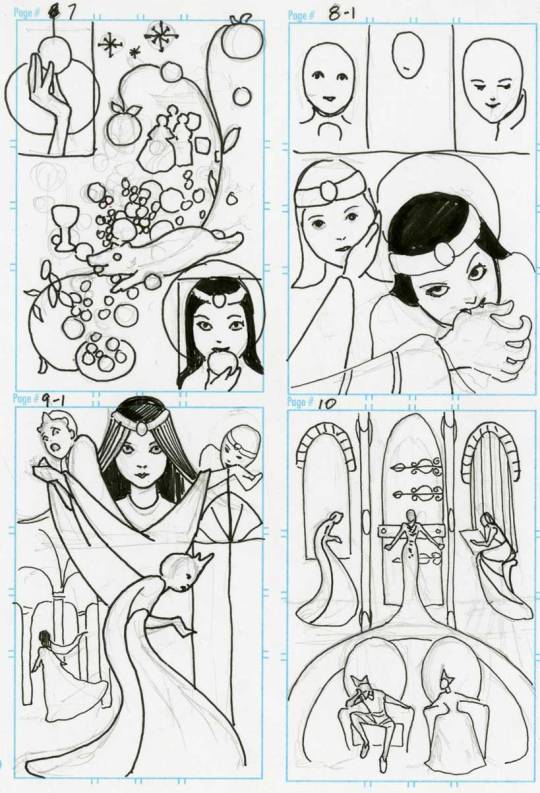
I enlarged these on my computer to fit onto 11"x14" paper, and traced the thumbs before finishing the art which was drawn in pen and ink and colored in Photoshop.
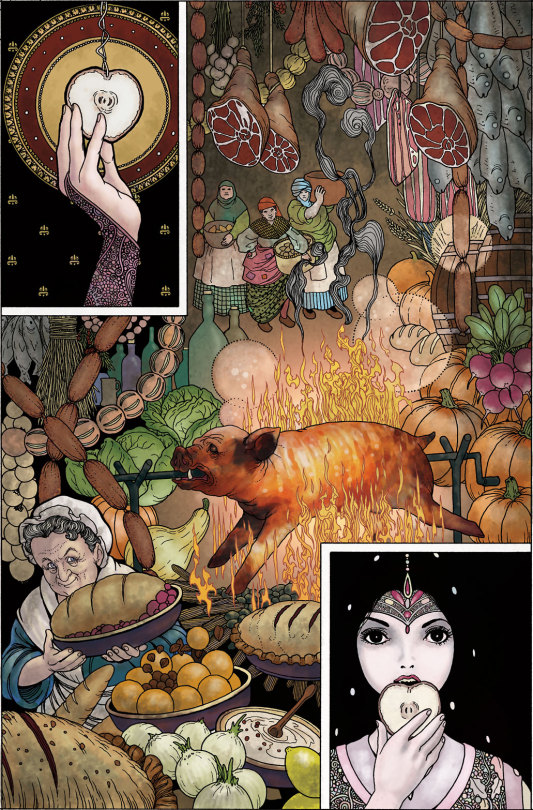
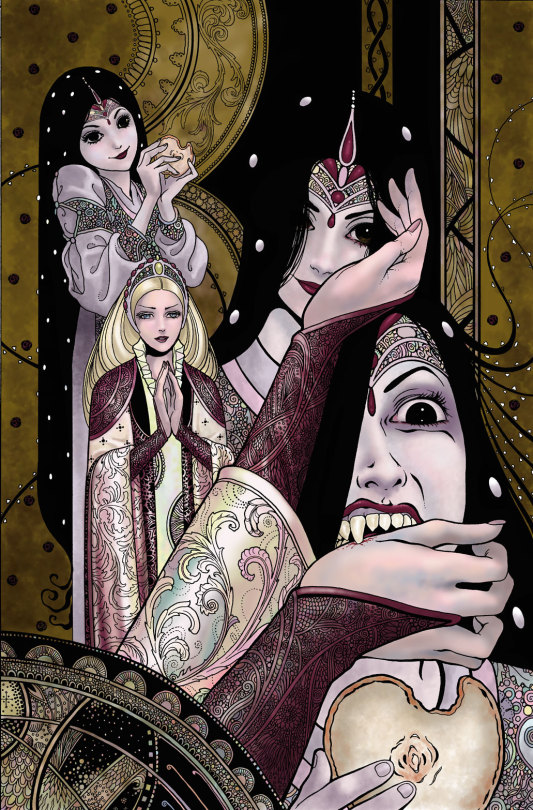
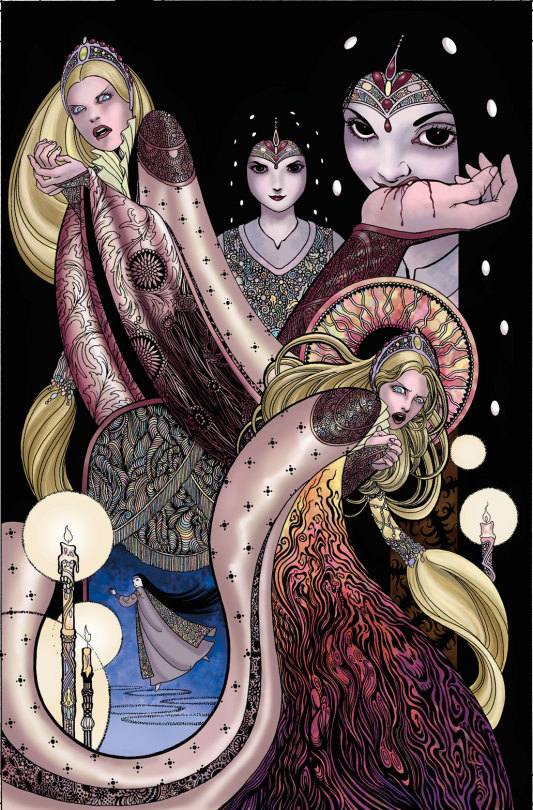
While I obviously made some changes, the essence of the thumbs is there in the final work. Tracing my thumbs retains some of the looseness of the original sketches, which is often lost otherwise.
So, there is a valid purpose to tracing at times, though in my opinion, too much tracing can weaken drawing ability, substitute for developing skills, and make the work kind of stiff.
If you want to, I'm not your judge. But it's weird to me that people think I must be faking my skills in some way.
Ironically, the word cartoon comes from the Italian word cartone, which is a large heavy sheet of paper - also, the origin of the word carton.
Preparatory sketches were made on this paper which was then transferred to the final work surface via either tracing or by stamping little holes in the paper through which dust was sprinkled, recreating the contours of the drawing for the artist to follow.
So the origin of the word cartoon comes from a process often used...for tracing.
3K notes
·
View notes
Text

POV: You're playing Hades 2 and spot an unfamiliar god boon symbol.
I'm so happy I got this done in time for Janmashtami lmao. My friend's (*cough* @randomfandomtraveller)headcanon is that Krishna would have a sweet spot for Melinoe because she almost has the same mission as teen Krishna.
I'm putting my hat in the ring to fight all the people that post AI generated images of the gods lmao. I'm not even religious but I think there's something so depressing that you want a plagiarism machine's version of your gods' iconography instead of an artist's version???
Bonus: Alt Version and WIP screenshot for all the freaks out there.


[Image Description:
Image 1: "The image is the artist's rendition of the Hindu God Krishna in the style of the videogame Hades 2. He is a dark skinned god with a slight build, and is wearing a red upper body cloth and a golden yellow _dhoti_. He is bedecked in gold ornaments on his shoulder, his upper arm, his hands and his feet.
He has long black curly hair, which leads into a cosmic gradient of dark blue and purple, dotted with stars. He is sitting casually, with his left hand on his knee and his right holding him up. In his hair, he wears a gold circlet which is dotted with a magical looking peacock feather. He's wearing a garland of red, white, and yellow flowers, and the garland seems to be flying in a breeze.
Encircling his head is a golden aura, which is lit up by divine looking light coming from the right side of the image.
The background of the image is that of the Hades 2 game, at the Erebus level. It is filled with greenery and leafless tree framinge the shot. Krishna's symbol is at the center of the image, which is a peacock feather that looks like an eye.
To the right of Krishna, there is a text box which states his name and his title, and a dialogue. The text box title says "KRISHNA, THE PROTECTOR INCARNATE"
The dialogue he says to the main character of Hades 2, Melinoë is "Something troubling you there on this fine night, Daughter of Persephone? Ah, perhaps a spot of trouble while fighting the Old Man? Well, the advice I have would take too long and I have little time, so here! Have a blessing, instead."
Image 2: The same picture as image 1 but this background is plain white with the artist signature.
Image 3: A desktop screenshot of the lineart of the artwork in Clip Studio Paint.
End Description]
#art#my art#krishna#hades 2#hades game#hades supergiant#artists on tumblr#desiblr#hindublr#janmashtami#lord krishna#hindu mythology
370 notes
·
View notes