#click or enlarge for high quality
Explore tagged Tumblr posts
Visit Tumblr Blog
Explore Tumblr blogs with no restrictions, modern design and the best experience.
Last Seen Tumblr Blogs


Fun Fact
Mobile US users spent an average of 115.8 minutes on Tumblr app monthly.
Text


I wanna preface this by saying I don't have issue with the art (I actually thought the Sherwood one was pretty cool) but this is something I've noticed more than once, for whatever reason the art is super artifact-ie (they remind me of the super crunch old punisher MAX scans I'd read lol) but the lettering and word bubbles are super clean, if they don't look that bad to you click to enlarge em I promise they're deep fried lol
I'd love to know if anyone has any theories on these, they're official digital releases (and you can tell from the speech bubbles these are in some way high quality), do you think its an issue with how the artists exported it? or how the letterer imported it? maybe something in incompatible file types between programs? I feel like the breakdown has to be between finished art and lettering but it of course begs the questions of did no one check it? did it not look like this for the letterer?
Tales From the Cave #1 (2023)
109 notes
·
View notes
Note
Every once in a while, I reread one of your stories and I can’t help but check your website for any updates for One Day 😇 Just curious: are you still working on it? No pressure whatsoever of course!! I love the way you portray Carlisle in that fic & am already super thankful for those first 8 or so chapters! Anyways, hope you are doing well & thanks for providing us with so many high-quality fics!
- Sannehale
Ah, this ask made my year. (Also now I realize your two blog names. Sneaky!)
Yes., yes I am. It was actually open on my laptop even as this ask came in. My prereader is asking about it too--I stopped giving her chapters because I was realizing that I got a lot of enjoyment out of sending them to her and that was filling enough void that it cut off my writing mojo. I'm thrilled though, that she can't see where it's going.
I'm stuck on chapter 16 (of likely 23-25) at the moment because a whole bunch of dominos have to fall in order to get to several reveals that are going to happen in very fast succession to move the story out of the second act. Also the second act/B story was hard because I am not a romance writer! 😆 It's not the genre I read and I'm not very good at writing it, but the middle of this story called for a romance and so there is one. Or so I hope.
I've also gone back and shored up some things that needed shoring--introduced a few of the characters who turned out to be important earlier on, and added another character in Bella's research mentor, Amy Jackson. I'm worried that I'm under-utilizing her at the moment.
This ask, though, prompted me to back out to the card view in the Scrivener project and I realize I actually did leave myself the breadcrumbs necessary to get myself out of here. Maybe I'll put my shoulder to the wheel and see what happens if I just follow the outline I laid out.
Anyway. I feel like I shouldn't end an ask without giving a little bit of some of the over 40,000 words that are written and not posted. So here's a tiny bit. This actually may not stay in, and in any event doesn't spoil anything--it's also the headcanon behind this chapter of Montage, though this scene was written years ago and my headcanon about Carlisle's name and his parents' names goes back over fifteen years now.
Of course, I knew a lot more than most people who were hunting down a relative from the 1600s. I clicked on the link for church records, and then delimited my search. If Carlisle was 367, that put him in 1644. That seemed reasonable. I filtered the results by the location, London, and then 1640 to 1650.
CULLEN, I typed. CARLISLE.
Zero hits. I frowned at my screen for a long moment and then practically slapped myself in the head. Of course there were no hits for Carlisle Cullen. Wasn’t this the very thing we’d been arguing about for months, now? I backspaced over the first name, and changed it to WILLIAM.
There were only three hits. Astonishing. I had assumed that Carlisle would have done his due diligence. He’d had hundreds of years to track this information down—why hadn’t he? William Cullen number one was in the baptismal records of St. Luke’s Catholic Church. He had been baptized in 1642. That would make him nearly the same age as Carlisle, no luck there. William Cullen number two, however, was on over seventy pages of documents—the records of St. James Aldgate, listed as parish pastor. And William Cullen number three almost caused my heart to stop.
Born 17 February 1644. Died 8 August 1667.
Twenty-three years old.
My heart, pounding, I clicked on the church register, enlarging it so that it filled my screen. The handwriting was old, faded and pixelated, but it was tidy and easy to read. Carlisle Cullen, it read, with William crammed onto the line before the first name, in the same handwriting but obviously a different pen—the lines were narrower, slanted slightly differently. Born and baptized on February 17, 1644. Father, William Cullen number 2. And mother…
My heart sped. There, in the same scrawly hand—his father’s hand, I realized, it must be—was written the words, Sarah Cullen (Crawforth).
A quick “Open in New Tab” allowed me to pull all the records from the 1600s from St. James Aldgate and in five minutes, I had a birth date of November 15, 1620. And a death date, which was of course expected, of February 17, 1644. But it was the annotation here which was breathtaking—in a different handwriting, written by the midwife? Some other member of the parish?
Died babe in arms.
Tears sprang to my eyes, and with blurry vision, on a hunch, I ran one last search. Then I printed the pages with the documents, shoved them in a folder, and headed for my car.
11 notes
·
View notes
Text
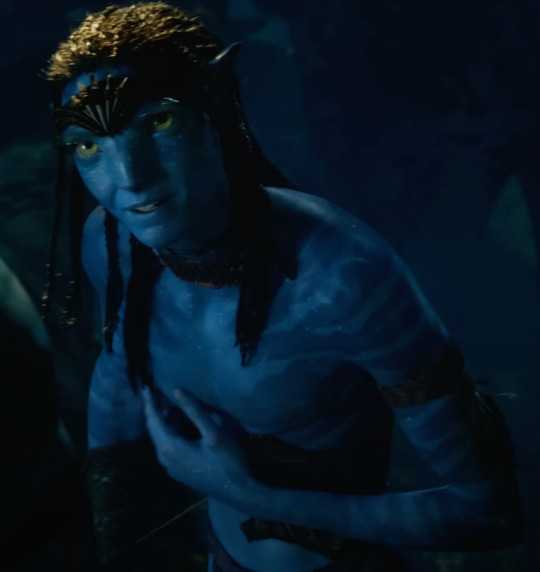
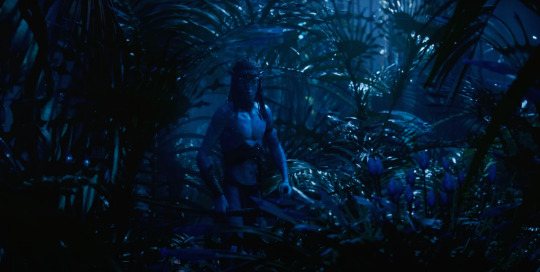
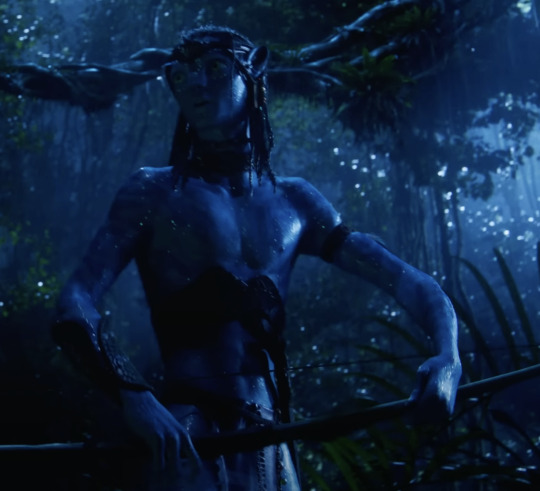
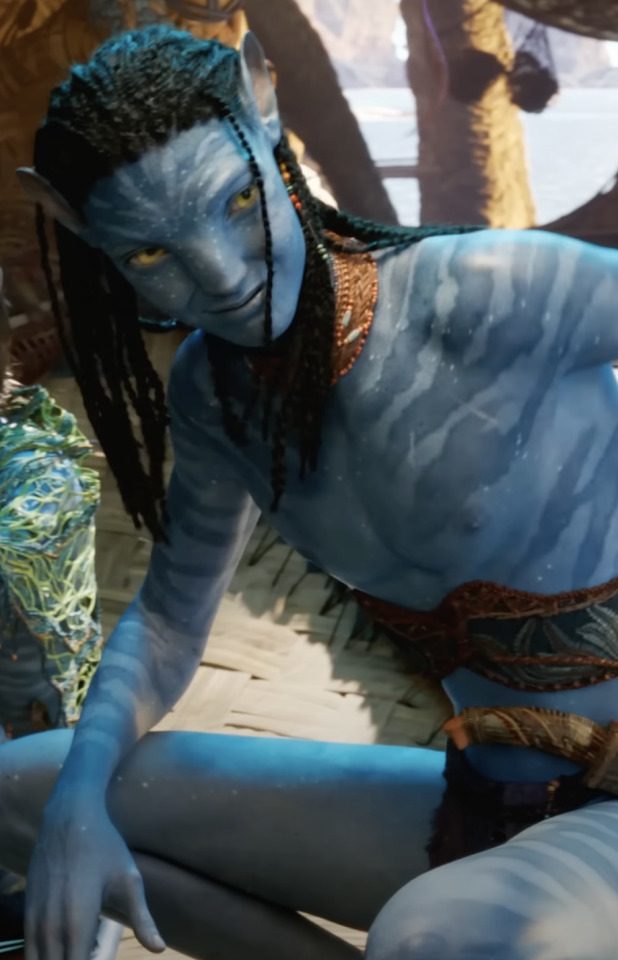
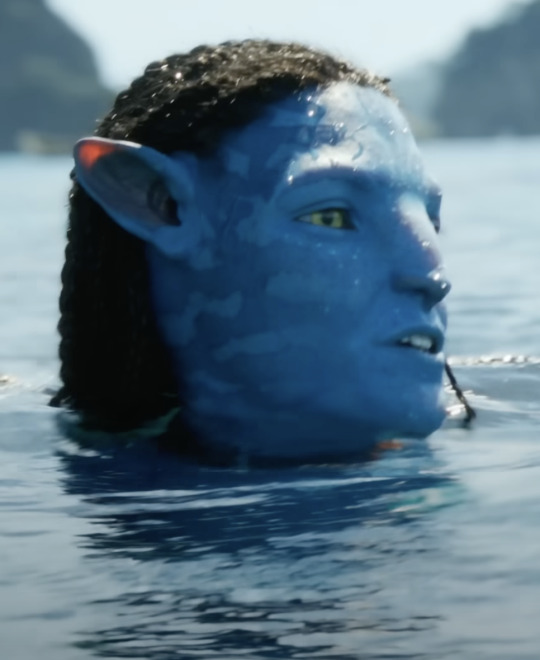
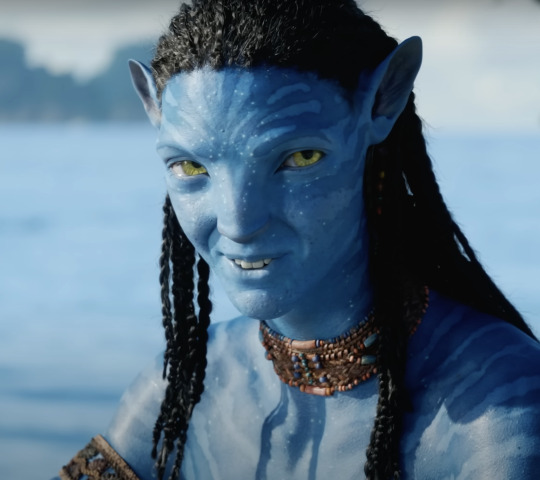
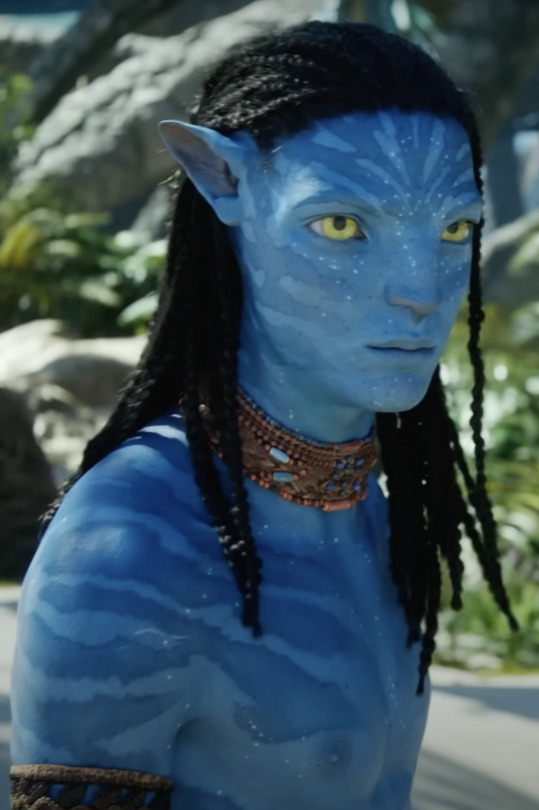
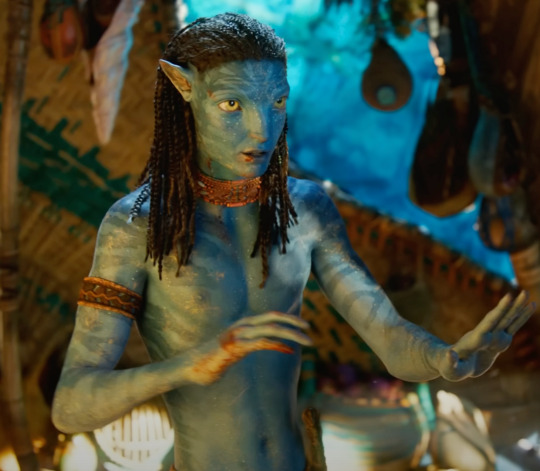
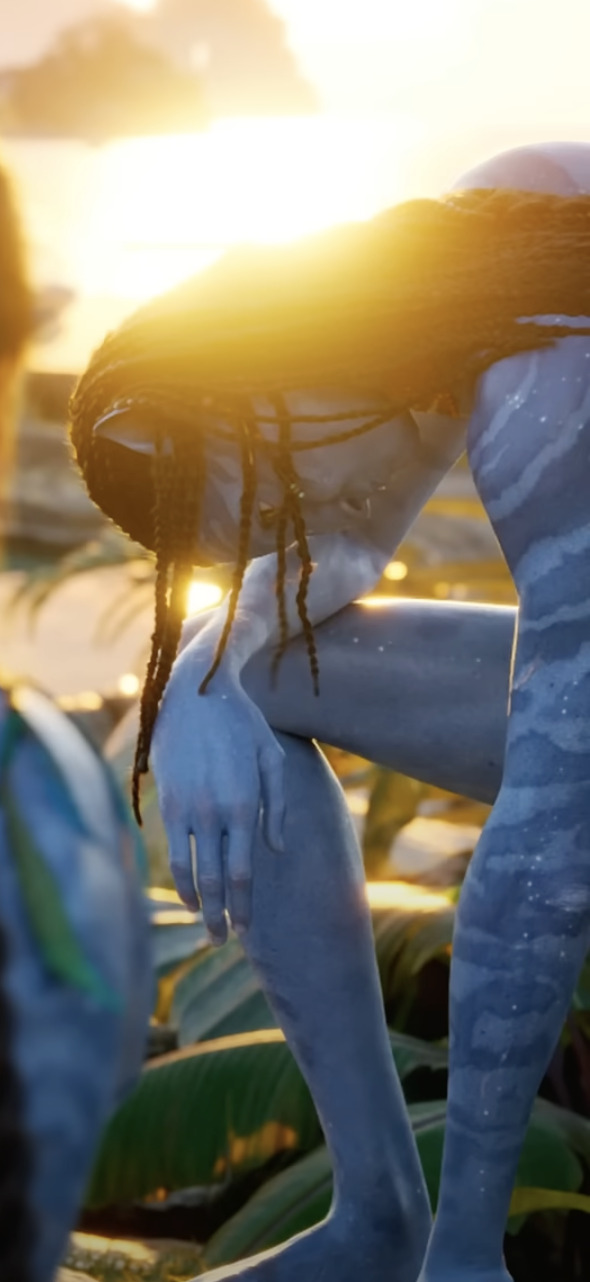
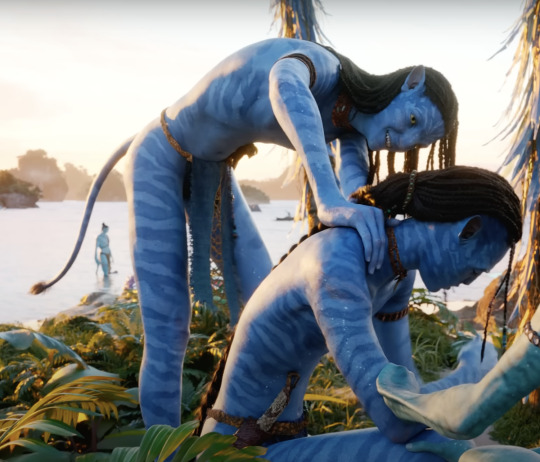
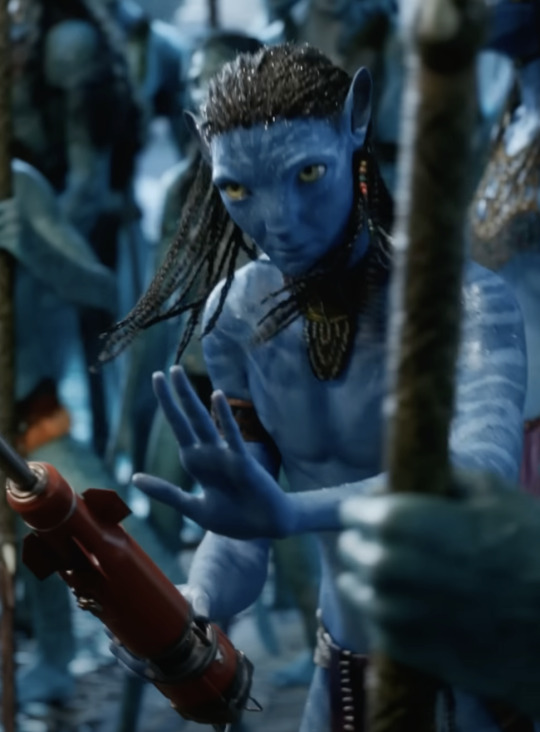
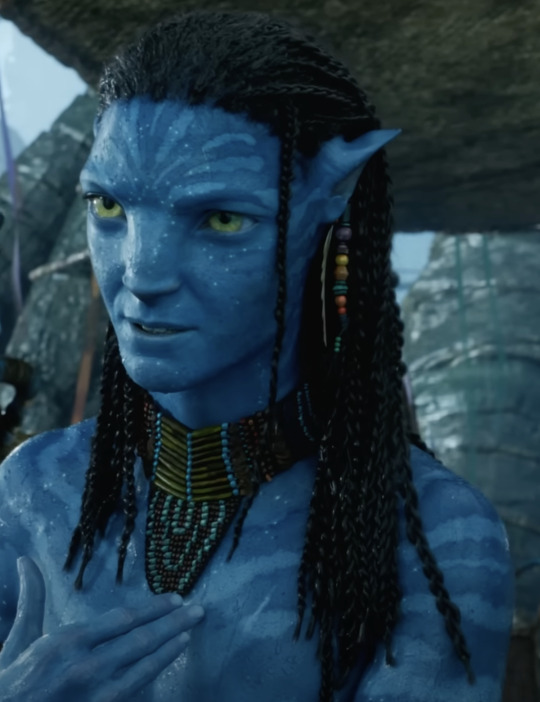
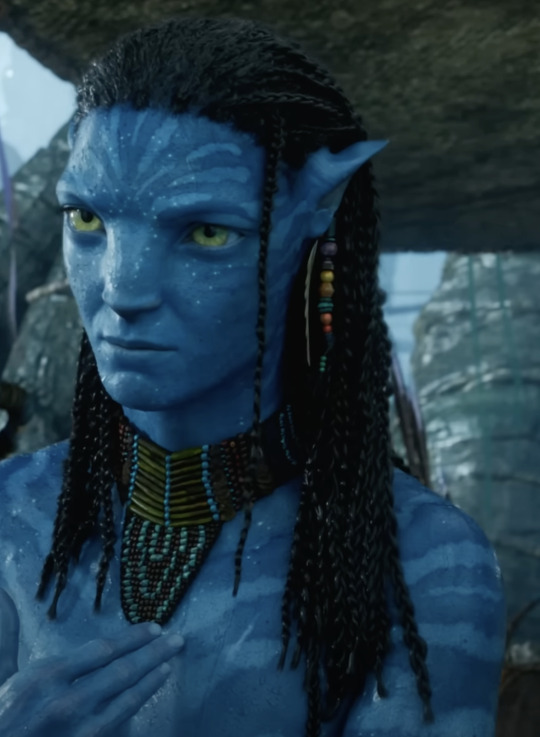
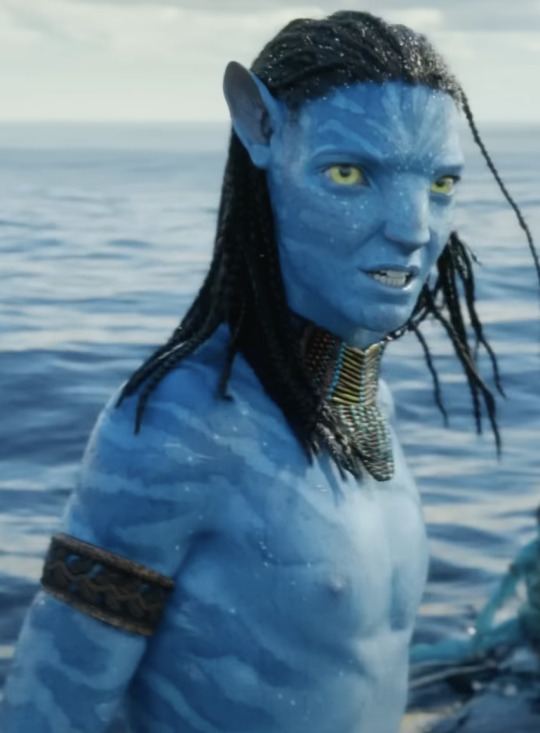
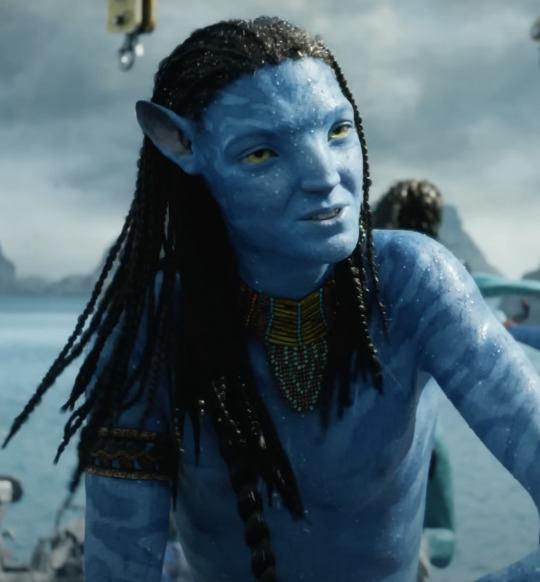
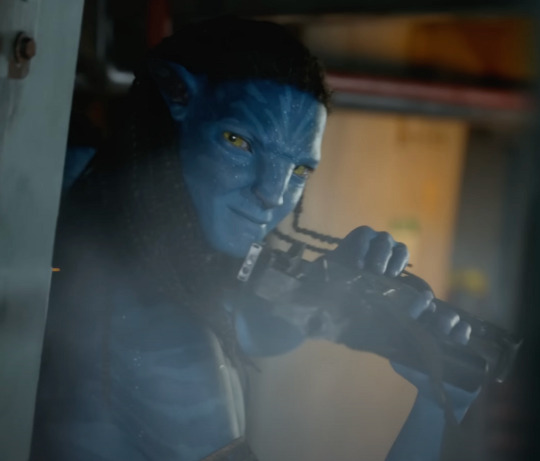
Neteyam High Quality photos

Neteyam 🏹
a collection of Neteyam HD and 4k photos
Avatar The Way of Water
you can view more images in my masterlist
"=⌕ Click on images to enlarge ꒱


#neteyam#neteyam sully#awow#avatar the way of water#avatar 2#avatar james cameron#avatar 4k#neteyam 4k#neteyam hd#avatar hd#omaticaya#awa'atlu
46 notes
·
View notes
Text
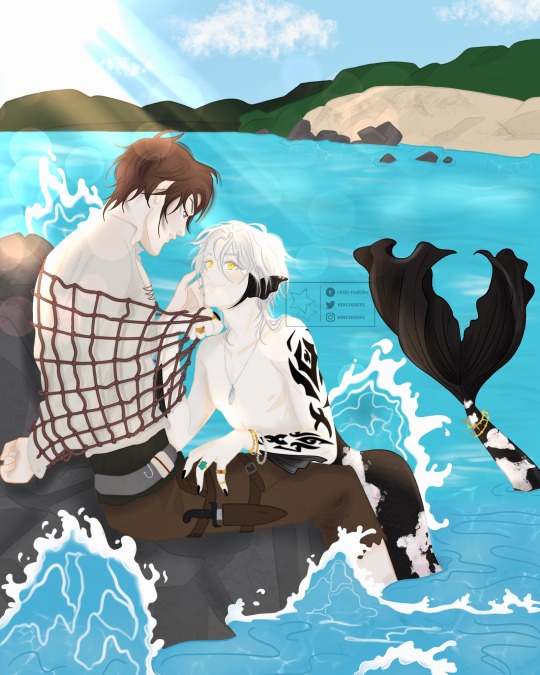
In Every Universe: Caught

Spooky season is the perfect time to announce a lil mini series I’m doing with my OCs where I draw them in different AUs ☺️
First up:
Rishida in this cute mermaid AU with a twist. The fisherman goes out hunting, but is caught instead…very similar to the real thing right? 🫢😉
Hope you like it! Please click to enlarge image…Tumblr quality is the worst 😑
Tag List: @littleturtle95 @magnus-the-maqnificent @elettralightwood @high-warlock-of-brooklyn @my-archerboy @sassybookworm2020 @khaleesiofalicante @radisv @raziyekroos @spotsandclawsthings
#can you guess what fish I used as inspiration for Ishida#my art#wretched and divine wednesdays#rishida#ryuji zenko#ishida tetsui#emsart
24 notes
·
View notes
Text
Dearest Tumblr…
Now what the funk have you done?
I know you need to make money and pay bills, I appreciate that, but it seems to me you could save a fortune by simply not paying people to constantly ruin this place!!?? Just a thought.
I love that you’re “working hard” on replacing the TumblrMart link back with our own Blog link, but honestly, please just do it already! …(EDIT…I spoke too soon…THANK YOU!!)… It was a most annoying obnoxious and user unfriendly move, and I’d honestly love to see the take up figures on your little anti ergonomic experiment.
And speaking of ergonomics and the user experience, do the people you pay to spoil things actually use this place? What have you done to the Lightbox/viewing experience in the iOS App? What is that?
Where I used to click once to view a post larger/in full quality, I now just get something small and not really enlarged that doesn’t display in high quality.
It is especially terrible on iPad.
Where I used to double click to zoom in/expand I’m now accidentally Liking posts.
Where I used to swipe to close I’m now greeted with a pile of scrolling posts that almost exclusively have no interest to me or any semblance of relevance to what I was just trying to look at.
I won’t look at things just because you want me to. My feed is so long sometimes it takes me half a night just to get to where I left it as it is!
Everything you’re changing at the moment is bad design and bad ergonomics, which is bad for the user and their experience.
If some things now take several/extra unnecessary clicks to achieve what was once possible in one then that’s not progress or improvement, that is just a negative impact on the user experience.
So guess what, if we don’t like something, or if something gets harder, we tend not to use it as much, and as far as I’m aware, all you have is your users, and if we use this place less often, that can lead to not using it at all way quicker than if you hadn’t changed something for the sake of changing something, or trying to copy someone else.
We are here because we like Tumblr. We are not here because we hope you become just like the places that we aren’t using.
Please don’t make this horrid little new Lightbox feature permanent.
Loves ya though, despite myself X
11 notes
·
View notes
Text
Stretch Your Images with PhotoCut
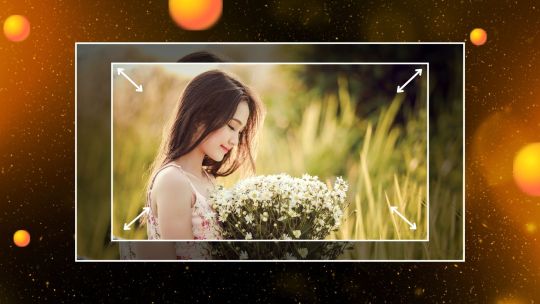
Do you ever need to size and stretch your photos when putting them to different uses? Whether it is an extra space, a dramatic effect, or just re-sizing an image for social networking purposes, PhotoCut can come in handy. After stretching your photos, you can cut out faces using PhotoCut. In particular, this online stretching and resizing tool is hassle-free and easy to navigate to resize images or stretch them. Let's see how it works, its characteristics, and how it will help you get the exact flawless, high-quality without losing clarity.
What is PhotoCut's Image Stretcher?
PhotoCut's image stretcher is an easy online tool that allows an easy resizing and stretching feature of images. You just have to drag its width and height by either clicking on the corners, dragging the sides, or entering specific pixel values/percentages. This is a free online tool that provides flexibility and precision for you to adjust the image's dimensions according to your needs. The best thing is that it ensures that the quality of your image will be intact and not distorted after stretching. You can create anime art using PhotoCut and stretch them according to your needs.
Why Should You Use PhotoCut’s Image Stretcher?
Whether you're a content producer, business owner, or just someone who loves taking photos for social media, you have to resize and stretch pictures very often. Here's why you should use PhotoCut's Image Stretcher:
Simple and Quick: No more complex software and confusing interfaces. The image stretcher at PhotoCut is easy, saving you precious time and frustration. Just upload your picture, change its size, and download it.
No Distortion: Most image resizing tools tend to blur and distort your images. PhotoCut ensures that your images are sharp and clear even when stretched. The tool will preserve aspect ratios unless you decide to change them.
Versatile Resizing: Whether you need to resize the image for social media, web, presentations, or even print materials, PhotoCut's image stretcher lets you change the dimensions of your image for any purpose. Whether a square image is required for Instagram or wide images are needed for banners, you can do that.
Batch Stretching: For the stretching of more than one picture, PhotoCut has an option of batch resizing. This saves you time as you are not going to resize one photo at a time and thus enhances your productivity.
Customizable Stretching: Unlike other tools, it does not limit you with its options. You get to choose how you would like your picture stretched. This is in terms of customization of the level of stretching to suit your needs.
How to Use PhotoCut’s Image Stretcher
Getting started with PhotoCut’s Image Stretcher is quick and easy. Follow these steps to stretch and resize your images in no time:
1. Start by Clicking the Stretch an Image for Free Button
The first step is simple, click the button that says “Stretch an Image for Free.” This will take you to the image stretcher tool’s main page.
2. Upload Your Image
Once you are on the page, you click to upload your picture. You can either drag the file from your computer to the site or use the "Upload" button for selection. PhotoCut has all the formats of files it can support, so it does not what type of picture you want to stretch; you can upload them all.
3. Resize Your Image
Once you upload your image, navigate the menu to the "Resize tool". Here, you should be able to select image width and height.
Specific Sizes: You can insert dimensions in pixels for width as well as height.
Resize with Percentage: You may want to enlarge or shrink according to a certain percentage – for example, to grow the image by 150 percent.
If you want to preserve the aspect ratio of the image- that is, so that it does not become skewed - be sure to keep "Constrain Proportions" selected. If you want to stretch one dimension, but not the other for example, you might make an image wider without increasing its height you can click off aspect ratio.
4. Preview the Changes
After entering the desired size or percentage, you can preview how the stretched image will look. PhotoCut will show the results instantly, so you can ensure the image is being stretched to your liking.
5. Download Your Stretched Image
Once you're satisfied with the new size, click the “Download” button to save your stretched image. It’s now ready to be used in whatever project you have in mind! You can put your stretched images on your Instagram story.
Features of PhotoCut's Image Stretcher
1. Flexible Image Resizing
Resize images by pixel or percentage, giving you full control over how much you want to stretch or shrink them.
2. Aspect Ratio Control
Preserve the original proportions of the image or stretch one dimension independently, depending on your needs.
3. Batch Resizing
Save time by resizing multiple images at once. This feature is great for large projects or when you need to resize several images for a consistent look.
4. No Quality Loss
Unlike other tools, where the resizing would degrade the image quality, PhotoCut guarantees that the images would still be sharp and clear even when stretched.
5. Easy-to-Use Interface
The intuitive drag-and-drop functionality and easy-to-use options make it so that even the least skilled user can use the tool to maximum effect.
6. Social Media Optimization
Perfectly suitable for resizing images, whether for Instagram, Facebook, or Twitter. Use PhotoCut to get yourself a square image for the popular Instagram network or a broad banner for Twitter.
Use Cases for PhotoCut’s Image Stretcher
1. Social Media
Social media platforms require specific image dimensions. PhotoCut makes resizing easy to ensure your photos look their best and fit perfectly on platforms like Instagram, Facebook, and Twitter. Try creating posts using the Scarlet color.
2. Marketing Materials
Create the most engaging banners, flyers, and promotional content - with PhotoCut, there is an image stretcher that makes sure your pictures look good and fit the given dimensions.
3. Websites and Blogs
Resize your pictures to suit your website or blog for proper formatting. PhotoCut assists you with making sure your images load quickly and fit your website's layout.
4. Presentations
Stretch your images to the aspect ratio of your slides, ensuring they fit perfectly in your presentation on PowerPoint or Google Slides. You can use Lilac color in your presentations.
5. Print Media
It stretches the image in preparation for printing, making it a more optimized resolution and size. Whether you're designing business cards, brochures, or posters, PhotoCut helps resize for print-ready quality.
Conclusion
PhotoCut's Image Stretcher is one of those must-have tools for anyone who wants to quickly and efficiently resize and stretch their images. Easy to use, no quality loss and flexible resizing options make it ideal for personal as well as professional use. Whether you post on social media, are creating some marketing materials, or are ready to add pictures to the website, PhotoCut makes your visuals just the best. Try it out today and see just how easily you can stretch your images without sacrificing quality!
FAQs
Q1. Will My Image Lose Quality When I Stretch It?
Ans. No, PhotoCut's image stretcher will preserve your image to be the best quality image. As long as you're not stretching it too far, this will always deliver the image in its most sharp quality.
Q2. Can I Stretch Multiple Images at Once?
Ans. Yes! PhotoCut offers a batch resizing feature, allowing you to stretch several images simultaneously. This feature helps save time and increases efficiency when working with many photos.
Q3. What File Types Does PhotoCut Support?
Ans. PhotoCut supports a variety of file formats, including JPEG, PNG, GIF, and more. So, you can upload almost any image type to stretch.
Q4. How Do I Prevent My Image From Getting Distorted?
Ans. To prevent distortion, simply keep the “Keep Proportions” option locked. This will ensure that the width and height are adjusted proportionally and the image maintains its original aspect ratio.
Q5. Is the Image Stretcher Free to Use?
Ans. Yes! PhotoCut offers a free version of the image stretcher that allows you to resize and stretch your images without any cost. Premium features, such as batch processing, are also available for enhanced functionality.
Q6. Can I Stretch an Image for Print?
Ans. Absolutely! If you’re preparing an image for print, you can use PhotoCut to adjust the size according to the print specifications, ensuring high-quality, print-ready results.
0 notes
Text
AI & Photography: How Professional Printing Is Evolving in the Digital Age
Discover how AI is transforming professional photo printing. Learn about AI-driven enhancements, smart printing solutions, and why businesses & photographers must adapt. Read more!
Introduction
The intersection of AI and photography has brought about a revolution in the way images are captured, edited, and printed. Traditional photo printing methods are gradually being replaced with advanced, AI-driven techniques that enhance color accuracy, resolution, and overall print quality. As professional photo printing undergoes a digital transformation, businesses and photographers must adapt to new trends to stay ahead.
This article explores the challenges of traditional photo printing, the dream outcomes of AI-powered solutions, and how these innovations are shaping the future of professional photo printing.
The Main Challenges in Traditional Photo Printing
Despite the beauty of printed photographs, traditional photo printing faced several hurdles that limited its potential:
1. Color Inconsistencies
Many photographers struggled with getting the right colors in their prints. What looked stunning on a screen often appeared dull or washed out on paper due to variations in printer settings and color profiles.
2. Limited Image Enhancement
Before AI, photo enhancement was largely manual. Professional editors spent hours adjusting brightness, contrast, and sharpness to get the desired output.
3. Print Resolution Issues
Low-resolution images often led to pixelation and loss of detail when enlarged for large-format printing. Traditional upscaling techniques could only do so much.
4. Time-Consuming Processes
The traditional workflow—from selecting images to printing—was time-intensive. Proofing prints, adjusting settings, and reprinting due to errors added unnecessary delays.
5. High Printing Costs
Professional printing was expensive due to material costs, ink usage, and manual labor. Many businesses struggled to balance quality and affordability.
The Dream Outcomes of AI in Professional Photo Printing
The evolution of professional photo printing through AI has addressed these long-standing issues, leading to remarkable improvements. Here’s what the future holds:
1. Perfect Color Reproduction
AI-driven color correction ensures that prints match digital images with precision. Smart algorithms analyze color profiles and adjust settings automatically for flawless reproduction.
2. Automated Image Enhancement
With AI, tedious editing tasks are automated. AI-based software enhances contrast, sharpness, and exposure instantly, saving time while improving image quality.
3. High-Resolution Upscaling
Advanced AI algorithms can upscale low-resolution images without losing quality. This allows photographers to print large-format images without worrying about pixelation.
4. Faster Processing Times
AI-powered printing systems streamline workflows. Automated adjustments, intelligent cropping, and one-click enhancements make printing faster and more efficient.
5. Cost-Effective Printing
AI optimizes ink usage and reduces wastage, making professional photo printing more affordable for businesses and individuals alike.
How AI Is Changing the Printing Industry
1. AI-Powered Editing Tools
Tools like Adobe Sensei and Topaz Labs use AI to enhance image details, remove noise, and sharpen blurry photos. These enhancements lead to superior print quality without excessive manual work.
2. Smart Printers with AI Integration
Next-gen printers come equipped with AI algorithms that analyze images in real time, adjusting print settings for the best output. AI-powered ink management also ensures optimal ink distribution.
3. Automated Quality Control
AI detects errors before printing, reducing the chances of misprints. This results in lower costs, higher efficiency, and improved customer satisfaction.
4. Augmented Reality (AR) and AI
Some printing services now offer AR previews, allowing users to visualize how prints will look on walls before ordering them. This improves user experience and enhances decision-making.
5. On-Demand and Custom Printing
AI simplifies personalized photo printing by automatically adjusting layouts, backgrounds, and designs. Users can create customized prints effortlessly, boosting creativity and business opportunities.
Why AI-Enhanced Printing Matters for Photographers and Businesses
For Photographers:
Ensures that printed images match artistic vision
Saves time on manual editing
Enables high-quality large-format prints
Enhances portfolio presentation
For Businesses:
Reduces operational costs
Speeds up printing processes
Improves customer satisfaction with better-quality prints
Enables innovative printing solutions like AI-driven posters and banners
The Future of Professional Photo Printing
AI is continuously evolving, and its impact on professional printing is only set to grow. In the near future, we can expect:
AI-powered voice-controlled printing for effortless operation
More sustainable printing solutions with minimal waste
Improved AI color grading for near-perfect accuracy
Personalized AI-generated designs for unique prints
As AI continues to refine and optimize the professional photo printing industry, photographers and businesses that embrace these changes will gain a competitive edge.
Conclusion: Why Choose PhotoStop for Professional Printing?
If you're looking for high-quality, AI-enhanced professional photo printing, PhotoStop is your go-to solution. They specialize in:
High-resolution fine art printing
AI-optimized color correction for perfect prints
Cost-effective and eco-friendly printing solutions
Fast and reliable services tailored to photographers and businesses
Stay ahead of the digital revolution with PhotoStop’s cutting-edge printing technology. Transform your images into stunning prints that last a lifetime!
Tags:
#AIPhotography #ProfessionalPhotoPrinting #DigitalPrinting #PhotoEnhancement #SmartPrinting #PrintingTechnology #AIPrinting #FineArtPrinting #PhotographyTrends
0 notes
Text
Easily enlarge your images without losing quality with our advanced resizing tool
.Achieve crisp, high-resolution results, making your images perfect for prints or detailed displays!
1 note
·
View note
Text
I am so tired of these big booty teases on OnlyFans charging money for Instagram content
click to enlarge Anytime I go to review a page and in the introduction there is a statement that they are in the top 0.1% on the site, I have certain expectations. I expect a level of smut and high quality that one would expect on a professional page like PornHub or XNXX. And then I realize that the model in question is a biggie bag of Latina goodness with a booty so phat, that it could solve…
0 notes
Text
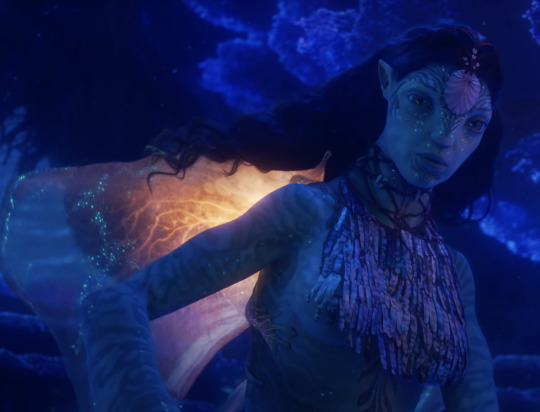
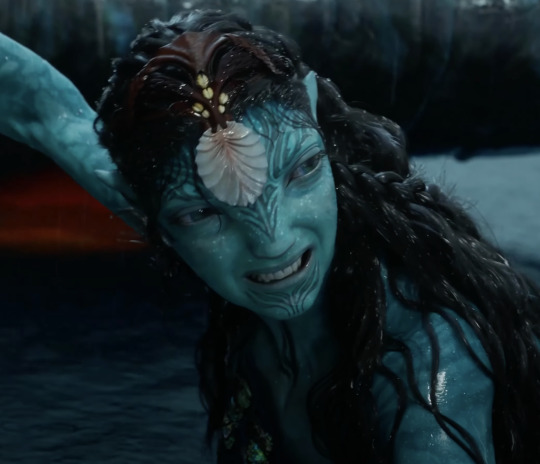
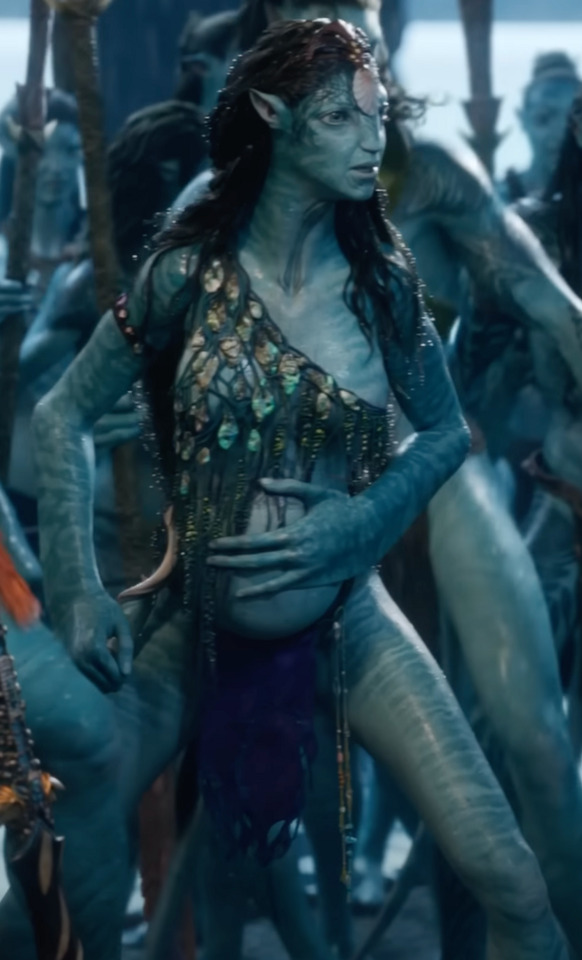
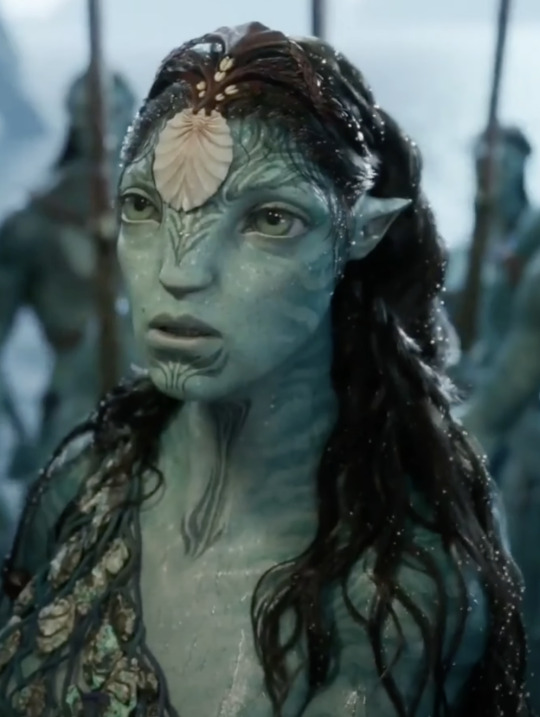
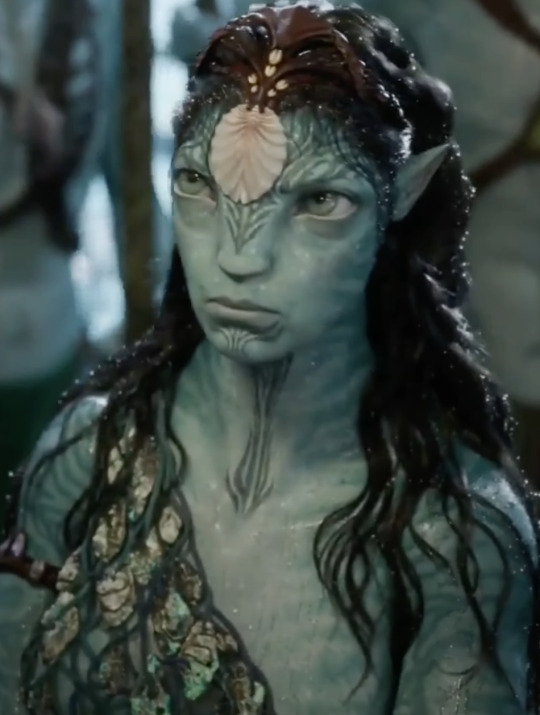
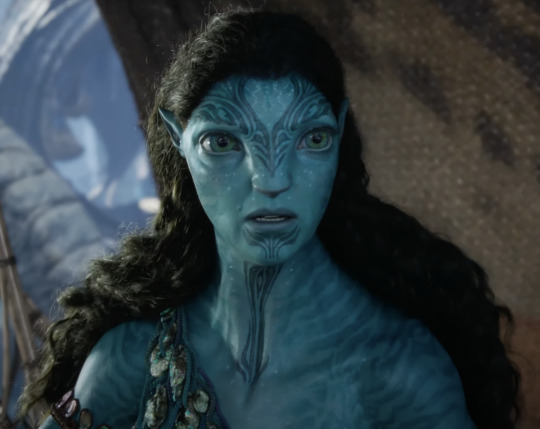
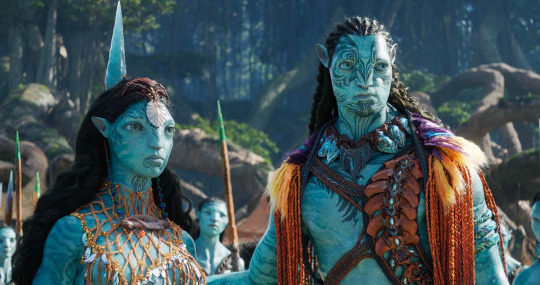
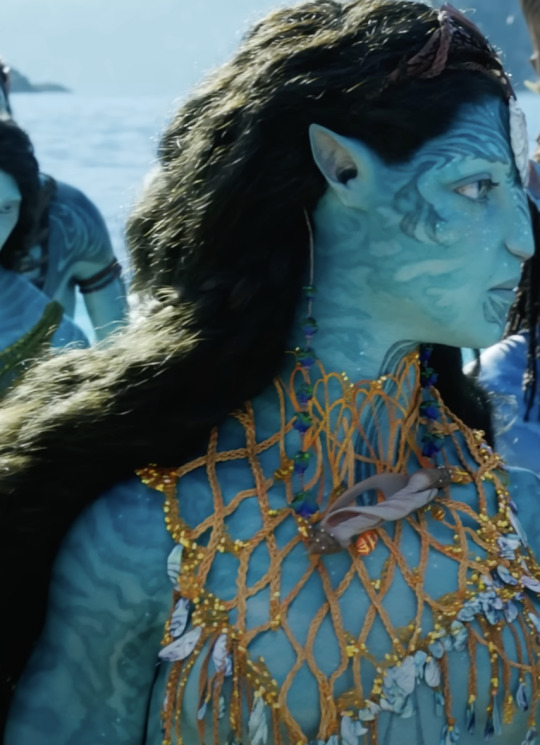
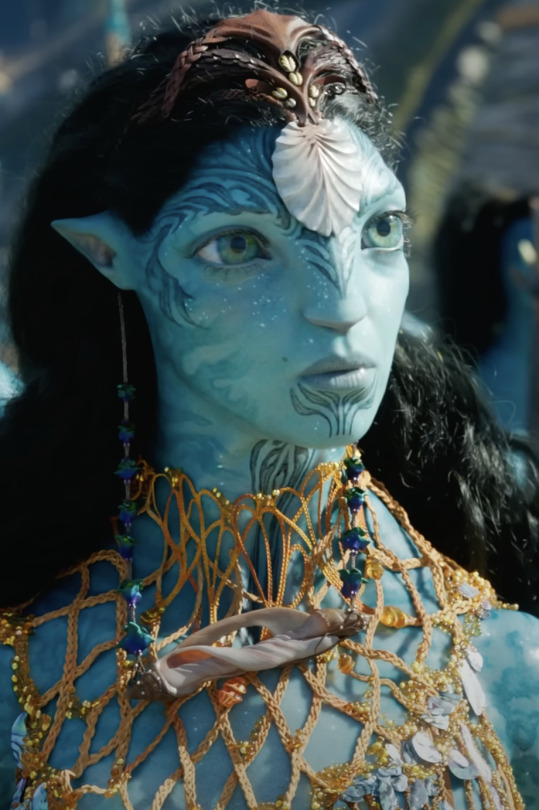
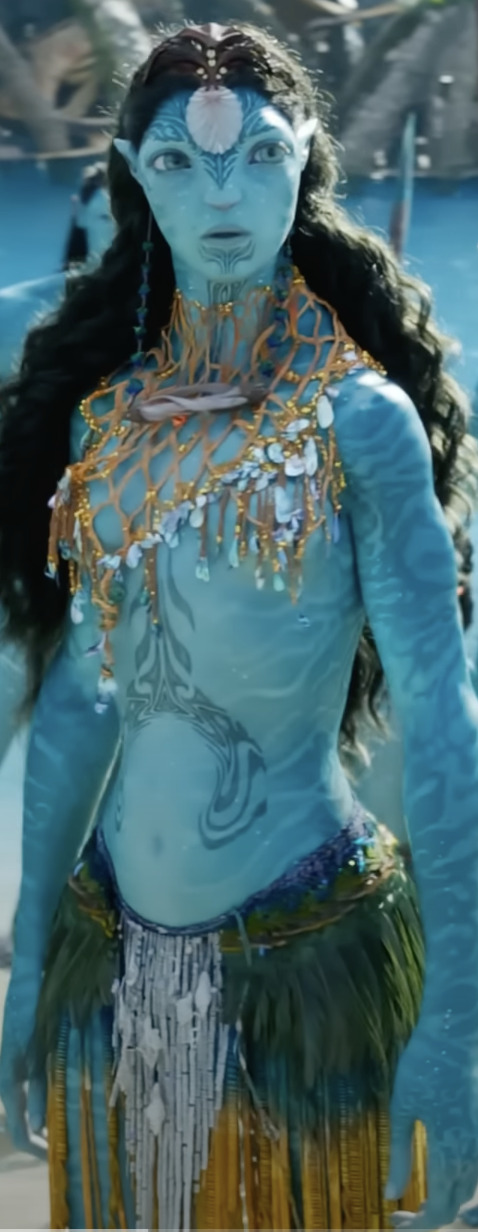
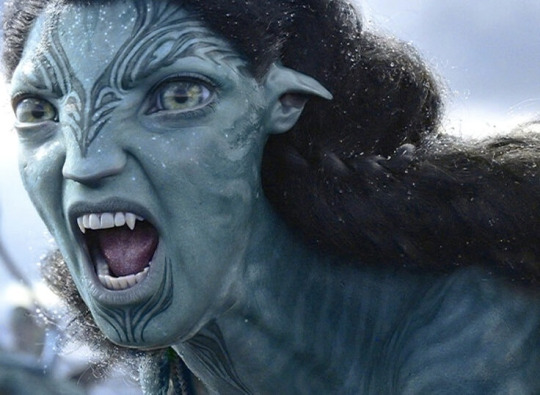
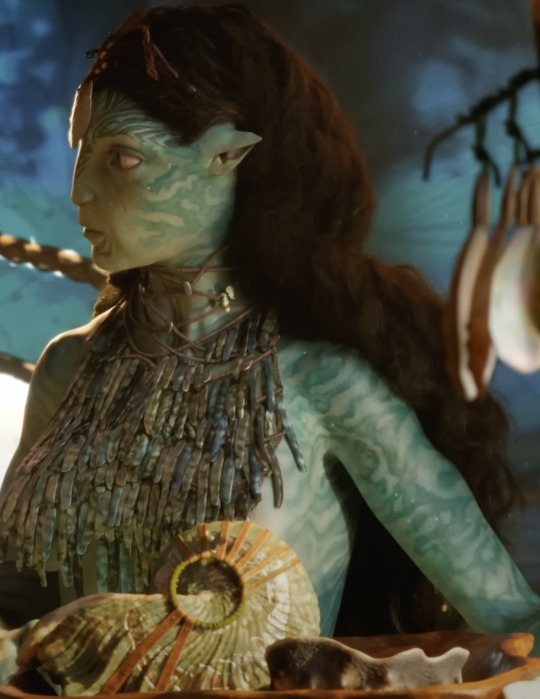
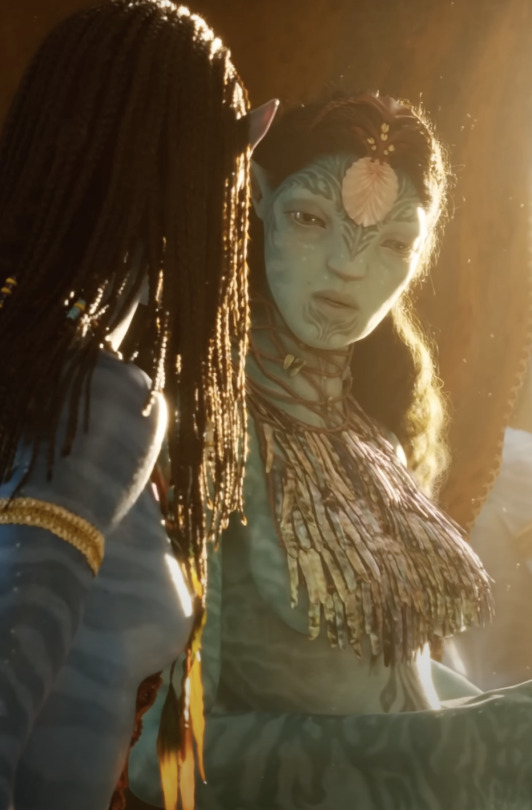
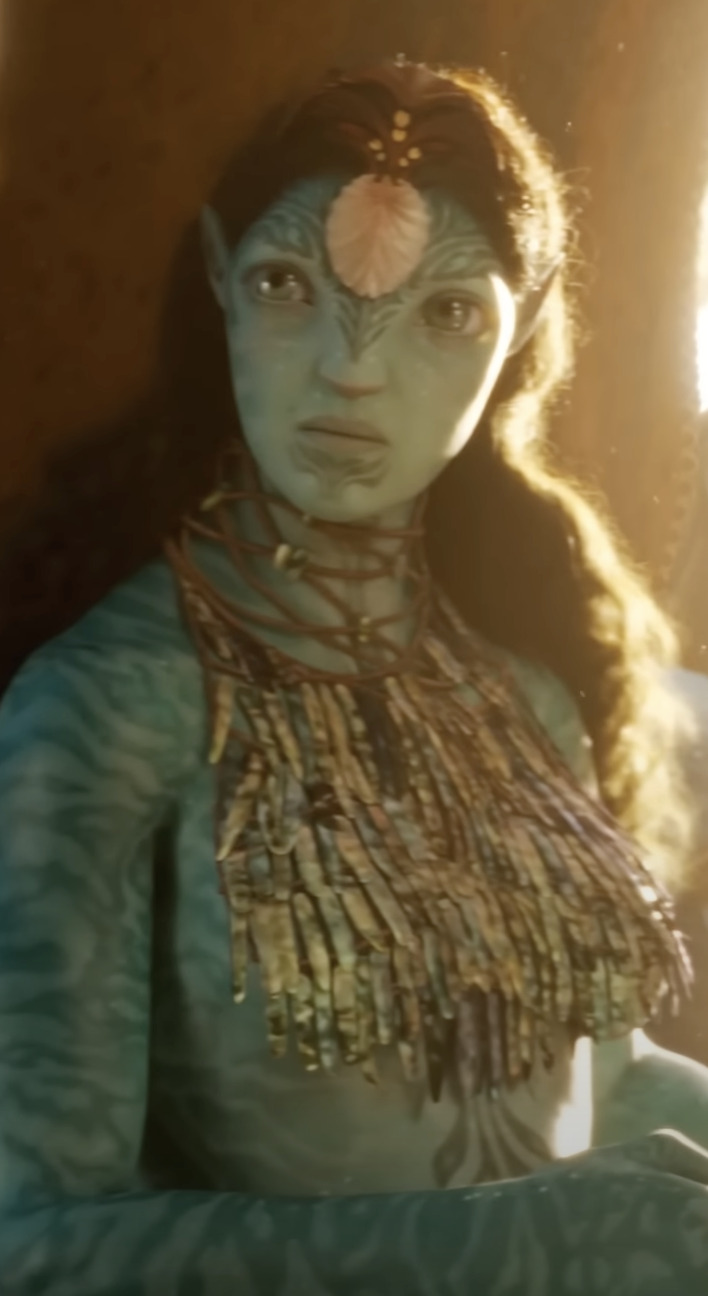
Ronal High Quality photos

Ronal 🌊
a collection of Ronal HD and 4k photos
Avatar The Way of Water
as always, this will be updated when I get more pictures
you can view more images in my masterlist
"=⌕ Click on images to enlarge ꒱


#ronal#ronal avatar#awow#avatar the way of water#awa'atlu#avatar 2#avatar james cameron#metkayina#ronal hd#ronal 4k
27 notes
·
View notes
Text
NVIDIA Overlay Powerful Game & App Features In NVIDIA App
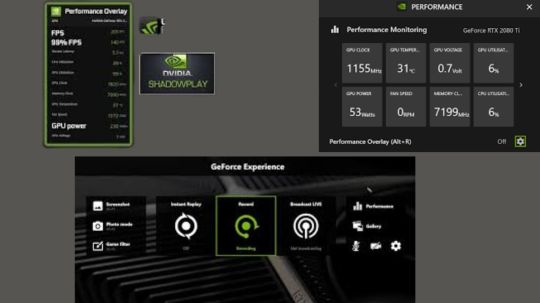
NVIDIA apps are fast and responsive. Compared to GeForce Experience, it downloads in half the time, has a modernized user interface that is 50% more responsive, and has many functions through sub-sections that are easy to navigate. In this article, we will discuss those functions thoroughly.
NVIDIA Overlay: Powerful Game & App Features
How to open NVIDIA overlay?
Alt+Z or the top right button of the NVIDIA app window opens the redesigned NVIDIA Overlay.
Complete video, screenshot, filter, and overlay capabilities are available in the new panel. To activate a feature without the NVIDIA Overlay, use the hotkeys.Image credit to NVIDIA
Pressing the button or Alt+F9 hotkey records your game, app, or desktop until you press it again. This is ideal for capturing competitive online games, YouTube walkthroughs and tutorials, and in-progress work, which can be sped up in post to produce a timelapse of a new piece of art.
These and other recordings can be captured at 4K 120 FPS or 8K 60 FPS utilizing the sophisticated AV1 codec in NVIDIA app. AV1 uses eighth-generation NVIDIA Encoders (NVENC) on GeForce RTX 40 Series graphics cards and laptop GPUs to encode 40% faster and produce higher-quality videos without using more disk space.
By decreasing blocky artifacts, color banding, and maintaining detail in fast-motion scenes even with high PC settings and DLSS 3 Frame Generation AV1 improves the fidelity of Horizon Forbidden West Complete Edition.
For gamers who record every multiplayer match and single-player walkthrough, disk space savings are significant. Saving footage to the same drive as the game can reduce Input/Output stutters and speed up loading. Click the Settings cog at the top of the Alt+Z NVIDIA Overlay panel and select “Video capture” to enable AV1.
Working or playing, Instant Replay records continuously. Instant Replay saves clips of amazing kills and amusing moments without capturing a multiplayer battle. Press Alt+Shift+F10 when anything spectacular happens. Set these lengths with the Settings cog.
Microphone lets you record videos or establish a push-to-talk key.
Press Alt+F1 to take SDR and HDR screenshots from any game.
Photo Mode lets you use strong screenshot tools in supported games with Alt+F2. Adjust camera angles, game appearance, and more.
In supported games, Highlights remembers crucial moments automatically.
The Settings cog at the top of the NVIDIA Overlay panel gives many customization possibilities. Change hotkeys, notifications, video sound sources, multi-track audio to record your mic input separately, video recording quality, disk space restriction, and file location.
After taking your first screenshot or video, the Alt+Z NVIDIA Overlay displays the Gallery. A click sorts your captures by game, and further options let you view only screens or movies. Click to view or enlarge your disk drive files for sharing or uploading.
Real-time post-processing filters let you customize your favorite games’ visuals. This functionality, which now incorporates AI-powered filters accelerated by Tensor Cores on GeForce RTX GPUs, is supported by over 1,200 titles.
The RTX HDR filter smoothly adds HDR to games without HDR support. Only 12 of the top 50 GeForce games support HDR. However, the RTX HDR filter lets you use your HDR-compatible monitor with hundreds of SDR games on DX12, DX11, DX9, and Vulkan, improving your experience.
The renowned Digital Vibrance from the NVIDIA Control Panel is enhanced by the AI-powered Freestyle filter RTX Dynamic Vibrance. RTX Dynamic Vibrance tweaks visual clarity per app, making it easy to customize gaming settings. Perfect balancing reduces color crushing, retaining image quality and immersion.
Finally, the Statistics panel lets users customize the overlay’s performance and system data, including software and system details, position, color, size, and more.
Driver Downloads & Info At A Glance
GeForce Game Ready Drivers and NVIDIA Studio Drivers give developers and players the best possible experience with their favorite games and apps. It has added bullet points to its Drivers page to show what’s new and better and which games are supported.
To download and install the latest driver, click “Download” or activate automatic downloads in Settings → Drivers. Simply click “Install” to upgrade your PC or laptop in seconds.
The NVIDIA app displays all driver-related news on a single carousel, so you may read about game announcements or driver technology. Click the dropdown in the top right corner to choose between Studio Ready Drivers and Game Ready Drivers.
You can revert to an NVIDIA app-installed driver below our latest drivers. Click the three dots, then “Reinstall”.
Graphics: One Stop for Driver and Setting Options
Millions of players have used GeForce Experience’s Optimal Playable Settings (OPS) to immediately optimize game settings for image quality and performance. Before OPS was created over a decade ago, configuring a game with dozens of settings and detail levels stopped people from playing at smooth frame rates or required extensive tuning.
Clicking “Optimize” auto-configured all game settings and enabled NVIDIA technologies like DLSS and Reflex.
The NVIDIA Control Panel’s “Manage 3D Settings” lets users enable and disable driver-level functionality globally or per-game.
The dynamic “Graphics” tab in the NVIDIA app conveniently displays all these choices.
Configure your resolution and screen parameters at the top, then select “Optimize” to instantly apply its recommended settings for your machine. Adjust the Performance and Quality slider below to customize the settings before pressing “Optimize”. The list of In-Game Settings below the Optimize panel shows real-time changes.
Scroll down to Driver Settings. These NVIDIA Control Panel 3D Settings options are still valid for recent titles. Users who want to alter older games and apps can use NVIDIA Profile Inspector to access outdated settings.
Highlighting a setting adds a “i” icon that shows a feature explanation.
Clicking a setting opens its configuration choices and details, making it easy to customize everything.
Click the “Global Settings” tab at the top of the page to alter these variables per-game and app or for all games and apps.
Click the icon below to arrange the Graphics tab alphabetically and reveal only certain programs.
You may manually add applications, reset settings, and guide the NVIDIA app to new folders to search for programs using the three dots on the right.
This different set of three dots on the far right of the screen, just above the Optimize button, lets you conceal an application from the list and navigate to its computer folder. Select “Hidden” from the Sort and Filter option and click “Done” to unhide an application. Unhide hidden apps using the rightmost three dots.
System: Performance Tuning, Display Settings & More
Display, video, and GPU choices are all in the system tab, which has an upgraded performance tuner to safely raise frame rates.
Displays have G-SYNC, resolution, refresh rate, and orientation adjustments. The NVIDIA Control Panel’s Surround, custom resolution, and multi-monitor settings will be added to future app versions. Configure them using the NVIDIA Control Panel for now.
Video has new AI-powered capabilities to improve streaming and local videos.
When viewed in Google Chrome, Microsoft Edge, Mozilla Firefox, or the VLC media player RTX branch, RTX Video HDR immediately converts SDR videos to HDR using AI. To enhance your GeForce RTX PC or laptop experience, use your display’s HDR capabilities to display even more vibrant colors.
AI-powered RTX Video Super Resolution (VSR) removes compression artifacts and sharpens edges while upscaling streaming video on all GeForce RTX GPUs.
The NVIDIA app’s System > Video page lets you activate these options and see if they’re active when watching video or streaming. Status indications will make it easier to tell if our AI-powered RTX Video capabilities are enhancing content in a future NVIDIA app release.
The Performance tab offers one-click GPU settings to maximize GPU performance. The NVIDIA program will test your GPU for 10–20 minutes. Let your system idle or results may be altered.
After completion, it will perform a safe overclock that won’t void your warranty or damage your graphics card. The automatic GPU tuner will keep your tuning profile optimized with periodic checkup checks.
Power users can tweak voltage, power, temperature, and fan speed targets to change its complex tuning algorithms. This is useful if you want fans to spin at 70% or enhance performance without exceeding a temperature threshold.
My Rig displays critical hardware information, and selecting “View Rig Details” copies details to the clipboard for easy system sharing.
Redeem Game/App Rewards
Rewards for NVIDIA app users include in-game content, GeForce NOW premium membership incentives, and more. Launch the NVIDIA app and visit the Redeem page to see NVIDIA’s latest incentives, like its THRONE AND LIBERTY GeForce Bundle with 200 Ornate Coins and a PC-exclusive Mischievous Youngster Gneiss Amitoi.
GeForce PC and laptop users must login with an NVIDIA account, which may be made using Google, Discord, or an email address, to claim prizes. All other NVIDIA app features are password-free.
Settings, Notifications, and More
Its Settings panel lets you change NVIDIA app language, toggle driver update and reward notifications, and access critical options quickly.
On the About tab, you can join early access betas to trial new features and view its privacy, license, and terms of use.
You can also tick “Configuration, performance, and usage data” and “Error and crash data”. It can reproduce, diagnose, and fix issues faster and enhance future updates using this information.
Read more on Govindhtech.com
#technology#technews#govindhtech#news#technologynews#technologytrends#ai#nvidia#nvidiaai#nvidiaapp#nvidiaoverlay
1 note
·
View note
Text
Get Your Files Ready in Any Format with PortYourDoc
In today's digital world, working with a variety of file formats is common. Whether you're trying to convert a GIF to PNG, resize an image, or change a PDF into a TIFF, file conversions can often be time-consuming and complicated. Luckily, port your Doc offers a simple, free, and fast solution to all your file conversion needs. From image resizing to document conversions, this powerful tool makes it easy to get the format you need—without the hassle.
If you’ve ever found yourself needing to convert a picture from PNG to JPG or trying to split a multi-page PDF into separate files, PortYourDoc has you covered. Here's a closer look at how you can take full advantage of this versatile file converter.
Why File Conversions Matter
There are many reasons you might need to convert a file from one format to another:
Compatibility: Some programs only support specific file formats. For example, while many websites and apps prefer JPG or PNG images, others may require GIF or WebP.
Quality & Compression: Converting from a high-quality format (like PNG) to a compressed format (like JPG) can save storage space without a noticeable loss in image quality.
Printing: When preparing files for printing, certain formats like TIFF are often required for better quality.
Convenience: When sharing documents or images with others, you may need to convert them into formats that are easier to view, share, or store.
The challenge is that most file converters are either too complex, expensive, or simply don’t support all the formats you need. But port your Doc offers a user-friendly solution for free!
Features of PortYourDoc: Convert, Resize, and More
1. Free File Format Converter PortYourDoc allows you to convert files between dozens of formats without paying a penny. Some of the most common conversions include:
GIF to PNG Converter: Quickly change animated or static GIFs to the popular PNG format, perfect for high-quality images with transparent backgrounds.
PNG to JPG Converter: Need to reduce the file size or make it compatible with websites or print services? Convert PNG images to JPG in seconds.
WebP to PNG: If you have WebP images and need to convert them to PNG for better compatibility, you can do it for free.
RAW to JPG Converter: Photographers often use RAW files, but if you need a more accessible, shareable format, PortYourDoc’s RAW to JPG converter will make it simple.
PDF to TIFF Converter: TIFF is widely used in professional printing, so converting PDFs to TIFF files is easy with PortYourDoc.
2. Resize Images in Seconds Sometimes you don’t need a full format change but simply need to resize an image to meet specific dimensions. Whether you want to shrink a photo for easier sharing or enlarge it for better print quality, PortYourDoc lets you resize images without compromising their quality.
3. Split PDF Pages Have a PDF document that you need to separate into individual pages? PortYourDoc offers a simple solution to split PDFs into separate files—ideal for when you only need a few pages from a large document. The tool is fast, efficient, and easy to use.
4. Convert Documents in Bulk Have multiple files that need conversion? No problem. PortYourDoc’s easy-to-use interface supports batch conversions, meaning you can convert large numbers of files at once, saving time and effort.
5. Fast and Secure Unlike many other online converters, PortYourDoc makes sure your data is secure. All files are handled quickly and securely, and the platform does not store your documents longer than necessary. You can rest assured that your files are in safe hands.
Common Conversion Tasks You Can Complete on PortYourDoc
How to Convert PNG to JPG: If you’ve ever asked, "How do I change a picture from PNG to JPG?", PortYourDoc makes it incredibly simple. Upload your PNG image, choose the JPG format, and download your newly converted file in just a few clicks.
Convert PDF to TIFF for High-Quality Printing: PDF to TIFF conversion is ideal for maintaining high image quality, especially when preparing files for printing. TIFF files are often used in industries where image clarity matters most, such as graphic design or photography.
Convert GIF to PNG for Transparent Images: Sometimes you need a cleaner, higher-quality version of an image, especially when transparency is key. PortYourDoc’s GIF to PNG converter ensures the quality remains intact while allowing you to work with transparent images more easily.
Convert WebP to PNG: As WebP images become more common, the need for converting them to widely accepted formats like PNG increases. If you have a WebP file that needs converting, PortYourDoc does it seamlessly.
Split Large PDF Files: If you're working with lengthy PDF documents that need to be separated into individual pages, PortYourDoc’s split PDF feature is a game-changer. It’s as simple as selecting the pages you want and converting them into separate files.
Why Choose PortYourDoc?
It’s Free Unlike many online converters that require you to sign up or limit how many conversions you can do per day, port your Doc is 100% free for everyday use. There’s no subscription, no paywall, and no hidden fees.
Easy to Use PortYourDoc was designed with simplicity in mind. Whether you’re tech-savvy or not, you’ll find the interface straightforward and intuitive. Just upload your file, choose your preferred format, and download the converted file—easy as 1-2-3!
Fast Conversions PortYourDoc understands that time is precious. That’s why all conversions happen in a flash, giving you the results you need without the wait.
Wide Format Support With support for an extensive range of file formats, PortYourDoc can handle almost any conversion task you throw at it. From images to documents, it covers all your needs.
Get Started with PortYourDoc Today
Ready to simplify your file conversions? Whether you’re a photographer, graphic designer, student, or anyone else who needs quick and easy file format solutions, port your Doc is the tool you’ve been searching for.
Stop wasting time with complicated software or unreliable tools. Visit port your Doc now and get started on your next file conversion task today!
0 notes
Text
Expand Your Images with AI Magic
Do you want your pictures to appear bigger and more magnificent? Now you can do that easily by enhancing your images using PhotoCut's AI Image Extender. You can enhance images for various needs, including photography, e-commerce, social media, or graphic design, and this tool gives you the easiest and most realistic way of enlarging images without losing their quality. Just give it a try and watch the magic happen right before your eyes!
How to Make Your Images Bigger with AI?
Expanding your photos using AI has never been easier. With PhotoCut's AI Image Extender, you can expand your pictures without losing details and get an immersive feel. Here's how you can do it in three easy steps:
Step 1: Upload Your Image
For the first step, you only have to select the image you would like to enlarge. You can upload photos straight from your computer or phone. The process is fast, no matter the device you are using.
Step 2: Let AI Work Its Magic
Upload your image. Choose the desired size or aspect ratio. Let the AI magically analyze your picture and expand beyond its original border. It uses advanced algorithms to add new elements, ensuring the result is seamless and natural. Whether you want to expand your image into a wider landscape or adjust the vertical dimensions, the AI takes care of all the details for you.
Step 3: Download Your Expanded Image
Once the AI has worked its magic, click the download button to save your new image in a high-quality format. You’ll have your expanded image ready to use in no time!
Make Your Images Pop with One Click
Say goodbye to manually cropping and stretching your photos. PhotoCut’s AI Image Extender takes care of the hard work, transforming your images effortlessly. With just a click, you can turn portrait photos into wide-angle landscapes, or even choose the direction of the image expansion. No more losing important details when adjusting the size! Let AI handle the heavy lifting and make your photos truly stand out.
Give yourself a virtual makeover using PhotoCut’s Buzz Cut Filter.
Get Realistic Image Expansions
One of the most impressive aspects of PhotoCut’s AI Image Extender is its ability to create realistic image expansions. The technology is designed to blend new elements seamlessly into the image, ensuring the expanded areas match the original scene perfectly. Whether it's for posting on social media, e-commerce, or any graphic design requirements, the extensions will look naturally part of the image. Chances are, you won't be able to tell which was the original piece and which came from the AI.
Effortlessly Resize Images for Any Platform
Are you tired of resizing images for social media platforms or other online uses? PhotoCut’s AI Image Extender makes this task incredibly simple. Upload your photo, select the required size or aspect ratio, and the AI will adjust it to suit your needs. No more messing around with manual adjustments and fear of losing quality! It works for Facebook, Instagram, and Twitter images; this tool makes sure that every time, your image will look great.
Blur your images online for free using PhotoCut.
Unleash Your Creativity
The possibilities that open up with your photographs using the AI Image Extender. Whether it is portraits, landscapes, or product photos, this device can be a very promising tool in unlocking some other creative potential for you. You can guide the AI through various specific adjustments to enhance the image or teach it on its own. Imagine changing any simple portrait into a dynamic scene or expanding a product photo where you can get new options for backgrounds on the e-commerce website. The power is in your hands!
Design amazing posters online for free using PhotoCut’s Poster Maker.
AI Image Extender for All Your Needs
PhotoCut’s AI Image Extender is perfect for a wide variety of purposes. Here are some key use cases where it shines:
AI Art and Images
If you're creating AI-generated artwork, this AI Image Extender can help you make images bigger and more detailed. From abstract designs, digital paintings, and illustrations to more, you can use this extender to expand your creations without losing quality.
Photography
It might be a bit of a crop or framing that is not all that great; the AI Image Extender would help you resolve this by just expanding the background. It's a landscape photo, a portrait, or it's an event photo; adding space where you need it gives the composition an improved look.
Social Media
Social media images often need to be resized to fit specific dimensions. With PhotoCut’s AI Image Extender, resizing images for posts, stories, and covers has never been easier. The AI makes sure your image stays high-quality and visually appealing while adapting to any social platform’s size requirements.
E-commerce
In the world of online shopping, product photos are everything. PhotoCut’s AI Image Extender is a game-changer for e-commerce. It allows you to create different versions of your product images with new backgrounds or extended views. This helps make your listings more dynamic, attracting more potential buyers.
Graphic Design
Whether it is posters, flyers, or other designs, the AI Image Extender can be of assistance to you. It enables the extension of images to create compositions that better fit the needs of your design but remain high-resolution and natural-looking.
Print Media
Creating print materials requires images to be sized up or down to accommodate the different formats. The AI Image Extender helps you expand your images for printing while retaining high resolution to deliver high-quality output. No more pixelated or distorted images in your brochures, magazines, or other print materials.
Discover More AI Tools to Enhance Your Photos
PhotoCut offers a range of AI tools to enhance your photos beyond just image expansion. Some of these tools include:
AI Replace: Instantly change elements in your photos with just a text prompt. Want to replace a background or an object? This tool lets you do it with ease.
AI Background Remover: Remove backgrounds and add new ones in seconds. Perfect for product photos, headshots, or creative editing.
AI Object Remover: Remove distracting objects from your images or unwanted blemishes, to make them clean and professional-looking.
Using these advanced tools will help take your image editing to the next level, as well as give you a more polished and appealing photo.
Why Choose Our AI Photo Extender?
1. Easy & Fast to Use
The interface of PhotoCut ensures that either novice or professional can operate the AI Image Extender easily. It's simple and fast, so you won't find yourself fiddling with the picture for hours.
2. Context-Aware AI
Our AI understands the image and tries to expand it naturally. The technology doesn't add arbitrary elements on top; instead, each new part will get incorporated in such a way that it creates coherent and authentic content.
3. High-Quality Output
We value image quality; our AI Image Extender guarantees you the perfect, high-resolution image fit for use in either the web or printed materials. If it's about social media, a printed work, we've got quality images coming for you every time.
Conclusion
Whether you need to expand pictures for social media, e-commerce, or some other website, PhotoCut's AI Image Extender makes image enhancement a very easy, efficient, and effective process. All you need is a few clicks, and the images are made to stand out. Try it today and witness the future of photo editing in action!
Remove text from your images in seconds using PhotoCut’s text remover.
FAQs
Q1. What is an AI image extender? Ans. An AI image extender is a tool that works on artificial intelligence to give an extension of images that are beyond their original borders with automatic designing of new content that blends well with the original image.
Q2. What types of photos can I extend? Ans. You can extend every type of image like selfies and portraits, landscapes, and product photos because AI will adjust specifically according to the needs of that particular image.
Q3. How accurate is the AI image expander? Ans. The AI is quite precise in the enlarging of the expansions which would hardly differ from the original picture. It will check on the images and insert fine details to merge well with the entire frame.
Q4. What image formats are supported? Ans. PhotoCut's AI Image Expander supports image file formats JPEG and PNG among many others to fit with most images.
Q5. Is there a free AI image extender? Ans. Yes! You can use PhotoCut’s AI Image Extender for free. This tool allows you to make your images bigger and change their dimensions without any cost.
Q6. Can I expand multiple images? Ans. Absolutely! You can expand as many images as you need with PhotoCut’s AI Image Extender. There are no limits to the number of photos you can enhance.
0 notes
Text
Also known as image editing, photo editing is a process that encompasses altering or retouching images of any kind, whether they are traditional photo-chemical illustrations or digital photographs. Traditionally known as photo retouching, the technique uses various tools such as the airbrush to modify photographs or editing illustration by using various traditional art mediums. However, with the increasing popularity of digital photos, there are many companies in the market that have launched different types of graphics software programs for photo editing such as normal photo editors, 3D modelers, graphics editors and vector graphics editor for manipulation, enhancement, and transformation of the images. In this context, one of the best software programs available in the market is Wondershare Fotophire. Some features that make this image enhancement software stand out among competitors are as follows Photo Editor While playing with photos, one of the chief functions of any software program remains photo editing. When you want to use this function in this software, the task becomes very easy as this feature enables you to fix poor lighting of a photo, or enhance the quality by adding something extra. By using the feature in Fotophire, with few clicks, you can adjust the saturation, crop bad parts and add creative effects such as vignettes, frames, and filters. In addition, the software offers you more than 200 photo effects such as overlay and filters, Further, you can easily get access to 20+ blend effects and a user-friendly interface Photo Cutter Cutting photos or the enhanced version of image cropping remains one of the major functions of any photo editing program and this program is not an exception. Whether you want a different background in the photo or just a transparent background, this remains the best photo cutter you can get on the market. For this purpose, the software offers various features such as customized brush sizes, background templates, and edge blur feature. For novices, the software offers built-in tutorials that teach them the process of cutting photos and making them elegant. Photo Eraser If any object is spoiling your photo and you want to remove it without spoiling the photo in the process, or you want to clone any part of the photo, all you need to do is to use Wondershare Fotophire image enhancement. This is due to the fact that the software’s algorithms analyze the environment and fill the area with matched textures to retain the beauty of the photo. With this photo eraser tool, not only you can remove date stamp or watermark, you can also erase people as well as unwanted objects in a jiffy. All you need to do is to take four prescribed steps of image enhancement to get the expected outcome. Photo Maximiser Tool If you want to enlarge photo for your home or any other premise, with this software, you can enlarge it to 1000% while maintaining resolution and sharpness. The software easily offers these facilities as it has 7 preset resizing methods. With photo maximizer feature, you can create low light photos, enlarge your photo for printing or create high-resolution close-ups. This feature also offers various facilities such as 8 Zoom Settings, One-Click Denoise, Color Correction and Before and After Views. If you are a novice, this software also offers an inbuilt tutorial for guiding you regarding this matter. Photo Focus If your photos are blurry or you want to enhance the quality of the photos, you can use Photo Focus feature of this software to fix the photo, and get professional photos with image enhancement. Some other facilities offered by this feature include Resharpen Tools, Creative Blur, 4 Focus Presets, Drag and Drop Interface as well as Before & After Views. For guiding through various steps, the software also offers you an inbuilt tutorial. With Wondershare Fotophire, professional level photo editing and enhancement is a cakewalk. Now, you can transform an ordinary photo into an extraordinary image that befits professionals.
Whether you are a graphic designer, a professional photographer intending to sell photographs or a hobbyist who takes photography seriously, Fotophire has all the elements to retouch, fix and transform your images. All you need to do is to visit this site and download the software on your PC and start creating brilliant images. Other Useful Tools From Wondershare Wondershare is a creative software product company. It has much useful software available. Some of the photo editing related popular software are listed below Photo editor - A handy quick photo editing tool. Photo maximizer - This software can enlarge your photos without loss of quality. Photo focus - Fix focus problems on your old photos with this software.
0 notes