#cleaning vinegar vs white vinegar
Explore tagged Tumblr posts
Visit Tumblr Blog
Explore Tumblr blogs with no restrictions, modern design and the best experience.
Last Seen Tumblr Blogs


Fun Fact
130K people were victims of a chain letter scam that affected Tumblr in May 2011.
Text
Vinegar is a versatile substance used in various applications, ranging from cooking to cleaning. Two common types of vinegar exist, each serving distinct purposes. White vinegar, with its lower acidity, is safe for culinary use and gentle cleaning. In contrast, cleaning vinegar’s higher acidity makes it a powerhouse for tough cleaning jobs, though it is not safe for consumption. Understanding the major difference between white vinegar and cleaning vinegar will ensure you use the right product for your needs, optimizing both safety and effectiveness in your home.
#difference between cleaning vinegar ad white vinegar#cleaning vinegar vs white vinegar#commercial cleaning Sydney#cleaning company
0 notes
Note
May I ask what your favorite biscuit recipe is? (I tend to go for Nancy Silverton's, but it's so much work and so much butter that sometimes I long for something else.)
I use my own recipe! Here it is.
BUTTERMILK BISCUITS

MAKES: 8-10 biscuits
INGREDIENTS
2 ½ cups (300g) AP flour
2 Tbsp (yes, Tbsp!) baking powder
1 Tbsp white or brown sugar or honey
1 tsp kosher salt
¾ cup (170g) butter (ideally salted), cold, sliced thin
1 cup (227g) cold buttermilk (1 Tbsp white vinegar + fill to 1 cup line with milk, let curdle 10 min)
optional: 1 Tbsp melted butter + 1 Tbsp honey, to brush over tops before baking
optional: honey butter (4 Tbsp softened butter + 2-4 Tbsp honey to taste; creamed), to serve
DIRECTIONS
1. Preheat oven to 450°. Grease a cast iron skillet, or line a baking sheet with parchment paper.
2. In a large bowl, whisk together flour, baking powder, sugar, and salt.
3. Work fat into flour: Add the sliced butter. Toss to coat each piece in flour. Use your knuckles and fingers to smash, rub, and smear butter into flour mix until it resembles coarse, moist, crumbly sand, with granola-like crumbles of butter. Some larger flakes are fine. Work quickly: Keep butter cold.
4. Add buttermilk in 3 parts, mixing with a spatula in between, just until large clumps form. You might not need all the buttermilk! Dough will be shaggy and moist but not unworkably sticky. (If too sticky, sprinkle liberally with flour during next step; brush off excess as you go.)
5. Form layers: Turn dough onto a clean, floured surface. With floured hands and a bench scraper, shape into a mass. Do not knead or overwork. Pat or roll out into a slab roughly 1” thick. Fold it in half, then pat back out. Repeat 3-5x to form layers.
6. Cut biscuits: Pat into a 1” thick slab. Use a biscuit cutter to cut 8-10 biscuit rounds, OR shape dough into a 1” thick rectangle (about 6x12”; the goal is 8 x 3x3” square biscuits). Using a large, sharp knife, slice ¼” off the outer edges to expose layers. Slide the edge strips under the dough so they don’t show. Cut the rectangle into 8-10 biscuits of desired size.
7. Arrange biscuits in cast iron skillet or on baking sheet with the sides very lightly touching. Brush tops with honey butter if desired (you can also brush it on after baking).
8. Bake 16-20 minutes until tall and golden brown.
NOTES
- Cast iron vs. baking sheet: Either works. Baking in a cast iron = crispy bottom crust.
- Cutting: The edges must be sliced to expose the layers so they can properly rise—use a biscuit or cookie cutter, not a drinking glass, or just cut square biscuits. If using a biscuit cutter: Do not twist while pressing down—it will smear layers together and inhibit rise.
- Arranging: Biscuits love to lean on each other. Make sure their sides are very lightly touching (not too close; they will expand as they rise) so they can cling to each other and climb higher during the bake.
- Keep dairy cold. If butter starts looking greasy, chill dough in fridge or freezer 15 minutes.
45 notes
·
View notes
Text
Planning for Mold Cleanup Costs: A Homeowner’s Guide

Mold in the house can be a big headache for any homeowner, especially when it involves planning the cost of cleanup. Cost estimates for mold cleanups can vary from small to large, depending on several influential factors involving size or material. With careful planning and the right approach, it is indeed possible to effectively take on mold issues without breaking the bank.
In this article, we will be taking you through literally everything you have to know about mold cleanup costs, from understanding the influential factors to tips on saving money while ensuring a job well done.
Cost of Mold Cleanup
Mold cleanup is not one-size-fits-all. Costs can range from minor cases, costing in the hundreds of dollars, to severe cases costing thousands of dollars. Here are the major variables that determine these costs:
Extent of the Growth The larger the mold growth, the more expensive the cleaning. Minimal spots on surfaces, such as those appearing on wall tiles or ceilings, are generally easier and less costly to address than general infestations that seep into walls and floors.
Mold Type Critical species, like black mold (Stachybotrys chartarum), necessitate special equipment and expertise, adding to the overall expense.
Location of Mold The mold in accessible areas is much easier—and less expensive—to clean. Mold hidden inside walls, ceilings, or HVAC systems requires much more labor to clean and thus is more expensive.
Extent of Material Damage Mold can ravage porous materials like drywall, carpeting, and wood. If these materials must be replaced, then this adds to your overall costs.
Professional Versus Do-It-Yourself Cleanup Smaller mold problems you can deal with yourself with the appropriate equipment and expertise. Larger mold infestations usually require professional assistance, too, which increases the expense.
How Much Does Mold Cleanup Normally Cost? Here's an approximation of the cost you may incur to clean mold, based on the severity of the mold manifestation:
Small Area (under 50 square feet): $500–$1,500 Medium Area (50–300 square feet): $1,500–$3,500 Large Area (300+ square feet): $3,500–$6,000 or more If other repairs like drywall replacement or leak fixing are required, then the costs start to add up.
How to Plan for Mold Cleanup Costs You can plan well for mold cleaning costs if you can develop a proper budget to avoid any unexpected expenses. Here's how to get started:
Assess the Problem Early Inspect your home regularly, especially in areas prone to moisture, like basements, bathrooms, and kitchens. Catching mold early can prevent it from spreading and save you money.
Get a Professional Inspection If you suspect a significant mold problem, hire a certified professional to assess the damage. A professional inspection typically costs $200–$600 but provides a clear understanding of the cleanup scope and costs.
Budget for Repairs Besides mold remediation, you may also need to account for repairs, such as replacing affected materials and eliminating the moisture source.
Check Your Insurance Look into your homeowner's insurance policy to see if mold cleanup is covered. Most of the time, it depends on the cause of mold. For instance, if it resulted from a sudden pipe bursting, your policy may be of help. However, if it is because of persistent water leaks, then most likely it is not covered.
Compare Quotes Reach out to multiple mold remediation companies and compare their estimates. Ensure each quote includes a detailed breakdown of services to avoid hidden fees.
DIY Mold Cleanup vs. Professional Services Deciding whether to handle mold cleanup yourself or hire a professional depends on the severity of the problem.
When DIY Is a Good Option You can often manage small mold problems (less than 10 square feet) on your own. Here’s what you’ll need:
Protective Equipment: Gloves, goggles, an N95 mask, and protective suit. Cleaning Solutions: White vinegar, baking soda, or commercial mold removers. Tools: Scrub brushes and disposable cloths. The mold area should be cleaned thoroughly, followed by complete drying of the area to avoid further growth.
When to Seek Professional Help Larger infestations, mold in inaccessible locations, and health concerns all call for professional remediation as the safest option. Professionals have the right equipment and know-how to eradicate mold and prevent further proliferation.
Approaches to Reduce Mold Cleanup Expenses The following are some helpful recommendations for decreasing mold cleanup expenses with assurance that the issue will be positively addressed:
Eliminate the Source of Moisture Mold will not disappear unless its cause is fixed. Repair the leaks to improve ventilation and use dehumidifiers to avoid moisture buildup.
Isolate the Priority Areas If your budget is limited, clean mold first in the most important places, such as bedrooms and living areas, where health risks from mold exposure are highest.
Practice Regular Maintenance Preventative measures-caulk around windows and doors, cleaning of gutters-can help avoid costly mold problems in the first place.
Hire the Right Pros You might save money in the long run by hiring the right remediation company. Look for certified experts who have good reviews and display transparent pricing.
Use Your Insurance Wisely If your insurance covers mold cleanup, it's time to file a claim and work with your provider to ensure that you receive the maximum benefit.
What to Expect During Professional Mold Cleanup The general steps for professional mold remediation will help you plan and budget for the job:
Inspection and Assessment Professionals inspect the area and determine the mold type.
Containment They isolate the place to prevent mold spores from spreading to other areas.
Air Filtration Mold spores are removed from the air using HEPA filters.
Mold Removal Cleaning is done using antimicrobial solutions; at times, removal of the affected material could be necessary.
Repairs and Restoration Materials affected are replaced and the spot restored to normal.
Final Inspection The team checks to ensure all mold has been removed and the source of moisture is addressed.
Avoiding Common Mistakes in Mold Cleanup Many homeowners make costly mistakes when dealing with mold. Here’s what to avoid:
Ignoring the Problem: Delaying cleanup can lead to extensive damage and higher costs. Using the Wrong Cleaning Products: Bleach, for example, is not always effective and can damage surfaces. Ignoring the Source of Moisture: Failing to patch up any leakages or other sources of moisture, mold is bound to grow once more. Choosing the Lowest Bidder: The cheapest remediation services can be a result of cutting corners, hence, incomplete cleaning. Can Mold Cleaning Be Avoided? The most economical means of reducing mold cleanup costs is to avoid the growth of mold altogether. Here are some ways to prevent mold:
Keep Humidity Levels Low: Make use of dehumidifiers and provide proper ventilation in humid areas. Fix Leaks Right Away: In case of plumbing leaks, roof damage, or foundation cracks, fix them right away. Monitor Your House: On a regular basis, look for indications of water damage or mold, particularly in the basement, bathrooms, and attic. Use Mold-Resistant Materials: Consider mold-resistant drywall, insulation, and paints when rebuilding or renovating, especially in areas prone to moisture. Plan Ahead Planning for the cost of mold cleanup is not the funniest thing to do, but it's a crucial step in protecting your home and health. Mold problems dealt with as soon as possible, plus a meager budget and preventive measures taken, will ensure that your home remains safe and comfortable with no unnecessary expenditure.
Conclusion Mold cleanup doesn't have to break the bank. Knowing what determines costs, the right decisions to make between DIY and hiring pros, and even taking preventive measures against mold growth-all these will help you get the job done without breaking the bank.
That said, remember that planning is everything. Continual maintenance of the home, early detection, and thoughtful budgeting all play an important role in keeping mold clean-up costs low. All three steps will protect not just your finances but also create a healthier environment for you and your family.
0 notes
Text
clothes cleaning,
clothes cleaning,
Keeping your clothes clean and well-maintained is essential for both hygiene and extending the life of your garments. With a variety of cleaning methods available, it can be challenging to determine which one is best for your specific needs. This guide will explore different clothes cleaning methods, tips for effective cleaning, and best practices to keep your wardrobe looking fresh.
1. Understanding Fabric Types
Before diving into cleaning methods, it’s crucial to understand the fabric of your clothes. Different materials require different care:
Cotton: Durable and easy to clean, cotton can typically be washed in hot water.
Wool: Sensitive to heat, wool should be washed in cold water and air-dried to prevent shrinkage.
Silk: Delicate and prone to damage, silk garments should be hand-washed or dry-cleaned.
Synthetic Fabrics (e.g., polyester, nylon): Usually machine washable but can retain odors, so it’s good to use specific detergents.
2. Washing Methods
Machine Washing
Sorting: Separate clothes by color (whites, darks, and colors) and fabric type (delicates vs. heavy fabrics).
Settings: Choose the appropriate wash cycle based on the fabric. Use cold water for darks to prevent fading and hot water for whites to help with stains.
Detergent: Use a high-quality detergent suitable for your fabrics. Consider using a detergent with enzymes for tough stains.
Hand Washing
Ideal for delicate fabrics like silk and lace.
Fill a basin with cold water and add a small amount of mild detergent.
Gently agitate the water, submerge the garment, and let it soak for 10-15 minutes. Rinse thoroughly and lay flat to dry.
Dry Cleaning
Best for garments labeled “dry clean only,” such as suits and formal dresses.
Take these items to a professional cleaner, as they have the proper solvents and equipment to avoid damage.
3. Stain Removal Techniques
Stains can be pesky, but quick action can help remove them effectively:
Act Fast: The sooner you treat a stain, the better your chances of removing it.
Blot, Don’t Rub: Blot the stain with a clean cloth to absorb excess liquid, avoiding rubbing, which can spread the stain.
Use Stain Removers: Apply a stain remover or a mixture of water and vinegar for common stains (like wine, coffee, or grease). Let it sit for a few minutes before washing.
4. Drying Clothes
How you dry your clothes is just as important as how you wash them:
Air Drying: Hanging clothes to air dry is gentler on fabrics and helps prevent shrinkage. Avoid direct sunlight to prevent fading.
Tumble Drying: For items that can withstand it, use a dryer. Be mindful of the heat settings—use low heat for delicate fabrics and higher settings for cotton.
Drying Rack: Use a drying rack for sweaters and other items that may lose shape in the dryer.
5. Ironing and Storing Clothes
Proper finishing touches can keep your clothes looking great:
Ironing: Iron clothes while they are slightly damp for better results. Use the appropriate heat setting for each fabric type. A steam iron can help remove wrinkles more effectively.
Storage: Store clothes in a cool, dry place. Use hangers for delicate items and fold heavier garments to avoid stretching.
6. Best Practices for Clothes Maintenance
Read Labels: Always check the care labels on your garments for specific instructions.
Regular Cleaning: Don’t wait until clothes are visibly dirty. Regular washing can prevent dirt buildup and odors.
Avoid Overloading the Machine: Overloading can prevent proper cleaning and may damage your clothes.
Use Fabric Softeners Sparingly: While they can make clothes feel softer, too much can build up on fabrics and reduce their absorbency.
Conclusion
Effective clothes cleaning involves understanding fabric types, employing the right washing methods, treating stains promptly, and following best practices for drying and storing garments. By taking the time to care for your clothes, you can ensure they remain fresh and last for years to come. Happy cleaning!
Feel free to modify any sections or let me know if you need more specific details on any topic!
0 notes
Text
DIY Vs. Professionals: What to Choose For Shower Grout Cleaning Project
Dirty grout in your bathroom can be a homage to disease-causing moulds. That is why from health to safety and comfort, a clean and properly functioning bathroom is important for better living. Don’t worry! Shower grout cleaning services have come to the rescue.

From DIY to professional methods of grout and shower tile cleaning in Sandringham, this blog will help you get a better understanding of different bathroom cleaning methods and choose between them.
DIY Methods Of Grout Cleaning
Below are briefly explained two DIY grout and tile cleaning methods you can try at home, all by yourself.
Baking Soda and Hydrogen Peroxide Paste
Form a paste by mixing baking soda and hydrogen peroxide. Using a brush, take a calculated amount and apply it to the tile surface. Let the paste rest there for a couple of minutes and then start rubbing the floor firmly in a circular motion. Continue brushing till you get the desired results.
Spraying Vinegar Mixed with Water
Fill a bottle with two equal parts of white vinegar and warm water. Mix it well; spray the solution on the affected area and notice when it breaks down the mineral deposits on the grout. Wipe it off using a microfibre cloth or any brush.
Inculcate spraying this solution on your bathroom walls after your daily bathing rituals and say goodbye to soap scum, moulds on the grouting and the hassle of monthly deep cleaning.
Methods Used by Professionals
High-Pressure Steam Cleaners
High-pressure steam cleaning is one of the most innovative chemical-free methods to clean shower tiles and grout. A pressure of more than 150 PSI and steam up to 190 degrees Celsius penetrates to get the tiles rid of moulds, stubborn stains and everything that deteriorates your bathroom’s esteem.
Rotary Floor Scrubbers
Very evident from its name, these high-powered machines work on rotating brushes. Given the large-size brushes, it provides exceptional coverage, time efficiency and better output than manual methods. This machinery possesses an inbuilt system to spray cleaning solutions on the targeted area. It also helps clean the corners perfectly, making sure the bathroom turns out to be as pristine as it ever was.
Choosing Between DIY And Professional Methods
Cost and Professional Knowledge: While using DIY methods to get rid of dirty grout is pocket-friendly and does not require professionalism; advanced methods remain expensive yet cost-effective and indeed require professional handling.
Energy Requirements and Output: In contrast to manual cleaning practices, advanced machinery requires energy i.e. electricity to operate. Discussing the output, both affect the targeted area differently.
While the DIY methods can be a go-to solution for easy stains and are suitable for a smaller area; professional tools can remove the toughest of the stains and moulds, that too covering the larger area in one go.
Ready to give your bathroom a refreshing outlook? If DIY methods aren’t working anymore, contact the cleaning experts and let them handle it their way. Hurry up!
Source
0 notes
Text
DIY vs. Store-Bought Leather Cleaners
DIY vs. Store-Bought Leather Cleaners: Vision Flow’s Comparison
Leather care is essential for maintaining the beauty, longevity, and durability of leather products, whether they are shoes, handbags, furniture, or car interiors. Cleaning is a fundamental part of leather care, but with so many cleaning options available, it can be difficult to decide between making your own leather cleaner at home or purchasing a commercial cleaner. At Vision Flow, we believe both options have their merits, and the best choice often depends on the type of leather, the condition of the item, and personal preference.
In this article, we’ll compare DIY leather cleaners with store-bought options, outlining the pros and cons of each to help you decide which is right for your leather care routine.
DIY Leather Cleaners
Many leather enthusiasts turn to DIY leather cleaning solutions because they offer an affordable and natural approach. These homemade cleaners often use ingredients like vinegar, water, olive oil, or mild soap, which are commonly found in most households.
Common DIY Leather Cleaner Recipes:
Vinegar and Water Solution: A mixture of equal parts white vinegar and water is often used as a basic leather cleaner. The vinegar’s acidity helps break down dirt and grime while the water dilutes its harshness.
Olive Oil and Vinegar Conditioner: Some DIY conditioners combine olive oil with a few drops of vinegar, which can be applied to leather to restore moisture and shine.
Mild Soap and Water: For a gentler approach, a mixture of water and a small amount of pH-balanced soap (like Castile soap) can be used to clean dirt and stains without harming the leather.
Pros of DIY Leather Cleaners:
Cost-Effective: One of the biggest advantages of DIY leather cleaners is their affordability. Many of the ingredients needed are already available in your home, saving you the cost of purchasing specialized products.
Natural Ingredients: For those who prefer a more natural, chemical-free cleaning approach, DIY leather cleaners are appealing. Ingredients like vinegar, water, and olive oil are safe and eco-friendly.
Customizable: DIY cleaners allow you to adjust the ingredients based on your leather’s specific needs. You can control the concentration of the solution, ensuring it’s mild enough for delicate leather or strong enough for tough stains.
Cons of DIY Leather Cleaners:
Inconsistent Results: One downside of DIY cleaners is that the results can be inconsistent. Not all leather types respond the same way to homemade solutions, and some may even become damaged over time if the mixture isn’t balanced correctly.
Limited Effectiveness on Tough Stains: While DIY solutions are great for light cleaning and maintenance, they may not be as effective at removing deep stains, grease, or mold as commercial cleaners.
Risk of Over-Saturation: Some DIY recipes involve using oils, which can saturate the leather and cause it to become greasy or attract dust and dirt. Over time, this can lead to a loss of leather texture and integrity.
Store-Bought Leather Cleaners
Store-bought leather cleaners are formulated specifically for leather care. They come in various forms, such as creams, sprays, foams, and wipes, and are designed to clean, condition, and protect leather without damaging its natural oils or fibers.
Types of Store-Bought Leather Cleaners:
Leather Cleaning Wipes: These pre-moistened wipes are convenient for quick cleanups and are perfect for regular maintenance of items like handbags, shoes, and car seats.
Leather Cream Cleaners: These provide deep cleaning and conditioning, ideal for full-grain and top-grain leathers that need regular hydration.
All-in-One Leather Cleaners: These products are formulated to clean, condition, and protect leather in one step, saving time and effort.
Pros of Store-Bought Leather Cleaners:
Designed for Leather: The biggest advantage of store-bought cleaners is that they are specifically designed for leather. These products are tested for safety and effectiveness on various leather types, minimizing the risk of damage.
Effective for Stubborn Stains: Commercial cleaners are more effective at removing tough stains, grease, and dirt. Many products are designed to penetrate deep into the leather, offering superior cleaning power compared to DIY solutions.
Convenient and Time-Saving: Store-bought cleaners, particularly those that come in wipes or sprays, are extremely convenient and easy to use. You don’t need to worry about mixing ingredients or measuring solutions—just apply the product and wipe clean.
Cons of Store-Bought Leather Cleaners:
Cost: One of the downsides to commercial leather cleaners is the cost. High-quality leather cleaners and conditioners can be expensive, particularly if you need to purchase multiple products for cleaning and conditioning.
Potential for Harsh Chemicals: Some store-bought cleaners contain harsh chemicals or synthetic ingredients that may not be suitable for all leather types, especially delicate or antique leather. It’s important to choose products that are free from harmful substances like alcohol or ammonia.
Not Always Eco-Friendly: Many commercial leather cleaners come in plastic packaging and may contain ingredients that aren’t biodegradable, which could be a concern for those seeking an environmentally friendly option.
DIY vs. Store-Bought: When to Use Each
Choosing between DIY and store-bought leather cleaners depends on your needs, the type of leather you’re cleaning, and your personal preferences. Here’s a breakdown of when to use each:
When to Use DIY Leather Cleaners:
Light Cleaning and Maintenance: DIY cleaners work well for routine, light cleaning tasks. They can help maintain the cleanliness of your leather items without causing damage.
Budget-Friendly Cleaning: If you’re looking to save money and have access to common household ingredients, DIY solutions are a great way to keep your leather clean on a budget.
Natural, Chemical-Free Approach: If you prefer to avoid synthetic chemicals and opt for a natural cleaning method, DIY cleaners made with vinegar, water, and olive oil are safe and eco-friendly.
When to Use Store-Bought Leather Cleaners:
Deep Cleaning and Tough Stains: For items that are heavily soiled, stained, or require deep cleaning, store-bought cleaners are more effective. They’re formulated to handle tougher jobs and penetrate the leather’s surface.
Specialized Leather Types: If you’re cleaning delicate, exotic, or vintage leather, it’s best to use a commercial cleaner specifically designed for these types. This minimizes the risk of damage and ensures the leather remains in good condition.
Time-Saving Convenience: For those who want a quick and easy cleaning solution, store-bought wipes or sprays are a great option. They require minimal effort and offer professional results.
Vision Flow’s Final Recommendation
At Vision Flow, we believe that both DIY and store-bought leather cleaners have their place in a well-rounded leather care routine. For routine maintenance and light cleaning, DIY solutions can be a great cost-effective and natural option. However, for deep cleaning, tough stains, and ensuring the longevity of your leather items, store-bought cleaners are often the safer and more effective choice.
For the best results, consider using a combination of both. You can use DIY cleaners for regular upkeep and switch to store-bought products when your leather needs a deeper clean or extra conditioning. Ultimately, the key is to know your leather, understand its needs, and choose the cleaning method that will help it look its best while extending its lifespan.
1 note
·
View note
Text
How To Keep Your White Clothes White And Bright

Keeping your white clothes clean is essential. It not only makes you look good but also shows that you care about being tidy. Wearing bright, clean white clothes adds a touch of elegance and shows that you pay attention to small details. When your white clothes look great, it reflects your good hygiene, while yellow stains or dirt can give the wrong impression. That’s why it’s important to have the right laundry routine to keep your whites fresh.
1. Sorting and Washing Techniques
To keep your whites bright, always wash them separately from colored clothes. This prevents color from bleeding into your whites and keeps them looking clean.
2. Effective Stain Removal Products
Use powerful stain removers like oxygen bleach, white vinegar, or special stain removers to tackle any stains quickly and effectively.
3. Immediate Action for Best Results
When a stain happens, act fast! Use items like stain pens, wipes, or hand sanitizer with alcohol to stop the stain from setting and make it easier to remove later.
4. Choosing the Right Detergent: Bleach vs. Oxygenated Cleaners
Using the right detergent is key. While bleach can help, oxygen-based cleaners like hydrogen peroxide are gentler on fabrics and still do a great job of keeping whites bright.
5. Low-temperature washing for Delicates
For delicate white fabrics like silk or lace, wash at lower temperatures to avoid damage while still getting them clean.
Conclusion
Keeping your white clothes white takes care at every step, from sorting to washing and even drying. Remember to separate colors, treat stains immediately, use the right detergent, and consider air-drying in the sun for natural whitening. If you want hassle-free laundry care, Washmart can help. We take extra care of your whites to keep them fresh and lasting longer. Let Washmart handle your laundry, so your whites always look their best!
#Local laundry in india#24-hour laundry#Pickup and delivery laundry#Affordable laundry#laundry for students
0 notes
Text
How to Keep Your White Walls and Surfaces Spotless

A gleaming white wall or surface can brighten up any room, adding a touch of elegance and modernity to your home. However, keeping those pristine surfaces spotless can be a bit of a challenge. Whether it's scuffs from furniture, fingerprints from curious kids, or the inevitable dust and dirt that accumulate over time, maintaining that fresh, clean look requires some know-how and effort. This guide will explore practical and easy-to-follow cleaning tips to keep your white walls and surfaces looking immaculate, helping you preserve their beauty for years to come.
The Significance of Clean Walls and Surfaces
Having clean walls and surfaces isn't just about aesthetics; it also contributes to the overall hygiene and atmosphere of your home. Spotless walls and surfaces can make your space appear larger, more inviting, and well-maintained. They reflect light better, enhancing the natural brightness of your rooms. Moreover, clean walls are less likely to harbour dust, allergens, and bacteria, which can contribute to a healthier living environment.
Identifying Common Stains on Walls and Surfaces
White walls and surfaces are particularly susceptible to visible stains. Some common culprits include:
Dust and Dirt: Everyday dust can settle and stick to walls, making them look dull.
Fingerprints and Smudges: High-traffic areas and surfaces frequently touched are prone to greasy fingerprints.
Scuff Marks: Furniture, shoes, and bags can leave scuff marks on walls and surfaces.
Food and Drink Spills: Kitchens and dining areas often suffer from accidental splashes and spills.
Mould and Mildew: High-humidity areas like bathrooms can develop mould and mildew spots.
Understanding the Causes of Dirty White Walls and Surfaces
White walls and surfaces can look dirty quickly due to their light colour, which highlights any imperfection. Factors contributing to this include:
Environmental Factors: Dust, pollen, and airborne particles can settle on surfaces.
Human Interaction: Touching walls, especially with dirty or oily hands, leaves marks.
Household Activities: Cooking, burning candles, and using fireplaces can result in soot and stains.
Moisture: In bathrooms and kitchens, moisture can lead to mould growth and water stains.
Effective Methods for Cleaning White Walls and Surfaces
Cleaning white walls and surfaces requires a gentle yet effective approach. Here are some methods to tackle various types of stains:
Dusting: Regularly dust walls using a microfiber cloth or a vacuum with a brush attachment to prevent dust buildup.
Spot Cleaning: For small stains, use a soft cloth dipped in a mixture of warm water and mild dish soap. Gently rub the stain in a circular motion.
Deep Cleaning: For more stubborn stains, mix water and baking soda to make a paste. Apply it to the affected area and leave it there for a few minutes before gently scrubbing it with a soft cloth.
Mould Removal: Use a mixture of water and white vinegar to spray onto mould spots. Let it sit for an hour, then wipe clean with a damp cloth.
Preventive Measures: Apply a coat of washable paint that resists stains and makes cleaning easier.
Maintaining the Cleanliness of White Walls and Surfaces
Prevention is key to keeping your white walls and surfaces spotless. Consider these tips:
Regular Dusting: Dust your walls and surfaces weekly to prevent dirt accumulation.
Use Washable Paints: Opt for high-quality, washable paints that make it easier to clean off stains.
Be Mindful of High-Traffic Areas: Pay extra attention to areas like hallways and near light switches.
Avoid Harsh Chemicals: Use gentle cleaning solutions to avoid damaging the paint or surface finish.
Address Spills Immediately: Clean up any spills or stains as soon as they occur to prevent them from setting in.
DIY Cleaning vs. Professional Services
When it comes to maintaining the pristine look of your white walls and surfaces, you might be weighing the options between handling the task yourself or hiring professionals. Both approaches have their advantages and potential drawbacks, and the best choice depends on your specific needs and circumstances.
Benefits of DIY Cleaning
Cost-Effective: One of the most significant advantages of DIY cleaning is the cost savings. You won't have to pay for professional services, which can add up, especially if you need frequent cleaning.
Immediate Action: When you handle cleaning yourself, you can address stains and spills immediately. This immediacy is crucial for preventing stains from setting and becoming more challenging to remove.
Control Over Products: Cleaning your walls and surfaces allows you to choose the products and methods that suit your preferences and environmental concerns. You can opt for eco-friendly or hypoallergenic cleaners if that’s important to you.
Satisfaction: There's a certain satisfaction that comes from doing the job yourself and seeing the immediate results of your efforts. It can be a rewarding task, especially when the outcome is a spotless home.
Drawbacks of DIY Cleaning
Time-Consuming: Cleaning walls and surfaces can be a time-consuming task, particularly if you have a large home or high ceilings. It requires a significant investment of your time and energy.
Physical Effort: The physical effort involved in cleaning can be strenuous. Reaching high spots or scrubbing stubborn stains can take a toll on your body, especially if you're not accustomed to such tasks.
Potential for Damage: Without the right knowledge and tools, there's a risk of damaging your walls and surfaces. Using the wrong cleaning agents or techniques can lead to discolouration, scratches, or other damage.
Advantages of Professional Cleaning
Expertise and Equipment: Professional cleaners have the training and experience to clean your walls and surfaces effectively. They know the best techniques and products to use for various types of stains and materials without causing damage.
Time-Saving: Hiring professionals frees up your time for other activities. You can focus on work, family, or leisure while the cleaning is taken care of. This can be particularly beneficial if you have a busy schedule or need the cleaning done on short notice.
Thorough Cleaning: Professionals can often achieve a more thorough cleaning than DIY efforts. They can reach high or awkward spots and pay attention to details that you might miss. Their services typically include a comprehensive approach, ensuring all areas are covered.
Stress-Free: Knowing that your cleaning needs are handled by professionals can be a relief. You don't have to worry about gathering supplies, figuring out the best cleaning methods, or finding the time to do it yourself.
Drawbacks of Professional Cleaning
Cost: The most apparent drawback is the cost. Professional cleaning services can be expensive, and regular cleaning may strain your budget. However, many find the investment worthwhile for the convenience and results.
Scheduling: You need to schedule professional services in advance, which might not always align with your immediate needs. Additionally, you’ll have to be home or arrange access for the cleaners, which can be inconvenient.
Trust and Security: Allowing strangers into your home requires a level of trust. Ensuring the company is reputable and its employees are trustworthy is essential to avoid potential issues.
Choosing Professional Wall and Surface Cleaning Services
If you decide that hiring professional cleaners is the right choice for you, it's crucial to select a service that meets your needs and standards. Here are some tips to guide you in choosing the best professional wall and surface cleaning services:
Research and Reviews
Reputation: Start by looking for companies with a good reputation in your area. Ask for recommendations from friends, family, or neighbours. Online reviews and ratings can also provide valuable insights into a company’s reliability and quality of service.
Experience: Choose a company with extensive experience in cleaning white walls and surfaces. Experienced cleaners are more likely to know the best methods for dealing with various stains and materials without causing damage.
Services Offered
Comprehensive Cleaning: Ensure the company offers a comprehensive cleaning service that includes all the tasks you need. This might include dusting, scrubbing, stain removal, and possibly even minor repairs if necessary.
Customisation: Look for a company that can customise its services to fit your specific needs. Whether you need a one-time deep clean or regular maintenance, they should be able to tailor their offerings to suit you.
Safety and Products
Eco-Friendly Options: If you prefer environmentally friendly cleaning products, check if the company offers green cleaning options. Eco-friendly products are not only better for the environment but can also be safer for your family and pets.
Safe Practices: Ensure the company follows safe cleaning practices and uses products that won't damage your walls or surfaces. They should be able to explain their methods and the products they use.
Cost and Value
Get Quotes: Request quotes from several companies to compare prices. Be wary of prices that are too low or are too good to be true, as they might reflect lower-quality service or hidden charges. A detailed quote should outline exactly what is included in the service.
Value Over Cost: While it might be tempting to choose the cheapest option, consider the value you’re getting for your money. A slightly more expensive service might provide better results and more comprehensive cleaning.
Customer Service
Communication: Pay attention to how the company communicates with you from the first point of contact. Good customer service is a sign of a professional company that values its clients. They should be responsive, courteous, and willing to answer all your questions.
Guarantee: Check if the company offers any guarantees or warranties for their services. A satisfaction guarantee can provide peace of mind, knowing that the company stands behind its work.
Insurance and Certifications
Insurance: Ensure the company is insured. This protects you in case of any accidents or damage during the cleaning process. Ask for proof of insurance before hiring.
Certifications: Look for any industry certifications or memberships in professional organisations. These can indicate a commitment to high standards and ongoing education in the field.
Selecting the right professional cleaning service can make a significant difference in maintaining the pristine condition of your white walls and surfaces. By doing your research and considering these factors, you can find a reliable and effective cleaning partner to keep your home looking its best.
Keeping your white walls and surfaces spotless can enhance the beauty and hygiene of your home. Whether you choose to handle it yourself or hire professionals, maintaining a regular cleaning routine and addressing stains promptly will help keep your space looking its best.
We’d love to hear from you! Share your cleaning tips, comments, and experiences with us. Your insights could help others create the perfect home office environment.
FAQ Section
How often should I clean my white walls and surfaces?
Regular dusting should be done weekly, while a more thorough cleaning can be done monthly or as needed, depending on the level of dirt and stains.
What should I avoid when cleaning white walls?
Avoid using harsh chemicals or abrasive cleaning tools, as they can damage the paint or finish. Stick to gentle, non-abrasive cleaners and soft cloths.
Can I use bleach to clean mould off my white walls?
While bleach can be effective, it can also damage paint and surfaces. A safer alternative is a mixture of water and white vinegar, which can kill mould without harmful effects.
© Top TD Cleaning Company
1 note
·
View note
Text
Marble vs. Granite: The Ultimate Guide for Indian Homes

For centuries, natural stone has graced the grand palaces and humble abodes of India. Two enduring favorites – marble and granite – continue to be popular choices for homeowners seeking timeless elegance and enduring functionality. But with distinct characteristics, these stones cater to different design needs and preferences.
Here at Rock Studio, a leading provider of premium granite and a trusted exotic marble supplier in India, we understand the importance of selecting the right stone for your dream home. This comprehensive guide explores the unique qualities of marble and granite, helping you make an informed decision that complements your lifestyle and design vision.
Unveiling the Allure: Marble's Timeless Beauty
Marble, a metamorphic rock formed from limestone, has captivated hearts for millennia. Renowned for its luxurious aesthetic and cool touch, it offers a sense of grandeur and sophistication to any space.
Marble's Strengths:
Unparalleled Beauty: Marble boasts a vast array of colors and veining patterns, ranging from classic white to dramatic black with captivating swirls and striations. This natural variation makes each piece unique, adding a touch of artistry to your home.
Versatility: Marble can be honed or polished, offering different finishes to suit your design preferences. A honed finish creates a more subtle, textured look, while a polished finish delivers a reflective, luxurious sheen.
Heat Resistance: While not as heat-resistant as granite, marble can withstand moderate heat, making it suitable for countertops in areas away from the cooktop.
Marble's Considerations:
Porosity: Marble is a naturally porous stone, meaning it can absorb liquids and stain easily. Regular sealing and prompt attention to spills are essential to maintain its beauty.
Scratch Resistance: Marble is softer than granite and more prone to scratches and etching from acidic substances like vinegar or citrus juices.
Maintenance: Marble requires more delicate care compared to granite. Using the right cleaning products and coasters is crucial to prevent damage.
A Well-Known Quote on Marble's Elegance:
As renowned Indian architect Shilpa Ranade once said, "Marble possesses a timeless elegance that elevates any space. Its natural veining patterns add a touch of artistry, creating a sense of luxury and sophistication."
The Enduring Strength: Granite's Unwavering Performance
Formed from molten rock, granite is one of the hardest natural stones available. Prized for its durability and practicality, it offers a robust and elegant choice for busy Indian households.
Granite's Strengths:
Durability: Granite boasts exceptional resistance to scratches, chips, and heat, making it ideal for high-traffic areas like kitchens. Hot pans and utensils pose no threat to this resilient stone.
Low Maintenance: Granite is a naturally non-porous stone, meaning it resists staining and requires minimal maintenance. Regular cleaning with a mild detergent is sufficient.
Versatility: Granite comes in a wide spectrum of colors and patterns, from classic black and white to vibrant greens and blues with flecks of gold or copper. This variety allows you to find a granite that complements any design scheme.
Granite's Considerations:
Cost: Exotic granites, quarried from locations around the world, can be more expensive than commonly available varieties.
Weight: Granite is a heavy stone, which can be a factor during installation, particularly for larger countertops.
Coolness: Compared to marble's cool touch, granite feels slightly cooler to the skin.
The Ideal Choice: It All Comes Down to You
While both marble and granite offer timeless beauty, the perfect choice for your Indian home depends on your lifestyle and design priorities.
Beyond the Basics: Exploring Exotic Options
Did you know? A recent study by the Indian Institute of Architects (IIA) found that nearly 70% of homeowners renovating their kitchens are looking for unique and premium materials.
0 notes
Text
Keeping Your Hardwood Floors Sparkling: A Guide to Cleaning and Care
Hardwood floors elevate the beauty and value of any home. But their elegance comes with a price tag: proper care and cleaning. While the process might seem daunting, with the right techniques, you can maintain your hardwood floors for years to come. This guide will equip you with the knowledge and steps to keep your hardwood floors looking their best.
Understanding Your Finish: Oil vs. Polyurethane
The first step to how to clean hardwood floors effectively is understanding the type of finish they have. Here's a quick breakdown of the two most common finishes:
Oil Finish: These floors have a warm, natural look and require a bit more maintenance. Oil penetrates the wood, creating a protective layer. However, it can dry out over time and needs to be reapplied periodically.
Polyurethane Finish: This is a more common finish, creating a durable, glossy or satin protective layer on the wood surface. Polyurethane finishes are generally easier to maintain than oil finishes.
Always check your manufacturer's recommendations for specific cleaning instructions tailored to your floor's finish.
The Cleaning Arsenal: Must-Have Tools
Before diving into cleaning techniques, gather the necessary tools:
Microfiber mop: These are gentle on wood floors and trap dust and dirt effectively.
Vacuum cleaner with a hard-floor attachment: Use this to remove loose dirt and debris regularly.
Bucket: Fill it with warm water for mopping.
Soft cloths or sponges: These are for applying cleaning solutions and drying floors.
Natural bristle broom: Use this for occasional sweeping of larger debris.
Avoid harsh chemicals, abrasive cleaners, or sponges, as they can damage the wood's finish.
The Cleaning Routine: Daily, Weekly, and Deep Cleaning
Here's a breakdown of your cleaning routine for beautiful hardwood floors:
Daily Maintenance: Use a microfiber mop to remove dust and loose particles. This prevents dirt build-up that can scratch the floor.
Weekly Cleaning: Vacuum your floors with the hard-floor attachment. This removes dust, pet hair, and other debris embedded in the floor's grain.
Deep Cleaning (Every 1-2 Months): This tackles tougher grime and restores the floor's shine. Here's how:
Prepare your cleaning solution:
For oil-finished floors: Mix a few drops of gentle dish soap or a manufacturer-recommended oil soap into a bucket of warm water.
For polyurethane-finished floors: Use a solution of one part white vinegar to four parts water.
Mop the floor: Dip your microfiber mop into the solution, wring it out thoroughly so it's damp, not soaking. Mop in sections, following the wood grain.
Rinse (optional): For polyurethane finishes, you can rinse the floor with clean water to remove any cleaning solution residue.
Dry thoroughly: Use a clean, dry microfiber cloth or mop to ensure no water remains on the floor's surface. Standing water can damage hardwood floors.
Extra TLC: Buffing and Spot Cleaning
Buffing (Optional): For an extra shine on polyurethane-finished floors, buff occasionally with a soft cloth using a manufacturer-approved floor polish.
Spot Cleaning: For spills or sticky messes, blot up the excess immediately with a clean, absorbent cloth. Then, use a damp microfiber cloth with a mild cleaning solution to clean the spot. Dry thoroughly afterwards.
Preventing Damage: Prolonging the Life of Your Floors
Here are some lifestyle habits that will help keep your hardwood floors looking their best:
Place mats and rugs: Use them in high-traffic areas to trap dirt and prevent scratches.
Doormats: Place doormats outside and inside entryways to capture dirt and moisture from shoes.
Furniture pads: Attach felt pads to the bottom of furniture legs to prevent scratches.
Trim your pet's nails: Long nails can scratch the floor's surface.
Minimize high heels: Wearing high heels can cause dents and scratches. Opt for slippers or soft-soled shoes indoors.
Control humidity: Maintain a humidity level between 30% and 50% to prevent wood floorboards from warping or shrinking.
By following these steps and adopting preventative measures, you can ensure your hardwood floors stay beautiful and add value to your home for years to come. Remember, consistency is key! Regular cleaning and proper care will keep your hardwood floors gleaming for generations to enjoy.
1 note
·
View note
Text
How to Clean and Maintain Your Sneakers: Expert Tips

In today's fast-paced world, sneakers have become more than just a functional piece of footwear; they're a fashion statement. Whether you're rocking classic white trainers or stylish black sneakers, keeping them clean and well-maintained is essential to preserve their style and longevity. To help you keep your favorite kicks looking fresh, we've compiled expert tips on how to clean and maintain your sneakers.
Know Your Sneaker Material
Before diving into the cleaning process, it's crucial to know what type of material your sneakers are made of. Different materials require different cleaning methods to avoid damage. For example, canvas sneakers are best cleaned with gentle soap and water, while leather sneakers may require a specialized cleaner and conditioner. Check the manufacturer's instructions or research online to determine the appropriate cleaning method for your specific sneaker material.
Regular Maintenance Routine
To keep your sneakers in top condition, establish a regular maintenance routine. This includes simple tasks like removing dirt and debris after each wear and storing them properly when not in use. Invest in a shoe brush or soft-bristled toothbrush to gently scrub away surface dirt from your sneakers. Additionally, use a sneaker protector spray to repel water and prevent stains, especially for light-colored or women's sneakers.
Hand Washing vs. Machine Washing
When it comes to cleaning your sneakers, you have the option of hand washing or machine washing. Hand washing is often preferred for delicate materials or when dealing with tough stains. Fill a basin with lukewarm water and a mild detergent, then use a soft brush or cloth to gently scrub the sneakers. Avoid using harsh chemicals or abrasive cleaners, as they can damage the material.
If you choose to machine wash your sneakers, place them in a mesh laundry bag to protect them from getting banged around. Use a gentle cycle with cold water and a small amount of mild detergent. Avoid using bleach or fabric softener, as they can cause discoloration and damage to the shoes. Once the cycle is complete, air dry your sneakers away from direct heat sources to prevent warping or shrinkage.
Focus on Problem Areas
Pay special attention to areas of your sneakers that are prone to dirt and stains, such as the soles, laces, and midsoles. For white sneakers, a mixture of baking soda and water can help brighten yellowed soles, while a toothbrush dipped in vinegar can remove stubborn stains from rubber midsoles. Replace worn-out laces with fresh ones to instantly refresh the look of your sneakers.
Drying and Storage
After cleaning, it's essential to properly dry and store your sneakers to prevent mold and mildew growth. Remove the insoles and allow them to air dry separately to ensure thorough drying. Stuff your sneakers with newspaper or shoe trees to help them retain their shape while drying. Avoid placing wet sneakers directly in the sun or using a dryer, as excessive heat can cause damage to the materials.
Once your sneakers are completely dry, store them in a cool, dry place away from direct sunlight. Consider investing in a shoe rack or organizer to keep your sneakers organized and easily accessible. Avoid storing sneakers in plastic bags or airtight containers, as they can trap moisture and lead to unpleasant odors.
Seek Professional Help
If your sneakers are particularly dirty or stained, don't hesitate to seek professional help from a shoe repair shop or sneaker cleaning service. These experts have the knowledge and tools to tackle tough stains and restore your sneakers to their former glory. While professional cleaning may come at a cost, it's often worth it to extend the life of your favorite kicks.
In conclusion, proper cleaning and maintenance are essential for preserving the style and durability of your sneakers. By following these expert tips, you can keep your sneakers looking fresh and stylish for years to come. So go ahead, rock those black sneakers or women's trainers with confidence, knowing that you have the knowledge to keep them in top condition.
0 notes
Text
The Complete Guide to Keeping Your Pup’s Gear Clean and Fresh
Keeping your dog’s leash and harness clean is an essential part of responsible pet care. A clean harness and leash not only make your pet look good but also prevent the buildup of dirt, bacteria, and funky smells. This comprehensive guide will show you how to properly wash and care for your dog’s gear so it stays clean and fresh and lasts longer.
Why is Cleaning Your Dog’s Harness Important?
Hygiene and Health Benefits
Regularly cleaning your dog’s harness and leash removes dirt, bacteria, and allergens, reducing the risk of skin irritation and ensuring your pup stays healthy and content.
Prolonging the Lifespan of the Gear
Proper care and maintenance can extend the lifespan of your dog’s harness and leash, saving you money in the long run.
Removing Dirt, Bacteria, and Odors
Types of Materials and Their Care
It’s important to check the manufacturer’s instructions first, as some harnesses may have specific care requirements.
Nylon
Nylon harnesses and leashes are durable and easy to clean. To maintain their quality, hand washing with a mild detergent is recommended.
Leather
Leather accessories are rather more delicate. To keep leather soft and supple, use a leather cleaner and conditioner. Avoid submerging leather in water to prevent cracking and damage. Always let the leather air dry completely before conditioning it with a dog-safe leather cream to maintain its texture and appearance.
Cotton
Cotton harnesses and leashes can be machine-washed on a gentle cycle with cold water. However, to avoid shrinkage, air drying is best.
Mesh
Mesh harnesses are lightweight and breathable but can be delicate. Hand wash with a gentle detergent and air dry to maintain their integrity.
Step-by-Step Washing Guide
Supplies Needed
Lukewarm water
Mild detergent (such as mild liquid dish soap, pet-safe detergent, or dog-specific shampoo)
Tools Required
Soft-bristled brush
Bowl
1. Preparing the Harness and Leash:
Begin by shaking off any loose dirt, pet hair, or debris from the leash or harness. If necessary, use a soft brush to remove any dried-on particles gently. Then, remove any attachments and hardware from the harness and leash before washing.
2. Hand Washing vs. Machine Washing:
Hand Washing: Fill a bowl with lukewarm water and add a small amount of mild detergent. Allow the leash or harness to soak in the soap for at least 10 minutes or until the water has cooled. Use the soft-bristled brush to gently scrub the harness and leash to work through any stubborn stains. Thoroughly rinse the item under running water to remove all remaining soap and suds. Gently squeeze out excess water and allow the leash or harness to air dry completely before use.
Machine Washing: Use a gentle cycle with cold water and mild detergent. Avoid using scented detergents, fabric softener, or bleach, as these can be harsh on the gear and might be irritating to your pet. It’s also a good idea to place the gear in a mesh laundry bag or pillowcase to prevent tangling and protect it during the washing cycle.
3. Drying Methods:
Avoid using a dryer, as high heat can damage the materials. Instead, hang the harness and leash in a well-ventilated area or lay them flat to air dry.
Additional Tips for Washing Dog Accessories
Removing Stubborn Stains: For tough stains, pre-treat the area with a stain remover before washing. Did you know that dish soap can effectively remove grease stains on dog items?
Dealing with Mold and Mildew: If you notice mold or mildew, soak the harness and leash in a solution of water and white vinegar before washing.
Scented vs. Unscented Detergents: Opt for unscented detergents to avoid potential skin irritations for sensitive pups. For items that have prolonged contact with your pet, use a gentle, pet-safe detergent or dog-specific shampoo.
To Protect Your Washing Machine: Use your pet’s removable dog bed covers or blankets to wrap their leashes and harnesses.
Wash your dog’s collar along with the leash or harness for a comprehensive clean.
Ensuring your dog's leash and harness are kept clean is a key aspect of being a responsible pet owner. This article will guide you on how to wash your dog's harness effectively. By following these steps, you'll ensure your furry friend's gear remains clean, fresh, and comfortable for countless adventures ahead.

FAQ
1. Can you wash a dog harness in the washing machine?
Yes, many dog harnesses are designed to be machine washable, making the cleaning process much easier. However, it’s important to check the manufacturer’s instructions first, as some harnesses may have specific care requirements.
2. How do you clean a smelly dog harness?
To clean a smelly dog harness, you can either machine wash it (if the manufacturer’s instructions allow) or hand wash it using a mild, pet-safe detergent. Be sure to clean all the nooks and crannies thoroughly, and rinse the harness well to remove any soap residue. You can also try using a mixture of water and white vinegar to help neutralize odors.
3. How often should you wash your dog’s harness?
The frequency of washing your dog’s harness will depend on the level of dirt, debris, and odor it accumulates. As a general rule, it’s a good idea to wash the harness every few weeks or monthly, depending on your dog’s activity level and the environments they frequent.
4. Are dog vests washable?
Yes, many cute dog harness vests are designed to be machine washable, just like dog harnesses. Again, it’s important to check the manufacturer’s instructions and use a mild detergent and gentle cycle.
1 note
·
View note
Text
Expert Fabric Sofa Cleaning Secrets for Sunshine Coast Homeowners
A sofa is not just a piece of furniture; it's a focal point in your living space, providing comfort and style. However, with regular use, fabric sofas can accumulate dirt, stains, and allergens, affecting both their appearance and longevity. In this article, we'll delve into expert fabric sofa cleaning secrets for Sunshine Coast homeowners.

Importance of Regular Sofa Cleaning
Regular sofa cleaning is essential for maintaining a healthy and aesthetically pleasing living environment. Not only does it enhance the appearance of your furniture, but it also eliminates allergens, dust mites, and bacteria that can accumulate over time. Additionally, proper maintenance can extend the lifespan of your fabric sofa, saving you money in the long run.
Understanding Fabric Types
Fabric sofas come in a variety of materials, each requiring specific care and cleaning techniques. Before embarking on the cleaning process, it's crucial to identify the type of fabric used in your sofa. Common fabric types include linen, cotton, polyester, and leather, each with its own set of characteristics and cleaning requirements.
Preparing for Cleaning
Before diving into the cleaning process, gather all necessary supplies, including a vacuum cleaner with upholstery attachments, mild detergent, white vinegar, and a soft-bristled brush. It's also advisable to perform a pre-test on a small, inconspicuous area of your sofa to ensure that the cleaning solution doesn't cause any damage.
Step-by-Step Cleaning Process
Vacuuming: Begin by thoroughly vacuuming the entire surface of your sofa to remove loose dirt, dust, and debris.
Stain removal: Treat any stains or spots on your sofa using a mild detergent or a mixture of white vinegar and water. Blot the stain gently with a clean cloth, being careful not to rub it further into the fabric.
Deep cleaning: For a deeper clean, use a fabric-specific upholstery cleaner or create your own solution using mild detergent and warm water. Test the solution on a small area before applying it to the entire sofa. Using a soft-bristled brush, gently scrub the fabric in a circular motion, then wipe away excess moisture with a clean, damp cloth.
Drying: Allow your sofa to air dry completely before placing any cushions or throws back onto it. Avoid using heat sources such as hair dryers, as they can damage the fabric.
Tips for Maintenance
To keep your fabric sofa looking its best, follow these maintenance tips:
Regular vacuuming: Remove surface dirt and debris at least once a week to prevent buildup.
Addressing stains promptly: Deal with spills and stains immediately to prevent them from setting into the fabric.
Professional cleaning: Consider hiring a professional upholstery cleaner annually for a thorough deep clean and stain removal.
DIY (Do it Yourself) vs. Professional Cleaning
While DIY (Do it Yourself) cleaning methods can be effective for routine maintenance, there are certain advantages to hiring a professional upholstery cleaner. Professionals have access to specialized equipment and cleaning solutions, ensuring a deeper clean and more thorough stain removal. Additionally, professional cleaning can prolong the lifespan of your sofa and maintain its appearance over time.
Conclusion
In conclusion, regular cleaning and maintenance are essential for preserving the beauty and longevity of your fabric sofa. By understanding your sofa's fabric type and following expert cleaning techniques, you can keep it looking fresh and inviting for years to come.
#fabric sofa cleaning service#best sofa cleaners near me#cheap cleaning service#Sunshine Coast#professional cleaners
0 notes
Text
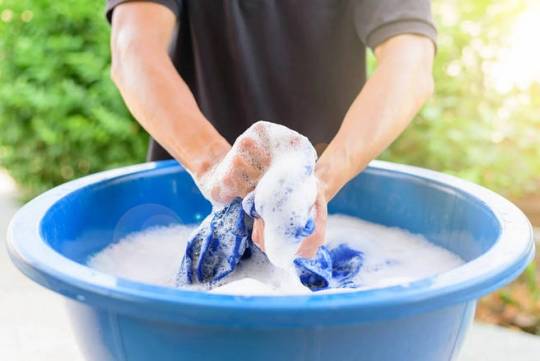
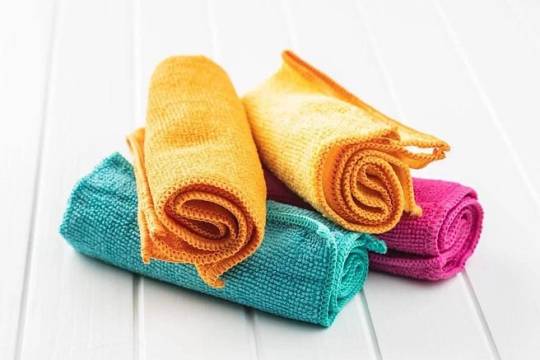
Properly Wash Microfiber Cloths & Towels: An Essential How-To Guide
Microfiber cloths & towels have revolutionized cleaning practices worldwide. Comprising fine synthetic fibers, these cloths are celebrated for their ability to attract and hold dust, dirt, and liquid. Unlike traditional cleaning cloths, microfiber traps particles, ensuring a cleaner, more efficient wipe-down. Given their widespread use in both domestic and professional settings, understanding the proper care and maintenance of microfiber cloths is essential. This article delves into the best practices for washing microfiber cloths and towels, aiming to extend their lifespan and maintain their remarkable cleaning capabilities.
Importance of Proper Washing Techniques
The longevity and effectiveness of microfiber cloths heavily rely on how they are washed and maintained. Incorrect washing techniques can damage the fibers, thereby reducing their efficiency and lifespan. Proper cleaning not only preserves the microfibers but also ensures that they continue to perform at their best. From choosing the right washing method to selecting suitable detergents, this guide offers detailed instructions to ensure that your microfiber cloths remain a dependable cleaning tool.
Preparing Microfiber Cloths for Washing
Hand Washing vs. Machine Washing
Deciding between hand washing and machine washing depends on the condition of the cloths. Hand washing is suitable for lightly soiled cloths and can be gentler on the fibers. In contrast, machine washing is more convenient for heavily soiled or stained cloths, offering a deeper clean.
Hand Washing Microfiber Cloths and Towels
Hand washing microfiber cloths is a simple yet effective way to clean them. Follow these steps:
Begin by shaking the cloth to release any loose dirt.
Fill a basin with cool or warm water. Hot water can damage the fibers, so avoid using it.
Submerge the microfiber cloths in the water. Gently agitate them by hand, focusing on heavily stained areas.
Let the cloths soak for about 15–20 minutes.
After soaking, rinse the cloths thoroughly under running water. Wring out excess water gently, being careful not to stretch the fibers.
Hand washing is ideal for maintaining the integrity of the microfibers, ensuring they continue to effectively trap dirt and debris.
Machine Washing Microfiber Cloths
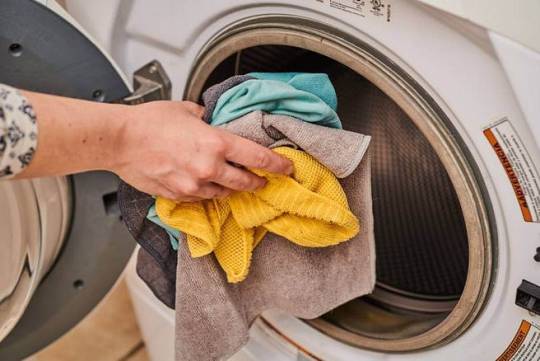
Machine washing microfiber cloths requires a gentle approach to preserve their cleaning efficacy:
Before washing, shake the cloths to remove excess dirt.
Use cold or warm water. Hot water can damage the microfibers.
Opt for a gentle, fragrance-free detergent. Avoid using fabric softeners or additives that can coat and clog the fibers.
If the cloths have a persistent odor, adding a tablespoon of white vinegar can help neutralize it.
Allow the machine to agitate the cloths for half of the cycle, then pause for a 15–20 minute soak.
Resume and complete the wash cycle.
These steps ensure that the microfibers are cleaned thoroughly without causing damage.
Temperature Settings and Detergent Choices
The ideal washing temperature for microfiber cloths is below 82 degrees Celsius. A mild, low-suds detergent is recommended. Fabric softeners and bleach should be avoided as they can degrade the microfiber’s cleaning ability.
Wash New Microfiber Towels First
It’s essential to wash new microfiber towels before their first use. Manufacturers often apply a silicone coating during production, which can impede the cloth’s ability to absorb liquids effectively. Washing new towels removes this coating, thus unlocking the full potential of the microfibers.
For the inaugural wash, it’s recommended to use a combination of white vinegar and laundry detergent. Add half a cup of white vinegar to the wash water, along with about half the usual amount of laundry detergent. The vinegar plays a crucial role in this process; it helps set the colors, ensuring they remain vibrant and fade less over time. Additionally, vinegar aids in removing any residual substances left from the manufacturing process, such as lint from the weaving.
This initial wash primes the towels for optimal performance. The removal of the silicone coating not only enhances the towels’ absorbency but also ensures that they are ready to tackle cleaning tasks more effectively from their very first use.
How Often to Wash Microfiber Towels
Microfiber cloths and towels should be washed frequently to maintain their cleanliness and effectiveness. If you’re using these towels for light tasks like dusting, they can be used several times before needing a wash. However, for heavier cleaning, such as in kitchens or bathrooms, it’s best to wash them after each use to remove dirt and bacteria.
For personal care or gym use, washing after every use is recommended to maintain hygiene. Consistent washing prevents the buildup of bacteria and odors. Remember to use a gentle detergent and wash according to the guidelines provided earlier in this article. Regular washing not only ensures cleanliness but also maintains the high absorbency and cleaning efficiency of your microfiber towels.
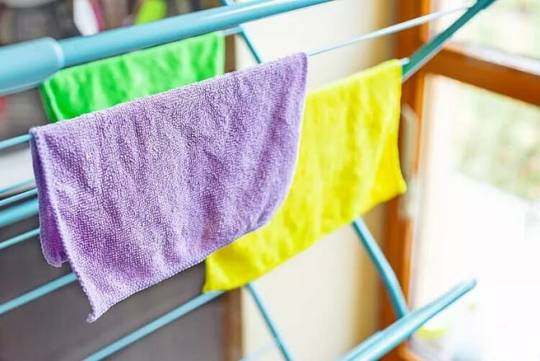
Drying Microfiber Cloths: Air-Drying and Machine Drying
Proper drying of microfiber cloths is as crucial as washing them correctly. There are two effective methods: air-drying and machine drying.
Air-Drying:
After washing, shake out the cloths to remove any excess water.
Hang the cloths in direct sunlight if possible. Sunlight has natural disinfecting properties.
If drying indoors, choose an area with good air circulation.
Machine Drying:
Dry microfiber towels separately from other items.
Before and after drying microfiber cloths, clean the dryer’s lint trap to avoid lint transfer.
Do not use dryer sheets or balls, as they can leave a residue on the microfibers.
Use a low heat or air-dry cycle to prevent damaging the fibers.
Both methods ensure that the cloths dry efficiently without compromising their structure or cleaning ability.
Maintenance Tips for Longevity of Microfiber Cloths
Proper maintenance of microfiber cloths is crucial for maximizing their efficiency and lifespan. Here are essential tips:
After each use, shake the cloth to remove loose debris and rinse it in warm water. This practice helps to dislodge dirt and maintain the cloth’s cleaning effectiveness.
Microfiber is most effective when used with water. If you must use cleaning solutions, opt for mild, non-abrasive options. Harsh chemicals can damage the microfibers and reduce their cleaning ability.
Store microfiber cloths separately from other cleaning materials to avoid cross-contamination and the transfer of lint or debris.
Clean your microfiber cloths regularly to prevent the buildup of dirt and bacteria. Regular cleaning also ensures that the cloths maintain their absorbency and cleaning efficiency.
Do not iron or expose microfiber cloths to high heat sources. Excessive heat can damage the fibers, leading to a loss of effectiveness.
Regularly inspect your microfiber cloths for signs of wear and tear. Replace them if they become overly worn or lose their effectiveness.
Common Mistakes to Avoid When Washing Microfiber Cloths
Ensuring the durability and functionality of microfiber cloths involves avoiding common washing mistakes:
Washing microfiber cloths with cotton or other lint-producing fabrics can lead to lint accumulation on the microfiber surface, reducing its cleaning capability.
Don’t overload the washing machine. Microfiber cloths expand and absorb more water than cotton, requiring more room to agitate and release trapped dirt.
Avoid using hot water as it can damage the microfibers. Stick to cold or warm water for optimal cleaning without causing harm to the cloths.
Steer clear of harsh detergents, fabric softeners, and bleach. These can coat and clog the microfibers, significantly diminishing their effectiveness.
Avoid high heat in the dryer. High temperatures can melt or damage the fibers. Opt for air-drying or low heat settings.
Always shake out the cloths before washing to remove loose debris. This prevents the redistribution of dirt during the wash cycle.
TIPS & TRICKS FOR WASHING MICROFIBER TOWELS
Knowing how to properly wash microfiber towels will help you keep them in good shape for effective cleaning.
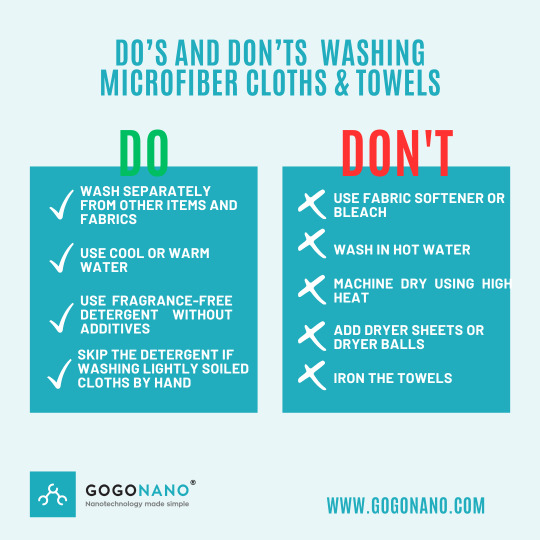
#microfiber cloths#microfiber towel#washing microfiber cloths#washing guide#cleaning guide#tips and tricks
0 notes
Text
Reclaiming Your Space: Mold Remediation Strategies in Broward
Broward County, situated in the tropical climate of South Florida, faces a constant battle against mold. Mold thrives in warm and humid conditions, making Broward an ideal breeding ground. The prevalence of mold poses not only aesthetic concerns but also potential health risks, making it imperative for residents to understand and implement effective mold remediation strategies.

The Climate Conundrum: Mold's Preferred Habitat
Broward County's climate, characterized by high temperatures and humidity, provides an optimal environment for mold growth. Mold spores, which exist naturally in the air, find ideal conditions for colonization in the presence of moisture. The constant battle against mold remediation broward begins with an awareness of the symbiotic relationship between the climate and mold infestations.
Spotting the Intruder: Identifying Mold in Broward Homes
Mold often lurks in hidden corners, making early detection challenging. Recognizing signs such as musty odors, visible mold patches, and indications of water damage is crucial for homeowners in Broward. The high humidity levels in the region make regular checks for condensation on windows, walls, and ceilings essential. Vigilance in inspecting damp-prone areas like basements and bathrooms can aid in identifying mold growth before it becomes a major issue.
Prevention Strategies: Building a Defense Against Mold
Prevention is often more manageable than dealing with a full-blown mold infestation. Broward residents can adopt proactive measures to control indoor humidity through proper ventilation and the use of dehumidifiers. Timely identification and repair of water leaks, no matter how minor, play a critical role in mold prevention. Ensuring proper drainage around the property and employing mold-resistant building materials are additional steps toward maintaining a mold-free environment.
DIY vs. Professional Remediation: Making Informed Choices
When faced with a mold problem, residents need to assess the scale of the infestation before deciding on a course of action. For minor, surface-level mold issues, DIY methods involving common household items such as vinegar and baking soda may suffice. However, larger or hidden infestations often necessitate the expertise of professionals. Broward residents must be aware of local regulations governing mold remediation to ensure safe and compliant removal practices.
Effective Mold Remediation Techniques: Reclaiming Your Space
For smaller mold problems, a combination of white vinegar, baking soda, and diligent cleaning can be effective. It is essential to utilize protective gear, including masks and gloves, to minimize exposure. In areas like Broward, where porous materials are prevalent, proper disposal of contaminated items is crucial to prevent further spread. Professional mold remediation often involves advanced techniques like HEPA filtration and antimicrobial treatments, ensuring a comprehensive approach to eliminating mold.
The Aftermath: Repairing and Safeguarding Against Recurrence
Mold removal is just the beginning; addressing the aftermath involves repairing the damage and implementing measures to prevent future occurrences. After removing mold, identifying and rectifying the source of moisture, whether it be a leak or inadequate ventilation, is paramount. Repairing or replacing damaged materials, such as drywall and insulation, ensures that the environment is no longer conducive to renewed mold growth. A thorough approach to the aftermath is essential for a lasting solution.
Conclusion: A Mold-Free Haven in Broward
Effectively reclaiming your space from mold in Broward demands a comprehensive strategy that considers the unique challenges presented by the region's climate. From understanding the climate-mold relationship to implementing prevention, identification, and removal strategies, residents can take proactive steps toward a mold-free living space. Whether choosing DIY methods or seeking professional assistance, the key lies in informed decisions and prompt, thorough action. Armed with knowledge and effective strategies, Broward residents can reclaim their spaces from the grasp of mold, fostering a healthier and more secure living environment
0 notes
Text
How To Clean a Velvet Fabric Sofa?
Are you the proud owner of a stunning green velvet fabric sofa? Congratulations, you've got yourself a piece of living room furniture that exudes elegance and style! However, keeping that luxurious green velvet sofa looking pristine can be a bit tricky. But fear not, because, in this comprehensive guide, The Royal Family Furniture reveal the secrets to maintaining the allure of your green velvet beauty. So, "How To Clean a Green Velvet Fabric Sofa?" You're about to find out!
1. Velvet Allure: Why Green Velvet Sofas are Trending
Green velvet sofas are having a moment in the world of interior design, and for good reason. They effortlessly blend classic sophistication with a touch of contemporary chic. But before diving into the cleaning process, let's take a moment to appreciate the allure of these exquisite pieces of living room furniture.
2. Gather Your Arsenal: What You'll Need
Cleaning a green velvet fabric sofa requires the right tools and products. Here's what you'll need to get started:
Mild detergent
Distilled water
White vinegar
Soft-bristle brush
Microfiber cloth
Vacuum cleaner with upholstery attachment
Spray bottle
3. The Essential Pre-Cleaning Step
Before you start scrubbing away, there's a crucial pre-cleaning step you should never skip. Dust and debris can accumulate on your green velvet sofa, dulling its luster. Here's what you should do:
Vacuum the sofa with a soft brush attachment to remove loose dirt and dust.
Pay extra attention to crevices and seams.
4. Spot Test: A Must-Do Step
Always perform a spot test before cleaning your green velvet fabric sofa. This ensures that the cleaning solution won't cause any color fading or damage. Here's how to do it:
Choose an inconspicuous spot on your sofa.
Dampen a corner of your microfiber cloth with the cleaning solution.
Gently blot the spot and check for any adverse reactions.
5. Cleaning the Green Velvet: Step by Step
Now that your spot test has given the green light, it's time to tackle the entire sofa. Follow these steps:
Create a cleaning solution by mixing a few drops of mild detergent with distilled water in a spray bottle.
Spritz the solution evenly across the sofa, but don't oversaturate.
Use a soft-bristle brush to gently scrub the velvet in a circular motion.
Wipe away the suds and dirt with a clean, damp microfiber cloth.
For stubborn stains, add a little white vinegar to your cleaning solution and repeat the process.
Allow the sofa to air dry.
6. Dealing with Spills and Stains
Accidents happen, but don't panic if something gets spilled on your green velvet sofa. Here's how to handle common stains:
Liquid Stains (Coffee, Wine, etc.): Blot the stain immediately with a clean cloth. Follow the cleaning steps mentioned above.
Grease and Oil Stains: Sprinkle cornstarch or baking soda on the stain to absorb the oil. After a few hours, brush away the powder and follow the regular cleaning process.
Ink Stains: Dab a bit of rubbing alcohol on a clean cloth and gently blot the stain. Avoid excessive rubbing to prevent further damage.
7. Routine Maintenance: Keep Your Green Velvet Sofa Gorgeous
Maintaining the beauty of your green velvet sofa isn't just about cleaning up spills. It also involves some routine care to keep it looking lush:
Fluff the Cushions: Give your sofa cushions a good fluff regularly to maintain their shape.
Rotate the Cushions: To ensure even wear, rotate and flip the cushions periodically.
Avoid Direct Sunlight: UV rays can fade the vibrant green color of your sofa. Place it away from direct sunlight or use curtains to protect it.
8. Professional Help: When to Call in the Experts
Sometimes, stains or dirt may be too stubborn to handle on your own. In such cases, it's best to call in professional upholstery cleaners. They have the expertise and specialized equipment to tackle even the toughest challenges.
9. Green Velvet Sofa vs. Other Materials: A Quick Comparison
Now that you know how to clean a green velvet fabric sofa, let's briefly compare it to other popular sofa materials like genuine leather and fabric sofas.
Genuine Leather Sofa Recliner: Leather sofas require regular conditioning to prevent drying and cracking. Cleaning is generally straightforward with leather-specific products.
Fabric Sofas: Fabric sofas can vary widely in terms of cleaning requirements, depending on the fabric type. Always check the manufacturer's instructions.
Conclusion
In conclusion, owning a green velvet fabric sofa can bring an air of opulence to your living room. But to maintain its allure, regular cleaning and care are essential. With the right tools, a little patience, and our expert tips, you can keep your green velvet sofa looking as luxurious as the day you brought it home. So, "How To Clean a Green Velvet Fabric Sofa?" You now have the knowledge to do it with confidence! Enjoy the comfort and style of your stunning sofa for years to come.
0 notes