#but since I use MMD in english mode rather than japanese mode I can put descriptive flavour text in the english comments
Explore tagged Tumblr posts
Note
Your 3d artwork is so nice! What software do you use, and how do you get the models? I'm curious and wanna try it out if my computer can handle it
Ah! Thank you so much!! I’m really glad you like what I make, it means a lot ^-^
I use MMD, MikuMikuDance, to make my renders! There’s.. almost definitely other software that might be better to use, but I am a vocalsynth nerd so I latched onto MMD when I was younger and have since learned its idiosyncrasies somewhat. It's supposed to be used for making videos - you can even import Vocaloid .vsq files and get compatible models to automatically lip-sync to the song's lyrics! - but I use it more for generating static images. I work with models rather than drawing because that means the anatomy, design, and so on are always consistent (since I'm using the exact same physical models each time). In terms of what is needed to run MMD, the website LearnMMD should have that information alongside all the download links. But, since MMD as a program has been around since something like 2008, I don't think it's quite as demanding on computers as you might think, especially if you don't use tons of effects or lots of high-poly models in the same project!
When it comes to finding models, MMD can load the .pmd and .pmx formats (.pmx is generally better since it's more recent). There are lots of these models to be found on places like DeviantArt, and they often come in different sorts of "styles", such as Animasa and Tda and Sour - my self-inserts are based on the Tda style. Many pre-existing models from games have also been converted into this format, so it's not all just vocalsynths. You can edit MMD models, such as to put parts together or add collision physics, using the PMX editor; I probably spend more time in the editor (and an outdated version at that) than in the actual animation software, haha!
Here's an example of what the version of PMXe that I use looks like, with Citri's model as an example:
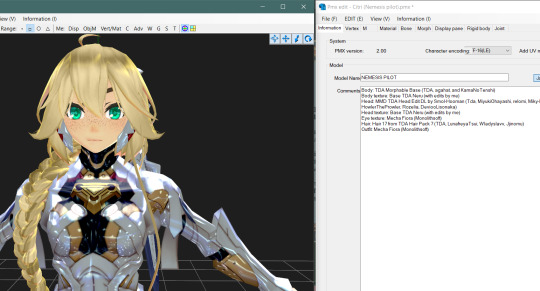
And here's an example of how MMD's interface itself looks while working in it (for me, at least! You can move stuff around, and change interface colours, and make sure your model's display panes are actually all translated unlike mine, and all sorts):

Sorry if this was a bit of a ramble, but, I hope it was alright! Thank you again for the ask!~
#a call from the void#not strictly about selfshipping#self‑insert: vessel of nemesis (citri)#thank you for being my model here haha#I like storing the model's credits in the comments area because then they're directly in the model file itself#but since I use MMD in english mode rather than japanese mode I can put descriptive flavour text in the english comments#and then that's what I'll see when I open the model up (this is also why the model name isn't the same in MMD as in PMXe)#(I like hiding alternate names in the other box. for example my PAFL self-insert's model name is ''echo'' when using MMD in english#but it'd be ''MT001-524'' if you switched MMD to japanese because that's what I wrote for that box#because that's her initial classification in the facility)#out of the inbox#spacerebel‑ships‑in‑spaceships#I very very recently found out that it's not ''TDA'' as in ''tee-dee-ay'' but instead ''Tda'' as in ''tee-da''#which is not something I had realised#MMD itself does come with some models to use by default! which I believe are animasa. the metal miku and sakine meiko ones are good#if you want to use effects you need to download an extra program I think but then you just.. use it from within MMD at the top corner
3 notes
·
View notes
Text
RAY-MMD lighting tips: a translation by ryuu
The following tutorial is an English translation of the original one in Japanese by ngreeed. (WARNING: the website is NSFW)
Let’s get started? If you just landed on this tutorial for advanced MMDers and is wondering what the hell is going on, there are beginner Raycast tutorials in Learn MMD! Also, if you feel like reading more about rendering tips, I suggest taking a look at my other tutorial: advanced MMD rendering tutorial (and why you should care).
Content Index:
Introduction
Lighting: introduction
Lighting: basics
Fog
Other Tips
Final Notes
Introduction to Lighting Content Index:
Directional Light
Rectangle Light
Sphere Light
Point Light
Spot Light
Spot Light IES
Disk Light
Tube Light
Basics of Lighting Content Index:
Ambient
Shadow
Fog
IES
LED
IBL
GIF
Fog Content Index:
Atmospheric Fog
Ground Fog
Volumetric Cube And Sphere
1. INTRODUCTION
This compilation was brought together by the MMD community and contemplates ngreeed’s own experiences with fog and lighting usages. Every picture shown in this translation can be found in the original documentations on Iwara and GitHub.
It was translated from Japanese to English by ryuu with written permission from the author to share it on my blog and add information. The translation was done with the aid of the online translator DeepL and my friends’ help. This tutorial has no intention in replacing the original author’s.
2. LIGHTING: INTRODUCTION
By learning lighting, you’ll have more freedom in directing your videos, but it’s only for those who are confident that they understand how to use Ray-mmd, because it’s a pre-requisite and an additional part of understanding how to use skybox and materials. If you’re unsure about the other two items, start by reading this wiki.
Originally, surface lights in a 3DCG software are characterized by their ability to create soft shadows, but the surface lights used in Ray-MMD are very difficult to handle and don’t provide much benefit, so we recommend using point lights or directional lights.
Translator’s note: for those wondering what lights are available in Raycast, there’s a translation below of the wiki’s list.
2.1 Directional Light
Directional light simulates lighting hitting an object from an infinite distance. The angle of each ray reaching the object is negligible and the rays will always be parallel to each other, so it is also called sunlight.
Directional light doesn’t take into account the coordinates of the light source and won’t affect the lighting effect when placed in any position of the scene. Only the rotation will affect the lighting, because of the nature of directional light requires shading calculations for the whole scene.
Therefore its computational overhead is the largest among all multi-source shadows, and its shadow quality is only suitable for lighting characters at very high quality, which you may use when you want to attach a bone to the main light source.
2.2 Rectangle Light
The light source will shine from a plane towards a fixed range. It’s used to simulate monitors, screens, smartphones, etc.
Since the light source of the area light needs to consider the volume of the light source, the real calculation of its shadow in real time is very difficult to do. It’s recommended to use spot light shadow instead.

2.3 Sphere Light
The light is emitted from the location of the light source to the surrounding area and the volume of the light source is taken into account to illuminate all the objects within the range.
Since the light source of the area light needs to consider the volume of the light source, the real calculation of its shadow in real time is very difficult to do, so the point light source shadow is used instead.
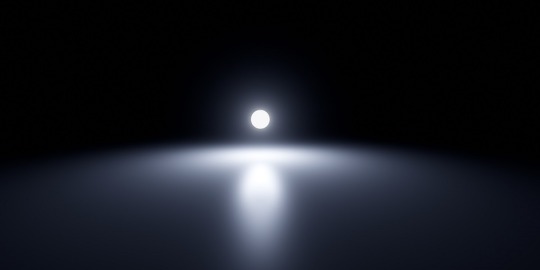
2.4 Point Light
Light source from a point, uniformly emitting light to the surrounding area, all objects within the range of light.
The point light source needs to calculate the shadows of objects within the range and will lead to a large shadow calculation overhead, while its shadow quality isn’t suitable for character lighting.
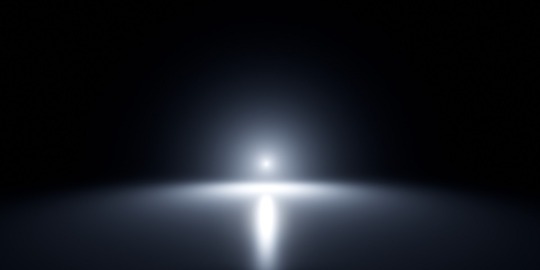
2.5 Spot Light
Spotlight dosn’t take into account the volume of the light source from a point, in a fixed direction to a certain range of cone angle irradiation object. The brightness of the edges of the ball will gradually fade and the angle of the ball can be controlled by the (Angle +/-) morph.
It’s used to simulate lampshade, flashlight and a car high beam. The quality of shadows is the best of all light sources, so it’s very suitable for irradiating the character on the simulation of stage lighting.

2.6 Spot Light IES
Sampling IES textures simultaneously on the behavior of the spotlight.
IES defines the luminous flux of its light at different angles, so that certain areas will be brighter or darker, thus simulating light coming through certain places and shining around the scene.

2.7 Disk Light
The light source will be irradiated from a plane object towards a fixed range. It’s used to simulate light from afar, because the light source of the area light needs to consider the volume of the light source.
The calculation of its shadow in real time is very difficult to do, so use spotlight shadow instead.
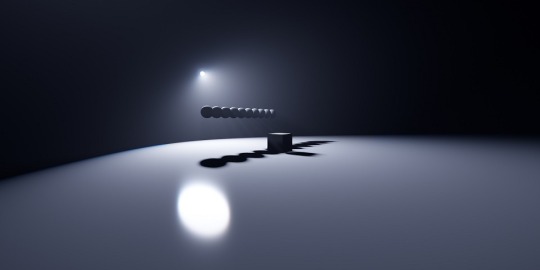
2.8 Tube Light
Uniform illumination of the surrounding objects. It’s used to simulate the light source of a lamp, because the light source of the area light needs to consider its volume
The calculation of its shadow in real time is very difficult to do, so use a point light source shadow instead.

3. LIGHTING: BASICS
Before explaining the parameters, let's start with an explanation of how to use the Lighting folder.
In the Lighting folder of ray-mmd, there are 10 different .pmx's to load into the MMD and their respective folders. Basically, the MME of the light will assign the .pmx's in the Default (Ambient/LED/GIF/IBL) folder of the respective light folder to the light’s .fx. .....lightning.... .fx is assigned to the LightMap tab of MME, and ...fog... .fx is assigned to the FogMap tab of MME.
Translator’s note: a fog .fx can be assigned to LightMap, but it’ll produce only fog.
Once you know this, you can play around with the lights and learn what you can do with them.
This spreadsheet shows the parameters and .fx available for each light, along with a brief explanation. The explanation of the terms is pretty much a translation.
3.1 Ambient
Reference: twitter.com
Assign the .fx in the Default Ambient folder to the LightMap to create a light without reflections or highlights when a material with high parameters such as Specular is lit. It is good to use it when loading multiple lights.
DirectionalLight is located in the Default folder, not in the DefaultAmbient folder.
3.2 Shadow
There are four types of shadow: low, medium, high and very high. If you assign it, when light (or fog) hits the model, it won’t shine on the model beyond it. Rather than increasing the shadow, it’ll stop when the light hits the model. In other words, it isn’t attached to the initial light, the light will be brightened nonetheless.

Default spot light.
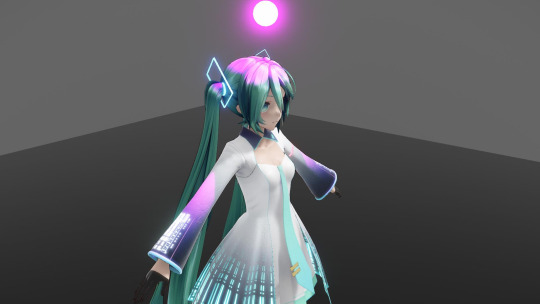
The same spot light with shadow (very high).
3.3 Fog
When fog is loaded, light streaks are created at the location of the light emitted by the light. There are also special parameters called MiePhase and MieDensity, but be aware that other parameters aren’t isolated. The godray may or may not be displayed depending on the angle and position of the camera. So be careful.
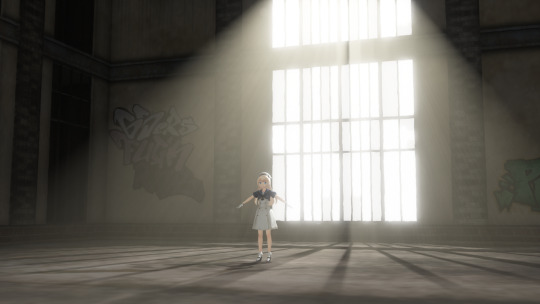
Godray representation using volumetric fog and disk light.
3.4 IES
Reference: unrealengine.com
Simply put, it’s a light which displays the distortion caused by the reflective surface of the lighting fixture, the shape of the bulb, and the lens effect.
It can express a light closer to the one you have at home than a straight spot light like the ones used on stage. You can think of it as basically spot light with just a little distortion in the shape of the light. A point light IES is also spot light.
3.5 LED
Reference: twitter.com
The light source itself is the same as rectangle light, but it can display AVI images or screen images.
In order to display images on the LED light source, load DummyScreen.x in the Extension folder and set the Background (B) in the upper left corner of MMD to ON mode. You can also load the background AVI and change the mode to display any image.
If you just want to display the image, you can set the material of your favorite model to material_screen, but you can use the LED as a light source for the image.
Translator’s note: in practice, it looks like this. In a more straight forward way to explain this, load the LED light and add main.fx to it. Then, load the dummy and select any AVI file or just enable the capture mode. The LED will start capturing the screen and emit light. You can play with the RBG sliders and all. I added a volumetric cube for the dark room effect and Sugiura-san for you to see how the panel behaves. Whenever there’s a change in the captured screen, the light behaves accordingly i.e. a red screen emits red light; a mostly white screen with green details emits white-ish.
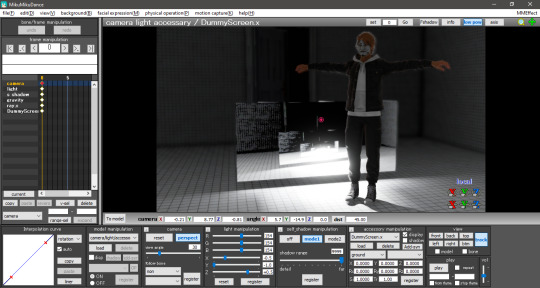
3.6 IBL
This and the GIF sections were writen by the translator, ryuu, as the original author requested information about it.
IBL stands for Image Based Lighting, which is what Raycast does! The image is projected into a sphere and it samples the data to light the objects. All of the skyboxes we use have images in the .dds format for easier rendering.
According to the spreadsheet, the only light capable of using IBL is sphere. To activate it, head to the Default IBL folder instead of the default one that opens when loading light properties. You’ll notice the sphere reacts with weaker lighting, you have to increase the intensity.
The following images are color tests with sphere IBL. The most visible differences are in how RG and RBG react: they produce shades of red and yellow, then white and pink respectively.
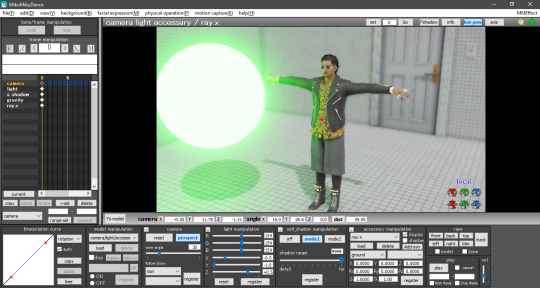
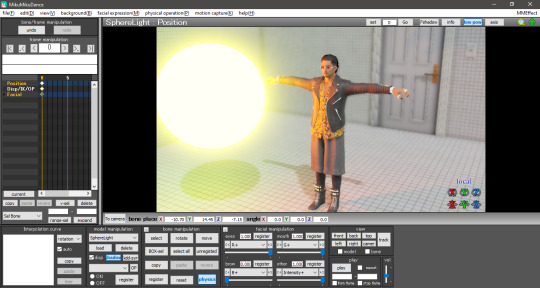

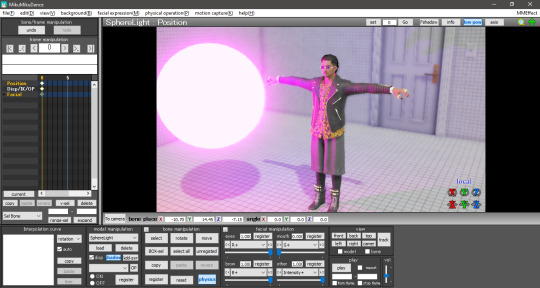

Now with disabled IBL, this making the sphere another common light. The default is very strong compared to IBL, Zhao-san hand’s shadow is even huge on the door behind him.
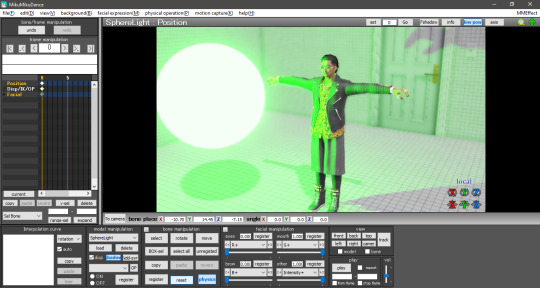

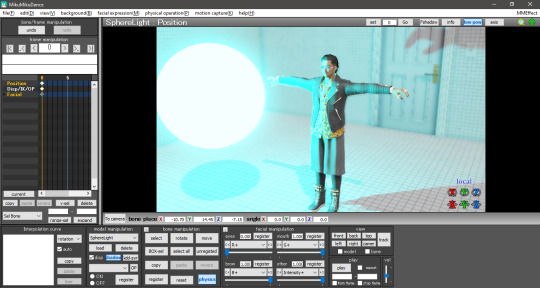
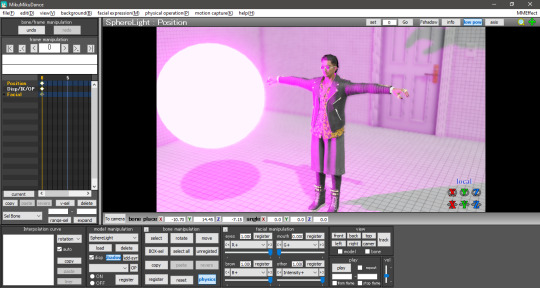
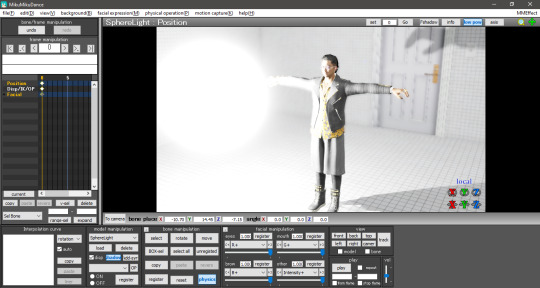
The .dds used was the default one in the Default IBL folder. I haven’t experimented with a different one yet, plus I believe it isn’t any .dds image that’ll work there. If we follow the logic of how custom skydomes are created, a HDR image is needed and you have to “craft” them.
3.7 GIF
A rectangle light can load .gif images and project them on their light, Just load the .fx inside the Default GIF folder to activate it. The default GIF is the following. However, when loaded as light, it doesn’t animate and has some distortions on the edges.

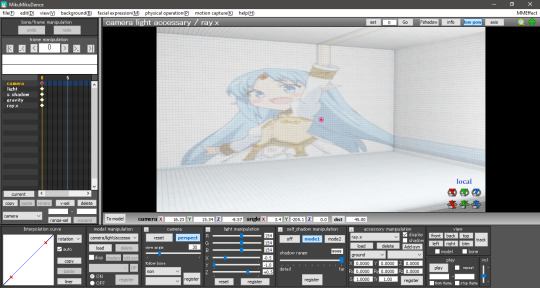
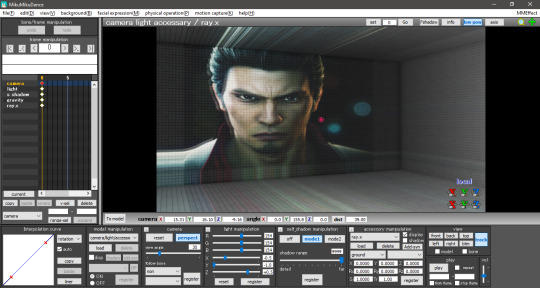
For now, the only advantage I see in using a GIF light is to mimic a projector effect at the cinema. You can use custom images by renaming the default one to rance1 and the new one to rance.
The projection’s size depends on the rectangle’s, so a small rectangle will show a small GIF. Also, keep in mind that the projection is a mirror of the original image.
4. FOG
The fog can be used to create realistic perspective, smoke, and air, and it can also be used in conjunction with fog lights to change the atmosphere. It’s important to note that when the fog is loaded, it’s rarely displayed in Model Edit mode, so be sure to check it in Camera mode. In this case, you may need to tweak the model display order a little to get it to show up.
There are four types of fogs: atmospheric fog, ground fog, volumetric cube and volumetric sphere.
4.1 Atmospheric Fog
If you don't know what you're doing, but want to use a fog, just load this to get a sense of perspective (or rather, fading in the distance). So if you have a stage that extends far into the distance, you can use this to get a certain atmosphere.
Also, only the atmospheric fog has multiple fog maps, which can be found in the AtmosphericFog folder with a godray .fx file. You can apply godray to the lighting (sunlight) in MMD and, by assigning a fog map with ...without sky... .fx, you can disable the fog effect on the skybox.
You can also disable the fog effect for skyboxes by assigning a fog map with ...without sky.... .fx.
The number of parameters is overwhelming and difficult to adjust, but it may be easier if you think that the parameters with Mie are related to the lighting (sunlight) in MMD.

Without fog.

With atmospheric fog and changed density and range values. The farther away the image is, the lower the saturation and lightness become. The perspective is clearer. It’s rare to see much difference, but the atmosphere changes quite a bit with and without the atmospheric fog.
4.2 Ground Fog
When loaded, the fog is displayed based on the ground, and its color and height can be adjusted using morphs. The number of adjustable parameters is small, but if you adjust them, you can use it in the same way as the ground-based atmospheric fog.
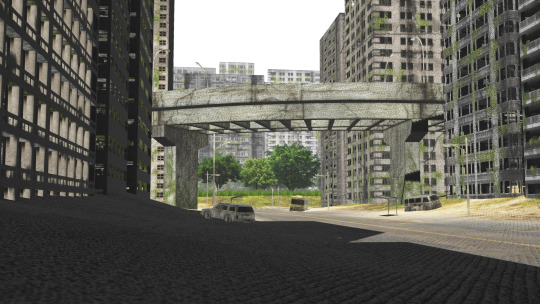
Without ground fog.
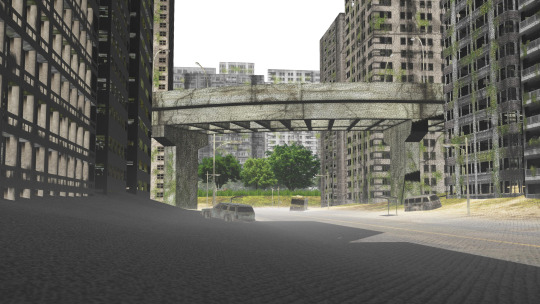
With ground fog.
4.3 Volumetric Cube And Sphere
Unlike the other fogs, these two are only loaded and not applied to the entire room. At first, they only appear small at the foot of the screen and need to be resized to fit the room. By the way, they are basically the same, just round or square. The advantage is that it can be assigned to a limited space only.
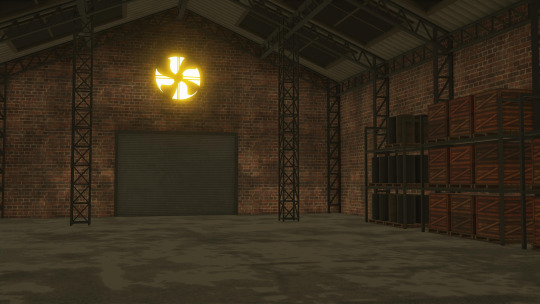
Without light.
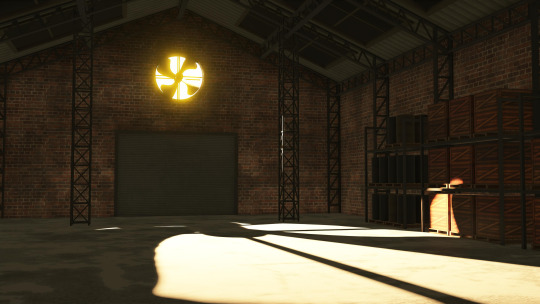
With light.

With light and volumetric fog. It might be good for a dusty atmosphere in a closed room.
5. OTHER TIPS
If you feel that your PC can't handle it, you can lower the shadow to low and get by.
The skybox time of day can be used as a second atmospheric fog which is easy to handle since it is built into the skybox. If you turn off EnvLightMap, Main and MaterialMap, it won't interfere with other skyboxes. It's pretty easy to use, but not for everyone.
Turn on Bokeh (DOF effect of Ray-MMD) and pull the MeasureMode morph of ray-controller to the right to bring the ray.x accessory into focus.
It's a good idea to set the SSAOMap of eyes and face to 0.
6. FINAL NOTES
Stages shown in this tutorial: P.T by G_Wuuuuu, warehouse by hiro K, skyscrapper by 化身バレッタ and abandoned city by NOB.
Models by SEGA.
I tried to keep the translation as faithful as possible to the original documentation. Thank you, ngreeed, for allowing me to share your tutorial with non-Japanese speakers.
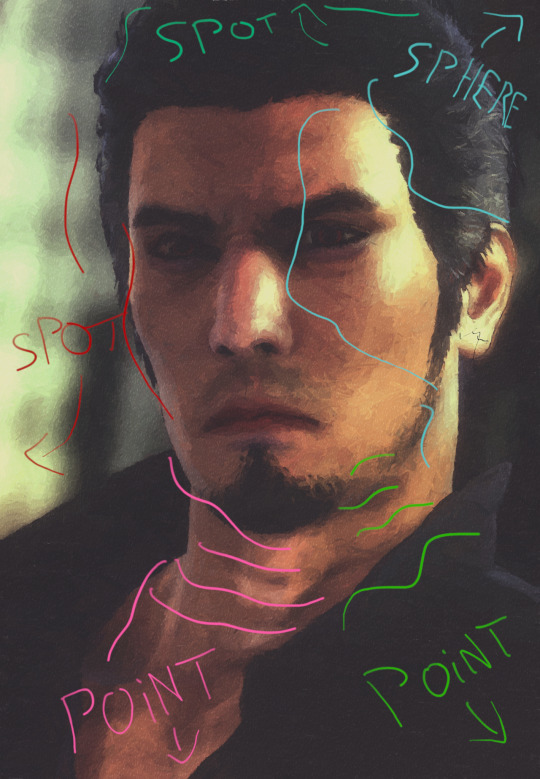
Also, I absorbed many knowledge from this tutorial and rendered a new image using the improved technique. Only the sphere light had fog. The colors were applied after adjusting all the lights in their black and white counterpart. Retouched in GIMP.


36 notes
·
View notes