#boxshape
Explore tagged Tumblr posts
Text
basically the issue witv perspective is that everyrhing is secretly boxes. yet not necessarily boxshaped. which means youre fucked.
42 notes
·
View notes
Text
If I recover I'm curvy and upset. If I'm at my ugw I'm bitter and boxshaped. And if I'm getting to my ugw, I'm not curvy and upset.
0 notes
Link
SPECIFICATIONSTypes of bags: Shoulder & Crossbody BagsStyle: FashionStyle: FashionShape: BoxShape: BoxPlace Of Origin: HE BEI ProvincePlace Of Origin: HE BEI ProvincePlace Of Origin: HE BEI ProvincePattern Type: AlligatorPattern Type: AlligatorOrigin: Mainland ChinaOrigin: Mainland ChinaOccasion: VersatileOccasion
0 notes
Photo
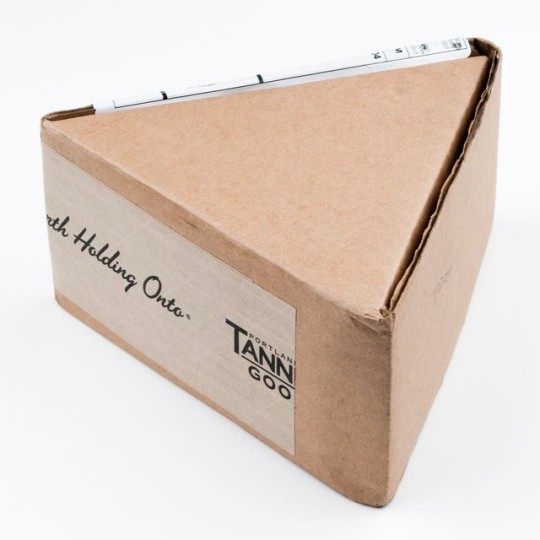
Triangular Box … • 📷© Dominique James 2017 • www.dominiquejames.com www.dominiquejames.net www.tannergoods.com www.mazamastore.com • @tannergoods @shopmazama #tannergoods #mazama #box #mail #postal #postallove #postalservice #postallife #package #packagedesign #packaged #packagereceived #packagereceived #design #designporn #triangle #trianglebox #shape #onlineshopping #onlinestore #onlineboutique #onlineorder #boxdesign #boxshape #cardboardbox #cardboardart #brand #branding #brandingdesign #branddesign (at Vidalia, Georgia)
#postal#tannergoods#trianglebox#onlinestore#brand#onlineboutique#postalservice#packagedesign#brandingdesign#onlineshopping#shape#branding#packaged#branddesign#postallife#designporn#cardboardart#boxshape#packagereceived#triangle#design#box#boxdesign#mazama#postallove#mail#onlineorder#package#cardboardbox
1 note
·
View note
Photo
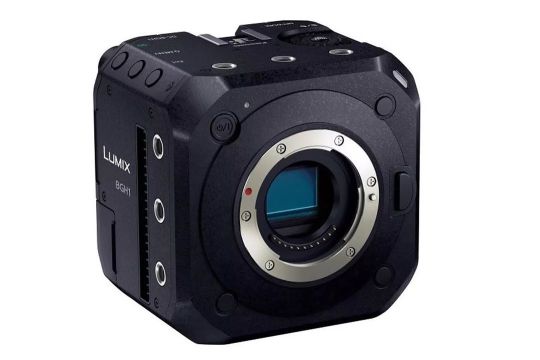
Panasonic announces tiny #boxshaped Micro Four Thirds #video #camera The Lumix BGH1 is #designed for versatile video #production . Panasonic has announced the Lumix BGH1, a unique device that the company describes as a “box-style mirrorless cinema and live event camera.” It has a Micro Four Thirds sensor and a compact cubic design, with one of the camera’s sides almost completely dominated by the lens mount. The BGH1 is designed for versatility, expandability, and ease of installation. Panasonic envisages it being used in #multicamera #situations #involving #drones , #live #streaming , and other #complex #setups . The camera has Power over Ethernet+, meaning it can be powered with the same cable that connects it to a #network , and up to 12 of them can be #controlled at once with the accompanying #lumix Tether for Multicam #app . https://www.instagram.com/p/CGSa_4XAH_Q/?igshid=19soe20ve9nte
#boxshaped#video#camera#designed#production#multicamera#situations#involving#drones#live#streaming#complex#setups#network#controlled#lumix#app
0 notes
Text
I spend a night in a cave and suddenly everything boxshaped weird but important to me
#avon answers#i keep seeing boxy buildings and just thinking#baaaawwwwwkkkksss#everything important was carried in a box underground#and all the underground buildings were boxy
2 notes
·
View notes
Text
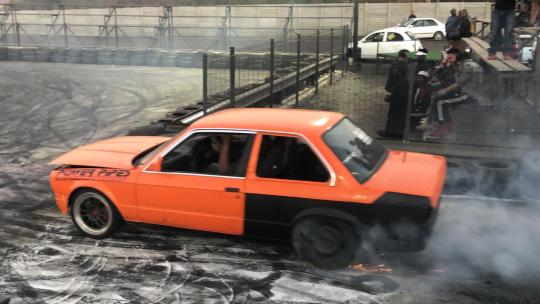



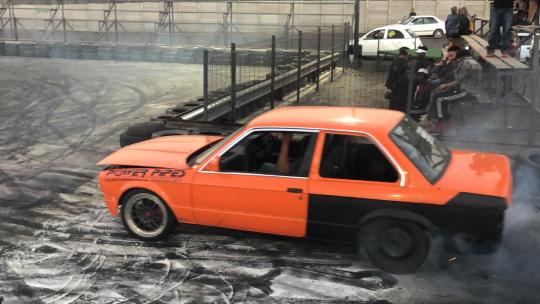



Today at #SpinCity #BMW #Gusheshe #boxshape #Sideways #325
5 notes
·
View notes
Text
Godot Tutorial Part 1: Getting Familiar with the Engine
If you've followed the previous tutorial, you should be looking at an empty Godot editor screen. Perhaps you've fiddled around with it, but this tutorial will assume you haven't. If you have, then it should still be easy enough to follow along.
So, without further ado, let's begin learning how to make a basic project where you can spawn physics-enabled cubes and watch them fall onto the scene.
Setting Up the Scene
Everything in Godot is a node tree, also called a scene. For the purposes of this project, we will be making a simple, flat plane upon which you can drop cubes.
On the left side, in the Scene panel, there should be a series of buttons, one of which is "3D Scene." Click that one to start off. The panel will change to just have one node called "Spatial." This is the root node of the scene, and there are multiple other types, as we'll see later.
Click the plus sign on the top left of the Scene panel to create a new object. In the search bar, type "MeshInstance" and select that corresponding node type. This will create an empty MeshInstance node under Spatial. The Inspector panel on the right side now has a bunch of info on it. What we want to focus on right now is creating a new mesh. Click on the box which says [empty] next to the "Mesh" option, and a dropdown will appear. For the sake of this tutorial, just click "New CubeMesh."

Now, you can see a mesh in the middle of the scene. Very nice! If you want to navigate the 3D scene, hold right-click and then you can move around in freelook using WASD.
If you click on the cube that's now in the Mesh slot, it'll open a sub-panel in which you can edit the properties of the cube. For the sake of this tutorial, just set the X and Z values of Size to 32. This will make the cube much larger and act well as the floor of the scene. Optionally, you can double-click on this node and rename it to "Ground" to keep things more organized.
Next, you'll want to add a child to the MeshInstance node. This can be done with the top-right plus sign with the node selected, by right-clicking and selecting "Add Child Node," or by pressing Ctrl+A with the node selected. This time, you'll want to add a StaticBody node so we can have floor collisions. To the StaticBody, add a CollisionShape node. Setting this up is similar to setting up the MeshInstance, but using "Shape" instead. Set it to a new BoxShape. Then, you can set the size manually through the inspector (note that it sets based on radius, so you want to set it to 16x1x16), or using the little dots that appear in the scene when you select it. If you use the latter, I recommend enabling Snap to make it easier to snap to increments of 1. This is easily done by clicking the magnet on the toolbar above.

Next add a Camera to the Spatial node. Cameras are important because they're literally how you view the entire scene. Move the camera towards the edge of the floor, raise it up a bit, and rotate it to look at the scene. If you need to visualize your results, click the Preview button on the top-left of the viewport.
The last thing you'll want to do is set up some basic lighting. Add a DirectionalLight node to the Spatial node. Rotate it so that it's facing the scene. You can use the widget that appears when you select it, or set the rotation in the Inspector under Spatial->Rotation Degrees. I recommend a rotation of about -60, -45, 0. If you'd like shadows, enable them under Light->Shadow->Enabled.
Save this scene by pressing Ctrl+S or under Scene->Save Scene. Call it whatever you'd like. I called it TestScene.
Optional: Creating a Ground Material
To make a material, you'll need some matching textures. Each texture is optional, but generally, the more you can use, the better your results will be. I like using ambientcg.com if I want good, realistic, entirely free textures. For the ground, I'm using this grass texture, but you can use whatever texture you'd like.
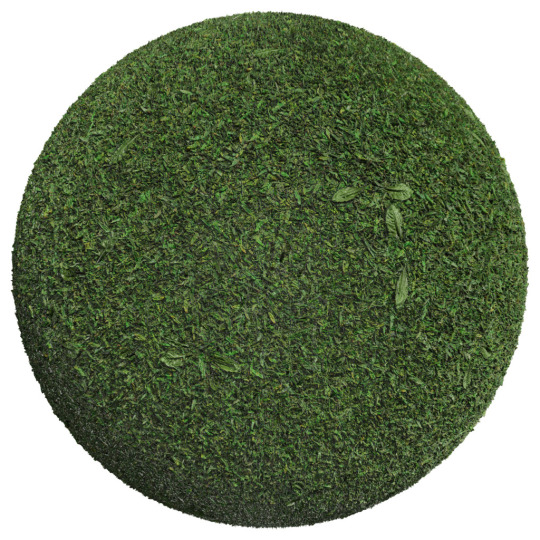
For the purposes of this project, you probably don't want anything bigger than 2K. Download JPG if you want slightly lower quality at lower sizes, and PNG if you want to maximize quality. I'm using 2K-JPG.
Once you've downloaded the zip file with all the textures, make a folder in your project called "textures" and extract the Color, NormalGL, Roughness, and AmbientOcclusion maps into that folder. Note that Godot uses the OS's file system for assets, so you don't have to deal with clunky manual import processes. You can see these textures in-engine with the FileSystem panel.
Select the ground mesh and, in the Material slot, add a new SpatialMaterial. Click on the newly created material to start editing it. Drag the Color texture into the Albedo Texture slot, the Roughness texture into the Roughness Texture slot, and under Normal and Ambient Occlusion, click "Enabled" and add their corresponding textures. The material will look too stretched-out and messy, so go to UV 1 and set the X and Y scale values to 8. Now you'll have a nice looking, grassy ground.
Creating the Physics Cube
Now that we have our basic scene set up, it's time to set up our spawnable object. Create a new scene by clicking the plus sign on top of the scene viewport, under Scene->New Scene, or by right-clicking in the FileSystem tab and selecting "New Scene..."
For this scene, you'll want to click on "Other Node" and create a new RigidBody node. Add a CollisionShape with a BoxShape in it, and add a MeshInstance with a CubeMesh. Conveniently, the default settings already fit. Save this one too. I saved it as RigidCube.
Optionally, you can add a material to the cube as well. I used this one. Note that this doesn't have an AmbientOcclusion texture, but does have a Metallic one. This goes into the Metalic Texture slot, and, in order to work properly, needs the Metallic setting to be at 1. All the other setup is essentially the same as the ground material.
And with that, the physics cube is all set up.
Adding Interactability
The first thing you need to do to get things interactable is to add a way for the engine to tell when you've pressed a button. Go to Project->Project Settings and it'll open up the project settings window. There's a lot of important stuff in here (like the ability to enable MSAA under General->Rendering->Quality), but the stuff we want to work with right now is under the "Input Map" tab.

There are a lot of default inputs here, but for the sake of teaching how to do it, I'm going to show how to add your own. Simply type an action name in the top text bar and click "Add" or press Enter. Call this "spawn_cube." On the new input which has been added, click the plus sign, click on "Physical Key," and then press Space on your keyboard and click "Ok."

Now, close that menu and return to the main scene with the ground. In the Filesystem panel, add a new folder called "scripts." Select the Spatial node and there will be a little button that appears in the top-right to add a script. Click that to create a new script and attach it to your object.

Set the path in the menu that opens to "res://scripts/SpawnCube.gd" and click "Create."

This will automatically open the Script editor, where you can write your script. The script we will make is the following:

Some of this will be there by default, and there will be an extra function called _ready() which executes when the script is started. The purpose of each line is as follows:
extends Spatial
This indicates that the script will be running on a Spatial object. Note that any object that can have a 3D position is a Spatial object, so this script could run on a MeshInstance, Camera, RigidBody, etc.
var rigid_cube = preload("res://RigidCube.tscn")
This tells the engine to, as soon as it loads this script, load the RigidCube scene into a variable. This will be useful later.
func _process(delta):
This function runs every frame the game is running. The delta parameter is how much time, in seconds, one frame takes, which is incredibly useful if you want to make sure something is moving steadily.
if Input.is_action_just_pressed("spawn_cube"):
This simply detects if we've just pressed the button mapped to "spawn_cube," which is currently Space. If you remove the "just," it will detect every frame that Space is held, which is good in some situations, but not this one.
var cube = rigid_cube.instance()
This creates a new node which is a copy of the RigidCube scene. Whenever you want to spawn a new copy of a scene, use instance()
cube.translation = Vector3(rand_range(-16, 16), 8, rand_range(-16, 16))
This sets the 3D position, or translation, of the cube such that it will always spawn at Y 8, but can spawn at any random position on X and Z between -16 and 16. This will spawn things randomly across the entire scene.
add_child(cube)
This adds the cube to the node that's running this script, in this case our Spatial node. If we don't do this, the node won't be added to our scene's tree, and thus will be "orphaned" and won't technically exist for us to see.
Wrapping Up
Now, you can click back into the 3D view. If you click the "Play Scene" button in the top right, it'll open a new window which shows the game from the perspective of the Camera. If you press Space, a new cube will spawn randomly and fall onto the scene. Do this as much as you'd like!

If you want to experiment with more, I encourage figuring out what other properties of the cube you can play with. Be sure to check the documentation for a list of all the different properties available. For example, you could try randomizing the scale and rotation as well.
Thanks for following along! Always open to requests for specific tutorial types, but otherwise next tutorial will be about creating a playable first-person character!
1 note
·
View note
Photo
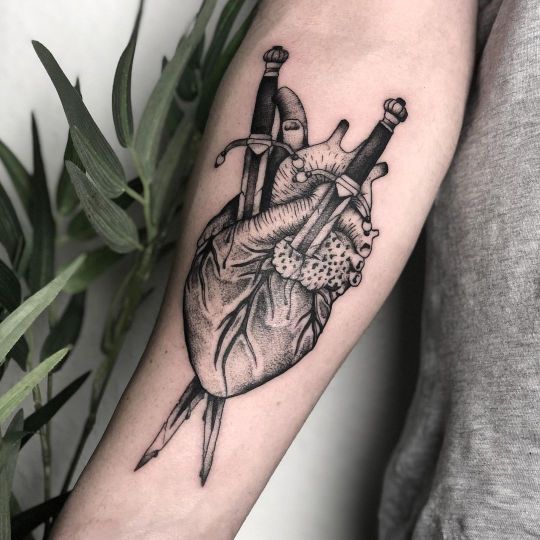
BOXSHAPED HEARTH ❤️🔥⚔️ #tattoo #budapesttattoo #tattooartist #tattoosofintsagram #tattooselection #hungary #blackworkersubmission #blacktoptattooing #blackwork #blackworktattoo #dotwork #linework #blacktattoo #hedonismworkshop #onlyblackart #blxckink #btattooing #darkartists #theartoftattoos #budapest #instatattoos #BLACKTATTOOMAG #TTTpublishing #tttism #Procreate #TAOT #hungariantattoos #hedonismworkshop #flashaddicted Insta: https://www.instagram.com/hedonismworkshop/ Facebook: https://m.facebook.com/hedonismworkshop/ Follow: @blkttt @dsrupt @tttism @na_no_ttt @ttthistory @ttt_ist @hungariantattoos @magyar_tetovalokalkotasai (helyszín: Bloomingmind Tattooshop) https://www.instagram.com/hedonismworkshop/p/CYZJFhIoMuf/?utm_medium=tumblr
#tattoo#budapesttattoo#tattooartist#tattoosofintsagram#tattooselection#hungary#blackworkersubmission#blacktoptattooing#blackwork#blackworktattoo#dotwork#linework#blacktattoo#hedonismworkshop#onlyblackart#blxckink#btattooing#darkartists#theartoftattoos#budapest#instatattoos#blacktattoomag#tttpublishing#tttism#procreate#taot#hungariantattoos#flashaddicted
1 note
·
View note
Photo

December 4 - Claimed by @eruditetrolls
Previously: Dec 1, Dec 2, Dec 3
Today’s adopt can be blamed on Hugo and Rachel for telling me to make one based on Dishonored! A game I’ve personally never played, but they have and nerded about so hey, have this fishy guy.
He’s 25$
Some rules under the cut:
IM if you want to claim
Pay within 48 hours (but if you have a paycheck coming in at date X I can be flixible)!
Name can be changed ofc.
Brimwy comes from the old english word “Brimwlyn” which means ocean surge. Alaena is from the latin word “balæna” which means whale.
The symbol is the middle part of the “Outsider’s Mark” from the game.
I used the “boxshape bodytype”-base for this adopt!
The “light” eye I imagine he is mostly or completely blind in but it’s up to you.
Don’t resell please <3
5$ discount on any 15$+ art-commissions of this character.
#fantroll#fantroll adopt#taimas christmas adopt calendar#base adopt#adoptables#december 4#taimas art
78 notes
·
View notes
Text
now ur cool!!! u became boxshaped like ur tutorial said!!!

oh god help me ive become a box
4K notes
·
View notes
Text
I’M BACK!
I’ve not been on tumblr for like forever but i would like to inform y’all that i am doing good. I had a period in which i felt really good with being full on masculine however that period is over i think. I went to work today with nail polish on and i got a lot of compliments. That felt good :) Next week me and my girlfriend are gonna update my wardrobe for more genderneutral and feminine clothing since my entire closet is filled with boxshaped t-shirts (ugh). Time to get more stylish. Also thinking about bleaching my hair again.
P.S. i am going to Oslo in 2 weeks to compete in my 4th big Quidditch event. The European Games with the Dutch national Quidditch team, the Flying Dutchmen.
P.P.S. if anyone has some advise on make-up i would love to know. I want try to look more feminine. Any help is welcome :)
3 notes
·
View notes
Text
Saint Laurent Women's Monogram Matelasse Rounded Box-Shaped Bag Black
Saint Laurent Women’s Monogram Matelasse Rounded Box-Shaped Bag Black
[wpramazon asin=”B01MT8LKU3″ keyword=”yves saint Laurent”]
View On WordPress
0 notes
Link
Shape can increase consumer engagement considerably. What's your ideal packaging shape? #FORMA #industrialdesign #packagingdesign #packagedesign #structure #prototype #template #shape #boxshape #bagshape
— FORMA Structural Packaging (@FormaPackaging) April 16, 2019
April 17, 2019 at 02:02AM
0 notes
Text
This slideshow requires JavaScript.
* Si … * Nila Dress Pink
NEW! DS’ELLES– LUDMILLA-LUMIERE CATWA HEAD APPLIER
NEW! DS’ELLES-(BOXShape Bento LUDMILLA Head Catwa kimberly
NEW! DS’ELLES LUMIERE Hud Applier Body Maitreya
DS’ELLES – Hud Eyes CATWA – SONGE-
✫✫✫✫✫ * Si ... * Nila Dress Pink NEW! DS’ELLES– LUDMILLA-LUMIERE CATWA HEAD APPLIER NEW! DS’ELLES-(BOXShape Bento LUDMILLA Head Catwa kimberly NEW! DS’ELLES LUMIERE Hud Applier Body Maitreya DS’ELLES – Hud Eyes CATWA – SONGE-
0 notes
