#before water boils but is hot take out a few tablespoons into a little bowl
Explore tagged Tumblr posts
Visit Tumblr Blog
Explore Tumblr blogs with no restrictions, modern design and the best experience.
Last Seen Tumblr Blogs


Fun Fact
Tumblr has been banned in Indonesia for providing people with access to pornographic content.
Text
the “im hanging on by a thread” “im telling you you gotta try apricot jam that thread will turn into a rope” is me with miso paste. my friend casually mentioned one day that her go-to easy vegetarian meal was miso soup and i was like making miso soup isnt easy (or vegetarian) you got to deal with the dashi and its a whole thing. she said well i mean i just use the miso and some tofu. truly a life changing interaction. now whenever i am sad and need easy hearty meal i make a bare bones miso soup…this has perhaps been a pillar holding me up this year
#my sad times miso adjacent soup:#heat some water. put some broc in there#before water boils but is hot take out a few tablespoons into a little bowl#stir in a chunk of white miso paste (not good to boil miso)#once water boils put in some instant noodles.#crack an egg on top if so desired. cook until noodles are done#take off heat. Add in some silken tofu sesame oil whatev toppings and mix in ur miso-water#voila. soup with miso in it (not to be confused w miso soup)#i’d say 10 min tops if ur pot is small (so water boiling faster)#now that my mind has been opened. friends what are ur go to vegetarian meals
19 notes
·
View notes
Text
Lemon Cake
— This looks hard, but I promise it’s just a lot of steps broken down into easy to follow sections, so you have everything prepared in front of you and can assemble the cake and have fun doing it!
Ingredients
8 oz cream cheese, softened (226g) We used one 8 oz package, full fat.
1 ½ sticks unsalted butter, softened (168g) unsalted butter, softened
2 cups sugar (400g)
4 large eggs, room temperature (to save time you can warm them in a bowl of very warm water for 5 min)
3 cups cake flour- see Notes for substitution (342g)
2 teaspoons baking powder (8g)
½ teaspoon baking soda (3g)
½ teaspoon salt (3g)
¾ cup milk (175g)
¼ cup lemon juice approximate amount in one small lemon
¼ cup vegetable oil (we used canola oil) (54g)
1 Tablespoon Lemon Extract (10g)
Zest of two lemons
For the Lemon Curd Filling
¾ cup sugar (150g)
¼ cup cornstarch (30g)
1 cup water (236g)
2 large egg yolks lightly beaten
2 Tablespoons butter (28g)
1 Tablespoon grated lemon zest
4 Tablespoons fresh lemon juice
For the Whipped Cream
1 cup heavy cream (240g)
¼ cup powdered sugar (29g)
1 teaspoon vanilla (4g)
For the Lemon Buttercream
3 sticks unsalted butter, softened (33g)
2 teaspoons lemon extract (adjust amount to your liking) (8g)(Check extract to make sure it still smells lemony.)
Zest of 1 lemon optional
7 ½ cups powdered sugar (863g)
¼ cup milk or more to reach the consistency you like (60g)
*Yellow Coloring Gel is Optional we used a touch of Americolor Lemon Yellow
Instructions
For the Lemon Cake
Preheat the oven to 325 degrees F. Grease and flour three 8 inch pans. We like to line the bottom of our pans with circles of parchment paper.
In a medium bowl, whisk the cake flour, baking powder, baking soda, and salt for 30 seconds and set aside.
In another bowl, combine the milk, oil, lemon juice, lemon extract, and lemon zest. Set aside.**It will take a on a thick, clumpy look- don't worry- the lemon is basically turning the milk into buttermilk.
In the bowl of your mixer, add the butter and cream cheese and mix at medium speed until smooth.
Gradually add the sugar and mix at medium speed for 2-3 minutes.
Add the room temperature eggs one at a time, mixing until the yellow of the yolk disappears.
With the mixer on low speed, alternately add the flour mixture and the milk mixture, beginning and ending with the flour mixture (We did 3 additions of the dry mixture, 2 additions of wet). Slightly increase the mixer speed just until combined.
Divide the batter between the three prepared pans.
Bake at 325 degrees F for 28-30 minutes or until a toothpick inserted into the center comes out clean or with just a few crumbs attached. Let cool for 5-10 minutes in the pans on a wire rack before turning out.
This recipe makes approximately 8 cups of batter. Works for cupcakes also (although there will be little to no dome).
For the Lemon Curd
Combine sugar, cornstarch and water in a saucepan over medium heat. Stir constantly, until mixture thickens and comes to a boil (3-4 minutes). Boil, stirring, for 1 minute more. Remove the pan from the heat.
Spoon about ½ cup of the hot mixture into a small bowl with egg yolks and stir quickly until combined. Continue stirring, while pouring the egg mixture back into the saucepan. Return pan to medium heat and cook, stirring, until the curd is thickened and lemon colored (1-2 min).
Remove from heat and stir in the butter, lemon juice, and lemon zest.-- Let the lemon curd cool, then press plastic wrap onto the surface, this will prevent a skin from forming on the top. Refrigerate.
This will fill a 2-3 layer 8 or 9 inch cake with some leftover. The recipe can be halved.I have refrigerated the lemon curd for a week and it was fine....I'm not sure how long it will keep beyond that. Makes 1 ¼ cups
For the Whipped Cream
Chill the mixing bowl and beaters/ whisk attachment in the freezer for 10 minutes.
Pour the whipping cream, powdered sugar and vanilla into the chilled mixing bowl, begin beating on low speed gradually increasing to medium high speed.
The cream begins to thicken (approx. 1 ½ minutes) and soft peaks form....peaks that slightly bend over. Watch closely as this happens quickly. Do not over beat.
For the Lemon Buttercream
In the bowl of your mixer beat the butter until smooth, blend in the lemon extract and zest.
Add ½ of the powdered sugar and ½ of the milk and mix at medium speed until combined.
Add remaining powdered sugar and gradually add the milk. You can also add a touch of lemon yellow coloring gel at this point if you would like more color.
Mix at medium speed 3 to 5 minutes scraping the sides and bottom of the bowl occasionally. At the end of mixing, slow down the mixer to very low speed for a minute or two, this will help to eliminate air pockets in the buttercream.
Yield: 6 cups - enough to fill and frost a 3 layer 8 inch cake
Can be frozen in an air tight container for at least 3 months. Thaw on countertop and remix
If your buttercream is too thin, add more powdered sugar.
If the consistency is too thick, add a bit more milk, 1 teaspoon at a time.
Assembling the Cake
Place the first cake layer on the cake plate or pedestal.
Pipe a dam of buttercream around the edge of the cake layer, using a piping bag with the tip snipped away (or ziplock bag).
Fill with a layer of lemon curd, followed by a layer of whipped cream. Top with the next cake layer and repeat steps with dam and filling.
Top with the third cake layer and fill any remaining gaps between the cake layers with buttercream.
Crumb coat the cake with a thin layer of buttercream. Chill in the freezer for 15 minutes to firm things up (optional).
Frost the sides of the cake with the final coat of buttercream (I added ridges with a cake comb). Finally, I piped rosettes around the top edge of the cake using a 2D piping tip and filled the top with a thin layer of lemon curd.Chill the cake until within a couple of hours of serving.
16 notes
·
View notes
Text
Breakfast with Cordelia #37 Lemon Meringue Pie


Sul Sul, Gerbits! Today we are going to be making a very special recipe for me. This recipe kind of scared me. But I wanted to make it, to remember my mom. One of her favorite flavors was lemon. And her favorite pie is a Lemon Meringue pie.

And that is what we are going to be making today. We are going to be following the Betty Crocker recipe. The recipe and description will be in the description down below.

The first thing we are going to do is make the pie crust. You can either have a store-bought one or you can make it yourself. Whichever you choose. I like homemade pie crusts. Rolling the pie crust out helps with anxiety.

Let’s start baking. In a medium-size bowl, you are going to mix your flour and salt.

Cut in the shortening with a pastry blender or a fork. You want to cut the shortening until the mixture looks like a bunch of small peas in the bowl.

Next, you are going to add 1 tablespoon at a time of ice-cold water. The ice-cold water helps with the flakiness that everyone loves on a pie crust. Do this until you can form a ball.

On a floured surface you are going to shape the dough. Wrap it in plastic wrap. And either put it in the refrigerator for about 45 minutes or place it in the freezer for about 20 minutes.

This recipe is a little bit different from other pies. Because you have to bake the pie crust before you bake the pie itself.

So after 20 minutes or so, take your pie crust out of the freezer. On a lightly floured surface, you are going to roll the crust out. You want to roll it out to about 2 inches larger than a 9-inch pie plate.

Place the pie crust into the pie plate. Trim any overhang that you may have. Make sure to prick the bottom of the crust so that it can bake evenly. If you don’t do this then you may have a few bubbles.

Bake the crust for about 13 to 15 minutes or until it is light brown. Cool it on a cooling rack.

Now we are going to start on the pie filling. You need to reduce the oven to 350℉.

In a small-sized bowl, you are going to beat the egg yolks with a fork.

In a saucepan, mix 1 ½ cups of sugar and the cornstarch. Gradually stir in the water. Cook it over medium heat. Stirring Constantly. Until this mixture thickens and boils. Make sure that you boil and stir for 1 minute.

Now we are going to temper the eggs. And to do that you are going to whisk at least half of the hot mixture into the egg yolks. Stir back into the hot mixture in a saucepan.

Return to a boil. And the mixture constantly for 2 minutes. Remove from the heat.

Now we are going to stir in the butter, lemon zest, and lemon juice with a whisk. Cover the saucepan and keep it warm.

Onto the fun part of the pie. There are two types of people in this world. The ones who like making meringue and the ones who are afraid/don’t like making meringue. I would classify myself as being the first. There is just something so fascinating in making a meringue.

To make the meringue you are going to need a medium-sized bowl. Beat your egg whites and cream of tartar. Some meringue recipes have the cream of tartar and others don’t. Just remember to look at the recipe.

You are going to whisk them together with an electric mixer on high until it is foamy.

Now we are going to add the sugar, 1 tablespoon at a time. Make sure that you scrape down the sides of the bowl so that everything is incorporated properly.

Continue beating the egg whites until the peaks are stiff and glossy. Beat in the vanilla.

Generally, fold the egg whites onto the lemon filling.

Bake the pie for about 20 to 25 minutes or until the meringue is browned.

Cool it on a cooling rack and refrigerate it. And enjoy.

I am not much of a lemon fan. But my gosh was this a fun pie to bake. It was time-consuming but I didn’t care I just wanted to make this in remembrance of my mom. Briella Flores Ponder. Love you mom.


I hope you all like this recipe. Make sure to like and subscribe for more recipes like this one in the future. And yes, I am dying in this costume. Who honestly would believe that a Yeti would be in Sulani. Sheesh. This is so warm! *haha*
Thank you for watching. Vadish, Dag Dag!
Show the original author some 💖💖💖 Betty Crocker
Show the original pie crust, author, some 💖💖💖 Betty Crocker
Printable version of this recipe: on the blog
Printable version of this pie crust recipe: on the blog
Feel free to support me on:
🐥Patreon 🐥 Kofi 🐥 Facebook 🐥 Pinterest 🐥
#baking#baking therapy#recipe sharing#sweets#dessert#baking blog#baking recipes#baking adventures#recipe#baker#baked goods#bakeblr#lemon#lemon meringue#pie#pie crust#betty crocker
8 notes
·
View notes
Text
Jane’s Recipe Blog: Summer Birthday Cake
(irl recipe is modified from weekend at the cottage Harvey Wallbanger Cake)

Magic Mix Orange Liqueur Cake
posted by user: Sugar
to: sugarandspikes.auradon.blog
date: 27 of June, Summer
Summertime, and the living is busy! I don't know about you, but between my school and my family, I've spent 72 of the last 78 hours running around like a chicken with my head cut off.

the girls are enjoying the summer weather at least! My roommate's boyfriend brought home another crate of chicks for the flock last week. We're being overrun with eggs. Expect more eggy recipes very soon!!
If you're anything like me, summer is the busiest time of year. School programs for me and Spikes are both picking up the pace with our summer service hours, and I've got my roommate and her boyfriend home all the time while they're on break. It's great having the extra hands around the house, but it also means that we've been visiting and hosting family and friends basically non-stop since the summer started.
I love baking. I love my family. I love watching my family enjoy my baking. But do you know what I don't love?
Missing out on those special summer moments because I'm spending every moment I'm home in the kitchen.
That's why this is the absolute easiest-ever summer cake. It's moist, soft, and packed full of the most delicious orange flavor. The orange glaze is easy to whip up in a few minutes, and it's a great excuse to buy a new whisk!

Check out my lemon bars recipe post for the story of how my last whisk died 😱
The non-stick coating on my new whisk makes it great for whipping up glazes, syrups, honeys, and other sticky sauces. Once things calm down, I'm thinking of making a lavender-infused honey glaze to put on my lemon poppy seed muffins for that little extra touch of sweetness.
And speaking of nonstick, the coating on the whisk makes it non-magnetic! Which is GREAT if you're like me and hosting any fairy friends this summer. Magnetic fields play havoc with flower fairy equilibrium. It's cool to be kind to our neighbors and avoid cooking with magnets when you're making treats for non-humanoids.
That being said, this cake doesn't involve any time boiling hot syrups, which makes it perfect for hot days like we've been having in Auradon lately. It also goes perfectly with a cold glass of lemonade, or a cup of iced ginger tea. The orange in the cake will meld great with lemon or ginger flavors, or provide a beautiful contrast to some black coffee, if you're just trying to get through the day 🙃

Sugar Says:
Watch your oven temp on this one - it's easy to underbake and end up with a cake that's still soggy in the middle.
If you like a more flavorful glaze, add an extra splash of vanilla to your mix. If you're serving this to kids, omit the vodka and swap for equal parts water or orange juice. (coconut water is also a delicious swap!)
Make sure to double check the size of your boxed cake mix BEFORE you add it to the bowl! A double size box mix may look good to your eyes, but it'll look a lot less good when it overflows your bowl and takes over your entire kitchen.
Spikes Says:
Why are there like four cups of booze in the cake??
I don't think it's fair to tell the kids they can't have this
We need to make a chocolate version of this STAT.
Sugar Says:
Magic Mix Chocolate Cherry Rum cake is going on the test kitchen list for the holidays!
THE RECIPE:
INGREDIENTS
For the cake:
1 box deluxe yellow cake mix
1 package vanilla flavoured cooked pudding and pie filling
1 cup canola oil
3/4 cup orange juice, fresh or from concentrate
1/4 cup vodka
1/4 cup Galliano liqueur
4 eggs
Softened butter (for pan)
For the glaze:
1 1/2 cup icing sugar
1 tablespoon orange juice
1 tablespoon Galliano liqueur
1 teaspoon vodka
DIRECTIONS
Preheat the oven to 350°F.
Grease a Bundt pan. Or a regular cake pan. I’m not your mom. A cupcake tin will also work, but know that this case doesn��t rise a ton, so you may need to fill your cupcakes higher than usual to compensate.
Add the cake mix and pudding mix into a medium-sized bowl.
Add oil, orange juice, vodka, Galliano, and eggs. A stand mixer will make this step easier, or you can conscript your boyfriend into mixing it at a low steady speed for 2 minutes 🙂
Pour the cake mixture into the prepared pan. Tap the pan on the counter to pop any bubbles in the batter.
Bake for 50 to 60 minutes. A toothpick inserted in the center should come out clean.
Let the cake cool. This step is essential. Fend off any partners who want to eat the cake hot out of the pan. Let cool about 20 minutes, or one really vicious round of Uno.
Once cake is partially cool, gently loosen the edges. Invert onto a plate.
Let the cake cool completely at room temperature (about 3-4 hours) before frosting. Do not try and hide the cake in the freezer. It will not work. They will eat it anyway and you’ll have to start over.
To glaze:
Mix the icing sugar, orange juice, Galliano liqueur and vodka until the mixture is smooth. Add more orange juice just a few drops at a time to achieve a thinner consistency.
Drizzle the glaze over the cake. Allow time for glaze to set before eating.
#this post is fully an experiment with some tumblr-as-recipe-blog formatting#my fic#Jane’s recipe blog#sugar and spikes AU#the cake recipe does work IRL and it’s very good :)
19 notes
·
View notes
Text
Bird's Milk Cake (Ptichye Moloko)

Ingredients
Pastry
3 eggs
200 mL (0.85 cup) white sugar
3 tablespoons honey
1 tablespoon white vinegar
1 teaspoon baking soda
3 tablespoons cow's milk
2 ⅓ cups pastry flour
Cream
200 mL (0.85 cup) white sugar
2 tablespoons pastry flour
400 mL (1 ¾ cups) cow's milk
1 ½ (12 tablespoons/¾ cups) sticks butter
Chocolate Glaze
3 tablespoons cocoa powder
100 mL (~0.4 cup) white sugar
3 tablespoons cow's milk
2-3 tablespoons of butter
Preparation
Pastry Layers
Heat small amount of water in a pot for a hot water bath.
In a glass bowl, beat the eggs with an electric mixer. Add sugar, milk and honey to the eggs, and mix well (with the mixer).
In a small cup combine vinegar and baking soda so it fully reacts (bubbles) before folding them into the main mixture in the bowl.
Put the glass bowl on the pot with the simmering water (the hot water bath) and keep mixing its content until it is warm.
Take the bowl off the pot and add the flour to it while it’s warm. Mix the dough well, cover with a lid and set aside for an hour.
Preheat the oven to 375 F. Cut four foil sheets (or use pre-cut ones) to fit baking sheet.
Divide the dough into four parts and spread a quarter evenly on one of the foil sheets with a spatula. This needs to be done carefully because the layer is thin, and you should be careful not to tear the foil.


Place the foil sheet with the dough on the baking sheet and put it in the oven. The first layer will be ready in approximately 10 minutes (depends on the oven). Keep checking not to burn it: it has to be golden-brown, not pale.
Repeat the procedures with the remaining three layers. Note that these layers will bake slightly faster because you’ll be putting foil on a hot baking sheet (that just came out of the oven).


Once a layer is ready, put it on a flat surface to cool down. Leave for at least an hour (or more) before peeling the foil off. Do it slowly not to break the layer, peel small pieces of foil and make sure there is no foil left, especially at the edges.


Proceed to making cream while layers cool.
Cream
Take the butter out of the fridge for a few hours. It has to be soft (room temperature).
In a glass bowl, mix sugar and flour with a spoon so there are no clumps. Add milk and put in microwave oven.* Heat the mixture in increments of 3 or 2 minutes, mixing with a spoon in between. Add vanilla once it is hot, but has not boiled yet. Get it to boil but not spill (it rises quickly, so watch if you have light and the microwave door is transparent).
The hot milk mixture has to cool down to room temperature, same as butter.
Beat butter with an electric mixer, but do not over-beat it. Then add the milk mixture little by little and keep beating with the mixer. The cream is done once the milk mixture and the butter are fully mixed and uniform.


Divide cream into three parts and spread between the four laters. There should not be cream on top of the last layer (it will be glazed with chocolate).


Use cutting board covered with parchment paper for ‘assembling’ the layered cake. It will be easy to cut it when you’re ready to serve.
Chocolate Glaze
In a small pot, mix cocoa powder and sugar so there are no clumps. Add milk and bring to boil over low heat, constantly mixing. Add butter and mix until it melts.


Once the glaze cools a little, spread it over the top cake layer with a spatula.


The cake should be in a fridge for a few hours (preferably overnight) before serving.
Cut the edges off and make pieces either rectangular or diamond-shaped. If the knife gets covered with cream and glaze, clean or wash it before proceeding to cut the cake further. This way, the edges will be even and neat.

Serve on a tray or a flat dish. Enjoy!

#baking#bakingtips#bakingrecipes#homebaking#bakinghacks#bakingfromscratch#foodphotography#foodie#instafood
2 notes
·
View notes
Text
From The Witch's Desk ~ Some "Berry" Nice Magick
Mundanely speaking, there isn’t a berry I don’t find delicious, so I’ve included a recipe for each berry in this post. Magickally speaking, there’s much more to these colorful delectable morsels than a muggle would ever guess, so we’re going to take a good look at this side of berries:
Blueberry
Folk Names: Bilberry
Power: Protection
Deities: Dark Lord; Lugh; the Hunter
Magical Uses:
Place some blueberries beneath the doormat to keep undesirables away from your property, or from entering your home. This protects against evil as well.
Make blueberry pies or tarts and eat when under psychic attack; this gets the protection inside you and increases the herb’s effectiveness.
To “bother” an enemy: soak dried blueberry leaves in hot water overnight. Stir in black mustard seed the following morning and throw this concoction across your enemy’s path, where they will step in it.
Blueberry Pie
2/3 to 3/4 cups sugar ¼ all-purpose flour ½ teaspoon grated lemon peel ¼ teaspoon nutmeg 5 cups blueberries Pastry for one 2-crust pie/9” 1 tablespoon butter or margarine
Preheat oven to 425 degrees F. In large bowl, combine the first 6 ingredients; let stand.
Roll out half of the pastry and line a 9 inch pie plate. Spoon filling evenly into crust; dot with butter or margarine. Prepare top crust and cover pie, sealing the edges. Bake 50 minutes or until golden.
____________________
Raspberry
Folk Names: European Raspberry, Red Raspberry
Gender: Feminine
Planet: Venus
Element: Water
Powers: Protection, love
Magical Uses:
The brambles (branches) of the raspberry are hung up at doors and windows for protection. This is also done when a death has occurred, so that the spirit won’t re-enter the house once it has left.
Raspberry is served as a love-inducing food, and the leaves are carried by pregnant women to alleviate the pains of pregnancy and childbirth.
Hoodoo mojo, “To Hold a Man”: There are a few ways that this plant can be used to bind a man to you– and you’d better make darn sure you want him before you do this, because once it’s done, you can’t change your mind…1) Make a tincture with raspberry leaves in a quart jar filled with spring water. Pour this tincture over your body while repeatedly reciting the man’s name. 2) It’s said that a man will never want to wander far from his woman or stray from the marital bed if she washes her genitals in raspberry leaf tea, sprinkles periwinkle on his food, and hides a magnolia leaf in the mattress…good luck, Ladies.
Turn about is fair play.
Now it’s the guys’ turn– more hoodoo mojo, “To Hold a Woman”: You have to find a branch of raspberry that has rooted at the tip, and take some of this from the plant without killing the plant. Boil the root in spring water, bathe in it, drink some of it; then serve the rest of it to your wife. It will keep the little woman faithful– if it doesn’t make her sick.**
*see the note below
Raspberry Lime Lemonade
1 1/2 cups lemon juice 1/3 cup lime juice 1 cup sugar 6 cups water 1 cup fresh raspberries
Combine lemon juice, lime juice, sugar, and water in a 2 quart pitcher. Stir until the sugar is completely dissolved. Add the raspberries and chill overnight. Pour over ice, serving it with a lemon or lime slice.
____________________
Strawberry
Folk Names: Poziomki, Tchilek, Jordboer
Gender: Feminine
Planet: Venus
Element: Water
Deity: Freya
Powers: Love, Luck
Magical Uses:
Strawberries are served as a love food, and the leaves are carried for luck. Pregnant women may wish to carry a small packet of strawberry leaves to ease their pregnancy pains. This berry can also be used to draw a stray lover back to you, but this spell I can’t post here– it’s a spell that’s included in my book, The Gray Witch’s Grimoire, which will be out in May. All I can say is, it’s a doozy.
Strawberry Love Salad
2 (3 oz.) boxes strawberry jello 1 cup boiling water 2 (10 oz.) boxes frozen strawberries, thawed 1 can crushed pineapple 1 package Dream Whip
Topping:
1 package cream cheese 1/4 cup sugar 1/2 cup chopped nuts
Dissolve jello into water. Add the pineapple and strawberries (with the juice). Refrigerate. Make the topping, which includes whipping together the Dream Whip, cream cheese, and sugar. Garnish with nuts.
____________________
Blackberry
Folk Names: Bly, Bramble, Bramble-Kite, Cloudberry, Dewberry, Goutberry, High blackberry, Thimbleberry
Gender: Feminine
Planet: Venus
Element: Water
Deity: Brigit
Powers: Healing, Money, Protection
Ritual Uses:
Blackberry was considered to be sacred to some of the old Pagan deities of Europe, and was used in worship. To the present day, blackberry pies are baked on Lughnasadh (August 2) by some of the Wiccans in commemoration of the harvest, seen poetically as the death of the God.
Magickal Uses:
The blackberry leaves are used in spells of wealth, as are the berries themselves, and the vines are protective if grown.
The blackberry plant is also used to heal scalds by dipping nine blackberry leaves in spring water and then laying them against the wound gently, while saying the following chant three times to each leaf (27 times in all):
“Three ladies came from the east, One with fire and two with frost. Out with fire, in with frost. “
This is an old invocation to Brigit, the ancient Celtic Goddess of poetry, healing, and smith craft.
Hang onto your hoodoo hats, “To Send Back Evil”: You’ll need a black candle in the shape of a human figure, whether it’s male or female will depend upon your enemy, and most new-age shops carry these candles. Lay this candle on a red cloth, sprinkle it with blackberry leaves and black salt. Wrap it up and tie both ends shut with a black ribbon. Hit this bundle three times with a hammer while shouting out the name of your enemy and exactly what evil-ass energy you want to return to them. Do this for seven days, repeating the exact words each time. On the eighth day, take this bundle to the graveyard, bury it and ask the spirits of the dead to dole out justice…Now this hoodoo magick, I can handle. *imagine evil wicked cackle inserted at this point*
Blackberry Pudding
1 1/4 cups milk 1/4 to 1/2 cup ground almonds 1 1/4 cups water 1 pint fresh blackberries 1/3 cup merlot or other red wine 2 tablespoons rice flour 1/3 teaspoon sugar 1/2 teaspoon salt 1/8 teaspoon ginger 1/8 teaspoon cinnamon 1 tablespoon butter @ room temp 2 tablespoons wine vinegar 1/4 cup fresh currants whip cream…for garnish
Place the blackberries in a bowl, and pour the wine over them, mixing gently– gently! The berries will soak up some of the wine; pour the rest off and discard (I can hear you groaning). Using a blender, combine the berries, rice, flour, sugar, salt, spices, and milk until well blended. Pour this mixture into a large saucepan and bring to a boil over medium heat, stirring constantly. once it’s hit a rolling boil, lit boil for two minutes to thicken. Remove from heat and stir in butter, then the vinegar, and then the currants.
Pour this mixture into a large serving bowl, or small individual dessert dishes. Chill and serve with a topping of whip cream. ____________________
Credits:
The delicious recipes for this post, or some of them anyway, have come from the following sources. (If you think I hang around the kitchen creating new recipes, think again– and listen, you might be able to hear my husband laughing.)
“From a Witch’s Kitchen: Celebrating Seasonal Magic in Every Meal” by Beth Brown
“The Wicca Cookbook: Recipes, Ritual, & Lore” by Jamie Wood & Tara Seefeldt
Both of these are great books, filled with wonderful recipes galore and interesting information. The Wicca Cookbook is actually filled with quite an impressive load of myth and folk-lore. I highly recommend both books.
**Note: I find a lot of this old hoodoo magick interesting and entertaining to read about, but realistically I would be very careful about actually using this type of magick on anyone; not only from an ethical viewpoint as far as magick and the rules of propriety are concerned, but also from the practical mundane aspect of safety. Just because the berries on a plant are edible, that doesn’t mean the entire plant is safe to ingest. Rhubarb is a good example of this– as delicious as the stem is, the leaves are poisonous.

13 notes
·
View notes
Text
youtube
Hot and spicy rice cake
Tteokbokki 떡볶이
Ingredients
1 pound of cylinder shaped rice cake (tteok), bought or homemade. (Use a little more if you’re not adding hard boiled eggs and fish cakes)
4 cups of water
7 large size dried anchovies, with heads and intestines removed
6 x 8 inch dried kelp
⅓ cup hot pepper paste (gochujang)
1 tablespoon Korean hot pepper flakes (gochugaru) aka “Korean chili flakes”
1 tablespoon sugar
3 green onions (scallions), cut into 3 inch long pieces
2 hard boiled eggs, shelled (optional)
½ pound fish cakes (optional)
Directions
Add the water, dried anchovies, and dried kelp to a shallow pot or pan.
Boil for 15 minutes over medium high heat without the lid.
Combine gochujang (hot pepper paste), gochugaru (hot pepper flakes), and sugar in a small bowl. Remove the anchovies and kelp from the pot and add the rice cake, the mixture in the bowl, the green onion, and the optional fish cakes and hard boiled eggs. The stock will be about 2½ cups.
Stir gently with a wooden spoon when it starts to boil. Let it simmer and keep stirring until the rice cake turns soft and the tteokbokki sauce thickens and looks shiny, which should take about 10 to 15 minutes. If the rice cake is not soft enough, add more water and continue stirring until it softens. When you use freshly made rice cake, it takes shorter time. If you use frozen rice cake, thaw it out and soak in cold water to soften it before cooking.
Remove from the heat and serve hot. If you have any leftovers, just keep them in the fridge and reheat them when you want to eat. You should finished it in a few days.
#koreanfood#kbbq#kfood#korean#food#foodie#recipe#bts#rm#jin#suga#jhope#v#kimchi#video#jimin#jungkook#in the soop#Youtube
0 notes
Note
Aah jejxksjx ok! Cedar giving Rowan a kiss on the cheek? :3c
Idk for what so you can make it up jsndnc
touches ask game
"Son of a fuck-"
Rowan curses under their breath at the melting chocolate in the pot on top of the stove in front of them. Why has it gone all weird and clumpy? It's supposed to be in a liquid state by now, the recipe book had said, so where had they gone so wrong-?
So caught up are they in their frustration towards the ruined chocolate, they almost don't notice when they feel a body pressing up against their back, arms winding around their waist, a chin resting on their shoulder. They only truly notice when Cedar begins to speak, murmuring into their ear.
"What's the matter, Ro-Ro?"
Rowan sighs, already feeling better wrapped in Cedar's embrace, with their warm breath on their neck. "I was trying to make a chocolate sauce thingy to go over that cake you made, but - " They gesture vaguely around the pot with their whisk. "Something seems to have gone wrong. It's gone all clumpy and... well, shite. Sorry, bun."
Cedar hums under his breath, stretching up on his tip-toes to get a proper look over Rowan's shoulder at the failed chocolate ganache. He covers Rowan's whisk hand with his own, giving the chocolate a few experimental stirs.
"It's seized," he says matter-of-factly. "You must've added the cream too late. You're supposed to do cream first, then chocolate."
"Oh," Rowan mumbles, face heating up. "Right. That makes sense. Sorry, I don't bake desserts much, aside from fruit tarts."
Cedar laughs quietly, giving Rowan a reassuring squeeze around the waist. "It's OK, sweetie. Everyone makes mistakes, it's not the end of the world. And there's an easy fix, anyway. You just gotta stir in a little bit of hot water, bit by bit until the clumps are gone and it's smooth. Here, let me help you. Hey, since we're boiling the water, would you like some tea?"
Cedar's right, of course. Once the kettle is boiled, it takes just a few tablespoons of hot water mixed into the chocolate until it has the consistency it should. Rowan breathes a sigh of relief, pulling the whisk through the ganache and giving it a twirl just to double check. A little bit of chocolate comes off the whisk with a splatter, but he hardly cares at this point. "Thank the gods, it looks fine now. Thanks, Cedar. I dunno what I'd have done without you."
Cedar smiles, wrapping an arm around Rowan again and resting their cheek on his shoulder. "Don't mention it, Ro-Ro. You did great." They giggle softly as Rowan affectionately runs his free hand through their fluffy curls, slightly tweaking the ribbon atop their head. They look up at him, intent on returning the favour, but their gaze falls on his cheek, instead. "Oh, you've got something on your face."
"Huh?" Rowan lets the whisk fall back into the bowl, reaching up to touch their face. "Where?"
Cedar giggles, an idea crossing their mind. "Here, I'll get it."
But instead of reaching their own hand up and wiping with their thumb, they tilt their head up and press a kiss with just a hint of tongue to Rowan's cheek. The already-warm, freckled skin almost immediately floods with heat under Cedar's touch, and they laugh into the kiss before pulling back.
Rowan looks down at him, face flushing an even deeper shade of pink when Cedar coyly licks the chocolate they'd kissed away from Rowan's skin off their lips. "Got it," they say cheekily. "And it tastes great, Ro-Ro. But I'm not sure if that's the chocolate, or just you."
Rowan huffs out a flustered sigh, pulling Cedar close and kissing their forehead. "For fuck's sake," they mutter. "You're so cute."
Cedar laughs, throwing both arms around Rowan's shoulder and pulling him even closer, the chocolate in the pot forgotten about for the time being.
#asks#epoch-smog#idk why but the idea of rowan and cedar baking sweet treats together made me go 🥺 so here we are#fern's writing#rowan aisling#apprentice cedar#rowan x cedar#need to come up with a ship name for the tree boys (gnc)
5 notes
·
View notes
Text
A Holiday Episode for The Sand Family: What Would Be Their Perfect Holiday Drink?
Alright ya’ll, this had been a running late holiday episode I was supposed to post a few days ago, but I just got to finish finalizing the recipes and the drawings the other day haha. Either way, here it goes!
Hope you enjoy! :)
---
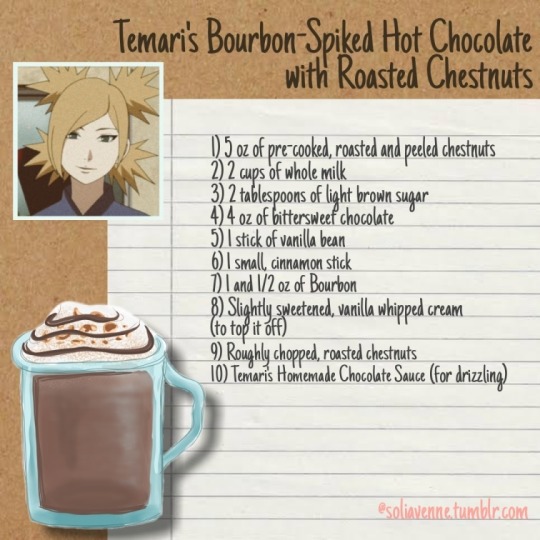
Temari starts off by finely chopping her pre-cooked, roasted and peeled chestnuts. She places the non-stick pan on medium low heat before pouring the chopped chestnuts in it, followed by the whole milk.
She then proceeds to chop the stick of vanilla bean into two pieces, takes 2/3 of it for the drink; with the remaining 1/3 of the stick to be set aside to flavor the whipped cream later. Temari splits the vanilla bean in half, lengthwise, and scrapes out the vanilla pulp inside and stirs it right into the simmering milk. The same step will be done later to the remaining vanilla bean. Temari prefers using vanilla bean instead of vanilla extract, as the vanilla extract contains unnecessary ingredients and tastes weaker compared to the vanilla bean itself.
Temari doesn’t like using ground cinnamon, as it doesn’t dissolve into the drink. To still have the cinnamon flavor, she throws in a small cinnamon stick into the milk.
Knowing from bad experience, Temari doesn’t leave the simmering milk unattended. She diligently scrapes the bottom of the pan every 1-2 minutes with a rubber spatula so it doesn’t form a film of milk solids that could burn if left neglected. She cracks up the heat a little to medium high to bring it to a boil. After so, Temari reduces the heat at the lowest setting to allow it to simmer, still stirring it occasionally for five minutes before taking it off the heat.
Temari likes using bittersweet chocolate instead of cocoa powder, as the butter content of chocolate allows for a richer taste. She chops the chocolate very finely to have it dissolve faster into the hot milk. Since bittersweet chocolate doesn’t taste as sweet, she adds two tablespoons of light brown sugar and stirs it to dissolve. After that, she takes out the cinnamon stick.
Temari prefers to blitz her hot chocolate in her high-speed blender as it allows her clean the counter and wash the utensils for the meantime as it blends. It leaves little to no trace of remaining chestnut pieces and usually results to a very smooth consistency.
After dividing the nutty, hot chocolate into her mugs and Shikamaru’s mug, she stirs in the Bourbon.
Temari prefers to whip her cold, heavy cream to a medium peak with a hand-held mixer alongside 2 tablespoons of confectioner’s sugar and the scraped vanilla bean from the left stick.
She tops off the drink with a healthy amount of sweetened, vanilla whipped cream, roughly chopped roasted walnuts (as expected), and a drizzle of her own chocolate sauce on to finish it off.
Bonus recipe:
Temari prefers homemade to store-bought if it doesn’t take much of her time to do it, one of the things she swaps for a homemade version is chocolate sauce, knowing it’s a one-pot no brainer recipe. So how does she do it?
Temari’s Homemade Chocolate Sauce
1) 1 ½ cups water
2) 1 ½ cups white sugar
3) 1 cup cocoa powder
4) 1 dash salt
5) 1 stick of vanilla bean.
Pour in the water, sugar, cocoa powder and salt into the pan and heat it over low heat. Stir the mixture constantly until it thickens up and comes to a simmer. Take it off the heat and then stir in the scraped vanilla bean. You can serve it warm, or make it in advance and store in a container into the fridge until ready to be served.
---
---
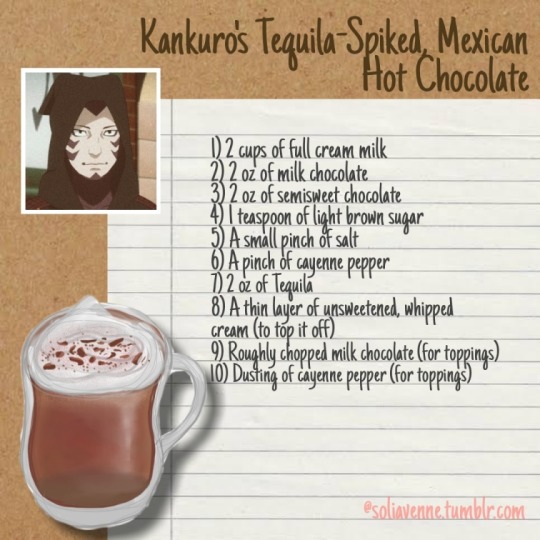
Kankuro gets cold easily, and he likes to be experimental at times with the food he eats. Hot chocolate with Tequila and a little kick of cayenne? Yep, you got him intrigued. He would certainly give it a shot.
Kankuro usually goes for whole milk, but he decides to go for full cream milk this time to balance off the taste of alcohol and spice perfectly. He does find it resulting to a thicker, decadent hot chocolate, which is something he’s not shy to indulge himself upon.
He prefers to use both parts of milk chocolate and semisweet chocolate. There are times where he opts to not add sugar at all due to the sugars present in his chosen types of chocolate, but if he’s feeling a little kick of a sweet tooth, he would use light brown sugar.
He starts off by finely chopping his chocolates and placing them onto the bowl. Last year, he thought he could chop it at the same time as he allows the milk to boil, but he ended up losing his concentration as he found joy in the sound of chocolate being chopped by his freshly-sharpened knife. The milk boiled over, and the panic had him throwing the chocolate into the scalded milk; with the weight of the chopping board tipping over the pot and resulting to a hot chocolate-less night. Never again. He knew better now. He learns the best after his own mistakes.
To make his favorite hot chocolate, pour in the milk, sugar, salt, ground cinnamon and cayenne pepper into the pot and heat it over medium low. As he only makes this once a year, specifically for the holiday as a sort of little tradition for himself as he dons his holiday sweater, Kankuro is extra mindful to scrape the bottom of the pot until it reaches a gentle boil. He reduces the heat to the lowest setting before pouring in his finely chopped chocolate from his fancy little glass bowl. After stirring it to dissolve, he removes it off the heat and then uses a ladle for extra precaution to transfer it to the mugs.
Stirs in the tequila into the hot chocolate.
Kankuro likes to top it off with a thin layer of store-bought whipped cream. He then sprinkles a small amount of roughly chopped milk chocolate to sweeten the cream, and pinch of cayenne for an interesting contrast.
Note: I forgot to add 1/4 teaspoon of cinnamon powder into the recipe image, but the recipe does call for it! I’m sorry for the error!
---

---
Gaara is not very keen on overly-indulgent, sweet drinks. Already thinking that chocolate is very rich itself, Gaara chooses to use low-fat milk. The lessened percentage of fat from his preferred type of milk is complemented by the butter content that the semisweet chocolate offers. The unsweetened cocoa powder packs in a deep, flavor of strong cocoa minus the fat content. This combination results to a less thicker form of hot chocolate, which Gaara prefers the most. To balance off the bitterness and the acidity, he adds a teaspoon of light brown sugar.
Same old step, Gaara combines the simple, yet the highest of quality products in his non-stick pan. Highest of quality meaning having it exposed less to commercialized practices, as Gaara opts to buy his commodities from Suna’s own, proud farmers as a form of his utmost support. Suna had propositioned to buy additional farmlands from Konohagakure, and their own agriculture business is now thriving for the better.
There are times where he visits the farmers himself, and they are more than happy to welcome their beloved Kazekage with an enormous feast of the freshest of their harvest. Gaara vowed to bring Shinki, Araya, and Yodo next time to introduce this practice he upholds in hopes of passing on the economical and moral importance of supporting their own people and own products to the next generation.
Since it is the holidays after all, he lets himself slide off a just a bit by topping his drink off with his own recipe of espresso whipped cream. It’s fairly simple, he whips the cold heavy whipping cream alongisde a small amount of vanilla bean and a teaspoon of instant espresso powder. It may come off as a surprise that he adds another shot of sugar into this as he wasn’t a person with a sweet tooth at all, but he does find that the molasses flavor of the brown sugar balances the concentrated caffeine flavor of the espresso perfectly.
He then proceeds to counter the sweetness from the brown sugar with a healthy sprinkle of sea salt on top, which Chojuro gave as a gift from the previous Five Kage meeting in hopes advertising it as an international product considering they were the ones who discovered it due to Kirikagure’s being surrounded by large bodies of seawater. It was still a new business, the Mizukage said with a chuckle, but the Kages, including Gaara himself, were intrigued and happy to try it.
---
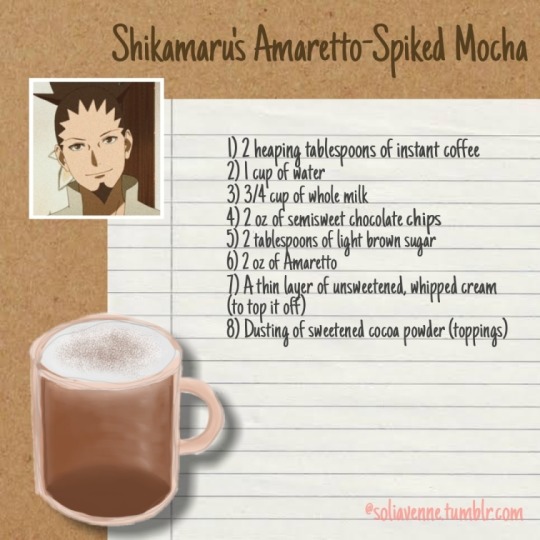
Shikamaru loves coffee. It was what kept him going from the long, dragged afternoons spent in the office doing paperwork ever since he started working for the Sixth Hokage up to the Seventh Hokage. The holidays doesn’t faze him to try something entirely new, it’s got to have a punch of caffeine in it, no ifs, no buts. Alcohol and chocolate? Sounds great to indulge himself in once in a while, but the taste of coffee needs to roll familiarity in his tongue for him to enjoy it fully; so an alcohol-spiked mocha is the perfect stroke to tickle his spots.
It’s nothing too fancy, set up a kettle to boil water for the coffee later as he heats up the milk for the hot chocolate to a gentle boil on a very low heat so it’s less of a risk to burn in case he forgets to stir it now and then. Once it does, he tosses in the semisweet chocolate chips, as the whole chopping business thing was something he didn’t want to trouble himself with. Once fully melted and combined, he takes it off the heat.
Shikamaru then proceeds to dissolve the instant coffee powder and the light brown in the boiling hot cup of water.
The ratio he goes for is to fill the first 1/3 of the cup with hot chocolate, then other third of it with the fresh cup of hot coffee. He then stirs in the amaretto, and a tops it off with a thin layer of store-bought whipped cream or Temari’s leftover whipped cream if he runs out of the previous choice. A little dusting of sweetened cocoa powder for the taste and the aesthetic.
Enjoys his second round of Amaretto-spiked Mocha the best when Shikadai is already asleep upstairs, leaving him and Temari alone to accompany each other as they sit together in the couch, cuddled and laughing under the warm blanket as they savor the cold holiday night in Konohagakure together.
---
---
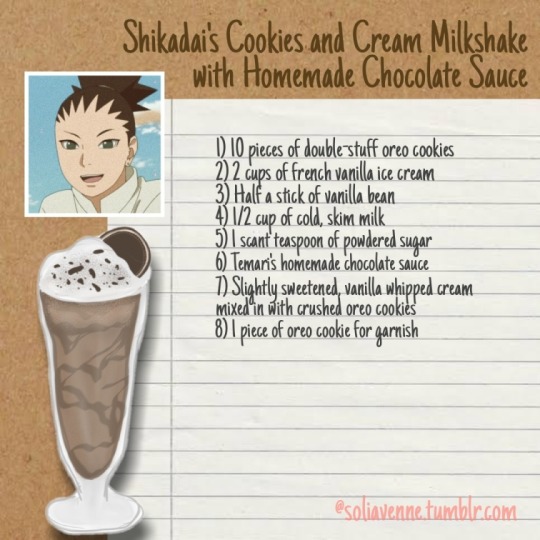
Shikadai would rather have a freezing milkshake than a hot chocolate because he doesn’t like waiting for the hot beverage to cool down as his mother and father had already gulped half of what they’re having.
Cookies and Cream milkshake was one of the specials that they only offered for the special milkshake month in Thunder Burger Restaurant during September. Since there was no way he could order it by the time the holidays arrive, he asked for Chocho and Inojin’s help to devise his own favorite milkshake recipe. Soon enough, he was able to perfect it; as approved by his own teammates, and Temari’s own highest standards.
Shikadai’s prefers to use skim milk, as he had discovered that the presence of egg yolks in his favorite french vanilla ice cream is what makes it creamier and richer than the usual vanilla ice cream. The lack of fat content in skim milk would balance off the french vanilla ice cream’s richness to prevent it from tasting too indulgent.
Shikadai allows the ice cream to soften up a bit to room temperature where it’s just a little melty. After that, he combines the ice cream, cold skim milk, half amount of the scraped vanilla bean, powdered sugar and chopped, seven pieces of oreo cookies into a high speed blender. He turns it off once he sees it is fully-blended.
He likes to drizzle the homemade chocolate sauce that his mother makes onto the milkshake glass, both for taste and aesthetic as a genetic nod to Shikamaru’s mentioned choice with the dusting of cocoa powder. One of his favorite parts in drinking this milkshake is whenever he uses his straw to scoop up the chocolate sauce that dribbled down onto the bottom of the glass.
Prefers to buy store-bought whipped cream to ease his job and just add the remaining half of the scraped vanilla bean to flavor it. He then proceeds to roughly crush 2 oreo cookies and mix it in with the vanilla-flavored whipped cream. After topping his milkshake with it, he likes to garnish it on top with a whole piece of oreo cookie.
---
---
Shinki’s disciplined behavior renders him uneasy in consuming so many indulgent foods in one night, considering every holiday within the Kazekage’s household had always been a feast. Braised stew and gizzard? Fine, everyone has their weakness, and he might find himself slipping up a little, but with his chosen drink, he would like to tone it down a bit.
Shinki’s health consciousness encourages him to try different healthier alternatives of the popular foods they consume on a daily basis. His latest endeavor was focused on the swelling trend of plant-based milks in the market. He studied the differences between a plant-based milk and regular milk, and he found notable information that he once shared with Gaara over dinner. Gaara smiled at Shinki’s interesting thought, and was now intrigued as well to try it, urging Shinki furthermore to give it a shot.
He went home once, paperbags filled with different cartons of different types of milk. He poured each one of it into small glasses for a taste test. Apart from the difference in the tastes, he also discovered that there were certain milks he thought would pair the best with a specific function. He liked oat milk the best if they are paired with cereal, and the notable creaminess and less nuttier taste of cashew milk paired well with coffee.
Coconut milk was better off for dishes where you naturally expect it to have a “coconutty” taste, since it was distinctly overpowering. Soy milk on the other hand… was an acquired taste for Shinki.
Now that he has the background information as to how it is supposed to taste like, he knew that he would increase its chances of being entirely healthy by making it himself. He wasn’t sure about it at first though, as he would opt to buy it if the recipe calls for professional skills and labor, but once he discovered how easy it was to make by the time he read the recipes Gaara printed for him, he was undeniably excited despite how stoic he looks like on the outside. If you look in close enough, you would see a curt, small smile on his lips.
Out of all the attempts of making almond, oat and cashew milk at home, Shinki found himself favoring cashew milk than the other two. Almond milk required straining it with a nut bag, and tasted prevalently nuttier, oat milk on the other hand ended rather a little slimy. Cashew milk was the easiest, as he didn’t need to do the extra job of straining it, and it resulted to a perfectly creamy milk with with a subtle, nutty note that goes well with his usual go-to drinks, such as coffee and tea. It was his perfect choice.
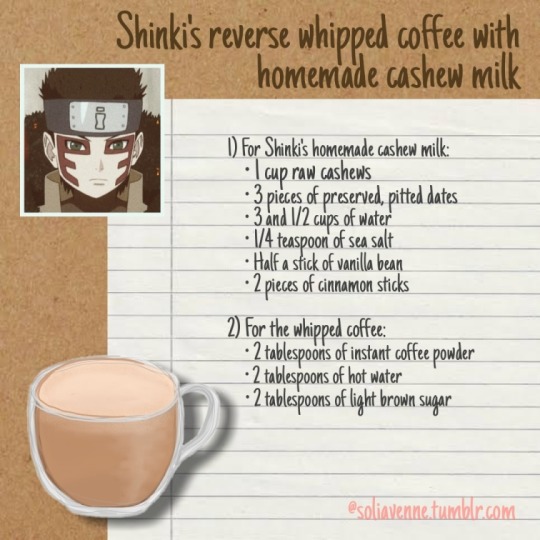
He might not make it as often as he wants to, but on the holidays, he makes it a day in advance prior to making his reverse whipped coffee.
Shinki pours in the overnight-soaked, softened raw cashews into the high-speed blender, alongside water, Gaara’s favorite sea salt, and the vanilla bean. Shinki likes to use preserved, pitted dates as a sweetener as it also offers another depth of flavor into the milk. He then starts it off by blending in low speed, and then cracking it up to a higher setting until it is fully smooth.
Shinki has his own labeled jar for his homemade cashew milk. To give it another depth of flavor, Shinki likes to throw in two small pieces of cinnamon sticks into the empty jar prior to filling it in with the cashew milk, allowing it to steep the spice’s flavor slowly as it stores in the fridge.
The next night, Shinki starts off by putting in the instant coffee powder, sugar, and hot water into a medium sized bowl. Shinki used to do it on the coffee mug itself, but the found out that it took longer to thicken up due to the lack of air circulation within the small area of the mug. He scrapes the bowl clean using a rubber spatula as he transfers the whipped coffee into his mug.
He then proceeds to heat up his cashew-milk to a gentle boil alongside one piece of cinnamon stick. Shinki leaves the other to steep in further into the left cashew milk. Shinki uses a fine mesh sieve to strain some small pieces of cinnamon from the stick as he would prefer the coffee to be thoroughly smooth.
The aeriated, whipped coffee adds a natural foam on top of the coffee. Shinki doesn’t like to add further garnishes.
Likes to keep it bitter and less sweet because he’s secretly eyeing the dark chocolate cake Gaara only buys during the holidays for later consumption.
---
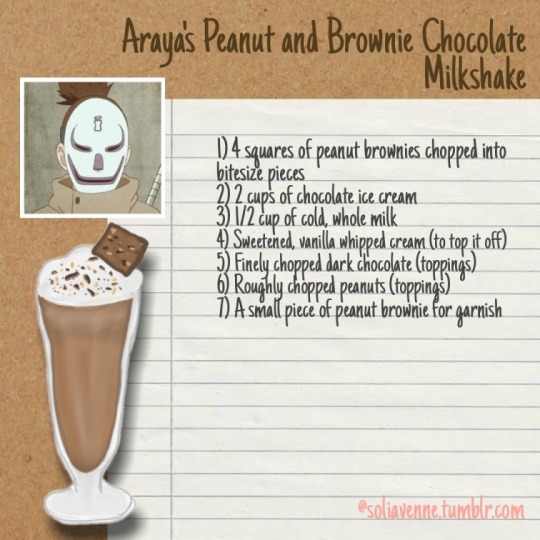
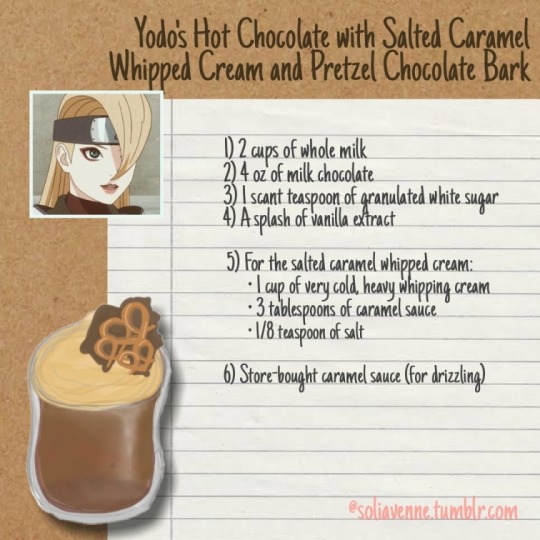
Bonus recipes to try from Araya and Yodo!
---
---
A happy, happy holidays to all of you lovely people! :)
#temari#kankuro#gaara#sand siblings#shikamaru#shikadai#shinki#shikatema#gaara of the desert#suna no gaara#araya#yodo#team shinki
243 notes
·
View notes
Text
For You
Pairing: Spencer Reid x Reader
Summary: Y/N waits all night for Spencer to come home
Warnings: Angst... maybe swearing, but I honestly can’t remember
Words: 2,451
A/N: My LPC and Masters are kicking my ass... I hate it here :)))))))
PART TWO HERE PART THREE HERE
Master List Permanent Tag List

Shoving the last Dorito in your mouth, you leaned off the couch to grabbing your phone from the coffee table. Your thumb swiped across the screen to accept the call. Muting the TV, you sat up and put the call on speaker, smiling as you heard his voice.
“Hey, Y/N/N” Your boyfriend of three years greeted you.
“Spencer” you smiled into the phone, more than happy to hear from him. “I didn’t speak to you yesterday, I missed you.”
“Yeah, sorry, we caught a break in the case” he apologises. “Did you know, only ten-point-seven percent of murders are committed by women, who tend to kill for reasons such as personal gain or jealousy. Our unsub actually went against the statistic.”
“So, you caught them then?” you asked, biting your lip to conceal your hope.
“Yeah, yeah, we did!” he confirmed, and you were sure that he was nodding. “We’re at the station at the moment but we should be leaving soon. I’ll be home around-” There’s a moment of pause while you assume he looks at his watch. “Around seven, seven-thirty. Definitely no later than eight.”
“Oh, Spencer, that’s great!” you grinned, standing up from the couch. “This week has dragged by without you.”
“Don’t worry, I’ll be back soon” he assures you. “I have to go though, there a bit of paperwork that needs to be finished before we can leave.” “Okay, no worries. I love you, bye” you say.
“See you soon, love you” he hangs up.
You turned of the TV and quickly got to work cleaning the apartment. It wasn’t dirty, not really, but your breakfast dishes were in the sink and you didn’t take the trash out last night. You had also neglected putting away the laundry and had thrown your coat and bag over the back of a chair, rather than hang them up.
Coming home to an empty apartment had demotivated you this week, making you not bother to keep up with the little things. Though you always missed Spencer when he was away on cases, this week had been especially trying.
You hung your coat up, moving your keys into the little bowl by the door. The laundry was seen to next, the tops separated and hung up while the pants were neatly folded and placed in the draws. Plates were quickly cleaned and dried, put into their place. You wiped down the sides, brushing the crumbs into the bin before quickly running the trash out.
Coming back into the apartment, you washed your hands before moving to the fridge. Having only went shopping a few days ago, it was still well stocked, and it had all the ingredients for Spencer’s favourite meal.
You had grown up with a dad who loved to cook, who had wanted to be a chef. Due to his severe eczema, which he used to tell he had to be ‘wrapped up like a mummy’ for, he was unable to pursue his passion. As such, he had cooked delicious meals at home for you and your mom, passing on recipes and filling you with a passion for food.
Cooking was something you found relaxing. You knew enough recipes by heart to not follow a recipe, but, instead, a pattern within your mind. You could cook your favourite dish without the need to measure herbs or spices, mind zoned out while you prepared the ingredients.
When you had began dating Spencer, he was basically living on coffee with the occasional take-out. Within two months of your relationship, his freezer was fully stocked with frozen home-cooked meals. While his slim physique remained, he did gain a healthy amount of weigh and appeared to look healthier.
It hadn’t taken you long to find out that his favourite was a slow roasted rack of lamb, with rosemary roasted potatoes, butter roasted carrots, broccoli, peas and mash potatoes. You had served the roast lamb at Easter, where Spencer proceeded to spend nearly thirty minutes telling you about the origin of eating lamb at Easter.
“It’s actually related to the Jewish Passover, from when the Egyptians painted lamb’s blood on doors during the plagues of Egypt. When some Jewish people converted, they caried on the tradition. In fact, in Christianity, Jesus…”
Coming from a diverse background (various religions were practiced in your family, some married and converted, others converted, an adopted cousin kept practicing his religion, thus you celebrated many different religions) you knew the some of what he was saying. However, you loved to hear Spencer talk.
Spencer could talk about anything and you would listen. You loved to hear his voice; the way his voice became higher when he got excited. You liked to lean back against the couch, your feet in his lap as he read to you. His voice lulled you into a calm and relaxed state, it put your mind at peace and made everything seem right in the world.
You cleaned the lamb, patting it dry with paper towels become setting it on the chopping board. You trimmed the fat, leaving only a small layer which would cook and add flavour to the meet. Pouring a tablespoon of oil into your hands, you gently rub it into the lamb before adding the spices, careful not to overwork the meat.
The meat was transferred into a dish before moved into the hot oven.
You then moved onto the vegetables. You coated par-boiled potatoes with oil, salt, pepper and rosemary become adding them to the oven. Carrots were peeled and cut, put into a tin-foil bowl with a teaspoon of butter and a sprinkle of sugar. Folding the tin-foil closed, you slid that into the oven too.
Potatoes were peeled, chopped and put on to boil. You cut the broccoli into smaller pieces and add them to a pot and put them onto boil too. Peas remained in a saucepan, covered in water, but you would turn them on in a little while.
You grabbed the latest Doctor Who DVD that Spencer had brought the week previous. You put the first disk into the DVD player and set the box beside the TV. Leaving the screen on the menu page, you left the room and went for a shower.

You looked at the clock again.
20:37
You sighed and looked down at your food which was damn near cold. Your stomach rumbled and you picked up your fork. You weren’t going to wait any longer. While the food is delicious, you don’t enjoy it. You don’t focus on the flavours as you chew and swallow, your mind focused on your thoughts.
Where was Spencer?
You had called his phone multiple times, but it had just rung out. You had called JJ, but she had left work before him. When you had phoned his work and spoken to his boss, Hotch had told you that Spencer had already left for the evening, and suggested you call Derek as they left together. Just like Spencer’s phone, Derek phone had rung out too.
Finishing your food, you took your plate to the sink. Rising the plate, along with the pots and pans, you then filled the sink with bubbly water. Grabbing the sponge, you began to clean.
Your mind was torn on whether to be worried or not. One the one hand, Spencer had said he’d be home – you checked the clock – over an hour ago but he still wasn’t here. He wasn’t at work and he wasn’t answering his phone. You bit your lip. Anything could have happened to him. There could be a problem with the subway, maybe he got injured on the way home, or something else could have happened.
Spencer’s an FBI agent though and is licenced to carry a gun. Not to mention, he’s a literal genius. If he got into trouble, you had no doubt that he would either be able to get himself out or be able to contact someone to raise an alarm.
Your mind told you that he was with Derek, that they were together and gotten distracted one way for another. They were like brothers, and easily got carried away and forgot about the time.
Spencer had to be fine. He had to be.
Hanging his bag on its hanger, Spencer closed the door. He toed off his shoes, pulling his arms from his cardigan. It had been a long night, a long week, in fact, and all he wanted to do was crawl into bed. He smiled at the thought of crawling into bed and curling around you, of cuddling into you and breathing in your scent as he fell asleep.
Spencer used to love going on cases but after he met you, that changed. Now, he wanted to get them over and get home as soon as possible. He missed you every moment he was gone. He missed waking up with you, with your toes pressed into his leg as you sought out his warmth. He missed reading to you in evenings, gazing at your peaceful face as he spoke the words from memory. He missed the kisses before bed, the giggles you’d make when he would tickle your side as you both laid beneath the duvet.
He walked down the small hallway and into the open-plan living room and kitchen. The first thing his eyes land on is the small dining table. His mouth parts a little as he looks at the single plate of food, a knife and fork beside it. it was his favourite meal but he knew it was stone cold, yet he remembered the taste and his mouth watered at the sight.
You had cooked for him.
His stomach began to twist as he turned towards the front room. The TV was on, displaying the menu for a DVD from his new Doctor Who collection, whose box sat beside the TV. Then he saw you, sitting on the couch and watching him.
His stomach dropped. You had been waiting for him. You had cooked him his favourite dinner, put on his favourite show and were waiting for him. He had told you he would be home by eight, and it was nearing one-thirty in the morning. The guilt in his stomach twisted like a knife as you stood up.
He knew you were mad; he could see it in the hard set of your jaw. He could also see the sadness swimming in your eyes as you looked at him. He had let you down, and he knew it wasn’t something you were easily going to forgive him for.
“You said you’d be home at eight” your voice was low, soft, but he could hear the sadness in your words.
“Yeah…” he agreed, he had said that. He had promised that.
“Where were you?” you asked. “I was worried, you didn’t call or anything.”
“Erm… Derek, he…erm… wanted to go to a bar” Spencer replied, looking down at his mix matched socks.
“So you went? You went, knowing that I was here, waiting for you” you shook your head, looking away from him in an attempt to hold back your anger. “You went to a bar with Derek, after telling me you would be home by eight? You didn’t even let me know! I’ve been waiting for you, Spencer, I cooked you dinner and everything.” “Y/N… I’m sorry” he reached out to you but you held up your hand, taking a step back.
He had gone to a pub. A pub. He didn’t even have the decency to call you, or even text, to say that he wasn’t going to be coming home when he said. He had left you to wait for him, to worry for him. And though you’ve hurt, you’re angry. Angry that this is the way he is treating you. He doesn’t even like pubs, so why would he leave you to go to one?
This isn’t the first time he’s done this either. He had done the same thing a month ago, just went out with his team after telling you that he’d be home for dinner in an hour. You had fell asleep on the couch waiting for him that night.
“You always do this to me” You shook your head, looking at him in disappointment. And, looking at your face, Spencer thought that was worse that seeing you angry.
“What?” He asked, his eyebrows furrowing.
“Abandoning me, you do it all the time!” You say. “You get called on a case and you don’t tell me, you leave me waiting at a restaurant. Stood up. You don’t tell me when your cases get extended, you tell me you’ll be gone two days but its six.”
“Y/N-” he begins, but you quickly cut him off.
“I don’t mind you going to clubs with Derek. I’m fine with cancelling plans because of work, I don’t mind that you’re called away” you tell him. “However, you don’t communicate with me. You stand me up, all the time. You don’t even call, and I’m tired of it. I did this for you Spencer.” You spread your arms out to gesture at the food and TV. “I try to do stuff for you and it goes to waste. Dinner reservations, movie nights, personal museum tours. They could have been rescheduled or the deposits refunded, if you had spoken to me. I… I’m tired of this Spencer. A relationship can’t work without communication.”
Spencer’s mouth is dry at your words, his own eyes stinging as he gazes sadly at your face. He can see how much it has affected you, how hurt you are but his actions. You were right though, he never called or texted you to let you know he wouldn’t be there for any of those things. His mind played over your words and his stomach twisted as the final sentence registered in his brain.
“What are you saying?” his voice is scratchy as he forces the words out, his fists clenched as he struggles not to cry.
“Maybe… Maybe we should take a break… for you to consider whether you can be committed, in all aspects, to this relationship” your voice is quiet as you answer him, your own eyes swimming with tears. “I’ll sleep in the spare room tonight, and then tomorrow… Well, Natasha said that I Could spend a few nights at hers.”
Spencer watched as you turned away from him, walking towards the spare room. You didn’t look back as you closed the door, and, finally, the tears fell from his eyes. This was it, he had lost you because he failed to do the most simple thing in a relationship. You were leaving him.
Permanent Tag List: @sskhair @sammypotato67 @spencerreids-wife @yoongi-holland @bucky-babygirl @youareperrrfectls @alexxcorona113 @tired-draculina @rachelxwayne @itsmoony @shigarakis-fifth-hand @andreasworlsboring101 @fantasticalfuchsbau @itsmyblogandillreblogifiwantto @ourmrswonderlandlove @loverboyreid @kburgenstein
#spencer reid#spencer reid fanfic#spencer reid fanfiction#spencer reid x reader#spencer reid x you#spencer reid x y/n#spencer x reader#spencer x you#spencer x y/n#Criminal Minds#criminal minds fanfic#Criminal Minds Fanfiction#criminal minds fandom#spencer reid angst#i'm back to ruin your life
305 notes
·
View notes
Text
Cakes for the Evans Part One: The Kai Cake Disaster
Today, dear followers, I began the first step of a long journey that I hope to share with you. Today, I baked a cake.

I had a whole lot of free time this afternoon with a whole lot of nothing to do, so I was hanging out with my sister. We were watching AHS when suddenly, out of nowhere, I had an idea. A “brilliant” idea. I was going to bake a cake.
The original plan was pretty simple. I’d find some ingredients in the cupboard, bake a little cake, and call it a day, but shortly after I gathered up a recipe and an idea for the flavor I though ‘huh, I could make a series out of this!’ So, I did.
From today, whenever I have the time and can gather the ingredients, I’m going to start baking a cake for each Evan (all the Evans in AHS, Warren Lipka, Peter Maximoff, and Ralph Bohner). Today I started with Kai Anderson.
It was, to be fully honest, a fucking disaster, so it being Kai’s cake is fitting.
At first things went well. I had a whole bag of tangerines in the fridge, as well as a few cartons of berries that were going to go bad soon. Me and my sister modified a few family recipes, and soon enough we had our idea.
Originally, the cake was supposed to be a two layer tangerine cake, with blackberry frosting in the middle and an orange blueberry glaze on top. As you can see, that didn’t happen.
We made the cakes themselves with little error. It was delightful to have something work out with no kinks. We took that for granted. With all our success, our egos had soared. There was no way this could go wrong after starting on such a bright note, right? Wrong.
First, the blackberry frosting just... didn’t turn into frosting. Like, we followed the instructions but the berries had a looot of water in them, so it sort of just turned into a sugary mess. We ended up just tossing it in a mason jar and plan to use it for crepes tomorrow.
Then, while I was zesting tangerines, my sister watched in horror as the cakes just... fell apart. Neither of them made it out of the pan fully formed despite the fact that we had greased them with a ridiculous amount of butter. One was salvageable... the other, not so much. We rolled with it, found a can of frosting in the pantry, and made some extra cake pops.
The cake pops.... well, we’ll get to that later.
The tangerine blueberry glaze ended up.... well, it was too thin, so we cooked it down and ended up with another weird sugary syrup slop, only this time it had chunks! Delightful! It ended up tasting pretty good, but took more steps and improv than initially intended.
Once all was said and done, we fetched the cake pops from the freezer only to find they had cemented themselves to the wax paper, and refused to budge. At this point, I was close to tears.
I would not, in all honesty, recommend this process to anyone. It was time consuming, took way too many bowls, and the ending product was kind of a mess. The only thing I can say is that it was, in the end, very delicious.
So, here is a full recipe and guide on how to make Kai Anderson’s Disaster Cake (and bonus cake pops). Good luck, you’re going to need it.

Ingredients*:
Tangerine Syrup
1 1/2 cups (about 4) tangerines, fully peeled
1/2 cup water
1 1/4 cups white sugar
The Cake
1/2 cup butter
1 cup white sugar
2 eggs
Tangerine syrup (measurements above)
1 1/2 cups all-purpose flour
1 3/4 teaspoons baking powder
1/2 cup of milk
Tangerine Berry Glaze
2 tangerines, zested and fully peeled
6 oz. (one carton) blackberries
6 oz. (one carton) blueberries
1 1/2 cups of sugar, food processed but not powdered
4 tablespoons of butter, softened
4 tablespoons of milk
1/3 cup agave syrup
Cake Pops
1 9″ round tangerine cake
1/2 cup Pillsbury cream cheese frosting
Cake Pop Frosting
Remaining Pillsbury cream cheese frosting
1/2 cup tangerine berry glaze
* - These are pretty good, but general approximations of the ingredients I actually used because this cake threw me for a loop and tested my imagination. Nothing worked like it was supposed to... literally.
Now, on to the disaster.
Instructions:
The Cake
First, peel 4 tangerines. Separate each of the sections of fruit and peel the skin off of the small sections.
Add the peeled pieces of tangerine to a medium saucepan with half a cup of water and 1 1/4 cups of white sugar.
Bring the mixture to a boil, stirring continuously to prevent burning. Once a boil has been reached, lower the temperature and bring the mixture down to a simmer.
Use a tool of your choice to mash the fruit as the syrup simmers. Once the fruit is mashed, continue stirring the mixture as it thickens and boils down. This process will take about ten minutes.
After ten minutes, pour the mixture into a food processor and blend until there are no large chunks of pulp left. Then, set the mixture aside to cool as you prepare the batter.
Before starting your batter, set the oven to 350 degrees fahrenheit and allow it to heat up as you work.
Add half a cup of butter, cold, to a bowl with one cup of white sugar. Use a mixer to cream the sugar and butter together.
Once it’s been creamed, add two eggs and mix again with the mixer until the ingredients have been evenly incorporated.
Next, add the flour, baking power, and now-cooled tangerine syrup to the bowl. Fold the ingredients together until there are no chunks of flour and the syrup is fully integrated. Then, fold in the milk.
Pour the batter evenly into two, nine inch round cake pans that have been greased thoroughly with butter or a baking grease of your choice. Crisco is a great alternative!
Bake the cakes at 350 degrees fahrenheit for 30 to 40 minutes. Ours were brown at the edges and cooked all the way through at 35 minutes, but based on your oven the time may vary.
Allow the cakes to cool in their pans, and then carefully turn one of them onto a plate for glazing. If it breaks, no problems! You can just use the other one.
If both cakes survive their trips out of the pan, you can use the tangerine berry glaze both between the layers and on top of the cake. If only one survives, simply put the glaze over top, and set the other, broken cake aside for cake pops.
The Glaze
Take one cup of white sugar and put it in a food processor. Blend it, but don’t do it enough for it to be fully powdered. Be impatient. Cut corners. In the end, you should have sugar with granules that are smaller than normal, but not quite small enough to be considered powdered sugar.
Zest two tangerines. Once you’ve collected all the zest you can, peel them, section them, and take the skin off of the small sections.
Put the tangerine zest and peeled tangerine sections in a food processor, and add your blueberries and blackberries. Next, add your slightly powdered sugar, your melted butter, and your milk.
Use the food processor to combine the ingredients. The mixture, when fully processed, should be slightly chunky, kind of like a jam! Transfer the mixture from the food processor into a sauce pan.
Bring the mixture to a boil, stirring regularly to prevent burning. Once it is at a boil, add your agave syrup. From there, lower the heat and allow the mixture to simmer for 15 minutes as you continue to stir.
If you are only making the cake, pour the glaze over the first cake, put the second layer on top, finally topping the whole cake with the remaining glaze. If you are making cake pops, set aside half a cup of glaze and use the rest to top your single layer cake.
The Cake Pops
If your cake, like ours, came out of the pan in five separate pieces, not to worry! There’s still hope for you yet, unlike Kai.
Put the crumbled pieces of your ruined cake in a bowl with 1/4 of a cup of pillsbury canned cream cheese frosting, preferably one that has sat in your cupboard for a few months after another failed baking experiment.
Get your hands dirty! Crush the cake with your hands to combine it with the frosting and turn it into a thick, doughy substance.
Once the frosting and cake are combined, add half a cup of your tangerine berry glaze to the dough and mix it in by hand again. The ending product will look kind of grey-ish???? and will have little bits of tangerine and blueberry skin throughout.
Roll the completed dough into balls. It should make about ten large pops, but more if you make them smaller.
Set the rolled balls onto a plate covered with wax paper, and add a cake pop skewer to each ball. Toothpicks would work too, I’m not one to judge. Even chopsticks might work if you really have no other options.
Put the newly skewered balls in the freezer until they harden enough to withstand being dipped in hot frosting. While they cool, prepare that.
Melt the remaining cream cheese icing in the microwave. I put it in for about 45 seconds after ripping the label off the plastic container and it worked well.
Add half a cup of your glaze into the icing and mix until they are fully combined.
Once your cake pops have hardened, take them out of the freezer and dip them into the liquid frosting, returning them to their plate to cool. Once they’re all frosted, return the plate to the freezer until the frosting forms a shell around the cake pop.
When it comes time to enjoy your cake pops, remove them from the freezer and then cry, as you find that they’ve become very stuck to the wax paper and refuse to come off. Use a knife and your fingers to try to pry them off, only to smash them a little in the process. Even better, do this while the icing is still slightly tacky! It will make it all the more frustrating.
Then, viola! You have a cake and some cake pops to share with your divine ruler!

In Conclusion
This cake was an experience.
It’s hard to rate this, because I haven’t made any of the others yet, but I’m extremely sure that it will be at the back of the pack. I can only hope none of the others are as terrible as this one was. I give it a 3/10.
On the bright side, it was tasty.
I like to think that this entire process is very reminiscent of Kai himself. It looks like a mess on the outside, and it’s a mess on the inside too. The only redeeming factor to both of them is that they’re yummy...
If I had to assign benign meaning to the actual parts of the cake, the blueberry glaze represents Kai’s awful blue dye job, while the tangerine cake is orange like the president he loves so much. A big thank you to @oublierlegarcon for giving me the idea of making this Kai’s cake. It’s extremely fitting
I have no clue who will come next, only time will tell, but I hope you enjoyed this disaster as much as I did. Until next time, goodbye!

#evan peters#peter maximoff#james patrick march#ahs#kai anderson#kit walker#warren lipka#jimmy darling#kyle spencer#rory monahan#ralph bohner#baking
21 notes
·
View notes
Text
Everything in balance recipes
Orange custard tartlets Wheat bread + butter
Seaweed bread + salt-cured fish
Makes 12-16 servings
Active work 1hr
Passive work 48 hours Contains gluten and fish
800 g salmon
250 g rock salt
1 tablespoon sugar
3 stalks of rosemary 1 tablespoon of white wine vinegar 1 tablespoon whole red peppercorns
take a whole deboned salmon fillet with the skin still attached and wipe it dry from any fluids. Cut away any possible excess fat.
In a bowl, mix together sugar, salt and whole red peppercorns.
Lay the salmon flat on a piece of baking parchment or film skin side down. Rub the salt-sugar-pepper mix on the salmon, covering it as completely as possible. Lay the rosemary stalks on top. sprinkle a very little amount of vinegar on the salmon.
Tightly wrap the fillet with the baking paper and some film or baking parchment. Move the salmon to a large enough oven pan to let it lay flat, and stack something heavy on top of it to weight it down.
Let your salmon cure for at least 48 hours, flipping it over every 12 hours to guarantee that it seasons evenly.
Take your fish out the fridge and carefully unwrap it. wipe away all the seasoning from the fish.
Place the fish on a cutting board skin-side down. Start slicing the salmon from the tail-side. You can cut off a small piece of the meat to make cutting easier.
Slice the fish as thinly as possible. You should be able to do this by cutting the fish slanted, keeping your knife around 30 degree angle while cutting and making a small sawing movement while cutting. Very sharp knife also helps!
Go through the whole fish slicing thinly. You can freeze the excess fish after cutting, and defrost the amount you are going to use. You can season the fish more with some lemon or dill.
Bread
500 g sour cream
300 cups rolled oats
50 g butter, melted
25-50 g seaweed powder
1-2 teaspoons salt
In a bowl, mix together oats, seaweed powder and salt. Add butter and sour cream.
heat your oven to 225 degrees celcius / 430 degrees fahrenheit)
Line a baking pan with a baking parchment.
To make the round breads, pour a part of the batter in a pan and gently pat it to the desired shape. You can dust it with more seaweed powder if it sticks to your hands or tools too much. Poke the bread with a fork for a few times before cooking.
Serve hot with salmon and butter. If not eaten right away, let cool and wrap in film to prevent from drying out.
Berries and caramel ginger sauce Serves 2 15 minutes + cooling
150 g raspberries
50 g cloudberries
100 g blueberries 50 g lingonberries OR
150g raspberries 100g blueberries 50g mulberries 50g cranberries Caramel ginger sauce
2 teaspoons of powdered ginger 2,5dl / 1 cup white sugar 1 dl/ ½ cup water 50g butter, cold & cubed
In a saucepan, mix together water and sugar. Bring to boil and let boil on low heat (your burner turned into the third or fourth available setting) until the sugar dissolves and the mixture starts to turn golden. Turn off the heat.
mix in the powdered ginger, stir.
add in the butter, keep mixing until it is completely dissolved and mixed into the sauce. Be careful not to burn your sugar!
In a bowl, mix together all the frozen berries. Split the mix into two serving bowls and pour some still warm caramel on top of it.
Berries can be substituted with other non-sweetened berries. Do not substitute berries with jam or other cooked and sweetened concoctions.
Chili jelly ducks
Makes 10-18 candies depending on the mold
Active work 45min
Cooling time 2-7 hours Contains gelatine
1 pomegranate
1 teaspoon of chili powder or 1 fresh chili
200g sugar
1 dl / ½ cup clear raspberry juice or pomegranate juice
16 g gelatin
Bowl of cold water for the gelatin leaves, enough to cover them (2-5dl)
Edible gold dust
Start by putting your gelatin leaves into a bowl of cold water. They will need at least 10 minutes under water, and they need to be completely submerged
Peel and scrape the pomegranate seeds into a pot.
Pour raspberry juice and sugar in. Heat until the sugar dissolves. Use a hand-held blender or a fork to break the pomegranate seeds, but be careful: the mixture may splash a bit while doing this!
Chop your red chili into 5-6 pieces, leave the seeds in. Add to the pot.
Let the mixture boil until it has reduced to approximately half and its consistency is like thick, runny syrup.
Gently lift your gelatin out of the water and squish as much water out of it as possible with your hands. Add to the pot, and stir to dissolve.
When the gelatin has dissolved, sieve your mixture. Lay out your duck-shaped molds (or other silicon molds of your choosing!) and gently pour the mixture into them. Move to the fridge to cool for approximately 2-7 hours until your gummies are hard and squishy, and easily pop out of molds. You can store them in molds until serving! These will hold in the fridge for 3-6 days.
Lemongrass-ginger cookies
Makes 12-15 cookies Active work 20 minutes cooking time 10 minutes Contains gluten, milk and egg
150 g salted butter
250 g sugar
250 g wheat flour 1 teaspoon baking powder 1 teaspoon of salt
2 eggs
2 teaspoons ginger powder 50 g candied ginger pieces
1 stalk of lemongrass
Pre-heat your oven to 200 C
In a saucepan, add your butter and one chopped stalk of lemongrass. Bring the butter to boil until it froths and slightly browns. You can gently stir it once or twice while it cooks. Turn off the heat and set the butter aside to cool. Let the lemongrass steep in the butter while it cools.
In a bowl mix together ginger powder, flour and baking powder. Set aside.
When the butter has cooled down a bit, pick out the lemongrass pieces. Pour the butter into a bowl and add sugar. Mix with a mixer until the butter and sugar are properly mixed and the mixture has lightened a bit. Add eggs and mix until properly incorporated.
Slowly add the flour mix while mixing continuously. When all the flour is added and mixed in, add the candied ginger pieces and mix them in. The dough should be easily moldable cookie dough at this point.
Roll your dough into kumquat-sized balls and move them into an oven pan lined with a parchment paper. Cook in the oven for 10-12 minutes or until golden brown.
Cool down before eating!
Makes 12-15 tartlets 1 hour active work 1,5 hours cooking and cooling time Contains gluten, milk, egg
For the bases 180 g Wheat flour
130 g butter
80 g brown sugar
pinch of salt
1 egg
For the filling
8 egg yolks
750 g full-fat milk or cream, both work equally well.
150 g sugar
15 grams grated orange peel
For the tartelette bases
In a bowl mix together flour, sugar and salt. Add cold, cubed butter and rub it into the flour. When the mixture is well mixed and crumbly, add the 1 egg mentioned in the first set of ingredients and knead it in. Keep kneading the dough until it forms a firm ball and does not stick to your fingers.
Wrap the dough ball into cling film and let rest in the fridge for at least 30-40 minutes.
While the dough rests, butter your tartlet molds.
When the dough has rested, flour a workstation and cut up your dough into 12 evenly sized balls. Move the balls to your tartlet molds and gently mold them to fit to your molds. The dough should be evenly thick everywhere. Cut off any excess that tries to stick out from the mold.
Poke a few holes to your dough and gently brush the innards with egg yolk. Bake the molds for 5-10 minutes, until their edges just lightly start to brown. Unmold the bases and set them aside to cool. You can still store the bases in the molds after first unmolding them.
For the filling 1. In a bowl whisk together sugar, orange peel and egg yolks.
2. Pre-heat your oven to 175 degrees celcius / 350 degrees fahrenheit.
3. Heat the milk on a saucepan until steaming but not boiling. Move your pot away from the heat. Pour half of the milk into the egg-mixture while stirring.
4. Pour the milk-egg -mix back to the pan and heat with low heat until the mixture just slightly starts to thicken. Pour the mixture into the tartlet molds.
5. Bake the tartlets in the oven for 20-25 minutes until the custard domes up lightly. Be careful not to overcook the custard! If the slight doming collapses, your custard has been a bit overcooked and should be removed from the oven immediately. 6. Let the tartlets cool in room temperature before removing them from the molds. Sprinkle a bit of brown sugar or orange jelly on top to serve.
Makes 9-12 large buns
45min active work 2 hrs of rising and steaming Contains gluten and milk
500 g wheat flour
50 g fresh yeast or 20 grams dry yeast
200 g whey from the butter recipe
1 teaspoon salt
pinch of sugar
500 g heavy/full fat whipping cream
Rock salt to taste
water
For the butter
Pour your cream into a bowl. You will need to mix your cream to whipped cream and over. When you over whisk the cream, the fat in cream will separate forming solid clumps and leave behind light colored liquid. When all the fat has separated, strain all the solid matter from the liquid. I recommend using cheesecloth for this if one is available. Do not toss the liquid, as it will be used for the bread!
Move the separated fat into a bowl. Using ice-cold water, rinse your butter until your water runs clear. You can use a spoon or a spatula to press your butter in the water to get out all the remaining leftover.
When your water runs clear, dry out the excess and add your salt. Use a spoon to work the salt into the butter. Taste, and add more salt if desired.
Move to an airtight container and set aside to wait.
For the bread
Warm the whey until it is 36-38 degrees celcius warm. Crumble yeast into the whey. If you are using dry yeast, heat the whey to 42-45 degrees before adding the dry yeast to it.
In another bowl mix together flour, salt and sugar. Make a well into the centre of the bowl.
Pour in the whey-yeast mixture and mix until the dough becomes smooth and separates from the bowl sides.
Cover the bowl and leave the dough to rise for 45min in a warm place.
Flour a workstation and move the dough on it. Knead the dough until it feels firm and smooth. Split the dough into 9-12 separate pieces and roll them into balls. Leave the bread to rise for another 20 minutes.
Line a steamer and turn it on high heat. When the water in it is boiling, move your buns into it. Steam them for 25-30 minutes.
After the first steaming turn off the heat and let the bread rest in the steamer for 5-10 minutes.
Serve hot with butter.
2 notes
·
View notes
Text
BACON CINNAMON BUNS
Continuing our “cooking during quarantine” version of this blog! I have managed to procure some yeast, so here we go with a recipe I’ve been wanting to make! Thanks to fiction-food.com for this recipe! This references a passage in the book and combines two foods mentioned into one spectacular dish!
This is a bit I love from the book and the inspiration for this recipe on the fiction-food.com blog.
Baz:
“I raise my eyebrows, and he laughs. "Calm down, miracle boy, I'm still a vampire––you still smell like bacon and homemade cinnamon buns."
"How can I smell like bacon and homemade cinnamon buns?"
"You smell like something I'd gladly eat." (Chapter 71, Carry On by Rainbow Rowell)
Be warned--this recipe takes a few hours for the dough to rise twice so budget that in when you are making it!
Ingredients:
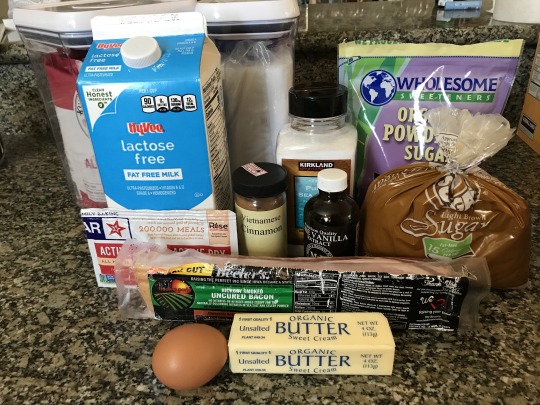
Buns:
2 Tbsp. Active Dry Yeast
1/4 Cup Hot Water (but not boiling! I used the microwave to heat it up)
1 Cup Milk (I used lactose free because that’s what we have here)
1/4 Cup Butter, sliced
1/4 Cup Sugar + a pinch more for the yeast
1 tsp. Salt
1 Egg, room temperature
3 1/2 Cups Flour
Filling:
1 pkg. Center Cut Thick Bacon, uncooked (mine was maple flavored but you can use plain)
1/2 Cup Dark Brown Sugar (recipe said 1/2 cup but I added a bit more--like a heaping 1/2 cup instead of flat)
2 tsp. Ground Cinnamon (as with the brown sugar I added another 1/2 tsp)
2 Tbsp. Butter, melted
Glaze:
1 Tbsp. Butter, room temperature/soft
1 Cup Powdered Sugar
2 Tbsp. Milk, warm
1 tsp. Vanilla Extract (recipe on website said 1/2 tsp but we like vanilla flavor so I used a whole tsp)
Pinch of Salt
Method:
Place the yeast into a bowl & add the hot/very warm water and just. a pinch of sugar. Let that sit while you warm up the milk (the yeast needs about 10 minutes to foam up).
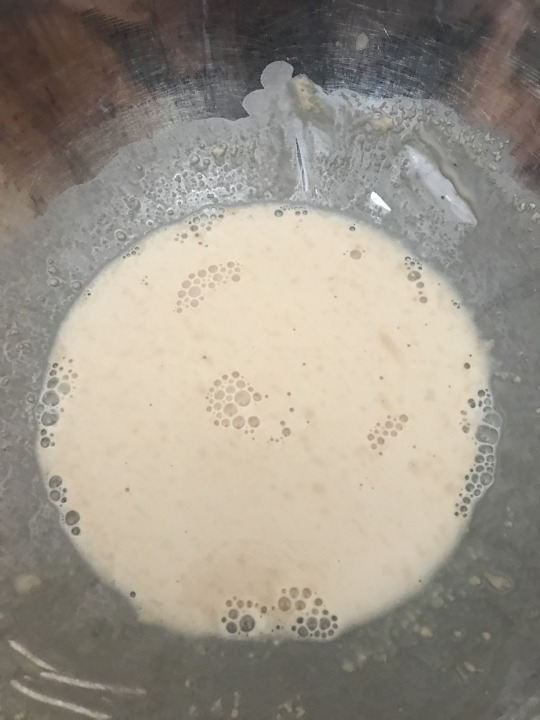
Pour the milk in a pot over medium heat & add in the 1/4 cup butter, 1/4 cup sugar, and1 tsp. salt. Stir until the butter is melted. Don’t let it boil. Remove from heat & let sit for a few minutes until the yeast's 10 minutes are up.
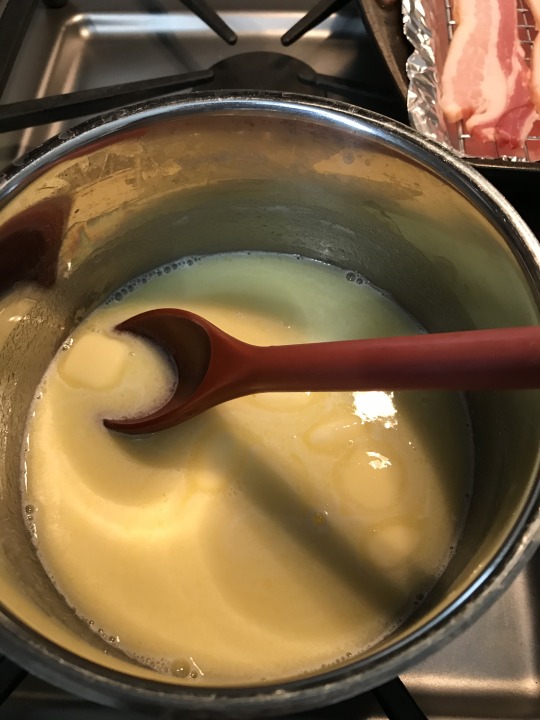
Whisk the egg into the milk mixture once the milk mixture has cooled down a bit. Once that’s mixed, whisk in the yeast mixture, until they are all fully combined. Pour into a large mixing bowl fitted with a dough hook (I used my KitchenAid) and add the flour little by little, making sure to mix on low to medium speed, until a dough is formed. The dough should be somewhat ball shaped. You can flour your hand and shape it into a ball but I didn’t need to do that.
Here is the dough attachment:
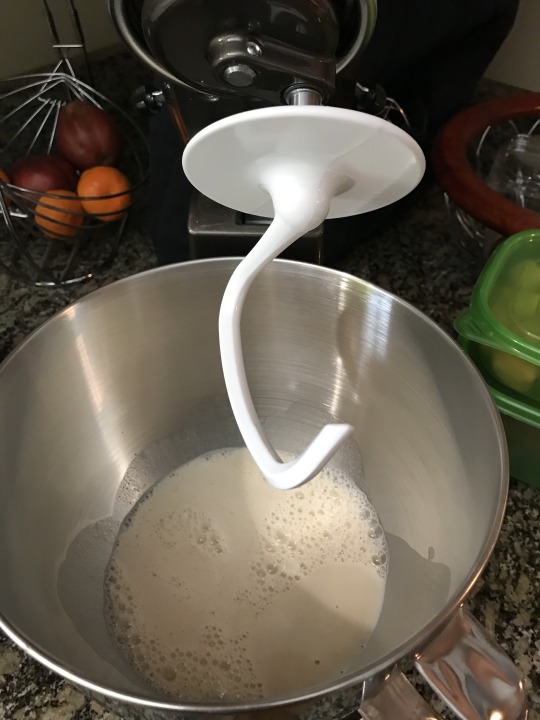
Here is the dough mixing:
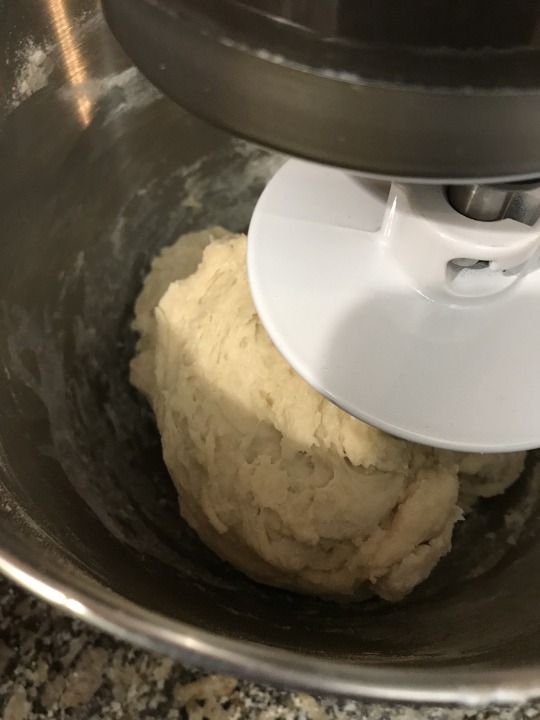
Here is dough before rising:
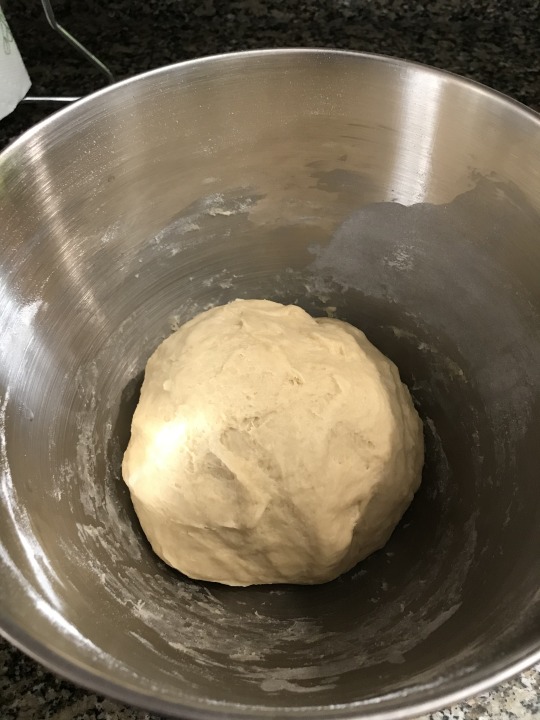
Cover the bowl with a towel slightly damp towel (I used hot water to moisten it. I hate the word moisten, omg) and then let the dough rise for an hour, or until it's double in size. (Mine was a bit more than double.)
When the dough is almost finished rising, heat your oven to 350ºF. Line a large baking tray (one that has sides or a rim) with foil, folding the excess over the edges of the tray. Place 1-2 wire cooling racks on top (however many will fit). Lay the uncooked strips of bacon on the rack over the tray. Slide onto the middle oven rack and bake for about 15 minutes, or until cooked but still pliable & not crispy. You don’t want the bacon crispy for this. Remove from the oven, pat with paper towels to remove most of the grease, then set the bacon aside until needed.
Bacon ready to go into oven and finished bacon:
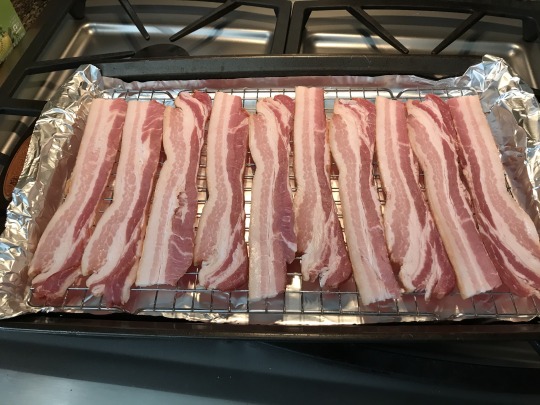
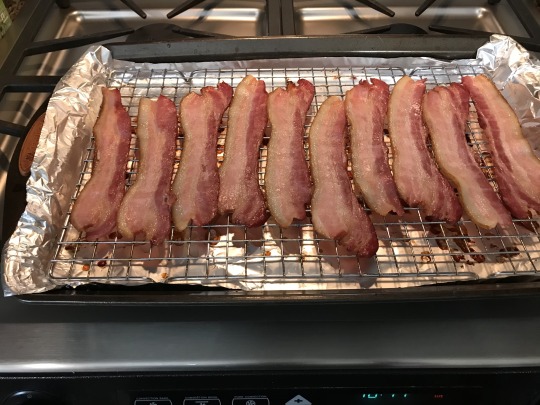
When the dough has finished rising flour your hand & punch down the dough. Flour a large, flat work surface (I use a silopat mat) scrape the dough out of the bowl and onto the surface. Gently (meaning don't press down hard with the rolling pin!) roll the dough out to a rectangle about 14" x 8" & 3/8" thickness.
Dough ready to roll out:
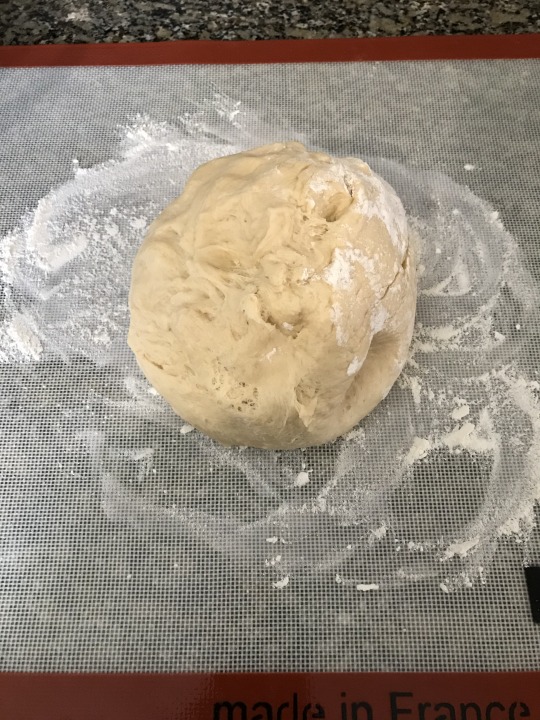
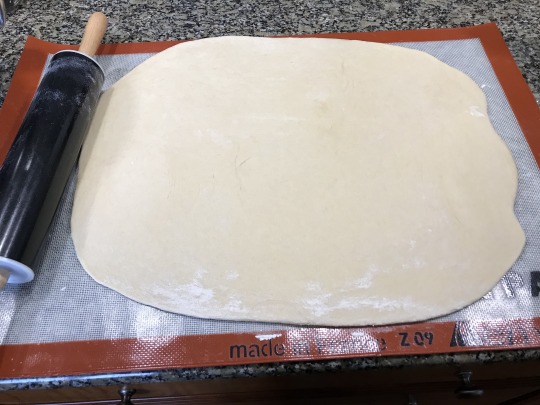
In a small bowl, stir together the brown sugar & cinnamon until completely mixed. Brush the melted butter onto the dough, covering the top of the dough completely. Sprinkle and gently spread the brown sugar cinnamon mixture all over it.
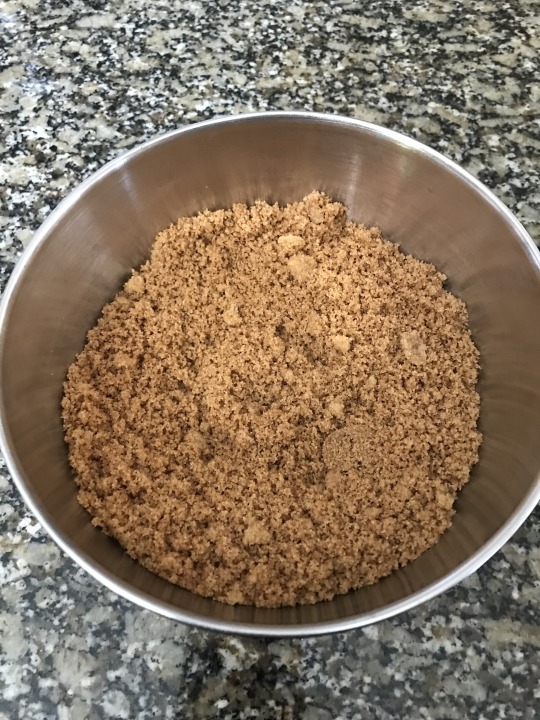
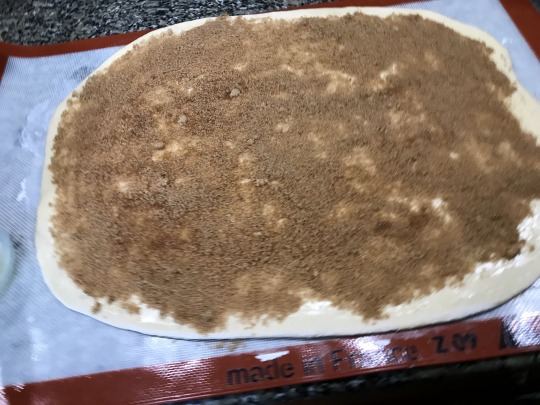
Next, lay on the strips of bacon parallel to the long sides, in 2 columns (I ended up with 5 rows = 10 pieces of bacon total). Flour your fingers again & gently roll the dough beginning at one of the long ends (this differs from the online recipe but my husband wanted bacon in every bit so we rolled it this way). You'll need to lift it a little as you roll so as not to push the bacon forward (so sort of an up, over, & down roll). Roll it from the edges first, tucking them in a little, and then rolling the center. Once it's all rolled up, pull the end over any bacon poking out & pinch the end and seam closed. Re-flour your surface if needed.
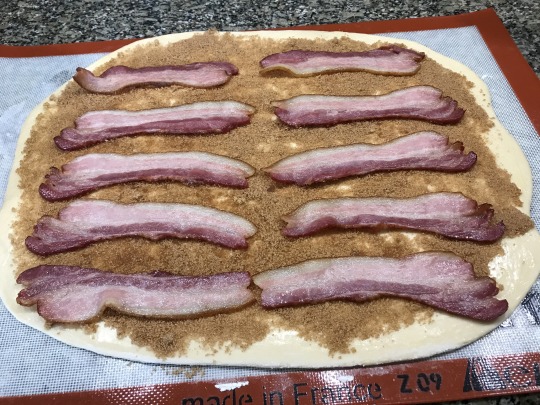
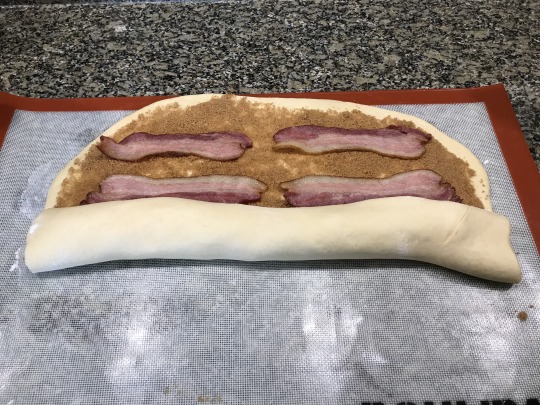
Choose which baking dish you want to use. These rolls are big so only a few can fit in a cake or pie pan together (they will expand during the second rising, so squishing a bunch in together isn't a good idea). I used a large baking dish lined with foil. You can spray your chosen dishes and pans with non-stick spray or butter them, which is what I did.
The recipe online said to use dental floss to cut the roll into segments but I just used a very sharp knife and did it with a gentle sawing motion so as not to crush the bun. (I will put the dental floss instruction at the end of this paragraph in italics if you want to try that method.)
here is the dental floss method: Take a pice of plain dental floss about 18" long & slide/shimmy it under the roll about an inch in & then cross & pull on the ends of the string to slice the dough. If the string is caught on tiny bit of bacon, simply hold the bacon in place with your thumb & forefinger while you pull the string away & it will detach, no problem.
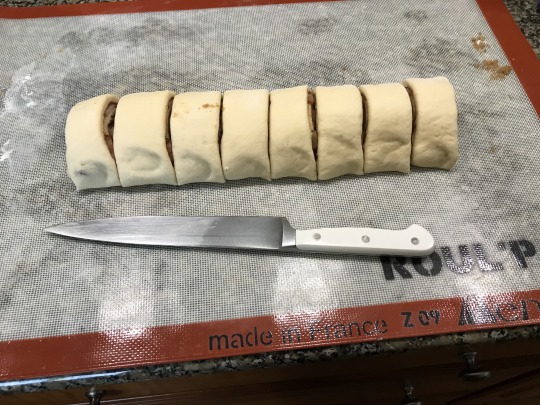
Lift the cut bun segment into one of your prepared dishes, cut side up, & then continue to slice the dough until it's all cut and in the baking dishes. Cover the baking dishes with plastic wrap & let rise for another hour.

Heat your oven to 350ºF. Once the hour time for rising is done bake the rolls for about 20 minutes, or until they are light golden brown.
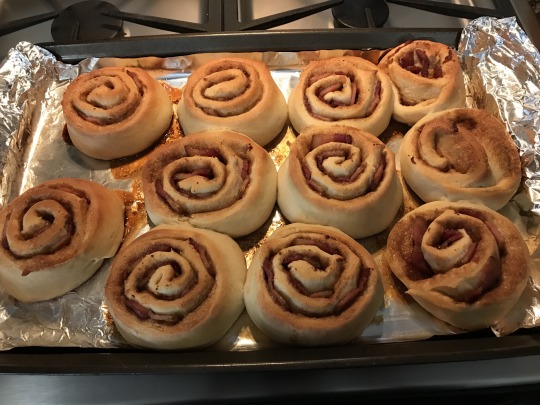
Remove from oven & let cool for a few minutes.
While the rolls are baking, place the butter for the glaze in a mixing bowl and beat until creamy. Add in the powdered sugar, 2 tablespoons milk, vanilla, and a pinch of salt, & mix until smooth and pourable. Once the rolls are done and slightly cool, drizzle the glaze over them. You can do zig zags or spirals or just dump a glob in the middle of the bun.
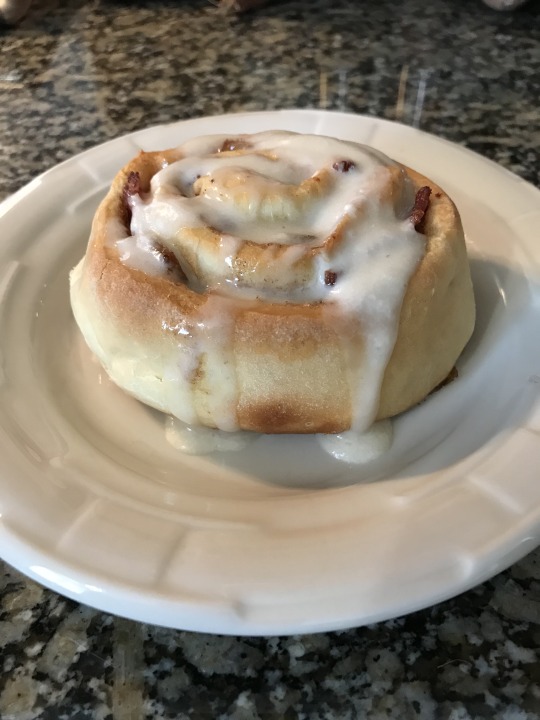
These were a RAGING SUCCESS with the family and I have been asked to make these again. Soon.
Hope you enjoy these! They were very good and definitely do justice to Baz’s bacon and cinnamon bun comment! I think Simon would approve!
The house smelled fantastic when they were cooking!
Here is the recipe without the photos:
Ingredients:
Buns:
2 Tbsp. Active Dry Yeast
1/4 Cup Hot Water (but not boiling! I used the microwave to heat it up)
1 Cup Milk (I used lactose free because that’s what we have here)
1/4 Cup Butter, sliced
1/4 Cup Sugar + a pinch more for the yeast
1 tsp. Salt
1 Egg, room temperature
3 1/2 Cups Flour
Filling:
1 pkg. Center Cut Thick Bacon, uncooked (mine was maple flavored but you can use plain)
1/2 Cup Dark Brown Sugar (recipe said 1/2 cup but I added a bit more--like a heaping 1/2 cup instead of flat)
2 tsp. Ground Cinnamon (as with the brown sugar I added another 1/2 tsp)
2 Tbsp. Butter, melted
Glaze:
1 Tbsp. Butter, room temperature/soft
1 Cup Powdered Sugar
2 Tbsp. Milk, warm
1 tsp. Vanilla Extract (recipe on website said 1/2 tsp but we like vanilla flavor so I used a whole tsp)
Pinch of Salt
Method:
Place the yeast into a bowl & add the hot/very warm water and just. a pinch of sugar. Let that sit while you warm up the milk (the yeast needs about 10 minutes to foam up).
Pour the milk in a pot over medium heat & add in the 1/4 cup butter, 1/4 cup sugar, and1 tsp. salt. Stir until the butter is melted. Don’t let it boil. Remove from heat & let sit for a few minutes until the yeast's 10 minutes are up.
Whisk the egg into the milk mixture once the milk mixture has cooled down a bit. Once that’s mixed, whisk in the yeast mixture, until they are all fully combined. Pour into a large mixing bowl fitted with a dough hook (I used my KitchenAid) and add the flour little by little, making sure to mix on low to medium speed, until a dough is formed. The dough should be somewhat ball shaped. You can flour your hand and shape it into a ball but I didn’t need to do that.
Cover the bowl with a towel slightly damp towel (I used hot water to moisten it. I hate the word moisten, omg) and then let the dough rise for an hour, or until it's double in size. (Mine was a bit more than double.)
When the dough is almost finished rising, heat your oven to 350ºF. Line a large baking tray (one that has sides or a rim) with foil, folding the excess over the edges of the tray. Place 1-2 wire cooling racks on top (however many will fit). Lay the uncooked strips of bacon on the rack over the tray. Slide onto the middle oven rack and bake for about 15 minutes, or until cooked but still pliable & not crispy. You don’t want the bacon crispy for this. Remove from the oven, pat with paper towels to remove most of the grease, then set the bacon aside until needed.
When the dough has finished rising flour your hand & punch down the dough. Flour a large, flat work surface (I use a silopat mat) scrape the dough out of the bowl and onto the surface. Gently (meaning don't press down hard with the rolling pin!) roll the dough out to a rectangle about 14" x 8" & 3/8" thickness.
In a small bowl, stir together the brown sugar & cinnamon until completely mixed. Brush the melted butter onto the dough, covering the top of the dough completely. Sprinkle and gently spread the brown sugar cinnamon mixture all over it.
Next, lay on the strips of bacon parallel to the long sides, in 2 columns (I ended up with 5 rows = 10 pieces of bacon total). Flour your fingers again & gently roll the dough beginning at one of the long ends (this differs from the online recipe but my husband wanted bacon in every bit so we rolled it this way). You'll need to lift it a little as you roll so as not to push the bacon forward (so sort of an up, over, & down roll). Roll it from the edges first, tucking them in a little, and then rolling the center. Once it's all rolled up, pull the end over any bacon poking out & pinch the end and seam closed. Re-flour your surface if needed.
Choose which baking dish you want to use. These rolls are big so only a few can fit in a cake or pie pan together (they will expand during the second rising, so squishing a bunch in together isn't a good idea). I used a large foil covered baking dish. You can spray your chosen dishes and pans with non-stick spray or butter them, which is what I did.
The recipe online said to use dental floss to cut the roll into segments but I just used a very sharp knife and did it with a gentle sawing motion so as not to crush the bun. (I will put the dental floss instruction at the end of this paragraph in italics if you want to try that method.) here is the dental floss method:
Take a pice of plain dental floss about 18" long & slide/shimmy it under the roll about an inch in & then cross & pull on the ends of the string to slice the dough. If the string is caught on tiny bit of bacon, simply hold the bacon in place with your thumb & forefinger while you pull the string away & it will detach, no problem.
Lift the cut bun segment into one of your prepared dishes, cut side up, & then continue to slice the dough until it's all cut and in the baking dishes. Cover the baking dishes with plastic wrap & let rise for another hour.
Heat your oven to 350ºF. Once the hour time for rising is done bake the rolls for about 20 minutes, or until they are light golden brown.
Remove from oven & let cool for a few minutes.
While the rolls are baking, place the butter for the glaze in a mixing bowl and beat until creamy. Add in the powdered sugar, 2 tablespoons milk, vanilla, and a pinch of salt, & mix until smooth and pourable. Once the rolls are done and slightly cool, drizzle the glaze over them. You can do zig zags or spirals or just dump a glob in the middle of the bun.
These were a RAGING SUCCESS with the family and I have been asked to make these again. Soon.
Hope you enjoy these! They were very good and definitely do justice to Baz’s bacon and cinnamon bun comment! I think Simon would approve!
The house smelled fantastic when they were cooking!
#cooking my way through carry on#carry on cooking#the food of Carry On#cinnamon buns#bacon#baz pitch#Simon Snow#bacon cinnamon buns
128 notes
·
View notes
Note
hey Miceál! if you are in the mood, i'd like to ask you for a great favor. could you share some irish recipes with me? even just one would mean a lot to me. i am half irish, but i am an orphan and i grew up in another part of europe, so i have very little connection to that side of me, and i believe it is very intimate to share something that my ancestors also shared, in order to commune and get to know them through my body in whatever way i can. thank you in advance fellow fenian!
hello, fellow Irish orphan! there are lots of wonderful Irish recipes out there, but I’ll share a couple that have special meaning to me and that I have fond memories of. it’s a classic: Irish stew and soda bread! this is a classic for a reason. there’s nothing more comforting on a cold and rainy day than a steaming bowl of Irish stew, and soda bread is probably the easiest kind of bread to make. it requires no waiting around for the dough to rise; you just make that dough and get that bread.
soda bread
first, the soda bread. it’s a great accompaniment, but it can also be made on its own and eaten whenever you need a good wholesome snack. slather a bit of butter on that badboy and indulge.
soda bread ingredients:
250g plain white flour (not self-raising, just plain)
250g plain wholemeal flour
100g porridge oats (I have made it without these before but if you want that authentic experience you’ll probably want the oats)
1 tsp bicarbonate of soda
1 tsp salt
25g butter, cut into small cubes
500ml buttermilk (if you have no buttermilk, I find adding 1 tablespoon of lemon juice to a cup of milk and stirring for a few minutes works fine)
soda bread creation time:
preheat oven to [takes a deep breath] regular oven 200C, fan oven 180C, or if you work with Fahrenheit (holy shit I spelled that right first time??) that’s around 390F and 355F respectively.
mix together all the dry ingredients, so your two flours, your oats, your bicarbonate of soda, and your salt.
rub in the butter so it’s all good and mixed in. remember to go easy on the dough, it has to be treated very gently.
add the buttermilk and stir the mixture carefully but quickly with a kitchen knife. you don’t want to be doing anything remotely near kneading, so you get to stir with a knife because apparently that’s somehow more gentle.
once everything is mixed, shape the dough into a round, flat-ish lump. just like the round loaves you see.
use the knife to score a nice good cross over the top of the dough. according to tradition, this is to allow the fairies to escape, but it’s also really good for allowing the bread to cook through properly.
put on a baking sheet and bake until it sounds hollow when you knock on it. this takes between 30-45 minutes in my experience, but after the 30-minute mark check regularly because it can be any time.
if for whatever reason it’s not ready yet, just flip ‘er upside-down for a few minutes.
leave to cool on a wire rack (to prevent the bottom from getting soggy) and covered with a tea towel (to keep the crust crusty).
from my experience this bread can sometimes be very dense, but experimenting with cooking times and flour ratios will shift it. I’ve found wholemeal to be slightly denser than plain flour, so once you get the hang of it tweak the recipe until it’s to your liking!
Irish stew
now times have changed you can make this in a slow cooker if you like, but I’ve never done that (yet -- I shall this winter and report back). this is how I used to eat it: sitting at the old wooden table in my friend’s kitchen, while her mam ladled it out of the massive saucepan that could drain a small lough.
(I have since become vegetarian, but this recipe would be just as nice as a hearty vegetable stew. if you’re vegetarian or there are any vegetarians out there who’d like to try it, hit me up for a recipe as I’d change this one pretty significantly in terms of technique if there was no meat.)
there’s a little controversy, as there always is with classic recipes: traditionally Irish stew is made with mutton, but mostly everyone just uses lamb. there’s also a debate raging about whether or not it should just have potatoes and onions in it, but honestly go ham. so long as there’s some nice tasty root veggies in there it’s grand, but of course potatoes are a must.
Irish stew ingredients
2 tablespoons vegetable oil
lamb chunks (I just get them already cut from the supermarket)
potatoes
roughly chopped onion
finely sliced leeks
roughly chopped carrots
2 tablespoons plain flour
1 1/2 pints beef stock (I just use a stock cube or two)
note how the vegetables have no measurements. this is just because I tend to make whatever looks right for the amount of people I’m cooking for.
Irish stew creation time:
heat the oven to 180C (or 355F)
take half of your vegetable oil and heat it up until it’s warm but not going crazy, and then add half your lamb and brown it.
take the lamb out and put it into a big casserole dish (or any large dish that has a lid and can go in the oven).
cover the lamb with half the potatoes, carrots, onions, and leeks.
add the rest of the oil to your frying pan and brown the rest of the lamb, and then add that into your casserole dish (or equivalent) over the veggies.
cover with the rest of the veggies so you have a weird veggie-meat lasagne.
add the flour to the frying pan and stir it around to soak up all the juices, then heat for a couple of minutes. add the stock a little at a time until everything turns to a nice, thick sauce with no lumps. it’ll kind of look like thick soup or brown gravy.
pour this sauce into your dish with all the meat and veggies.
if you have any stock left over, throw that in too. put the lid on and cook it in the oven for about an hour.
after an hour check to make sure there’s still plenty of sauce. if there isn’t, add some boiling water. the meat and veggies must always be covered with liquid, or they’ll dry out. once this is done (or if everything is fine!) bake for another hour, checking a little more regularly to make sure it’s nice and saucy.
if there’s too much sauce at the end, bake for a little longer with the lid off.
once the hour is up, it’s done! add salt and pepper if you like. best served piping hot with a hunk of thick crusty bread, while the wind and rain howls outside.
I hope these work out well for you and I hope they succeed in making you feel a little closer to your family. as part of your wider Irish family and the slightly narrower Irish orphan family, I hope these recipes bring you warmth and comfort as the days get colder.
33 notes
·
View notes
Text
Chapter 138 - Lemon Meringue Pie


Sul Sul, Gerbits! Today we are going to be making a very special recipe for me. This recipe kind of scared me. But I wanted to make it, to remember my mom. One of her favorite flavors was lemon. And her favorite pie is a Lemon Meringue pie.

And that is what we are going to be making today. We are going to be following the Betty Crocker recipe. The recipe and description will be in the description down below.

The first thing we are going to do is make the pie crust. You can either have a store-bought one or you can make it yourself. Whichever you choose. I like homemade pie crusts. Rolling the pie crust out helps with anxiety.

Let’s start baking. In a medium-size bowl, you are going to mix your flour and salt.

Cut in the shortening with a pastry blender or a fork. You want to cut the shortening until the mixture looks like a bunch of small peas in the bowl.

Next, you are going to add 1 tablespoon at a time of ice-cold water. The ice-cold water helps with the flakiness that everyone loves on a pie crust. Do this until you can form a ball.

On a floured surface you are going to shape the dough. Wrap it in plastic wrap. And either put it in the refrigerator for about 45 minutes or place it in the freezer for about 20 minutes.

This recipe is a little bit different from other pies. Because you have to bake the pie crust before you bake the pie itself.

So after 20 minutes or so, take your pie crust out of the freezer. On a lightly floured surface, you are going to roll the crust out. You want to roll it out to about 2 inches larger than a 9-inch pie plate.

Place the pie crust into the pie plate. Trim any overhang that you may have. Make sure to prick the bottom of the crust so that it can bake evenly. If you don’t do this then you may have a few bubbles.

Bake the crust for about 13 to 15 minutes or until it is light brown. Cool it on a cooling rack.

Now we are going to start on the pie filling. You need to reduce the oven to 350℉.

In a small-sized bowl, you are going to beat the egg yolks with a fork.

In a saucepan, mix 1 ½ cups of sugar and the cornstarch. Gradually stir in the water. Cook it over medium heat. Stirring Constantly. Until this mixture thickens and boils. Make sure that you boil and stir for 1 minute.

Now we are going to temper the eggs. And to do that you are going to whisk at least half of the hot mixture into the egg yolks. Stir back into the hot mixture in a saucepan.

Return to a boil. And the mixture constantly for 2 minutes. Remove from the heat.

Now we are going to stir in the butter, lemon zest, and lemon juice with a whisk. Cover the saucepan and keep it warm.

Onto the fun part of the pie. There are two types of people in this world. The ones who like making meringue and the ones who are afraid/don’t like making meringue. I would classify myself as being the first. There is just something so fascinating in making a meringue.

To make the meringue you are going to need a medium-sized bowl. Beat your egg whites and cream of tartar. Some meringue recipes have the cream of tartar and others don’t. Just remember to look at the recipe.

You are going to whisk them together with an electric mixer on high until it is foamy.

Now we are going to add the sugar, 1 tablespoon at a time. Make sure that you scrape down the sides of the bowl so that everything is incorporated properly.

Continue beating the egg whites until the peaks are stiff and glossy. Beat in the vanilla.

Generally, fold the egg whites onto the lemon filling.

Bake the pie for about 20 to 25 minutes or until the meringue is browned.

Cool it on a cooling rack and refrigerate it. And enjoy.

I am not much of a lemon fan. But my gosh was this a fun pie to bake. It was time-consuming but I didn’t care I just wanted to make this in remembrance of my mom. Briella Flores Ponder. Love you mom.

I hope you all like this recipe. Make sure to like and subscribe for more recipes like this one in the future. And yes, I am dying in this costume. Who honestly would believe that a Yeti would be in Sulani. Sheesh. This is so warm! *haha*

Thank you for watching. Vadish, Dag Dag!
previous / next
Breakfast with Cordelia Description
https://www.bettycrocker.com/recipes/classic-lemon-meringue-pie/8f991b88-55b0-4740-b12c-251958d663a6
https://www.bettycrocker.com/how-to/tipslibrary/baking-tips/how-to-make-pie-crust
#TS4#Random Alphabet Legacy Challenge#Generation C#Baking#Simblr#Lemon#Pie#Breakfast with Cordelia#Cordelia's Journal#😂😂😂#Her as the Yeti was priceless#It made me laugh so much#While taking the screenshots#and editing
18 notes
·
View notes
Text
Cinco de Mayo: Vibrant flavors make for a zesty celebration
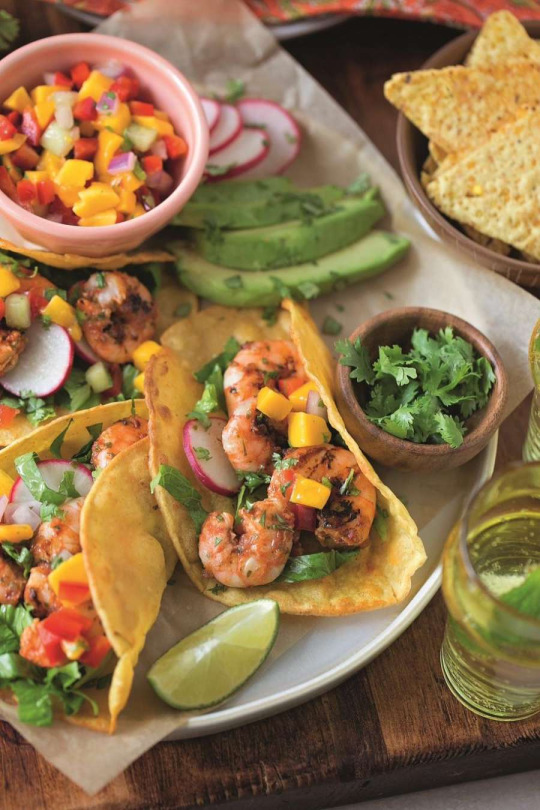
Hot and Smoky Shrimp Tacos
Recipes from Salsas and Tacos by The Santa Fe Cooking School, photographs by Natalie Dicks, reprinted with permission.
Tacos, chips and salsa, Margaritas, Tequila, and guacamole will be center-stage tomorrow at home parties and at many restaurants providing the backdrop with music, decorations and Mexican-inspired fare. Why? It is the celebration of Cinco de Mayo. The day is a double celebration for me since it also is my birthday.
Many think it is the celebration of Mexico’s independence, which it is not. It is the day in 1862 when the Mexican Army surprisingly defeated the French in the Battle of Puebla. What I find interesting is that Cinco de Mayo is celebrated more in the United States than Mexico, although it is a big celebration in Puebla, where the day is celebrated with parades and reenactments of the 1862 battle.
Perusing the bookstore shelves, “Salsas and Tacos” by Susan Curtis and the Santa Fe School of Cooking (2019, Gibbs-Smith, $14.99) stood out; a hot little book with big taste to spice up your Cinco de Mayo. It was exciting to find this book because I met Susan many years ago when we were taking a “train-the-trainer” class in teambuilding using culinary arts in New York City. I have since taken a class at her school over a decade ago, and will see her soon in Santa Fe where she is an ambassador for the upcoming International Association of Culinary Professionals annual convention. I know I will be returning with products from her store and some recipes, too.
New Mexican cuisine is a melting pot of Mexican, Spanish, Native American and America Cowboy cooking techniques and flavors. The book provides bold recipes from the chefs from the Santa Fe School of Cooking. I found the “heat rating” for the salsa recipes and the techniques of roasting and toasting of chiles helpful. From the basic salsa fresca, roasted corn and Anasazi Bean salsa to grapefruit-orange salsa, to Jicama-Watermelon Salsa, and the recipes below for mango salsa and lemon-cucumber salsa, the vibrancy of the colors will enhance your tacos. The author writes, “It wouldn’t be fair to provide you with recipes for such amazing salsas and then leave you without any taco recipes. Hold on to your shoes because these taco fillings will knock your socks off!”
Taco recipes included go beyond a taco filled with ground beef, lettuce, tomato and cheese. If you are planning a gathering on Sunday, an assortment of taco fillings and salsas and homemade tortillas will make your Cinco de Mayo party the hottest around. Adobo Pork Tacos with Grilled Pineapple; Potato, Poblano Chile, and Spinach Tacos with Cream; Steak and Mushroom Tacos with Green Chiles; and these recipes for Hot and Smoky Shrimp Tacos and Apple Pie Tacos are among the recipes you will find.
Mango Salsa
The headnote says, “This is a wonderful garnish for grilled tuna or salmon, or any fish taco. It can also be used as a base for an excellent fish salad by mixing about 1 pound of grilled tuna or salmon into the salsa.” Rating medium.
2 large ripe mangoes
1 medium hothouse cucumber* cut into quarter-inch dice
2 medium red bell peppers, roasted, peeled, seeded, and cut into quarter-inch dice
1 medium red onion, peeled and cut into quarter-inch dice
1/3 cup coarsely chopped fresh cilantro
2 to 3 serrano chiles, minced
Fresh lime juice, to taste
Salt, to taste
*Regular cucumbers may be substituted, but peel and remove the seeds.
Peel the mangoes with a small sharp knife. Cut the flesh away from the large flat pit in two pieces then cut it from the narrow edges of the pit. Cut these pieces into quarter-inch dice.
In a medium bowl, combine the diced mango, cucumber, bell peppers, red onion, cilantro, chiles, lime juice, and salt. Toss gently but thoroughly.
Let the salsa stand at room temperature for 20 minutes to allow the flavors to meld. Serve at room temperature or slightly chilled. Makes 3 cups.
Lemon Cucumber Salsa
The headnote says, “Serve as an easy way to dress up a simple piece of fish or as a refreshing side salad.” Rating medium.
2 cups lemon cucumber* unpeeled, cubed
Zest and juice of 1 lemon
2 green onions, trimmed and thinly sliced on the diagonal
2 teaspoons crushed red chile (chile caribe)
2 tablespoons chopped fresh herbs (a combination of chives, mint, tarragon, and/ or cilantro is good)
Salt, to taste
Combine all the ingredients and stir. Let stand for 20 minutes, taste, and adjust seasoning. Makes about 2 cups.
*Tip: Lemon cucumbers are named for their shape and color, which resemble lemons. If you cannot find lemon cucumbers, peeled and seeded cucumbers may be substituted.
Hot and Smoky Shrimp Tacos
The headnote says, “The flavor and the spiciness of chipotle chiles, which are smoked red jalapenos, make a perfect foil for the garlicky shrimp. This dish was meant to be hot, but you can vary the intensity of heat by reducing the quantity of chiles. If you like, the shrimp may also be prepared using an outdoor grill; make the sauce without the shrimp then brush some on the shrimp before grilling. Toss shrimp with the remaining sauce after they are cooked.”
Taco Filling
3 tablespoons olive oil
1 tablespoon butter
8 cloves garlic, sliced
11/2 pounds medium shrimp (26-30 per pound), peeled and deveined
11/2 teaspoons coarse salt
1/8 to 1/4 cup pureed chipotle chiles in adobo
1/2 cup roasted tomato puree or canned tomato sauce
2 tablespoons cold water
Juice of 1/2 orange
Juice of 1 lime
1/2 cup chopped cilantro (about ½ large bunch)
Corn tortillas (store bought or use recipe on pg. 107 in the book which is found at https://bit.ly/2Prv3nI)
Preheat a heavy skillet or saute pan to medium hot (325 degrees); add olive oil and butter and continue heating until oil begins to smoke (400 degrees). Immediately add garlic, shrimp, and salt, stirring or tossing vigorously. Oil tends to splatter at this temperature, so be careful. When shrimp begin to turn opaque, stir in the chipotle chile puree and saute about 15 seconds to completely coat shrimp. Add tomato puree, water, and orange and lime juices. Reduce heat slightly and bring to a boil for 1 minute. Remove from heat and stir in cilantro. Serve in corn tortillas, 2 or 3 shrimp per taco.
Serving suggestion: Garnish tacos with shredded romaine lettuce, Salsa Verde (recipe on page 24 in book), sliced avocados, radishes, lime wedges, and a dollop of sour cream. Serve with white rice and black beans.
Makes 20 to 25 tacos
Apple Pie Tacos
The headnote says, “Dessert tacos aren’t a traditional Mexican dish; however, we wanted to include one of our favorite creations. We decided on the simple approach in keeping with the easygoing and casual nature of tacos. Easy to prepare, these look like tacos and have the universally satisfying flavor of Mom’s apple pie.”
Taco Filling
4 tart apples, peeled, cored, and cut in quarter-inch-thick slices
Dash of salt
1/4cup plus 2 tablespoons sugar, divided
2 tablespoons all-purpose flour
2 teaspoons cornstarch
2 tablespoons butter
2 teaspoons ground Mexican canela or cinnamon
1/2 teaspoon ground allspice
1/2 cup apple juice
1/8 cup powdered sugar
1 teaspoon ground Mexican canela or cinnamon
Preheat a heavy skillet or saucepan to medium (300 to 325 degrees). Toss sliced apples with salt and 2 tablespoons of sugar then with flour and cornstarch. Place butter in pan; when it sizzles, add apple slices. Cook 3-4 minutes, stirring occasionally, until flour mixture combines with butter. Add canela and allspice then apple juice and remaining sugar. Bring to a slow boil and cook for 5 minutes, until apple slices are soft and sauce is smooth and thick. Allow to cool for a few minutes before serving.
Tacos
This recipe is from pg. 108 from the book:
2 cups all-purpose flour
1/2 teaspoon salt
11/2 teaspoons baking powder
3 tablespoons vegetable shortening
3/4 cup hot water (145 degrees or more)
Combine dry ingredients in a bowl and mix well. Cut in the shortening until mix is the consistency of course cornmeal. Add water and mix to form a soft but not too sticky dough. Knead about 15 times to form a smooth dough. Form into 8 to 10 equal-size balls. Cover and let stand for 20-30 minutes. Flatten dough, rolling away from you with a small wooden dowel or rolling pin, turning dough 1/8 turn after each roll. Tortillas should be about 5 inches in diameter and of a uniform thickness. Cook tortillas on a preheated 350-degree comal, griddle or skillet for 15-20 seconds on the first side; flip over, and cook 20 seconds more while pressing down with a spatula. Keep warm in a cloth towel until ready to serve.
To serve: Spoon about 2 tablespoons of the filling on each tortilla and fold in half. Melt some of the butter on a preheated comal, nonstick skillet, or griddle; place a filled tortilla in the butter. Cook about 11/2 minutes per side, until golden brown. Repeat for remaining tacos. Caution: If the temperature is too high, the tortillas will brown before filling is heated through. Dust tacos with powdered sugar and canela or cinnamon.
Note: These may be prepared ahead of time and reheated in a 325-degree oven.
Makes 8 tacos
Serving suggestion: Accompany tacos with vanilla or cinnamon ice cream, fruit sorbet, or whipped cream.

2 notes
·
View notes