#application for citizenship certificate canada
Explore tagged Tumblr posts
Visit Tumblr Blog
Explore Tumblr blogs with no restrictions, modern design and the best experience.
Last Seen Tumblr Blogs


Fun Fact
There were a total of 171.5 billion posts on Tumblr in 2019.
Text
🇨🇦 Canada’s Express Entry system is offering a golden opportunity for skilled immigrants dreaming of permanent residence (PR). 🇨🇦 Here's all you need to know about the essential documents, PR application process, and the costs involved 👇
#60 Day Deadline#Canada Express Entry system#canada immigration#express entry#Immigration Refugees and Citizenship Canada#language test results#Permanent Residence#permanent residency documents#police clearance certificates#PR application
0 notes
Text
How to Prove Your Identity in Canada Without a Driver’s License
In Canada, a driver’s license is one of the most widely accepted forms of identification. But what if you don't drive or don't yet have a license? Fortunately, there are several other valid ways to prove your identity when you need to access services, verify your age, or complete important transactions. Understanding these options ensures that you’re always prepared — even without a driver's license in hand.

1. Primary Forms of Non-Driver Identification
If you don't have a driver’s license, you can use other government-issued ID cards to prove your identity. Some of the most commonly accepted alternatives include:
Canadian Passport: A passport is the gold standard for proof of identity and citizenship. It's accepted almost everywhere for identification purposes.
Provincial or Territorial Photo ID Cards: Many provinces offer official photo ID cards for non-drivers. For example, Ontario offers the Ontario Photo Card, while British Columbia has the BC Services Card.
Permanent Resident (PR) Card: For newcomers, a PR card serves as both proof of identity and legal status in Canada.
Citizenship Certificate or Card: This document proves Canadian citizenship and includes your name, photo, and signature.
Secure Certificate of Indian Status (SCIS): For Indigenous individuals, this government-issued card is an accepted form of ID.
Each of these IDs provides verifiable details such as your full name, date of birth, photograph, and often your signature, meeting requirements for official identification.
2. Secondary Identification Options
Sometimes, institutions may request two pieces of ID: one with a photo and one with supporting information. In that case, you can present documents like:
Health Card (with photo) — depending on the province.
Social Insurance Number (SIN) card or letter (usually as secondary ID).
Birth Certificate.
Bank or credit cards with your name printed.
Utility bills or rental agreements showing proof of address.
It’s always best to check ahead of time what forms of ID are accepted, especially for critical processes like banking, healthcare registration, or government applications.
3. Why a Provincial ID Card Is a Smart Move
If you don't drive but need a reliable piece of photo ID, applying for a provincial photo identification card is highly recommended. These cards are issued by your provincial or territorial government and often require similar documents as a driver's license application — proof of identity, proof of residency, and proof of legal status in Canada.
This card can make everyday tasks — such as picking up packages, accessing government services, or even entering age-restricted venues — much smoother.
4. Stay Informed and Prepared
No matter which ID you use, keeping it current and securely stored is crucial. Always make sure your name, address, and other details are updated promptly after major life changes like moving or marriage.
Need help navigating the different forms of identification in Canada or preparing for your future licensing needs? Check out LicensePrep.ca — your trusted resource for expert guides, ID tips, and practice tests to help you stay ready and confident!
#CanadianID#NonDriverID#IdentityVerificationCanada#LicensePrepCanada#CanadianPassport#PermanentResidentCard#SecureID#CanadaIdentification#ProofOfIdentity#PhotoIDCanada
5 notes
·
View notes
Text
Title: Understanding Income Proof Requirements for a Student Visa in Canada
Introduction: When applying for a student visa in Canada, providing the necessary income proof is a crucial step. The specific type of income proof required may vary based on individual circumstances. In this blog post, we will explore the common types of income proof accepted and shed light on the financial requirements set by the Canadian government for international students.
Types of Income Proof:
Bank Statements: Submitting bank statements for the past 4 months showing a minimum balance of CAD 10,000 (or the equivalent in your home currency) is often accepted.
Guaranteed Investment Certificate (GIC): A letter from a financial institution confirming a GIC with a minimum value of CAD 10,000 can serve as proof of financial resources.
Scholarship or Financial Aid: A letter from your school stating that you have been awarded a scholarship or financial aid covering your tuition and living expenses is another form of income proof.
Employment Letter: If you plan to continue working while studying, a letter from your employer stating your intent and income can be considered.
Alternative Evidence of Financial Resources: In cases where the above documents are not available, you may provide alternative evidence, such as property ownership documents, investment statements, tax returns, or letters of financial support from family members or friends.
Considerations: The amount of income proof required may depend on the duration of your study program. Shorter programs may require less documentation than longer-term programs. It is important to note that each province or territory in Canada may have specific financial requirements for international students.
Submission and Application Process: Once you have gathered the necessary income proof, you can submit it with your study permit application either online or by mail. The Immigration, Refugees and Citizenship Canada (IRCC) will review your application and determine whether to grant you a study permit.
Conclusion: Understanding the income proof requirements for a student visa in Canada is essential for a successful application. By providing the requested income proof and meeting the financial requirements, you increase your chances of obtaining a study permit and pursuing your educational journey in Canada.
Remember to refer to the official website of IRCC for the most up-to-date information regarding financial requirements for student visas.
#StudentVisa #StudyInCanada #IncomeProof #FinancialRequirements #InternationalStudents #VisaApplication #IRCC #StudyPermit #EducationAbroad #CanadaVisa #FinancialResources #Scholarships #EmploymentProof #BankStatements #GIC #VisaProcess #VisaAssistance #VisasConnect
#StudentVisa#StudyInCanada#IncomeProof#FinancialRequirements#InternationalStudents#VisaApplication#IRCC#StudyPermit#EducationAbroad#CanadaVisa#FinancialResources#Scholarships#EmploymentProof#BankStatements#GIC#VisaProcess#VisaAssistance#VisasConnect
5 notes
·
View notes
Text
I am a trained passport agent and look at applications every day so if anyone on here has questions about how to get a passport feel free to DM me!
One quick correction about OP’s post. The passport card ONLY allows you to cross by land over the border to either Canada or Mexico. But both book and card are UNDENIABLE PROOF you are a US citizen.
YOU NEVER HAVE TO PAY FOR AN APPLICATION. The only time you pay is when you’re SUBMITTING everything. If a website asks you to pay ahead of time online, that will be a scam.
also FedEx and Triple A will push you to use Rush My Passport. They claim they can get you your passport back to you quickly if you pay a stupid amount of extra money. They cannot get your passport back to you any faster. These are the current (11/10/2024) times:
4-6 weeks - Routine ($100/book, $15/card for 15years old and under, $130/book, $30/card for 16 years old and up
2-3 weeks - expedited (same fees above plus 60 per application)
Brand New or Renewal
If this is your first time applying for a passport you’ll need to find a passport acceptance facility (post office, library, town hall, etc. check on travel.state.gov) and have an additional fee of $35 to pay to them.
If you’ve had a passport before and it’s about to expire or has been expired for less than five years then you need to renew. You do not need to go to a passport acceptance facility, just mail in a renewal form.
Form DS-11 is for first time passports OR new passports if your old passport expired MORE than five years ago. OR if your last passport was a five year passport from when you were underage, and you are now 16 or older, this is the application you need.
Form DS-82 is for renewals if your ADULT 10 YEAR passport is either about to expire or has been expired for LESS than five years
What you’ll need
Application (ds-11 or ds-82) filled out by hand in black ink or printed filled in with form filler online. Don’t make mistakes like cross outs or white outs they won’t accept it if it is.
Proof of citizenship (birth certificate, birth abroad certificate, naturalization papers or old passport)
Proof of ID - only if you’re applying with DS-11 (driver’s license, learners permit, military ID, passport, state ID)
Passport photos - CVS, Walgreens, Triple A, Staples, Walmart etc all take them
Checks or Money orders. Money orders can often be purchase at grocery stores and banks. You’ll need at least one to pay the US Department of State or card/book/and expedite. You only have to pay a second fee of $35 to the acceptance facility if you’re applying for the first time or for a brand new one. They may accept cash but check with them first.
I really hope this helps clear things up! If anyone has questions please feel free to DM me!!
Now is a good time to check if you need to renew your passport or get one for the first time.
Not even as an alarmist thing, but because you want to do it NOW before any requirements change and your get distracted by the world. It's just a good thing to have.
The full passport book is pricey ($130), but the card ($30) has all the same benefits as identification and can be used at land borders.
8K notes
·
View notes
Text
International Students: DLI Transfers and Study Permit Extensions
Navigating the New IRCC Policy for International Students: DLI Transfers and Study Permit Extensions
As of November 8, 2024, Immigration, Refugees and Citizenship Canada (IRCC) has implemented significant changes to the International Student Program, affecting how international students transfer between Designated Learning Institutions (DLIs) and manage study permit extensions.
New IRCC Policy: No Enrollment at New DLIs Without a New Study Permit
Under the updated regulations, international students can no longer enroll at a new DLI by simply notifying IRCC through their online account. Instead, students must apply for and obtain a new study permit before transferring to a different post-secondary DLI. This change, effective November 8, 2024, aims to enhance program integrity, ensure compliance, and address challenges within Canada’s international education system.
However, IRCC introduced transitional measures for students transferring for the Winter or Spring 2025 semesters. Students can begin studying at a new DLI while their study permit extension is being processed, provided they meet specific conditions:
Acceptance: Have a Letter of Acceptance (LOA) from the new DLI for Winter or Spring 2025.
Application Submitted: Have applied for a study permit extension with the new DLI’s details.
Valid Permit: Hold a valid study permit (even if it names the previous DLI).
Compliance: Continue meeting all conditions of their current study permit, such as full-time enrollment and academic progress.
For transfers after Spring 2025, students must wait for the new study permit approval before starting studies at the new DLI, unless their previous DLI faced issues like closure, program discontinuation, suspension, or loss of designation status.
Process for Transferring Schools
Transferring to a new DLI requires careful planning and adherence to IRCC’s new process. Here’s a step-by-step guide:
Secure Admission: Obtain a Letter of Acceptance (LOA) from the new DLI, ensuring it is on IRCC’s official DLI list and not on the suspension list.
Apply for a Study Permit Extension: Submit an online application to extend your study permit, specifying the new DLI. This is mandatory for post-secondary students and replaces the previous process of updating DLI details online.
Include Required Documents: Upload all necessary documents (detailed below) via the IRCC secure account or web form if the application is already in progress.
Verify Eligibility for Early Enrollment: For Winter/Spring 2025 transfers, confirm you meet the criteria to start studying while the application is processed. Otherwise, wait for study permit approval.
Update IRCC Records: Once approved, ensure the new DLI is reflected on your study permit to maintain compliance.
Special Considerations:
Quebec Students: Obtain a new Quebec Acceptance Certificate (CAQ) if transferring between schools, except for vocational training centres.
Co-op Programs: Apply for a new co-op work permit if transferring to a co-op program at the new DLI.
Failure to follow this process can lead to serious consequences, including study permit cancellation, removal from Canada, or ineligibility for future permits like the Post-Graduation Work Permit (PGWP).
Documents Required for Study Permit Extensions
When applying for a study permit extension to transfer to a new DLI, students must submit the following documents through the IRCC online portal:
Letter of Acceptance (LOA): A new LOA from the new DLI, issued on official letterhead, detailing tuition fees, program start and end dates, and registration deadline.
Provincial/Territorial Attestation Letter (PAL/TAL): Required as of January 22, 2025, for most study permit applications, unless exempt (e.g., extending at the same DLI or level of study). Check with your new DLI for issuance.
Letter of Explanation: A document explaining the reason for transferring schools (e.g., better academic fit, program quality, or career alignment). For high school to post-secondary transitions, clarify the pursuit of further education.
Valid Passport: A copy of the passport’s biographical page.
Current Study Permit: A copy of your existing study permit.
Proof of Funds: Financial documents (e.g., bank statements, scholarship letters) proving you can support yourself in Canada.
Academic Records: Transcripts or enrollment proof from the current DLI to demonstrate active study.
Biometrics: If not provided within the last 10 years, biometrics are required for applications submitted from within Canada.
Quebec Acceptance Certificate (CAQ): If transferring to a school in Quebec, unless exempt.
For students already in Canada, apply at least 30 days before the current study permit expires to maintain implied status, allowing continued study under the same conditions until a decision is made.
Key Considerations and Tips
Compliance is Critical: DLIs report enrollment status to IRCC twice yearly. Non-enrollment at the DLI named on your permit can lead to investigations and enforcement actions.
PGWP Eligibility: Transferring schools may impact PGWP eligibility, especially if the new program doesn’t meet field-of-study or language requirements for applications submitted on or after November 1, 2024.
Plan Early: IRCC processing times for study permit extensions can be lengthy. Apply early, especially if your permit is nearing expiry.
Consult Experts: Seek advice from your DLI’s international student advisors or a immigration representative to ensure compliance.
0 notes
Text
How to Apply for Canada PR in 2025: Step-by-Step Guide to Secure Permanent Residency
Canada offers one of the most attractive immigration programs in the world, with a strong focus on skilled workers, entrepreneurs, and family reunification. If you're looking to live and work in Canada, applying for Permanent Residency (PR) is a key step. In this comprehensive guide, we'll walk you through the Canada PR application process, eligibility criteria, popular pathways, and expert tips to ensure your successful application. For personalized guidance, Y-Axis is here to assist you every step of the way.
What is Canada PR and Why is it Important?
Canada PR allows individuals to live, work, and study anywhere in Canada. Permanent residents enjoy nearly all the same benefits as Canadian citizens, including access to healthcare, social services, and more. Securing PR opens doors to many opportunities, such as employment, education, and the ability to apply for citizenship after a certain period. Y-Axis helps you navigate through the process, ensuring you meet all the eligibility requirements.
What Are the Different Pathways to Apply for Canada PR?
There are several pathways through which you can apply for Canada PR. Here are the most common ones:
Express Entry Program: A popular route for skilled workers, this system uses a point-based system to rank candidates. It’s divided into three categories: Federal Skilled Worker Program (FSW), Federal Skilled Trades Program (FSTP), and Canadian Experience Class (CEC).
Provincial Nominee Program (PNP): If you have skills in demand in a specific Canadian province, you can be nominated by that province to apply for PR.
Family Sponsorship: If you have a close relative who is a Canadian citizen or PR holder, they can sponsor your application.
Business Immigration: Entrepreneurs and investors who plan to start a business in Canada can apply for PR under the Start-Up Visa Program.
Quebec Skilled Worker Program (QSWP): If you plan to settle in Quebec, this program allows you to apply for PR based on a selection grid of skills.
3. What Are the Eligibility Criteria for Canada PR?
To be eligible for Canada PR, you must meet certain requirements. Here are some key factors considered:
Age: Applicants aged between 18 and 35 receive the highest points.
Work Experience: At least one year of skilled work experience in the last ten years.
Education: A degree, diploma, or trade certification from an accredited institution.
Language Proficiency: English and French proficiency through the IELTS or TEF tests.
Job Offer (optional): Having a valid job offer in Canada can boost your application.
Adaptability Factors: Having relatives in Canada, a spouse's qualifications, or French language skills can help.
Y-Axis can assist you in understanding these eligibility requirements and how to maximize your profile to increase your chances of success.
Expert Tips for a Successful Canada PR Application
Maximize your CRS score: Improve your language test scores, gain more work experience, or obtain a provincial nomination to increase your CRS points. Y-Axis can help you with strategies to improve your profile.
Prepare your documents in advance: Ensure all documents are accurate and complete before submitting your application to avoid delays. Y-Axis ensures your documentation meets all the requirements.
Seek professional help if needed: Working with a certified immigration consultant or lawyer from Y-Axis can streamline your process and help avoid common mistakes.
Canada PR is a valuable gateway to a better quality of life in a world-renowned, multicultural country. With the right guidance and preparation, your dream of becoming a Canadian resident can become a reality.
If you’re ready to begin your journey towards Canada PR, contact Y-Axis today for a free consultation! Our experts can guide you through every step of the application process.
#canada permanent residency#canadaprvisa#visa#prvisaconsultant#pr visa#australia visa#australia#permanentresidency#bestconsultants#visaconsultants#prvisa
0 notes
Text
Legal Requirements for Certified Translations: What You Need to Know
In a globalized world, certified translations are a critical requirement in many legal, governmental, and academic settings. Whether you're applying for immigration, submitting documents to a court, or validating foreign credentials, a certified translation may be legally required — and not just any translation will suffice.
This blog explains the legal requirements for certified translations, including what a certified translation is, when it’s needed, and what to look for in a qualified translation provider.
What Is a Certified Translation?
A certified translation is a translated document accompanied by a signed statement from the translator or translation agency, attesting that the translation is accurate and complete to the best of their knowledge and ability.
This certification usually includes:
The translator’s or agency’s name and contact information
A declaration of accuracy
The date of the translation
The original and translated documents
The translator’s signature (and sometimes notarization)
When Are Certified Translations Legally Required?
Certified translations are commonly required in the following scenarios:
1. Immigration and Visa Applications
Agencies such as USCIS (United States Citizenship and Immigration Services) require certified translations for documents like:
Birth and marriage certificates
Passports
Police records
Academic transcripts
Each translated document must be accompanied by a signed certification of accuracy.
2. Court Proceedings
Courts may require certified translations of:
Legal contracts
Court rulings or judgments
Affidavits or witness statements
Evidentiary documents in another language
3. Government and Regulatory Filings
When filing with tax authorities, patent offices, or other regulatory bodies, translated documents such as licenses, financial statements, or compliance records may need certification.
4. Academic and Credential Evaluation
Universities and credential evaluation services often require certified translations of:
Diplomas and degrees
Transcripts
Professional certifications
5. Business and International Transactions
In global mergers, partnerships, or real estate transactions, certified translations are often needed to validate contracts, company bylaws, or power of attorney documents.
Legal Standards Vary by Country
Each country has its own rules and expectations for certified translations:
United States: USCIS accepts certified translations without notarization. The translator must certify their fluency in both languages and the accuracy of the translation.
Canada: Certified translations must be completed or reviewed by a translator certified by a provincial association, such as ATIO or STIBC.
United Kingdom: The UK accepts certified translations accompanied by a signed statement of truth, but some institutions may require sworn translations.
European Union: Many EU countries require sworn translations, done by translators authorized by a court or government body.
If you're submitting documents internationally, check local requirements or consult a qualified translator familiar with the jurisdiction.
Certified vs. Notarized vs. Sworn Translations
It’s important to understand the differences:
Certified Translation: Includes a signed statement from the translator or agency.
Notarized Translation: The translator’s certification is notarized by a notary public, verifying the identity of the signer.
Sworn Translation: Performed by a sworn translator officially authorized by a court or government (common in many EU countries).
Some documents may require both certification and notarization, depending on the authority requesting them.
Who Can Provide Certified Translations?
While requirements vary, a qualified translator or a reputable translation agency typically provides certified translations. Look for:
Native proficiency in the target language
Knowledge of the document’s subject matter
Membership in recognized professional associations (e.g., ATA, ITI, NAATI)
A track record of compliance with legal and institutional standards
Avoid using automatic translation tools for legal documents — accuracy and accountability are critical.
Tips for Ensuring Compliance
Ask the requesting institution what type of certification is required.
Verify the credentials of the translator or agency.
Keep originals and copies of all submitted documents.
Allow extra time — certified translations may take longer to prepare than standard ones.
Request digital and physical versions, depending on how the document must be submitted.
Final Thoughts
Certified translations are more than a formality — they serve as legally valid representations of foreign-language documents. Whether for immigration, court proceedings, or academic evaluation, failing to meet legal translation requirements can delay your process or lead to rejection.
By understanding what certified translations entail and choosing qualified providers, you can ensure your documents meet the necessary legal standards — accurately, reliably, and on time.
Language Translation Services, Certified Translation Services, Language interpretation Services,
#Language Translation Services#Certified Translation Services#Translation Services#Translation#Translation Company#Language interpretation Services#Language interpretation
0 notes
Text
Canada Federal Skilled Workers Program: Your Complete Guide to a New Life in Canada

Dreaming of moving to Canada for better opportunities? If you are a skilled professional, the Canada Federal Skilled Workers Program could be your golden ticket! This program is one of the most popular pathways to Canadian permanent residence. In this blog, we'll break down everything you need to know — in simple words — about the federal skilled workers program in Canada and how IRA Immigration can help you achieve your dream.
Let’s get started!
What is the Canada Federal Skilled Workers Program?
The Canada Federal Skilled Workers Program (FSWP) is part of the larger Express Entry system. It is designed for individuals who have the skills, education, work experience, and language ability needed to contribute to the Canadian economy.
If you qualify for the federal skilled worker program, you can apply for permanent residency and start a new chapter of your life in Canada. The best part? You don't even need a job offer to apply (though having one can improve your chances)!
Why Choose the Federal Skilled Workers Program in Canada?
Moving to a new country is a big decision. Naturally, you want to choose the best route. Here's why the federal skilled worker program in Canada is such a great option:
Quick Processing Time: Through Express Entry, your application can be processed in as little as 6 months.
No Job Offer Required: You can qualify based on your points without needing a Canadian employer.
Family Friendly: You can bring your spouse and children with you.
Path to Citizenship: After staying in Canada for a few years, you can even apply for Canadian citizenship.
With so many benefits, it’s no wonder that thousands of people apply through the Canada Skilled Workers Program every year.
Basic Eligibility for the Canada Skilled Workers Program
Before you get too excited, let's check if you qualify. To be eligible for the Canada Federal Skilled Workers Program, you must meet certain basic requirements:
Work Experience: You need at least one year of continuous full-time (or equivalent part-time) work experience in a skilled occupation.
Language Ability: You must prove your proficiency in English or French through a recognized language test like IELTS.
Education: A minimum of a Canadian secondary school diploma or an Educational Credential Assessment (ECA) for foreign education.
Proof of Funds: You should have enough money to support yourself and your family unless you already have a valid job offer.
Score 67 points: Canada uses a points system based on factors like age, education, work experience, language skills, and adaptability. You need at least 67 out of 100 points.
If you meet these requirements, you can move ahead and create an Express Entry profile.
How Does the Federal Skilled Worker Program Canada Work?
Understanding the process is super important. Here’s a simple step-by-step guide on how the federal skilled worker program in Canada works:
Check Eligibility: Use online tools or consult with IRA Immigration to see if you qualify.
Prepare Documents: Gather all required documents, such as passports, education certificates, language test results, and proof of funds.
Create an Express Entry Profile: Submit your profile online.
Receive a CRS Score: Your profile will be ranked based on the Comprehensive Ranking System (CRS).
Get an Invitation to Apply (ITA): If your score is high enough, you’ll receive an ITA.
Apply for PR: Submit your final application within 60 days of receiving the ITA.
With the help of an expert consultancy like IRA Immigration, this journey can be much smoother!
Points System for Canadian Skilled Worker Program
You might wonder, how are the points calculated for the Canada skilled workers program? Here's a simple breakdown:
Age: Younger applicants score higher points.
Education: Higher education gets more points.
Work Experience: More experience earns you more points.
Language Skills: Good English or French skills are crucial.
Job Offer: A valid job offer gives extra points.
Adaptability: Having a spouse with good language skills or previous Canadian experience helps.
Each factor plays an important role. The more points you collect, the better your chances of getting selected through the federal skilled worker program in Canada.
Popular Jobs for Canadian Skilled Workers
Certain occupations are always in demand under the Canada Federal Skilled Workers Program. Some popular fields include:
Information Technology (IT)
Engineering
Healthcare (Nurses, Doctors, Physiotherapists)
Finance and Accounting
Skilled Trades (Electricians, Plumbers)
Teaching and Education
If your profession falls under one of these areas, you have a great chance of getting selected.
Moreover, for those who don't fit into the highly skilled category, Canada also has a low-skilled worker program under other immigration streams.
Benefits of Moving to Canada Through the Skilled Worker Program
By applying through the skilled worker program in Canada, you open doors to many incredible benefits:
Free Healthcare: Access to one of the world’s best healthcare systems.
High Quality of Life: Safe cities, beautiful landscapes, and diverse cultures.
World-Class Education: Your children can study in excellent public schools.
Social Benefits: Unemployment insurance, pensions, and child benefits.
Canada truly offers a better future for skilled workers and their families.
How IRA Immigration Can Help You
Applying for the Canada Federal Skilled Workers Program can feel overwhelming. But don't worry — IRA Immigration is here to guide you at every step.
With years of experience and a team of expert consultants, IRA Immigration can help you:
Check your eligibility
Improve your CRS score
Prepare your documentation
Create a strong Express Entry profile
Handle all legal formalities smoothly
By choosing IRA Immigration, you ensure your application is safe.
Final Thoughts
The Canada Federal Skilled Workers Program is truly a life-changing opportunity. With the right guidance, you can secure a bright future for yourself and your family in one of the world’s most welcoming countries.There's no reason to wait if you have the skills, experience, and ambition. Let IRA Immigration help you make your Canadian dream come true!
0 notes
Text
How Canadian Licensing Systems Protect Against Identity Fraud
Identity fraud is a growing concern worldwide, and Canada is no exception. As licenses increasingly serve as key forms of identification for banking, travel, and government services, Canadian licensing systems have had to evolve with robust security measures to protect against identity fraud. Whether you are applying for your first license or renewing an existing one, it’s important to understand how these systems work to safeguard your personal information.

1. Advanced Physical Security Features
Modern Canadian driver’s licenses are embedded with multiple physical security features designed to make them extremely difficult to forge or tamper with. These include:
Holographic overlays: Special images that appear when the license is tilted, making duplication extremely difficult.
Microprinting: Very tiny text that is not visible to the naked eye but detectable under magnification, preventing easy reproduction.
Ghost images: A faint second image of the license holder that helps prevent photo swapping.
Raised lettering: Some jurisdictions use raised text that you can feel, adding another layer of protection against fakes.
These built-in technologies make it easy for authorities and businesses to quickly spot a fraudulent license during routine checks.
2. Digital Data Encryption
Canadian licensing systems now store driver data in encrypted databases, making unauthorized access to personal information extremely difficult. When information is transferred — such as when police scan your license or when you renew online — the data is encrypted both in transit and at rest. This ensures that even if someone intercepts the data, it remains useless without the decryption keys.
3. Stringent Identity Verification at Issuance
Before issuing a license, provincial and territorial licensing authorities conduct rigorous identity verification checks. Applicants must present multiple pieces of identification, including:
Proof of legal status in Canada (passport, PR card, visa).
Proof of residency within the province.
Secondary documents such as a birth certificate, citizenship card, or utility bill.
In many cases, cross-checks with federal databases (like immigration records or citizenship status) ensure that the applicant is who they claim to be. Newcomers may also face additional document checks to confirm their eligibility before a license is issued.
4. Real-Time Photo Comparison and Biometrics
When you renew your license or apply for a new one, your photograph is compared with existing photos on record using facial recognition software. This system helps detect cases where someone might be trying to fraudulently assume another person’s identity. In the future, more provinces are planning to expand the use of biometrics, such as fingerprints or iris scans, to further strengthen identification measures.
5. Ongoing Monitoring and Alerts
Canadian licensing systems do not just verify identities at the point of issuance — they continue monitoring afterward. If a license is reported stolen, lost, or involved in suspicious activity, it can be flagged in the system. Law enforcement agencies and border officials have real-time access to these databases, making it harder for stolen or fraudulent licenses to be used undetected.
Additionally, provinces encourage drivers to immediately report lost or stolen licenses to prevent identity theft and ensure the system remains secure.
Canadian licensing authorities are committed to staying ahead of fraudsters by continually updating security features and identity verification processes. Thanks to multi-layered protection — from physical security measures to real-time monitoring — Canadians can trust that their licenses remain a strong line of defense against identity fraud.
For step-by-step guidance on obtaining your driver’s license safely and staying informed about new ID requirements, visit LicensePrep.ca. Their resources make navigating the licensing process simple and secure!
#IdentityFraud#CanadianDriversLicense#LicenseSecurity#IDVerification#LicensePrepCanada#FraudPrevention#DrivingInCanada#Secure
4 notes
·
View notes
Text
Parental Sponsorship Made Easy: Steps to Reunite in Canada

Family means everything, and being separated from your loved ones can be incredibly challenging—especially when your parents are miles away. Fortunately, Canada offers a compassionate and structured Parental Sponsorship program designed to help families reunite. If you're a permanent resident or citizen of Canada looking to bring your parents or grandparents here, this guide will walk you through the essential steps and simplify what may seem like a complex process.
What Is Parental Sponsorship?
Parental Sponsorship is part of Canada's Family Class immigration stream. Through this program, Canadian citizens and permanent residents can sponsor their parents or grandparents to become permanent residents of Canada. Once approved, your loved ones can live, work, or even retire comfortably in Canada, surrounded by family.
Step 1: Check Your Eligibility
Before applying, you must meet specific criteria to become a sponsor:
Be at least 18 years old
Be a Canadian citizen, permanent resident, or registered under the Canadian Indian Act
Meet the Minimum Necessary Income (MNI) requirements for the past three tax years
Sign an undertaking to financially support your parents for 20 years (10 years in Quebec)
Your financial capability is critical. If you’ve sponsored others recently, ensure that existing responsibilities won’t interfere with your new application.
Step 2: Submit the Interest to Sponsor Form
Each year, Immigration, Refugees and Citizenship Canada (IRCC) opens a limited window for sponsors to express their interest. This is known as the Interest to Sponsor form. The process is usually random, so it’s vital to submit early and correctly.
Tip: Monitor IRCC updates closely. The submission window is short and fills up quickly.
Step 3: Wait for the Invitation to Apply
If you are selected in the pool, you’ll receive an Invitation to Apply (ITA) from IRCC. This is your green light to proceed with the formal sponsorship application. It’s important to respond within the deadline and include all required documentation to avoid delays or refusals.
Step 4: Submit Your Application Package
Your application will include two parts:
Sponsorship Application – Completed by you, the sponsor
Permanent Residence Application – Completed by the parent(s) or grandparent(s)
Make sure all forms are filled correctly and supporting documents (such as proof of relationship, financial documents, etc.) are attached. Accuracy is essential.
Step 5: Medical and Background Checks
Your sponsored family members will be required to undergo medical exams and submit police clearance certificates. These checks ensure your parents are admissible to Canada in terms of health and security.
Step 6: Wait for a Decision
Processing times can vary depending on case complexity and volume. On average, it may take 20–24 months for the entire process, but timelines can change.
During this time, your parents may also consider applying for a Super Visa, which allows them to visit you in Canada for up to five years at a time while waiting for permanent residency.
Step 7: Welcome Your Parents Home
Once approved, your parents or grandparents will receive their Confirmation of Permanent Residence (COPR) and can make their move to Canada. It's a joyful reunion that marks the beginning of a new chapter for your family.
Why Professional Help Matters
Parental Sponsorship applications can be overwhelming, with strict timelines, financial obligations, and evolving rules. Working with an experienced Canadian immigration lawyer or consultant can make all the difference.
We’ve helped countless families navigate the process successfully—Visit us today to learn how we can help bring your parents to Canada with confidence and clarity.
Final Thoughts
Reuniting with your parents in Canada is a heartfelt goal that’s entirely within reach—with the right steps and support. From eligibility to application, each part of the journey matters. Don’t let red tape stand in the way of family togetherness. Visit us to begin your parental sponsorship journey today—because every family deserves to be together.
0 notes
Text
Best Immigration Consultant in Delhi: Maara – MARA/CICC

Introduction
Thinking of moving abroad but overwhelmed by the paperwork and legal jargon? You’re not alone. The immigration journey is like climbing a steep hill—you’ll need the right gear and an experienced guide. That’s where Maara, one of the best immigration consultants in Delhi, comes in. With a team certified by MARA and CICC, Maara makes your dreams of settling in countries like Canada and Australia a smooth reality
Book a Free Consultation with us from here
Understanding Immigration Consultancies
What is an Immigration Consultant?
Simply put, an immigration consultant is your one-stop shop for everything visa, permanent residency, and citizenship. They're equipped to know immigration laws, application processes, and what will work best for your specific situation.
Role of Certified Consultants (MARA & CICC)
CICC stands for College of Immigration and Citizenship Consultants in Canada. It's the regulating body that oversees immigration consultants and makes sure that they are highly qualified and ethical.
Who is Maara?
A Trusted Name in Immigration
Maara is not just another immigration agency. It’s a well-established consultancy in Delhi with a mission to make global relocation stress-free, affordable, and trustworthy. Whether you're a student, skilled worker, or someone seeking a fresh start abroad, Maara tailors its services to fit your needs.
Mission and Vision
Maara believes in honesty, accuracy, and transparency. Their vision is to become India’s most trusted bridge between ambition and opportunity.
Industry Reputation
With hundreds of positive reviews and successful visa cases, Maara is often recommended by word-of-mouth—always a sign of trust.
Credentials and Certifications
What is MARA?
MARA stands for Migration Agents Registration Authority in Australia. Agents registered with MARA must follow a strict Code of Conduct, ensuring you get legal and honest advice.
What is CICC?
CICC is the College of Immigration and Citizenship Consultants in Canada. It’s the licensing body that governs immigration consultants and ensures that they’re well-qualified and ethical.
Why These Certifications Matter
You wouldn’t trust a doctor without a license—why trust a consultant without one? These certifications protect you from fraud and give you peace of mind.
Services Offered by Maara
Study Visa Assistance
Dreaming of studying in Canada or Australia? Maara will help you choose the right course, university, and handle all the paperwork for your student visa.
Permanent Residency (PR)
Whether it’s Express Entry for Canada or Skilled Migration for Australia, Maara simplifies the path to becoming a permanent resident.
Work Visa Solutions
Maara assists professionals and skilled workers in finding jobs and acquiring work permits abroad—legally and efficiently.
Visitor Visas
Planning a trip? Maara also handles tourist and visitor visa applications with quick turnaround times.
Spouse/Family Sponsorship
Bringing your loved ones with you? Maara can help with family reunification visas and spouse sponsorships.
Specialization in Australia and Canada Immigration
MARA for Australia
From student visas to permanent residency, Maara’s MARA-certified agents know the ins and outs of Australian immigration policies.
CICC for Canada
With CICC-certified consultants, Maara is fully equipped to guide you through complex Canadian immigration pathways like Express Entry, PNP, and more.
Why Choose Maara Over Others?
Transparency and Ethics
What sets Maara apart is their honest communication—no hidden fees, no fake promises.
High Success Rate
With a track record of thousands of approved applications, Maara has one of the highest success rates in the industry.
Personalized Guidance
You’re not just a number at Maara. They provide tailored advice, based on your profile, goals, and timeline.
Step-by-Step Immigration Process with Maara
Initial Consultation
Discuss your goals and get a free eligibility check.
Profile Evaluation
Maara’s experts analyze your qualifications and suggest the best pathway.
Documentation
They help you gather and verify all required documents—no stress, no mess.
Application Filing
Your application is filed by professionals, minimizing the risk of errors.
Post-landing Support
From airport pickup to accommodation guidance—Maara stays with you after you land.
Client Testimonials
"I got my PR in just 7 months thanks to Maara!" – Rahul, Delhi "Their honesty and professionalism made the entire process so easy." – Priya, Gurgaon
Cost and Affordability
Maara offers flexible payment plans and transparent fee structures. You pay for the value, not for the brand.
How to Spot a Fake Consultant
Watch out for:
No certifications (MARA/CICC)
Unrealistic guarantees
No office address
Asking for cash-only payments
Always verify before you commit.
Online and Offline Support
Maara operates both offline (Delhi office) and online, making it easy for clients across India and abroad to connect.
FAQs About Immigration and Maara
Q1: How do I know if Maara is legit? A: Check their MARA and CICC credentials, online reviews, and verified office in Delhi.
Q2: What’s the success rate of Maara’s applications? A: Over 90%, especially for PR and student visa cases.
Q3: Do they handle spouse sponsorships? A: Yes, Maara specializes in family reunification services.
Q4: Can I consult them online? A: Absolutely. They offer full support over Zoom, calls, and email.
Q5: What documents are usually required? A: Varies by visa type, but generally includes passport, academic/work records, and proof of funds.
Conclusion
Immigration is a life-changing decision, and the journey should be in the right hands. Maara, backed by MARA and CICC certifications, provides a trustworthy, efficient, and affordable route to your international goals. If you're serious about settling in Canada or Australia, don't settle for less. Let Maara lead the way.
5 Unique FAQs
1. Can Maara help with job placement overseas? Yes, especially for Canada and Australia where job offers boost your PR chances.
2. How long does the immigration process usually take? Anywhere from 6 months to 2 years, depending on the visa type and country.
3. Does Maara handle IELTS coaching too? They partner with top coaching centers to help you prepare for IELTS or PTE.
4. What age group is ideal for immigration? Typically 18–35 years old, but older applicants can still qualify with experience or sponsorship.
5. Can I get a refund if my visa is rejected? Maara offers partial refunds based on the terms discussed upfront—transparency is key.
Book a Free Consultation with us from here
0 notes
Text
Processing Times for Canadian Immigration Pathways
Processing Times for Canadian Immigration Pathways as of April, 2025, based on available data from IRCC.
Understanding IRCC Processing Times
IRCC measures processing time from receipt of a complete application to a final decision. Estimates are updated monthly for permanent residence and citizenship and weekly for temporary residence and permanent resident (PR) cards. Exclusions include:
Expression of Interest (EOI) submission or Invitation to Apply (ITA) wait times.
Document preparation or mailing of permits/visas.
Biometrics processing (typically 8 weeks for visas).
Key Influencing Factors:
Volume: High application numbers increase backlogs (821,200 backlogged applications as of February 28, 2025).
Completeness: Missing documents trigger delays.
Country of Residence: Visa office caseloads vary.
Complexity: Verification-intensive streams (e.g., H&C) take longer.
IRCC Capacity: Automation, policy changes, and the 2025–2027 Immigration Levels Plan (395,000 PRs in 2025) impact efficiency.
Processing Times by Pathway
1. Express Entry
Programs: Federal Skilled Worker Program (FSWP), Canadian Experience Class (CEC), Federal Skilled Trades Program (FSTP), Provincial Nominee Program (PNP, Express Entry-aligned).
Processing Times:
FSWP: 6 months
CEC: 6 months
FSTP: 6 months
PNP: 8 months
Analysis:
Express Entry meets IRCC’s 6-month standard for 80% of electronic applications, making it the fastest permanent residency pathway.
PNP takes longer due to provincial nomination (e.g., Alberta’s AAIP Express Entry Stream adds ~2 months).
As of February 28, 2025, 25% of Express Entry and 36% of PNP applications were backlogged, exceeding IRCC’s 20% target.
Spring 2025 policy changes removed LMIA-based CRS points, potentially reducing application volumes and stabilizing times.
Category-based draws (e.g., healthcare, French proficiency) influence CRS cutoffs, affecting ITA timelines.
Delays: Incomplete applications, additional verification, or high CRS score requirements.
2. Labour Market Impact Assessment (LMIA)
Purpose: Ensures foreign worker hiring does not harm Canadian labor markets, processed by Employment and Social Development Canada (ESDC).
Processing Times:
Global Talent Stream: 10–15 business days (average 12 days)
High-Wage Stream: 30–40 business days (average 35 days)
Low-Wage Stream: 40–50 business days (average 45 days)
Agricultural Stream: 25–35 business days (average 30 days)
Analysis:
Global Talent Stream is fastest, targeting tech roles.
LMIA approval precedes work permit applications, adding 2–5 weeks (inside Canada) or 5–17 weeks (outside Canada).
The Spring 2025 removal of LMIA-based CRS points may lower application volumes, potentially shortening times.
High-wage and low-wage streams face longer delays due to stricter labor market tests.
Delays: Incomplete employer documentation (e.g., recruitment proof), high volumes, or regional restrictions (e.g., no low-wage LMIAs in high-unemployment areas).
3. Spousal Sponsorship
Purpose: Allows citizens/PRs to sponsor spouses, common-law, or conjugal partners.
Processing Times:
Outside Canada (non-Quebec): 10 months
Outside Canada (Quebec): 36 months
Inside Canada (non-Quebec): 24 months
Inside Canada (Quebec): 32 months
Analysis:
Includes biometrics, eligibility, and relationship verification.
Quebec’s longer times stem from the Québec Acceptance Certificate (CAQ) requirement.
Automation tools reduced the family sponsorship backlog to 14% by February 28, 2025 (from 15% in January).
Complex cases (e.g., custody disputes) may take up to 24 months.
AOR recipients can apply for faster visitor visas.
Delays: Weak relationship evidence, additional requests, or high caseloads at visa offices (e.g., New Delhi).
4. Humanitarian and Compassionate (H&C) Considerations
Purpose: Exceptional pathway for inadmissible/ineligible applicants with compelling circumstances.
Processing Time: 24–36 months (estimated, based on 2022 data and 2025 trends)
Analysis:
H&C applications averaged 32 months in December 2022 due to detailed humanitarian reviews.
73% of 76,200 Refugee and Humanitarian Class applications were backlogged in 2022, with no significant 2025 reduction reported.
Applicants must request specific IRPA exemptions with strong evidence.
Only one H&C application is processed at a time.
Delays: Extensive verification, high volumes, or weak submissions.
Purpose: Allows parents/grandparents to visit for up to 5 years per entry.
Processing Time: 3–8 months (varies by country/visa office)
Analysis:
Depends on visa office caseload and country (e.g., longer for India).
Requires proof of relationships, medical insurance, and host financial support.
Biometrics (8 weeks) are included.
Recent insurance requirement changes improved accessibility.
Delays: Incomplete insurance/financial proof or high-volume visa offices.
Tip: Submit complete documents; check country-specific times on Canada.ca.
6. Visitor Visa
Purpose: Permits tourism, family visits, or business for up to 6 months.
Processing Times:
Inside Canada: 16 days
Outside Canada: 30 days (post-biometrics, varies by country)
Biometrics: 8 weeks (included)
Analysis:
Country-specific variations persist (e.g., India faces delays).
65% of applications were backlogged as of February 28, 2025, against a 50% target.
Spousal sponsorship AOR holders receive priority.
Weekly updates ensure accuracy.
Delays: Missing travel history, financial proof, or seasonal peaks.
7. Refugee Pathways
Programs: Government-Assisted Refugees, Private Sponsorship, In-Canada Asylum Claims.
Processing Times:
Government-Assisted: 24–30 months
Private Sponsorship: 18–27 months
In-Canada Asylum: 24–36 months
Analysis:
2022 data showed 76% of 23,000 government-assisted and 73% of 76,200 private sponsorship applications backlogged.
The 2025–2027 plan targets 79,000 refugee admissions, straining resources.
Automation and the Permanent Residence Portal slightly improve private sponsorship efficiency.
Verification complexity drives long timelines.
Delays: Global demand, security checks, and backlogs (55,700 private sponsorships in 2022).
Study Permit
Processing Times:
Outside Canada: 5–17 weeks
Inside Canada: 4 weeks
Extension: 207 days
Work Permit
Processing Times:
Inside Canada: 218 days
Outside Canada: 5–17 weeks
PGWP: 5–6 months (online), 2 months (paper)
Analysis: 32% backlogged (February 2025). LMIA-based permits add time.
Citizenship
Processing Times:
Grant: 7 months
Certificate: 3 months
Analysis: 18% of 239,600 applications backlogged (February 2025). AORs issued for March 17, 2025, submissions.
Tip: Verify residency (1,095 days in 5 years).
Permanent Resident (PR) Card
Processing Times:
New: 26 days
Renewal/Replacement: 91 days
Analysis: Weekly updates; delays from verification.
Influencing Factors
Backlogs: 2,029,400 applications in inventory, 821,200 backlogged (40%) as of February 28, 2025.
Automation: Tools like Chinook and analytics for spousal sponsorships speed routine cases but flag complex ones.
Policy: Reduced 2025 PR target (395,000) prioritizes economic streams, easing backlogs.
Changes: LMIA point removal and flag poling restrictions (December 2024) streamline processes.
Visa Offices: Regional variations persist.
Tips to Minimize Delays
Submit complete applications to avoid requests.
Use online portals for faster processing.
Track status via IRCC’s Client Application Status tool.
Respond promptly to biometrics/information requests.
Consult immigration representatives for complex cases (H&C, refugee).
Check visa office-specific times on Canada.ca.
Apply early to navigate seasonal peaks.
0 notes
Text
How to Apply for a Student Visa Canada: Step-by-Step Process Explained
Studying in Canada is a dream for many international students, thanks to its world-class education system, diverse culture, and wide range of career opportunities. However, to embark on this exciting journey, the first essential step is obtaining a student visa Canada. In this comprehensive guide, we'll walk you through the step-by-step process of applying for a Canadian student visa, ensuring that you are well-prepared for your application.
Step 1: Ensure Eligibility for a Student Visa
Before applying for a student visa Canada, it is crucial to confirm that you meet the eligibility criteria. Here are the basic requirements:
Proof of Acceptance: You need a valid acceptance letter from a Designated Learning Institution (DLI) in Canada. This is the first and foremost document that Immigration, Refugees, and Citizenship Canada (IRCC) will require to process your application.
Proof of Sufficient Funds: You must prove that you have enough funds to cover tuition fees, living expenses, and return travel. The cost of study in Canada varies depending on the program and location, but it is important to demonstrate that you can financially support yourself during your studies.
No Criminal Record: You may be asked to provide a police certificate to prove that you have no criminal background.
Medical Examination: In some cases, you may need to undergo a medical exam to ensure that you are in good health.
Intention to Return Home: You must convince the Canadian authorities that you will leave Canada after your studies are completed. This can be demonstrated through ties to your home country, such as a job offer, family, or property.
Step 2: Gather Required Documents
Once you confirm your eligibility, the next step is to gather all necessary documents for the application. The list may vary depending on your situation, but generally, you will need:
Acceptance Letter from a DLI in Canada (as mentioned earlier).
Proof of Funds showing that you have sufficient financial resources to cover your stay.
Passport with a validity of at least six months beyond your intended stay in Canada.
Photographs as per the Canadian visa specifications.
Statement of Purpose (SOP): A letter explaining why you want to study in Canada and how it fits into your career plans.
Educational Documents like your academic transcripts, diplomas, and any additional certifications.
Language Proficiency Test Results: You may need to provide IELTS or TOEFL scores to prove your English language proficiency.
Medical Exam Report: If required.
Police Clearance Certificate: If required.
It’s important to check the specific requirements of your study in Canada program, as some universities or colleges may ask for additional documents.
Step 3: Apply Online or Offline
You can apply for your student visa either online or offline. Most applicants prefer to apply online for convenience and faster processing times.
Online Application: Visit the official website of the Canadian Government and create an account with IRCC. Fill out the application forms and upload scanned copies of all required documents. After submitting the application, you will need to pay the processing fee.
Offline Application: If you choose to apply offline, you will need to download the application package from the IRCC website, fill it out, and submit it to your nearest VAC (Visa Application Centre) along with the required documents and fees.
Step 4: Pay the Application Fee
The application fee for a Canadian student visa is approximately CAD 150. This fee must be paid at the time of submitting your application. The payment can typically be made online through various methods such as credit cards, debit cards, or bank drafts.
Step 5: Wait for Processing
Once your application has been submitted, IRCC will begin processing your application. This can take several weeks to months, depending on various factors, including your country of residence, the volume of applications, and whether additional documentation or a visa interview is required.
During this period, IRCC may ask you for biometric data or additional documents. Be prepared to respond promptly to any requests. The average processing time for a student visa application can range from 4 to 6 weeks, but this may vary.
Step 6: Biometrics Appointment
If you are required to provide biometrics (fingerprints and a photo), IRCC will notify you about the appointment. You will need to visit a VAC or a designated biometric collection center to complete this process. This step is mandatory for most applicants.
Step 7: Interview (if necessary)
In some cases, you may be asked to attend an interview at the Canadian embassy or consulate. This is not always required, but if you are requested to do so, make sure to be prepared and provide clear answers about your study plans and intentions to return home after your studies.
Step 8: Receive Your Study Permit
Once your application is approved, you will receive a study permit Canada, which allows you to study in Canada. You will receive a Port of Entry (POE) Letter of Introduction, and if you are from a visa-required country, you will also be given a temporary resident visa (TRV) to enter Canada.
Step 9: Arrive in Canada
Before traveling to Canada, ensure that you have all necessary documents in hand, including your passport, visa, POE Letter of Introduction, and any additional documents requested by the Canadian authorities. Upon arrival, you will need to present these documents to the immigration officer.
Once cleared, you will be allowed to enter Canada and start your studies at your chosen institution.
Important Tips for a Smooth Application
Apply Early: Begin your student visa application process well in advance of your desired start date. This allows you to deal with any unforeseen delays or issues that may arise.
Check for Specific University Requirements: Some Canadian universities or colleges may have specific visa requirements. Always verify with your institution to ensure you meet their criteria.
Track Your Application Status: You can track the status of your application online through your IRCC account. This helps you stay informed about the progress of your visa application.
Conclusion
Applying for a student visa Canada is an essential step toward achieving your educational goals in Canada. By following this step-by-step guide, you can ensure that your application process is smooth and timely. Be diligent in gathering your documents, meeting deadlines, and preparing for the visa interview, if required. Canada’s world-class education system and career opportunities make it an exciting destination for international students. With the right preparation and guidance, you will be on your way to studying in one of the best countries for higher education. Also read: Scholarships in Canada: Your Guide to Financial Aid and Tuition Discounts
0 notes
Text
Canadian Student Visa 2025 | A Complete Guide

Thinking about studying in Canada in 2025? You're not alone! Canada continues to be a top choice for international students, offering world-class education, multicultural cities, and post-study work opportunities. But before you pack your bags, you’ll need a Canadian Student visa, officially known as a study permit. Here's your complete guide to getting started.
Why Study in Canada?
Canada is known for its high academic standards, research-driven programs, and welcoming immigration policies. Canadian universities consistently rank among the best globally, and with strong support for international students, it’s no surprise that thousands choose Canada every year.
Plus, studying in Canada could open doors to permanent residency through programs like the Post-Graduation Work Permit Program (PGWPP) and Express Entry.
What Is a Canadian Study Permit?
A study permit is not a visa. It allows you to study at designated learning institutions (DLIs) in Canada. You’ll also need a temporary resident visa (TRV) or an electronic travel authorization (eTA) to enter the country, which you’ll receive automatically if your study permit is approved.
Who Needs a Study Permit?
You need a study permit if:
Your course lasts more than six months.
You’re studying at a designated learning institution (DLI).
You’re not a Canadian citizen or permanent resident.
Short-term courses (six months or less) typically don't require a study permit.
Canadian Student Visa Requirements (2025)
To apply for a Canadian study permit, you’ll need:
✅ Acceptance Letter: From a Designated Learning Institution (DLI).
✅ Proof of Funds: To cover tuition fees, living expenses, and return transportation.
✅ Valid Passport: Must cover the entire study period.
✅ Passport-Sized Photos: As per visa guidelines.
✅ Medical Exam: Required for students from certain countries.
✅ Police Clearance Certificate: Proving you have no criminal record.
✅ Statement of Purpose (SOP): Explaining your study plans and career goals.
✅ Biometrics: Fingerprints and photo.
💡 Tip: Start collecting your documents early to avoid last-minute stress!
Step-by-Step Application Process
1. Apply to a DLI: Before anything else, apply and receive an acceptance letter from a recognized Canadian institution.
2. Gather Your Documents: Prepare all required documents carefully. Double-check expiration dates and official translations if necessary.
3. Apply Online: Create an account on the Immigration, Refugees and Citizenship Canada (IRCC) portal and fill out your application.
4. Pay the Fees: As of 2025, the study permit application fee is CAD 150. Biometrics fees may cost an additional CAD 85.
5. Biometrics Appointment: Visit your nearest Visa Application Center (VAC) for fingerprinting and photographs.
6. Attend an Interview (if required): Some applicants may be called for an interview at their local Canadian embassy or consulate.
7. Wait for Processing: Processing times vary by country but usually take between 6 to 12 weeks. You can track your application online.
8. Prepare for Arrival Once approved, you'll receive a Port of Entry (POE) Letter of Introduction and, if required, a TRV or eTA.
Key Changes to Note for 2025
Higher Financial Proof Requirements: Due to inflation and rising living costs, students are required to show stronger financial evidence compared to previous years.
Updated DLI List: Always ensure your school remains on the list of approved institutions.
Faster Processing for SDS Applicants: Students from certain countries using the Student Direct Stream (SDS) can expect quicker decisions.
Final Thoughts
Starting your Canadian study journey is an exciting step, and getting your visa approved is the first milestone! The key is preparation, attention to detail, and understanding the new 2025 requirements.
If Canada is on your radar for 2025, now is the time to begin! Research your programs, gather your documents, and make your study abroad dreams a reality. Feel free to drop your questions in the comments.
0 notes
Text
GIC Canada Explained: Everything Indian Students Must Know Before Applying
For Indian students planning to study in Canada, understanding the Guaranteed Investment Certificate (GIC) is an essential part of the student visa process. The GIC isn’t just a financial requirement—it’s a part of proving your ability to live and study in Canada independently. If you're wondering what GIC is, why it's important, and how to apply for it, this article will give you a clear, step-by-step breakdown.
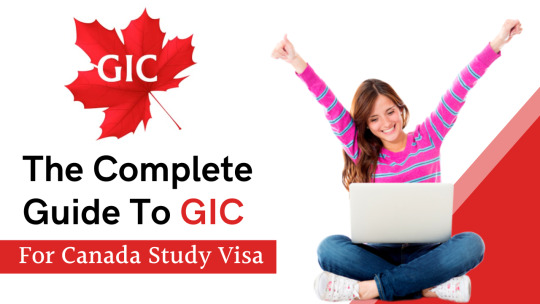
What is a GIC in Canada?
A Guaranteed Investment Certificate (GIC) is a short-term investment offered by Canadian banks to international students. It serves two purposes:
Proof of Funds for Visa Approval – Immigration, Refugees and Citizenship Canada (IRCC) requires international students to show proof that they can support themselves financially. The GIC fulfills this requirement.
Living Expense Support – Once in Canada, students receive monthly payments from their GIC account to cover living expenses.
As of 2025, Indian students must invest CAD 20,635 in a GIC to meet the IRCC’s financial requirement under the Student Direct Stream (SDS) category.
Why Do Indian Students Need a GIC?
The GIC is a mandatory requirement for those applying through SDS, which offers faster visa processing. Here’s why Indian students should take it seriously:
Faster Visa Processing: SDS visa applications are usually processed within 20 days when all documents (including GIC) are correctly submitted.
Financial Security: You’re assured of having living expenses covered as soon as you land in Canada.
Banking Setup Made Easy: Most GIC providers help you set up a Canadian bank account even before you arrive, saving you time and effort.
How Does the GIC Process Work?
Here’s a simplified breakdown:
Choose a Designated Bank Only select Canadian banks are authorized to offer GICs to international students, such as:
Scotiabank
ICICI Bank Canada
SBI Canada
CIBC
RBC
Open a GIC Account Apply online through your chosen bank’s GIC portal. Submit identity proof like your passport and admission letter from a Designated Learning Institution (DLI) in Canada.
Transfer Funds Transfer the required amount (CAD 20,635 for 2025) from your Indian bank to your Canadian GIC account.
Receive a GIC Certificate Once the money is deposited, the bank issues a GIC certificate, which you submit during your visa application.
Withdraw Funds in Canada After arriving in Canada, you'll get an initial lump sum (usually CAD 2,000) and the rest is released monthly for 10-12 months.
Important Tips Before Applying
Start Early: GIC approval can take a few days to a couple of weeks, depending on the bank and document verification.
Keep Documents Ready: Ensure your passport, admission letter, and bank KYC documents are up-to-date.
Choose the Right Bank: Compare processing time, support services, and fees across banks before finalizing.
Common Questions Answered
Can I cancel my GIC? Yes. If your study permit is refused or you decide not to study in Canada, your GIC can be cancelled and refunded.
What if I need more funds? The GIC covers your living expenses, but tuition and other costs must be managed separately. Scholarships and part-time work may help.
Final Thoughts
For Indian students, the GIC is not just a financial product—it's a gateway to unlocking your dream to study in Canada. From smoother visa approvals to secured monthly allowances, it plays a crucial role in your study-abroad journey.
If you're looking for guidance on choosing the right GIC provider, comparing universities, or applying for a student visa, platforms like MSM Unify can make your entire process smoother and smarter. From expert counselling to one-click applications, MSM Unify is your trusted partner for studying abroad confidently.
Also read: Complete Guide to Study in Canada: Tuition, Living Costs & Scholarships for Indian Students
0 notes
Text
Canada Super Visa Requirements: A Complete Guide by IRA Immigration

Bringing your loved ones closer, especially parents and grandparents, is a dream for many immigrants in Canada. If you’ve settled in Canada and want your parents or grandparents to visit longer without having to reapply frequently, the Canada Super Visa is just what you need.
But before you apply, understanding the Canada Super Visa requirements is essential. In this blog, we’ll break it all down for you, step by step, in the simplest language possible. We’ll also share the benefits, eligibility criteria, and how IRA Immigration, one of the best visa consultants in Delhi, can guide you through the process.
What is the Canada Super Visa?
The Super Visa Canada is a special type of visa that allows parents and grandparents of Canadian citizens and permanent residents to visit and stay in Canada for up to 5 years at a time without needing to renew their status during that period. Even better, it can be valid for up to 10 years, depending on your passport's validity.
Unlike a regular visitor visa, which typically allows a 6-month stay, the Canada Super Visa is a fantastic option for long-term visits.
Who Can Apply? Super Visa Canada Eligibility
Before you apply, it’s important to check the super visa eligibility. Here's who qualifies:
You must be the parent or grandparent of a Canadian citizen or permanent resident.
You must have a signed invitation letter from your child or grandchild.
Your host in Canada must meet the minimum income for a Super Visa to support your stay.
You must purchase Canadian medical insurance valid for at least one year.
You must undergo a medical exam if requested.
Still unsure if you meet all the Canada Super Visa requirements? Don’t worry—IRA Immigration can assess your case and confirm everything before you begin the process.
Canada Super Visa Requirements – Document Checklist
To apply, here are the documents you’ll typically need:
A letter of invitation from your child or grandchild in Canada.
Proof of relationship (birth certificate or legal documents).
Proof of your host's Canadian citizenship or permanent residency.
Proof of minimum income (Notice of Assessment, T4, etc.).
Medical insurance from a Canadian company (at least $100,000 coverage).
Completed visa application forms.
Medical exam results (if required).
Meeting all the super visa Canada requirements can seem overwhelming, but having a visa expert helps. That’s why so many families trust IRA Immigration, a top-rated visa consultant in Delhi, to make the process smooth and stress-free.
Super Visa Processing Time – How Long Does It Take?
Once you’ve submitted your complete application, you might be wondering how long it takes. The super visa processing time can vary depending on where you apply from. Typically:
In India, it takes about 2 to 4 months.
If extra documents or a medical exam are needed, it might take longer.
Pro tip: Submitting a complete and accurate application is key to avoiding delays. That’s where super visa immigration consultants like IRA Immigration can help, by ensuring nothing’s missing or incorrect.
Minimum Income for Super Visa – A Key Requirement
One of the most important parts of the Canada Super Visa requirements is the minimum income threshold. Your child or grandchild in Canada must prove they earn enough to support your visit.
Here’s a rough guide (updated yearly) based on family size:
1 person (you): approx. $27,000
2 people: approx. $33,000
3 people: approx. $41,000
And so on. If your family in Canada doesn’t meet this requirement, your application could be refused. That’s why many people consult super visa immigration consultants like IRA Immigration to double-check their documents before applying.
Benefits of Super Visa Canada
Choosing the Super Visa Canada over a regular visitor visa has many advantages:
Longer stay: Up to 5 years without having to renew status.
Multiple entries: Travel in and out of Canada without reapplying.
Stability: Great for parents who want to spend more time with grandchildren.
Faster processing: Often faster than sponsorship immigration programs.
No need to become a permanent resident right away.
If your goal is to spend quality time with family without immigration complications, this visa is a great choice.
Why Choose IRA Immigration – Trusted Visa Consultants in Delhi
Applying for a visa—especially one with so many requirements—can feel stressful. You don’t want to miss any step or submit the wrong document. That’s why choosing experienced visa consultants in Delhi like IRA Immigration makes a huge difference.
Here’s how we help:
Personalized eligibility checks for the Super Visa.
Help gathering and preparing supporting documents.
Guidance with purchasing the right medical insurance.
Review of income documents to ensure you meet the minimum income for the Super Visa.
Updates on super visa processing time and application tracking.
We’ve helped hundreds of families reunite in Canada with successful Super Visa approvals, and we’d love to help you too.
Final Thoughts – Is the Canada Super Visa Right for You?
If you’re a Canadian citizen or permanent resident who wants your parents or grandparents to spend more time with you, the Canada Super Visa is an excellent choice. It offers longer stays, fewer hassles, and a clear application process if you meet all the Canada Super Visa requirements.Remember, even a small mistake on your application can lead to delays or rejection. That’s why having IRA Immigration, one of the best visa consultants in Delhi, by your side can make all the difference.
0 notes