#anyhow best I stop dithering and see what I can do
Text
Well, after fundamentally rejigging the events of this scene, and as a result those of the rest of the entire chapter as well, I may possibly be able to eke out something worth a damn. Great...
#the things I do for#fanfiction#and friends. This whole thing started as a birthday gift. last year's birthday gift#the whole 5 chapters#Ha! I was foolish once......#still am#anyhow best I stop dithering and see what I can do
7 notes
·
View notes
Text
How to gif
Hey everybody! There has been some interest in me sharing a gif making tutorial with you all, so here it is! I hope you enjoy it! 💖
I use screen recordings for giffing, so in this tutorial we’re going to be working with a video, rather than screen caps or other methods. This tutorial is for Photoshop (version doesn’t matter, since all of these controls will be present). I happen to use CS5.1 though, and I work on a Mac. The experience should be similar on Windows, and equivalent processes/menus/etc should also be available in GIMP.
First, open your video from Photoshop.
Then from the menu choose Window -> Animation to get the animation panel open. Now we’re going to get this video ready to be giffed. I’m using a clip I took of an interview with Gwil that I used for a recent gif set, and hadn’t deleted yet so the file was handy. I have all of this video to gif conversion work saved as a Photoshop action, which I would recommend since this gets dull to repeat, but actions are beyond the scope here, so I’ll simply walk through the process step by step.
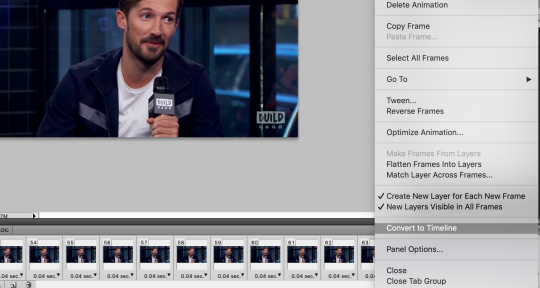
From the upper right corner of the animation panel, click the dropdown menu, then select “flatten frames into layers”.
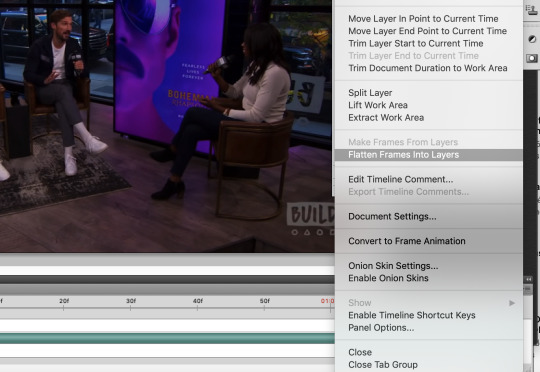
Say yes if a dialogue box opens, then wait - it might take a moment depending on your computer. Notice that you now have lots of layers in the layer view.
Next, go back to the same animation menu, and select “convert to frame animation”. The initial view for a video is a timeline, and you’ll need to work with frames right now.
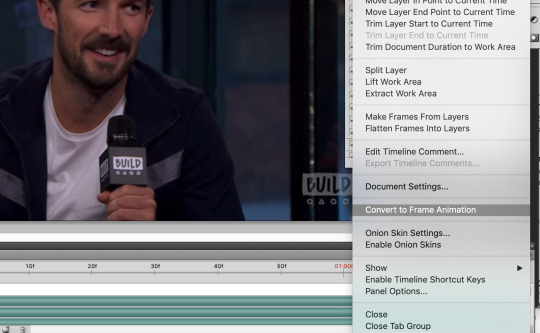
Next, also in the same menu, select “make frames from layers”. This will take those layers we generated before from the video and use them to create frames for us to use instead.

Now delete the first frame - you’ll see it has a ridiculously long duration. That’s just left over from the video and we don’t need it. Select it in the frame view, then hit the little trash can icon.

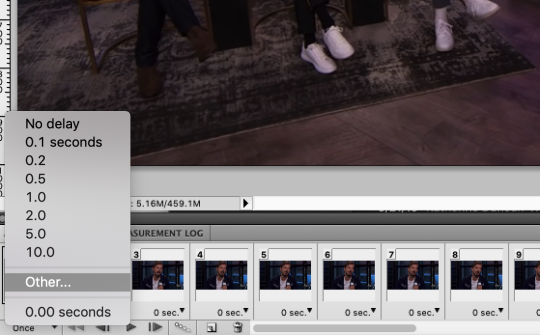
Bye-bye. It’s time to change the duration on the remaining frames. They all currently say zero and we don’t want that, we need some duration for them. Select all frames either from the animation menu, or by clicking the first frame, holding shift, then scrolling and clicking on the last frame.

With all frames select, click the down arrow next to any frame and choose “other” for the duration. I use 0.04, so type that into the box that pops up and hit ok.
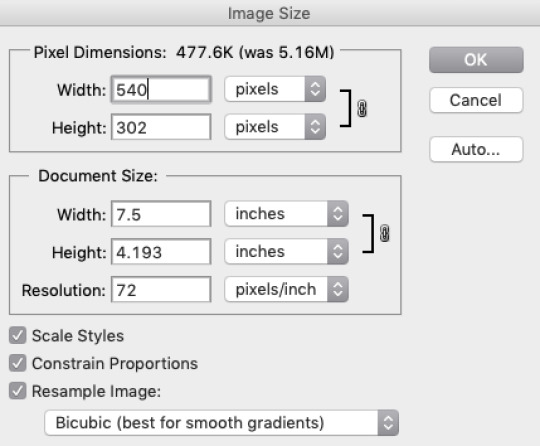
We’re almost there! All you need to do now is resize the image. Go to the menu and select Image -> Image Size. Make sure the height and width are linked (with the little chain showing the line connecting the two dimensions) and you have bicubic selected for the image resampling (other resampling settings can cause undesired results).
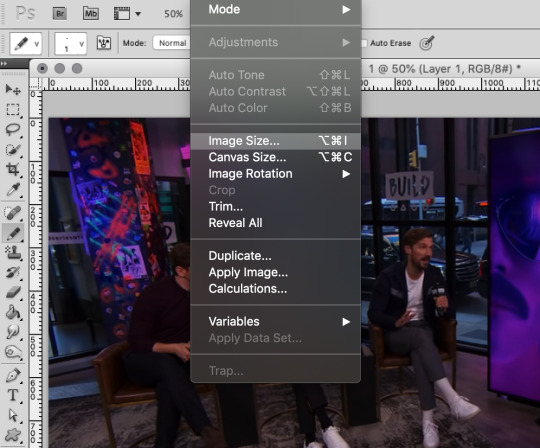
I use 540px for full width gifs, so that’s what I’ll be using here. If you want half-size widths, go for 270px.
Now you’re ready to get coloring! When it comes to this part, it’s really up to your preference. There are many ways to do it and nothing’s necessarily the best. Just do what looks good to you. I’ll walk through what I do, and then you can use your best judgement for where you’d like to go from there.
In the layers panel, scroll up and select the highest layer. We’ll be adding some adjustment layers (Window -> Adjustments) on top.
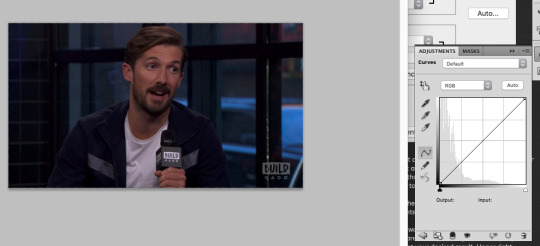
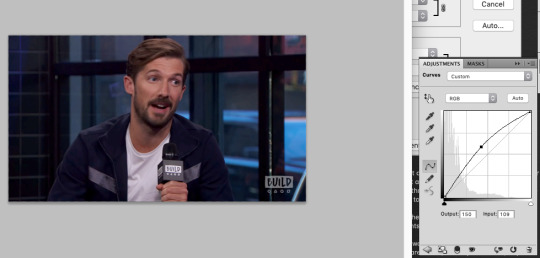
I always begin with curves. Select the curves item in the adjustments panel. Curves are a way to adjust the dark/light balance of an image in a fine-tuned manner. There are some presets you can use, or you can drag the curve however you like to get your desired result. Upper right represents white, and lower left represents black. Gray values fall in the middle. I want to brighten this image, so I will click in the middle of the straight diagonal line and pull upwards.
Before:
After:
Now, I always up the vibrance. I like how it looks, and the result is less obvious than increasing saturation. Click the back button in the adjustments view and select vibrance.
I set it at +14, because that’s what seems to consistently produce a decent result. The colors pop a bit more now.

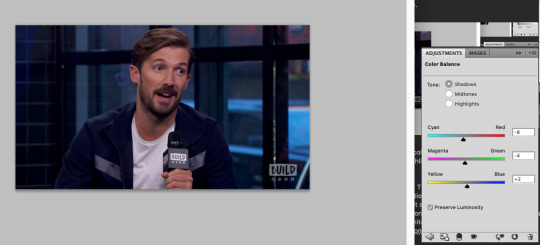
Now we’re going to tweak the color balance. Hit the back button in the adjustments menu again, and select the color balance item. This is where you can get into the nitty gritty of your image.
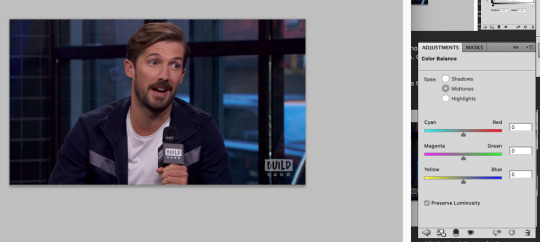
Color balance allows for not just overall color adjustment for the image, but separate color changes for shadows, highlights, and midtones. As you can see above, nothing has changed yet.
I always start by adjusting shadows first. This is less of a science and more of a ‘get it to look good by eyeballing it’ situation. Generally you want the items that are black to look black and the items that are white to look white, without a color cast on them, and peoples’ skin tones should look normal. In this image we have the black microphone, white shirt, and Gwil’s face, so we can adjust the shadows, highlights, and midtones based on those elements.
I like to start with shadows first - be sure to select the radio button for the one you want to work on.
This did darken the image a bit, but no worries. Highlights next.
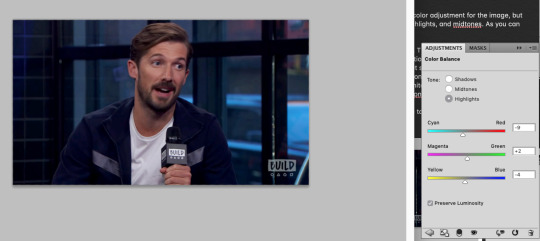
And then on the midtones to finish it up.
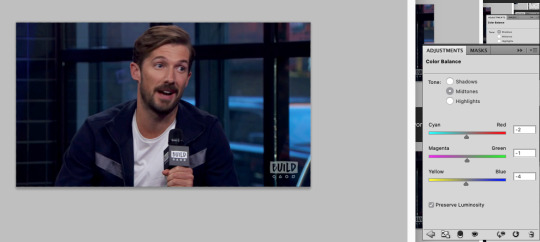
Feel free to go back in and tweak any of the values you chose if you’re not happy with how all of the adjustments look together. This looks alright for our purposes though, so let’s move on.
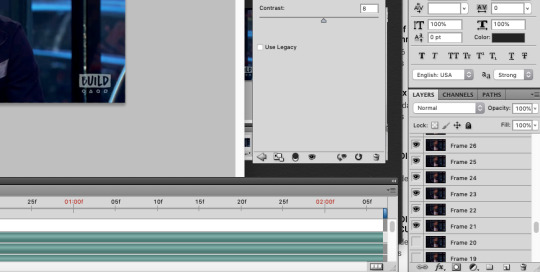
In the adjustments panel, let’s add one more thing. Hit the back button and then select brightness/contrast. This image is looking a little muddy still, so let’s up the brightness and tweak the contrast to be higher so it feels really alive.
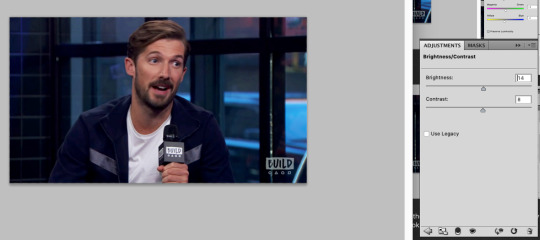
Much better. It looks like maybe you could be sitting there across from Gwil. Now that we have this masterpiece, it’s time to chop the frames down to a suitable length. This gif has 87 frames, which I find from general experience to be too long. I aim for about 70, but if a gif has a lot of action or a lot of color variety those both can increase the size, so you may need to decrease the frame count to 60 or even down to 50 (especially with big gifs). I’m sticking with the 3MB size limit for gifs, because I don’t care for the compression that happens otherwise, so these frame counts are based on that.
Select some frames in the animation panel and delete them - be sure to delete only from the beginning or end, and not in the middle, or your gif is going to skip like a scratched CD. Or broken record. Or something. You don’t want missing frames in between. The same thing with accidentally dragging frames out of order (which I have done).
I’m taking 20 off of the beginning of the gif for starters.
Now, in the animation menu select “convert to timeline”. We want that timeline back now, because it helps us see what the gif will end up looking like far better than the frame view, which plays the gifs with a lag. It’s easier to preview with the timeline, and you don’t have to worry about which frame you’re currently on etc etc.
In the layers menu, you will now see that some layers have an eye next to them, meaning they are visible, and some don’t. Delete all of the invisible layers. We want them gone so they don’t increase our file size upon save, and they’re only taking up room anyhow.
Next, select all of the layers of your gif except for the adjustment layers, then right click (option click) and select “convert to smart object”.
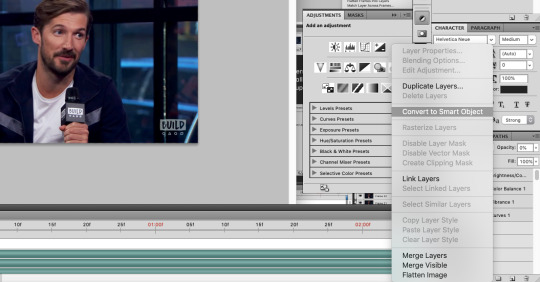
Now, with your new smart object selected, go on the menu to Filter -> Sharpen -> Smart Sharpen (you didn’t think I’d skip sharpening did you?).
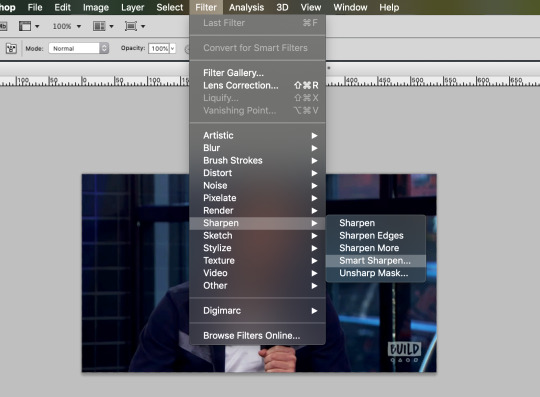
This is what my smart sharpen settings look like, so feel free to copy them.
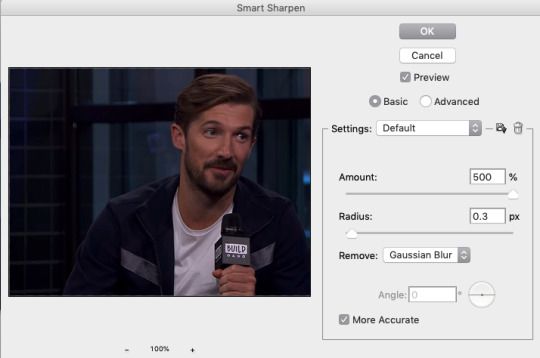
(Note the preview doesn’t show our adjustment layer work) Select ok - your image is now sharp!

I’m going to add a watermark at this point by using the text tool, typing my text, then moving it to the upper right and lowering its opacity. You can do that too if you like, or skip it if you don’t want to bother. 10pt size font is what I use.
We’re ready to save!
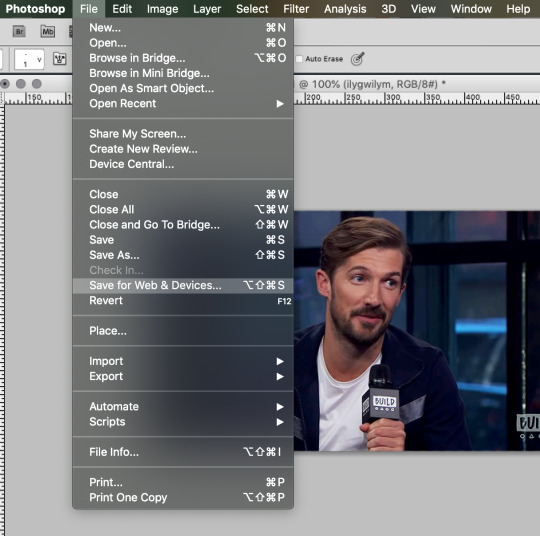
From the menu, go File -> Save for Web & Devices.
If you have saved a gif before you might have some settings saved (at the very top with ‘presets’), or you might want to make a new setting. This is what my save settings look like. Note that I created this setting by editing a no-dither gif preset Photoshop has, so I don’t apply dither to gifs. It does save some on the file size and I haven’t noticed any difference in quality.
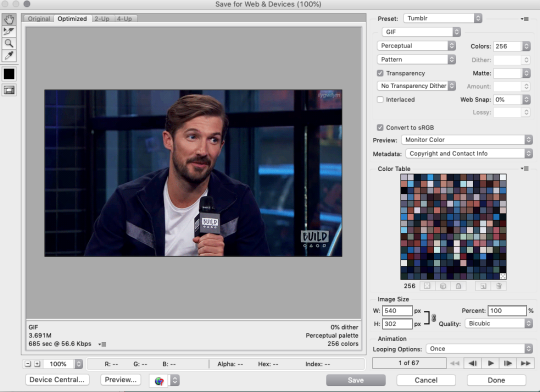
You’ll see in the lower left that my file size is still too big though - 3.6 won’t work if I want this to be an under 3MB gif. I’ll delete some frames and come back to this screen. The increase in brightness may be a culprit with this gif too, but I don’t want to change that, so I’ll simply remove frames.
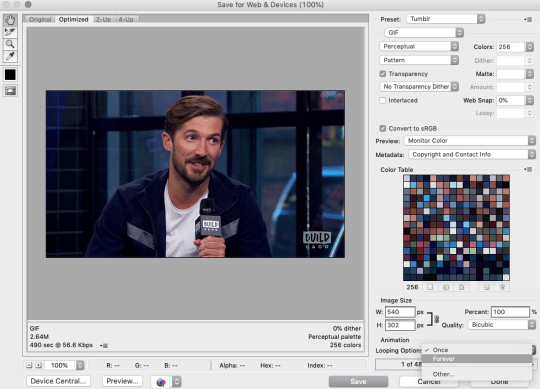
This is small enough now. 2.6MB. Now select “forever” under looping options (otherwise your gif will stop after one go).
Now hit save if your gif is at the size you want, and choose a name for it, and viola! Gif complete!
If your gif is still too large, you can go back and delete some frames, as I did, or you can change your coloring to be less bright or have less contrast. Generally I think people don’t mind if your gif is shorter as long as it looks good, so I would prioritize appearance over duration. Gif making can be frustrating, especially when you’re fighting with file sizes, but in the end it’s all worth it to make something people will enjoy. 💖
I hope you found this tutorial informative and enjoyable! If it helped you out, perhaps spare a reblog to share the love!
56 notes
·
View notes
Last Seen Blogs

bobmerdeka
BOBMERDEKA
andyesisaidyesiwillyes
and yes i said yes i will yes

bearsn
Time Is Dancing

queenliadbaddest
LiaBadaZz

armadaderaj
The Things We Do