#also my first time using tool mod!!
Explore tagged Tumblr posts
Visit Tumblr Blog
Explore Tumblr blogs with no restrictions, modern design and the best experience.
Last Seen Tumblr Blogs


Fun Fact
Tumblr posted its first advertisements in May 2012 and subsequently earned $13M in revenue.
Text

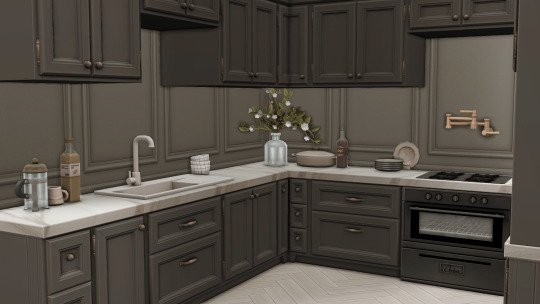

Dahlia's new apartment. Best Mods for Realistic & Aesthetic Gameplay releasing tomorrow on my channel!
#I wanted to try a darker color scheme for once#also my first time using tool mod!!#original by simlicy and renovated by me <3#ts4#ts4 build#ts4 simblr#ts4 interior#pixelglam#mybuilds
464 notes
·
View notes
Text


Cozy Cabin Collection - Bedroom
Hey everyone!
The final part of the Cozy Cabin Collection is here! It is a bedroom set and includes a modular closet with items to fill them up with.
I'm a little sad to say goodbye this cabin theme because I gained a lot of followers through the time I was making these sets and I also learned a lot of new skills and techniques. When I came up with the idea of a large collection to guide us through autumn and winter, I hadn’t expected it to become so significant in terms of sentimental value. I was always thinking about the next idea to bring to life and living in a cabin in my mind. Despite this being a sad moment, I’m so excited for what’s next! I’ll be creating a set for a commercial lot, and I’ve had this idea for about a month and a half. After seeing what the next expansion pack will be, I’m even more excited because I think it will complement it well.
A bit more about this set: It started as a bedroom set but somehow turned into a closet set with bedroom items. At first, I only wanted to add two closet pieces with the door, but I figured it would be more versatile (and not too much extra work) if I included the corner piece as well. A little info on how the door works: You can slot the door onto the closet pieces, with three slots available on each piece. It only makes sense to use the side slots if you have two or more pieces placed next to each other. I added multiple slots for hanging clothes so you can use the in-game clothes (or other CC ones) that are grouped together, but also place individual items without using the TOOL mod.
The wicker basket, folded sweaters and the hat box are stackable.
For the curtains, I made a curtain rod that, for some godforsaken reason, looks completely different in-game than the rod on the curtain items themselves, despite them having the same texture and everything. This was the reason I couldn't include them in the last set—I just couldn’t get them right no matter how hard I tried. I even checked out other CC that does the same thing by separating the rod, and they all had the same problem. Somehow, the lighting on them looks different, and I couldn’t find a solution. So sorry for this issue but hopefully it's not too noticable.
I think that’s all! I’m really grateful for all of you being here—thank you, and I hope you’ll like this set as well. Let me know if you have any issues, and feel free to leave your thoughts below so I can see what you like and what you don’t.
The Set Includes
Wooden Bedframe
Bed Mattress
Decorative Pillows
End Table
End Table Lamp
Wooden Bench
Closet (3 types+corner)
Closet Door
Hanging Elegant Coat
Hanging Jacket
Hanging Puffer Jacket
Hanging Tops
Wicker Basket
Designer Hat
Fluffy Hat
Folded Sweaters
Decorative Footwear (3 styles)
Hat Box
Makeup Bag
Curtain Rod
Closed Curtain (3 heights)
Opened Curtain (3 heights)
Antler Wall Lamp
-BECOME A MEMBER- Public release on the 15th of March 6PM CST
#ts4cc#ts4 maxis match#maxis match#the sims 4 cc#the sims 4 custom content#ts4ccfinds#sims 4 cc#cc#the sims cc#cc finds#sims 4#ts4 cc#ts4 custom objects#valia#valiasims#cc download#sims4 download#ts4 download
2K notes
·
View notes
Text
Throwback to my first time cheating at multiplayer minecraft. Put your torches down, let me explain. And no, I haven’t done it since.
I don’t remember what version it was, only that it was a very long time ago. Food healed hearts directly, and- this is the important part- mossy cobblestone could not be crafted or mined anywhere in the overworld save the floors of dungeons.
It also was a brilliant, vibrant green, so much more aggressive than its current gentle texture, but that’s neither here nor there.
I was playing on a survival server I’ve long since forgotten the name of, and I was putting the finishing touches on my lovely brick house. But the floor, no no. I was a picky child; only the finest of flooring would do.
I wanted mossy cobblestone.
Immediately I was at an impasse. I could strip mine and explore caves in the hope of finding one dungeon; but I needed two whole stacks of it for my floor. There was no /locate command at the time, and I knew nobody else well enough to ask for it. And at the time, chunkbase and other seed scanning tools didn’t exist; not that it would have helped, since I didn’t have the world seed.
Perplexed, I logged off and consulted with friends at school the next day.
There, I was advised to try an x-ray texture pack.
So I did.
And it worked a treat! The dungeons were rendered perfectly visible to me, and I easily dug straight down (smart and subtle!) and raked in the precious mossy cobblestone I needed.
At one point, one of the mods asked me in chat if I was x-raying. Having just turned off the pack minutes before the message came through, I cheerfully said no and skipped off to finish my floor.
At no point during this entire exercise did it occur to child me to use the x-ray pack to mine for the diamonds I could clearly see.
5K notes
·
View notes
Text
Vanilla Gpose Tips
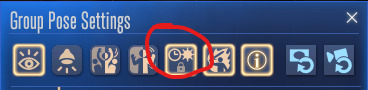
I get asked occasionally how I make my screenshots if I'm not using shaders or mods. The short answer: Patience. Gpose's suite of tools is a lot more robust than it used to be when it was first released. But if you want a screenshot to really shine without using third party add-ons, it's not something you can just go into gpose, take a printscreen and get back out. You might capture a moment with nice lighting that way, but it takes more than that. 1. Choosing a location and time of day is job one. What kind of mood are you trying to convey? Does your intended screenshot have a theme (or a prompt?) or are you just looking at your new glam and marveling at how fine your character looks in it? Does a lighter or darker setting suit the character better? Setting, time of day, and weather can affect this. 2. You can stop time and weather from changing. I keep this on by default because it can take upwards of 30 minutes IRL to fine tune a screenshot. The middle button below. Make sure it's highlighted.
3. Toggle battle effects on/off. It's the button right next to the time/weather stop, the icon of the guy holding the sword. If the icon is highlighted as it is in the screenshot, your battle effects are on. If you want to capture pure motion and not worry about battle effects, turn this off. 4. Wet effect. Use it, use it, use it. It doesn't just make clothes look wet and make skin glossy, it actually helps to bring out texture and detail on the character's outfit. Especially since the graphics updates in 7.1. I've found it also adds shine to hair and can help the eyes stand out more.
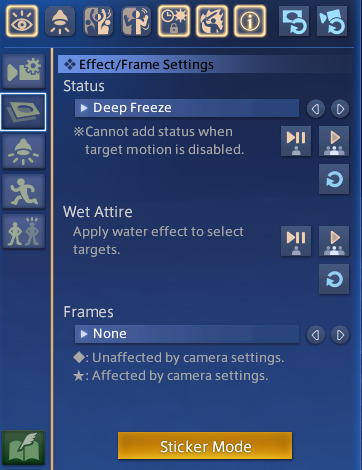
5. Sticker Mode. Yes, there are oodles of cute minion stickers, flags, and numbers, but there are also some great effects to be found in the Decorations category! Sparkles and twinkles, lens flare, among other things can help enhance metallic points on a glamour, AND they can be resized! So if you want a more subtle twinkle on the edge of your spectacles or earrings, you can tilt and downsize your desired sparkle. There are also cute flowers and hearts. 6. Quick Keys. If you're playing on a keyboard, the 1 on your top number row freezes the screenshot. This is extremely helpful if you're trying to catch a battle emote right at a specific moment. If you miss it, keep trying because emotes will continue to cycle until you change them. R and Scroll Lock will both hide/unhide the gpose controls. X will turn on lighting. Space Bar will toggle your character to stop them from facing the camera and vice versa. 7. Lighting Intensity is Dependent on Distance. The closer you're zoomed in on your character, the brighter the light is going to be when you turn it on. Try adjusting your zoom in or out and toggling the light to see if the illumination is to your liking. You can also adjust the RGB on the lights to fit the mood/environment. I also recommend turning on Manual Brightness. 8. Color Filter and Screen Effect. These two features, in my opinion, require the most patience. Not every color filter and screen effect will work well together in every scenario. Click through and preview all of them in your screenshots and see if some SE's work better with your preferred CF. You might find an unexpected combination that you love. Trailer and Echo color filters are great for flashbacks (no one uses Aetherometer, it's an eye bleeder). Use the Pencil or one of the monochrome CFs and Noise 2 SE to create a nice black and white film or photo effect. 9. Frames. Frames are one of the more limited features and not always needed in order to capture a great screenshot. Action poses benefit from the Cinema frames, however, while more lighthearted moments play well with the photo options.
10. Emotes. Before you enter Gpose, be sure to /groundsit to clear your most recent emotes. Summoning mounts and minions also count as emotes for the sake of Gpose. By the same token, you can use battle abilities before entering Gpose, and this is what it will cycle through. You can't activate a battle ability while IN Gpose. You will have access to all of your non-battle emotes and facial expressions, though. You can combine any emote with any facial expression by choosing the action first, and expression second, so you can /prettyplease and /awe at the same time to make your character look hilariously horrified. If you enter Gpose with an active battle ability, you can still apply a facial expression to it from within the tool. 11. Bits and Bobs. Enable Manual Focus and Depth of Field will help bring out the details of the background more, and will help to make a more cohesive screenshot. Manual Focus is great if you want your character in the frame, but you want to shift the focus elsewhere, to an object or another person in the background for example. In the same menu where you'll find emotes, click the second eye button to "Track Camera". Your character's eyes will follow the position of the camera. Lastly, again, have patience. Allow yourself time to play with all the tools Gpose has to offer. You're probably not going to get the winning screenshot after clicking Printscreen just one time, you should take multiple shots from different angles with different lighting and effects, then compare them all and pick the ones you like best. And remember, even if it's the true endgame, it's not a competition. Your screenshots are not "worse" or "boring" just because you're not using third party tools. I look forward to seeing what you create, and you should too.
427 notes
·
View notes
Text
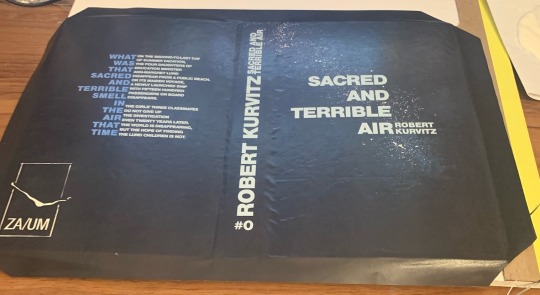
HI!!! After finishing Disco Elysium I wanted to read Sacred and Terrible Air, but there were two issues:
1. It’s not officially released in English
2. I don’t like staring at pdfs!
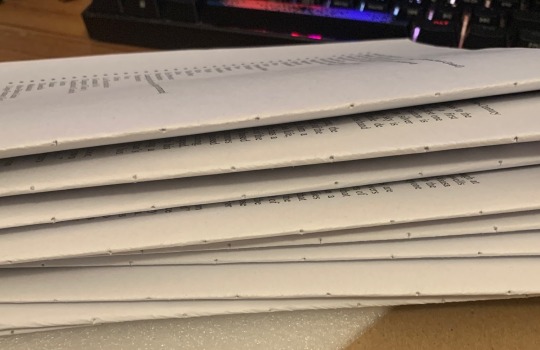
So I did what any sane person would do. That is take three days of my life printing and binding it.
TRANSLATION (“thank you Group Ibex” we all say in unison!):
PROCESS PICS:
I apologize in advance for anyone who has experience in this sort of thing this is so botched.
I have NEVER done anything like this before, I don’t even read books on my own volition, but if the Disco fixation wants me to learn how to sew and bookbind I’ll do that.
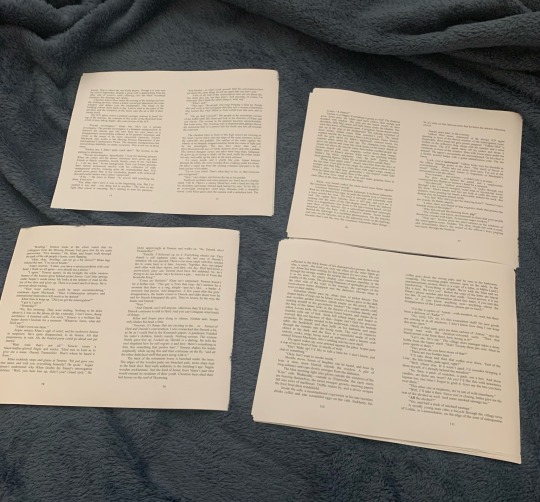
Four of the signatures above. There were nine total, eight of them with 8 sheets/32 pages and the last was five sheets I think. Threw the pdf into adobe acrobat and went straight to printing with those settings and the “booklet” option enabled.
Pricked holes through each signature! Used thumbtacks and a piece of foam I scavenged from my room, worked out great. It’s probably also worth mentioning I do not have a bone folder, book press, or any of the other fancy schmancy bookbinding tools. Flattened the pages with a pencil and pressed with D&D books…
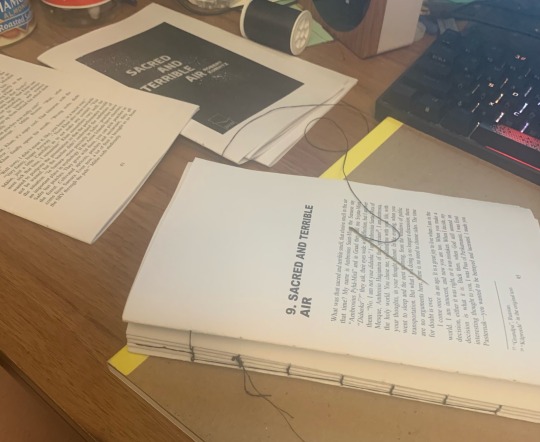
SEWING TIME. I have never sewn in my life. My success in this regard can be majorly attributed to Sea Lemon on youtube, particularly this tutorial:
youtube
The process from printing to finishing sewing the signatures took ~8 hours. Now we hit our first roadblock, I had no glue for the spine! After going to sleep and waiting what felt like ages (literally 10 hours or so) before I was free to visit a craft store, I tried to find PVA glue because that’s what you’re supposed to use I think?? Yeah. They were out of PVA glue and my impatient ass got mod podge.
‘Tis glued! As you can see I added cardstock to the ends. Joyous day.
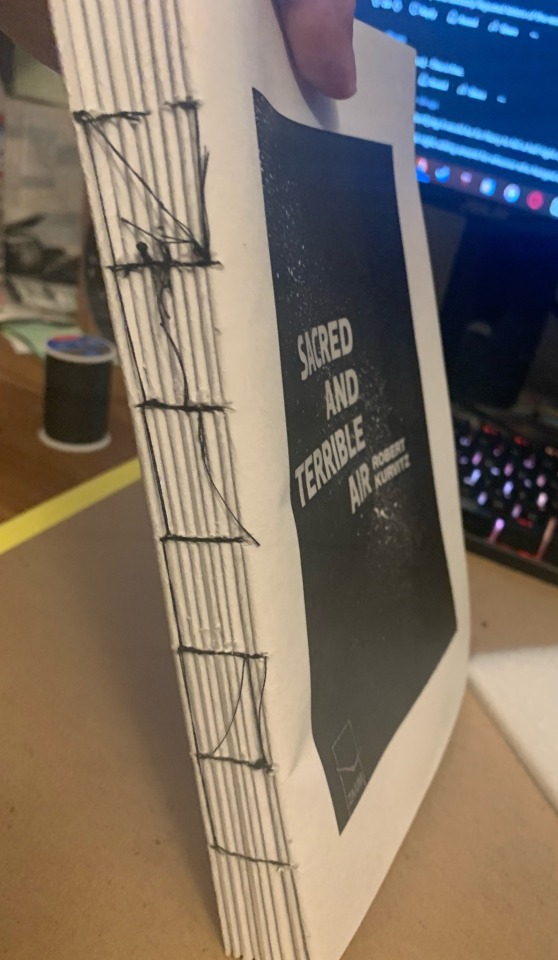
Also, you see that sketchbook in the pic? Yeah? You see that lovely cardboard?
It is now the cover. Rest in piss bristol sketchpad backing.
———
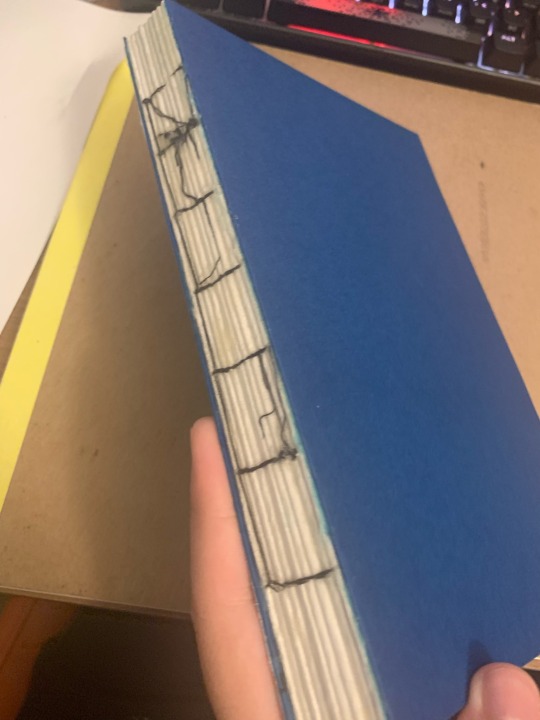
EDIT: I see a bunch of people want to attempt this so here’s a video on how to make the hardcover: https://youtu.be/Av_rU-yOPd4?si=7T5zgVJGAfPFBxn-
youtube
I didn’t use any measurements or advice from it but it’s a good reference for when it comes to assembling the cover from ~3:50 onwards. The boards are same size as your text block pages and spine, I think I made the cover width a bit longer just in case it doesn’t cover the text block though. Do not do this with the spine, I regret it.
And note, this is NOT a tutorial, it is the process of someone who got a bit too silly and decided to bind a book, obviously do your own research lol. Don’t be afraid to try it though, it’s surprisingly simple!
———
… So, now that’s done! I swore to myself I wouldn’t start reading SATA/PJÕL until I finished this project completely, meaning I’ll be doing that now yippee :]
#sacred and terrible air#püha ja õudne lõhn#disco elysium#pjõl#i’m normal#proud of this despite it being pretty scuffed#uhh yeah#the spine is a bit too wide but who cares at this point HAHA#my art#i guess?? my creation??
305 notes
·
View notes
Text
The Reddit Blackout, #196, And Being New to Tumblr
okay i've seen a lot of people in the past ~24 hours or so confused by everything going on with Reddit & Tumblr from both sides - people new to tumblr who don't know how to use it, and tumblr users who don't know what's going on with reddit and why many of its users have joined up here i know this isn't really related to my blog but fun fact about me: i was up until recently a very active reddit user and even mod a subreddit, but I've also been on tumblr for about 3 years now on different accounts, so I think I can see pretty well from both sides of this and explain what's going on this post will be split in 2 sections: what happened with reddit (and what #196 means), and a guide for new users
1. What The Hell Is Going On With Reddit?
The thing that's caused all this ruckus is a major change to Reddit's API, which is what Reddit provides to people so they can pull directly from Reddit to make third-party apps or tools.
The change is that Reddit is changing its previously free API to be paid. Which on its own kinda sucks for developers, but it's not unexpected. They need to make money somehow, right?
The problem is that the API pricing is WAY TOO FUCKING EXPENSIVE. The developer of the most popular 3rd party Reddit app, Apollo, says it will cost him $20 million a year to continue running the app as normal.
Essentially, this pricing forces almost everything third-party to shut down, which causes 3 major problems:
Third-party apps cannot keep running, which sucks for normal users because Reddit's official app is awful. It's slow, its video player is a thing of nightmares, it doesn't have many useful features third-party developers have made.
It sucks even more for visually impaired users because they can't use the official Reddit app at all. Reddit's official app does not work with iOS's native text-to-speech function. Third party apps, on the other hand, often do. So Reddit is forcing blind users away.
Third-party moderator tools cannot keep running, which sucks for moderators because many rely on these tools to properly moderate their subreddits. And moderators are often necessary, because without them subreddits get banned and hate speech and even CSA can often run rampant.
So you see why this change is bad.
Reddit users were PISSED.
So over the past week and a half or so, they have been working on organizing a site-wide blackout. The majority of the most active subreddits have now gone private. Some are only doing it for 48 hours, others (such as r/196) are doing it indefinitely.
That's why you can't access most of Reddit right now, and that's why many users have come here.
You're probably still wondering, though - what is this #196?
Well, as you may guess, it's connected to that subreddit r/196 I just mentioned. r/196 is a subreddit which only has one rule: every time you visit, you must post before you leave.
That's it, that's the subreddit.
The thing about r/196 that set it apart from most other subreddits - and what lends the subreddit's users perfectly to Tumblr - is that it was dominated by queer and leftist users.
So now they've come here and set up shop in #196 and r/196 so they can continue their merry little shitposting.
There's a ton of lore related to r/196, actually, but this is already a long tumblr post and quite frankly I cannot be bothered to write about it at the moment.
2. I'm Here From Reddit, What Now?
Hello there, random new user. As a double-citizen of Reddit and Tumblr, let me show you around this place.
First off, there are some other people who are better at explaining that I am who have made some really helpful things. Watch this Strange Aeons video as a guide to Tumblr culture and functionality and read this post which directly compares Reddit and Tumblr.
Assuming you've done that, here's some additional advice of my own:
Do you miss sorting subreddits by top of all time/the year/the month? Well, you can do something very similar with tags! If you go to a tag at the top of the screen you can select top, and then at the dropdown that says "all time" you can select different time periods! Even 6 months, which Reddit hasn't ever had.
Tumblr has a lot of cool customization features! Even outside your icon/banner/bio, you can change you blog colors and on desktop you can have an html theme (which has its own thriving community here). That customization is part of what sets Tumblr apart from everywhere else - I think you'll enjoy playing with it.
Notes will probably confuse you at first. Unlike the different numbers for upvotes and comments, notes combines the total number of likes, reblogs, and replies into the same number.
Outside of organizing your own blog, when making your own posts tags are what help other people find your post. Use them! But don't abuse them, because then people will just block you.
There are three ways of people finding your post: if someone follows you, if someone follows the tag(s) assigned to your post, and if someone is just scrolling through the tag(s) assigned to your post (and also the secret 4th way no one uses, which is finding it on the trending page, but even if people did use it no one will find your post initially that way)
tumblr is no longer The Discourse Website. And unlike what Reddit wants you to believe for some reason, it is very much alive still. Most of the people seeking fights have moved to Twitter (though some have also moved back here again). You will not get any brownie points for being a dipshit like you do on some subreddits.
So there, welcome to the hellsite (affectionate), you'll pick up on all the in-jokes eventually, for now just try not to be a nuisance and soon enough this'll be your new internet home.
#reddit#reddit blackout#reddit migration#196#r/196#reddit refugee#new to tumblr#long post#text post#xavi.txt
2K notes
·
View notes
Text
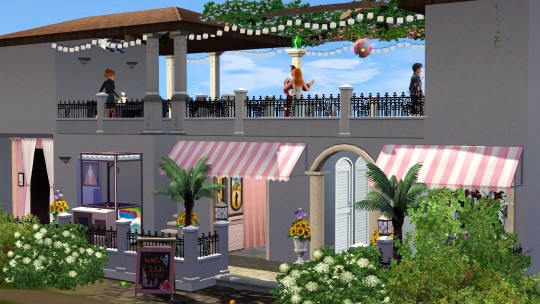
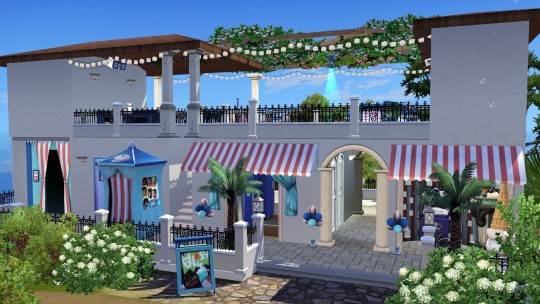
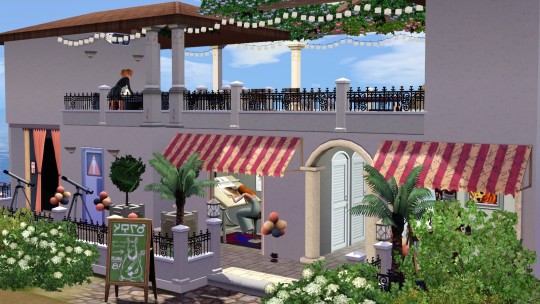
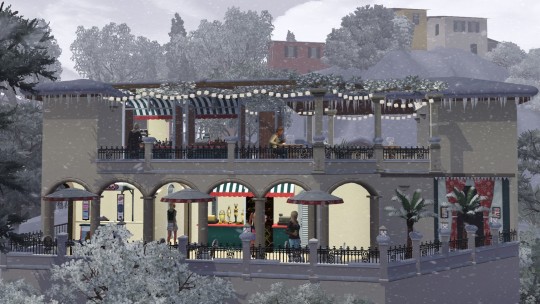
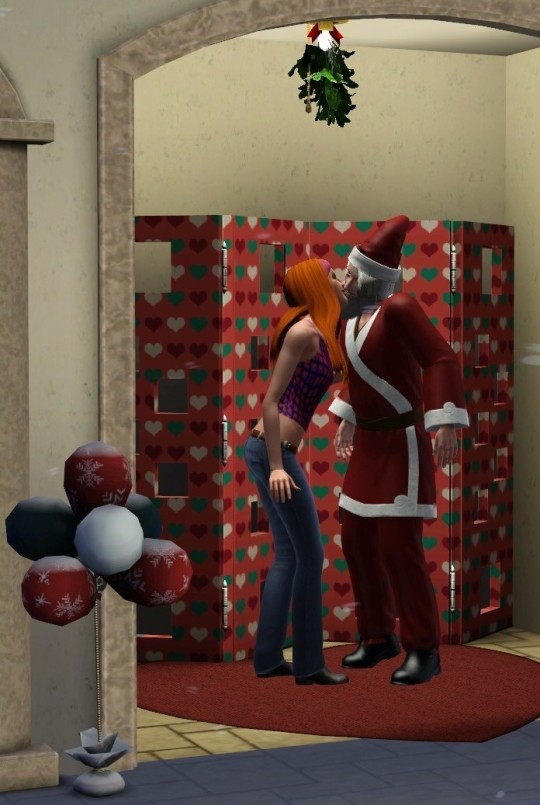
100 followers celebratory build:
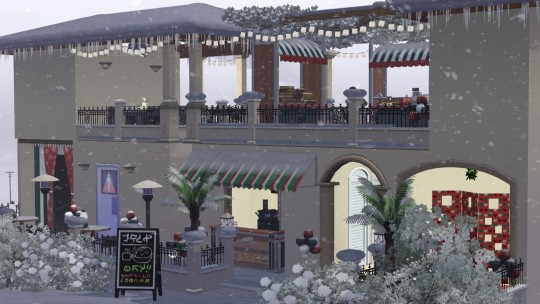
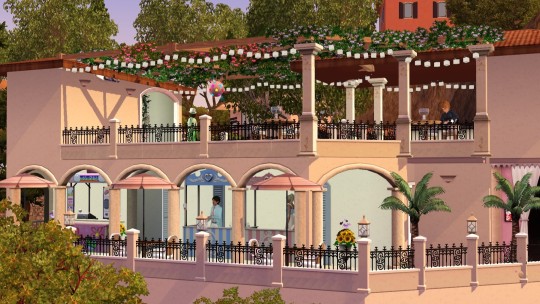
Simynthos Festival Grounds
When I reached 100 followers back in November I promised you guys I would build something special. And what better way to celebrate than to build some festival grounds for Simynthos?! It was not an easy build, though, and playtesting festival grounds is a bit of a pain. This took a while to finish… But it's finally ready to be shared, yay!
Due to the small size of the lot it was not possible to place all the intended objects for the different festivals. I had to get creative to find activities for the sims to do instead! The festivals on Simynthos will therefor be a little different from your usual festivals. I placed more information on the different festivals at the end of the post. If you want to be surprised in game, do not read that section and do not look too closely at the screenshots 😉 This is also the reason there are only four screenshots up top. They would have given too much away! Don't scroll below the Download link if you do not want to see more screenshot before playing the lot!
Unfix-able issues and things to know (This section contains a few spoilers! I'm sorry for that, it could not be avoided…):
Sims can sometimes get stuck on the stairs and end up in the room underneath. That's why I added a door there so they can leave.
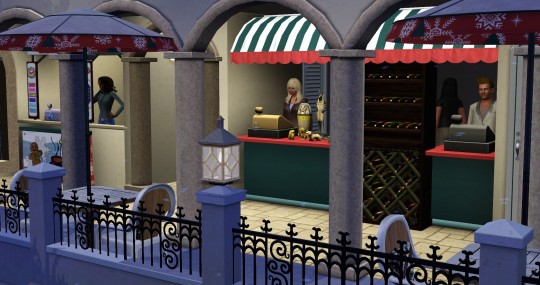
The homeless sims who tend the registers at the winter festival stay over night in front of the lot. I assume it's because there are no apartments or roads on the island. Due to being outside so long in winter they will turn blue/frozen, but they will thaw each other out with a blow dryer 🤣
The vendors at the winter festival will leave their posts most of the time, but will return as soon as you start buying.
Some of the functional objects have been placed with the "moveobjects on"-cheat in order to make it possible for sims to interact with them in such a thight space! So be very careful when you do any alterations! From the top of my head these objects would be non-functional when moved: Mistletoe, Barista Bar, Nectar Racks.
I used @omedapixels S3DT (Sims 3 Decorator Tool) to decorate the winter festival market stands. You do NOT need the mod for the items to stay in place, as long as you don't move them when redecorating. Then they may slip back into normal mode and you will only be able to place them back with the mod. But it's only in a couple of places, so even if that happens, it will not have a significant impact on your game.
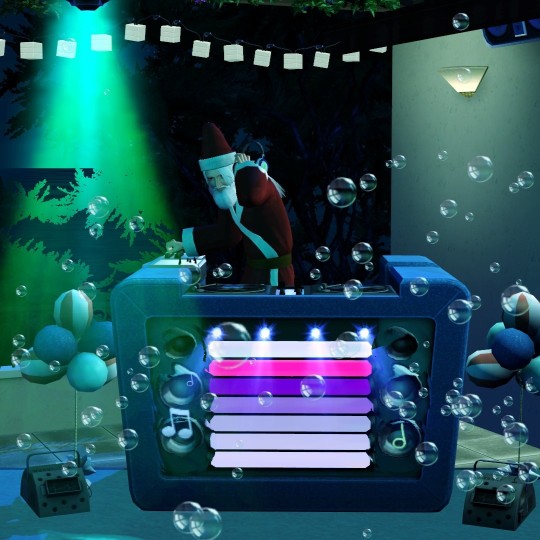
About the music on the lot:
Initially I intended to assign each festival a different music genre, but this wouldn't work for two reasons: First you can not assign different genres for different seasons, and second the genre would be set back to classic music when the lot is placed in in edit town mode anyway. But here are my recommendations of music genres for the different festivals:
Spring: French
Summer: Electronica
Fall: Songwriter
Winter: Unfortunately we do not have a holiday music genre in the game without mods. So if you're not using mods, just choose anything that seems most appropriate to you. But if you're open to using mods, there are several music replacement mods out there with seasonal music. I've been using the "Music to their ears"-mods by the creator Nasenfahrrad over on MTS in my game. The Winter Holiday genre can be found in part 2 (link).
Quickest way to change the music on any community lot:
Enter the cheat "testingcheatsenabled true"
Ctrl + Shift + Click on the ground anywhere on the lot
Select "Build On This Lot"
Ctrl + Shift + Click on the speaker
Select "Change To…"
Details:
This lot was build to be placed in Simynthos on the empty community lot near the beaches. Lot address: Ferry Way 2
Lot Size: 20 x 15
All Expansion Packs used except for Into the Future
No CC
No Store Content
Download Link (SimFileShare)
More information on the different festivals below
‼️ Spoiler Alert ‼️
Do not read any further if you want to be surprised by the festivals in game!
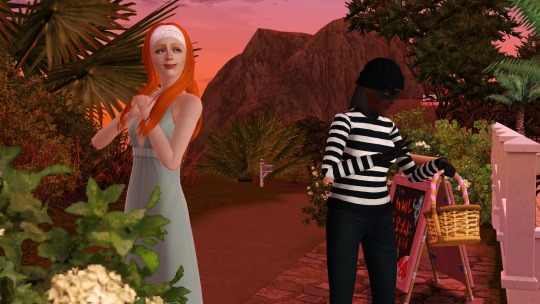

Spring: Festival of Hearts
Dance floor
Wedding Chapel
Claw Machine
Kissing Booths
Photo Booth
Festival Photo Booth (Spring)
Summer: Simynsonic - Island Beatz
DJ Booth
Dance floor
SimLife Goggles
Face Painting Booth
Ice Cone Machine
Arcade Machines
Juice Keg
Festival Photo Booth (Summer)
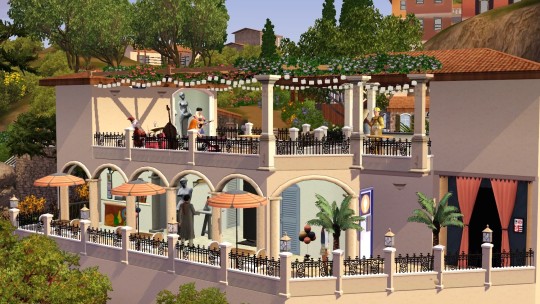
Fall: Arte Simynthos - Fine Arts Festival
Band Setup (Piano, Drums, Base, Guitar)
Dance floor
Sculpting Station
Easel
Drafting Table
Telescopes
Festival Photo Booth (Fall)
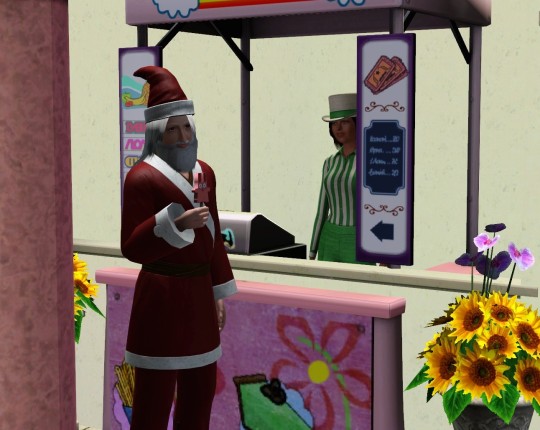
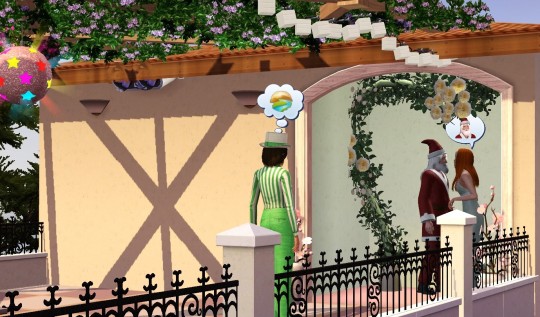
Winter: Merry Simynthos - Holiday Market
Mistletoe
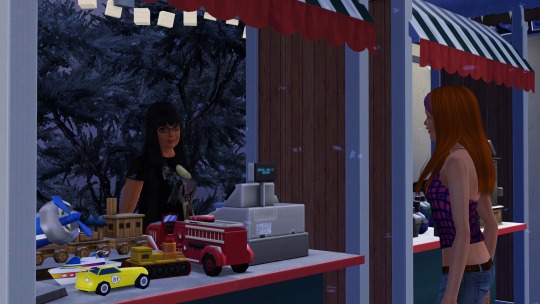
Market stalls (Nectar, Toys/Comics, Elixirs, Books, Relics/Gems)
Barista Bar
Santa's Chair
Festival Photo Booth (Winter)
Thanks to the lovely models for these screenshots: Glenn Clover and Holden Wozny.


#sims 3#simynthos#sims3#ts3#thesims3#sims 3 cc#ts3cc#sims 3 festival grounds#sims 3 community lot#s3cc#sims3cc#sims 3 download#no cc build
83 notes
·
View notes
Text
Some tips for The Sims 3 Buy/Build
Install LazyDuchess’ Smooth Patch to alleviate lag, esp in Buy/Build and CAS.
Keep your CC merged and organized, esp your patterns, this will also alleviate a lotta lag across all modes.
When building on community lots, or any lot rlly, avoid going to the edit world menu, and just put testingcheats enabled into the cheat window, then shift+click the ground of the lot to enter Buy/Build mode. This makes leaving it to save a lot easier, with less “preparing” screens to possibly get hung up in.
Lower your settings, you don’t need any adjacent lots loaded, and you certainly don’t need super water on either. You can always switch these back on when you’re done.
While you’re at it, remove your HQ mod, and turn off your Reshade/Gshade preset, or at least turn off your depth shaders. I only ever turn on my depth shaders when I’m taking screenshots for better fps while playing. The DoF shader esp requires a lotta resources your game could be using to simulate all those 78 townie sims instead.
Save as… vs Save, I Save as… at least every third save. It’s also just good habit to keep backups.
When using the CASt tool, set down everything you plan to CASt first, then switch to a category like the wall tool to avoid eventual lag and drag when using it a lot. Love yourself. You don’t have to suffer using CASt tool in an overpopulated category like misc deco.
Utilize the clone option through testing cheats to duplicate already CASted objects, it’ll keep your design just like the dropper tool, but it’s a lot less time consuming, I promise.
Don’t be afraid to use the swatch save tool for objects you use often, esp community lot objects, as it helps to keep your aesthetic consistent. I also keep all of my favorite streetlamps, benches, and public trash bins etc in a convenient custom collection folder to speed up the process of doing multiple lots in one sitting. These handy tools are there, use them.
The issue with custom counters. They mess up sometimes, if you can’t recolor it suddenly, here’s how to fix that. Now if you can’t place down a cupboard suddenly, even though nothing’s in the way, and you’ve got moveobjects on activated, try putting it on the wall a tile over, and then try adding it to your desired spot again. Lastly if you set down counters or cupboards at a corner, and it messes up the textures, but you can still recolor it, you could do what the video I linked above does, or you could simply pull out the CASt tool, and switch it back to any of its original swatches and click the check, then feel free to recolor it as you want.
Railings will also do the ��can’t recolor” trick too, but this is a simple fix, just delete it, and replace it, and you’re good.
“Oh no, I switched between buy and build mode, and now my catalogue won’t load, and I can’t click on anything at all!” Don’t panic, hit F2 and/or F3 on your keyboard, these are shortcuts for switching between them, and if you’re lucky it’ll load properly again. Should you get the bug where you load a category and it’s somehow empty, don’t fret, just click on a different category and this should fix it. Then if you get the bug where all the objects you put down disappear suddenly, sorry your game is haunted. Call an exorcist, or just reload, they might reappear if you do.
Tbh, if you run into any kind of major bugs, it’s likely a sign to either save immediately or just restart your game. These only ever show up when you’ve been at it a while ( at least for me ), therefore starting fresh wouldn’t hurt. Probably also wouldn’t hurt to check whether you might’ve installed something the game didn’t agree with by running Dashboard, or put it through the ol’ Save Cleaner.
Honorable Mention: Keep an eye on the texture sizes and poly counts of objects. I know it’s tempting to build these ultra hyperrealistic lots with clutter at every inch, but unless you’re just doing it for screenshots, or for your story, or using it very sparingly, it is not by any means recommended purely for gameplay. This is just the truth when it comes to any Sims game. You don’t want lag, or max memory crashes, or save errors? The Sims 3 is a 32bit game, that’s almost old enough to drive, be easy on it.
478 notes
·
View notes
Text
Bot spam, adverts, communities, and you.
Hi everyone! I'm Bee, and today I'm writing this post to let others know of some ways to help combat Tumblr's current bot issue happening inside communities.
First, here's an index of this post:
Ways to help stop the bots from invading your communities.
How to spot a potential bot account and a bot invasion.
What a bot community looks like. (So you can report it!)
Long post under the cut with pictures and instructions on what to do if you want to do this or want others to maybe do this, so click read more and let us continue!
-----
To begin, here is the first step should absolutely take towards keeping your community free of bots.
1 - Deny them access.
If you own a community on tumblr?
Set it to request/invite to join.
It's that easy! How do I do this you ask?
Navigate to community settings > down to Joining, and set it to:

This means that anyone can request to join, but it's up to the admin's and the mods to accept those invites. If a blank blog* requests to join, you can easily deny those and just accept those that seem like real people. (&I'll explain what a blank blog is in a bit.)
If your community is small (say less than 500 people with less than 5 invites a week), this shouldn't be too bothersome if you remember to check it once or twice a week or so. :)
And if you're a member of a community that has an active admin:
Ask the admin to set it to request to join!
While this may not be the most ideal way of handling this issue, it never hurts to ask, right? You could always make a poll and see if others vote/feel the same way and maybe they'll change it, too. But, remember, it's up to the admin's discretion on if they want to actually do this. If they don't, then sadly you might have to either deal with it or make your own community if the admin/mods neglect to do their jobs. :(
Note: Staff are working on developing ways to help community admins better moderate their communities. This isn't just a 'we'll have to suffer through it' issue. It's just going to take time, is all.
Until we're given the tools to stop them, this is the only way that we (real people) are going to keep bots and blank blogs* out of our communities until tumblr staff comes up with a concrete way to keep them out.
-----
2 - How to spot a (possible) bot and a bot invasion.
Most bots now'a'days are what I like to call 'blank blogs'.
These type of blank accounts are also widely used by scammers. So if you're an artist and you get a DM from someone asking for a commission of their pet/son, yes, you are about to get scammed!
You can read more about this scam by clicking this link here.
While there have been a few mistaken users who have been caught up and mistaken as as a bot, once I removed them from my community they DM'd me back after I'd requested them to do so, and I explained to them how to change their profile banner, add a description, ect, and told them how reblogging worked on tumblr (as they honestly didn't know how the site worked), and we were all good after that!
My rule of thumb: Humans should do human things on the human website. If you don't, you aren't human.
Blank blogs (presumed to be bots,) are blogs that look like this:
Note the following with these 'blank' blogs:
No change in their background image. No change in their icon. (Just the default.) Generic randomly generated name or 'keysmash' name.* No posts or reblogs. They had 0 liked posts. Yet they were following dozens of people.
*These names can also be 3 English words slapped together to make a username. This is also a common tactic used by scammers (as I'd mentioned prior as well) as mentioned previously.
If you get a DM/ask from a blog like this (or ANY blog) and:
They ask for a commission of their son/daughter and/or their pet. They say 'hey pretty' and try to hit on you. (romance scam.) They try to offer you money to buy your art as a NFT (also a scam.) They try to sell you crypto or get you to invest. (obvious scam.) They try to sell you a product or service. (phishing scam) They try to get you to go off tumblr to a different website to 'talk'. They say they're a sugar daddy/mommy looking for a 'sugar baby'. They offer you some sort of free money. (nothing's free. it's a scam.) They offer you a job position or say <company> is hiring. They try to sell you HRT. (yes.. that's 100% a thing they're doing.)
It is all 100% an attempt to scam you.
Bots will sometimes join communities just for the sake of having people to target. Communities are full of people, so communities with more people are more likely to be targeted and joined by bots.
That's also why bigger Communities get more bot ad/p0rn ad spam.
Here is what a bot invasion looks like:

All blank blogs (I checked!) with no sign of human life.
All with random jibberish names, all joining on the same day.
-----
3 - What a bot community looks like. ....So you can report it!
I'm mentioning this part because I know there will be people who get curious and browse tumblr to find 'new things' and 'new interests'. And I'm here to point out what are the biggest and most obvious signs of bot made communities and/or communities made to scam.
Note: Do not join these communities, and do not, under any circumstance, click any of the links that are featured by these communities. They could very well take you to a phishing website or even something that gives you a virus. If you want to report them, just view the community, click the . . . at the top right corner and report it for spam unless it's doing something illegal. then report it as such.
Again. Don't let curiosity kill your phone/PC/Tablet. It's not worth it.
-----
The search.
So again, say you're new, and you like money. So you search 'money' in the tumblr search and then view communities.
As of right now, you'll see communities like this:

I don't think it takes a rocket scientist to point out the obvious as to which one of these was made by a bot/scammer.
So let's turn out focus to good ol 'Juwa 777 Download APK '
(Again. Do not actually go and download this.)
Things to note:
It only has one member. The admin. And viewing the admin? It is a blank blog.
The only post on this community... is an advertisement.

Thus it is pretty safe to say, a bot / scammer made this community.
Here is a second example further down the list:
Again, things to note:
One member (admin), blank blog, one post that's an advertisement.

Now here is one that's more 'tricky' as it has more members.
But the content itself is an obvious scam.


I won't show the members as a few are porn bots, but they follow the same theme of nonsensical names or 3 english words slapped together. They may reblog posts (usually porn...) or post things (again.. porn), but they're still bots.
If you see communities like these, make sure you report them. Just note if you report too many too fast (usually after 3) you'll get a 'oops try again later' bug for some reason and you'll have to wait to report more.
-----
So in conclusion: If you don't want bots, just don't let them in.
If you can't handle accepting invites, make someone a mod (who you trust) and let them help you accept new member invites. Divide the load and we can keep out the bots and keep our communities safe and clean until something is done about them.
Until then, please make sure to share this so others know what to do, and if you have any questions I'd be happy to answer them in the comments. :)
-Bee
69 notes
·
View notes
Note
Not sure if you’ve been asked this before, but what are your favorite/essential mods for new vegas? I’ve only ever played it unmodded so I’m curious
Good question! I definitely have answered this before, but that was so many years ago. It's only now that I've taken the opportunity to overhaul and modernize my own mod set-up that I've been figuring out the answer to this question myself. But I can definitely talk you through the most important parts of my new load order.
First, however, every single person modding this game in this day and age absolutely needs to start with the Viva New Vegas modding guide, and follow every step to the letter. The recommendations are air-tight and the instructions are written and presented as if you, the reader, have never even seen so much as a computer before. It's amazing. The "Base" of VNV contains nothing but bugfixes, lightweight unofficial patches, performance optimizations, and other under-the-hood stuff designed to remedy FNV's infamous stability issues while maintaining a completely "vanilla" feel. This makes it absolutely necessary, in my opinion, even for people who don't actually want to play with any (other) mods. Especially crucial to this guide is its mandate to use Mod Organizer 2; if you're using Nexus Mod Manager, Vortex, or Fallout Mod Manager any time since Biden got elected, you are shooting yourself in the foot plain and simple. The best endorsement that I can give of Mod Organizer 2 is that it mods you game completely virtually, meaning that if you fuck your mods up beyond repair, you can just go to your actual FNV launcher in your root folder and boot up the vanilla game like nothing ever happened.
And the "Extended" section of Viva New Vegas consists of more modding tools, quality of life tweaks, content restorations, and a curated list of strongly recommended gameplay modifications that nevertheless all come down to your personal preference (though deviating from their provided list may make you use your brain a little bit when choosing the right compatibility patches, and so on).
This isn't going to cover every single thing that I play with, but here's everything that I would think to suggest to anybody who asked. With that said, here's Fallout "Lou" Begas's Mod Recommendations, 2024 Edition:
Viva New Vegas Extended: Lou's Preferences
VNV Extended recommends several gameplay modifications that come down to personal preference. I installed just about all of them, with a few exceptions (I don't care at all for B42 Optics, for example). Here's some specific details:
Just Assorted Mods has a hell of a lot of features but I actually enable are breath-holding, the vanilla sprint, and the loot menu (though I flip-flop often on using JAM's Bullet Time in place of V.A.T.S.). If you install VNV and boot up the game and wonder "what is all this fucking shit on my HUD," it's probably some of Just Assorted Mods's components. Just disable the ones you don't want in the in-game Mod Configuration Menu, which you will also have available if you followed the instructions for VNV Base.
Vigor is a modernized fork of JSawyer, the mod that was originally created by FNV's own director after the game's release that tweaked a lot of under-the-hood game settings and statistical balance to his personal preferences. JSawyer Ultimate Edition a more faithful modernization of the original JSawyer whereas Vigor is "a more lightweight alternative" that dials back some of the more drastic features of JSUE. Your choice of these, or none of them, is purely personal preference, and my preference is for Vigor. Any form of JSawyer is strongly recommended if you play in Hardcore Mode.
Simple Vigor Config is used in conjuncton with Vigor and is an intuitive and easy way to overwrite Vigor's gamesetting changes with your own preference. I use the config to adjust carry weight to a much more punishing (25 + 5*STR) formula that incentivizes the use of backpacks, mindful inventory management, and companion inventory space; and to increase the starvation, thirst, and sleep Hardcore Mode rates to 10, 5, and 14 respectively.
Desert Natural Weathers is the weather mod to end all weather mods, in my view, and it includes configuration for customizing the darkness and visibility of nighttime. This effectively obsoletes former dinosaurs like Darker Nights Ultimate Edition. Refer to the post that I made on DNUE's Nexus page here for a copy of my settings to darken those dang nights with DNW.
In AIStewie's Tweaks's nvse_stewie_tweaks.ini file, I set bCustomSpecialPoints = 1 and iNumPointsToAllocate = 35. This slightly reduced starting stat spread forces you to make tradeoffs in your character creation, because it starts with a perfect middle 5 in every stat. Every addition above average will require a subtraction below average. The "Essentials" INI included with VNV Base is all that most players will ever need, so this is my one specific personal tweak that'll keep you from scrolling through every single option in the whole damn thing (though I also recommend enabling the tweaks that hide all of your skill check tags in dialogue for more immersive and less gamified roleplaying in conversation: set bNoSkillTags, bRemoveFailedSuccessText, bRemoveRedOutline, and iRemoveTags to all = 1. )
Lou's Personally Valuable or Sentimental Tweaks and Fixes
Better Pause Menu Screen (Simple Blur). I play with an ultrawide resolution and the vanilla pause menu filter doesn't actually extend past 1920x1080. So this is really vital, lol.
Vanilla Animations Weapon Scale Fix. This mod will fix a common issue with custom weapons and animation mods where your weapon will become invisible because its scale has gotten stuck at 0.
Companion Carry Weight Fix. All companions in the game have an invisible attribute called "companion suite" that, among other things, halves their carrying capacity based on their actual stats. If you play with a super low carry weight formula like I do, you can see how this is a problem. Here's the solution.
Miscellaneous Tweaks Collection includes a few files that I get great use out of: No DLC Recipes Early (great unless you integrate DLC crafting ingredients into your base game somehow) and Vendors Have Throwables (why the fuck are throwing weapons so hard to find in vanilla!). There are others that I use as well but I recommend these two the most generally.
Lucky 38 Suite Upgrade Terminal Tweak is a very cute little mod that removes the ugly wall-mounted terminal and makes you purchase your suite upgrades from the actual computer on the desk in the master bedroom instead.
I Fought the Law - Simple NCR Start finally gives you a good reason to check out NCRCF if you're not siding with the Powder Gangers.
Hire Cass Early was my "dream mod" for the longest time, and thanks to some help, it's finally a reality. Simply pick up the letter that this mod adds to the Mojave Express office in Primm and you can recruit Cass right away (through the usual persuasive requirements) without ever stepping off the road from Goodsprings to the Mojave Outpost. Part of my ongoing "make @ikroah real" project.
Harder Strip Access. Getting into Vegas to finally confront Benny should feel like a tremendous accomplishment. This mod makes it so. Better pony up the caps or call in one hell of a favor, kid! With any kind of tougher economy mods, especially, this mod makes it wonderfully Herculean to just buy your way onto the Strip.
Balance Tweaks
Pseudo-Realistic Carry Weight - No Weightless Item Overhaul and Realistic Bottle Cap Weight. The former is actually an optional file; the main file just implements the the carry weight formula that I was coincidentally already using. The latter just forces you to think strategically about how much money you're walking around with. Can you tell that I love inventory management? Note that if you give bottlecaps weight, you should definitely let yourself drop them when necessary by editing Stewie's Tweaks (bShowCurrencyInContainers = 1).
Carry Weight Affects Speed, Med-Tek Trauma Kit (Lou's Version), and More Conditions to Fast Travel. The first appearance of my own mods on this list! These three mods in conjunction tie your encumbrance and your overall health to your mobility far more strictly. I love the balancing act of packing enough supplies for an excursion while leaving enough room for loot that I can still fast travel with, and the choice to get greedy with more loot than I can comfortably carry and just hope to not run into danger on my slow walk back toward a merchant. My tweaks to the classic Med-Tek Trauma Kit mod apply this level of emergent gameplay and resource management to your limb health, though it makes the game much more difficult unless your character specializes in Medicine. I haven't tried it myself, but Simple Healing System is fully configurable, modern mod that I've had my eyes on and that might be better for most general playstyles, and it might even be compatible in conjunction with my Med-Tek mod for extra intensity!
Better Charisma (Charisma Affects Dialogue Skill Checks) and/or Charisma Affects Reputation. I've always been very frustrated with how much of a meaningless dump stat Charisma is, and the phenomenon of the 1 CHA 100 Speech player character in general. These two mods, which you can use just one of or both together, give Charisma much more meaningful and palpable functionality.
Terrifying Presence (Lou's Version), speaking of Charisma, changes the requirement for this perk from Level 6 and 70 Speech to Level 2 and 6 CHA, making it much more accessible to more types of intimidating characters. This same mod includes alternate options to take it as a trait instead, with the drawback(s) of either tanking your Speech and Barter and/or increasing your addiction chance. See also: Less Snarky Terrifying Presence.
New Vegas Karma Rebalance is a great under-the-hood mod that makes FNV's nearly vestigial karma system less nonsensical without removing it or its effects on the player entirely. Thanks to this and Mass Ownership Tweaks, which is already included in VNV Extended's recommendation of Essential Vanilla Enhancements Merged, Cass won't hate your guts just for stealing a few things from Caesar's Legion at Cottonwood Cove, especially not after you've already killed them all.
Damage Multiplier solves the sluggish damage sponge problem that plagues Bethesda engine combat by simply multiplying all damage dealt globally, both by and to the player, by a factor of your choosing. I use 2.5x, which is usually enough to kill any level-appropriate human being with a single shot to the head. 2x should be the minimum. Combine with Combat Enhancer NVSE and NPCs Use Ammo for overall faster but much more ferocious and intense combat engagements.
Visuals and Animations
Third Person Camera Overhaul. Though I'm still getting used to its extremely specific configuration settings, this is vital for a third-person enjoyer like myself. It obsoletes any and all "dynamic camera" or "shoulder swap" mods of the past. Once you figure out how it works and what you like, you're set for life.
Realistic Movement and Dramatic Inertia. Although a little goofy, it has never felt better for me to physically move around in the game than it has before. I like the weight and get-up-and-go that this mod has for me as a player, but it's especially significant in firefights and other combat situations where, now, your targets can't dodge bullets by shifting direction instantly or stopping and turning on perfect dimes. For a single, less heavyweight alternative, try 360 Movement and Diagonal Movement together instead. Each pair of these mods is incompatible with the other pair, however.
B42 Loot, B42 Interact, and B42 Inject. I recommend a lot of the B42 family of animation overhauls in general (except B42 Optics, lol) because I just love seeing my character actually do the things they're doing. For B42 Loot, I use the included config file to disable the "force pull" effect, and for B42 Interact, there exists compatibility patches between it and its more third-person oriented counterpart Animated Ingestibles, but I'd only look into that if you know what you're doing (though, I do).
Character Kit Remake is a mod that I was turned onto recently. For a long time I have scoffed at character appearance overhauls out of nostalgia for those classic gamebryo engine potato-faces and what I thought was, to be blunt, the tasteless ineptitude of the actual overhauling. But I do really like this one, even if the showcase of screenshots do a really bad job of selling it. It looks a lot better in motion and in game, I promise. i think that these people are just not good digital photographers.
Height Randomizer. It's funny how much you can get attached to a minor character when they are, for whatever reason, especially tall or short. This lightweight mod just adds some height variance to all NPCs in the game that don't already have a non-normal 1.00 height setting in vanilla.
The Strip Groove. Dance on command. Endorsed.
Items, Economy, Crafting, Survival, Repair, Etc.
Gloves Galore (Lou's Version), Power Armor Gloves, Combat Armor Gloves, and White Glove Society Wear Gloves. Anyone who has followed me long enough on here should know that I have strong, totally normal feelings about gloves.
Armed to the Teeth Redux and literally any backpack mod. I've used this duffel bag forever, for example. I love these ones because I personally love when you can physically, literally see the things that a character is supposed to be carrying.
Flashlight NVSE. Another piece of Agnes Sands's arsenal, this is the one "old" mod that I can't quit. Even if it is a little janky, I've yet to find a better directional flashlight mod. Only install this is you think you can handle wrestling with it a little, and make sure your "Exterior" flashlight settings are all on the lowest quality regardless of computer specs (or else it causes flickering). It's a must-have for darker nights, too.
Famine is the last "loot scarcity" mod you'll ever need. Combine it with Harder, Barter, Faster, Stronger from the VNV Extended recommendations list for a really tough time affording even basic necessities without tailoring your build for mercantile success... which is just how I like it.
Cheaper Repair Costs. The vanilla formula for determining the cost of weapon and armor repairs at merchants is, in a word, fucked, where it literally costs twice the weapon's base value to repair it from broken. This mod lets you adjust that proportion so that you won't be better off literally selling and buying another gun in every single case. I play with a rate of 67% (which means that paying a merchant to repair a completely broken weapon from 0% health to 100% health will cost 67% of the weapon's base value).
Alternative Repairing does too much cool, practical shit to the base repairing system to even get into here. To keep it short, it intuitively incentivizes actually scrounging for all kinds of formerly useless junk that you can now scrap for spare parts. Check it out.
Water Overhaul. Ever play with a Universal Water Bottling mod and find things suddenly far too easy? Water Overhaul combines all the convenience and sense-making of bottling water anywhere with the much-needed tradeoff of truly purified water being much rarer. All that convenient H2O is now just radioactive enough to keep Goodsprings Source from singlehandedly breaking the survival economy of the game (not to mention the literal economy).
Cowboy Coffee and Coffee Grounds, my own mod that adds brewable coffee to the wasteland. While mostly just created because it's cute, it's really nice to have a reliable and palpable source of sleep deprivation relief when playing in Hardcore Mode.
Gun Oil From Animal Fat, another mod of mine that provides a cheaper, craftable, and less demanding but less effective repair option to complement Weapon Repair Kits. I patched this one recently to fix some old issues, and it's great for incentivizing emergent gameplay (since you need to hunt for meat, and cook the meat for fat, and combine the fat with loot to make the gun oil).
Sound
Less Constant Music and Passive Combat Music Tweaked do exactly what they say on the tin and are perfect for people who like to get immersed in the natural sound of their environment, especially if you're a chronically stealthy player like me and you've trained yourself to constantly listen for enemy footsteps. I do recommend keeping Less Constant Music disabled when you first start a game, though, because until I can figure out how to add an exception to it myself, it will remove the background music from character creation at Doc Mitchell's house more often than not, and I really like that music.
SPEAKING of Doc Mitchell's music, Try Not To Get Killed Anymore is one of the first mods I ever made and it has never left my load order. It simply replaces the musical sting that plays when you die with an emphatic, tolling bell and the refrain from Doc Mitchell's theme, plus an optional version that includes his ghostly voice telling you to try not to get killed anymore. Two of my other personal sound replacers are the Mysterious Stranger Level-up Theme, Simple Snap Sound Effects for Quest Updates, and Mechanical Camera VATS.
165 notes
·
View notes
Text
Baldurs Gate 3 High Quality Screenshot Tutorial 2.0
Hi everyone, I decided I wanted to make a more specific and slightly more in-depth tutorial on how I take screenshots in Baldur's Gate 3. For this tutorial, you will need ReShade and Otis_INF'S Photomode Mod. If you do not want to download these for whatever reason, my older tutorial covers alternative ways to get some nice screenshots.
1. ReShade (skip if you already have ReShade downloaded)
For this step, you're going to want to download ReShade. ReShade is important to this tutorial as it's going to allow you to take screenshots of your game in higher resolutions. To do this, find a ReShade preset you like on the Nexus. (You can find lots of them by just typing in "reshade" in the search bar). From there, most mod authors will explain how to download ReShade in their mod description and get it working for your game.
Once you successfully have Reshade installed, a bar of text will appear at the top of your screen, prompting you to press 'home.' This will put you through a mini-tutorial if just installed it.
2. Photomode Mod
For this mod, you'll need to subscribe to a patreon to get access. Installing it is really simple, just unzip the zip file and put its contents in a folder, then run the tool once you have BG3 running.
Personally, I choose to re-map all the controls to different keys on my keyboard as I find it makes it much, much easier for me to use. Specifically, I re-map the movement, camera tilt, and starting the photomode controls. FOV is also really important to pay attention to, so make sure you like the controls for that as well.
Make sure to test the camera mod to make sure it's working before moving on to the next step.
3. High Resolution Screenshots (Hotsampling)
Hotsampling simply means that we're going to briefly make our game run in a resolution much higher than what we usually would, which often times means your game window will end up looking huge and run off your screen.
To do this, we need to make sure a few things are in place before trying to hotsample, or the screenshot won't be captured properly.
Go through this checklist to ensure hotsampling will work:
• If you have more than one monitor, you have to make sure your monitor is set to show only on one screen. (This setting is found in Displays on Windows)
• Make sure BG3 is set to borderless windowed mode
• In ReShade, go to the settings tab. Ensure you have a key set up for taking screenshots, and that you know the folder your screenshots will be saved to. It's essential to use ReShade to take screenshots, nothing else will work. Use ReShade's screenshot key.
Once you make sure you have the above done, go to the photomode mod, and click on the hotsampling tab. From here, you can change the resolution of your game. Typically, I take my screenshots in 3,840x2,160 or 5,760x3,240 if I want a very clear image. Those are just 2x and 3x my monitor's resolution (1920x1080), so you can adjust if your monitor is different. Once your chosen resolution is set, your BG3 window will likely run way off your screen and potentially make your computer lag. (This means it's working). Make sure your BG3 window is active, then hit the screenshot key you set earlier in ReShade. This screenshot should now appear in the folder that's set for screenshots in ReShade. (It typically defaults to the folder where your game is installed).
4. Extra fine-tuning
There are a couple of ways to enhance screenshots in BG3 even further.
The first way is through using ICGS Depth of field. This tool will allow your sceenshots to minic depth of field the same way cameras IRL can do it it—it makes for some beautiful screenshots, and I'm seriously impressed by how well it replicates that look. The author gives a tutorial on how to get it working—I know it seems complicated, but follow it step-by-step and play around, it'll come to you very soon!
The other tool that I just found recently is Relight for ReShade. This tool allows you to add some lighting on a character, which I thought was so cool. Here's a tutorial for this, too.
5. Post-Processing
This step is entirely up to your own creativity, but I just thought I'd share Photopea as a good, free software (that you don't even need to download) to help you edit your photos. It basically works exactly like photoshop!
Ok that's it for all but I think I will continue to update this post and add to it whenever I find anything helpful :)
& Thank you to all the wonderful mod authors out there for creating all this software and allowing us to take beautiful images, it makes me so happy !!
150 notes
·
View notes
Note
How you meet for mayuri ? Maybe for him love at first sight so he has to let her know?

Mayuri Kurotsuchi x f!reader part 1
warnings: dissection discussed, suggestive, mayuri being mayuri author’s note: thank you for the request! i actually got SO into this, it had ME giggling by the end 😭😭😭 word count: 826
part 2
︶︶꒷꒦︶꒦︶꒷︶︶
“Master Mayuri,” calls a small voice from behind.
“What is it, Nemu?” Captain Mayuri responds, too busy with the hollow body he just cut open before him to turn around. He puts down the black-bloodied scalpel and pins the open, loose skin onto the table. He picks up his forceps next, practically jumping to start picking and pulling.
“Third Seat Akon has requested that you come down to meet the newly appointed Fourth Seat for the 12th Division,” Nemu states in her usual, steady tone.
Mayuri rolls his eyes and lets out an exasperated sigh. “Anyone below Third Seat is none of my concern, you and Akon can handle them,” he reaches once more into the hollow.
Nemu doesn’t say anything else but also doesn’t move to leave which earns a scowl of Mayuri.
Finally, he sets the tools down. “What could be so important about a new Fourth Seat,” he mumbles to himself. He folds his arms, putting his hands in the opposite sleeves, and walks to Nemu, “Very well, this better be good.”
Nemu leads Mayuri out of his personal lab down the hall to the main 12th Division lab. When they enter, they see Akon smiling and speaking with you, giving you a rundown of the place.
Akon notices Mayuri and Nemu approach, “There he is,” he says turning.
“Yes I’m here to meet the oh-so-important Fourth Seat,” Mayuri says, his voice thick with sarcasm, waving his long-nailed hand. “I would like to return to the body I was-“
You finally turn to look at Mayuri and it makes him stop mid complaint. His face doesn’t show much but his eyes widen ever-so-slightly.
“Captain Mayuri, a pleasure,” you say softly, a confident smile on your lips as you bow.
He only returns a half nod as he never bows to anymore, not even the Head Captain, but the thought of kneeling almost flashed through his mind.
This woman, he thought. He didn’t speak, only stared at you like he was stripping you down—clothes, skin, muscle, ligaments.
“She has an extraordinary background in her research in Mod-Souls. Her papers from when she was in the academy helped us in our development of them,” Akon explains.
Your cheeks warm slightly at being praised but you look at Mayuri and his expression hasn’t changed, causing a shiver to run through you.
Mayuri couldn’t rip his eyes off you. Everything about you was something he wanted to study so deeply. He wanted to see your hair strands under a microscope and poke at your skin. But at the same time, he couldn’t dare cut open something so perfect, and it confused him all the same.
He shook himself out of his thoughts, his heart was beating rapidly. What the hell is this, maybe he should put himself under the knife to see what’s going on with him.
“I was never told it was someone from the academy. That makes you quite commendable, I suppose,” he speaks finally.
You hold his gaze steadily, “I suppose,” you challenge. His eyes narrow at your response.
Akon lifts his hands up, “Well, I was just finishing up giving her a tour so I could-”
“No need. Akon, Nemu, leave us. I will finish showing her around myself,” he smiles blankly.
Both Akon and Nemu say nothing as they bow and walk away to their respective areas leaving just you and the Captain. Despite being around the man notorious for cutting apart anything he pleases, you feel relaxed.
“Hm,” Mayuri hums thoughtfully as he starts to circle you slowly, observing, “Based on your current breathing and heart rate, you feel no fear around me.”
You stand still, holding your relaxed pose as he moves, “I see no reason to. You already know my knowledge will be of use to your research institute so I know you won’t kill me.”
“Death should be the last of your worries,” as he circles, his eyes gorge on your figure once again. He’s fascinated with himself for being so fascinated with you.
“Are you saying you’re going to cut me open?” you ask casually. Experimentation on yourself was nothing new to you.
“Precisely,” he stops before you once again, “You’ve… captivated my attention in a way I can’t seem to explain, myself.”
“And knowing you, you must find out how to explain it,” you answer, smirking.
“Precisely..” he says slowly, taking a few steps closer to you, close enough to feel your body heat. You don’t move, firmly holding his gaze. He can’t decide if he despises your bravery or if he finds it admirable.
With his face close to yours, he smiles, squinting his eyes, “Well, I must finish giving you a tour, mustn’t I? Would you follow me to my personal lab?”
“Certainly,” you return the exaggerated smile. He leans back and turns, expecting you to follow. You do, truly unsure whether this tour will finish with him inside you… one way or another.
- - - - - - - tag: @stygianoir
#bleach#bleach x reader#mayuri kurotsuchi#mayuri x reader#mayuri kurotsuchi x reader#drabble#one shot
54 notes
·
View notes
Note
Gaty!! didja get any intresting information from the "exitors" ??
- 🍁Maple Anon
[OOG IM SO SORRY THIS TOOK SO LONG I HAD TO PROCESS TPOT 11 WHEN IT CAME OUT IM STILL ON AN AUTISM HIGH FROM IT]
ALRIGHT!! I've gotten what I can from the EXITors and compiled all of my notes, it's time for me to show my findings on!!
The EXIT!
So what IS the EXIT?
The best thing I can gather having not been there myself, is that it's an extra-dimensional space that exists within Four. Whenever something is eaten (or... in Four's words "zooped") by Four, they shrink down to accompany the initial "space" of Four's mouth, AKA the only place in his body that is closest to following the laws of Physics... Once you enter that door, things get WAY stranger....
I should also preface that we don't know for sure if every algebralien has such a space, as we have only observed these in Four, who seems to have far more power, or at least.... he decides to use far more power than other algebraliens... It's entirely possible that Four is the only one who has the ability to house a space like this!
LAYER ZERO: The Entrance

Diagram legend:
Four's mouth, one of the entrances to the EXIT. Appears much, MUCH higher up once anything enters Layer 0. This diagram does not show the true depth of how far the floor is from Four's mouth.
Four's OTHER mouth. His main tool of contestant transportation when contestants get eliminated... It's not very visible at all, you'd have to pull back Four's mane to even see it, and even then it's also invisible from the other side!
Skin?? Layer?? Honestly I don't know what makes up algebralien skin aside from the fact that in Four's case it acts as the catalyst for the initial "shrinkage" of anything that enters the space... It also seems to give Four a weakness to fire!
The EXIT door... The entrance to the rabbit-hole...
Strange trees. I don't fully know why these growths populate this area and beyond, as they don't seem to have any sensing function such as taste buds or stomach cilia, but I believe they were the first creations Four practiced on when constructing his inner world... he does think about himself quite often.
LAYER ONE: The Classrooms

Starting with a simple algebra classroom, Layer One is a seemingly endless collection of rooms down a long, winding network of hallways that range from other typical classrooms, to portals to areas outside of the EXIT, and even strange, nonsensical collections of things that are.. well... according to Pencil, "don't deserve a description"...
This layer was the only one accessible to the EXITors for months on end before Liy decided to take a peek behind the curtain... Since I believe the EXIT's vast characteristics were created from personal aspects of Four, it makes me think of just how much Four keeps hidden away about himself... Why does he like school so much??
LAYER TWO: The Fourest

Feeling claustrophobic? Take a trip to the scenic and expansive Fourest! I consider this a bit of a "hub" of the EXIT, as it seems like the most widespread place to put different entrances to other, deeper areas, as well as, of course, the pathway out...
Compared to the classroom, this area is the most "organic" in terms of literally being comprised of Four... The classrooms themselves contain a percent of material created from his own body, but it seems a lot has been taken from outside and placed within... This area, however, is pretty much all him. its thanks to this area that I was able to take some small samples stuck to the EXITors clothing.. and i am SO excited to study it! Ahh!!
LAYER THREE: Below...?

[can you tell this is when mod's hand started to get tired/lh]
The descriptions I got from Match, Liy, and Stapy were pretty... odd... to say the least for this wacky pocket dimension, and its certainly where my knowledge of the EXIT seems to come to a close, as the closest the EXITors got to any deeper level was this strange little castle full of even stranger secrets.... You must admit, Four might be cruel but he has an eye for architecture!
Out of the other layers, this one seems to be a combination of both Four material and outside material, making me wonder if this is where Four keeps his best kept secrets or... maybe even his insecurities?
ADDITIONAL NOTES:
Oh yeah... I heard about this... thing that some of the EXITors encountered... From what I know it seems to be simply another part of Four rather than a thinking creature of its own, but it's certainly hard to say!
I'd like to give a thank-you to Pencil, Match, Stapy, Liy, David, and 8-Ball for your contributions to my research!!
...and an apology to Bracelety, Dora, and Firey Jr for er... bringing up such a frustrating and-- well... traumatic event for this information--
...While I must admit I don't enjoy the fact that the EXIT left these fellow contestants a pretty awful impression of algebraliens, I really am glad we have them back!!
PHEW!!! Now that I have most of my information on the EXIT finally on here, time to get back to some of the other questions I got!!
#this took me so lo n g i hope yall enhoy ourhtidgg#xfohv#tpot#asks#tpot 11#bfb four#tpot gaty#gaty tpot#the exitors#bfdi#osc#osc community#osc art#object show fanart#algebraliens#algebralien
69 notes
·
View notes
Text


Sooo… to start let me say I used to Draw and Post stuff for EVERYTHING I was into but now I only really post my 2 hyper fixations (which I think is more fun? Maybe? Still figuring some Social Media Mentality stuff out haha). But rest assured I still consume a lot of content (mostly a FUCK TON of Manga and some Games).
So I love Dolls and I play Identity V (since like 2019 but I’ve had soooo many Account Issues do not get me started, so inconsistent playing on and off). When I was going through old Dolls I realized I still had 2 Lalaloopsy (while 3 cause one of them came with a Lil Sis I haven’t decided what to do with yet). And with the Buttons Eyes and jokes people make about Lalaloopsy and IDV I decided… Doll Mod time. I decided to do my two favorite skins for my girls Emma and Emily (Hello Kitty Dream Emma and Recovery (Once Line) Emily)! They were Originally Jewel and Berry (Jewel that came with her Lil Sis and Berry with the Kitchen Play-set but idk where the Kitchen ended up) but I cut them in half and switched tops and bottoms so the collars and skirts matched closer to what I wanted to make! It’s sort of my first time doing this type of Sculpting and I bought Sculpting Tools for it and am proud of my improvement even between on to the next (I did Emma first then Emily)!
I know Emma’s outfit has waaay more Bows but it’s too small to do more than what I did and even then I added so many!!! Also no idea if Emily’s hat is supposed to have Gold on it or it’s actually Sliver I cannot tell with the lighting in Game. I tried to do the pattern of the back of the hat but it’s close enough (small scale small scale…).
I’m actually a Hunter Main (and try a bunch of Hunters though mostly 2 old Mains and 3 new ones) and rarely play Survivor lol (though I love a lot of the Survivors as Characters). I used to literally ONLY play Emily but recently picked up Emma because that Hello Kitty skin was too cute to pass up (also Survivor rework happened while I was away so trying new builds out). Also I love this Emily skin but I can’t use it in matches because the Pin glows red right on the chest and I can never tell if it’s the Heartbeat for Hunter or not lol.
#my art#doll mods#lalaloopsy#identity v#IDV#Emma woods#Emily dyer#gardener Identity v#doctor identity v#hello Kitty Dream Emma#recovery Emily#once skin line#let me tag their spoiler names too hold on#lisa bec#Lydia jones#have been having a lot of trouble with drawing so trying different art medias for new inspiration#I want to draw more but health and mental block with it so#I like crafts that are have fiddlely bits idk how to describe it#might’ve posted this at the worst time for visibility? idk#oh yeah I love Emma and Emily but don’t actually ship them#but no hate to those who do#artisrs on tumblr
41 notes
·
View notes
Text
I bought it because I like pain I guess
TS2:
Initial load up was fast
Intro video still loud as fuck
Shadows are permanently off
Graphics can be scaled up to highest screen resolution, smooth edges etc
Refresh rate 48 the only option available, animations smooth without stuttering
Seemed only fitting to start out with the Goths. A slight hang on the 4th column of icons like always when loading but otherwise fast
Tool tips, neighbourhood stories, sim bio etc all unchanged. Graphics and assets unchanged (except Ikea stuff is missing - RIP)
Zoom levels, camera, lighting no visible change
I have a migraine so may not be coherent
Uh oh, stuttering during a scripted event
Worth noting that my laptop is old and has been on for over 24 hours with another game loaded up - my other version of the game would 100% have not worked until I restarted my entire laptop
On that note my laptop is not searing me alive like it did previously
I can't seem to use the middle mouse button to rotate the camera. Was that a mod?
Shadows have automatically turned on now? And the option is no longer grayed out. Weird
Cassandra and Don just got married
I minimised the game from full screen and reopened the window, it took a couple of seconds to load but didn't crash
My husband has asked what snacks I want for our gaming night, this is very important
Stress testing minimise and reopen. This is hurting my head. The game hasn't crashed at all
My kids are watching in interest. "Good job" says the youngest. We shall see
Cheats still work and all of the same options seem to be there
I've chosen 'invite all neighbours'. It stuttered as they loaded in but did not freeze as my previous game would have
Darren is NOT amused that Cassandra is married
Sorry my husband came home and I had to rip myself away temporarily
Middle button rotate is back? Not sure why this stuff is kicking in as I play
My husband said "holy shit it's not crashed yet"
Could be because I don't have 50GB of CC... yet
Running smooth as butter with 20+ sims
Don set fire to the kitchen - no lag loading in the fire engine etc
The documents folder is called The Sims 2 Legacy
Layout inside the documents is the same
Programme files are categorised TS4 style but the contents seem similar? I'm not a modder but there's still neighbourhood templates etc
Loading the bin families up took 2 seconds
CAS loaded up quick
Swapping heads really fast and overloading it with clicks - it lagged but didn't crash
Hair and outfits loading notably faster, moving through catalogues quicker
Still not stutter or lag free though, definitely still waiting for those cache and thumbnail files to fill and load up
So far it does seem to run better vs my old vanilla game. There might genuinely have been some work done on it.
Store CAS stuff isn't included
Loaded in to a new lot quickly
I've filled a 64x64 lot with chairs as homage to LGR. It hasn't crashed
I've made a gigantic household using the tombstone of life and death - the frame rate has dropped a bit, but it's handling it pretty well. I definitely would have had pink soup by now usually. Lots of audio didn't play errors in the cheat console but I think that's because of how many sims there are.
Gun's camera mod is working, also it let me replace the files without closing down the game? And the new cameras worked instantly without restarting. Could you always do that?
My eye and skin defaults still work
Put a few hacks in and they didnt immediately crash everything
I've closed and reloaded the game several times in a row and no crashes, it loads into the neighbourhood faster now that it's gotten past the first load lag
CC required a restart to load in
Overall I played mostly vanilla for 5 hours with no crashes or pink soup. This was while the Sims 1 amd Dragon age installed in the background and I had a few web pages open. My previous game with no CC wouldn't have even loaded up under those conditions in the past so to play for so long was incredible.
I'm sure as I add CC back in it will slow down again and the pink soup will return but all in all I feel there is a definite improvement in this version on my setup specifically (beat up old gaming laptop with shit ram).
21 notes
·
View notes
Note
How do you do your Final Fantasy edits?
The hard way, my friend. No AI is used here, I do it all by hand. 🥰 I assume you mean the screenshot manipulations I create? I'll try and give a simple summary... First, I boot up Remake on PC and use a "free camera" mod(you can find the links to the mods I use on my archive pages for manipulations, which is on my pinned post) to take a couple screenshots that I think will work well together. Sometimes I change my mind and choose a different one. It can be hard to match the camera angles and lighting, so sometimes I have to mess with that later, as well. But it's easier if they fit together from the beginning. We'll take my current WIP as an example. I started with these two screenshots:


I open them in the free program GIMP (GNU Image Manipulation Program), which anyone can download at gimp.org. Then the first thing I do is choose the base image. In this case, they're both facing the same way, so I choose to flip Sephiroth(you can't really do that with Cloud easily because of his earring, and his hair is less symmetrical). Since the camera was closer up on Cloud, and he's the smaller one, I usually choose Sephiroth's to be the base image. With that decided, I roughly cut Cloud from his background and paste him onto Sephiroth's image as a new layer. Then I position him, resize him, rotate him, whatever I need to do until he seems to be in the desired place, which ends up looking like this: (I ended up adding snow for this preview, so it would look more complete than it is when I showed it to my server, haha)

If you look at Cloud, you can still see a thick outline of his old background around his head. Once he's positioned properly, it's time to remove the rest of his background(I use a size 10 eraser with 100% hardness and zoom in about 5 times). Then I need to think about where they're connected, and how to make them look like they're touching, as well as layering to make them seem intertwined, as if they're truly occupying the same space together.

I cut away some of Cloud's shirt, and the rest of that effect will come with shading later. If I wanted Cloud even closer, I would make a duplicate of Sephiroth and erase his background, so that his lock of hair would appear to go over Cloud's face. I could also make it semi-transparent, so you could see the outline of Cloud's face through his hair. You can see I have some small game defects to fix, such as Cloud's hair clipping through his ear. I leave those tiny details for later, typically. Sometimes, because of their height differences, I have to "rebuild" missing parts of them from scratch, such as I did for this other manipulation:


It's a delicate process that's mostly the clone tool(to keep the textures) and some freehand drawing, but I don't have an art tablet, so I use my mouse for everything, which can be quite challenging. I've had a lot of practice from translating doujinshi, where I'd erase the words, rebuild the missing part of the image, and then place the translated words over that spot.
In any case, I decided I wanted more out of this manipulation than just leaning against each other. I wanted Cloud to be reaching up towards Sephiroth, and perhaps for Sephiroth to be pulling him closer. To do that, I needed pictures of their hands/arms like so:


I've taken hundreds of shots, so I looked through what I had first, but it wasn't the right angle, or was the wrong outfit for Cloud, so...then you open up those images and cut out the parts you want. After that, you work on positioning and things like that again. I haven't finished with that part yet, so it looks a little awkward. (And when you're doing these kinds of things, color matching is very important, but that's a bit advanced.)

I'm not fully satisfied yet, so I'll probably remove the rest of the background from the arms and then mess with the placement. As for Sephiroth's hand, I intend to thread it in Cloud's hair, so Cloud will need to be duplicated in order to create that layering effect, as mentioned previously. Which should end up looking similar to this one:

(I had to draw in most of Cloud's hand because I didn't have the camera mod back then, and the Sephiroth shot was provided to me by Coeurlwhiskers.) After that, it's a matter of shadows and highlights, remaining details, and finishing up the colors, etc. It's a long and difficult process, and can take many hours to complete, depending on how ambitious I get with it. Most of that stuff would be a much longer tutorial, and I did used to do some actual artwork a long time ago, so I...kind of know what I'm doing?? I probably do a lot of stuff the hard way(like not using layer masks) because I just don't have the time to teach myself more than the basics. 😅I know it may seem daunting, but it's really fun! I hope I managed to answer your question properly. Feel free to ask follow ups~
20 notes
·
View notes