#also i dont have an embroidery machine so i will be doing applique for the eyes
Explore tagged Tumblr posts
Visit Tumblr Blog
Explore Tumblr blogs with no restrictions, modern design and the best experience.
Last Seen Tumblr Blogs


Fun Fact
Tumblr.com rank in the US is 25.
Photo


another poll... which one should i sew... frog or shark...
#this is cholyknight again the same person who made the manta ray pattern i didi ...#*did#also i dont have an embroidery machine so i will be doing applique for the eyes
14 notes
·
View notes
Photo
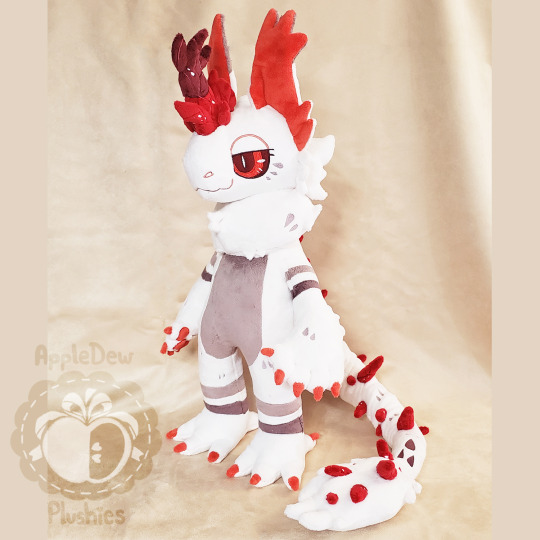
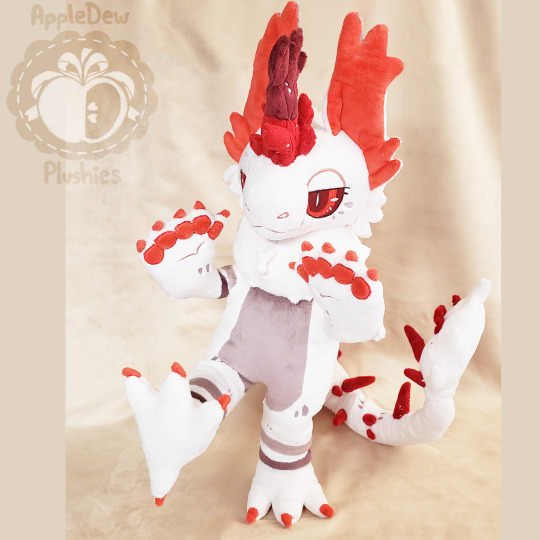
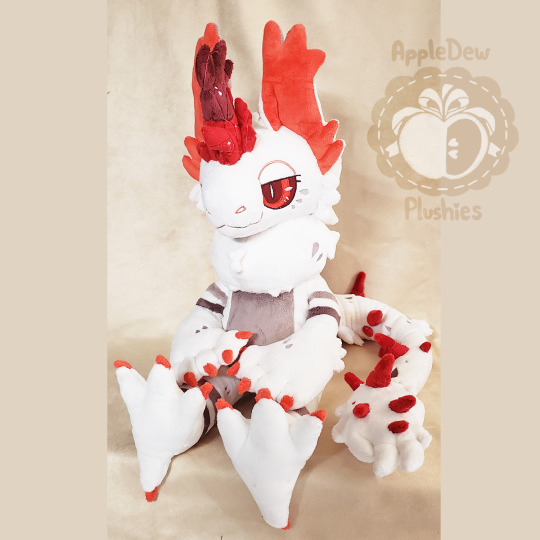
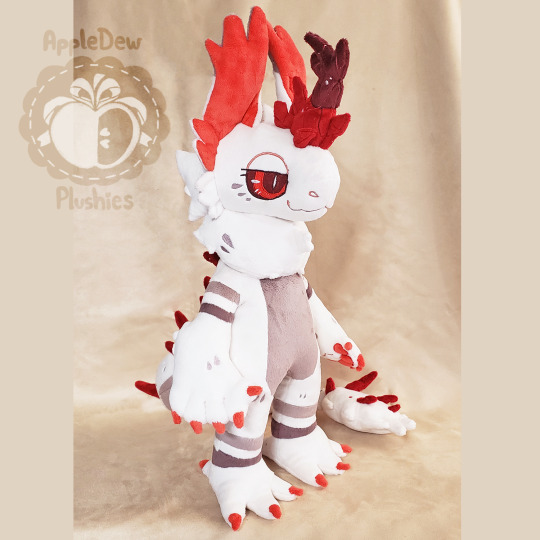
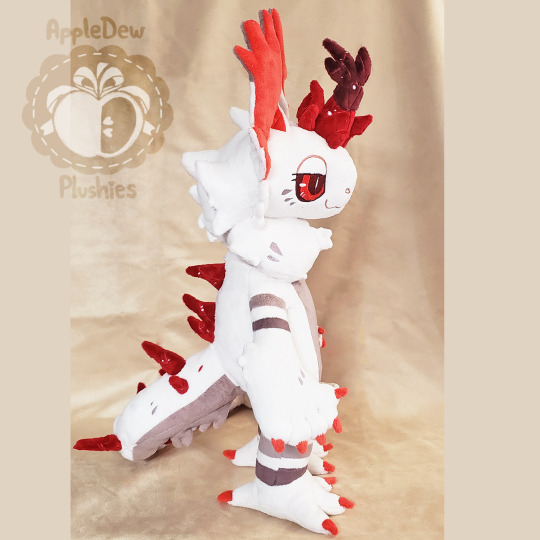
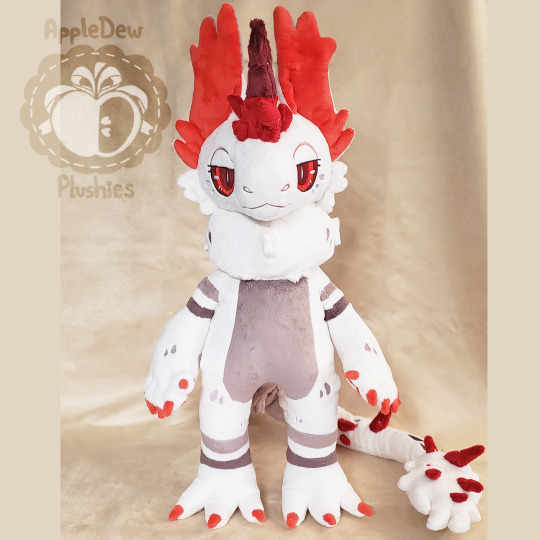
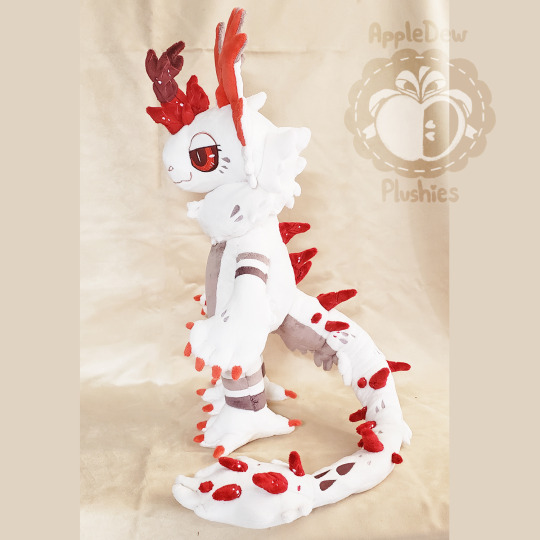
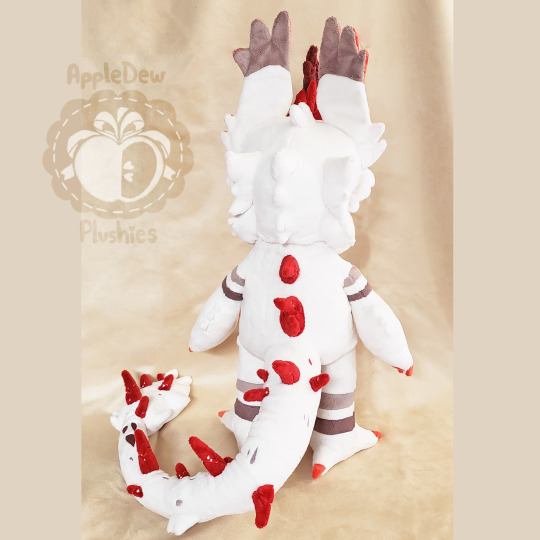
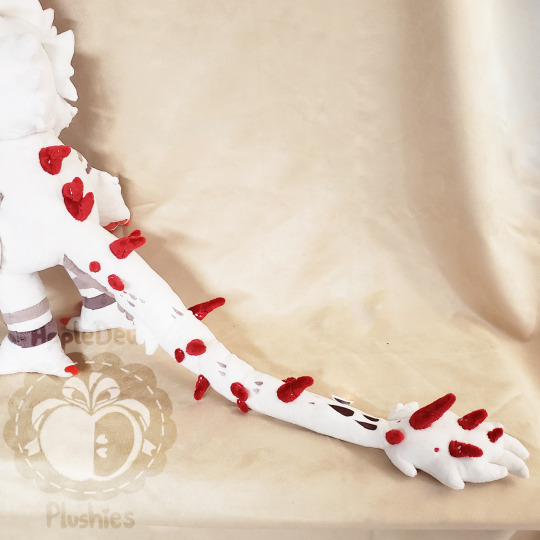
Topaz is all set!
made for lemoncakes42 on Instagram!
Topaz is made of minky and custom dyed minky; there is ball jointed armature in the plush as well. Topaz stands at about 19 inches from the top of the head to the bottoms of the feet, 23 inches including the ears. The face, and some markings on the body are machine embroidered and appliqued. This sweetheart is posable and can stand up on their own with support of the tail!
PHEW! This little one was a handful! ^^;
So starting off with fabric picking; I did have to dye 2 colors. The two brownish/grey colors were dyed but I kept running into issues with the dye running after washing. :/ A few extra washes helped immensely but some of the color did end up fading a bit. This wasn’t too huge a deal since it felt like the colors were at least close enough, but I’m still a bit said that I couldn’t get the gorgeous colors I was anticipating after the first washes.
Before all of this, patterning was going on. I attempted to avoid handsewing as much as possible since i was expecting to have to do a bit of that with the gems. In the end, I did have to remake the front of the neck floof on the front since it came out a bit small. I do wish i could have had a better understanding on how the shape the back a little better, but oddly, I just couldn’t figure out HOW to make the back puff up as nicely as the front, mainly how the join the front and back at the side for a more seamless transition. I do absolutely LOVE how the front looks though!
On the HUGE plus side, I was able to recycle Andi’s longer neck pattern for Topaz! The original plan was to keep them the same proportions as a regular teddy, but I think the longish neck to make room for the floof adds a nice touch! ^u ^ More changes were planned, but were scrapped because it wouldn’t have had the chubby teddy look.
This is the first teddy I’ve added armature to, and I’m in love! They feel more like a soft action figure, but I absolutely love how poseable they are! There was a tiny issue with getting the tail length right, but that was knocked out and resolved fairly quickly.:)
Embroidery took no time at all! But I did have to rehoop the front body since I missed 2 markings on each sides of the legs (the small ones closer to the middle of the legs). Even embroidering the gems wasn’t too much of an issue. To be honest, all the gems on the tail are basically 3 different sizes with a vaguely similar design. All I really did was make one design of each side and just shift around the shines and line detailing! ^^;
Handsewing took a WHILE; I think at the end it was 12 hours. But it was well worth it! I dont recall how long it took to handsew the claws, but it’s also up there! On the bright side, the claws were sewn together using my embroidery machine, all i had to do was cut and handsew. ^u ^
Overall, this sweetheart took a while, but wow. I genuinely impressed myself!
___________
More intimate WIPs can be found on my Ko-fi! :) https://ko-fi.com/appledew
Twitter: https://twitter.com/AppleDew_
Instagram: https://www.instagram.com/apple.dew
Tumblr: http://appledew.tumblr.com/
Furaffinity: http://www.furaffinity.net/user/appledew
deviantArt: https://www.deviantart.com/appledew
29 notes
·
View notes
Note
Hi! Do you have any advice for starting making plushies? I really dont know where to start and embroidery is terrifying! haha
Hiya~! Hope you don’t mind me copy pasting the last time I answered the first bit aha
If you’re looking for resources, my friend has some really helpful beginner tutorials here: https://www.deviantart.com/diffeomorphism/art/So-you-want-to-make-plushies-A-beginner-s-guide-423683194
There’s also NazFXStudios extensive tutorials on gumroad. If you’d like to try out some premade patterns rather than diving right into your own I’d recommend Teacuplion or Sew Desu Ne/Choly Knight
For other advice, unless you’re stubborn like me, maybe start small and simple until you get the hang of sewing itself. I would suggest using premade patterns if you’re a complete beginner, pattern making can be pretty overwhelming and it definitely helps if you have at least a basic understanding of how shapes fit together. Try not to get too discouraged if you first plush aren’t great aha, we’ve all been there and we all have to start somewhere~
For embroidery, I’m not sure I’d recommend diving right in aha, embroidery machines are expensive, and you have to buy things like thread, stabiliser and topping as well, not to mention a digitising program if you don’t want to rely on buying files. Maybe try something like iron on transfers or applique with a regular machine until you’re a bit more experienced/sure you want to pursue sewing, before dropping a load of money on equipment
79 notes
·
View notes
Photo


Brevard Demort is all set!
Made for Nikolacode on Instagram.
This plush is made of custom printed minky, minky and small bits of stiff felt. They lay at about 10 inches from the tip of the nose to the back tips of the legs. The face, cutie mark, detailing on the wings and hair/tail are machine embroidered and appliqued. The glasses are not removable.
I screamed into the void a few times, not going to lie. ^^; Not with Brevard, but with the minky print. x. x
SO! To be honest, Brevard was a BREEEZE to make; heck, there was little to no struggle with patterning the mane and plenty of handsewing. BUT all of the screaming came from the printed minky. 75% of the original print was too blue or red and overly saturated, including the colors for the wings (mane colors was mostly okay); I ended up ordering a swatch with 3 color variants and the original colors. The original colors on the swatch came out closer to what I wanted. Proceed with screaming and contacting the company about this (but definitely not screaming at them, I promise :) Support was super pleasant. ). They made things right, though I ended up brightening the base purple to be lighter so this mistake possibly wouldn’t happen again. x__x
Things worked out in the most part after. ^^;
The final print was of only the base body, the mane and tail color came from the original print. I decided to just go with regular minky for the wings since I had colors in hand that were close enough and I didnt want to risk another misprint.
Aside from that, I dont think I have much else to say about little Brevard. The mane and tail weren’t much of a struggle aside from having to run almost all the pieces through my embroidery machine to applique the stripes.
The glasses were also made of regular minky since I couldn’t seem to get the cotton fabric I picked up to work out. I do plan on looking into more materials that have as much as forgiveness as minky. *hint hint*
I apologize for the quick and short break down; if maybe I can have a better write up in the future. ^^;
But overall, Brevard is gorgeous! I was excited to work with printed minky again to achieve details that I can’t achieve. :)
___________________
Twitter: https://twitter.com/AppleDew_
Instagram: https://www.instagram.com/apple.dew
Tumblr: http://appledew.tumblr.com/
Furaffinity: http://www.furaffinity.net/user/appledew
deviantArt: https://www.deviantart.com/appledew
7 notes
·
View notes