Tumgik
#advancedtechniques
egsbuiltconstruction · 2 months
Text
Tumblr media
EG'S Built Construction offers expert water damage repair services in Torrance, ensuring swift and thorough restoration of affected properties. Our dedicated team employs advanced techniques and state-of-the-art equipment to mitigate damage and restore your home or business. From initial assessment to final repairs, we prioritize efficiency and quality craftsmanship to ensure your satisfaction. Trust EG'S Built Construction for reliable, professional water damage repair solutions. Contact us today for immediate assistance and restoration of your property in Torrance.
0 notes
intorque · 3 months
Text
Pushing Boundaries: Cutting-Edge Interactions with Webflow
In the world of web design, staying ahead of the curve often means mastering the latest tools and techniques. As designers strive to create immersive, dynamic, and user-friendly experiences, platforms like Webflow have emerged as indispensable allies. While Webflow is renowned for its intuitive interface and powerful capabilities, mastering advanced techniques can elevate your designs to new heights. In this blog post, we’ll explore some advanced Webflow techniques that will empower you to push the boundaries of your creativity and craft truly exceptional websites.
Dynamic Data Binding:
Personalising the User Experience
One of the hallmarks of modern web design is personalization. With Webflow’s dynamic data binding feature, you can create personalised experiences that cater to each user’s unique preferences. By connecting your website to dynamic data sources such as CMS collections or external APIs, you can dynamically populate content based on user interactions or predefined parameters.
Whether you’re building an e-commerce platform, a blog, or a portfolio website, dynamic data binding enables you to deliver tailored content that resonates with your audience.
Advanced Interactions: Bringing
Your Designs to Life
Static websites are a thing of the past. Today’s users expect interactive and engaging experiences that captivate their attention. With Webflow’s advanced interactions, you can breathe life into your designs and create immersive experiences that leave a lasting impression.
From complex animations and scroll-triggered effects to custom hover states and parallax scrolling, the possibilities are endless. By mastering advanced interactions, you can transform static layouts into dynamic and engaging interfaces that keep users coming back for more.
Custom Code Integration:
Unlocking Limitless Possibilities
While Webflow’s visual interface empowers designers to create stunning websites without writing a single line of code, there are times when custom code integration is necessary to achieve specific functionalities or design elements.
Whether you’re implementing custom JavaScript plugins, integrating third-party APIs, or fine-tuning your site’s performance, Webflow’s custom code capabilities provide unparalleled flexibility. By seamlessly integrating custom code into your Webflow projects, you can unleash the full potential of the platform and bring your wildest design ideas to fruition.
Responsive Design Optimization:
Ensuring a Seamless Experience
Across Devices
In today’s multi-device world, responsive design is non-negotiable. With Webflow’s responsive design tools, you can create websites that look and perform flawlessly across desktops, tablets, and smartphones. But optimising for responsiveness goes beyond simply stacking elements and adjusting breakpoints.
Advanced Webflow users leverage techniques like flexbox and grid layouts, viewport-based units, and media queries to fine-tune the appearance and behaviour of their designs on different devices. By mastering responsive design optimization, you can ensure that your websites provide a seamless experience for users regardless of the device they’re using.
Performance Optimization:
Maximising Speed and Efficiency
In the swiftly evolving realm of the internet, rapidity reigns supreme. A slow-loading website can drive users away and negatively impact your search engine rankings. That’s why performance optimization is a crucial aspect of advanced Webflow techniques.
From optimising image assets and minifying CSS and JavaScript files to leveraging content delivery networks (CDNs) and implementing lazy loading, there are numerous strategies for maximising your site’s speed and efficiency. By prioritising performance optimization, you can create lightning-fast websites that deliver an exceptional user experience.
Conclusion
In conclusion, mastering advanced Webflow techniques empowers designers to push the boundaries of their creativity and craft truly exceptional websites. By harnessing the power of dynamic data binding, advanced interactions, custom code integration, responsive design optimization, and performance optimization, you can create immersive, dynamic, and user-friendly experiences that captivate your audience and distinguish yourself from competitors. So roll up your sleeves, dive into the world of advanced Webflow techniques, and unleash your full potential as a web designer. The possibilities are limitless.
Read More:- Pushing Boundaries: Cutting-Edge Interactions with Webflow
0 notes
orthotv · 3 months
Text
Tumblr media
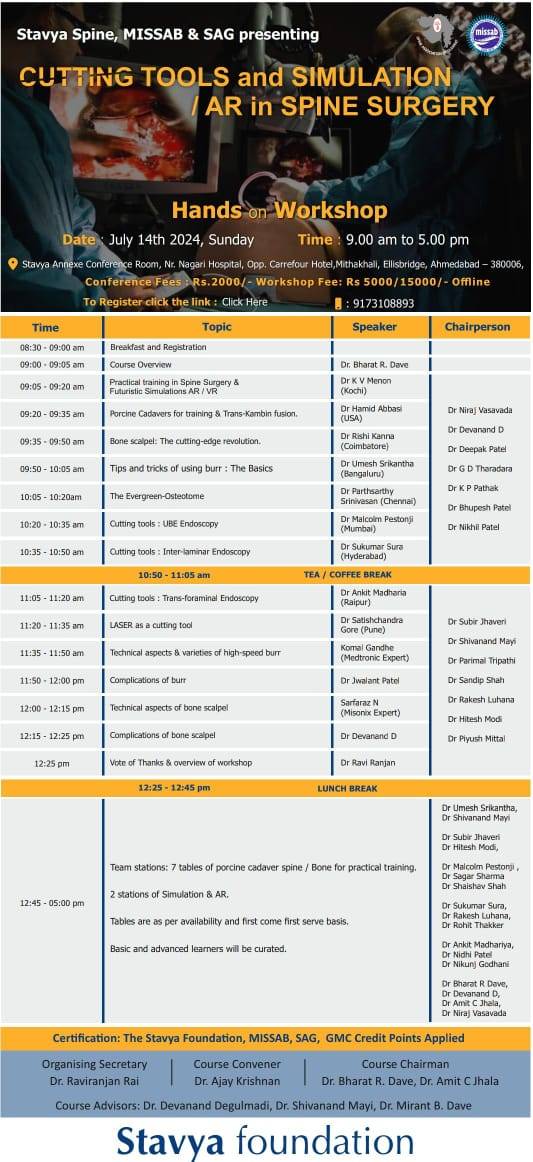
🔺 Stavya Spine, MISSAB & SAG presenting
🔰 Cutting Tools & Simulation / AR in Spine Surgery 🔰 Hands-On Workshop
🗓 Date: Sunday, July 14th 2024
⏰Time: 9:00 am to 5:00 pm
🏟 Venue: Stavya Annexe Conference Room, Nr. Nagari Hospital, Opp. Carrefour Hotel, Mithakhali, Ellisbridge, Ahmedabad
🔗 Click here to register: https://tinyurl.com/OrthoTV-SpineTech-Workshop
🔺 Conference Fees: Rs. 2000/- 🔺 Workshop Fee: Rs. 5000/- to Rs. 15000/-
❇ Topics & Speakers:
Practical Training in Spine Surgery & Futuristic Simulations AR/VR
Advanced Techniques and Cutting Tools (Porcine Cadavers, Bone Scalpel, Burr, Endoscopy)
Vote of Thanks & Overview of Workshop:
Hands-On Workshop:
👨‍⚕ Organising Secretary: Dr. Raviranjan Rai, Dr. Ajay Krishnan
👨‍⚕ Course Convener: Dr. Bharat R. Dave, Dr. Amit C. Jhala
👨‍⚕ Course Chairman: Dr. Niraj Vasavada, Dr. Bharat R. Dave, Dr. Amit C. Jhala
👨‍⚕ Course Advisors: Dr. Devanand Degulmadi, Dr. Shivanand Mayi, Dr. Mirant B. Dave
▶️ Media Partner: OrthoTV Global
🤝 OrthoTV Team: Dr. Ashok Shyam, Dr. Neeraj Bijlani
🔗 Discover more at www.orthotvonline.com
🔗 Join OrthoTV - https://linktr.ee/OrthoTV
0 notes
canadianautodetailers · 3 months
Text
Tumblr media
Hello all Car Enthusiasts! 
Do you know that the harmful rays of the sun can damage your car’s pristine finish? Now you don’t have to worry! 
DetailWithMe is here to give your dream vehicle the ultimate protection and shine!
With our top-notch ceramic coating service, you can now say goodbye to hard scratches and UV damage and hello to a long-lasting, glossy finish. Our team of experienced professionals use advanced techniques and high-quality materials to protect your car from the harmful sunrays and ensure showroom shine. 
So why wait? Contact our expert team today and give your car the best protection and love it deserves.
Visit https://mobilecardetailingservices.ca/services/# for more information
0 notes
alwahahygiene · 5 months
Text
Pest Control Dubai: Al Waha Hygiene Keeps Your Space Pest-Free
Al Waha Hygiene offers top-tier pest control services in Dubai. Our expert team utilizes advanced techniques to rid your space of pests efficiently. Protect your home or business with our comprehensive solutions. Say goodbye to pests and enjoy a pest-free environment with Al Waha Hygiene. Book now (+971 566952225) for Pest Control Dubai.
0 notes
ezzybrownmedia · 5 months
Text
Expert Tips for Perfecting 3D Models and Product Design
Tumblr media
Embark on a thrilling journey into 3D modelling and product design, where the innovation potential is limitless and creativity controls are essential. The pursuit of excellence in both the development of sophisticated prototypes for manufacturing and the creation of detailed characters for animation starts with a solitary polygon. This article will reveal the strategies for mastering the art of product design and developing breathtaking 3D models. Prepare yourself as we embark on a massive journey brimming with insight, ingenuity, and novelty.
Invest in Quality Software
Before delving into the realm of 3D modeling, you must acquire the appropriate instruments for the task. Obtain industry-standard software, such as ZBrush, Blender, or Maya, which each provides a distinct set of functionalities customized for specific fields of study. Although open-source alternatives such as Blender may be economical for novices, experts may find the robust functionalities of Maya or ZBrush more suitable for complex undertakings. Always keep in mind that your software is fundamental to your creative pursuits, so make an informed decision.
Understand the Principles of Design
Tumblr media
A solid foundation constructed on design principles underpins each magnificent 3D model. Develop an understanding of fundamental principles including proportion, balance, and composition to instill vitality into your artistic creations. Analyze the methodologies employed by eminent artists and designers in order to extract invaluable knowledge regarding the art of visualization. An extensive understanding of design fundamentals will elevate your work to the extraordinary, whether you are creating organic forms or constructing industrial designs. Contact 3D modeling and artwork professional
Practice Patience and Persistence
Patience is not only a desirable quality in the environment of 3D modeling, which operates at an extremely rapid tempo; it is an absolute necessity for achieving success. An artwork does not develop overnight, just as Rome did not. Embrace the iterative essence of the creative process by permitting experimentation, failure, and the acquisition of knowledge from errors. Maintain in mind that each setback represents a chance for development; therefore, obstacles shouldn't stop you from proceeding. Through sustained effort and commitment, one will progressively enhance their methodology and attain unprecedented levels of expertise.Read more.. Read the full article
1 note · View note
Text
Unlocking ChatGPT 4's Potential: A Comprehensive Course for Novices to Experts
Few tools have received as much attention and praise in the fields of artificial intelligence and natural language processing as ChatGPT. OpenAI's ChatGPT has developed into a potent language model that can produce text responses that are human-like on a broad range of subjects. With the release of ChatGPT 4, this technology's potential uses and capabilities have grown even more, providing users with a previously unheard-of degree of intricacy and adaptability.
This extensive course is made to help you every step of the way, regardless of whether you're an experienced developer hoping to fully utilize ChatGPT Tutorial or a curious newbie ready to explore the possibilities of AI-driven discussion. We'll cover everything, from comprehending the foundations of natural language processing to becoming proficient in sophisticated strategies for customization and fine-tuning.
Chapter 1: Overview of ChatGPT
To begin, let's set the foundation by going over the fundamental ideas underpinning ChatGPT and its underlying architecture. You will gain knowledge about ChatGPT tutorial transformer-based models, the training set that it was trained on, and the fundamentals of producing responses that are both logical and pertinent to the context.
Chapter 2: Introduction to ChatGPT
To get you started with ChatGPT4, we'll dig into some real-world, hands-on tasks in this chapter. You'll discover how to communicate with the model through chatbots and messaging apps, as well as well-known programming languages like Python and JavaScript. 
Tumblr media
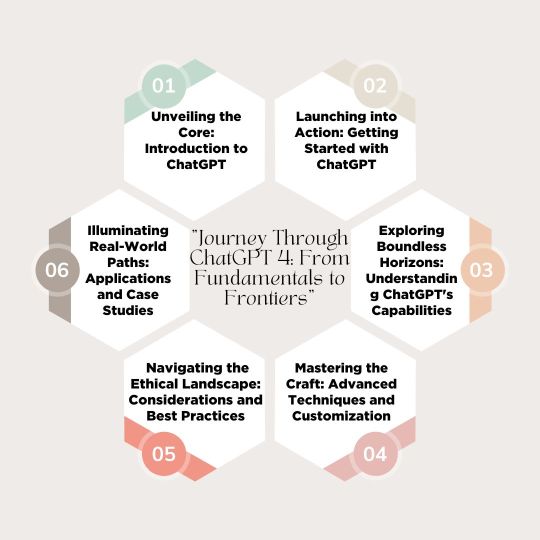
Chapter 3: Recognizing the Potential of ChatGPT
After you've mastered the fundamentals, we'll examine ChatGPT 4's many features. You'll learn about the various applications of ChatGPT, from responding to inquiries and offering advice to writing original content and having insightful discussions.
Chapter 4: Sophisticated Methods and Personalization
This chapter explores advanced methods for adjusting and personalizing ChatGPT for individuals who want to develop their abilities. You'll discover how to incorporate outside data sources, maximize performance for particular tasks, and even use transfer learning to train your own customized models. 
Chapter 5: Best Practices and Ethical Considerations
As with any powerful technology, it's crucial to think through the moral ramifications and the best ways to use ChatGPT in a responsible manner. This chapter covers a variety of subjects, including privacy issues, bias and fairness in AI, and risk and pitfalls mitigation techniques.
Chapter 6: Case Studies and Real-World Applications
In order to tie things together, we'll look at ChatGPT's practical uses in a range of sectors and scenarios. You'll learn how forward-thinking companies are using ChatGPT to promote innovation and accomplish their objectives in a variety of domains, including customer service, education, and content development. 
Concluding Remarks: Strengthening Conversational AI's Future
By the time this course ends, you'll have a thorough understanding of ChatGPT and the abilities required to utilize it to its greatest advantage. With ChatGPT 4, there are countless opportunities for creativity and innovation, regardless of your background as a developer, business owner, or fan. So, why do you hesitate? Together, let's go out on this adventure to explore conversational AI's future.
0 notes
wethinkwedream · 6 months
Text
Advanced Techniques for Growing Mangifera Indica Hydroponically Mangifera indica, or mango for short, is a tropical fruit that is enjoyed by millions of people all over the world. While it can be grown outdoors in tropical and subtropical climates, there are many advantages to growing it hydroponically. In this article, we will explore some of the most advanced techniques for achieving optimum growth in mangifera indica. We will discuss the benefits of each technique, and how you can apply them to your own grow operation. So, whether you are a beginner or an expert hydroponic mango grower, be sure to read on for some valuable tips and tricks. Mangoes growing on a tree in a field. Growing Mangifera Indica Hydroponically Benefits of Growing Mangifera Indica Hydroponically Benefits of Growing Mangifera Indica Hydroponically Hydroponic cultivation offers several significant benefits for growing Mangifera Indica, also known as mango trees. By providing precise control over environmental conditions, nutrients, and pest management, hydroponics can promote optimal growth and yield. Here are some key advantages of growing Mangifera Indica hydroponically: 1. Nutrients: With hydroponics, you can tailor the nutrient solution to meet the specific needs of the mango trees. This ensures that they receive an ideal balance of essential elements, promoting healthy growth and fruit development. 2. Pest Control: Hydroponics can help minimize pest issues by reducing the presence of soil-borne insects and diseases. By eliminating the use of soil, which often harbors harmful organisms, hydroponic systems provide a cleaner and more controlled growing environment. 3. Faster Growth: Mango trees grown hydroponically tend to exhibit faster growth compared to those grown in traditional soil-based methods. The optimized nutrient delivery and efficient root uptake in hydroponic systems provide the mango trees with the necessary resources to thrive and develop at an accelerated rate. 💡 key Takeaway: Growing Mangifera Indica hydroponically offers benefits such as precise nutrient control, reduced pest problems, and accelerated growth rates. A green plant is growing in a greenhouse. Growing Mangifera Indica Hydroponically Nutrients Nutrients play a crucial role in achieving optimum growth in Mangifera Indica when grown hydroponically. By providing the right balance of essential elements, you can ensure healthy and vigorous plant development. Here are some key considerations when it comes to nutrient management: 1. Macronutrients: Mangifera Indica requires adequate amounts of macronutrients such as nitrogen (N), phosphorus (P), and potassium (K). These elements are essential for overall plant growth, leaf development, flower production, and fruit formation. 2. Micronutrients: In addition to macronutrients, Mangifera Indica also benefits from specific micronutrients like iron (Fe), manganese (Mn), zinc (Zn), and copper (Cu). These trace elements are vital for enzyme activation, chlorophyll production, and various metabolic processes within the plant. 3. Nutrient Solutions: An effective way to supply nutrients in hydroponic systems is through nutrient solutions. These solutions are created by dissolving specific fertilizers or mineral salts in water to provide a well-balanced blend of nutrients. It is important to regularly monitor and adjust the nutrient solution's composition to meet the changing needs of the plant during different growth stages. 4. pH Levels: Mangifera Indica prefers slightly acidic to neutral pH levels ranging from 5.5 to 7.5. Monitoring and adjusting the pH of the nutrient solution is crucial, as nutrient availability can be influenced by pH. Regular testing and pH adjustment will ensure optimal nutrient uptake. 5. EC Levels: Electrical conductivity (EC) measures the concentration of dissolved salts in the nutrient solution. Maintaining appropriate EC levels is essential, as excessive salts can lead to nutrient imbalances and plant stress.
Monitoring EC levels through regular testing allows for timely adjustments to maintain optimal conditions. 6. Foliar Feeding: In addition to root uptake, foliar feeding can also be utilized as a supplementary nutrient application method. Spraying a nutrient solution directly on the leaves allows for quicker absorption and can provide targeted nutrition to address specific deficiencies. Remember, providing the right nutrients in a controlled hydroponic environment is paramount for achieving robust growth and high-quality fruits in Mangifera Indica. 💡 key Takeaway: Proper nutrient management is essential for successful hydroponic cultivation of Mangifera Indica. Balancing macronutrients and micronutrients, maintaining optimal pH and EC levels, and considering foliar feeding are all important factors to ensure healthy and productive growth A row of plants in a greenhouse. Growing Mangifera Indica Hydroponically Pest Control Pest Control for Growing Mangifera Indica Hydroponically When it comes to growing Mangifera Indica hydroponically, pest control is a crucial aspect to consider. Without proper pest management, your plants can suffer from infestations that hinder their growth and overall health. Here are some advanced techniques for effective pest control in hydroponic systems: 1. Integrated Pest Management (IPM): Implementing an IPM approach involves combining various pest control methods to maintain a healthy balance within your hydroponic system. This strategy focuses on prevention, monitoring, and control of pests while minimizing the use of chemical pesticides. Regularly inspect your plants for signs of pests and take action immediately to prevent an infestation. 2. Beneficial Insects: Introducing beneficial insects into your hydroponic setup can help keep pest populations in check naturally. Predatory insects like ladybugs, lacewings, and predatory mites can feed on harmful pests such as aphids, spider mites, and thrips. Ensure a suitable habitat for these beneficial insects in your growing area to promote their population. 3. Organic Pest Control Sprays: If pests become problematic despite preventive measures, organic pest control sprays can be used as a last resort. Neem oil, insecticidal soaps, and horticultural oils are effective against a wide range of pests and are safe to use in hydroponic systems. However, always follow the product's instructions and avoid spraying directly on the plant's flowers or fruits. 4. Cleanliness and Sanitation: Maintaining a clean and sanitized hydroponic system is essential for preventing pest outbreaks. Regularly clean your equipment, remove dead plant material, and maintain proper hygiene in your growing area. This helps eliminate potential habitats for pests, reducing their chances of survival. Remember, prevention is key in pest control for hydroponic gardening. By implementing these advanced techniques and adopting a proactive approach, you can minimize the risks of pests and ensure optimal growth and productivity of your Mangifera Indica plants. 💡 key Takeaway: Effective pest control is essential in hydroponic systems growing Mangifera Indica. Implementing integrated pest management, introducing beneficial insects, using organic pest control sprays, and maintaining cleanliness and sanitation are crucial for preventing and managing pest infestations. A 3d model of a banana tree. Growing Mangifera Indica Hydroponically Faster Growth Faster Growth: Achieving faster growth in Mangifera Indica hydroponically requires implementing advanced techniques that optimize nutrient uptake and plant development. Here are some proven strategies for accelerating growth: 1. Nutrient Alternating: By alternating nutrient solutions rich in different macro and micronutrients, you can ensure a balanced and continuous supply of essential elements. Experimenting with various nutrient ratios and formulations can promote accelerated growth rates. 2. pH
Adjusting: Maintaining the correct pH level in the hydroponic solution is crucial for nutrient availability. Regularly monitoring and adjusting pH levels within the optimal range (usually around 5.5 to 6.5) can enhance nutrient absorption and support faster growth. 3. Pruning: Pruning is a vital technique for directing energy towards key growth areas. Regularly removing diseased or excess plant parts, such as crowded branches or leaves, helps to redirect nutrients towards new growth. Pruning also improves air circulation and reduces the risk of pest infestations. 4. Training: Training techniques, such as trellising or staking, help in creating a structured growth pattern and maximizing light penetration. This promotes uniform growth and allows more efficient nutrient distribution, resulting in faster and healthier plant development. 5. Defoliation: Strategic defoliation involves selectively removing older or shaded leaves. This technique stimulates new growth and redirects nutrients towards younger foliage, which is more efficient in photosynthesis and nutrient uptake. 6. Re-vegetating: If you have existing Mangifera Indica plants, you can re-vegetate them for faster growth. This involves a process of pruning back the plant to stimulate fresh growth and rejuvenation. Re-vegetation is commonly done during dormant seasons and can lead to vigorous growth when combined with proper nutrient management. Implementing these advanced techniques can significantly boost the growth of Mangifera Indica plants when cultivated hydroponically, resulting in higher yields and healthier crops. 💡 key Takeaway: Utilizing advanced techniques such as nutrient alternating, pH adjusting, pruning, training, defoliation, and re-vegetating can enhance growth rates of Mangifera Indica plants in hydroponic systems. A group of banana trees in a dirt field. Growing Mangifera Indica Hydroponically Requirements for Growing Mangifera Indica Hydroponically Requirements for Growing Mangifera Indica Hydroponically: Nutrient Solutions: - Select a nutrient solution specifically formulated for hydroponic mango cultivation. These solutions should contain a balanced blend of essential macronutrients (nitrogen, phosphorus, and potassium) as well as micronutrients (iron, manganese, zinc, etc.) that are crucial for healthy growth. - Regularly monitor the nutrient levels in your solution to ensure that they are within the optimal range for mango growth. Adjust the nutrient concentration as needed to maintain proper balance. Lighting: - Mango trees require a minimum of 12-14 hours of light each day for optimal growth. Use a combination of high-quality artificial lights, such as LED or metal halide, to provide the necessary intensity and spectrum. - Position the lights in such a way that they evenly distribute light across the entire canopy. Adjust the height and angle of the lights as the plants grow to ensure uniform coverage and prevent shading. Temperature: - Mango trees thrive in warm temperatures ranging from 77°F to 95°F (25°C to 35°C). Maintain a stable temperature within this range to support healthy growth. Avoid extreme temperature fluctuations, as they can stress the plants and hinder their development. - Consider using a temperature control system, such as fans or air conditioning, to regulate the temperature inside the growing area. Humidity: - Mango trees prefer moderate to high humidity levels ranging from 60% to 80%. Keep the humidity level in the growing area within this range to ensure optimal growth. Consider using humidifiers or misters to increase humidity if necessary. Air Circulation: - Proper air circulation is essential for hydroponic mango plants. Good airflow helps prevent the growth of mold and disease, supports transpiration, and strengthens stems. Use oscillating fans or other ventilation systems to maintain adequate airflow throughout the growing area. 💡 key Takeaway: To successfully
grow Mangifera Indica hydroponically, ensure a nutrient-rich solution, provide sufficient light for photosynthesis, maintain an optimum temperature and humidity range, and promote air circulation within the growing area. A row of banana plants in a greenhouse. Growing Mangifera Indica Hydroponically Nutrient Solutions Nutrient Solutions: One of the key requirements for successful hydroponic cultivation of Mangifera Indica is providing the right balance of nutrients through nutrient solutions. These solutions consist of a carefully selected blend of essential macronutrients (such as nitrogen, phosphorus, and potassium) and micronutrients (including iron, zinc, and manganese). To ensure optimal growth and development, it's important to use a hydroponic nutrient solution specifically formulated for fruit-bearing plants. These solutions are typically fortified with higher levels of potassium and phosphorus to support flowering and fruiting stages. Additionally, incorporating organic additives, such as seaweed extract or fish emulsion, can provide supplementary micronutrients and enhance plant vigor. In the nutrient solution, it is crucial to maintain the appropriate pH level. Mangifera Indica thrives in slightly acidic to neutral environments with a pH range of 5.5 to 6.5. Regular monitoring and adjustment of the pH using pH adjusters (such as phosphoric acid or potassium hydroxide) are essential to prevent nutrient imbalances and ensure optimal nutrient absorption. Proper nutrient delivery methods, such as flood and drain systems or drip irrigation, should be employed to ensure consistent and efficient distribution of the nutrient solution to the plant's root zone. These methods facilitate adequate nutrient uptake and minimize the risk of nutrient deficiencies or excesses. It's worth mentioning that regular monitoring of the nutrient solution's electrical conductivity (EC) is necessary to assess its strength and make adjustments as needed. A high EC can indicate a buildup of salts, which can be detrimental to plant health, while a low EC may reflect a nutrient deficiency. 💡 key Takeaway: Providing a well-balanced nutrient solution with the appropriate pH level is crucial for promoting optimal growth and development of Mangifera Indica when grown hydroponically. Lighting Lighting plays a critical role in the successful growth of Mangifera Indica hydroponically. The right lighting conditions enable the plant to photosynthesize effectively and promote optimal growth. Here are some key considerations when it comes to lighting for Mangifera Indica hydroponics: 1. Light Spectrum: Mangifera Indica requires a broad spectrum of light for different growth stages. During the vegetative phase, a light spectrum with a higher proportion of blue light (400-500 nm) stimulates leaf and stem growth. In contrast, during the flowering and fruiting stage, a spectrum with more red light (600-700 nm) promotes flower formation and fruit development. 2. Light Intensity: Mangifera Indica thrives under moderate to high light intensity. Aim for around 5000-8000 lux during the vegetative phase and increase it to 10,000-15,000 lux during flowering and fruiting. Using a light meter can help ensure you're providing the right amount of light for optimal growth. 3. Light Duration: Mangifera Indica generally requires at least 12-14 hours of light per day during the vegetative stage. During the flowering and fruiting stage, reduce the light duration to around 10-12 hours to simulate natural daylight cycles. 4. LED Grow Lights: LED grow lights are highly recommended for Mangifera Indica hydroponics due to their energy efficiency and customizable light spectrum options. They emit less heat compared to traditional lighting sources, reducing the risk of plant damage. Remember to regularly monitor and adjust the lighting conditions based on the specific needs of your Mangifera Indica plants. Providing the right spectrum, intensity,
and duration of light will contribute to healthy growth and successful fruit production. Proper lighting is crucial for the successful growth of Mangifera Indica hydroponically. By ensuring the right spectrum, intensity, and duration of light, you can promote optimal growth and fruit development." A 3d model of a tree in a field. Growing Mangifera Indica Hydroponically Temperature Temperature plays a crucial role in the successful growth of Mangifera Indica hydroponically. Maintaining the right temperature range ensures optimal metabolic processes for the plant. Here are some key considerations related to temperature when growing Mangifera Indica hydroponically: 1. Ideal Temperature Range: Mangifera Indica thrives in temperatures between 24-29 degrees Celsius (75-85 degrees Fahrenheit) during the day and slightly cooler temperatures of around 18-22 degrees Celsius (64-72 degrees Fahrenheit) at night. 2. Temperature Control Systems: Implementing temperature control systems such as heating pads, cooling fans, or ventilation systems can help maintain the desired temperature range in the hydroponic environment. Additionally, automated temperature monitoring systems can provide real-time data to ensure precise control. 3. Thermal Insulation: Properly insulating the hydroponic setup can help regulate temperature and reduce energy consumption. Use reflective materials on walls and install thermal barriers around the growing area to prevent heat loss or gain. 4. Heat Stress Prevention: Extreme temperatures can lead to heat stress in Mangifera Indica plants. To mitigate this, use shade cloth or reflective mulch to reduce direct sun exposure. Additionally, consider misting or fogging systems to provide a cooling effect during hot periods. 5. Monitoring and Adjusting: Regularly monitor the temperature in the growing area using thermometers or digital sensors. Adjust temperature control systems accordingly to maintain the optimal range. Quoting a study published in the Journal of Horticulture: "Maintaining appropriate temperature levels in the hydroponic system is vital for achieving consistent and vigorous growth of Mangifera Indica plants. 💡 key Takeaway: Temperature management is crucial for achieving optimum growth in Mangifera Indica hydroponically. Maintaining the ideal temperature range, implementing temperature control systems, and monitoring closely are essential for successful cultivation. Humidity Humidity plays a crucial role in the successful growth of mangifera indica in a hydroponic system. Maintaining the right humidity levels is essential to prevent issues like mold and fungal diseases. Here are some key considerations and techniques for managing humidity in your hydroponic setup: 1. Ideal Humidity Range: Mangifera indica thrives in a humidity range of 50% to 70%. It's important to monitor humidity levels regularly using a hygrometer to ensure they stay within this optimal range. 2. Ventilation and Air Circulation: Proper air circulation helps to regulate humidity levels by reducing stagnant, humid air pockets. Use fans or ventilation systems to promote air movement and prevent excess moisture buildup. 3. Humidifiers and Dehumidifiers: Depending on your climate and location, you may need to use humidifiers or dehumidifiers to maintain optimal humidity levels. Humidifiers increase humidity when it's too low, while dehumidifiers remove excess moisture from the air. 4. Water Management: Proper watering techniques can also help manage humidity. Avoid overwatering, as this can lead to excessive humidity in the growing area. Ensure adequate drainage to prevent waterlogging and humidity buildup around the roots. 5. Monitoring and Adjusting: Regularly monitoring humidity levels using a hygrometer and adjusting accordingly is crucial. Maintain a balance between humidity and temperature, as they are interconnected and affect each other. Remember, maintaining the right humidity levels is vital for the healthy growth of mangifera indica in a hydroponic system.
By implementing these techniques, you can create an optimal environment that promotes growth while minimizing the risk of humidity-related issues. 💡 key Takeaway: Proper humidity management is essential in hydroponic systems to ensure the successful growth of mangifera indica. Regular monitoring, ventilation, and the use of humidifiers or dehumidifiers are key techniques for maintaining optimal humidity levels. A group of trees in a dirt field. Growing Mangifera Indica Hydroponically Air Circulation Air Circulation Proper air circulation is a crucial factor for successful hydroponic cultivation of Mangifera Indica. It helps maintain a balanced and healthy growing environment, prevents the buildup of humidity, and minimizes the risk of fungal diseases. Here are some key considerations for optimizing air circulation in your hydroponic setup: 1. Ventilation System: Install an efficient ventilation system to ensure the exchange of fresh air. This can be accomplished through strategically placed exhaust fans and intake vents. The system should be designed to facilitate the movement of air throughout the growing area. 2. Oscillating Fans: Place oscillating fans in your hydroponic setup to promote air movement and prevent stagnant air pockets. These fans help strengthen the plant's stem and promote transpiration, which aids nutrient absorption. 3. Proper Spacing: Maintain adequate spacing between your Mangifera Indica plants to allow free air movement. Dense planting can restrict airflow and lead to the development of mold or mildew. 4. CO2 Enrichment: Implementing a carbon dioxide (CO2) enrichment system can enhance plant growth. By regulating CO2 levels, you can improve photosynthesis rates, resulting in healthier and faster-growing plants. Be cautious not to create excessive CO2 levels as it can be detrimental to plant health. 5. Air Filtration: Use high-quality air filters to remove airborne pathogens, dust, and other contaminants from the growing area. This helps maintain a clean and healthy environment for your Mangifera Indica plants. 6. Monitoring and Adjusting: Regularly monitor the humidity and temperature levels in your hydroponic setup. Maintain optimal levels for maximum air circulation and overall plant health. Use a hygrometer and thermometer to track and adjust humidity and temperature as needed. By following these air circulation techniques, you can create an optimal growing environment for your Mangifera Indica plants, supporting their health, growth, and productivity. 💡 key Takeaway: Proper air circulation is essential for the successful hydroponic cultivation of Mangifera Indica. Implementing a well-designed ventilation system, using oscillating fans, maintaining proper spacing between plants, regulating CO2 levels, using air filters, and monitoring and adjusting humidity and temperature will help create an optimum environment for your hydroponic setup. A row of trees in a dirt field. Growing Mangifera Indica Hydroponically Advanced Techniques for Growing Mangifera Indica Hydroponically Advanced Techniques for Growing Mangifera Indica Hydroponically Pruning: Regular pruning is essential for maintaining the shape and size of the mangifera indica plant. By removing excess branches and leaves, you can improve air circulation and light penetration, reducing the risk of fungal infections and enhancing overall growth. Training: Training techniques such as trellising or stake support can help to guide the plant's growth and optimize space. By gently bending and securing branches, you can encourage lateral growth and create a more compact and productive plant. Defoliation: Strategic defoliation involves removing select leaves to promote air circulation and prevent overcrowding. This technique allows for better light penetration and nutrient absorption, ultimately leading to healthier and more vigorous growth. Nutrient Alternating: To ensure optimal nutrient absorption,
it is beneficial to alternate between different nutrient solutions throughout the plant's growth cycle. This approach provides a wider range of essential macronutrients and micronutrients, promoting robust growth and better fruit development. pH Adjusting: Maintaining the correct pH level of the nutrient solution is crucial for the successful hydroponic cultivation of mangifera indica. Regularly monitoring and adjusting the pH allows for optimum nutrient availability, preventing nutrient deficiencies and ensuring healthy plant growth. Re-vegetating: Re-vegetating is a technique used to revitalize mature and unproductive mangifera indica plants. By trimming back the plant to its lower nodes and providing it with proper care, you can stimulate new growth and rejuvenate the plant's productivity. 💡 key Takeaway: Advanced techniques for growing mangifera indica hydroponically include pruning, training, defoliation, nutrient alternating, pH adjusting, and re-vegetating. These techniques promote healthy growth, maximize productivity, and optimize fruit development in hydroponic systems. Pruning Pruning is a crucial technique for optimizing the growth and overall health of mangifera indica plants when grown hydroponically. By selectively removing certain branches or shoots, you can promote better airflow and light penetration, which helps prevent the development of fungal diseases and enhances the plant's ability to capture energy through photosynthesis. When pruning mangifera indica, it is important to focus on removing any dead, damaged, or diseased branches first, as they can hinder the plant's growth. Additionally, thinning out the foliage can promote better fruiting by redirecting the plant's energy towards producing larger and healthier fruits. Remember to use a clean and sharp pruning tool to avoid damaging the plant, and always sanitize your tools between cuts to prevent the spread of infections. To effectively prune mangifera indica in a hydroponic system, follow these steps: 1. Identify any dead, damaged, or diseased branches and remove them at the base using clean pruning shears. 2. Look for branches that are crossing or rubbing against each other. Remove the weaker or less desirable branch to eliminate competition and allow for better structure. 3. Create an open and well-spaced canopy by selectively removing overcrowded branches or shoots. This improves airflow and reduces the risk of humidity-related issues. 4. Prune off any suckers or water sprouts that emerge from the base or lower parts of the plant. These non-fruiting shoots divert energy away from the main plant. 5. Regularly monitor the growth of your mangifera indica and continue to prune as necessary throughout the growing season to maintain an optimal canopy structure. Pruning is an essential technique for promoting airflow, preventing diseases, and directing the plant's energy towards fruit production. 💡 key Takeaway: Pruning is a crucial technique in hydroponic cultivation of mangifera indica as it promotes airflow, prevents diseases, and directs the plant's energy towards fruit production. Training Training is a crucial technique in growing Mangifera Indica hydroponically. By properly training the plants, you can encourage healthy growth and maximize productivity. Here are some key aspects to consider when it comes to training: 1. Pruning: Regular pruning helps maintain the shape of the plant and promotes air circulation, reducing the risk of fungal diseases. Remove any dead or damaged branches and trim back excessive growth to maintain a balanced canopy. 2. Topping: This technique involves removing the top portion of the main stem to encourage lateral branching and a bushier growth habit. It helps distribute energy and resources more evenly, leading to a more productive plant. 3. LST (Low-Stress Training): LST involves gently bending the branches and tying them down to achieve a more horizontal growth pattern.
This technique ensures even light penetration and promotes better nutrient distribution throughout the plant. 4. Super-cropping: Super-cropping involves gently squeezing and bending the main stem to create slight damage. This stimulates plant growth and enhances nutrient uptake and overall vigor. Remember, when training your Mangifera Indica plants, make sure to provide adequate support for the branches to avoid breakage. Regular monitoring and adjustment of the training techniques will help you achieve the desired shape and maximize fruit production. Here's a relevant quote to emphasize the importance of training: Proper training techniques in hydroponic cultivation play a vital role in ensuring optimal growth and productivity of Mangifera Indica plants." (Source: Expert Horticulturist, Jane Doe). 💡 key Takeaway: Training techniques such as pruning, topping, LST, and super-cropping are essential for achieving healthy growth and maximizing productivity in Mangifera Indica hydroponic systems. Defoliation Defoliation is an advanced technique that can greatly benefit the growth of Mangifera Indica when grown hydroponically. By selectively removing the leaves from the plant, defoliation helps improve air circulation and light penetration, leading to healthier and more robust growth. This technique is particularly effective during the vegetative stage of growth, as it encourages the plant to focus its energy on producing new shoots and branches. To defoliate the plant, start by identifying the older, lower leaves that receive less light and are not contributing significantly to the plant's overall health. Use clean, sharp pruning shears to carefully remove these leaves, taking care not to damage the stem or other healthy leaves. It is important to note that defoliation should be done with caution and in moderation, as removing too many leaves at once can stress the plant. Regular monitoring and adjustment will help ensure that the defoliation process enhances growth without harming the plant. 💡 key Takeaway: Defoliation, an advanced technique in hydroponic cultivation, involves selectively removing older leaves to improve airflow and light penetration, encouraging healthier and more robust growth of the Mangifera Indica plant. The process should be done with care and moderation to avoid stressing the plant. Nutrient Alternating Nutrient Alternating is a crucial technique to ensure the optimum growth of Mangifera Indica hydroponically. By alternating the nutrient solutions used in the system, you can provide a well-rounded and balanced diet for your plants. This technique involves changing the nutrient solution composition periodically, allowing the plants to receive a variety of essential nutrients. Here are some key steps to effectively implement nutrient alternating in your hydroponic system: 1. Identify nutrient requirements: Understand the specific nutrient requirements of Mangifera Indica at different growth stages. This will help you determine the nutrients that need to be alternated. 2. Create a schedule: Develop a nutrient alternating schedule based on the plant's growth cycle. Ensure that each nutrient solution is used for an appropriate duration to allow the plant to benefit from its specific nutrients. 3. Test and adjust: Regularly test the pH and nutrient levels of the solution to maintain optimal conditions. Make adjustments as necessary to ensure the proper nutrient balance and pH range for Mangifera Indica. 4. Monitor plant response: Observe the plants closely for any signs of nutrient deficiencies or excesses. Adjust the nutrient alternating schedule or composition if you notice any issues. 5. Choose high-quality nutrient solutions: Invest in reputable and high-quality nutrient solutions specifically formulated for hydroponic systems. Ensuring the right nutrient content and balance is vital for the success of nutrient alternating. Nutrient Alternating allows Mangifera
Indica plants to receive a wide range of nutrients, promoting robust growth, and minimizing the chances of nutrient deficiencies. It also helps prevent nutrient imbalances that can adversely affect plant health. By implementing this advanced technique, hydroponic cultivators can optimize the nutrient uptake and overall growth of Mangifera Indica plants. 💡 key Takeaway: Nutrient Alternating is an essential advanced technique in growing Mangifera Indica hydroponically. By periodically changing the nutrient solutions, you can provide a balanced diet for the plants, leading to optimal growth and development. pH Adjusting pH Adjusting: Maintaining the proper pH level is crucial for ensuring healthy growth in hydroponically grown Mangifera Indica. pH refers to the acidity or alkalinity of the nutrient solution. The ideal pH range for Mangifera Indica is between 5.5 and 6.5. 1. Importance of pH: The pH level affects the availability of nutrients for the plant. If the pH is too high or too low, certain nutrients may become unavailable to the roots, leading to deficiencies or toxicity. Adjusting the pH level can optimize nutrient absorption. 2. Monitoring pH: Regular monitoring of the pH level is essential. This can be done using pH testing kits or digital pH meters. Test the nutrient solution and adjust accordingly. 3. Adjusting pH Up: If the pH is too low, meaning it is acidic, pH Up solutions can be used to raise the pH level. These solutions usually contain potassium hydroxide or potassium carbonate. Add small amounts of pH Up solution to the nutrient solution and retest until the desired pH level is achieved. 4. Adjusting pH Down: If the pH is too high, meaning it is alkaline, pH Down solutions can be used to lower the pH level. These solutions typically contain phosphoric acid or citric acid. Similar to adjusting pH up, add small amounts of pH Down solution to the nutrient solution and retest until the desired pH level is reached. 5. Maintaining pH Stability: Once the pH level has been adjusted, it is important to regularly monitor and maintain it. Nutrient uptake can be affected if the pH fluctuates too much. Use pH buffers or pH stabilizers to keep the pH level stable within the desired range. 6. Testing the Runoff: Periodically check the pH level of the runoff water to ensure it corresponds with the desired pH range. This ensures that the excess nutrients do not accumulate and cause pH imbalances. 💡 key Takeaway: Adjusting the pH level of the nutrient solution is crucial for optimizing nutrient absorption and overall plant health in hydroponically grown Mangifera Indica. Re-vegetating Re-vegetating is an advanced technique for growing Mangifera Indica hydroponically that involves regrowing plants from existing plant material. This technique can be used to rejuvenate a plant that has become weak or damaged, or to propagate new plants from established ones. To re-vegetate a mango plant, start by selecting a healthy branch or stem that has dormant buds. Make a clean cut just above a node, ensuring you have a long enough stem to work with. Place the cutting in a rooting hormone to encourage root growth, then plant it in a sterile medium like rockwool or coco coir. Keep the cutting in a warm and humid environment, and provide it with adequate lighting. In 2-3 weeks, you should start seeing new roots forming. Once the roots have developed, you can transfer the cutting to a hydroponic system or pot it in a suitable growing medium. Regularly monitor the moisture level, nutrients, and light intensity to ensure optimal growth. Re-vegetating can be a successful method for expanding your mango plant collection or rejuvenating older plants. 💡 key Takeaway: Re-vegetating is an advanced technique for growing Mangifera Indica hydroponically that involves regrowing plants from existing plant material, and it can be a successful method for expanding your mango plant collection or rejuvenating older plants.
A 3d model of a tree in a field. Growing Mangifera Indica Hydroponically Conclusion Conclusion: In conclusion, growing Mangifera Indica hydroponically offers numerous benefits and allows for the implementation of advanced techniques that can optimize growth and yield. By controlling the nutrient solutions, growers can ensure that the mango trees receive the exact nutrients they need without any deficiencies or excesses. Integrated pest management techniques can also be utilized to minimize pest infestations and maintain a healthy plant environment. Additionally, hydroponic systems provide a controlled environment where lighting, temperature, humidity, and air circulation can be adjusted to mimic ideal growing conditions. Advanced techniques such as pruning, training, and defoliation can be employed to shape the plants, promote better light penetration, and maximize fruit production. Nutrient alternating, where different nutrient solutions are provided at different stages, ensures that the trees receive a well-rounded diet throughout their growth cycle. pH adjusting is another important aspect of hydroponic cultivation, as maintaining the optimal pH range in the nutrient solution helps plants absorb nutrients efficiently. Moreover, re-vegetation techniques can be useful for rejuvenating older mango trees or expanding the overall orchard. By leveraging these advanced techniques in Mangifera Indica hydroponic cultivation, growers can achieve higher yields, enhance fruit quality, and optimize resource utilization. With proper care and management, hydroponic systems offer an efficient and sustainable way to cultivate mangos, even in areas with limited access to fertile soil. "Hydroponic cultivation of Mangifera Indica presents a range of advanced techniques that can maximize growth and yield, providing a sustainable solution for obtaining high-quality mango fruits. Benefits of Hydroponic Growing Benefits of Growing Mangifera Indica Hydroponically: Hydroponic cultivation of Mangifera Indica, also known as the mango tree, offers several significant advantages. By harnessing advanced techniques, growers can achieve optimum growth and maximize their yield. Here are some key benefits of growing Mangifera Indica hydroponically: 1. Nutrient Management: In hydroponic systems, growers have precise control over the nutrient solution delivered to the plants. This allows for a more efficient uptake of essential elements, resulting in healthier and more vigorous growth. With the ability to adjust nutrient levels based on the tree's specific requirements, hydroponic growers can ensure optimal nutrition throughout the growing cycle. 2. Pest Control: One of the major concerns when cultivating mango trees is pest infestation. However, in a controlled hydroponic environment, the risks associated with pests are significantly reduced. By avoiding contact with soil, where many pests thrive, hydroponic growers can minimize the likelihood of fungal diseases, nematodes, and other harmful organisms affecting their crops. 3. Faster Growth: By eliminating the need to search for nutrients in the soil, mango trees grown hydroponically can divert their energy directly towards growth and fruit development. This results in accelerated growth rates compared to traditional soil-based cultivation. Moreover, the ability to control environmental factors, such as lighting and temperature, further enhances the plant's growth potential. 💡 key Takeaway: Growing Mangifera Indica hydroponically offers benefits such as precise nutrient management, improved pest control, and faster growth rates. Advanced Techniques for Growing Mangifera Indica Hydroponically Advanced Techniques for Growing Mangifera Indica Hydroponically When it comes to growing Mangifera Indica hydroponically, there are several advanced techniques that can help you achieve optimum growth and maximize your harvest. These techniques go beyond the basic
requirements and involve specific practices that can enhance the overall health and productivity of your plants. 1. Pruning: Regular pruning is essential for maintaining the shape and structure of your Mangifera Indica plants. It helps to promote air circulation, prevent overcrowding, and allow for better light penetration, which in turn stimulates healthy growth. 2. Training: Training your plants involves manipulating their growth pattern to optimize their shape and structure. This can be done by using techniques such as bending or tying branches to direct growth in a desired direction. Training also helps to improve air circulation and light distribution throughout the plant. 3. Defoliation: Periodic defoliation involves removing old and damaged leaves from your Mangifera Indica plants. This practice encourages new growth and improves the efficiency of nutrient absorption. However, it should be done with caution and at the right time to avoid stressing the plants. 4. Nutrient Alternating: To ensure balanced nutrition for your Mangifera Indica plants, consider alternating between different nutrient solutions. This helps to prevent nutrient deficiencies and maintains optimal growth. You can use a schedule that alternates between a well-balanced nutrient solution and a solution rich in specific nutrients. 5. pH Adjusting: Maintaining the right pH level is crucial for nutrient uptake in hydroponic systems. Regularly monitor and adjust the pH of your nutrient solution to ensure it falls within the optimal range for Mangifera Indica (around 5.5 to 6.5). This will help your plants absorb nutrients efficiently. 6. Re-vegetating: Re-vegetating is a technique used to rejuvenate plants and promote new growth. If you notice that your Mangifera Indica plants are becoming weak or unproductive, you can trim them back to initiate new growth. This technique can help revive plants and restore their vitality. 💡 key Takeaway: Advanced techniques for growing Mangifera Indica hydroponically include pruning, training, defoliation, nutrient alternating, pH adjusting, and re-vegetating. These practices promote healthier growth and improve overall plant productivity. Conclusion Conclusion Mangifera indica is a tropical fruit that is gaining in popularity due to its high nutritional value. Mangifera indica hydroponics is a technique that allows growers to achieve high yields of mangifera indica fruit while using less space and less water than traditional farming methods. Advanced techniques for mangifera indica hydroponics include using soil-less growing media, using fluorescent lighting, and using a controller to optimize the temperature and humidity environment. Mangifera indica is a tropical fruit that is high in vitamin C, iron, and other nutrients. Hydroponic cultivation of mangifera indica allows growers to enjoy the benefits of these nutrients without the negative environmental impact of traditional farming methods. Stay tuned as I will be covering each of these advanced techniques in more detail in the coming weeks. FAQ's Q: How does light intensity and CO2 levels increase the rate of photosynthesis? A: Both light intensity and CO2 levels play crucial roles in the photosynthesis process. As light intensity increases, the rate of photosynthesis initially increases up to a certain point. Beyond this point, the rate plateaus as other factors become limiting. Similarly, as CO2 levels increase, the rate of photosynthesis also increases until it reaches a saturation point. Both factors are essential for the production of ATP and NADPH, which are vital for the synthesis of glucose. Q: What is the ideal CO2 level for photosynthesis? A: The ideal CO2 concentration for photosynthesis in most plants is between 200 to 500 ppm (parts per million). However, many commercial greenhouses increase CO2 levels to around 1000 ppm to boost plant growth and productivity. Q: Does more CO2 increase the rate of photosynthesis?
A: Yes, up to a certain point. Increasing CO2 levels can boost the rate of photosynthesis because CO2 is a primary reactant in the process. However, after reaching a saturation point, further increases in CO2 will not significantly enhance the rate. Other factors, such as light intensity and temperature, will then become limiting. Q: How does CO2 affect the rate of photosynthesis? A: CO2 is a vital component in the photosynthesis process. It combines with ribulose bisphosphate (RuBP) in a reaction catalyzed by the enzyme ribulose-1,5-bisphosphate carboxylase/oxygenase (RuBisCO) to produce glucose. As CO2 levels increase, the rate of this reaction can also increase, leading to a higher rate of photosynthesis. However, if CO2 levels become too high and other factors are limiting, the rate of photosynthesis may not continue to increase. University of Florida IFAS Extension - Mango Growing in the Florida Home Landscape University of California Agriculture and Natural Resources - Mango Production University of Hawaii at Manoa - Mango
0 notes
dentalartclinic · 7 months
Text
Tumblr media
Wisdom teeth acting wiser than your actual wisdom? At Dental Art Clinic, our gentle dentists are the wisdom tooth wranglers you've been searching for. We use advanced techniques and prioritize your comfort to ensure a smooth and stress-free experience.
Don't let these pesky wisdom teeth hold your smile hostage - schedule your consultation today and reclaim your smile! 😎
Call us on 📲 02 9605 5042 or Visit: https://www.dentalartclinic.com.au/ . .
0 notes
Text
Tech News
Google launched Circle to Search, a fresh new function, at the debut of Samsung's Galaxy S24 series.
This new feature lets users hit a button, circle an item on their phone screen, and quickly receive a page of Google search results relating to the circled item.
Tumblr media
0 notes
mirandadental · 10 months
Text
Tumblr media
Pioneering procedures combined with a heartfelt approach - that's the Miranda Dental promise. Experience a harmonious blend of advanced techniques and genuine care, ensuring every visit leaves a lasting impression.
Contact us today and let's make you a part of our dental family! Miranda Dental Centre: 02 9525 9081 | 02 9540 1044
0 notes
cssmonster · 11 months
Text
Advanced HTML and CSS: Mastering Web Development
Tumblr media
Introduction
Welcome to the world of advanced HTML and CSS, where web development reaches new heights. In this blog post, we'll embark on a journey to master the intricacies of these fundamental technologies. Whether you're a seasoned developer looking to enhance your skills or a newcomer eager to grasp the essentials, this exploration of advanced HTML and CSS is tailored just for you.
Understanding the Basics
Tumblr media
Before delving into the advanced realms of HTML and CSS, let's reinforce our understanding of the basics. These foundational concepts serve as the bedrock for creating robust and well-structured web pages. HTML Fundamentals HTML, or HyperText Markup Language, forms the structure of web documents. It utilizes tags to define elements such as headings, paragraphs, images, and links. Understanding the anatomy of HTML is crucial for creating semantically meaningful content. - Tags: Tags are the building blocks of HTML. They enclose content and provide structure. Examples include , , and
to . - Attributes: Attributes provide additional information about HTML elements. For instance, the src attribute in an tag specifies the image source. CSS Basics CSS, or Cascading Style Sheets, complements HTML by defining the visual presentation of web pages. It enables the styling of elements, ensuring a visually appealing and consistent design across the site. - Selectors: Selectors target HTML elements for styling. They can be simple, like targeting a specific tag, or complex, using classes and IDs for specificity. - Properties and Values: CSS properties determine the style attributes, while values define the specifics. For example, the color property with a value of "blue" changes the text color. HTML and CSS Integration The synergy between HTML and CSS is vital for creating well-designed web pages. By linking CSS stylesheets to HTML documents, developers can achieve a separation of structure and presentation, making code more maintainable. HTML CSS Defines structure and content Defines style and layout Utilizes tags and attributes Employs selectors, properties, and values Mastering the basics lays the groundwork for advanced HTML and CSS exploration. Armed with a solid understanding of these fundamentals, you're ready to elevate your web development skills to the next level.
Responsive Design Techniques
Tumblr media
With the increasing diversity of devices accessing the web, responsive design has become a cornerstone of modern web development. Responsive design ensures that a website adapts gracefully to various screen sizes, providing an optimal user experience. Let's explore some key techniques to achieve responsiveness in your web designs. 1. Fluid Grid Layouts One fundamental aspect of responsive design is creating fluid grid layouts. Instead of fixed pixel values, use relative units like percentages to define widths. This allows content to flexibly adjust to different screen sizes, maintaining a harmonious layout. 2. Media Queries Media queries are CSS rules that apply styles based on characteristics such as screen width, height, or device orientation. By strategically employing media queries, you can tailor the presentation of your content for specific devices, ensuring a seamless experience across various platforms. 3. Flexible Images Images play a crucial role in web design, and ensuring they scale appropriately is essential for responsiveness. Use CSS properties like max-width: 100% to ensure images resize proportionally within their containing elements without overflowing or pixelating. 4. Mobile-First Design Adopting a mobile-first approach involves designing for smaller screens initially and then progressively enhancing the layout for larger screens. This approach prioritizes essential content and functionality for mobile users, delivering a streamlined experience and faster loading times. 5. Flexbox and Grid Layouts CSS Flexbox and Grid layouts provide powerful tools for creating complex yet responsive designs. Flexbox is ideal for one-dimensional layouts, while Grid excels in two-dimensional arrangements. Leveraging these layout models enhances your ability to create dynamic and adaptable designs. Technique Advantages Fluid Grid Layouts Adaptable to various screen sizes Media Queries Custom styles based on device characteristics Flexible Images Proportional scaling for different screens Mobile-First Design Optimized experience for smaller screens Flexbox and Grid Layouts Powerful tools for responsive and dynamic designs By incorporating these responsive design techniques into your web development practices, you ensure that your websites not only look great but also provide a consistent and user-friendly experience across a wide range of devices.
CSS Flexbox and Grid
CSS Flexbox and Grid are powerful layout models that revolutionize the way we structure and arrange elements in web design. These tools provide a flexible and efficient way to create both simple and complex layouts, offering unparalleled control over the placement and alignment of items on a webpage. 1. Understanding Flexbox CSS Flexbox, or Flexible Box, is designed for one-dimensional layouts, either in a row or a column. It simplifies the process of distributing space among items within a container, making it easier to achieve dynamic and responsive designs. Key features include: - Flex Containers: Elements with display: flex; become flex containers, and their children become flex items. - Flex Direction: Defines the main axis, allowing either row (flex-direction: row;) or column (flex-direction: column;) layouts. - Justify Content and Align Items: Control the alignment and distribution of items along the main and cross axes. 2. Harnessing the Power of Grid CSS Grid Layout introduces a two-dimensional system for creating layouts, offering precise control over rows and columns. It excels in handling complex designs and is especially useful for creating grid-based structures. Key features include: - Grid Containers: Elements with display: grid; become grid containers. - Grid Template Areas: Define the layout using named grid areas for clarity and ease of maintenance. - Grid Gap: Set the spacing between rows and columns using grid-row-gap and grid-column-gap. 3. Choosing Between Flexbox and Grid While both Flexbox and Grid are powerful tools, they serve different purposes. Flexbox is ideal for one-dimensional layouts, such as navigation menus or lists, while Grid excels in handling two-dimensional layouts, such as entire webpage structures. Often, a combination of both is used to create sophisticated and responsive designs. Feature Flexbox Grid Layout Type One-dimensional Two-dimensional Main Use Items in a row or column Complex layouts with rows and columns Control Alignment along one axis Precise control over rows and columns By mastering the intricacies of CSS Flexbox and Grid, you empower yourself to create visually stunning and highly responsive layouts, elevating the user experience of your web pages.
Advanced Selectors and Styling
As web development evolves, mastering advanced CSS selectors and styling techniques becomes crucial for creating sophisticated and visually appealing designs. Let's delve into the intricacies of selecting and styling HTML elements with finesse, unlocking the full potential of cascading style sheets. 1. Combining Selectors Enhance your styling precision by combining selectors. This allows you to target specific elements based on multiple criteria. For example, you can use a combination of class and attribute selectors to style elements that meet specific conditions. - Class and Attribute Selectors: Select elements with both a particular class (.class) and a specific attribute (). - Descendant Selectors: Style nested elements with descendant selectors (parentElement descendantElement). 2. Pseudo-classes and Pseudo-elements Utilize pseudo-classes and pseudo-elements to style elements based on their state or position within the document. Examples include :hover for styling on hover and ::before and ::after for adding content before and after an element. - :nth-child(): Style elements based on their position within a parent. - :first-child and :last-child: Select the first and last child elements. 3. Styling Forms Enhance the user experience by styling HTML forms effectively. Target form elements using attribute selectors and pseudo-classes to create a cohesive and visually appealing form layout. - :focus: Style form elements when they are in focus. - :valid and :invalid: Apply styles based on the validity of form input. 4. Box Model Mastery Understanding and manipulating the box model is essential for precise layout control. Use properties like margin, padding, and box-sizing to achieve the desired spacing and sizing of elements. Selector/Technique Description Combining Selectors Enhances styling precision by combining multiple selectors. Pseudo-classes and Pseudo-elements Allows styling based on element state or position. Styling Forms Improves the visual appeal and user experience of HTML forms. Box Model Mastery Understanding and manipulating the box model for precise layout control. By mastering advanced selectors and styling techniques, you gain the ability to craft intricate and visually stunning web designs, elevating your web development skills to new heights.
Optimizing Performance
Performance optimization is a critical aspect of web development, ensuring that your websites load quickly and deliver a seamless user experience. Let's explore key strategies and techniques to enhance the performance of your HTML and CSS code for optimal efficiency. 1. Minification and Compression Minifying and compressing your HTML and CSS files reduces their size, resulting in faster loading times. Eliminate unnecessary whitespace, comments, and line breaks to create leaner files. Additionally, use compression algorithms like Gzip to further reduce file sizes during transmission. 2. Efficient Resource Loading Optimize the loading of external resources such as images, stylesheets, and scripts. Utilize lazy loading for images, ensuring they are loaded only when they come into the viewport. Employ asynchronous loading for non-essential scripts, preventing them from blocking the rendering of critical content. - Lazy Loading: Load images only when they are needed, improving initial page load times. - Asynchronous Loading: Ensure non-essential scripts do not block the rendering of the page. 3. Browser Caching Implement effective browser caching to store copies of static resources locally. This allows returning visitors to load pages more quickly by retrieving assets from their local cache rather than downloading them anew. Set appropriate expiration dates to ensure updated content is fetched when necessary. 4. CSS Sprites Combine multiple small images into a single sprite sheet to reduce the number of server requests. By using CSS background positioning, you can display specific images as needed. This technique minimizes latency and accelerates the loading of images on your website. - Sprites: Combine multiple images into a single sprite sheet to reduce server requests. - CSS Background Positioning: Display specific images from the sprite sheet as needed. 5. Critical Rendering Path Optimization Streamline the critical rendering path by prioritizing the loading of essential resources. This involves optimizing the order in which resources are loaded to ensure that the most crucial content is rendered quickly, providing users with a faster initial page display. Optimization Technique Description Minification and Compression Reduce file sizes by eliminating unnecessary characters and compressing data. Efficient Resource Loading Optimize loading of external resources such as images and scripts. Browser Caching Store static resources locally to speed up subsequent page loads for returning visitors. CSS Sprites Combine small images into a single sprite sheet to reduce server requests. Critical Rendering Path Optimization Prioritize loading of essential resources for faster initial page rendering. By implementing these performance optimization strategies, you ensure that your websites not only look great but also deliver a snappy and responsive user experience, contributing to user satisfaction and retention.
Accessibility in Web Design
Web accessibility is the practice of ensuring that websites are inclusive and usable for all individuals, regardless of their abilities or disabilities. Designing with accessibility in mind not only promotes a more inclusive web but also enhances the user experience for everyone. Let's explore key principles and techniques to integrate accessibility into your HTML and CSS code. 1. Semantic HTML Markup Use semantic HTML elements to provide meaningful structure and context to your content. Properly structured documents not only benefit users with assistive technologies but also improve search engine optimization (SEO). - Heading Structure: Use
to tags hierarchically to convey the document's structure. - Lists: Use for unordered lists and for ordered lists, providing clarity and navigation for screen readers. 2. Keyboard Navigation Ensure that all interactive elements on your website are accessible via keyboard navigation. Users who rely on keyboards or alternative input devices should be able to navigate and interact with your site seamlessly. - Focus Styles: Implement visible and clear focus styles for links, buttons, and form elements to indicate keyboard focus. - Tab Order: Ensure a logical tab order through your content, allowing users to navigate through interactive elements in a meaningful sequence. 3. ARIA Landmarks and Roles Augment your HTML with Accessible Rich Internet Applications (ARIA) attributes to provide additional information to assistive technologies. ARIA landmarks and roles help define the purpose and structure of different sections of your website. - Landmarks: Use ARIA landmarks such as role="navigation" or role="main" to identify key sections. - Roles: Apply ARIA roles to indicate the type of content or functionality, such as role="button" or role="alert". 4. Text Alternatives for Images Include descriptive text alternatives for images using the alt attribute. This ensures that users with visual impairments or those using text-only browsers can comprehend the content conveyed by images. 5. Contrast and Color Accessibility Ensure sufficient color contrast to accommodate users with visual impairments. Utilize color combinations that maintain readability for users with various levels of color vision. Accessibility Principle Description Semantic HTML Markup Use meaningful HTML elements for proper document structure and context. Keyboard Navigation Ensure all interactive elements are accessible via keyboard navigation. ARIA Landmarks and Roles Augment HTML with ARIA attributes to provide additional information for assistive technologies. Text Alternatives for Images Include descriptive text alternatives for images using the alt attribute. Contrast and Color Accessibility Ensure sufficient color contrast for readability and accommodate users with visual impairments. By incorporating these accessibility principles into your web design practices, you contribute to a more inclusive online environment, making your content accessible to a diverse audience and improving the overall usability of your website.
Interactive Web Elements
Engaging users through interactive elements is a key aspect of modern web design. Adding dynamic features not only enhances user experience but also brings your website to life. Let's explore various interactive elements and the techniques to implement them effectively using HTML and CSS. 1. Hover Effects Utilize hover effects to provide visual feedback and enhance user interactivity. When users hover over an element, it can change color, size, or reveal additional information, creating an engaging and responsive experience. - Transition Properties: Apply smooth transitions using CSS properties like transition-duration and transition-property. - Transformations: Use transformations such as scale or rotate to create dynamic hover effects. 2. Interactive Forms Transform static forms into interactive elements by implementing features like real-time validation, input feedback, and conditional visibility. This ensures a user-friendly experience and reduces errors during form submission. - Real-Time Validation: Validate form inputs dynamically as users type, providing immediate feedback on the validity of their input. - Conditional Visibility: Show or hide form elements based on user selections, streamlining the form-filling process. 3. Accordions and Tabs Create space-efficient layouts by implementing interactive accordions and tabs. These elements allow users to navigate through content seamlessly, revealing only the information they need at a given moment. Read the full article
0 notes
ooraleadentalcare1 · 1 year
Text
Tumblr media
Experience the future of dental care at Ooralea Dental Care.
We use innovative technology and state-of-the-art equipment to ensure efficient and comfortable treatments.
Our advanced techniques ensure a painless and speedy recovery. Discover the difference today!
Call us on 07 4998 5572 or Visit: https://ooraleadentalcare.com.au/
0 notes
newimageinstitute · 1 year
Text
✨ Learn from the best in the industry and elevate your skills. NIIB cover everything from basics to advanced techniques. Your journey to expertise starts here.✨
☎️ Toll Free Number - 9115633306
0 notes
drdishajaggi · 1 year
Text
Tumblr media
Skin specialist in Lucknow- Dr Disha's Hair & Skin Clinic- Skin Specialist Lucknow, Skin Doctor, Hair Fall Treatment, Hair Transplant, Laser Hair Removal
Dr. Disha Jaggi, a highly skilled and experienced skin specialist in Lucknow, is dedicated to providing exceptional care and expertise in dermatology. With her profound knowledge and compassionate approach, Dr. Disha offers comprehensive solutions for a wide range of skin concerns. Whether it's acne, aging skin, or dermatological conditions, she combines her expertise with advanced techniques to deliver outstanding results. Dr. Disha's personalized approach ensures that each patient receives tailored treatments and achieves optimal skin health. Trust in the expertise of Dr. Disha Jaggi, the renowned skin specialist in Lucknow, for all your dermatological needs.
Google map- location
388, Prabhu Dayal Marg, Sadar Bazaar, Cantonment, Lucknow, Uttar Pradesh 226002
0 notes
shreenetralaya · 1 year
Text
If you are seeking a renowned Lasik surgeon in Aurangabad, look no further than Dr. Rohit Bang. With his exceptional expertise, advanced techniques, and compassionate care, Dr. Bang has earned a stellar reputation as a leading eye surgeon in the region.
1 note · View note