#about 8 km very scenic and not too difficult
Explore tagged Tumblr posts
Text
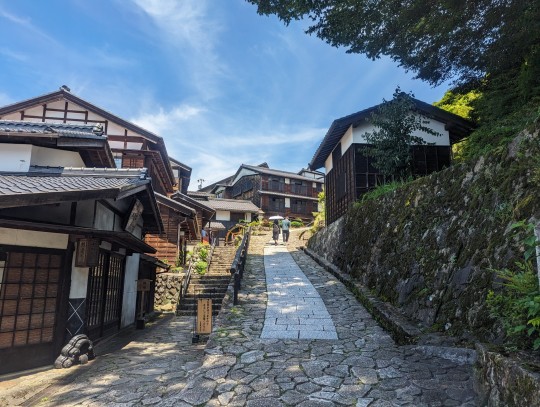
been a while since i've posted anything from my trip, but i'm only abroad for two more weeks 😭 so here's a pic from my current location of Magome, Japan 🤩
#we came here to walk the Nakasendo trail#about 8 km very scenic and not too difficult#however it's barely 11 am and already over 90 degrees so we decided not to do it and just hang out in a coffee shop most of the day lol
19 notes
·
View notes
Text
The Outer Ring Road
where do i start, this is the road that literally defines hyderabad. it is very dear to me. before i continue let me just say that ive never been onto the ORR because i cant drive a four wheeler ,so this entire article should be taken with a grain of salt.
the ring road, nehru ring road, the orr runs for 158 km with 4 lanes and 1 hard shoulder. it is the first proper expressway in telangana and one of the finest roads in india . it has 19 exit/entry points which as the interchanges.more about that later . the construted in 2005 and finished in 2018,it happened in phases starting with the financial district part to help connectivity with the financial district.the longest strecth the 78km from patancheru to ghatkesar was the last to finish. most of the project was finished under the A.P government before the formation telangana. pv r expressway is the only other expressway in telangana at a length of 11km.which might not sound like much but it was a big deal back then.one of the reason why ORR is so close to me is because whenever i cycle ORR is a nice mile stone a sign that things are gonna get better and the view is gonna get scenic and the END of traffic .it is a sign of smooth sailing. i also take the orr as the first point for a break ,i can sit down and drink some water and admire its beauty. one thing about the orr is that it sorrounds you completely and if we were to walk in any direction ,literally any direction you are bound to stumble upon it. it is something that protects you from others and covers you with warm blanket of security.it also amazes me that everyone living in the city gets there food through the toll entries of the orr .think about it ,6 million people depending upon 19 roads.what would i do with you.also just think how humongous this object is 158 kilometres ,if we were to walk non stop it would take us 5 days to walk it.thats totally crazy.also the construction of it is even more monumental.how does one even build something so huge,if only i could ever be a part of such project.it would take a single person atleast 200 years to build ,think of it as a work that took the co operation of thousand of individuals working towards a single united goal -which i think is just stupid crazy. you might say ,hey madhav there have been much bigger projects much more monumental than this, well is it in hyderabad tho ,if it isnt well too bad-im not gonna write about it.there are speed guns here which are hidden ,so we can actually never say they are there ,one could try ig to find out but id rather not.
Speed limits: (subjected to change)
Minimum is 40 km/hr
Maximum is 100 km/hr
Fine amount is 1400/- INR, Speed guns are located at few points.
Please stick to the speed limits.
Lane system
Fast lanes are dedicated to cars : Lane-1 and Lane-2 (From right)
Slow lanes are dedicated to Trucks. : Lane-3 and Lane-4
there have been so many instances of accidents on the ORR mainly because we hyderabadis go crazy on here .sometimes tires burst due to the heat produced by the high speeds.
ORR exits
1. Gandipet,2. Edulanagulapally,--- Gachibowli, --- Nanakramguda
3. Patancheru, 4. Sultanpur,5. Saregudem,---Gowdavalli (temporary),6. Medchal,7. Shamirpet,8. Keesara,9. Ghatkesar,10. Taramatipet,11. Pedda Amberpet,12. Bongulur,13 Raviryal,14. Tukkuguda,15. Pedda Golkonda,16.Shamshabad,17. Rajendranagar,18. TSPA (APPA),19. Narsingi
The orr uses 6 types of interchanges:
1)trumpet
2)diamond
3) partial cloverstack
4)dumbell
5)roundabout
6)double trumpet
These might be a little to spot for the naked eye and we might never notice then if we dont pay special attention to it.but the next time you use the orr try to make sense of the structure. It is difficult to comprehend such a thing especially when we look at it from our small human eyes.i think this is how ants feel when they come across our daily objects.and they might interpret human objects the way we do.
The double trumpet is widely used .it has been used at 7 locations.
Diamonds at 3
2 dumbells
6 roundabouts
1 partial clover stack
1 trumpet
Heres a task for you try to figure out which exits use which ,you can take the help of google maps or better go there personally and figure them out
Using different types of interchanges has there own advantages .
For example a partial clover stack is very efficient in handling traffic and good for all the congested zones however they are costlier to build.whereas a roundabout interchange are really simple ,with next to no cost ,however they are not really good at managing the traffic. This shows how much planning went into the orr and helps to show how beautiful these things are.i personally love the double trumpet they look sick


0 notes
Text
Rabbit Ear Saddle
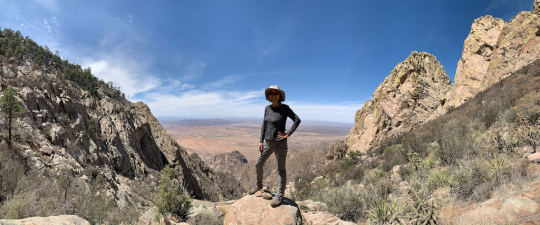
Date of hike: April 11, 2021
Country: USA
Region: Organ Mountains, New Mexico
Trailhead: Unmarked parking at mile 3.6 on Baylor Canyon Road (coming from US 70)
Hike Destination: Rabbit Ear Saddle (col between South Rabbit Ear and Rabbit Ear Plateau)
Distance: 5.5 miles (9 km), out and back trail
Elevation gain: 2,400 ft. (ca. 800 m.)
Difficulty: Difficult route
The Organ Mountains of New Mexico are a narrow mountain range running north-south to the east of Las Cruces, New Mexico. The range presents a single jagged comb with a few prominent spires called the three Rabbit Ears visible from many miles around.
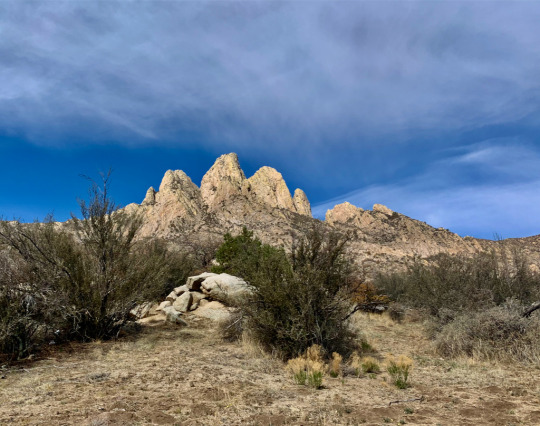
This is superb hiking territory—wild, scenic, and uncrowded. But the area has a drawback in terms of trail conditions. Except for the most popular trails like the Dripping Springs trail on the western side or the Pine Tree Loop on the eastern side of the range, you will have to proceed under the assumption that the trails are unmarked and very faint at times and that there are few if any directional sign posts along the way. Note also that some of the “trails” are actually just routes. Proceeding along these routes requires that you follow somebody else’s recording trail, using a GPS positioning and tracking service like GAIA or a very detailed description in order keep to the route. A complicating factor with these trails and routes is that cairns have been erected by well-meaning trail users. But the cairns are haphazardly placed, and at times a series of cairns can actually lead you away from the hiking trail/route if they have been erected by climbers going for the entry point to a technical climb. This happened to me on a solo hike along the Indian Hollow Trail, where I ended up at the foot of Sugarloaf Peak, way off trail (note the neatly stacked cairn in the foreground).
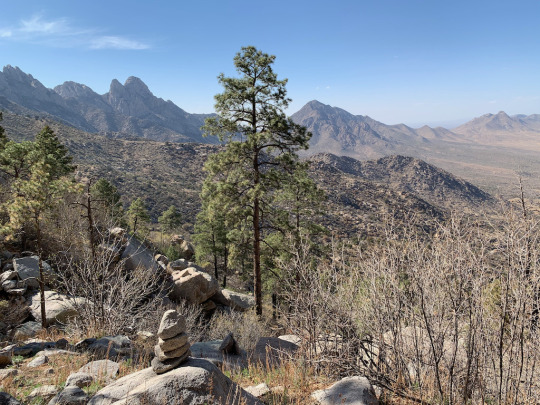
We’d already been enjoying several moderate hikes in the Organ Mountains and were looking for something that would stretch our abilities and get us to greater heights. We got more than we bargained for.
Reading up on the more difficult trails Alltrails, we were tempted by the Rabbit Ear Saddle trail. All reviewers all emphasized the difficulty of the trail, but overall it seemed well worth the try. The saddle lies to the south of the three Rabbit ears (see arrow), and it promised to be much more thrilling than the sedate Baylor pass further to the north which also straddles the Organ Mountain range.

One of the reviewers, a local man by the name of Mike Hoskins, even left his contact information on his Alltrails review, along with the offer to guide anyone who was interested to the top. I contacted him, and he answered right away, but unfortunately he couldn’t do it the next day. Still, he kindly offered a wealth of information, including an annotated terrain map from GAIA with some landmarks and tricky passages marked.
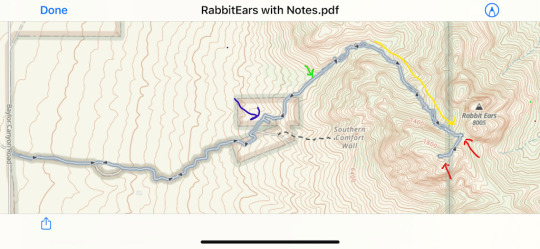
Equipped with this information, we set out at 9 am full of vigor and anticipation.
We parked the car at the trailhead along Baylor Canyon Road (Alltrails reliably guided us there) and then set out as the sun was climbing up into a cloudless sky. The first part of the trail proceeds along a former mining road, which has been eroded to the point where it resembles a dried up riverbed. A motorized vehicle would have no chance getting through. The approach to the foot of the Organ Mountains is beautiful, though, as one is heading straight for the most dramatic section of the Organs.
After about a half hour, we met a man coming the opposite way, and he asked us if we planned to go “all the way up.” When we answered in the affirmative, he made a concerned face and said something about us being rather late in the day. “You’re going to get the full sun both ways,” he added with a frown. Since this was early April and we had plenty of water with us (we thought), we were not too concerned about this.
A mile and a half into the hike, we came across a former fluoride mine.
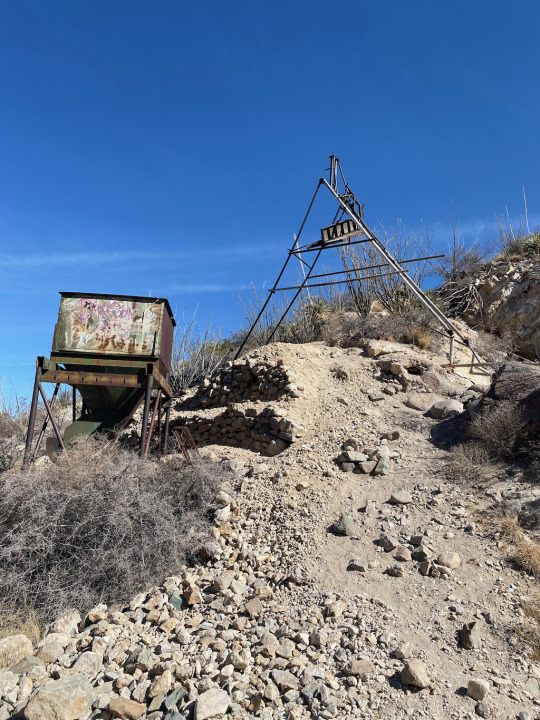
The mine shafts were exposed, with the trail passing right between two deep unprotected clefts. I dropped down a stone and didn’t hear it plunk at the bottom. It’s best to watch your step around this place--once you slip on the scree, you are done for. Here, we met another group with backpacks, but they weren’t going much further than the mine, as we learned. For the rest of the day (another 8 hours) we were completely alone.
The trail climbed up steeply here before easing into the canyon bed where it essentially ended. From here on we were faced with a boulder field. Following the instructions from Mike, we clambered from boulder to boulder. At one point, a truck-sized boulder blocked the way, and to get around it, a slight overhang had to be negotiated. Only after I took off the backpack and flung it up above the overhanging boulder, could I pull myself up, then I grabbed Liang’s hand and got her up as well. This kind of scrambling and boulder-hopping continued for about two hours. Since the hiking poles were now more hindrance than help, we stowed them in the backpack and instead donned gloves, so we could more easily go on all fours, which was increasingly called for as the terrain got steeper.
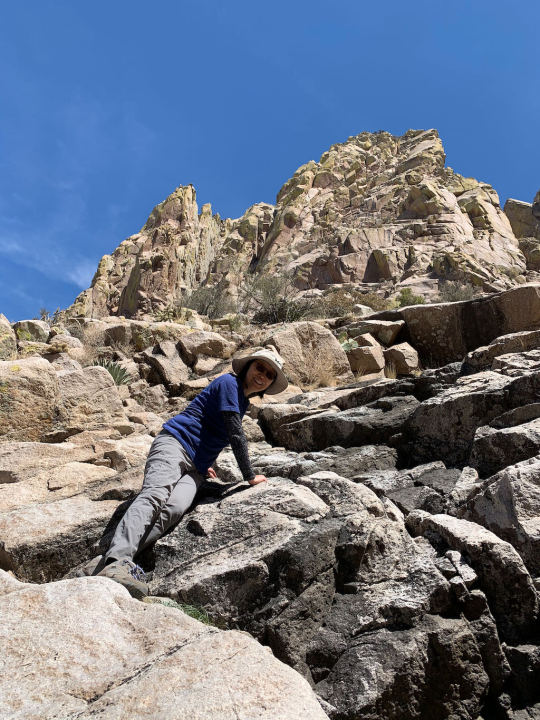
Brambles and cacti were omnipresent, and soon the water breaks were interspersed with cacti-spike removal stops. The sun was baking the canyon pretty good now, and I began to cast a somewhat concerned look at our shrinking water supply (we brought 2.5 liters). We were now directly underneath the southern Rabbit Ear, and aiming broadly for the col between that and the Rabbit Ear Plateau.
Sometimes, smooth granite slabs were quite steeply inclined and after one tricky passage ,I said to Liang “If there’s another exposed portion like this, we should turn around.”
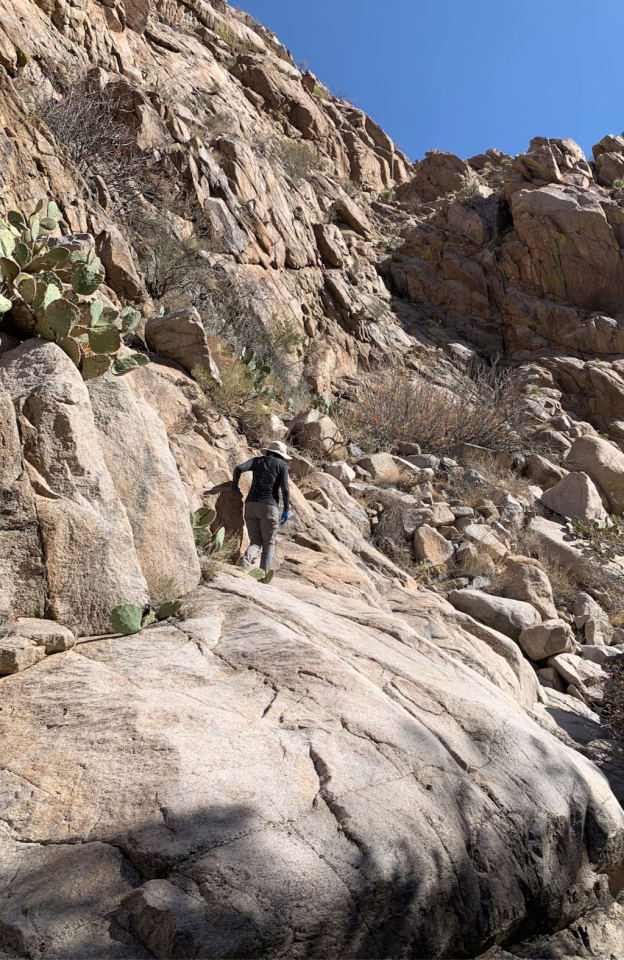
In this kind of rough territory, the Alltrails map is only of limited value because the blue location dot does not move with the accuracy necessary, and my other apps, including GAIA and OS maps did not have a trail marked that we could follow because there simply was no trail. From here on, we increasingly started to verge off the route. At one point, we again lost the canyon floor and began scrambling up the side of a blunt protrusion that curved away from our intended direction. It got to the point where we either had to backtrack a considerable distance or forge ahead, bushwhacking through dense brambles and traversing a steep slope to rejoin the canyon floor. While I was scouting the terrain ahead, Liang was checking Alltrails, and we both arrived at the same conclusion, i.e. to proceed diagonally downward to the left.
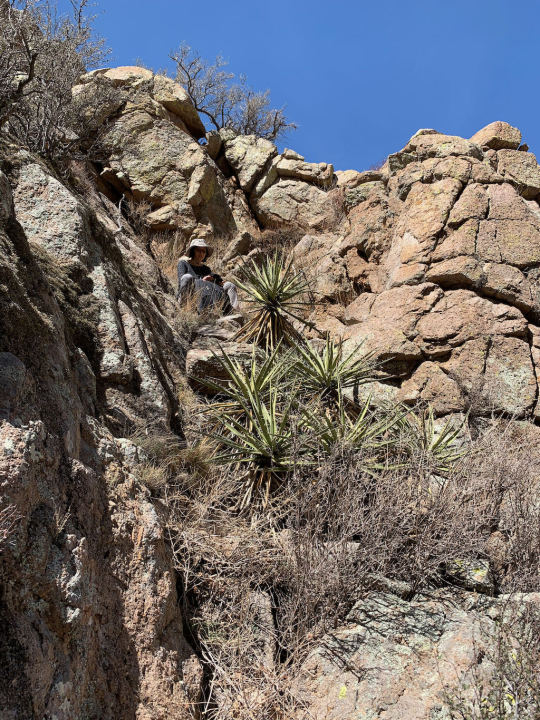
When we were back on the route, a boulder big enough to cast some shadow beckoned as our lunch spot, and here enjoyed a hearty sandwich, while trying to drink (water) responsibly. It was now 2 pm, and we’d been on the hike for over 4 hours. The saddle above us looked still pretty far away, and we began to entertain doubts whether we’d even make it. But refreshed after the picnic, we tackled the slope with renewed resolve, scrambling over endless boulders, trying (often unsuccessfully) to avoid cacti, and keeping an eye on the directional progress.
About 5 hours into this adventure, we had once again lost the route and approached a conveniently located outcropping where we could assess the situation. Panting and gulping water (irresponsibly), we decided to call it quits since the saddle still looked quite a bit higher than our position, and we were running low on energy. After resting a few minutes, though, I suggested to Liang that I might as well press on and see if the saddle was perhaps closer than we thought. Equipped with only a water bottle, I tackled the slope one more time, making swift progress now. Ironically, the going was only getting easier from here on up, and ten minutes later, I stood on top of the Rabbit Ear Saddle, taking a selfie.
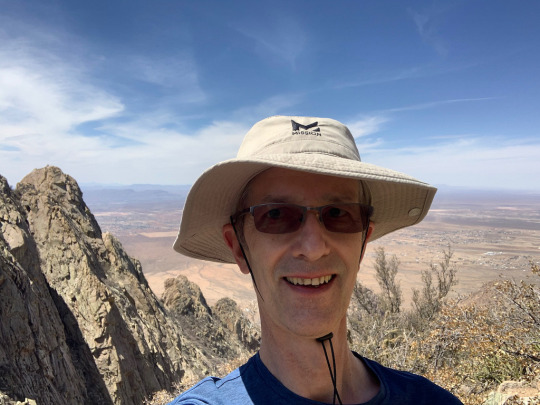
Liang and I texted a few times trying to determine whether she should make the effort to come up as well. At first I thought it was barely worth it, but then it seemed silly not to reach that sense of completion. So, while Liang scrambled up toward the saddle with the backpack, I raced back down to meet her halfway. A short while later, we both stood beaming and high-fiving on the col. From here, one could progress up to the Rabbit Ear Plateau, but the way was very steep and would require the better part of an hour to complete it. We were now down to half a small bottle of water, and the afternoon was advancing, so we decided to take in the view and then started our descent.
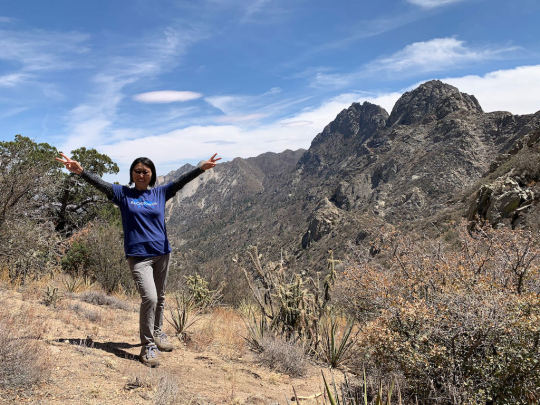
It’s amazing how much easier it was to keep to the route going down. Assessing the shape of the terrain from the higher vantage point is much easier, and we cold follow the canyon without getting lost. We were going at a good clip now, occasionally entrusting our lives to the soles of our shoes when traversing leaning granite slabs. Some large boulders again posed challenges on the way down, and at one point Liang, trying to slide down from a sharp-edged rock suddenly lost her balance and could have ended up head-down in a crack, but I held on to her forcefully and tilted her back upright. Shaken by this almost accident, we took a break and decided to proceed more slowly from her on.
The wind had picked up ever since we left the saddle, but now it was blowing at an almost frightful force. My eyes watered so badly, I had a hard time seeing clearly, which didn’t make negotiating the extended boulder field any easier. There is a point where strong winds are more than simply an inconvenience but turn into an actual hindrance. This stretch of the way seemed to go on interminably, as we were leaning into the wind, fighting to keep our balance. After a long series of boulder-hopping, we arrived at the tricky rock with the overhang. Here Liang jumped down into my outstretched arms, and things got easier from here on.
After reaching the narrow trail that led down to the abandoned mine, we stopped briefly to finish the last of our water. The former mining road from the parking lot had appeared to us full of stumbling blocks on the way up; but now, heading down, it appeared like a hiking superhighway, compared to the situation back in the canyon. On that final stretch, the scenery turned quite spectacular, as the late-afternoon sun bathed the Organ Mountains in yellowish light.
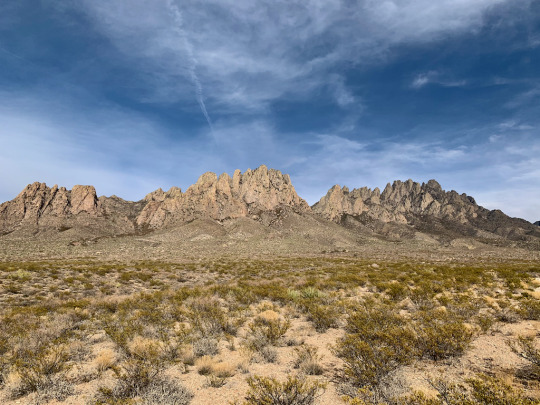
We reached our car just under 9 hours after starting the hike. We both agreed that this had been among the toughest hikes we’d yet undertaken and certainly the most unpleasant. But looking back on it now, it had certainly been worth the effort.
1 note
·
View note
Text
10 + 1 Grand Fondo Bike Rides in Seven Months
Hello people, my name is James. I am neither a pro cyclist nor a barista, so don’t take my opinions on either subject too seriously. I just love brewing/drinking coffee and riding my bike; I think the two are a match made in heaven. Not surprisingly, a lot of people think so too.
To start things off, allow me to chronologically share 100-km bike routes I’ve taken within the past seven months of cycling.
1. Lower Antipolo, Caloocan, North Caloocan. 101 km.

This was my first metric century ride, a month into cycling. I had planned a coffee delivery route and a schedule and was fully expecting to make it to each stop in good time. On paper, it didn’t seem that hard. How naïve I was. What the map doesn’t tell you is how horrible the roads are, how hot the weather is, or how crowded with trucks some streets are. Add to that the fact that Komoot is not a good on-the-fly navigation tool, and I was on the fast lane to disaster. Getting lost in a totally janky area on the bumpiest roads was not fun at all.
I was dying, but I kept at it. I was a noob who refused to admit defeat. After getting out of the sticks known as North Caloocan, I hit the mythical wall and bonked. As I thought that things couldn’t get any worse, it rained. Thankfully I was close to a Jollibee so I refueled and let the rain pass. Later that day, I did laps close to home just to complete 100 km since I was just a couple of km short.
4/10. It was totally my fault for being unprepared, but this ride sucked. I’d give it a 3/10 but there’s a bonus point since it was my first long ride.
2. Tagaytay via Daang Hari and Paliparan. 140 km.
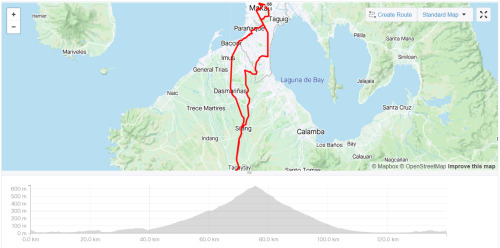
Tagaytay seems to be a test of courage or rite of passage that every budding cyclist has to undertake. And it is quite an undertaking. However which way you slice the cake, you’ll have to climb. If gradients aren’t your thing, you’d quickly question why you’re doing this in the first place.
Like every long ride (I know this now), it requires adequate preparation, i.e. time, weather conditions, road and traffic conditions, hydration and snacks, and physical fitness. I was more prepared than I was the first century ride, but we started late and therefore finished late.
I had good company during this ride and being with them made the exhaustion bearable. It was hot on the way up and the traffic was dreadful on the way back, but we survived thanks to Pocari Sweat and Choco Mucho.
7/10. This was a good “beta test” for me. Could’ve easily been an 8/10 but the Mang Inasal at the roundabout ran out of inasal. I got the last piece, but Jilson and Dan had to settle for something else.
3. Pililia Windmills via Binangonan. 114 km.
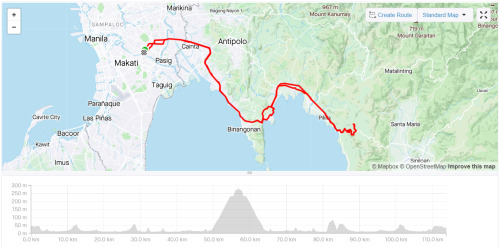
This was my first time riding with a large group. There were seven of us. As this was in the same week as my ride to Tagaytay, I came into this fairly confident and with high morale (aside from the fact that I was the seventh wheel). It slowly got lower as mishap after mishap occurred; a flat tire, a broken chain, another flat tire...
On this ride, I learned that it’s essential to have an idea of each person’s capabilities so you can set the right pace and adjust where and when necessary. We all had different types of bikes, different fitness levels, and different experiences biking on the road. It couldn’t be helped that some were dropped and others had to wait. In this regard, it was a tough and long day and toward the end of it, I was itching to be home.
6/10. At the time, climbing Pililia felt like treading through mud, but making it to the top was very rewarding. Good food and good conversation made up for aching legs.
4. San Jose Del Monte (Fake Eiffel Tower) via McArthur Highway. 111 km.
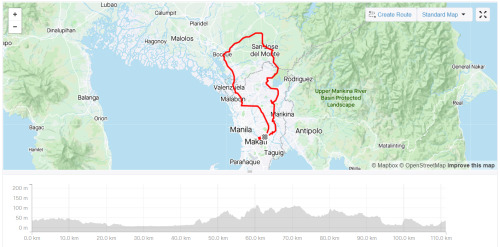
This started out as an easy ride on flats. We were all prepared and even the traffic and heat didn’t hamper our confidence. Once we were out of the highway and passing through barangays, the views became nicer. There was less pollution too. We saw the fake Eiffel Tower and met a couple of lolos who were still going strong. It was a good day that was only made better by a tasty, cheap, meal.
By this time, my fitness level and technique were steadily improving, and I was starting to enjoy climbing more. The way back was hilly, but it was no trouble for me. The cause of stress was, as usual, the traffic on the way back. If you can help it, don’t ever pass through Caloocan! It’s the worst. Commonwealth is also a horrible place to ride a bike.
7/10. Good times with good friends! The stop-and-go, clip-and-unclip traffic was a bummer. AG cramped up, but proud of him for powering through it and clocking in his first 100-km ride.
5. Tagaytay via Nuvali and Cardiac Hill. 136 km.
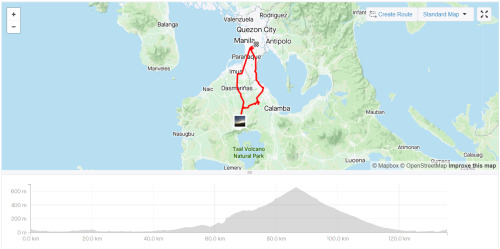
Second time riding to Tagaytay. This time, we rode out early. Iver and I met up in Makati and rode straight to Nuvali where we were to meet the rest of the guys. All was going well and we were maintaining a steady pace, till we made a mistake and met an accident.
Instead of making a right to Greenfield, we went straight to CALAX. We were none the wiser, so it felt strange when workers started screaming at us. While Iver was looking at them, one of the security personnel near the toll gate stepped in front of me. I had to stop and since Iver was still looking at the guys yelling at us, his front wheel hit my rear and he went over the bars. When I felt the impact, I looked back and I kid you not, I saw him go over in slow motion! He landed on his shoulder and he burst an eyebrow; thank God for helmets!
As he sat with his blood dripping on the pavement, I was torn between taking a photo and making sure he was okay. I went with the latter, but later on, he told me that I should’ve snapped the photo. What a guy!
Cardiac Hill was a bit of a challenge. In fact, it was the hardest part of the way to Leslie’s. I stopped at the base of the hill for a moment just to steel myself and went up the hill without stopping. Slowly, but surely.
8/10. As usual, the traffic was the worst. Sorelle was in so much pain that going all the way back to Manila on two wheels was out of the question. It was getting late too, so we decided to stop in Bacoor and take a Transportify back to manila. The first and only time (so far) I did the forbidden technique, but it was the smart thing to do.
6. Pisong Kape via Sumulong and Teresa. 103 km.

One of those rides where we didn’t have a fixed destination. We just wanted to go up Antipolo and down Teresa and back, and maybe climb to the windmills if we felt like it.
A fairly easy ride up Sumulong Highway and a fun time descending to Teresa. It wasn’t all good vibes though, since one of the guys punctured a tire on a descent, which we think caused his crash. He was okay, but his brand new cycling jersey wasn’t.
We made it all the way to Tanay and had breakfast silog there, and decided to head to Pisong Kape at the base of Pililia. When it showed signs of rain, we decided to turn back. More mishaps. Someone got a flat, and another one dropped a chain and had FD issues on the way to the climb to Antipolo from Teresa. We got split up at some point too.
5/10. This is what’s referred to as a bad juju ride. Hot, traffic, and a ton of things we’d rather not experience on the road. I stopped and waited for a good half hour at Decathlon Masinag, but left and rushed home since I needed to poop, lol.
7. Nuvali via a straight and narrow road through barangays and National Highway. 102 km.

It was the day before heading to Baguio for the holidays and I made brunch plans in Alabang with Elle. I was really excited to bike to her but more so to see her. If I left the house late, it would be hot and traffic would be terrible, so I decided to leave at dawn and make a long ride out of it and go all the way to Nuvali.
I didn’t want to take the service road like last time, so I followed the map through I don’t even know what road this is. All I know is that it was straight and narrow and clogged with tricycles. It spanned several barangays in Pasig, Taguig, Pateros, Sucat, Alabang, etc., and eventually led me to the National Highway.
It was all flat and this was my first ride on carbon wheels. I was riding solo, so I could go as fast or as slow as I wanted. I made it to Nuvali in 2:20. After resting for half an hour, I took the same route to Alabang and was there in 1:30. On the way back, I took the service road.
ELLEven/10. The route sucked both ways but it was a good day with Elle. What else can I say?
8. Macabebe Beach via Obando. 175 km.
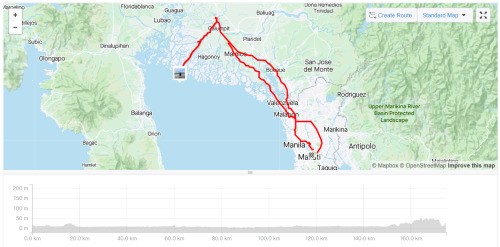
The flattest route I’ve taken, both literally and figuratively. Levi and I rode out from the Mandaluyong circle at 3:30 AM and cut through Manila to get to Monumento. From there, we opted to avoid McArthur Highway and instead took the more scenic, Obando way. I say scenic, but in reality, all we saw was black. We only stopped to buy pandesal and to navigate. As the sun rose, we found ourselves getting closer to the longest 24 km of my life.
It was a hard left turn from the highway about a km from the arc of Pampanga. The streets were narrow, and we passed through about four barangays. There were a lot of cars on the road, which was quite irritating because we had to stop when they did. The straights never seemed to end; in fact, I went “Look Ma, no hands!” for about what seemed like a couple of km. As we neared the beach though, we were rewarded by breathtaking views on both sides. The beach itself was mediocre and we stayed only for half an hour to eat our pandesal.
The way back was more difficult. You guessed it, it was due to the heat and the traffic and the horrendous roads in Bulakan. We stopped for coffee and to shield ourselves from the burning sun a few times, but overall we kept a steady, okay let’s be honest, frantic pace. We got to Makati a little over 1:00 PM. Levi and I made it in less than 10 hours. With stops. I was spent.
9/10. This was quite an experience. I always wanted to try a purely flat ride, so I did. It was boring. I’m not saying it was easy -- far from it. Being on flats takes a certain type of mindset and discipline, not to mention you have to be strong. The effort it takes to get from point A to B in a specific time is the same back and forth. Unlike climbing, there’s no descending that comes after. You can’t freewheel down the mountain and recover. I learned a lot on this ride, one of the things being that I like gradients more than watts.
9. Tagaytay via RevPal, Sungay, and Sampaloc. 110 km.
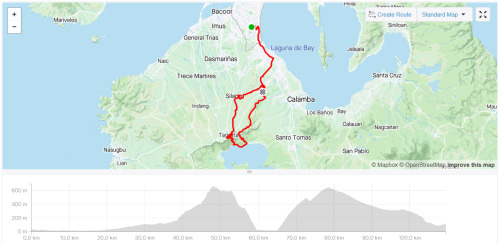
Tagaytay take three, route three. This time, we drove to Alabang and started there. What we should have done is start in Nuvali. But Luz insisted on starting in Alabang. This was not a good idea, lol. I want to preface this with the statement that as it was, the planned route was a killer. It didn’t help that I had little sleep and had a hard workout the day before. Another bad idea.
Let me give you a TL;DR: We climbed up RevPal from Nuvali, went down to Taal via Sungay, and climbed back up to Tagaytay proper via Sampaloc. From there, we went back down to Nuvali via Cardiac Hill.
Easy on paper, not so much in action. RevPal is steep, but not impossibly difficult. Part of the difficulty is avoiding all the other cyclists occupying the road, weaving their way up (known as nag tatahi) while staying out of the way of cars. At some point, my right knee started acting up, adding to the difficulty level of the ascent.
What was unexpected though was how scary the descent on Sungay was. I won’t get into detail, but suffice it to say that we should have taken it as a sign when we saw that other riders were dismounting so they could walk down... That said, what an adrenaline rush!
The climb up Sampaloc was tough with an aching knee (which by the way has no ACL), but thankfully there were a lot of trees and cover. Not my best performance, but I still made it up without stopping. The descent from Tagaytay proper was meh. From Nuvali, we rode with our friends who had the brilliant idea to park there. I slept on the way home.
9/10. I officially dubbed our group Mountain Goats after this ride. We have a lot of rides that are less than 100 km, but we often reach over 1000 meters of elevation gain. On this outing, we hit 1,640. I wonder how I’ll fair if I do this again in good condition.
10. Sierra Madre Loop via Teresa. 118 km.
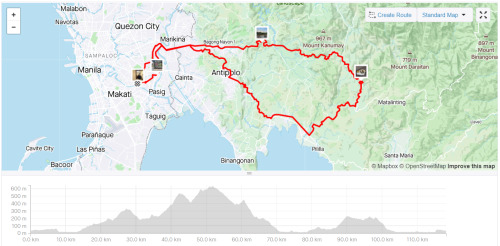
I think this is the most fun Grand Fondo I’ve done. It’s the highest I’ve climbed in the fastest time. 1740 m in 5:43:28. Arguably the most fun I’ve had on a bike. The climbs could kill you if you don’t pace yourself, but the descents were so rewarding.
The only sucky part about this ride was motorcyclists who go up on their underbone bikes and bank the corners like they own the place. They don’t signal when they turn. They take sudden U-turns. They overtake you, swerve, and suddenly stop in front of you. They are a danger to themselves and others. In fact, Levi mentioned that when she was there, a guy on a Mio overshot a corner and he and his bike went under the guard rail onto the cliff. Thank God he was alive.
10/10. The chicsilog was made even more delicious by the view from the top of the mountain.
10 + 1. Laguna Loop. 192 km.
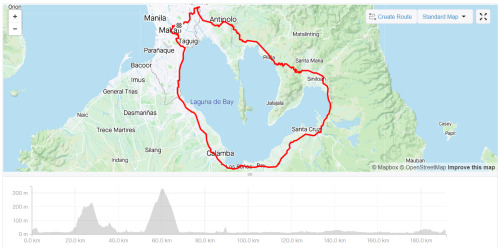
Laguna Loop is fun they said. You should try it, they said.
Well, I did. And I hated it. THEY LIED. This is by far the worst Fondo I’ve done. It was fun climbing Antipolo via Cabrera Road. It was fun going down Teresa. It was fun going up Pililia (which was so much easier than the first time). It was fun going down Mabitac. And that’s where the fun ended.
From that point, it was flat. It was hot. It was traffic. And the drivers were so bad. By bad, I mean jempoy bad. By jempoy bad, I mean trying to ride you off the road and driving at your side with their window down to argue with you. It was not fun. Have I said that it wasn’t fun?
2/10. Not gonna lie, I don’t even consider this ride as a Grand Fondo (which is why it’s a +1 and not a solid 11); the only part of the ride that counts is the first part with the ascents and descents. The rest was just really getting it over with. One point for that first part and another for the good company. WILL NEVER DO THIS AGAIN.
Okay, that’s it. It’s quite a long post but it should be okay since it’s the first one? I hope you enjoyed my unedited reviews of my 100-km rides. Again I’m not a pro so don’t take these scores seriously. Ride the routes yourself if you can and let me know what you think!
1 note
·
View note
Text
My Solo trek to valley of skeletons (Roopkund Trek)
Hi guys, This is my first blog about my trekking journey as a solo traveler on a really interesting trek known as Roopkund trek, also famous as valley of skeletons.
It was April 2018 when I thought of going on a trek alone. Although I had already done some treks in Himachal Pradesh and Uttarakhand but every time I was accompanied with a group. But this time I decided to go alone because I had only 5 days for this 8-9 day trek (including travelling) and also because no one was ready to go at that time :p. So. I decided to go alone and told my family that I am going with a bunch of friends.
I could have booked any package for this trek but I had money and time constraints, so I skipped this, did a lot of research regarding the route, trek distance, meals etc. I purchased a good 2 people tent and a sleeping bag, though I forgot to purchase sleeping mat, but I was able to manage that with the help of a local shop owner during the trek.
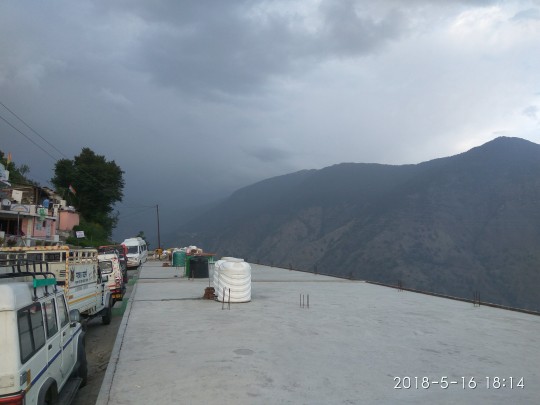
I had already made bus bookings from Delhi to Kathgodam (14th May, night) and back (19th May, night). I borrowed a rug sack from my cousin and started my journey on 14th May 2018 at around 10 PM.
DAY 1 :
I reached kathgodam next morning at around 6 AM had some bananas(as no other shops were open). It started raining and I was wishing that it stops in an hour or so, as I had to travel 250 km more to reach Lohajung (Trek start point). The rain stopped in a while and meanwhile I asked the locals about how to reach my destination, on which they replied that I should go to the railway station and ask the cab drivers there. So, I went straight to the railway station and started asking the drivers for the journey, but to my disappointment they were charging Rs. 5000 for the journey, as they were not ready for sharing cab and would only give personal cab.
So, I waited more and luckily I found one shared cab which was going till Almora and it costed me just Rs. 50. Then to reach Lohajung, I had to change 3 more shared cabs (Almora - Garur - Gwaldam - Dewal - Lohajung) and after a long journey of 8-9 hours, I reached Lohajung (which is a small village and starting point of Roopkund trek) at a cost of around Rs. 250. I rented a room for Rs. 200 for a night, ate there and asked the shop owner for the trek route. I thought of taking a guide with me but the guide tole me that he will take around Rs. 5K for this, so I chucked this plan and decided to find my way on my own. It started raining later at night but soon the sky was clear and I was ready to start my trek the next day.
DAY 2 :
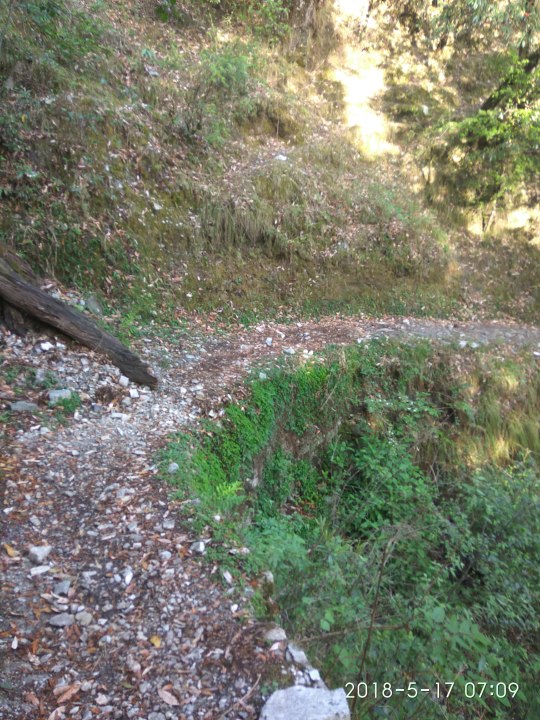
I started my trek at around 6 AM. The trail was very clear and a proper path was visible so trekkers can go on this route very easily. There were few villages at the starting of trek but after half an hour, only the jungle area was there. This day was going to be very hectic for me as I had to cover 23 km to reach a point know as Bedni Bugyal, where I would set up my camp.
After trekking 9 km for around 3.5 hours, I reached a point, also known as padav in local language, called Didna village. This was a really quiet village and there were many houses but no one was living as they went down in this season. Only one shop was open, where I had some yummy maggie and filled up my water bottles. (Remember to take at least two 1 Liter water bottles with you and keep filling them with natural water from falls, on the way). After a rest of 45 minutes, I started the trek again.
After travelling for an hour, I reached a plain surface where I received phone signals again (I lost them after an hour of starting trek) and I video called my mom. I started again and found a natural water fall from where I filled my water bottles. The view were amazing and I was felling so alive and great instead of being along on most of the trek.
After another hour, I reached a small shop where I found 2 locals. They asked me to stay there for the rest of the day as the distance was too long from there. But I had to keep moving because I had a very strict schedule. I kept moving and eating dry fruits (Cashew, Walnut) time to time gave me energy. There were water sources after every 1-2 hours so I was pretty much hydrated the whole time. At one moment, I encountered two ways and I had to decide which one to take. I followed my instincts and the path which had horse shit on it.
After trekking for 2 more hours, I got frustrated and exhausted as I was reaching no where and there was no one to ask about the directions but I kept moving and moving, because I got scared of the thought that if I stay here then I will die here alone. :( Finally after trekking for half an hour more, I saw a shop at a far distance and I could not be more happy :). I stopped there just to rest for a while, clicked some pictures and then I continued to reach that shop.
I went to the shop and I confused it with some other point (Ali bugyal) that I wanted to reach, but Ali bugyal was actually 7 km away from that point. I rested there, ate egg bhurji and filled up my bottles. Then I started the trek. I was really feeling the pressure in my stomach and I had to shit really bad, so I started digging a pit (but failed), then I did it anyway and covered it with a stone. (clever me :p).
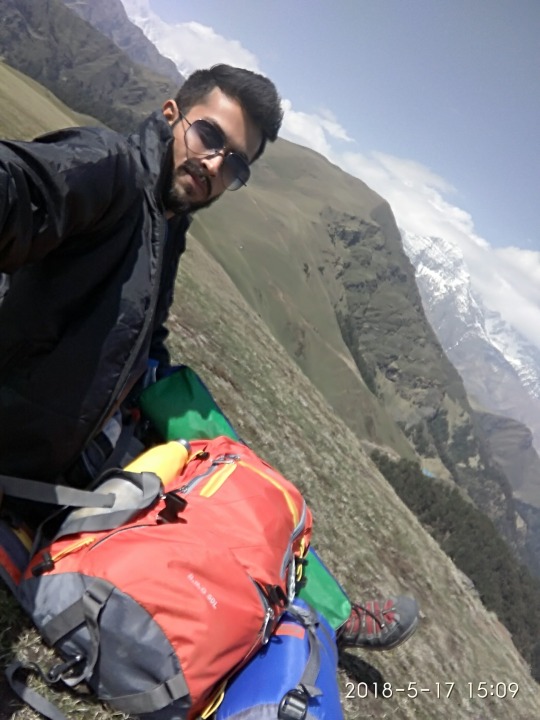
After trekking for another 45 minutes, I reached Ali bugyal which was very beautiful and the grass was very soft there. I found some group members there and chatted with then for a while, they were school boys from Mumbai and they clicked pictures with me as they thought that I am very strong to come on this trek alone ;). I moved past all groups and stopped at a maggie point, ate maggie and choclates to gain energy. After resting for half an hour, I started for my final journey of the day to reach bedni bugyal. I reached there at around 5 PM and went to a shop to setup my camp near it. The shop owner was pretty surprised to know that I traveled 23 km that day and that too alone to reach there, he praised me. There were a lot of camps already set up there by various trekking organisations (they all had their own place reserved). The shop owner helped me in setting up my tent on a plain surface and I loved the view from my tent.
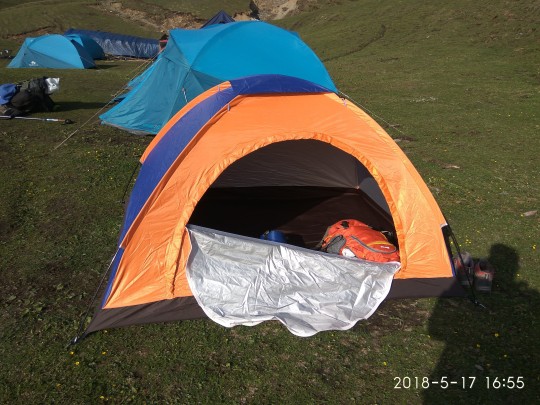
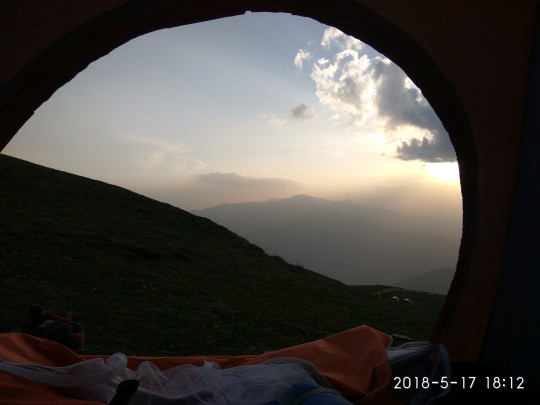
I had some chat with some fellow trekkers and one of them told me that they went up the previous day and stayed there. The whether gone bad along with rain and hailstorm which also kind of destroyed their tents and the toilet tents flew away due to strong wind. So, I decided that I will go to the top next morning and return back to bedni bugyal and stay here only. For dinner, the shop owner arranged Non veg food for me and it was delicious, he also provide me the sleeping mat for Rs, 30 a night. The locals there were so polite and helpful with everything. I slept early that day because I had to wake up early the next day to start the trek.
DAY 3 :
I woke up at 5:30 AM, left my tent at 6:15 AM and started my trek to reach the second last point (just below roopkund lake) known as Baguabasa. The trek was around 7 km long and there were few maggie points in between. I was packed from toe to head with many layers of thermals.
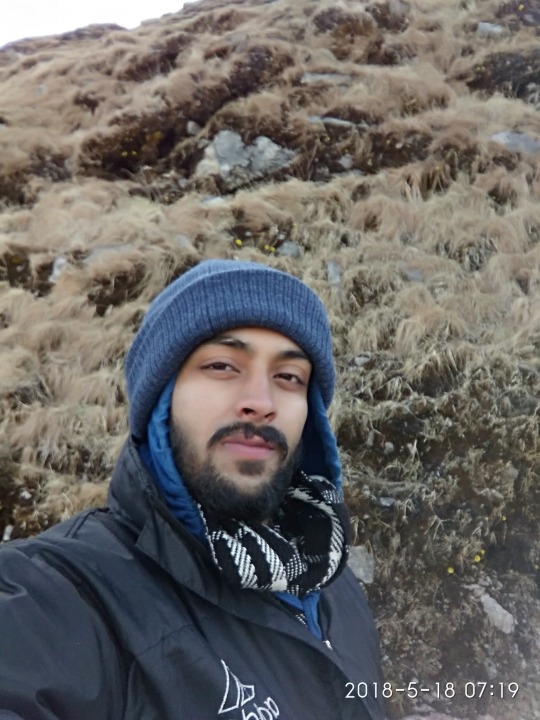
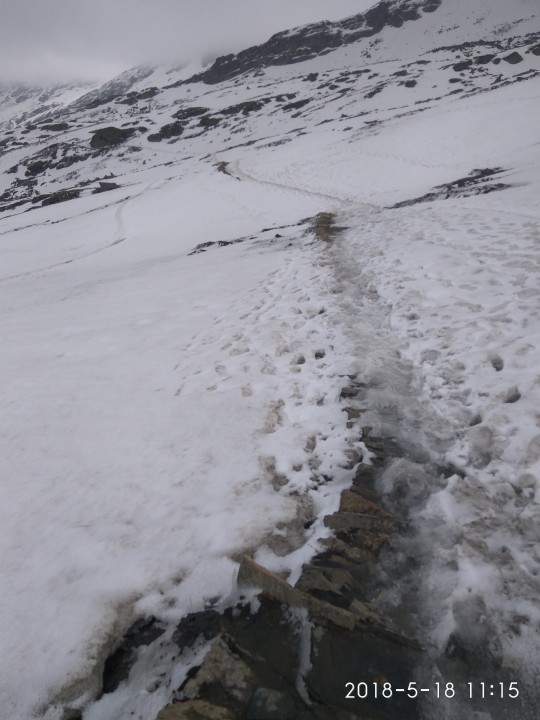
The wind intensity was very high that day and it was really cold too, due to which I was finding it really difficult to walk even. But I thought about my destination and the beauty that I was about to encounter and somehow got the motivation to keep moving. After trekking for around 2.5 hours, there was a camp site where I saw various camps and groups. I stayed there for a while and had my breakfast. After that I moved with a group for a while and then crossed them to move further. The scenic beauty was taking over my mind and for once I even thought of setting there :p. I could see snow capped mountains around me but they were still far and I just wanted to reach there and touch the snow. Soon, I reached a point where the snow patches were below my feet, WHAT AN AMAZING VIEW :)

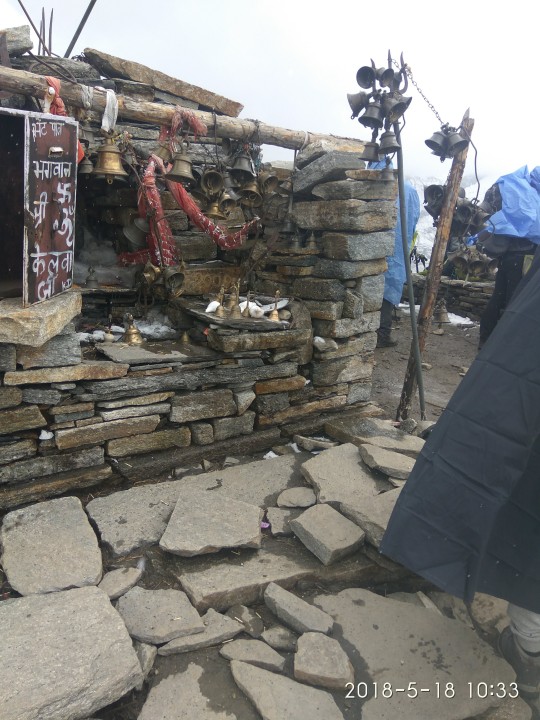
I rested there for a while and then started the trek further. After trekking for around 1 hours, I reached a small Ganesh temple from which Bagubasa was only 30 min. trek. I also encountered snowfall at that point. There were many people, mostly groups and couples, who were clicking pictures and chilling. I guess I was the only one who went along there :p. I clicked some pictures and stayed there for a few moments just to rest and enjoy that moment. Travelling alone has some good perks, firstly you don’t have to depend on anyone and can move according to you own pace. Secondly, you can rest at any point for how much long you want.
This was the temple:
After 15 minutes of rest and Anda bhurji there, I started trek. After a while I came to a point where I could not believe my eyes because I could only see snow all around and not a single person. That moment I realized that taking this journey alone was worth the risk. I captured some scenes and sat there, played with snow for a while :).


I created a video just to capture the view around me:
youtube
On that route, I encountered some people who were returning from Baguabasa. We waved at each other and did a little talking. They were also surprised by the fact of me being trekking alone. Its good to get appraisal from strangers, sometimes.
The snow was around 1 feet on this route and my feet went into it many times. Fortunately I was wearing gaiters which protected my feet and prevented snow to get into my shoes. Although I did slip few times. Then after 45 minutes, I reached the camp site Baguabasa. There were few tents setup there and one maggie point as well. The rates of maggie, egg dishes, chocolates etc. are pretty high at high altitudes.
Baguabasa :
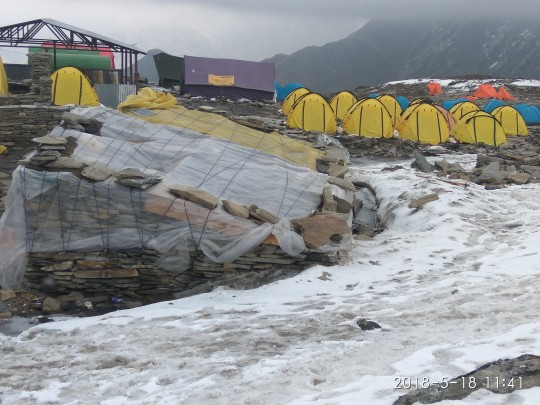
After reaching baguabasa, I went to the maggie point and ate some more egg Bhurji with bun (the bun was sweet and I thought that it would be normal bread). At the shop, I met some people belonging to a single group. They went up towards roopkund lake but could not reach it and came back. The shop owner told me that reaching roopkund at this time was very difficult as the weather was not good. He also gave me an offer of taking me to roopkund at around 4 AM the next morning, but for that I would have to stay at baguabasa for that night. As I was on a strict schedule and also didn’t have enough money to pay them, I decided to chuck that plan and move alone towards the lake, till the point I could reach. So, I started and trekked for another 15 minutes and stopped. I could not see any trail there and the weather was also degrading. So, I stayed there for a while, clicked some pictures and came back to the shop.
View from Baguabasa:

After staying there for an hour, I started my trek back to bedni bugyal. I was about to reach camp site of bedni and just then I realized that I can not walk further as I was feeling dizziness and headache. I could see my camp but was unable to reach there. So, I sat down there and took a half hour nap on the ground itself. I somehow reached my camp at around 5 PM and took a medicine (Diamox) for preventing AMS (Acute Mountain Sickness). Then I slept as I was feeling very sick. At the time of dinner, the maggie point owner there woke me up and served me with delicious Veg food (Veg meal - Rs. 100 and Non Veg meal - Rs. 150). After that, I spent some time in the tent looking into the sky, gazing the million stars. Then I slept, I had to trek down the next day.
DAY 4:
I woke up not too early, around 7 AM, has breakfast and sat down near the shop. I talked to the shop owner for the route to reach down. He told me the route and also told me that he will ask a group guide to take me with them on the route. Soon, the group came to bedni from baguabasa and after resting for an hour we started our descend down. I made some friends from that group which made the trek much easier and I had no motivation to trek down.

We reached down in around 4-5 hours and from where the group went to Lohajung in their booked cabs. As I was alone and there was no space in their cabs, so I waited there for a while and then a local mini truck driver gave me lift to Lohajung and charged mere Rs. 100 for it. I reached Lohajung in 2 hours and rented a room there. I sat with some locals and had a good time for a while, got stoned and finally went to my room to sleep.
DAY 5:
On this day I had to say goodbye to this beautiful village Lohajung. Trust me, I never wanted to leave but I had to because that’s how life works. We have to get back to where we belong. So, I talked to a cab driver and asked him for the journey from Lohajung to Kathgodam. it cost me Rs. 800 to reach Kathgodam in around 8 hours. I chatted with two fellow trekkers In the cab which made the route short and easy for all of us. After reaching Kathgodam, all three of us went to a restaurant to eat any food apart from egg and Maggie and drank beer. Then I had my bus at around 10 PM and both of them had train to Delhi. I bid adieu to them and went to the boarding point to wait for the bus and finally left the place and reached Delhi the next morning.
On this trip I learnt a lot about myself, my will power, my stamina, doing deep thinking, talking to strangers, making new friends in a short time, living just on Maggie, Egg and water, enjoy my own company etc. I will remember this trip my whole life.
1 note
·
View note
Text
Dahiwadi – A way of life Its 5 am (early morning for most of us) and the alarm bell rings ….. Dare I press the snooze button and am sure to miss on what fun lies ahead of us Hastily we all get up and after packing our backsacks and our meager daily essentials , we head off to exciting extended weekend After managing to hop on our old time friends to tag along , we, a group of ten ( 6 adults , “Abhijeet , Pratima , Trupti , Vikrant, Hubby and Self “ and 4 notorious pranksters “ Om, Shaurya , Vrushank and my little Munchkin , Vivs” squeezed into the car to start the 300km drive from Mumbai to Dahiwadi via Satara On the way , , we started munching right on the word Go Healthy breakfast of Home made finger licking Idlis , Yummy Aloo Sandwiches and methi Theplas .. Not to mention the sinful Chips and farsan . Took a halt at the famous Food Court to do our morning ablutions . It was drizzling and the weather was pleasing enough to keep our mood upbeat . As we reached Satara during our lunch time , we had a sumptuous meal of Jwari Bhakri , Gavran Chicken , Mutton ( A total feast for Non Veggies ) and Akkhi Masoor Dal and the staple Bharlela Vanga ( Treat for Veggies as well ) Then before moving ahead to Sajjangad , we ladies headed to a small clothing outlet which was bang opposite our Manas Restaurant . The window shopping looked good and we actually managed to get some nice day to day outfits. Looking at our happy faces , our respective spouses wondered whther it was d meal or the shopping that’s adding the glow … Well we ladies know it better …. Right !!! Within half an hour we reached Sajjangad ,, Literally means the Fort of Good people … we were kind of misfits … on this soil … Lol .. This is a popular scenic spot located about 20 kilometers from Satara city. You will find here a series of waterfalls, one of which is 500 meters in height. Most tourists come here during the rainy season when the waterfalls become thunderous.. Sajjangad in the district of Satara not only occupies a place of historical importance but tops the list when it comes to the devotees of Samarth Ramdas Swami, one of the most prominent spiritual mentors in this part of India. It was here that he stayed for a long time as also breathed his last. We walked up the 100 steps with heavy breaths … ( Cons of the mundane urban life ) but enjoyed the climb since it was coupled with Poses and selfies . On our downhill march , we also noticed the beautiful rain bow since it was drizzling in the sunshine . We all were happy as kids to spot this magical moment since its difficult to spot such sights sitting in the closed city office walls Further, we decided to move to Chowpatty … Well halt … The name is not a misnomer .. Its just like our very own Chowpatty with food stalls minus the beach ( J ). We with mutual consensus decided to give a miss to the Kaas Plateau is about 22 kilometers from Satara city. A UNESCO World Heritage Site, it comes alive with a wide variety of flowers - more than 850 different species - during the months of August and September. Since we were in June and visiting a plateau without flowers would not have been a great sight . ( We shall visit again only for Kaas Pathar in Sept …. Keeping Our fingers crossed )After gorging on the junk food like Pav bhaji , Bhel Puri ,Ice cream and giving out burps of happiness, we laid our hands on the famous Mango barfi, Kandhi Pedhe , Jambul and Ground nuts . Tired as we jumped into the car to head to Dahi -wadi , to our friend’s maternal abode . Pratima’s Parents and her younger sister , Chakuli and friend Sneha were eagerly awaiting to greet us all with open arms After a quick dinner ( since our tummies were already full ..) we snuggled in the bedsheets to peaceful sleep . Next day after a good night sleep , we all headed to Shikhar Shingnapur . The Shambhu mahadev mandir in shingnapurits an old temple devoted to lord shiva. when I heard about shikhar shingnapur for first time then i thought its related with another famous temple of maharashtra that is shani shingnapur, which is devoted to lord Shani dev since this temple is located at top (shikhar) of shingnapur hills, thats why it must be called shikhar shingnapur. two more shiva temples which should be visited by lord shiva devotees and are very near to this temple are amruteshwar temple and guptlinga temple (about 3 km away). the temple is connected with great king shiva ji maharaj family. shiva ji maharaj used to visit this temple often. There are many shivlingas (around 8) in the temple. thats why this temple is also known as dakshin kailash. Also in the inner sanctum, we saw two shivling. in this temple and 5 nandi . During mahashivratri festival many devotees visit this temple. And as per legend, lord shiva and parvati ma got married here. After a delicious homemade meal served at Khanaval ( interesting news being this place holds the wedding ground of our very Own Abhi and Pratima ) we ventured to Guptlinga mahadev temple – this secluded shiva temple is situated about 3 km from shikhar shingnapur shiva temple. both these temples are connected with chhatrapati shivaji maharaj family. another important shiva temple situated nearby is amruteshwar temple. maha dwar of shree shetra guptlinga mahadev mandir. like shikhar shignapur, this temple is also connected with great king Shivani maharaja family. Udayanraje Bhosale is the 13th descendant of the Maratha king chhatrapati Shivani maharaja. view from the main gate of the temple premises. at the entrance few ladies were selling pooja material. we were greeted by few monkeys at this point you have to climb down around 100-200 steps to reach the mahadev temple. there are few shiva and parvati ma statues placed on the way.. guptlinga mahadev temple. it’s a small temple known for its gupt shivling.. Inside the sanctum can see one marble tile is removed in this above photo. the tile is removed to feel the gupt shivling which is placed right below this shivling. that’s why it is called as guptlinga mahadev temple. There is water below this shivling. you have to put your stretched arm totally inside this cavity made by displacing the tile. at a distance of 2 to 2.5 feet, the shivling is felt in inverted shape. it is said that only fortunate people can touch it. i saw few people were scared to put their hands inside the cavity. so take the mahadev name and try your luck. After this was the highlight of the trip , wherein we all moved to fields … Shetat…. Alongwith Bhau ( Pratima’s father ).. Well in the locals , Our parents are not termed as Baba, Daddy , Pappa , But by the name which the entire houselhold calls them as .. hence our favourite Bhau took us to the trip down the memory lane … We all had the famous bullock cart ride . A bullock cart or ox cart is a two-wheeled or four-wheeled vehicle pulled by oxen (draught cattle). It is a means of transportation used since ancient times in many parts of the world. They are still used today where modern vehicles are too expensive or the infrastructure does not favor them. Used especially for carrying goods, the bullock cart is pulled by one or several oxen (bullocks). The cart (also known as a jinker) is attached to a bullock team by a special chain attached to yokes, but a rope may also be used for one or two animals. The driver and any other passengers sit on the front of the cart, while load is placed in the back. Traditionally the cargo was usually agrarian goods and lumber.The kids had a blast on this humpty dumpty ride while the adults were somehow holding their spines upright . . Then we plucked brinjals , Ground nuts , Drumsticks , Methi, , Bottle Gourd ,and managed to get enough for a three days The wind was blasting and the atmosphere was pleasant but a bit dry .The sugarcane fields were sashaying as per the wind directions and the atmosphere was magical . With a heavy heart we bid adieu to the fields , On the way sighted the national bird taking his ritual walk . Walking August , this pristine beauty with all the colours embedded into one, was like a lottery . We cherished every moment of this serene walk .After this we visited the famous Gondavale which is a samadhi place of Shri Brahma Chaitanya Gondavalekar Maharaj. Gondavale is a very famous pilgrimage place. It gets crowd on every pournima and at the time of Shri Raamnavmi, Gurupournima, Gokulashtami, Daasnavmi.. Gondavalekar Maharaj was devotee of the god Rama. He spent a lifetime teaching the importance of peace. He showed path of devotion of god Rama to thousands of devotees. He taught a Mantara to people “Shri Ram Jay Ram Jay Jay Ram Samadhi Mandir : is the place where Shree Maharaj rests after he discarded the human body. The day begins early at the mandir at 3 am. It is best to attend the Kakad aarti which starts at 4.45 am which is followed by phugadi, bhajan etc. The Samadhi is a simple stone structure atop which are the paduka. On the level above that is the Gopal Krishna idol. It represents that this location was a cowshed. Shree Maharaj loved cows and he had wished that he be put to rest among the cow After an eventful day we headed back to “ Pratima “The bungalow Name of Pratima’s Maternal abode completely satiated . We had great dinner served by Pratima’s Aai . Then despite a tiring entire day schedule we ladies had the energy to spare to our small talks on Life and life beyond work . The topic was so interesting that we actually took it till 3.30 early morning .. Managed to wake up by 9 am so as to march back to Mumbai . We left from Dahi wadi at 11am bidding farewell to a great hospitality . Thanks a lot Pratima for giving us an opportunity to meet your real self . This trip re-inforced the very basis of our existence . It’s the local which is still genuine . Dahiwadi Rocks !!!!
9 notes
·
View notes
Photo

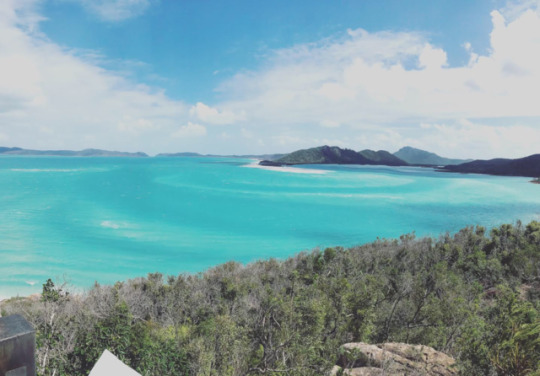

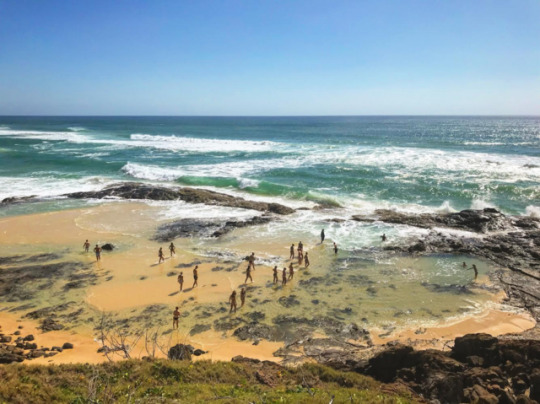
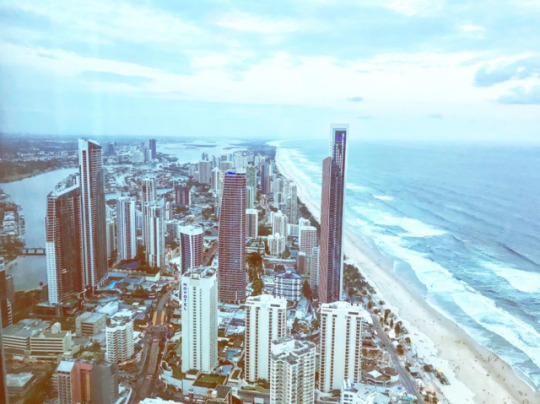
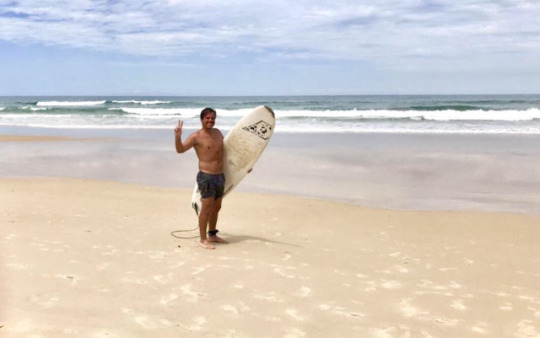
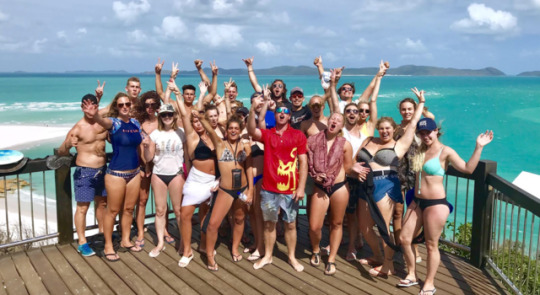
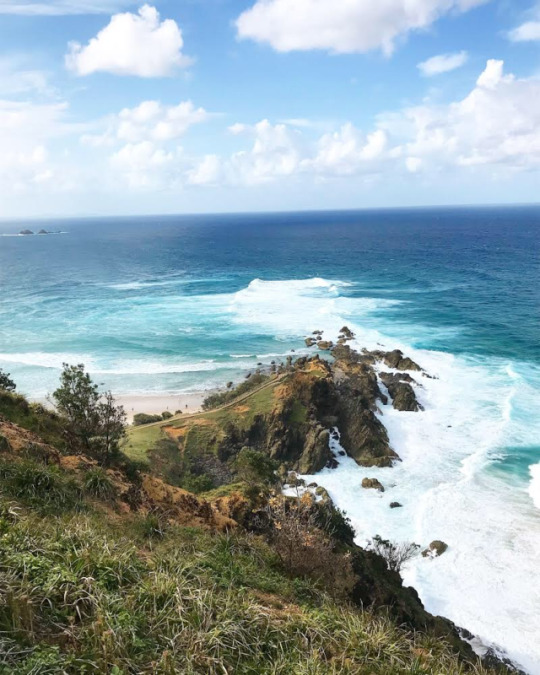
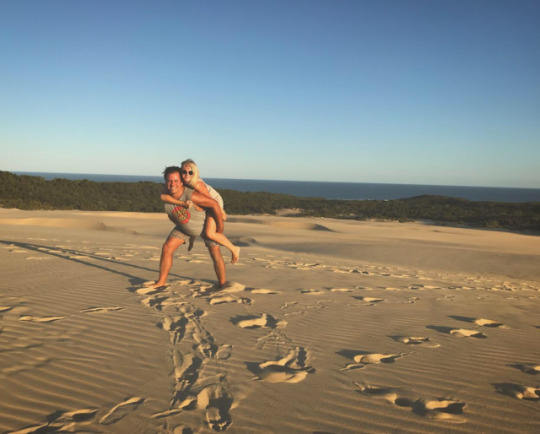
STRAYA EAST COAST'N - Feb 1st 2018 (Australia ) After travelling to 10 different countries and living in Australia for 2 whole years I've finally set off today on an east coast adventure. I will be travelling almost 2000 kilometres from Cairns to Byron Bay with my gal pal Lauren. Island hopping, boat accommodations, beach exploring, cities and the surf are just a few things we'll be getting into. We took a bus 4 hours from Cairns to Townsville to meet the Sea Link Ferry in order to make it to Magnetic Island. With only half an hour to spare we ran around Townsville trying to get a few things before jumping on the Ferry. Finally "Maggie" Island, outlined in golden sandy beaches and national park. Magnetic Island is home to a small residential neighbourhood of locals, wild koalas and many more critters. It's a great tourist destination and if you're looking for a good time X-Base is where we set up camp amongst many other backpackers looking for a cheap/ fun accommodation. After a relaxed night at Base meeting new people and sipping goon(cheap nasty wine) at a sunset cliff, the next day we explored the island. We hired a convertible 4 wheeler to do some off-roading. We drove across the island to the Fort Walk, I'd say it's more of a hike than a walk but nonetheless it was stunning. Once used for military to store ammunition and camouflage themselves from enemy invaders the Fort is now a popular trek to spot wild koalas and capturing some epic shots of Radical Bay, Arthur Bay and Florence Bay. Including a 360 degree panoramic view of the coast when reached to the tip-top of the Fort. Later we did some SERIOUS off-roading. Lauren drove up and down an extremely steep road with potholes that were 2 feet deep and 1-6 feet wide. There were moments that I thought the vehicle would tip over but we had a cry-laugh about it and explored the 3 bays and national park. If you don't understand "cry-laugh" go slap your funny bone against something hard. After a swim in the ocean we drove to West Point the opposite side of the island, had some ice cream before heading back to base. That evening was well spent with a great couple of American girls, hostel games and loads of dancing. The staff lads at base were such great fellas to party with I felt like I had also worked there for ages. Fun times! The following day after pulling our lives together we headed back to Townsville from the island but had a bit of an expensive hiccup cause Lauren forgot her purse, but it could happen to anyone...all good👌🏼. We now are back on route, down the coast headed straight for the oh so majestic Whitsunday islands. Finally we made it to the small town of Airlie Beach, home to the Great Barrier Reef and gateway to the famous Whitsunday islands. After checking into our accommodation at Nomads hostel we took a stroll around this quiet beach town. I came here to visit exactly two years ago so it was nice to see what changes had been made to this small sleepy oasis. After stocking up on goon we met our new tour group at the marina. We spent 2 days on the Tongarra catamaran soaking up the sun and the sea. Unfortunately for the weather being slightly bipolar, causing major swells, it took ages to get anywhere. We took shelter in Nara Bay an enclosed bay hidden from the rough choppy water. The following day we made it over to the second nicest beach in the world- Whitehaven Beach. Pure beaming white silica sandy beaches, fringed in palm trees and surrounded by swirling blue water, just a few traits Whitehaven is famous for. A $10,000.00 fine goes to anyone caught taking sand from this national park but I couldn't help that a pound of it got caught up in my underwear and swim shorts. Felt lucky to have travelled to this heaven on earth twice ❤️. Riding the catamaran back to Nara Bay we met a hawk that flew down to the boat and we threw raw kangaroo meat in the air to feed it. That night was filled with lots of games, drinks and dancing as loud as we can in this secluded bay somewhere in the Whitsunday Islands. Before heading back to Airlie Beach we all took turns struggling to stay on a banana boat that was dragged around the bay of Nara. After the Tongarra after party, a night filled of dancing with new friends, we spent the following day laying by the gorgeous lagoon before heading to our next destination. After a 14 hour overnight bus we eventually made it to Rainbow Beach. Known for its beautiful multi-coloured sandy beaches and being the gateway to Fraser Island, Rainbow Beach is a small tiny town. We spent only one day here hanging out on the beach and bodysurfing before our next adventure to Fraser Island. The following day we met our new group of roughly 30 people that we would be driving up and down the 120 km long Island with. We were split into groups of 8 and in 4 separate vehicles that we had to drive on the beach along the coast of Fraser. Being very tropical, untouched and the largest sandy island in the world made it difficult to drive around but we all managed. Our first stop on the island was the stunning Lake McKenzie, this fresh water lake was so pure and clean with bright blue water and silica sands too... Like Whitehaven. After some group bonding on the beach we went to our camp off of Cathedral beach to set up where we will be spending a total of 3 days, 2 nights. Before dinner that evening we climbed these amazingly picturesque and extremely steep sand dunes through dingo territory. We climbed to the top of a hill overlooking a part of Fraser Island. The next morning we drove along the shore line to a cove that's called the Champagne Pools. This was a highlight for myself. The Champagne Pools are a series of natural lagoons enclosed by rocks and clusters of shell fish. As the massive swell from the ocean smash up against the cliffside, water rushes in causing bubbles to form all around us like a "champagne bubbly" sensation. Some jelly fish came through too but none were harmful, I picked a few of them up to show the others just how harmless these little jellyfish were. After lunch 7 of us arranged a cheap 15 minute scenic flight over Fraser Island. This was a very small aircraft that would dip and take sharp turns like a rollercoaster over top of Butterfly Lake and other sand dunes. The flight allowed us to see both ends of the island. Later we met with the rest of that gang at Eli Creek- a natural fresh water lazy river that we tubed down in the afternoon to cool off after all the excitement. To end our day of excursions we checked out a beached shipwreck from the 1900s that was one of the quickest boats in its time. Circling the world 5 times in use of medicine and shipping patients this ship was eventually beached and used in the war, later on in life weddings and other events were also held on it until it became what it is today due to corrosion from the sea. That evening myself and a fellow French-Canadian, named Simon teamed up as the "Canadian Connection" and made a big pasta dinner for all 30 of us. The evening was filled with great food and drinking games. Following day we headed over to TeaTree Lake for a dip before heading back. Tea trees outline this freshwater lake and the natural oils from the trees make the lake water an orange colour. The smell of the air and water was so fresh I swam for ages out to the middle of the lake. It was great, quiet and calm and my hair and skin felt great after too. I was randomly greeted by a duck out there. Later we made it back to rainbow beach where some people went their own way but some of us that got along stayed up played a couple rounds of cards against humanity (UK version). Off to the next place! A 2 hour bus ride later, we made it to the gorgeous Noosa. This wasn't very planned so we kinda spent the first day hopping from accommodation to accommodation until we found something available in this tropical surfers paradise. It was kind of love at first sight between Noosa and myself. Noosa is a small separated suburban area surrounded by dense national park full of wildlife. It has incredibly beautiful coastal views, upscale shops, restaurants, stunning beaches and three separate islands. It has a laid back hippie feel but is still clean and upscale.. Like a much larger Port Douglas. Lauren and I spent Valentine's Day together down by main beach. We treated ourselves to a fancy mimosa filled brunch, went on a 3 hour coastal hike through national park and later had an Italian dinner and movie with a few gals we re-met from Fraser Island. We spent our last day hanging out on sunshine beach. She went bodyboarding and I surfed, well attempted to surf. The swell was very large so I got kind thrown around but I'm glad I gave it my all and tried it out. Later we took a long walk into town for dinner and walked back to say our final goodbyes to our short stay in Noosa. I'll be back! *terminator voice*. I'm currently on route from Noosa, through Brisbane to the Gold Coast, the city on the beach. This "Miami" of Australia has tons of attractions to choose from so we decided to stay in the heart of it all, in Surfers Paradise. We lucked out with Happy Travels sorting us out with a free private accommodation at Bunks hostel, best hostel I've ever stayed at in Australia. Our first night out we met a group of travellers who brought us out to a karaoke bar. The night ended with a fat lip I got from swinging the microphone around during a Grease Lightening duet with Lauren. Slapping myself in the mouth with the mic I essentially gave myself a natural self inflicted lip filler (haha). The following day we just laid by the pool, took a long evening stroll along the oceanside and had a fancy dinner at the Hard Rock, well not so fancy and over priced. Sunday we walked one hour to Pacific Fair mall to do some shopping and it was a fantastic shopping centre that felt like it never ended. We later caught the tram, headed back to surfers and shopped around some more before having a late night burger by the beach at bar Cavil. That night we also pre-purchased tickets for the following day for....DREAM WOLRD!!! Dream World is the largest amusement park in all of Australia and Lauren and I had the chance to experience all of it. We went on a Monday, a working day and I'd suggest going on a week day because we had the amusement park and water park to ourselves practically. We even managed on going on the most popular coaster, the tower of terror a total of 3 times. Almost lost my voice by the end of the day. Our tickets included an entry to the observation deck at the Sky View tower back in Surfers Paradise too. We polished off our day at this observation deck, towering 77 stories over the Gold Coast at dusk made for some really spectacular views and great photos. It was a beautiful day and a phenomenal way to end our visit to Goldie, can't wait to revisit one day. FINALLY Byron Bay, the original reason why I left Canada to visit Australia was for this small hippie oasis. This true surfers paradise tucked away in the hills along the most easterly point of Australia. We took a 3 hour bus ride to the famous Byron Bay, a very popular Aussie vacation destination, home to celebrities and very wealthy locals. Shortly after arriving we did a two hour hike to the Cape Byron Lighthouse, the last of the great 19th-century Victorian era lighthouses. This walk has truly spectacular coastal views that wrap around the most easterly part of Byron bay. This was a must-do I'd recommend it to everyone, we even saw a pod of dolphins playing in the waves. Two of my great friends set me up with a two day progressive surf lesson with a company called Stoked, which was how I spent my Wednesday. I've been surfing in 5 different countries and I'm still not very good. This Stoked surf school taught me a few things I've been doing wrong and I eventually managed to ride a number of waves right to the shore. That night we met up with an old pal named Cheeseburger Charles and he took us on a wild night out to a small club called Woodys. Thursday was a hangover day. We spent the day being lazy but later in the evening we met with Charles and went to a really fancy Italian restaurant called Trattoria Basiloco. We ordered almost everything off the menu, calamari, pizza, lasagna, calzone, bruschetta and gnocchi. Unfortunately most of the time spent in Byron was rainy but the next day big, naughty Charles picked up Lauren and I and took us on a road trip for the day. He drove us up to Lennox head, Ballina, through Tweed and into the Gold Coast where we had a late afternoon at an enormous shopping centre. Saturday...our last day was still a wet and rainy one. I did my last class of surfing at Lennox Beach and it was much easier the second time around. The class and I got to relax in the fresh red waters of TeaTree Lake just opposite Lennox Beach after our 4 hour surf lesson, a great way to wind down after battling waves. We spent our last night out at a nice dinner in town. Miraculously on our last day the sun came through the dark cloud barrier that hung over Byron for days. I woke up the KRAKEN(Lauren) at 7am with good news about the weather. We ran down to the main beach of Byron and soaked up 4 hours of sun, I body surfed waves until it was time to pack our things and head home. We now both sit at the Gold Coast airport waiting to head back to Cairns. The east coast of Australia was an absolute blast, naturally stunning and I just had the best time with my gal pal venturing through the many different parts of Straya(Australia). Happy to call this country my home for the foreseeable future.
#backpackerlife#backpacking#aussielife#travelaustralia#australia#wanderlust#traveller#islands#beaches#surf#surflife#islandwildlife#nature hikes#getlost#world travel
1 note
·
View note
Text
6 Days Lemosho Route

Lemosho route approaches Mount Kilimanjaro from the west. It crosses from Shira Ridge to Shira 2 camp offering the hikers a pleasant hike. Till it joins the Machame route on day three, the visitors would experience the low traffic. Then both the route take the same track while passing some of the southern circuit splendors like the Lava Tower, Barranco and Barafu. The minimum days to trek in this route is 7, but 8 days is recommended as it will give more chance to acclimatize and achieve the summit. Lemosho is considered to be one of the most scenic routes to Kilimanjaro. The spectacular sights of the rain forest, Shira Plateau and all the other view points of the southern circuit add to its scenic views. Lemosho has low crowds until it combines with Machame.and Lemosho route is highly recommended and it has an abundance of wildlife such as elephant, buffalo, eland and lion which come over to forage during dry season from Longido game controlled area. Day 1: Arusha (1400m) – Londorossi Gate (2100m) – Mti Mkubwa camp (2750m) We depart from Arusha to Londorossi Gate, which takes about 4 hours, where you will complete entry formalities. Then drive to the Lemosho trailhead (another hour to reach the trailhead). Upon arrival at trailhead, we eat lunch, and then commence through undisturbed forest which winds to the first camp site. The porters, who arrive at the campsite before the clients, will set up your tent and boil water for drinking and washing. The chef will prepare a snack then dinner for the clients. At nighttime, mountain temperatures may drop to freezing so be prepared! Day 2: Mti Mkubwa Camp-(forest camp) - (2750m) – Shira 2 Camp (3840m) Distance: 18 km Hiking Time 8-10 hours Habitat: Moorland We continue on the trail leading out of the forest and into a savannah of tall grasses, heather, and volcanic rock draped with lichen beards. As we ascend through the lush rolling hills and cross several streams, we reach the Shira Ridge before dropping gently down to Shira 1 camp. The view of Kibo from across the plateau is amazing. From here, it is a gentle walk east toward Kibo’s glaciered peak, across the plateau to Shira 2 camp on moorland meadows by a stream. Day 3 Shira (3840m) – Lava Tower (4630m) – Barranco Camp (3950m) Distance: 10 km Hiking Time: 6-8 hours Habitat: Semi Desert From the Shira Plateau, we continue to the east up a ridge, passing the junction towards the peak of Kibo. As we continue, our direction changes to the South East towards the Lava Tower, called the “Shark’s Tooth.” Shortly after the tower, we come to the second junction which brings us up to the Arrow Glacier at an altitude of 16,000ft. We now continue down to the Barranco Hut at an altitude of 13,000ft. Here we rest, enjoy dinner, and overnight. Although you end the day at the same elevation as when you started, this day is very important for acclimatization and will help your body prepare for summit day. Day 4: Barranco Camp (3950m) – Barafu Camp (4550m) Distance: 9 km Hiking Time: 8-10 hours Habitat: Alpine Desert After an early morning breakfast, it is now time to conquer the Great Barranco Wall! Although it may look intimating at first glance, hikers state that this Class 2 hike is usually much easier than they anticipated. At the top of the Wall, you will have a view of Heim Glacier and will be above the clouds. The trail then winds up and down in the Karanga Valley and intersects with the Mweka Route, which is the trail used to descend on the final two days. As you continue hiking for two hours, you will reach Barafu Hut. This is the last water stop for the porters because there is no accessible water at Barafu Camp (4550m). The word “barafu” in Swahili means “ice” and this camp is located on a rocky, exposed ridge. Tents will be exposed to wind and rocks so it is important for hikers to familiarize themselves with the campsite before dark. An early dinner will be served so hikers can rest before attempting the summit the same night. Your guide will brief you in details on how to prepare for summit night. The two peaks of Mawenzi and Kibo are to be seen from this position. Day 5: Summit Attempt Barafu camp (4550m) – Uhuru Peak (5895m) – Mweka (3100m). Hiking time: 8h to reach Uhuru Peak, 7 - 8h to descend to Mweka Distance: Approximately 5 kms ascent. 12 kms descent Habitat: Stone scree and ice-capped summit You will rise around 23h30, and after some tea and biscuits you shuffle off into the night. You will head in a north-westerly direction and ascend through heavy scree towards Stella Point on the crater rim. For many climbers the 6-hour walk to Stella point is mentally and physically the most challenging on the route. At Stella Point (5685m) you will stop for a short rest and will be rewarded with the most magnificent sunrise you are ever likely to see (weather permitting). From Stella Point you will normally encounter snow all the way on your 2-hour ascent to Uhuru Peak. The time you will spend on the summit will depend on the weather conditions. Do not stop here for too long, as it will be extremely difficult to start again due to cold and fatigue. Enjoy your accomplishment and a day to remember for the rest of your live. Faster hikers will see the sunrise from the summit. The walk back to Barafu from the summit, takes about 3 hours. Here you will have a well earned but short rest and hot lunch in the sun after eating you’ll collect the rest of your gear, before heading down to Mweka hut (3100m). The route is not difficult and will take you down the rock and scree path into the moorland and eventually into the forest. Mweka Camp is situated in the upper forest and mist or rain can be expected in the late afternoon. Later in the evening, we enjoy our last dinner and wash on the mountain and a well-earned sleep. Day 6- Mweka camp (3100m) - Mweka Gate (1980m) Hiking time: 3 hours Distance: Approximately 10.5 kms Habitat: Forest Following a well-deserved breakfast, your staff will have a big celebration full of dancing and singing. It is here on the mountain that you will present your tips to the guide, assistant guides, chef(s), and porters. After celebrating, you will descend for three hours back to Mweka Gate. The National Park requires all hikers to sign their names to receive certificates of completion. Hikers who reached Stella Point (5685m) receive green certificates and hikers who reached Uhuru Peak (5895m) receive gold certificates. You will be served a hot lunch then you will drive back to Arusha for long overdue showers and more celebrations. Lemosho Route 6 days Rates Include Accommodation the night before and after the climb Quality, waterproof, four-season private mountain sleeping tents Professional, experienced, mountain guides All Park fees Rescue fees All meals while on the Mountain Guides, Porters, cook salaries and park fees Quality Mess tents with table and chairs Large portions of fresh, healthy nutritious food Clean, purified drinking water Crisis management and safety procedures Fair and ethical treatment of porters Airport transfers Lemosho Route 6 days Rates Exclude Tanzania Visa Gratuity/ Tipping Personal Expenses (e.g. laundry, telephone, beverages, etc.) Meals not listed above Read the full article
0 notes
Text
Nag Tibba- The Best Weekend Trek
I read somewhere that “If you see Sunrise and Sunset daily, that means you are the luckiest person” and today after a very long interval of time I saw that exceptional view of the sunrise from the Nag Tibba. I was exhausted and starving but it was a very small cost for this beautiful portrait of nature. We were lying down on the grass, watching the clear blue sky, and enjoying the calmness of that place.

But, how we get here?
Nag Tiibba trek was always in my bucket list when I heard it for the first time and finally, I got that chance to pull it out. One of my friends asked Would you like to join us for Nag Tibba Trek? Without thinking too much, I accept the proposal. We were three and excited about this trip. We were gathered for making plans and on the spur of the moment, we decided the date, time and fixed the whole schedule for the upcoming weekend. Next few days we finished all our packing and on a Thursday night, we depart for Uttarakhand.
To reach Nag Tibba our first main stop is Dehradun. Dehradun is the place from where the actual journey starts. It is well connected with all means of transport. You can take the bus, Rail, and flight as well from Delhi.
Road — If you travelling from bus or cab it will take approx 6 to 7 hours to reach Dehradun. Rail — Rail facilities are also available from Delhi to Dehradun on daily and alternate bases. You can choose it according to your convenience. Air — If you want to take air experience or want to reduce time then this is the best option for you. It takes 45–60 min to reach Jolly Grant Airport Dehradun.

Route Plan for Nag Tibba -
Route 1- Dehradun -> Pantwari -> 8 Km trek to Nag Tibba and 3 km to Nag Tibba Summit Route 2- Dehradun- >Mussoorie road-> Devalsari village -> 13 km trek to Nag Tibba
We depart for Dehradun at 10 pm from Delhi ISBT and we decide to follow the route-1
Day-1
At morning 4:15, we reached Dehradun bus stand but before we think about our next step, rain welcomed us in Dehradun. I don’t know about you but I’m really fond of untimely rain and tea. And without wasting any time, we head towards the tea stall. Sipping a cup of tea with watching drizzling and lots of silly talk with friends is always a wonderful time for me. After taking light snacks we were ready to move our next stop which was Pantwari village and luckily the rain was also stopped. To get any public vehicle/transport for Pantwari you have to first visit Mussoorie station and from there you’ll get the transport for Pantwari. But we booked a taxi directly to Pantwari Village instead of going to Mussoorie -> Naina Bagh village
At 5:30 we head towards the Pantwari Village. It was a beautiful morning where sun yet not appeared, the breeze was flowing, which opens our sleepy eyes and introduced the freshness of this place. We left the Dehradun behind. Here the road was smooth and the window showing the changing colours of the landscape. One side with long pine trees and other side shows the yellowish fields where people are working. By looking at these mesmerizing view, we didn’t realize the pace of time and approx 9 am we reached that place where the actual trek starts for Nag Tibba.
At 9:30 we start our trek and one of my friend leading us from the front because he visited there before and have a better idea about route rather than us. That’s why we didn’t hire a guide. But make sure if you are visiting for the first time then you should hire a guide.

Why I’m saying this?
Nag Tibba trek is 8–9 km long which is full of twists and turns, which go through the dense forest. Especially in winter when the whole area will be covered with a blanket of snow, then it is quite difficult to find out and be on the right path. And your one wrong step takes you to where nobody wanted to stuck which is full of wild creatures.
We were moving to our base camp but our speed was quite slow because of all our camping stuff. It was quite hard but we were motivated and after 5 hours of trek, we reached to Nag Temple and we decided to pitch camp near Nag Temple. Nag Temple is 1 km before the peak which is dedicated to Nag Devta. Local villagers have the Great faith in Nag Devta. The local people have been offering prayers (puja) to the Snake God (Nag Devta) at this peak which is a testament to its sanctity. There is also a water source near the temple which you can use if you run out of water. But water is not very clean so make sure you boil it or use chlorine tablet before consumption.
Day-2
How often do you we get a chance to wake up with the chirping of birds and the view of glowing Himalayas? Maybe very few. That morning was amazing for us. We wake up at 4:45 and decided to head towards the Nag Tibba Summit for capturing the beautiful sunset view. We distribute the work. I was helping my friend in packing tents and another friend making tea for us. It took a complete 15 minutes to pack all our stuff. Now we had no time for tea. We pour the tea in a vacuum flask and decided to enjoy it at the summit with sunrise view. At 5:02 we start the trek to the summit. The trail was going steeper and steeper after every single step. After struggling to reach the summit. Fortunately, we finally saw some flags waving in the air. We saw each other face with a devilish smile and without saying a single word, we ran to reach the top first. Yes, it sounds silly but was the memorable laugh for us. After 50 seconds of run, we were at the top. All were completely out of breathing. It was a bit of a climb but trust me, when you reach there you will forget every little step that you took.
There was still 3–4 minutes in the sunrise. We could see the beautiful Himalayan peaks like Nanda Devi, Bunderpunch, Chaukhamba, etc and after a couple of minutes, we witnessed the awesome sunrise from Nag Tibba. And finally, there was time to go back home. This trip was not only for fun, but it’s about taking new experience, knowing our capability, and pushing our limits. Every time when I visit these type of places it proves me that “Life is…beautiful”.

Best time to Visit — Nag Tibba is a weekend destination, so it is accessible throughout the year.
Summer (April to June) — In the summer season, Nag Tibba offers clear view of surrounding hills and mountains. The weather is pleasant in a day but after evening temperature goes down so it is better to carry light woollen clothes. Monsoon (July, August, mid-September) — In Monsoon season, you’ll find everything painted with the green colour. Sometimes you’ll see trees are loaded with red wine colour’s flowers which makes your trek more scenic. But rain can interrupt you during the trek so don’t forget to carry raincoats and waterproof bags. Winter Season (December to February) — In Winters, you’ll find everything covered with a white blanket of snow which enhances the charm of Nag Tibba and attract more tourists/trekkers.
For more details- Click here
0 notes
Text
Samaria Gorge!
Samaria gorge is the longest gorge in Europe, 16 km long with cliffs soaring up to 500m high and only 3 m wide at some points. Samaria gorge is one of those must do experiences for Crete, so we knew it was one of those things we wanted to make time for. Nevertheless a couple of people tried to talk us out of it which wasn't very confidence inspiring, including the nice man at our concierge desk who helped us book the trip. We got up at 5:30, & made our way through Chania (where other people were just leaving the club) to a random square where the tour buses to Samaria pick up. There was a bunch of other hikers there, and it was interesting to see everyone's idea of work out clothes with varied from intense hiking gear complete with ski slope ready poles, to a SUNDRESS & TOMS. While on the trail I think I was passed by sundress girl, so I can't hate. The trip to the starting town of Omalos was about an hour, a scenic drive through the windy roads of the white mountains. On a random turn with no signs of civilization around, we slowed to pick up what appeared to be a hitch hiker, a 50 year old German man in short shorts and long curly blonde hair. He turned out to be our guide and he gave us an overview of what to expect on the hike, including some good advice- watch where you step- and some more warnings- there's no way to rescue you if you hurt yourself so please don't do the hike if you have any issues. Thus inspired we began! The hike is long, but it's almost all down hill so it is not difficult in that sense. I would say the trickiest part was the first few kilometers where the path is extremely steep & sometimes just loose rocks. Especially since the hike can get over 3,000 visitors a day in high season, I could see how it would be easy to have start an acme chain reaction of people rolling down the hill & forming a human snow ball. However we started the hike pretty early, so it wasn't too crowded when we made the trek & we were able to take our time. I thought the hike was absolutely beautiful. At first we were walking through a forest but then in opens up to these impossibly tall and colorful cliffs, with all these different rock formations. Walking through the gorge was my favorite part, there was a clear green river running through parts, and the landscape was so bizarre it almost felt alien. Pictures don't really do it justice, but it'll upload some anyways. At the end we made the full hike in about 6 hours, which was a good time, so we were able to swim for a little in the ending town of Agia Roumeli. Boy Aj has a good story about our time there that I'll let him share- We reached the Libyan Sea - a mass of sparkling brilliant blue water cut by soaring limestone cliffs. Despite the rough landscape the sea was calm and inviting, and the long hike and hot air made it an easy choice to go swimming. Boy AJ (me, writing) got on his soapbox about how we need to get away from the crowds of people swimming near the ferry to the far side of the beach, with only a handful of people and interesting outcrops. We headed out that way and once away from the crowds saw and old tanned body stretched out on a towel, seemingly naked. "Do you think that man is naked?" Boy Aj asked. "I don't know," Girl AJ said, a little uncomfortable. There were two ways around him: down between the man and the ocean, in full view and proximity to his crotch, or above him, wherein one might justify his direction away from the body to a casual stroll admiring the mountains. "Which way should we go?" asked boy AJ. "Above," declared girl AJ, correctly. And with that the two bravely went off around the naked man. Boy AJ fixed his sight on a cave up and to the right of the man and made his way through the hot sand. His eyes were strained and his feet hurt but he made it safely to the other side without harming his American humility. But where'd his wife go? He looked back and there in the hot sand just feet above the naked man was girl AJ, seated in the sand putting on her socks in shoes in full view of the nudist. Boy AJ then saw everything, his weathered hose coiled up on his red belly. The moments passed like hours as she tied her laces, but finally Girl Aj had her shoes on to master the hot sand and they were free. They turned and headed towards their destination, but something was wrong about the old lady to their right and the old man to their left. They were naked, all of them; a shameful nightmare of American Protestant culture on every side. So they got over it and went swimming and it was quite nice. The ferry ride home turned out to be a surprise hit as well because it allowed us to see some of the wild and beautiful untouched southern coast. We're excited to go back to that area when we stay at the boat only accessible Loutro! All in all we got back at 8:30, walked over 16 miles, had some sore calfs, but it was definitely a worthwhile experience. With much love, Aj & aJ
2 notes
·
View notes
Text
Neighborhood #12: Atgāzene

Name: Atgāzene Meaning: Named after an old German manor Area: 0.75 km2 (58th) 2014 Population: 1613 (42nd) 2008 Population density: 1647 people/km2 (28th) Distance from Riga Central Station by public transit: 8 minutes (train) Public transit lines: #10, #42, and #56 busses; #27 trolleybus; Rīga-Jelgava train line Places of interest: Atgāzenes iela Where to eat: Lulu Pizza at Vienības gatve 113 Date of Visit: March 26, 2017
Last month Līga and I, along with our friend Justine from America, journeyed out to the southern edge of the city to visit Atgāzene, Rīga’s tiniest neighborhood. And when I say tiny, I mean TINY; at just three-fourths of a square kilometer, it’s 25 times smaller than Kleisti (the city’s largest neighborhood), and makes up a puny 0.35% of the city’s area. The neighborhood is shaped like a nearly perfect quadrangle, resembling something like a shard of glass. Vienības gatve (Unity Avenue, the road to Jelgava), Kārļa Ulmaņa gatve (named after Latvia’s pre-WWII president), and the Rīga-Jelgava railroad make for logical boundaries, but the neighborhood is so small and has such few major points of interest that its often included as a part of Ziepniekkalns on websites like ss.lv for simplicity’s sake.

From above, its clear to see that there are two major sections divided from one another by Graudu iela. The slightly larger northern part is almost exclusively residential and made up of smaller houses, whereas the southern part consists mostly of Biznesa Augstskola Turība, a few shopping centers, and the territory of an old sanatorium which now makes up a mixed-use business park.

Justine, Līga and I decided to take advantage of the neighborhood's two train stops, so we boarded a train to Jelgava at Central Station and then got off just two stops later at the “Atgāzene” station less than nine minutes later. I was very excited to finally get off at this stop, as I had passed it by thousands of time on the way to and from work in Jelgava but had never had the opportunity to see this area up close. The original historic wooden station burned down in 2007, and it was replaced by this minimalist “box” station. Thankfully what they rebuilt isn't as gaudy as the shipping container of a station that was put up in Imanta, but it's still a shame that the history was lost.


We started down the appropriately-named Dzelzceļa iela (Railroad street). Like many of the small roads in this neighborhood, it was unpaved and lined with wooden fences of various colors. The houses here were mostly all two story or shorter, with a few exceptions. The only non-residential building we could see in this part of the neighborhood was a gated kindergarten with a sign that politely asked drivers to close the gate after passing through.


After a short walk we were at Kārļa Ulmaņa gatve, the northern boundary of the neighborhood. Here the four-lane thoroughfare crossed the train tracks via a simple concrete beam bridge. The wide walls underneath had given some local graffiti artists (and simple vandals) the perfect canvas for some artwork, although what we found here wasn't as impressive as that we've seen elsewhere throughout the city. The three of us walked up the stairs to the bridge and then went out to the middle to get a view of virtually the entire western part of the neighborhood along the train tracks. From here you could also see the towers of Panorama Plaza in nearby Pleskodāle, Rīga's fifth tallest structures.


We now started towards the neighborhood's easternmost edge along Vienības gatve, walking past a historically significant oak tree and a Harley Davidson dealership. All of these thousands of times I had passed by either on the train or bus to or from Jelgava, and I had never known there was a Harley dealership here. The building had some very cool graffiti art on the back, with a “Riders of the Storm” theme in shades of only orange and black. It took only about two minutes to get to Vienības gatve.


Next we took a right and continued down the street a bit until we got to Ģimnastikas iela, where we took a right and walked back towards the station. Before this, we passed an advertisement for Hesburger, Latvia's version of Wendy's, and the headquarters of Tilde, a Latvian translation software company. At the corner of Vienības and Ģimnastikas was one of the country's 126 Fenikss casinos. Although Latvia has very few destination casinos ala Vegas or Atlantic City in the US, there are countless small casinos operated by multi-national chains that can be found in shopping centers, the bottom floors of apartment buildings, and nearly anywhere else imaginable. Although in general I dislike seeing these due to the social problems that I know they aggravate, this one at least had a cool wild west vibe to it compared with the hundreds of soul-crushingly depressing and anonymous ones.


Walking back towards the train tracks down Ģimnastikas iela, we passed what claimed to be the city's best hotel. Knowing nobody who has stayed there I can't confirm nor deny that claim, so if you're looking for a place to stay a night in Rīga you'll have to decide for yourself whether or not to take their word for it. Along the streets were more brick and wooden houses built at various times over the past few hundred years. Although we didn't know until it was too late, we passed by (and unfortunately didn't take a picture of) a house that the legendary Latvian poet couple Rainis and Aspazija lived in for a few years during the 1920s at Dīķa iela 11. We did, however, get a pretty cool shot of one of the new red and silver trains passing by at the end of the street. As we've seen in a few other places, someone took the time to transform an electrical box into a green totem pole using spray paint.


And we were virtually back where we had started. We had now seen the northern third of the neighborhood and had followed roughly this path:

We continued south along the tracks before coming to a small stream that required crossing. It was a bit strange how the stream seemed to intentionally go through this part of Dzelzceļa iela completely uncovered, as I can imagine that after a lot of rain it would be a bit difficult to drive through. As we walked, we got a few more nice train pictures, first an electric passenger one and then a pair of diesel engines hauling freight.


We now hung left onto Diķa iela, where we passed by Rīgas Igauņu Pamatskola, a primary school opened in 1989 which specializes in Estonian language and culture. At the intersection with Atgāzenes iela there was a traffic mirror to help make the narrow crossroad a bit less dangerous, as well as a small house with a guard dog. I liked his style — unlike a lot of small yippering yappering poodles, he simply just stared at us calmly and silently as if to say, “we both understand that I'm an intimidating rottweiler and that you aren't going to come over here, so let's skip the barking part and keep it at that.”


We turned down the cobblestone Atgāzenes iela, walking by some more houses before briefly wandering onto the grounds of the Igauņu Pamatskola. We also passed by what seemed to be one of Rīgas Satiksme's (the city's public transit company) offices and another traffic mirror that provided the opportunity for a selfie of sorts.


Of all the streets in Atgāzene, this was probably the most scenic in terms of the cobblestones and colorful wooden houses. One of the houses had a rare Soviet-era sign with the street name in both Latvian and Russian. It's fitting that the street is named “Atgāzenes iela,” because it really sums up the feel of the entire neighborhood quite well. After a short walk we were back at Vienības gatve.


Back almost exactly where we had turned onto Ģimnastikas iela, we again continued south towards Rīga's city limits. We passed more old brick and wooden houses before coming to a large business park called 87 Vienības gatve, which consists of the old buildings from an 1890s sanatorium. Unfortunately, the gate to the business park was closed since it was a Sunday, otherwise we would have wanted to walk around the park and take some pictures since it looked quite nice. Before the intersection with Graudu iela, we also saw a cool wire frame sculpture of a hand holding a paintbrush outside of a home improvement shop as well as some very colorful bird houses.


On the right side of Graudu iela we passed a discount goods store, a music school, and a floral therapy firm. The left side of the street was dominated by the buildings of Biznesa augstskola Turība, known in English as “Turība University.” This private college is the largest business school in the country, and although it used to have an unfair reputation as a “pay for a degree” type of school, all of my friends who have gone there have told me that they were quite satisfied with their studies. The university even paid for its own infill train station, a great deal for both the school in terms of convenience for students to travel there and for Pasažieru vilciens since aside from the Jelgava, Riga and Olaine stops, its one of the ones the people most consistently use.


Since Ģimnastiskas iela, our route had looked like this:

At this point we were all quite cold and hungry, so we wandered down Bikstu iela to the shopping center anchored by Maxima XX where we found a “Pica Lulu,” one of the city's most popular pizza chains. Of all of the city's pizza options, Lulu is one of my favorites. They do pizza dough very well, but like most places in Latvia, the tomato sauce is far too sweet. In fact, I once got into an argument with my students over whether there was any difference between ketchup and tomato sauce. Sadly, for most of Latvia's tomato sauces there is very little difference (aside from Rundāle, which is the only one I ever buy). I absolutely loved the wallpaper where we were sitting. It's nothing special for pizza places to have stylized urban scenes on the wall, but what I love is that instead of showing Paris or New York or some other cliched global city they have a stylized Soviet block house similar to the ones found all throughout the city (and especially the adjacent neighborhood of Ziepniekkalns). Many people dismiss Soviet block housing as a simple eyesore best to be ignored, so I like how they not only acknowledged it but did something cool and creative with it. Lulu has 24 hour delivery all throughout the city, so if you have a pizza craving at two in the morning you know who to call.


After having eaten and warmed up, we continued down into the final stretch of Atgāzene. Walking back to Vienības gatve, we passed a fireworks shop and a McDonalds before coming to a Rīgas Satiksme client center which seems like also used to be the terminus and turn-around for a trolleybus line. Next to the loop was a large stone marker that used to demarcate the city's border. It was a bit further to Ābolu iela, the current southern border of both Atgāzene and Rīga itself (at least on this side of Vienības gatve).


We turned right onto Ābolu iela (Apple street), the southern boundary of Atgāzene, as well as one of Rīga's borders with the town of Mārupe. Although the left side of the road was technically Mārupe and the right side Rīga, it would be virtually impossible for a casual passer-by to guess that there was a boundary here as both sides look geographically and architecturally identical. At the end of the road, we took a right and started heading back towards the BA Turība train station where we waited just a few minutes before the yellow and blue electric engine rolled up to the platform to take us back home. In that time that we waited, Līga took pictures of some snowdrop flowers that had just barely started to bloom. Despite the grey and cold, there was hope that spring was just around the corner (or at least so we thought).


Our final route had gone like this:

Although it was so small, Atgāzene really did have a different feel to it compared to the surrounding areas with its small houses, dirt roads, and urban feel to it. While nearby Bieriņi and Mārupe also have similarly small houses, they feel much more suburban whereas Atgāzene has this certain sense to it where you really know that you're in the city. That's not to say that it's not a calm and peaceful place by any means, and I imagine that its 1600 or so full-time residents enjoy life there. If you're looking for a low-key and tranquil neighborhood to have a nice walk through, this might be an option: just make sure to take the train.
A few random observations:
Thanks to its minuscule size, I feel that this is the neighborhood that we were able to explore and document in the greatest detail. There were just a few streets that we didn't walk down in entirety, and those that we didn't we were able to see virtually end-to-end from where we were standing. Compared to this, our walk through Kleisti was quite incomplete. It feels a bit presumptuous to say that “I've seen all of Atgāzene” after just one visit, but in this case that might actually be possible.
For all of the massive neighborhoods in Rīga lacking passenger train service (Purvciems, Bolderāja, Āgenskalns, ect), Atgāzene is almost comically overserved by rail transit. With 2.6 stations per square kilometer (yes, sadly I did the math), I'm going to go out on a limb and say that it's the neighborhood with by far the most train stations compared to its size. Better yet for rail commuters, the Rīga-Jelgava line is one of the busiest routes in the country, with trains in either direction at least once an hour and often more depending on the time of day.
The April that came just a few days after this walk was one of the strangest Latvia has ever seen. We had a lot of false starts to spring, followed by bursts of snow (!) at the end of the month. One one hand I feel bad that my Fulbright colleagues (including Justine) probably got a bad impression of Latvia weather-wise this year with a green Christmas and a white Easter, but on the more selfish other hand I've barely had any seasonal allergies this year.
Special thanks to Justine for exploring with us, who was a very good sport despite the cold and cloudy weather!
And that does it for Atgāzene. The next two neighborhoods that we just visited, Beberbeķi and Bieriņi, were done so on warm and sunny days, so the pictures for those will look far less gloomy than Āgenskalns and Atgāzene did. Till next time, let's hope that spring is finally here to stay, and make sure to wish Latvia good luck in the International Ice Hockey Federation World Championships in France and Germany over the next few weeks!
Nākamā Pietura: Beberbeķi!
#Atgāzene#Rīga#Latvija#Atgazene#Riga#Latvia#urban exploration#urbanexploration#UrbanPhotography#urban photography#rainis#Aspazija#trains#railroad#latvian trains#vilciens#dzelceļš#Латвия#Рига
2 notes
·
View notes
Text
Everest Base Camp Trek Guide
Reaching Everest base camp is being the goal of thousand of adventure trekkers from all over the world. There is a magnificence view, trekking through this area and experience with Sherpa culture and lifestyle.
This is a very helpful online guide to Everest base camp trek. You will find all the information on it to trek safely and successfully to the base camp.
I am providing general information to the Everest base camp trek, which guides you to plan well the Everest base camp trek.
About Everest Base Camp Trek
The classic Everest base camp trek leads through the Khumbu valley, enjoying the beauty of the Sagarmatha national park and takes to the view of 4 highest mountains above 8000+ meters. These highest mountains are Everest (8,848m), Lhotse (8,516m), Makalu (8,470m) and Cho-Oyu (8,201m).
This Popular trek discovers and follows the footsteps of Sir Edmond Hillary and Tenzing Norgay Sherpa as you trek from Lukla to EBC.
It is a teahouse trek so you will stay in some of the highest villages in the world. You may explore the local culture and tradition of native Sherpa people and learn about their historical connection with the mountains.
Visiting Kalapatthar (5,550m) and enjoying with 360-degree panoramic view on the trek is one of the main attractions.
Exploring the various old and historical Buddhist monasteries with some other monuments and learn about religion, culture and festivals are some other experiences of the trek.
Everest base camp trek starts with a scenic mountain flight from Kathmandu to Lukla. This half an hour flight offers the scenic mountain view of different Himalayan ranges. After landing at Lukla, you trek to Phakding which is a short day trek.
Crossing some different suspension bridges and enjoying with the view, you keep continue your trek to the Everest base camp passing Namche, Tengboche, Dingboche, Lobuche, and Gorakshep. It takes 8 days hike from Lukla to EBC including 2 rest days for altitude practices.
You trek back to Lukla in 3 long days trek after visiting Kalapatthar and fly back to Kathmandu after spending a night in Lukla.
Everest Base Camp Trek Itinerary
Everest base camp trek is 12 days itinerary which is all the trekkers follow. But you may make one day shorter or a few days longer as your fitness and attitude practice.
I suggest following the normal itinerary or even making it longer to avoid the altitude problems. Here is a detail itinerary overview day by day for your easiness.
Day 1 Fly to Lukla and trek to Phakding
You will have an early morning flight to Lukla from Kathmandu today. The flight takes 30 minutes which offers a beautiful view of scenic Mountain View, different villages, and beautiful landscapes. Once you land on the Lukla airport, then you start your trek to Phakding crossing Chheplung, Thadokoshi and Ghat villages. It is a short day trek to Phakding which takes you around 3 hrs.
Day 2 Trek from Phakding to Namche Bazaar
This is a long day trek to Namche. You ascend altitude about 800 meters today. The trek is about 6-7 hrs long crossing 5 different suspension bridges on the same river. You will enter the Sagarmatha national park from Monjo where you check-in. After having your lunch in Jorsalle, you trek another 3 hrs to Namche Bazar.
Day 3 Acclimatization rest day in Namche
This is your first altitude practice day which is mandatory before reaching the base camp. You hike up to Everest view hotel passing the highest airport (Syangboche) in the Khumbu region. It takes 2 hrs to reach to Everest view hotel. After enjoying the view of Mt. Everest, Lhotse, Nuptse, Amadablam and other beautiful mountains from here, you hike back to Namche Bazar or may go to Khumjung village (the biggest village in the region).
Day 4 Trek from Namche to Tengboche
It is a beautiful day today to trek to Tengboche. You will enjoy the view of the same mountains which you already have seen during the acclimatization hike. Trekking through a nice and clear trail about 2 and a half hours, you reach Kyanjuma from where the trail to Gokyo divides then trek downwards to Phunkitenga. Here you stop for your lunch and ascend 2 hrs through the forest to Tengboche. You may visit a historical old monastery here in the evening.
Day 5 Trek from Tengboche to Dingboche
After a scenic view from this hill in the morning, you trek downwards to Deboche. Then you cross a suspension bridge and climb for a while to Pangboche. Your next stop for your lunch is Somare which takes about an hour's walk from Pangboche. Now, you already cross the tree line and be in the open area. You feel less oxygen in the air in this area while trekking to Dingboche.
Day 6 Rest day at Dingboche
This is you’re the second-day acclimatization rest day. Today, you hike up to Nangar-Tsang hill which takes about 3 hrs. You will see the fourth highest mountain of Nepal (Makalu) from here including regular mountains Lhotse, Nuptse, Amadablam, Thamserku and more. Then you hike back to the lodge in Dingboche.
Day 7 Trek from Dingboche to Lobuche
Today, you hike through a ridge keeping Pheriche on your left. You trek about 3- 3 and a half hours to Thukla (Dhukla) where you stop for lunch. After lunch, the trail ascends to Thukla's top. Here you see lots of monuments of dead climbers. From the top of Thukla, the trail goes easy another hour to Lobuche.
Day 8 Trek from Lobuche to Everest base camp via Gorakshep
This is your important day because you are reaching your goal. You need to start a little bit earlier in the morning. First, you trek to Gorakshep which takes you about 3 hrs and you take some quick lunch. After your quick lunch, you hike to Everest base camp leaving all your stuff at the lodge except your needed warm equipment. It takes 2- 2 and a half hours to reach base camp and the same to come back so it is a long day trek.
Day 9 Hike up to Kalapatthar and trek back to Pheriche
This is the day to see incredible Everest Himalaya. You start your hike very early morning with your flashlight to Kalapatthar. Hiking to the Kalapatthar takes about 2 hrs and an hour back. You will enjoy a 360-degree view of the Everest Himalaya from Kalapatthar. Then you trek back to Pheriche following the same way until Thukla.
Day 10 Trek from Pheriche to Namche Bazaar
Today is another a long day trek from Pheriche to Namche. It takes around 7-8 hrs but you feel comfortable to walk in the lower region. You will come back to the trees line after Pangboche and will be easier to breathe. This trail will be familiar to you because you already have been passed along the way up to the base camp.
Day 11 Trek from Namche to Lukla
This is also a long day that you took 2 days to come up. It takes around 7 hrs to Lukla from here. You will stop in Phakding for your lunch and trek another 3 hrs to Lula with ascending trail. This is you’re the last night of mountain stay so you may celebrate your trek here.
Day 12 Fly back to Kathmandu
Keeping a beautiful unforgettable memory of the Everest base camp trek, you will fly in the early morning from here to Kathmandu. After a peaceful mountain stay, you will arrive in the noisy city missing your family and home.
Everest Base Camp Trek Distance
Everest base camp trek round trip from Lukla to Lukla is about 130Km. It looks easy from day by day according to the map.
8 Days trek from Lukla to Everest base camp is 68 Km and return to Lukla from here is 62 Km. 8 Days including 2 rest days up to the base camp is a normal and recommended trekking itinerary for everyone. Trekking camps are longer the first a few days and descending back from EBC. Doing the whole 130 Km in 11 days is fairly enough.
Everest Base Camp Trek FAQs
Before planning a trek to the Everest base camp, you may search for some solution to frequently asked questions. It helps you to plan well your successful Everest base camp trek. Here are some regular questions and their answers to support to prepare your trek.
How hard is Everest Base Camp Trek?
Everest base camp trek is not an easy one. But this is a gradual elevation gain trek because of some days trek in above 4000 meters with low-level oxygen. The elevation makes difficult to walk with a hard breath.
Flying from Kathmandu (1350m) to Lukla (2,856m) is already too high and feel the altitude. You will trek day by day slowly up to base camp (5,364m) and Kalapatthar (5,550m). So It is a moderate level trek by fitness and strenuous trek with gaining altitude and its effect.
How much does it cost for Everest base camp trek?
Everest base camp trek is a teahouse trek so you don’t need to carry foods and tents and don’t need much manpower. It is not an expensive trek compare to the trekking in other countries. You find good deals through the internet with different costs but 600 USD to 1300 USD is a fairly good price according to the service type.
Do you need a guide and a porter to Everest base camp trek?
My suggestion is better to hire a guide and a porter for the trek. You may do independently too but you may be in pressure every day to find the right direction and accommodation. If you are trekking individually, you need to research yourself about everything in Everest but if you have a guide he may provide all the information.
A porter plays a vital role to make your successful Everest base camp trek. Carrying such a heavy load and enjoying nature is not a joke so if you have a porter, you may fully enjoy nature and a happy holiday.
When is the best tie for Everest base camp trek?
The best time to trek to the Everest base camp is from March to May in spring. It is the climbing season for the Everest expedition so you see lots of colourful tents of the climbers at the base camp.
Visibility is nice and clear during these months. Weather is stable and dry in this season and the forest will be colourful with blooming rhododendron in the lower area.
September to November in autumn is the highest season and good to trek to base camp. This season has flooded trekkers all the way. Winter has still a nice view but this is a very cold season and summer from June to August is not recommended for this trek.
Do you need a trekking permit for Everest base camp trek?
Yes, you do need the trekking permits. You are going to do a trek inside to the world heritage site of UNESCO (Sagarmatha National Park) so you need to have a national entry permit and Pasang Lhamu Rural Municipality entry permit. The Sagarmatha national park entry permit cost you 3000 NPR and Pasang Lhamu fee 2000 NPR.
Will you get altitude sickness during Everest base camp trek?
If you follow the itinerary having 2 acclimatization rest days for altitude practice it may not effect. But you need to walk slow, not keep thinking about altitude, drink plenty of clean water, keep warm yourself all the time should be fine.
You lose your appetite, difficult to sleep, getting tired while resting, headache, try to vomit, nausea, and some other symptoms, better have one more day rest or descend as soon possible.
What should you pack for the Everest base camp trek?
The important thing is having well equipped for the Everest base camp trek. You can hire some things which you don’t use again after the trek in Kathmandu or can buy all the gear. Here is a list of basic equipment which you need for the trek.
· Thermal Layer
· Trekking Shirts
· Fleece Jacket
· Feather Jacket (Down Jacket)
· Hiking Trousers and Shorts
· Waterproof Jacket and Trouser
· Sun Hat
· Woollen Hat
· Buff
· Windproof Warm Gloves
· Hiking Boots
· Sport shoes/Sandals
· Some pairs of Trekking Socks
· Duffel bag/Rucksack
· Daypack
· Rain Cover
· Sleeping Bag
· Trekking Poles
· Sunglass
· Head Torch
Do I need insurance for the Everest base camp trek?
Yes, you need to have travel insurance for the Everest base camp trek. Before buying insurance, you need to be sure if it covers up to 6,000 meters and any emergency evacuation service includes one.
Accommodation and Food in Everest Base Camp Trek
Everest base camp trek has a lot of choices of accommodation. You can get a private room every place and get the attached bathroom in some places. If you would like to have luxury accommodation during the trek, it is also possible but it cost you expensive. A place like Tengboche will be difficult to get accommodation if you have not booked in advance.
Food in the Everest base camp trek has lots of choices that you can choose from the food menu. Also, they cook local food if you would like to taste the Nepalese and Sherpa food. The cocks are trained in most of the lodges and food items are almost the same.
You may buy bottled water in each place but as you go higher, the price goes higher. You may drink normal tap water using purification tablets, drops or sterilizers. Also, you may bring eco-bottle which filters everything. Remember to bring two bottles with you to feel the water and use purification then you always have ready water to drink.
Everest Base Camp Trek is one of the most popular treks in Nepal than entire treks in the Nepalese Himalaya. It has a great number of natural and cultural attractions. I hope this information helps you to plan your Everest base camp trek and learned something about the trek before you jump on. The trip starts here: https://www.frolicadventure.com/everest-base-camp-trek
0 notes
Text
Not exaggerating. Each word in this photo story about my Spiti travel is true and have lived every moment along with the other women in our group.
Let me start with Hikkim, the highest post office in the world. I have the post cards in my hand to send to my loved ones.
Hikkim post office , claims to be the highest in the world
8th day of our Spiti valley tour; date being 17th August and am with my best closeup smile even though a night before I did have weird feelings while writing these postcards from Langza. Firstly because in the world of emails and whatsapp, I was planning to send postcards that too from the top of the world called Hikkim.
And secondly I was thinking a lot as if the messages on the postcards were my last messages; the most important ones & the only things that I needed to say to Sudiip ( my husband ) & Aashvik (my son). At a height of 14500 ft, Langza does make you feel like that, I guess.
Langza village – For sure one of the most exotic places to spend time for introspection
This is Langza at a height almost equal to that of the heaven. Max 8 to 10 houses surrounded by mountains on all sides and a Buddha statue staring across the Spiti valley from a shoulder of the ridge above the village.
Luxurious homestay after a 50min uphill winding ride to this remote village, super tasty food and a phone (BSNL land line) to talk to…Wow! And ofcourse, making a call from the roof terrace of this Langza homestay under the cold starry night, to talk to our loved ones was truly offbeat:-)
This is Sapna and myself having one of the most heavenly soups to beat the cold at Langza homestay after our phonecalls from the roof
Langza was our highest stay but not the coldest. Coldest in the region is Komic village and you can see the highest restaurant board below. Spiti valley claims all the interesting destination selling titles…highest post office, highest restaurant, the last village, the only house, the only dhaba , the only souls and so on.
This is me @ world’s highest restaurant in Komic (Shivering inside, posing outside)
Anyway..from Langza, Hikkim & Komic, we were to go to Chandratal via Kaza. This was almost the end part of our journey which had started at Shimla on 10th Aug and was to end on 19th Aug at Manali. However, by afternoon of 17th Aug the story, the scenes, the sporadic showstoppers , everything changed.
Before taking you to the climax of the story, let me show you some glimpses of our journey so far and introduce you to the characters of our story.
All of us @Shimla, the first day of our women tour to Spiti valley in Himachal
Here we are. This was taken at Shimla Mall road in the evening. Sapna, Bharati, Asha & myself ( right to left). Sapna’s history is interesting she was in Kerala when the floods happened, she was in Khardungla Leh when the snowslide happened and now she was in Himachal when an orange alert was indicated.
Bharti’s last travel was a decade back to Kashmir. She had left work, two daughters, two dogs and a worrisome husband behind to be on this women tour that too to Spiti in Himalayas.
Asha, the third lady in the pic was on her third women trip within a year. Quite particular about the food and stay (disliked tents), she didn’t know the adventure that awaited her.
All women tour to Spiti valley in Himachal- Some flashback
Shimla to Sangla
This slideshow requires JavaScript.
Sangla to Kalpa
This slideshow requires JavaScript.
Kalpa to Tabo
This slideshow requires JavaScript.
Tabo to Dhankar and Mudh
This slideshow requires JavaScript.
Oh ! I have to talk about Dhankar experience here.
The monastery that you can see above is Dhankar, built on an elevation overlooking the confluence of the Spiti and Pin Rivers – one of the world’s most spectacular settings. And the village of Dhankar is surrounded by lotus petals like structures which makes it look like the spiritual centre or the place of awakening literally.
I guess we were just short of one more minute of meditation at Dhankar for our awakening to know what was coming.
To compensate, Sapna and I also decided to trek to the holy Dhankar lake for remaining enlightenment. Perched above the Dhankar village and Gompa, Dhankar Lake lies after a steep trek of 45 minute to 1.5 hr (depending on what goes on in your head and body).
From a distance, it did seem simple but that was an eye wash. To add, I also decided to trek in sandals given that I had only seen 20% of the path from a distance and wanted to avoid bothering our driver with luggage shifting to take my shoes out.
Result? Every time I looked behind to assess the descend part while I was climbing up the mountain, the only thought in my head was…
‘Khudi ko kar bulad itna he koi bhi pahaad chad jaaye aur phir khuda tujhse pooche, gadhe chad to gaya hai ab utrega kaise’
Anyway, we did finish the trek somehow and anyhow despite all body odds. And to treat ourselves for the big win we even ate 2 extra nutella chocolate pan cakes at lunch just to keep our weight, fat and sugar levels intact.
By evening we were at Mudh and this is me having tea. I thought this pic should be the cover page of my book someday.
Sipping green tea in the evening at Mudh
Mudh lies at the end of motorable road in the Pin valley. As you can see, you get totally isolated with tea in hand and views in front here. No phone no connection, only introspection.
Pin Valley views, then Mudh to Kaza
This slideshow requires JavaScript.
Beautiful right? Pin Valley was quite scenic. I wanted to stop for pictures at every turn but our driver didn’t really like to be left behind other vehicles on these roads.
The meditation and introspection may not have worked for me but the law of attraction did work at this point, and we got a tyre puncture. Courtesy that, I clicked these and we even reached Kaza on time.
Kaza was the biggest town and the biggest market. We ate (from Thenthuk to Teemo), we shopped (from all kinds of souvenirs to household stuff) and we made calls (from our family members to maids to dogs). Yes, atleast BSNL worked !
Second day, from Kaza we drove to see Key and Kibber intentionally and Tashi gang unintentionally. Let me explain how? Now is the time to introduce you to the antagonist of the story, the showstopper, our driver Mr. Chaman.
He looks daring here but the pic is misleading 🙂
Chaman reminded me of the monsterjob commercial , ‘Caught in the wrong job. Thin, tall, and paranoid. Scared for a driver’s profession and usually expected things to go wrong from puncture, to bad weather to pushing the vehicle to getting stuck in Spiti.’ Would tell us ,‘ Jo driver ka sune to sukhi aur jo na sune to dukhi’
This day, contrary to Chaman’s wish, I asked him to drive to Ghette after Kibber & Key monastery for the views. Chaman was already reluctant and then the weather also decided to play spoilsport.
It started drizzling.. After 30 min of driving, we found a vehicle on the road waiting for its trekkers to return. Instead of asking,’ How far is Ghette?’ Chaman asked, ‘How far’? The fellow said,’ 6-7 kms more’.
Ironically we had already crossed Ghette and the fellow meant Tashi Gang village from there. After many twists and turns we finally reached Tashi Gang on top of the mountains. One small camp around and two souls..
Chaman decided to return immediately to head to Langza but the road had become wet. As we tried to move ahead in speed for inclined roads, the tyres began to lose grip and the ground got messy & slippery. This was too much for Chaman’s tolerance. He began,’ ab kar lo apna intezaam yahin par’ and stopped the car.
Before the chauvinist in him could reach it’s heights, I gave him back. But ya, to make him drive we waited until his enlightenment when he saw other cars coming from either sides being safely driven without fear.
Reached Langza by evening and we missed Ghette even on return.
Langza to Chandratal via Kaza
Chandratal lake on a cloudy rainy day
Camping at Chandratal – Fancy no? This was supposedly our last night stay in our choicest list of govt forsaken places.
Govt forsaken because we are talking about the merciless Himalayas in Spiti Valley, Himachal. These places are highly landslide prone . It’s not a border area so no development, no roads & no Army around to help.
Telephone connection is a luxury. BRO ( border road organization) wakes up only at 11 am to start the work and that too after days of reminder provided one is able to send the information in first place. Afterall, not everyone carries a satellite phone.
We were glad, after Chandratal we would reach Manali soon and then fly back to Bangalore.
When we reached Chandratal, it started raining. Instead of going to the camp first, we thought of visiting the Chandratal lake. It was at less than 2 kms by car and then a few hundred meters by walk. To add to the spice in life, Sapna’s stomach started to hurt. She went to mark her territory for obvious reasons near the lake and realized it was a stomach infection.
With difficulty, we returned to the tent. It was damn cold, very difficult to even get out of the bed. The drizzle turned into a downpour in sometime.
Before dinner, Chaman came with his driver friend called Amar to give another bad news. ‘Manali road is closed due to cloud burst. No one can go ahead, we may have to go back to Shimla from where we started.’
Was it a joke? We had taken 6 days to reach Chandratal from Shimla. I said, ‘we will see tomorrow’.
I knew that the route from Chandratal to Manali was already at its worst and Chaman had been fearing to drive on those treacherous roads since beginning so I wanted to decide based on what other normal drivers would do in the morning.
Now was the time for some genuine god remembrance. Before sleeping, I recited Hanuman Chalisa and prayed for some divine intervention. That night I couldn’t sleep well due to cold and weather anxiety.
Halfway through the night, I woke up to someone’s singing outside of our tents ,’ Snowfall snowfall.‘ Hum sab phas chuke hain, jaldi utho bhai log.’ And this was the scene outside.
https://www.traveljaunts.in/wp-content/uploads/2019/09/Chandratal-day-part-1.mp4
Some were excited to see the snow, some were worried and drivers like Chaman were shit scared. We didn’t know what was the right thing to do. Go towards Manali or go back to Shimla via Kaza or stay where we were.
Within minutes, some of the vehicles started to leave Chandratal. After some group discussion with other drivers, Chaman too instructed us to get into the car . The idea was to atleast try and reach the village on the highway called Batal. Chandratal is connected via link road from the highway so if it takes 2-3 days to clear highway, the link road takes forever. We also got to know that last year in Sept, within 3 days, the place had received feets of snowfall and people were rescued with great difficulty. Even the tents at the camps had fallen down.
With tension in mind and around, we sat in the car. Chaman made sure that our vehicle was amidst other vehicles. We started but hardly a few meters were crossed and Chaman realized that the vehicle wouldn’t restart once the engine is shut down. The vehicle was stuck.
The snowfall was increasing. The tension started to build up not only within our vehicle but also among others behind us. Overtaking was out of question on such roads. People wanted to get to the highway as soon as possible before the falling snow would completely make it impossible and too risky to drive.
The camp owners of Chandratal had the best idea of driving on such roads. They abused our vehicle and the driver first and then tried to help but in vain. Our vehicle had to be pushed aside so that the remaining vehicles could pass.
We were asked to shift to other vehicles. This time, I was in slippers not even in my sandals since my shoes had got totally wet the previous day at lake. With 2 heavy bags in hand, slipper on feet and confusion in mind, I fell flat on the snow. All fine, just checked … the bag was open and the wallet was missing. For sometime, I tried to look around then calculated my survival chances and left the idea of money. That was my true awakening 😉
After all these back and forth actions, getting on a vehicle then getting down, walking on snow and in water, pushing the vehicle and then pulling it aside, we were told that it was too late now. Snow was too much and it was risky for vehicles to go ahead. Even the vehicles that had gone ahead were stuck.
So, we had to walk back to the tent.
https://www.traveljaunts.in/wp-content/uploads/2019/09/Chandratal-day-part-2.mp4
It was state of delirium for me. Bharti was down, she decided not to enter the camp but wait outside. Asha too wasn’t in great shape due to her half hearted sleep in the tent last night. The only person who could take a nap in such chaos was Sapna.
Being the poor organizer of this tour, I decided to walk again on the snow in my slippers to talk to the one man police near our camp area who had the satellite phone. Asking for phone was futile. I was told,’wait till evening for information from Kaza, anyway the camps have enough supplies for next 30 days.’
Chandratal after the snowfall – within hrs goats had nothing left to eat
Luckily, sun god came to give some respite. By noon, the snow started melting, the road cleared a bit and Chaman’s vehicle too started with some push and pull by other vehicles. Despite being not sure about the vehicle or Chaman, we still took chance. Lost wallet was the last thing on my mind, I was only saying ,’ God I surrender to your will.’
Chaman stopped the vehicle only at Batal, no breaks . And hurray we were alive!
In this close to a 30 minute journey from Chandratal to Batal, we had easily crossed 5-6 water streams, ditched hundreds of falling stones on the road due to the snow meltdown, skipped a few breaths and missed God like never before.
At Batal, we got to know that Manali road was closed due to couple of landslides ahead. No one had the exact idea as there was no communication. Since it was already evening, none of the vehicles could take chance of driving ahead so the locals suggested to stay put at Batal for the night.
This news made life worse for many sensitive travelers. They all had just realized their own life’s importance for their families. This is another awakening that happens in such trips. You not only start loving your own life but also start fantasizing about how important you are for others and what they would do without you.
Though there were many who cried in Batal but the main character of this melancholy scene was a bong women from Kolkata, a solo traveler. She even anticipated that her father would get hospitalized and her husband would reach asylum without any news of her. Commendable! Infact, she even made sure that everyone on this route from fellow travelers to locals who face such things every year knew about her painful story.
I couldn’t afford to express anything other than arrange for the food and tents as the dependency was on one camp, one shabby guesthouse and two small dhabas for so many of us stuck at Batal. It was already 18th Aug and in no way we could catch our flight from Chandigarh on 19th, when Manali itself was a distant dream.
Good thing, in Batal I found my wallet inside the suitcase. With money in hand now, I bought warm socks and gloves to survive another tent night. Thankfully the highway dhaba there, did keep all this stuff too.
Morning view from our tents at Batal the next day
Next day, JCB was supposed to come from Kaza to clear the highway. Till 11 am, there was no scene but vehicles started to move ahead to wait near the landslide. This route from Batal to Chantru was the worst and has always been.
We asked Chaman if the vehicle would go. Chaman showed confidence for the first time,’ I won’t stop the vehicle till Manali’. Mountain Dew or Old Monk effect, don’t know.
Spana was worried that our vehicle shouldn’t be the last vehicle on road since if we were to get stuck for some reason, there would be no one behind to help. We did start before others but just a few meters into our mission and Sapna realized that she had forgotten her bag.
We had to go back. Fears too come true. Now we became the last vehicle on the adventure. As we continued, some 1.5-2 kms ahead, our vehicle took its last breath and stopped for the final time.
Sapna and I immediately got down from the vehicle and started waving and screaming at the vehicles in front of us. There were two ahead of us but only one stopped and agreed to help. They were some boys from Delhi who were on this road trip in a zoom car.
We left the luggage & our vehicle and Chaman there itself and somehow fitted ourselves in the other vehicle to get to the landslide point where we could find help from others.
As soon as we reached, to my luck I found one vehicle which was going empty till Manali. It belonged to Mr. Shiv Raj Bodh, the owner of Moon lake Camps, Chandratal. He was coming from Kaza. The biggest helper and the God send person for us.
He was the hero of this scene. He even agreed to come back with me to the place where our vehicle was stuck to get the luggage while others waited at the landslide point.
By noon, the road opened for the adventure ahead. Bharti and I got into the backseat of Mr Shiv Raj Bodh’s 4 by 4 vehicle along with our luggage . Sapna and Asha stayed in the same zoom car with Delhi boys.
The route from Batal to Chatru was nothing less than a dream sequence, it definitely crossed all limits of an unforgiving adventurous terrain. On top of that Mr. Shiv Raj bodh was the Michael Schumacher of Spiti region.
Throughout, I kept reiterating the movie dialogue from Jab we met movie
‘ Babaji ab please is trip ko boring bana do ji.’
This is what am talking about- The complete route from Batal to Chatru was similar or worse.
After the ride of our lives,’ we reached Chatru by late afternoon. At Chatru, another news – Two more landslides, the road itself got washed off so it would take days.
Chatru is where the Police made an entry into the scene by evening. They said,’ Go back to Kaza and stay there till things improve’.
We were almost 150 people stuck in Chatru. Bikers, trekkers, our women group, some solo travelers, a malyalam movie crew including the leading actress Manju Warrier and a few foreigners. Our bong girl said,’ we would die and not go back’.
Hrs of discussion with the police resulted in all of us getting a chance to speak on their satellite phone to atleast inform our families that we were alive. In the meantime I had already arranged for the tents from India hikes base camp so that in worst case we would have some place to spend the night.
And it was the worst case, we had to spend another night in the camps you can see below.
Another night being stuck in Chatru due to landslide – Our camps
Next morning was beautiful but none of us was really able to enjoy and acknowledge the beauty around. And how could we? Our Sapna was still struggling with her stomach infection and the biggest wish of her life was a comfortable loo at this point.
By 9 am, there was an ambulance in Chatru which had come from Kaza and some additional officials for rescue operations. We were told, the only way out was to walk, trek and cross the landslide.
In desperation, we decided to do that but we had luggage and a lot of it. Finally we got a govt vehicle to drop us along with our luggage till the landslide point. This was the scene there.
Thanks to all the saviors especially Mr. Shiv Raj bodh, his friend (who had reached the scene already) and our govt vehicle driver among many others who helped us cross the landslide area along with our luggage.
A Govt bus was waiting on the other side of the landslide area to help the trapped tourist reach Manali. We took a sigh and boarded the bus. Atleast now we would reach Manali…
Just a little further ahead of Rohtang pass another scene awaited us.
Landslide near Madhi on Manali Rohtang highway
Landslide before Madhi and we were stranded again. Thankfully, at least the phone network was there. Most of us got down from the bus to make calls. The next day that is 21st Aug was my husband’s birthday. Since there was no way I could reach Bangalore I decided to make arrangements from there itself.
The hero of this scene was a regular truck driver who overheard me telling my neighbor friend,’ I might not be able to reach Bangalore so please arrange for the cake and food.’ When I finished my call, the truck driver came up to me and said ,’ Gudiya app zaroor ghar pahunchogi’.
I was touched. It felt like the most positive message straight from heaven. This fellow was empathetic towards me, who himself has a hard life on roads. I just happened to be in that situation by chance whereas he would have faced this many times. God, your creations never cease to surprise me.
Stuck before Marhi on the way to Manali near Rohtang pass
Now getting back to getting stuck part. So we had just crossed Rohtang pass and the nearest village Madhi was 5 plus kms ahead on the highway to Manali. Being stuck in Himalayas near one of the high passes with rains and chances of snowfall is not a good feeling.
In sometime it got dark and started to drizzle too. Babaji had decided not to make this trip boring at all. By 8 pm all the hopes to reach Manali died down as even the JCB stopped working.
We were to spend the cold night in the bus. The only respite was that we could talk to our families in our last moments. No water, no food and no blankets.
The hero of this night scene was Neeratram, our bus driver, who decided to trek downhill till Madhi Dhabas to get food and water for all the passengers in the bus. Some brave bikers too joined him as the rain subsided. That night we ate post midnight.
Morning came with another challenge ,’ the loo challenge’. Instead of waiting for the landslide to get cleared, we decided to leave the luggage in the bus and trek downhill till Madhi and take a vehicle from there for Manali.
I went ahead assuming everyone to follow but only Sapna came down. Bharti and Asha went back to the bus and decided to wait for the road to open rather than trek downhill. On the highway down, we got lift from a small cattle carrying truck.
I would never forget those 5kms, the surface literally created dents on my bum.
Once in Madhi, I started looking for another vehicle to go to Manali and got a shared vehicle after some additional circus.
Now the story should end right? but no..at Gulaba just before Manali there was 4-5 kms of traffic jam. Sapna and I got down from the vehicle along with other locals and started to walk downhill taking short cuts. The locals had called the vehicle to the point where the jam ended so we tagged along.
Finally, by 2 pm this ordeal ended when we reached Manali. Gosh!
About the other two? So once the landslide area got cleared a bit, they also took lifts in smaller vehicles as the bus wasn’t allowed to cross till evening and reached Manali by 4 pm comfortably.
That day, we ate like there was no tomorrow and laughed at every incident like it was so much fun.
Not sure about others but I were to ask myself
Will this deter me from traveling or taking such trips? I would say no
Secondly, will this discourage me from organizing tours in Spiti valley?
I would still say no because no other tour can offer such ROI… Within 10 days you learn from camping to trekking to crossing streams to walking on snow to taking the roller coaster rides to ditching bolders and to surviving on kadhi chawal, rajma chawal, bread anda and maggi . Last but not the least, free weight loss is complimentary 🙂
Ready for the next adventure with me girls?
Spiti valley tour- One hell of a trip to Govt forsaken places ! Not exaggerating. Each word in this photo story about my Spiti travel is true and have lived every moment along with the other women in our group.
0 notes
Text
9 Day Kilimanjaro Climb Lemosho Route
Climbing Highlights
Duration: 9 Days Climb, 2 Days in the Hotel Category: Trekking Trekking Route: Lemosho Attraction: World tallest free-standing mountain at 5895M asl, The three peaks (Mawenzi, Shira and Kibo), The Snow, Five distinct climate zones. Cultivation, Forest, Heather-Moorland, Alpine Desert and Summit climate zones Tour Guides Language: English, Spanish, French, German, Italian, Start in: Moshi End in: Moshi Packing list: Camera set with enough zoom etc. Extra info: Provide Porters and Cookers to accompany you while on the mountain.
Climbing Overview
The mountain Climb through Lemosho Route is unique, challenging and adventurous. Suitable for experienced climbers and those with enough energy. The climb takes up to 9 days to and from the top of Africa.
Climbing Details
DAY 0: Arrive at the Kilimanjaro International Airport Arrive at the Kilimanjaro International Airport where you will be met at the airport and be transferred to the Hotel in Moshi/Arusha for overnight. DAY 1: Arusha (915 m/3,000 ft) to Londorossi Gate After breakfast, a briefing at your hotel will be given by your chief Guide followed by a drive to Londorossi Park Gate (2,250m / 7,380ft, 2.5 hours). After park rules and regulations the trail commencing takes us to the forest with our 4WD vehicle towards Lemosho Glades (2,390m 7,830ft, 11km, 45 minutes) and Walk along the forest trails to Mti Mkubwa campsite thereafter dinner and overnight at Mti Mkubwa camp site. DAY 2:Mti Mkubwa Camp (2,750 m/9,020 ft) to Shira Camp The trail slowly becoming very steep and enters the moorland zone, then crosses the Shira Ridge at 3,600 m/11,810 ft and drops gently to Shira Camp one located by a stream on the Shira Plateau. Early morning after breakfast continue as the trail gradually steeping and enters the giant heather moorland zone Several streams are crossed then it gains the Shira ridge at about 3600m / 11,810ft and drops gently down to Shira one camp site located near by the streams on the Shira Plateau. Dinner and overnight at Shira one campsite. DAY 3: Shira Camp (1) 3,500 m/11,485 ft to Shira Camp Today you will have a very moderate walk across the plateau which leads you to Shira Camp two on moorland meadows by a stream. Although variety walks are available on the plateau just to make this an excellent acclimatization day. DAY 4: Shira Camp 2 - 3,840 m/12,600 ft - to Lava Tower You will have breakfast and precede hiking east up to a steeping path above the vegetation toward Kilimanjaro looming mass. After several hours of walking now commerce, you’re a walk through a rocky landscape to reach the prominent landmark called Lava Tower at 4,630 m/15,190 ft. This chunky remnant of Kilimanjaro earlier volcanic activity is several hundred feet high, and the trail passes right below it. For extra credit, the sure-footed can scramble to the top of the tower. After a lunch stop near Lava Tower, descend for 2 hours below the lower cliffs of the Western Breach and Breach Wall to Barranco Camp at 3,950 m/12,960 ft. There are plentiful photo opportunities on this hike, especially if the walls are festooned with ice. Barranco Camp is in a valley below the Breach and Great Barranco Walls, which should provide you with a memorable sunset while you wait for your dinner. On this day, be careful to become aware of any signs of altitude sickness. DAY 5: Barranco Camp - 3,900 m/12,800 ft - to Karanga Camp After breakfast, we continue up a steep ridge to the great Barranco Wall, and then you climb this magnificent obstacle which turns out to be easier than it looks. Topping out just below the Heim Glacier, you can now appreciate just how beautiful Kilimanjaro really is. With Kibo glaciers soaring overhead you descend into the lush Karanga Valley to the Karanga Valley campsite. From the camp you can look east and see the jagged peaks of Mawenzi into the African sky. After a hot lunch at the camp your afternoon is spent at leisure for resting or exploring. After two long days please note this short day is very important for your acclimatization since your summit push is about to start a while to come. DAY 6: Karanga Camp - 4,200 m/13,780 ft to Barafu Camp This morning you will hike east over intervening ridges and valley to join the Mweka Route, which will be your descent route. Turn left toward the mountain and hike up the ridge through a sparse landscape for another hour to Barafu Hut where you will receive a hot lunch. The last water point on this route is Karanga Valley as there is no water at Barafu Cam. Even though Barafu is the Swahili word for ice. The famous snows of Kilimanjaro are far above Barafu Camp near the summit of the mountain. Your tent will be pitched on a narrow, stony, wind-swept ridge, so make sure that you familiarize yourself with the terrain before dark to avoid any accidents. Prepare your equipment and warm clothing for your summit climb, and drink a lot of fluids. After an early dinner, go to bed for a few hours of valued sleep. DAY 7: Summit Day! Barafu Camp You will be up around 11:30 PM, and after some hot tea and biscuits you will drag your feet off into the night. 6-hour climb northwest up through heavy scree between the Rebmann and Ratzel glaciers to Stella Point on the crater rim is the most challenging part of the route for most climbers. At Stella Point 5,685 m/18,650 ft you stop for a short rest and a chance to see a supremely sanguine sunrise. At Stella Point, you join the top part of Marangu Route but do not stop here too long, as it will be extremely difficult to start again due to cold and exhaustion. Depending on the time of year and current storms you may stumble upon snow on your remaining hike along the rim to Uhuru Peak. On the summit, you can enjoy your accomplishment and know that you are creating a day that you will remember for the rest of your life. After your 3-hour descent from the summit back to Barafu Camp, you will have a well-deserved but short rest collect your gear, and hike down a rock and scree path into the moorland and sooner or later into the forest to Mweka Camp 3,100 m/10,170 ft This camp is in the upper forest, so you can anticipate mist or rain in the late afternoon., Dinner and washing water will be prepared and the camp office sells drinking water, soft drinks, chocolates, and beers. DAY 8: Mweka Camp -3,100 m/10,170 ft to Mweka Gate After a well-deserved breakfast it is a short scenic 3-hours hike back to the park gate, please note no tips is given on the way until all your gears and the rest of the crew have reached the gate safely, but do remember to tip your staff at the gate, At Mweka Gate you will sign your name and add details in a register. This is also where successful climbers normally receive their summit certificates and can be followed by a bottle of champen. Climbers who reached Stella Point are issued green certificates and those who reached Uhuru Peak receive gold certificates. From Mweka Gate you will continue down to Mweka Village 3 km where you will be served a delicious hot lunch after which you are driven back to Arusha for a past due hot shower and comfortable night in a nice hotel in Moshi/Arusha. DAY 9: Arusha other destinations in Tanzania Depart for the airport or other destinations in Tanzania or A trip to the beaches at Zanzibar as it is one of the very good way to build up your strength we can arrange many rationally priced trips and safaris around Moshi and Arusha region. Lemosho Route Price Special Offer Supplement 9 Days Single Traveler 2750 $ - - 9 Days minimum 2 Persons 2600 $ 2500 $ 50 $ 6 Days Single Traveler 1850 $ - - 6 Days minimum 2 Persons 1800 $ 1750 $ 50 $ Tour Price Include Transfers from Kilimanjaro Airport to Moshi 2 nights at Key's Hotel Transfers from Hotel to gate entrances starting point All meals while on Climb 2litre water on a daily basis Transfer to/from Arusha Staff fees Hotel accommodation where noted Walking Tour in the in some protected areas Guides Porters Price Excludes: International airfares and departure taxes All items of person nature such as telephone call, fax, email etc Tips and gratuities to hotel, lodges, porters, camp staff – guide(s) Alcoholic and non-alcoholic drinks Laundry services Visa and International flight tickets fees. Read the full article
0 notes
Photo

A Trek to Dayara Bugyal - One of the finest meadows in Uttarakhand Trekking in Himalayas always give different & best experience doesn’t matter to which place or in which season you are trekking. You get to see snowy white fairyland during winters, alluring flowers during spring, a river of clouds during summer and sceneries during autumn. This time I headed for Dayara Bugyal trek in the month of November and experienced the autumn season at its best. Before starting my journey, let me tell you a little about the Dayara Bugyal Trek. Dayara Bugyal is a 4 days trek having moderate difficulty level which starts from a small village in Uttarkashi called Barsu and it also ends at the same. Situated near the region of Gangotri, the trek offers majestic views of some Himalayan peaks including Srikanth, Gangotri, Jaonli, Banderpuch, etc. In Uttarakhand, the word Bugyal means Alpine meadows or green pasture of land situated at an altitude above than 3000 meters. The drive to Barsu had to be started from Dehradun, so I boarded the Volvo bus from Kashmere Gate ISBT Delhi and reached Dehradun on the next day by early morning.
Day 1:
After meeting the trek mates, we started our drive to Barsu village, situated in the Uttarkashi district. Barsu is a tiny hamlet having very less population and is the starting point as well as terminating point of the trek. The village is around 180 km from Dehradun and the drive takes around 6-7 hours usually. We began from Dehradun ISBT and took the Mussoorie road. The view of the Doon valley was scenic as always. We drove through Dharasu, Chinyalisod, Uttarkashi, and Bhatwari. The drive through the mountains was quite scenic. The driver was too fast in driving and it was seeming that we will reach the destination quite early. But thanks to the weather. It started raining and hailing and the driver controlled the speed. However, the weather was quite enjoyable and we had fun during the road journey. We also got to see few trees of cherry blossoms amidst the way. Reached the village by 4 PM and checked-in into GMVN Guest House. Just after check-in, we had delectable pakoras and started exploring the village. Initially, the village was looking normal like other villages with no scenic views but then we turned our head and looked back. The magnificent Himalayan peaks were clearly visible in Orange shade as the sun was about to set. We visited the nearby temple and had a short interaction with locals. In the night we packed our stuff for the next day trek and slept.
Day 2:
Today was our first trekking day. We got ready and started our trek by 8 AM after having breakfast. We took the trail from the village and started walking. The initial trail was a bit steep but the steep part continued only for few meters. The further route was a mixture of mild uphill and flat trail. We continued our walk through the forest. The trail was scenic as it had trees with colorful leaves on both sides of the trail. Even the path was covered with those leaves and walking on that route was giving a feel of a crunchy carpet. The forest got finished when we reached the Barnala Campsite. The campsite was situated a few meters below the Barnala Tal, which was a small lake. We continued our walk and reached the lake. It was also our Lunch site so we took a halt there to have our packed lunch. There was also a temple situated beside the lake. While having lunch, the weather changed drastically and it started hailing. The good thing was that it didn’t continue for more time and the weather turned normal. We resumed our trek after lunch and moved towards Dayara Bugyal which was our destination of the day. The campsite at Dayara Bugyal was situated at a distance of 2.5 km from Barnala Tal. The trail was paved but steep throughout the way. The further trek was a bit difficult as it was steeper than the previous one and we recently had lunch. It took us another 2 hours and finally, we were at Dayara Bugyal. The weather was not giving a good signal as black clouds were approaching us. We quickly pitched our tents and decided to rest inside. We got into the tents to have Maggi and tea and suddenly it started snowing heavily. Though it snowed only for one and half hour, still it covered the complete meadow with a white layer of snow. The view was unbelievable beautiful after the snowfall. Later we had dinner and enjoyed the starry night.
Day 3:
We all woke up by 8 and the sun was bright and sharp. Opened the zip and saw the mighty Banderpooch massif right in front of us. This was the best moment for me on the trek. We got so excited that we did not put on shoes and got out from the tent barefoot. The view was literally astounding. After clicking photos, we had our breakfast and then headed towards Bakharia Top. The top was around 2 km from the campsite. We began our trek through the snowy meadows. The trail was through the snowy meadows and a mixture of an uphill, downhill and level walk. Apart from Banderpunch massif, we could see the complete Gangotri ranges, Srikanth, Jaonli and Draupadi ka Danda peaks. It took us one hour to reach the last leg of the Bakharia top. The final ascent to the top was quite steep. It made us tired but the view vanished all our tiredness. We got a perfect panoramic view from the top. Had some refreshments while on the top and also shot some timelapse videos of clouds over the Banderpunch. Later we started descending towards our campsite through the same route. We had hot lunch there and then packed up all our stuff because we had to leave for Barnala Tal. The downhill trek was comparatively easy but due to snowfall, the trail became quite slippery. We reached the campsite by late noon and set up our camps. The site was serene and surrounded by dense forest. In the evening we had dinner with the bonfire and called it the day.
Day 4:
This was our last day of the trek. We got ready and started our trek to Barsu. As usual, the downhill trek took less time and we reached the village by retracing the same route. After reaching the village, we got freshened up and then boarded the taxi to Dehradun. We drove all the way back to Dehradun and then continued our further journey to home (Delhi). I had a wonderful time on the trek and the Bugyal is quite scenic. The trek is best for the people looking for a not much difficult trek with great views of the Himalayan peaks.
0 notes
Text
21 Best Things To Do in Asheville, NC
Surrounded by the Blue Ridge Mountains and located along the French Broad River, Asheville just might be the most beautiful city in the United States.
Take in the views of the city from the scenic Blue Ridge Parkway, and you’ll quickly see why it’s referred to as the Land of the Sky.
There are numerous things to do in Asheville and for such a small city, it really packs a punch when it comes to activities on offer.
Hiking in the mountains, feasting on southern cuisine, relaxing in hot springs, and sampling craft beer are just a few of the things you won’t want to miss.
I’ve spent a lot of time in Ashville over the last decade, and in fact, my wife and I got married and had our honeymoon in here! It’s easily one of my favourite cities in the USA and a place I always look forward to visiting.
In this Asheville travel blog, I’m excited to share some of the best activities, attractions, and places to visit in the city!
1. Visit the Biltmore Estate
A visit to the Biltmore Estate definitely deserves the top spot on this list of things to do in Asheville.
This historic mansion was built between 1889 and 1895 by George Vanderbilt. It’s a great example of the Gilded Age and an absolutely stunning place to explore.
The Biltmore Estate is actually the largest privately-owned home in the US.
It features an astounding 250 rooms and is surrounded by picturesque gardens, ponds, and a lovely conservatory full of various plants and flowers.
After touring the estate and the grounds, be sure to drop by the winery. You can take a tour of the underground cellars, sample several different types, and pick up a bottle of your favourite wine to take home.
You can visit the Biltmore Estate every day from 9AM to 5PM. Tickets cost $70 for adults and $35 for youth with a free audio guide.
Pro tip – if you book your tickets at least a week in advance, you save $10! It’s about a 15-minute drive from downtown to reach the estate, which you can find on the map here.
⇒ See Also: 15 Denver Attractions You Don’t Want To Miss
2. Take a Walking Tour
Whenever I’m in a new city, I love going on a walking tour to get to know the place. Asheville is a small city and is very walkable, so you can easily explore downtown on your own two feet.
Thanks to Explore Asheville, you can choose between two excellent self-guided walking tours of Asheville. They have an urban trail as well as an architecture trail that you can follow.
Both have interactive and printable maps, and the urban trail even has an audio guide as well.
If you��d prefer to go with a guide, you can sign up for the Tip-Based Asheville Walking Tour.
This excellent walking tour is about 2.5 hours long, taking you through downtown Asheville while covering all the highlights and insider tips on where to eat and drink (plus, some samples along the way). The cost is based on tips, so whatever you feel is appropriate.
3. Drive the Blue Ridge Parkway
If you’re wondering what to do in Asheville, just jump in your car and take a cruise on the Blue Ridge Parkway. This National Parkway and All-American Road is part of the Appalachian Mountains and one of the most scenic drives in the country.
The Blue Ridge Parkway actually stretches through both Virginia and North Carolina. It’s 755 km (496 miles) long and is full of viewpoints, hiking trails, historic sites, and so much more. This is one of the most incredible places to visit on your trip to Asheville.
Every time we have people come to visit when we’re in Asheville, one of the first things we do is head out for a drive on the Blue Ridge. These amazing views really never get old, so I don’t mind going back every time we’re in town.
4. Climb Mt. Pisgah
As I mentioned, there’s a lot to see and do along the Blue Ridge Parkway. One of the best things to do in Asheville NC is hiking up the trail at Ms. Pisgah, which is easily accessible via the Parkway.
It’s about a 45 minute to hour-long hike to reach the top of Mt. Pisgah. While it’s not exactly an easy hike, it’s not too difficult. The hike is about 1.2 miles (1.85 km) to the top and there are plenty of places to rest along the way.
There’s a large TV tower at the top and an observation deck. From here, you can enjoy some of the best views of the Blue Ridge Mountains and the city off in the distance. You can find the trailhead for Mt. Pisgah on the map here.
⇒ See Also: 21 Fun Things To Do in Detroit – An Insider’s Guide
5. Dinner With a View at Pisgah Inn
After hiking up Mt. Pisgah, you’re sure to work up an appetite. While you can certainly bring a picnic lunch to have on the Parkway, my vote goes to enjoying a meal at the nearby Pisgah Inn.
Grab a drink and head out to their observation deck while you wait for a table. They have plenty of rocking chairs where you can kick back and soak in the amazing views.
Having eaten here several times, I’ll give my recommendations for the fried green tomatoes and the walnut crusted mountain trout.
They’re open from 11:30-4 for lunch and then again from 5-9 for dinner. You can get directions and find the Pisgah Inn on the map here.
If you’d rather be up in the mountains than down in town, you might want to look into booking a room here. It’s pretty awesome when you can wake up and have the Blue Ridge Mountains right outside your window!
6. Play Disc Golf
If you enjoy the great outdoors, one of the top things to do in Asheville is playing a round of disc golf.
For those unfamiliar with the sport, it’s just like golf but with a frisbee instead. The goal is to get your disc into a basket with the least amount of throws, and you can use a variety of different discs in the process.
The biggest difference between disc golf and regular golf is that it’s almost always totally free! That’s the case at nearby Richmond Hill, an excellent course and local hangout. Get directions and find the park on the map here.
If you’ve never played disc golf before and don’t have any gear, there are plenty of shops in Asheville where you can pick up a starter kit.
For about $10, you can get a driver, a mid-range disc, and a putter. Just try not to lose them on your first round. Most people write their name and phone number on discs as a precautionary measure.
⇒ See Also: 21 Top Things To Do in New Orleans
7. Feast on Southern Food
Asheville is home to plenty of amazing restaurants of all different styles. If you’re travelling here for the first time, I recommend sticking mostly to southern fare. After all, you’re in the south even though the State is North Carolina!
For brunch, a solid choice is Biscuit Head. Their slogan is “put some south in your mouth” and that’s exactly what you’ll do here. Choose your favourite biscuit (I love the pulled pork) and top it off with their various jams and butters.
One of the best restaurants in Ashville, in my humble opinion, is Home Grown. This local eatery serves local food cooked by local people, so you know your money is going right into the local economy when you eat here.
I personally love their Redneck Pot Pie or buttermilk fried chicken. You can see Home Grown and much more in our “Streets, Beats & Eats” video on Asheville.
youtube
8. Drink Local Craft Beer
Asheville has been named Beer City USA on several occasions. There are over 40 breweries and beer pubs here in total! As such, sampling local craft beer should be high atop your list of things to do in Asheville NC.
Walking around Asheville, you’re never too far from a brewery. Some of the best places for a beer include Asheville Brewing Company, Burial, and Green Man. The best way to find your favourite brew is ordering up a flight to sample 4-5 different styles.
While they’re not exactly microbreweries, it’s also worth it to visit the Asheville locations of New Belgium and Sierra Nevada. The former has a scenic location right along the French Broad River, while the latter is a bit of a hike as it’s out by the airport.
If you want to take a tour of either, be sure to sign up well in advance! I’ve been to a lot of breweries, and these are two of the best I’ve ever seen.
9. Visit a Few Museums
If you’re downtown and aren’t quite sure what to do in Asheville, why not drop into one of the city’s museums for a bit? Whether you’re interested in art, science, or even pinball, there’s a museum for you here.
The Asheville Art Museum has recently had some major renovations and is bigger and better than ever!
It’s open from 10-5 Tuesday-Saturday and 1-5 on Sunday. It’s totally free to visit, but donations are very much appreciated. You can find the museum on the map here.
Just a block away, you’ll find the Asheville Museum of Science. They’ve got lots of cool exhibitions and displays that are fun for all ages. It’s open Monday-Saturday from 10-5 and from 1-5 on Sunday and costs $7-8 to visit.
If you love a good retro pinball machine or video game, you’ll definitely want to check out the Asheville Pinball Museum.
For $15, you can play as many games as you want on their 80+ machines. Hours vary depending on the day, but they’re typically open until 9PM. Get directions to the museum here.
⇒ See Also: How To Spend 24 Hours in New York City
10. Explore the RAD (River Arts District)
For art lovers, one of the top things to do in Asheville NC is visiting the RAD (River Arts District).
Hundreds of artists have galleries and studios in this area along the French Broad River. It’s a really fun place to explore for a while, especially on the weekends.
On the second Saturday of each month, the RAD is a very lively place. There are demonstrations, workshops, wine tastings, live music, and a lot more. There’s even a free trolley that you can ride as you bounce around the different venues.
Whether you’re interested in painting, ceramics, photography, or jewelry, you’ll find something to enjoy in the RAD.
While you’re over here, be sure to drop in another excellent local craft brewery — Wedge. You can find the River Arts District on the map here.
11. Fun on the River
Speaking of the French Broad River, there are lots of fun things to do there. Well, at least during the warmer months. There’s not much going on in the dead of winter…
One of my absolute favourite things to do in Asheville is tubing down the river.
The best way to enjoy the Homer Simpson of water sports is by signing up with this tubing experience. It’s like a floating pub crawl!
I won’t’ give it all away, but it’s a lot of fun and you can also bring your own beverages to put in the onboard cooler. Click here for details.
If you’d prefer a bit more activity than just lazily floating down the river, you can also rent a kayak or a SUP (stand up paddleboard). There are a few different places that rent boards as well as tours you can sign up for to get out and enjoy a day on the river.
12. Listen to Buskers
Walking around downtown Asheville, you’re sure to hear a lot of music. Some of it may be coming out of shops and bars, but more often than not, it’s actual musicians jamming in the street!
It’s very common to see people “busking” on the streets of Asheville. Busking is when you play music in public and simply open your guitar/violin/keyboard case to take tips from passersby.
The various musicians busking around downtown Asheville really add to the eclectic atmosphere of the city. If you enjoy the music, stop for a while to listen and toss a few bucks in to show your appreciation.
13. Day Trip to Hot Springs
If you’re looking for some good old-fashioned R&R on your trip to Asheville, then you may want to add in a day trip out to the town of Hot Springs, NC. It’s not just a clever name, as the small town is home to some amazing hot springs.
It’s about a 45-minute drive from downtown Asheville out there, and it’s well worth it.
The Hot Springs Resort & Spa has amazing mineral baths and spa services. After a busy couple of days exploring the city, a nice massage and a soak in the hot springs is just what you need.
The resort has a variety of different options, so be sure to check their website for details.
Just be sure to book in advance, as it’s a popular place. They also have several different choices for on-site accommodation if you’re interested. You can get directions to the Hot Springs resort on the map here.
⇒ See Also: 27 Top Things To Do in Chicago – The Ultimate List For Travellers
14. Join the Friday Drum Circle
One of the coolest things to do in Asheville NC, for both visitors and locals alike, is joining in the weekly drum circle. People of all ages and backgrounds come out to enjoy this fun and free event.
The drum circle goes on every Friday at Pritchard Park downtown. People usually start showing up around 5 and it gets bigger and bigger until the whole park is packed with people drumming, dancing, and singing.
Even if you don’t have a drum of any kind, it’s a good time. You can just dance to the music and enjoy connecting with people. Once the drum circle wraps up, you’re smack dab in the middle of downtown Asheville on a Friday night.
⇒ See Also: Top 10 Best Bars in Chicago – A Guide To The City’s Nightlife
15. Shop at the Grove Arcade
If you’re looking to do a little shopping before you leave Asheville, be sure to swing by the Grove Arcade downtown. This building has a very interesting history, which I recommend you read before going there!
At the Grove Arcade, you’ll find a very diverse array of shops, including the Batter Park Book Exchange and Champagne Bar, Nutz About Fudge, the Woodrow Instrument Company, and much more.
In addition to all the great shops inside, there’s also the Outdoor Artists Market. You’ll find paintings, clothing, jewelry, and local honey, among other things. The Grove Arcade is open from 10-6 Monday-Saturday and noon-5 on Sunday.
16. Treat Yourself at the Grove Park Inn
For those who enjoy the finer things in life, a trip out to the Grove Park Inn is a must when visiting Asheville. In case you were wondering, yes, it is the same Grove who started the shopping arcade.
E.W. Grove is known as the “father of modern Asheville.” He was a self-made millionaire who moved here in 1910 and opened this grand inn soon thereafter. A hundred years later, and it’s still going strong as one of Asheville’s premier resorts.
Even if you don’t splurge on a room at the inn, it’s well worth it to pay a visit here.
Book yourself a nice spa treatment and then grab a hand-crafted cocktail and a bite to eat at their Sunset Terrace Lounge, or choose one of the many other options for wining and dining.
⇒ See Also: 21 Best Places to Eat in Chicago – A Guide For Foodies
17. Take a Hike
By far one of the most popular things to do in Asheville is hiking.
If you’ve got your own wheels and are willing to drive 45 minutes to an hour outside of town, you have tons of options for excellent hiking trails.
In addition to the aforementioned Mt. Pisgah trail, other great options include Catawba Falls, the Devil’s Courthouse, or Max Patch. A hike to the latter can be rewarded with a trip to the hot springs, as it’s a pretty short drive between the two.
There really are tons of options for hiking in Asheville with varying difficulty and distance from town. Just check this awesome Asheville trail finder to figure out which option is best for you!
18. Explore the North Carolina Arboretum
Another fantastic choice for spending time outdoors in Asheville is the North Carolina Arboretum. Here you’ll find some lovely cultivated gardens, a bonsai exhibit, hiking & biking paths, and much more.
It’s a great place to spend a couple of hours, especially on a nice day.
Actually, the arboretum is also a solid choice in the colder months thanks to the Winter Lights display they put up. The place really turns into a winter wonderland from late November until the end of the year.
The arboretum is open from 8-7 in the fall/winter and from 8-9 in the spring/summer. They don’t charge an entrance fee per person, but rather charge a flat fee of $14 per vehicle to enter. You can find them on the map here.
⇒ See Also: Chicago Architecture River Cruise – A Guide For Travellers
19. Go on a Ghost Tour
One of the spookiest things to do in Asheville is going on a ghost tour. Haunted Asheville has a few different options for chilling, thrilling tours that are fun for the whole family.
On their classic walking tour, you’ll learn the stories behind some of Asheville’s most haunted spots from a resident ghost expert. Tours usually run at 8PM and sometimes there’s another one at 9. Tickets cost $23 for adults and $15 for children 9-14, while those under 8 go for free.
Another option is their Biltmore Village Mystery Tour. Apparently, you learn about a kangaroo that appeared from another dimension on this tour. Sounds cool to me!
⇒ See Also: Where To Eat in Meredith New Hampshire: A Guide To The Best Restaurants
20. Sundowners at Sky Bar
After a busy day of exploring Asheville, there’s no better place to watch the sun go down with a nice adult beverage than SkyBAR.
Grab a cocktail and take in the amazing views from this rooftop bar, and you’ll see why Asheville really is the Land of the Sky.
While there are some quality beer and wine choices on the menu, this place is all about the cocktails. I personally recommend their Mixed Berry Mule or the Peach Ginger Whiskey Sour. You really can’t go wrong with any of the options.
SkyBAR is located in the historic Flatiron Building in downtown Asheville.
Half the fun of visiting there is going up in the old school elevator, which still requires an operator. They open at 5 during the week and an hour earlier on the weekends.
21. See a Show
No matter what night of the week it is, there are plenty of shows going on in Asheville. Take your pick between theatrical performances, stand-up comedy, live music, and more.
The live music scene is one of the things I love the most about Asheville.
The city has several venues that range in size and style, so you get all sorts of different acts coming to town. Some of the best places to see music here include the Asheville Music Hall, Salvage Station, and the Orange Peel.
Be sure to check the calendar and see what’s playing when you’re in town.
During the warmer months, you’ll also find many different outdoor events and festivals happening in Asheville.
One such festival is Shindig on the Green, which takes place all throughout the summer at Pack Square Park. There are free shows most Saturdays as well as lots of informal jam sessions and other fun things going on.
Now You Know What to Do in Asheville NC!
Well there you have it. I hope you’ve enjoyed this look at one of my many homes away from home.
Asheville is such a cool city with so much to offer, whether you’re into the great outdoors, epic adventures, the arts, or just chilling out. Whatever you do, there’s always lots of amazing beer, food, views, and music!
Images in this article courtesy of Shutterstock.com.
Like This Article? Pin it!
The post 21 Best Things To Do in Asheville, NC appeared first on Goats On The Road.
21 Best Things To Do in Asheville, NC published first on https://travelaspire.weebly.com/
0 notes