#What is the best shutter speed in different situations?
Explore tagged Tumblr posts
Visit Tumblr Blog
Explore Tumblr blogs with no restrictions, modern design and the best experience.
Last Seen Tumblr Blogs


Fun Fact
Tumblr has been providing a Korean-language service since 2013.
Text
FAQ + About (for mobile)
About me: My name is Milli (she/her), 25yrs. I love taking photos of nature and my Subaru. I’m a huge nerd about mushrooms, plants, and skulls. I’ve been hiking ever since I was a little kid and at this point I feel at home in the woods.
I have a flock of chickens, a boyfriend, a dog, and waaay too many house plants
Did you take all the photos on this blog?
Yep, every photo posted here was taken by yours truly unless otherwise noted (very rare).
What camera/lenses do you use?
My full frame kit is:
Nikon D850
Sigma 150-600mm f5.6-6.3
Nikon 50mm f/1.8 G
Nikon 85mm 1.4 G
Nikon 105mm f/2.8 VR G
Nikon 17-35mm f2.8
Kenko extension tubes
Raynox 250
Vanguard Alta Pro 263AB (works for macro + everything else)
Filters and other gear:
Hoya CPL 62mm + Stop down/up kit
B+W CPL 77mm
Tiffen Graduated ND
WNDRD PRVK 32L
Other cameras/lenses I’ve owned:
D50
D7000
60mm f/2.8 ED Macro
20mm 1.8 ED
Sigma 150-500mm f5.6-6.3
What camera gear would you recommend for a beginner?
Before you worry too much about getting the best gear, make sure you learn how to use it first. You could go out and buy the fanciest camera and lenses and still not take good photos because you don’t know how to use your camera or how to “see”. There’s also a saying, “you marry your lenses and date your bodies”. Invest in good lenses, preferably full frame compatible ones in case you ever decide to upgrade to full frame, and get a cheaper body to start. With that out of the way…
If you’re just starting out, I’d recommend getting a refurbished or used camera from the D7100+ line. They’ve come down in price as of late and are pretty solid cameras. Just make sure to check the shutter count.
I’d skip anything from the D3000 & D5000 lines. They’re not bad cameras but they do not have built in autofocus meaning they rely on the lens itself having autofocus. This isn’t horrible but it does limit what lenses you can use (and some of the lenses that won’t autofocus with those cameras are good AND cheap) and that can be confusing for a beginner.
As for a lens, a 50mm f/1.8, or 35mm f/1.8 is a great lens. Both lenses are inexpensive, have good quality glass, and can used for nearly everything. The 18-55mm lens that comes with cameras isn’t bad either.
I don’t shoot Canon/Sony/whatever else so I can’t give any advice there sorry!
How did you learn to take photos?
LOTS of practice, I first picked up a camera back in 2013. In high school and college I took photography classes but ultimately I didn’t really learn much from them, they started at too basic of a level.
I did learn a lot about photography from taking art classes however. They taught me framing, how to use shadows/light, and movement in a photo (where does your eye travel when you view an image/art piece). My mom is also a professional photojournalist so I picked up some knowledge from her and my grandfather who’s also a published photographer.
How can I take better photos?
Again, lots of practice. Learn what every setting and button on your camera does, try different shooting modes, take the same photo at several different apertures and shutter speeds to see what changes. You can learn a lot from reading articles too but the best way to learn, imo, is by doing. Don’t worry about getting the best gear and the best camera, learn how to take photos first.
Study other photographers photos, and even paintings, and see what you like. Pay attention to directional lines and where your eye travels. Learn how to use Photoshop/Lightroom (just pirate it). Take photos in different weather, lighting, and times of day.
What programs do you use to edit? What presets/filters do you use?
I use Lightroom and Photoshop Classic along with custom presets that I’ve made for different situations (fog, snow, etc) to process most of my images and then I make minor tweaks. A lot of my presets started as VSCO presets and then I kept the things I liked and changed the things I didn’t.
What is your job?
I’m a real estate photographer specializing in short term rentals. I love it.
Are you related to Eddie Vedder?
Yep, we’re very distantly related. Something like 7th cousins twice removed but I’ve never met him.
Can you add a photo to your print shop?
Sure! Just tell me the name of the photo (or link it if possible, I reuse a lot of names) you want added and I’ll get it up there.
May I use one of your photos?
I’m 100% ok with people using my photos as a reference for drawing/painting, I’d even love to see the result. For anything else, just shoot me an ask beforehand and I’ll let you know. Please do not repost my photos on Tumblr or elsewhere without my permission.
36 notes
·
View notes
Text
Tips to Get Creative Photos Using a Slow Shutter Speed
In photography, the combination of creativity and scientific principles results in a dynamic and rewarding profession. Although this combination may seem difficult at first, learning the principles of both aspects opens up a world of creative possibilities. Consider the concept of shutter speed. While fundamentally technical, understanding its intricacies allows photographers to capture various situations. If you are a beginner, reading "Yvette Heiser- Learn the Fundamentals of Photography with Yvette Heiser, Texas" can help you master the basics and advance your talents.
What is Shutter Speed?
Shutter speed is when a camera's shutter remains open, allowing light to reach the digital sensor or film and form an image. This important photography feature determines how long the sensor is exposed to light throughout the capture process. It is measured in time units, ranging from milliseconds to minutes. Adjusting the shutter speed allows photographers to manage the exposure of their photographs, catching subjects with variable degrees of motion blur or stopping fast-moving action, impacting the overall appearance and feel of the photograph.
Tips to Get Creative Photos Using a Slow Shutter Speed
Understand Motion Blur
First thing, incorporating motion blur is an important aspect of creatively using slow shutter speed. Try capturing moving things like flowing water, bustling streets, or swinging trees to give your images a dynamic and ethereal look. To generate spectacular motion blur, set your camera to a slow shutter speed and use a tripod to keep the rest of the scene clear.
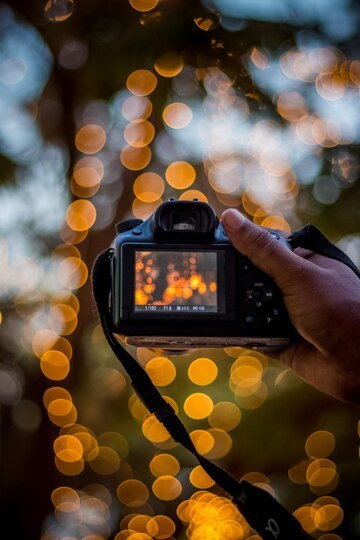
Play with Light Trails
Light trails are a captivating effect produced by long exposures, often seen in images of traffic at night or fireworks streaking across the sky. To shoot beautiful light trails, select a place with moving light sources and slow your camera's shutter speed. Experiment with various exposure periods and compositions to create one-of-a-kind and fascinating light paintings that add drama and intrigue to your images.
Experiment with Long Exposures in Low Light
Low light circumstances are ideal for experimenting with long exposures and lower shutter speeds. Extend the exposure duration to capture the delicate beauty of night vistas or twilight landscapes, allowing the camera to soak up more light and show intricate details that might otherwise go unnoticed. Use a tripod and a remote shutter release to reduce camera shake and get clear, breathtaking shots even in low-light circumstances.
Incorporate Motion in Portraits
While portraits typically require a fast shutter speed to freeze motion and capture crisp details, using controlled motion can add a dynamic and artistic flair to your portraits. Try intentional camera movement or move the subject gently during the exposure to create a sense of movement and energy in your portraits. This technique can result in dreamy, painterly effects that evoke emotion and captivate the viewer's imagination.
Final Words
Try the above-mentioned creative ideas to take the perfect picture. To improve your photography skills, experiment with different shutter speeds and subjects during the day and at night. Whether you are a photographer or interested in posting your picture on social media, read "Yvette Heiser—Clever Tips to Click the Best Photos For Social Media" to get the best images.
#yvette heiser#photographer#photographytips#PHOTOGRAPHYTIPS#PHOTOGRAPHYTYPES#TRAVEL PHOTOGRAPHER#TRAVELPHOTOGRAPHY#WEDDINGPHOTOGRAPHERS#WILDLIFEPHOTOGRAPHY#YVETTE HEISER
7 notes
·
View notes
Text
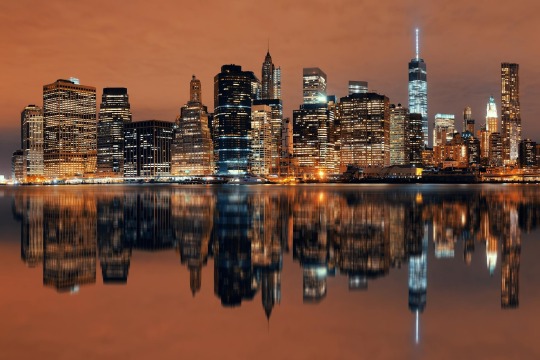
3 Tips for Urban Photography in New York

When we think about urban photography in New York, we often envision iconic skylines and bustling streets. It’s essential to consider optimal lighting conditions and how they can transform our images. By scouting locations during the day, we can pinpoint the perfect spots for night time shots. But there’s more to capturing the essence of the city than just timing. Embracing spontaneity and candid moments can truly elevate our work. So, how can we effectively combine these elements to create stunning visuals that resonate? Let’s explore three practical tips that can enhance our approach.
Optimal Lighting Conditions

Optimal lighting conditions play a crucial role in the art of urban photography, especially in a city as dynamic as New York. We often find that the best times to shoot are early mornings or late afternoons, when the light casts a warm glow, enriching our images.
During these hours, we can leverage our shutter speed and aperture considerations effectively, capturing both the vibrancy and detail of the city.
When we’re shooting in bright conditions, we typically use low ISO settings, around 100 to 200, which helps maintain image clarity. If we’re capturing fleeting moments, increasing the ISO to 400 or 800 allows us to freeze action without sacrificing quality.
We also need to be mindful of our white balance considerations; shooting in RAW enables us to adjust the white balance later for optimal color accuracy.
Aperture plays a crucial role in how we frame our shots. Wider apertures can create beautiful bokeh effects, especially in low-light situations, while smaller apertures ensure sharpness across the scene.
Night photography Technique
Capturing the urban landscape of New York at night presents a unique set of challenges and opportunities that can elevate our photography. To make the most of night photography, we need to master our camera settings. Using manual mode gives us full control, allowing us to adjust aperture, shutter speed, and ISO for optimal results.
For those stunning city lights, we often start with a low ISO (100-200) and use a lower aperture to maintain sharpness. Long exposure techniques are crucial; we typically opt for longer shutter speeds, sometimes exceeding 30 seconds, to capture the dynamic movement of light trails. A sturdy tripod is essential to prevent camera shake during these longer exposures.
When composing our shots, we employ various composition techniques, like the rule of thirds and leading lines, to guide the viewer’s eye through our urban landscapes. Moreover, scouting locations during the day allows us to envision our nighttime shots better.
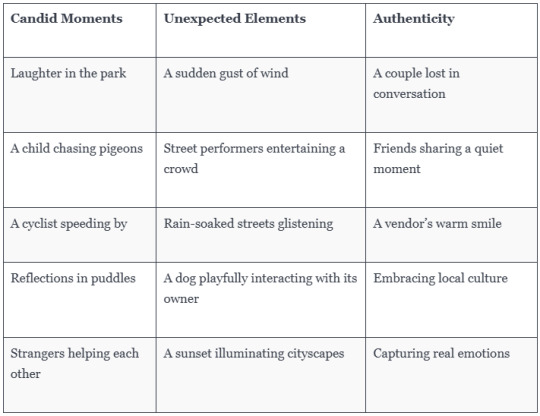
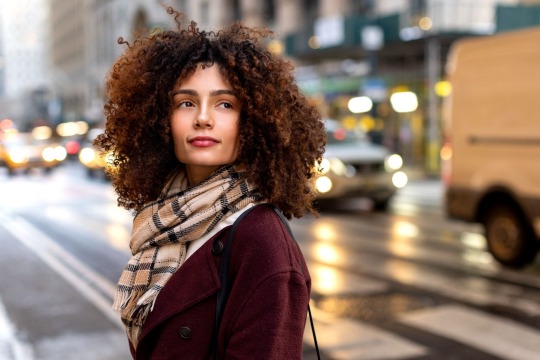
Embrace Candid Moments
Embracing candid moments can transform our urban photography experience in New York. These unplanned shots capture the city’s spirit, showcasing genuine interactions that reflect authenticity. Let’s embrace the unexpected and allow spontaneity to guide us as we explore vibrant streets and hidden corners.
Here’s a table to inspire our approach:
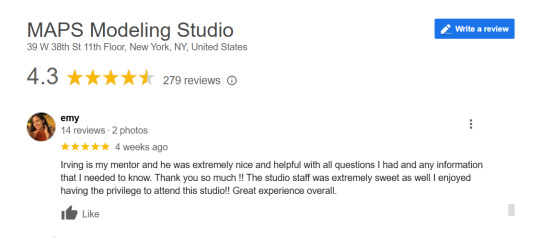
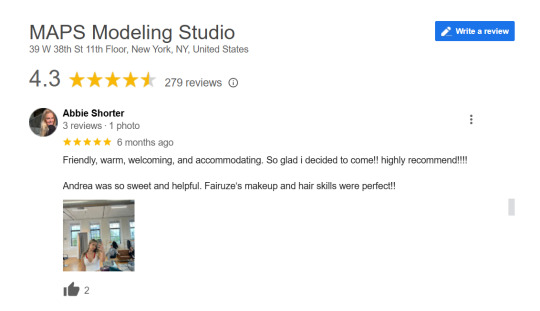
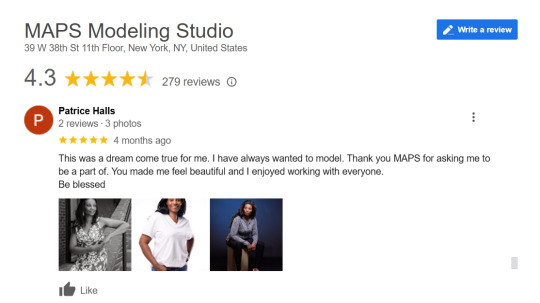
What Our Clients Are Saying
At Maps Studio, we take pride in creating memorable experiences in urban photography. Here are some reviews from our clients that showcase their thoughts and feelings about our services. Check out these snapshots of feedback from various platforms and see how we’ve made a difference in capturing the spirit of New York. For more information, visit us at mapsstudio.nyc.

Frequently Asked Questions
What Is the 3:1 Rule in Photography?
The 3:1 rule in photography means the subject should be three times further from the camera than the background. This helps us create depth and keep our main focus sharp, enhancing overall composition.
How to Take Good Photos in NYC?
To take good photos in NYC, we should explore different neighborhoods, embrace candid moments, and experiment with lighting. Let’s capture the city’s energy by engaging with our surroundings and finding unique perspectives in our compositions.
What Are Three Major Rules in Street Photography?
When we dive into street photography, we’ve gotta remember three major rules: capture candid moments, engage with our environment, and respect privacy. These principles help us create authentic and compelling images that resonate with viewers.
How to Take a Good City Photo?
To take a good city photo, we should embrace natural light, explore unique angles, and capture candid moments. Let’s engage with our surroundings, allowing spontaneity to shape our compositions for truly captivating images.
Conclusion
In conclusion, urban photography in New York offers endless opportunities for creativity and expression. By taking advantage of optimal lighting conditions, mastering night photography techniques, and embracing candid moments, we can capture the vibrant essence of the city. Let’s remember to explore during the day, experiment with our settings, and stay open to the spontaneous magic that surrounds us. With these tips in mind, we’re ready to create stunning images that truly reflect New York’s unique character.
Visit Mapsstudio for more information about photography.
#maps modeling studio#map design studio#maps modeling studio reviews#maps studios boston#maps studio nyc#modeling studio#film#maps nyc modeling#modeling photography studio#maps modeling studio photos#photography#landscape#photographer#photographers on tumblr#urban photography in New York#Good Photos in NYC
1 note
·
View note
Text
Sathees Kumar SAMPAR Appointments on How to Be a Good Photographer

Sathees Kumar SAMPAR Personal Appointments on the Topic How to Become a Good Photographer serve as a perfect guide for beginners. In the journey to becoming a skilled photographer, the right knowledge and continuous practice are the most important steps you can take. Sathees Kumar SAMPAR Personal Appointments offer valuable insights for anyone looking to understand the art and technique of photography, making the path to improvement both structured and achievable.
Photography Is Both an Art and a Technical Skill
Photography allows you to express how you see the world. At the same time, it is a craft that requires learning and practice. Anyone with interest and patience can become good at photography by understanding the basics and exploring their creativity.
Start by Learning the Essentials of Photography
To build a strong foundation, you must first learn how a camera works. Key settings like ISO, aperture and shutter speed make up the exposure triangle. ISO affects how sensitive your camera is to light. Aperture controls how much of the scene is in focus and how much light enters the lens. Shutter speed determines how motion is captured. Mastering these three settings will help you take clear and well-lit photos.
Also understand focus modes and white balance. These will help you make your subjects sharp and your colors realistic. Every camera, even smartphones, offers these basic tools in manual or semi-manual settings.
Choose the Right Equipment Based on Your Needs
You do not need to buy the most expensive camera right away. Use the camera you already have and focus on technique first. Many great photographers began their journey with a basic camera or smartphone. Once you are comfortable and want more control, consider investing in a DSLR or mirrorless camera.
Pick a camera that suits your preferred photography style. A compact camera is good for travel photography. A camera with fast autofocus is useful for sports or wildlife. Choose lenses that can cover a variety of situations like portraits and landscapes.
Practice Daily and Try Different Photography Styles
Improvement comes with regular practice. Take photos every day if possible. Explore new locations and photograph everyday scenes from different perspectives. Practice shooting in different lighting conditions. Try to understand how light, color and framing affect your final image.
Explore various styles such as portrait photography, landscape photography, street photography, macro photography and black and white photography. Trying different styles will help you discover what you enjoy most and allow you to become a well-rounded photographer.
Learn How to Use Light Effectively
Light is the most important element in photography. Learn to use natural light such as sunlight during golden hour which happens shortly after sunrise or before sunset. This time provides a soft and warm light that makes photos look beautiful and professional.
Avoid harsh midday sunlight when possible as it creates strong shadows. Cloudy weather offers soft light that is excellent for portraits. Indoors, you can use window light or simple lamps to create mood and depth. Understanding how light works will improve your photos more than any camera setting can.
Improve Your Composition Skills
Composition is how you arrange elements in a photo. A well-composed photo is pleasing to the eye. Learn the rule of thirds which involves placing your subject off-center to create balance. Use natural frames like windows or doorways to focus attention on your subject.
Look for lines, patterns and textures in your environment. Use them to guide the viewer’s eye across your photo. Changing your angle or distance from the subject can completely change the story of the photo. With time, these choices will become instinctive.
Edit Your Photos to Bring Out the Best
Editing helps improve photos by adjusting things like brightness, contrast, sharpness and color. Start with simple apps like Snapseed or Lightroom Mobile. These apps are free and beginner friendly. If you want more control, use professional software like Adobe Lightroom or Photoshop.
Crop your photo to improve framing. Adjust highlights and shadows to bring out more detail. Use color balance to fix unnatural lighting. Avoid over editing as it can ruin the natural look of your photo. The goal is to enhance your work without making it look unrealistic.
Study Great Photographers and Learn from Them
Learning from the work of experienced photographers can inspire you and teach you new techniques. Look at their photos closely and try to understand their use of lighting, angles and composition. Follow their work on social media or photography websites.
Try to recreate similar photos as a learning exercise. This will help you develop your skills and eventually shape your own unique style. Attend exhibitions, read books and watch tutorials. The more you expose yourself to great work, the better your own work becomes.
Build a Strong Portfolio and Share Your Work
Start saving your best photos in one place. This collection is called a portfolio and it shows your progress and your ability to tell stories through images. You can make a portfolio online using free platforms like Wix or paid services like Adobe Portfolio.
Sharing your work on Instagram or photography forums helps you connect with other photographers and get useful feedback. As your skills grow, this portfolio can also help you get photography assignments or freelance opportunities.
Keep Practicing and Stay Motivated
There will be days when your photos do not come out as expected. That is normal. Every good photographer has gone through the same process. What matters is your consistency and your willingness to learn.
Keep exploring new ideas. Challenge yourself with photography themes or participate in online photo contests. Surround yourself with positive and creative people. Take breaks if you feel tired but never give up. With time your skills will improve and your confidence will grow.
Conclusion
Sathees Kumar SAMPAR Personal Appointments on the Topic How to Become a Good Photographer show us that photography is not just about equipment or settings. It is about learning to see the world differently and capturing moments that matter. A good photographer is always learning, always observing and always creating.
#photographer#satheeskumarsampar#photography#personalappointments#originalphotographers#naturephotographer
0 notes
Text
High Speed Roller Doors That Make Your Business Move Faster
When it comes to keeping your business running smoothly, every second counts. That’s why high speed roller doors are a smart choice for places like warehouses, factories, and loading docks. These doors open and close much faster than regular doors, helping to save time and keep the flow of work steady.

Here’s why high speed roller shutter doors stand out:
· Fast Opening and Closing
These doors work quickly, cutting down waiting times for trucks and workers. This means less delay when loading or unloading goods.
· Keeps Temperature Just Right
Whether you need to keep cold air inside or stop hot air from coming in, these doors seal tightly. This helps save on energy bills by keeping the inside temperature steady.
· Strong and Long Lasting
Made from tough materials, high speed roller doors can handle lots of use every day without wearing out. This means fewer repairs and less downtime for your business.
· Safer Work Environment
Many doors have safety features like sensors and emergency stop buttons, which help prevent accidents.
· Protects Your Property
With strong locking systems, these doors keep your warehouse or facility safe from unwanted access.
At Ozone Me, we know that every business has different needs. That’s why we offer several types of high speed roller shutter doors to match your specific situation:
· Interior High Speed Doors
Perfect for dividing spaces inside a building while keeping things moving smoothly.
· Exterior High Speed Doors
Built to handle Dubai’s weather, these doors secure your entrances and exits without compromising speed.
· High Speed Freezer Doors
Designed for cold storage areas, these doors help keep the cold in and allow for quick traffic flow.
Choosing the right door means considering how often it will be used, what environment it will be in, and what safety features matter most to you.
When you work with us, you get more than just a door. We offer free site visits to understand your needs, straightforward advice on the best options, and fair prices without surprises. Our team has helped hundreds of clients find the right door to keep their business running well.
High-speed roller doors are the way to go if you want doors that save you time, cut energy costs, and keep your property safe. Don’t wait until slow or faulty doors slow down your operations.
Visit OZONEME DXB to see what we offer and talk to our experts. With the right door, your business can keep moving forward every day.
0 notes
Text
Scaffolding vs Formwork: Understanding the Key Differences

In the construction industry, both scaffolding and formwork play crucial roles in ensuring structural stability and efficiency. They serve distinct purposes, even though they appear similar. Scaffolding provides temporary support for workers and materials, while formwork acts as a mold for concrete structures. Understanding the differences between scaffolding shuttering, formwork panels can help construction professionals make informed choices.
What is Scaffolding?
Scaffolding is a temporary structure erected alongside buildings or infrastructure projects to provide workers with safe access to various heights. It consists of metal or wooden platforms supported by vertical and horizontal frames. Scaffolding is commonly used for:
Construction of multi-story buildings
Maintenance and repair work
Painting and plastering
Installing glass or façade systems
Types of Scaffolding
Single Scaffolding: Commonly used for brickwork, it consists of standards, ledgers, and putlogs parallel to the wall.
Double Scaffolding: Often used for stone masonry, it has two rows of scaffolding for extra stability.
Cantilever Scaffolding: Used in situations where the ground does not support standard scaffolding.
Suspended Scaffolding: A platform suspended from the roof, commonly used for painting or window installation.
Trestle Scaffolding: Suitable for interior work, where platforms are supported on movable tripods.
What is Formwork?
Formwork, also known as shuttering, is a temporary mold into which concrete is poured and allowed to harden. The primary purpose of formwork is to shape structural components like columns, beams, and slabs. Formwork panels are available in various materials, each offering distinct advantages in durability, cost, and reusability.
Types of Formwork
Timber Formwork: Traditional and cost-effective but requires skilled labor for installation.
Steel Formwork: Highly durable and reusable, offering precision in concrete structures.
Aluminum Formwork: Lightweight and corrosion-resistant, commonly used in large-scale projects.
Plastic Formwork: A modern alternative that is easy to clean, lightweight, and reusable, increasingly preferred by plastic formwork manufacturers in Bangalore.
Modular Formwork: Prefabricated panels designed for rapid assembly and disassembly, improving efficiency in construction.
Key Differences Between Scaffolding and Formwork
Function: Scaffolding supports workers and materials, while formwork supports fresh concrete until it hardens.
Material: Scaffolding is generally made from metal or wood, while formwork can be made from timber, steel, aluminum, or plastic.
Placement: Scaffolding is positioned externally around structures, whereas formwork is placed where concrete is poured.
Reusability: Both can be reused, but steel and plastic formwork tend to last longer than traditional scaffolding materials.
Load-Bearing Capacity: Formwork must withstand the weight of wet concrete, whereas scaffolding needs to support workers and equipment.
Advantages of Modern Formwork Solutions
Formwork are offering innovative solutions that provide several benefits, with advancements in construction technology:
Lightweight Design: Reduces labor intensity and speeds up assembly.
High Reusability: More cost-effective over multiple projects.
Improved Surface Finish: Eliminates the need for additional plastering or finishing work.
Resistance to Water and Chemicals: Extends the lifespan of formwork panels.
Finally, while scaffolding and formwork are both essential in construction, they serve unique functions that complement each other. Scaffolding shuttering is crucial for worker safety, while formwork panels shape the structural elements of a building. With innovations like plastic formwork, construction professionals now have access to more durable and cost-effective solutions.
If you are looking for plastic formworks in Bangalore, Nova Formworks is the best choice. Their high-quality, reusable formwork systems enhance efficiency, safety, and long-term sustainability in construction projects. Choosing the right system can significantly impact overall project success.
0 notes
Text
Top Qualities to Look for in the Best Photographer Near Me

Finding the best photographer near me can be a daunting task, especially when you want someone who can perfectly capture your special moments. Whether it's for a wedding, family portrait, or professional event, the right photographer can make all the difference. With countless options available, understanding the key qualities that define the best photographers can simplify your search and ensure your needs are met with exceptional artistry and service.
Understanding Your Needs
The first step in selecting the best photographer near you is to clearly define your own requirements. Are you looking for someone who specializes in weddings, portraits, fashion, or corporate events? Identifying your specific needs will guide you to photographers with the right expertise and experience.
Top Qualities of the Best Photographer Near Me
1. Expertise and Experience
The best photographers have extensive experience in their field. With years of practice, they hone their skills and develop a keen eye for composition and detail. Always look for photographers with a proven track record in the specific type of photography you require, as this expertise translates into high-quality results.
2. Creativity and Artistic Vision
Photography is an art form, and the best photographers possess a unique creative vision. They can see beyond the ordinary and capture moments in a way that tells a compelling story. When choosing a photographer, browse their portfolio to gauge their artistic style and creativity.
3. Technical Proficiency
The best photographer near you should have a strong grasp of the technical aspects of photography. This includes an understanding of lighting, exposure, shutter speed, and post-processing techniques. Technical proficiency ensures that they can handle various shooting conditions and produce crisp, clear images.
4. Professionalism and Reliability
Professionalism is a hallmark of the best photographers. They should communicate clearly, meet deadlines, and be punctual for shoots. Reliability is crucial as you want someone who respects your time and delivers on their promises.
5. Strong Interpersonal Skills
Photography often requires close interaction with clients. A photographer with excellent interpersonal skills can build rapport, making you feel comfortable and confident in front of the camera. This connection is vital for capturing natural and authentic images.
6. Attention to Detail
Attention to detail is what sets the best photographers apart. They notice the little things that can make or break a photo, such as stray hairs, reflections, or background distractions. Their meticulous nature ensures that every shot is polished to perfection.
7. Versatility and Adaptability
The best photographer near me should be versatile and adaptable, capable of handling various types of photography and unpredictable situations. Whether it's an outdoor shoot with changing weather conditions or a dimly lit indoor setting, they should be able to adjust their approach to achieve the best results.
Making Your Decision
After considering these qualities, shortlist a few photographers and arrange an initial meeting or consultation. Discuss your vision, requirements, and any concerns you may have. Seeing how well the photographer listens and responds to your needs can be a good indicator of working compatibility.
Conclusion
Selecting the best photographer near you involves more than just a quick online search. By focusing on qualities such as expertise, creativity, technical skills, and professionalism, you can find a photographer who will not only meet but exceed your expectations. At Alf Photography, we pride ourselves on embodying these qualities to deliver exceptional photography services. As a leading choice for those seeking the best photographer near me, we are committed to capturing your moments with artistry and precision. Explore our portfolio and services to see how we can bring your vision to life.
FAQs:
1. What should I look for in the portfolio of the best photographer near me?
Look for diversity in their portfolio, consistency in quality, and a style that resonates with your personal taste. A strong portfolio showcases their versatility and expertise.
2. How important is a photographer's experience in their specific field?
Experience is crucial as it provides the photographer with the skills and knowledge to handle various situations effectively. It also indicates a history of satisfied clients and success in their craft.
3. Can I request specific styles or themes for my photography session?
Yes, the best photographers welcome input from clients and can tailor their services to meet specific style or theme requests, ensuring your vision is accurately captured.
4. How do the best photographers handle post-processing?
Top photographers use post-processing to enhance images subtly, maintaining a natural look. They should be proficient with editing software to correct lighting, color, and minor imperfections.
5. Why is the photographer’s communication style important?
Effective communication ensures that the photographer understands your expectations and can convey their process clearly. It helps build trust and ensures a smooth working relationship.
6. How can I verify the reliability of a photographer?
Check reviews and testimonials from previous clients, and consider their responsiveness during your initial inquiry. A reliable photographer will be attentive and consistent in communication.
0 notes
Text
Photography tips for beginners:
HOW TO IMPROVE YOUR PHOTOS
Photography is one of those things that can seem really complicated when you’re just starting out. There’s so much to learn about cameras, lenses, lighting, and composition. But once you get the basics, it becomes a fun and creative way to express yourself. Here are a few simple photography tips that can help beginners take better photos.
Understand your camera before you even start snapping photos; it’s important to get to know your camera. Whether you’re using a smartphone or a DSLDR, learning the settings can really help improve your shots.
ISO: This controls how sensitive your camera is to light. A higher ISO can help you take photos in darker places, but it can also make your photos look grainy, so try to keep it low when you're in bright conditions.
Aperture (f-stop): The aperture controls how much light gets into the camera. Aperture and f-stop are both terms for measurement of how much light passes through a camera lens.
Shutter Speed: This is how long the camera's shutter stays open to let light in. Faster shutter speeds freeze movement, which is good for sports or action shots, while slower speeds can blur movement.
Tip: If you're just starting out, try using your camera's auto mode or aperture priority mode to help you learn how settings affect your photos.
Composition Is Key Composition is all about arranging the elements in your photo.
Rule of Thirds: Imagine your photo divided into 3x3 grid. Place your subject along these lines or at the intersections. This can make your photo more balanced and interesting.
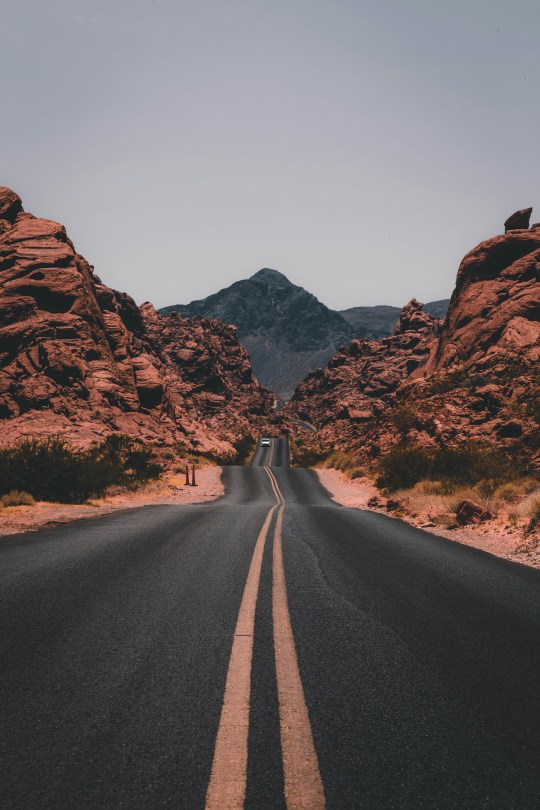
Leading Lines: Look for natural lines in your scene—like roads, rivers, or even shadows.
Framing: Find a way to frame your subject using elements in the scene, like trees, windows, or doors.
Tip: Don't just place your subject in the center of the frame every time. Play around with different positions to see how it changes your photo.
Pay attention to lighting. Lighting is everything in photography. The right lighting can make a big difference in how your photo looks.
Golden Hour: The time right after sunrise or just before sunset is known as "golden hour." The light during this time is soft and warm, which makes everything look beautiful.
Natural Light vs. Artificial Light: Natural light (from the sun) is usually the best, but artificial light from lamps or flashes can work if you need to control the lighting more. When shooting indoors, try to use soft light instead of harsh, direct light.
Tip: Experiment with different lighting conditions and see how they change the light of your photos.
Focus on Your Subject Make sure your subject is sharp and clear. In portrait photography, this means focusing on the eyes of the person you're photographing. If the subject is out of focus, the whole photo will lose its impact.
Autofocus: Most cameras and smartphones have autofocus, which helps you get good images quickly. Just make sure your camera is focusing on the right spot—usually the face or the main subject of your photo.
Manual Focus: If you want more control, try using manual focus, especially in tricky situations where autofocus might struggle, like in low light or with a moving subject.
Tip: Always check your photos to make sure your main subject is in focus. If it's blurry, you may need to adjust your camera settings or the position of your subject.
Edit Your Photos Editing is a big part of photography too! Even a small adjustment can make a photo look way better.
Exposure: If your photo is too dark or too bright, adjust the exposure to balance things out.
Contrast and Saturation: You can make colors pop or make the image feel moodier by adjusting contrast and saturation.
Cropping: Don't be afraid to crop your photos if you need to improve the composition. Sometimes cutting out a distracting background can make a big difference.
Tip: There are plenty of free editing apps available, like SnapSeed or Lightroom Mobile. You don't need to go overboard with editing—sometimes just a few adjustments are enough to make your photo shine.
Photography is a journey, and it's important to be patient and keep on practicing. Don't worry if your photos aren't perfect right away. The more you shoot, the more you'll understand your camera, how light works, and what makes a great photo. Keep experimenting with different settings, compositions, and lighting conditions. Soon, you'll start seeing your skills improve!
1 note
·
View note
Text
Shopping Around for DSLR's
// AUGUST 8TH, 2006
In response to a couple of my mates writing to me in the past day or so (Brett and Dave) requesting information about digital SLR cameras and photography, if I may I'd like to cover a few points that will hopefully help ANYONE make the right decision when it comes to upgrading to the wonderful world of SLR photography.
Some of you are already scratching your heads saying, "what the hell does SLR stand for...?" It stands for "Single Lens Reflex" or in other words cameras that have detachable lenses. To assist in the rest of this dialogue, I will be frequently drawing information from, and linking to the wonderful site that is "Digital Photography Review" or more commonly referred to as "dpreview.com".
At the time of writing this, there are three main players in the "pro-sumer" range of SLR cameras - Canon, Nikon and Pentax. All three have entry level models at the moment:
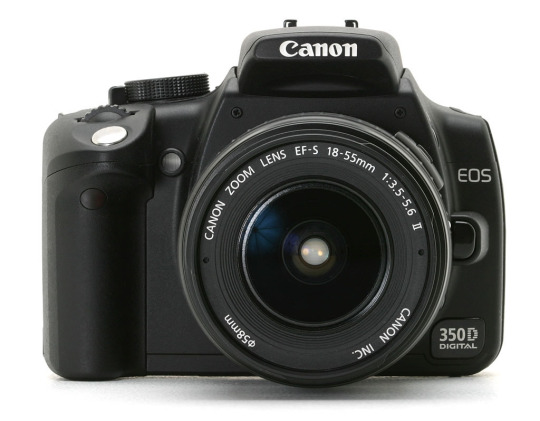
Canon EOS 350D (known in the US and Canada as the Digital Rebel XT) - retails for USD $650 - $700
Nikon D70s - retails for USD $950 - $1,000
Pentax *ist DL2 - retails for USD $400 - $500
Click here for a side-by-side review of these models.
The question has been asked of me, "why should I not look beyond the entry level models towards a more professional outfit...?"
The answer to that one is simple and probably covers the most important point I want to make in this post today. If you aren't already right into your photography and already have your head around the concepts of shutter speeds, apertures, bracketing, ISO speeds etc, then you are best advised to save your money on the camera body this time around and instead invest the money you will save in lenses.
While awesome photos have a lot to do with the person taking them, the understanding of good composition and light and the capabilities of the camera body itself, the thing that really makes the magic happen is the lens. It is rare that you will ever have ONE lens that will "do it all" for you in terms of capturing your shots in any one situation, so expect to be shopping around for 4-5 lenses by the time you will have enough to satisfy your needs. My four currently consists of:
Canon EF 28-105mm f/3.5-4.5 II USM (all-purpose)
Canon EF 75-300mm f/4-5.6 III (telephoto)
Canon EF 50mm f/1.8 II (portraits)
Sigma 10-20mm f/4-5.6 EX DC HSM (wide angle)
There's no two ways about it these are expensive little buggers, but they will hopefully outlive your camera body due to either wear and tear or upgrading so it makes sense to initially invest in your lenses as opposed to a whiz-bang pro body.
For example (I will use Canon as an example here as they are the cameras that I use and believe in) you could be tossing up between a Canon Rebel XT Digital (350D) and the flashier Canon 30D. First of all, a comparison between the two models shows that besides the obvious price tag difference (the 30D is almost twice the price of the 350D) the 30D has the following feature benefits:
slightly greater maximum resolution
greater sensor size
9 focal points as opposed to 7 on the Rebel
greater metering choices
can shoot many more frames-per-second
larger LCD screen
These may appear to be minor differences for a doubled price-tag, but the focal point, metering and frames-per-second improvements are major and are primarily responsible for the added bucks.
The point I am trying to make here is that with the $600 or so dollars you would save by going with the Rebel XT (350D), you could get yourself an additional telephoto lens AND a portrait lens. Then in a few years time when you have a bit of a feel for the more technical aspects of the craft, you can splurge all you want on the higher end models.
Make sense?
The only thing to be mindful of, and this is very important, is that once you have started investing in Canon or Nikon lenses (which are not interchangeable across the brands), you are more or less stuck with that brand for good unless you have the urge to sell EVERYTHING you have and start from scratch again. So do your homework, check out "dpreview.com" for all the camera technical features, reviews and comparisons with other models, and make a decision that you think will be right for you in the long term. Personally I don't think you can go wrong with Canon, but there are plenty of Nikon punters out there who will offer their two bucks worth on the matter too I am sure!
Either way, if you have any further questions, leave a comment below and I'll take care of them for you...
Links & credits:
Digital Photography Review // dpreview.com
Masey on Instagram // instagram.com
0 notes
Text
Pleasant wedding ceremony pictures in Berhampur
Scenic Outdoor Shots
Historic Locations: Berhampur has beautiful temples, including the Taratarini Temple and the Maa Budhi Thakurani Temple. Capturing some pre-wedding or couple shots around these areas adds a rich cultural vibe.
Lush Greenery and Beaches: For natural beauty, beaches like Gopalpur Beach provide a serene, coastal background. The green spaces around Berhampur also make for peaceful, scenic shots, especially if the wedding venue has outdoor areas.
Traditional Mandap Decor
Temple-Inspired Mandap: A mandap adorned with marigolds, jasmine, and brass or copper vessels can provide a warm, traditional look.
Draped Floral Garlands: Incorporating strings of local flowers like mogra or jasmine around the mandap and the seating area creates a lovely ambiance.
Soft Lighting: Opt for natural lighting during the daytime and decorative lanterns or diya lights for evening ceremonies, enhancing the warmth and elegance of the setting.
Capturing Cultural Rituals
Detailed Shots of Rituals: Highlight the tying of the Mangalsutra, the Saptapadi (seven steps), and other traditional rituals. Close-ups of hands, jewelry, and attire during these moments add an authentic feel.
Candid Moments with Family: Capture the moments of laughter, tears, and joy shared among family members, especially during the bride’s entry and the couple’s first appearance.
Guest Interactions and Group Photos
Traditional Family Portraits: Arrange family members in a relaxed manner around the couple to capture moments that feel personal and joyful.
Candid Group Shots: Rather than formal group photos, encourage family and friends to interact naturally, capturing genuine smiles and laughter.
By incorporating these elements, a wedding ceremony in Berhampur can be captured in a way that celebrates both tradition and personal moments, resulting in beautiful and pleasant memories for the couple and their families.
Why Image Care Photography could be an excellent choice for your wedding:
Professional Experience and Expertise:
Wedding photographers typically have years of experience and have captured many weddings. This wealth of experience allows them to anticipate and adapt to various scenarios, from indoor venues with tricky lighting to outdoor ceremonies with unpredictable weather. Experienced photographers know how to work with different camera equipment, lenses, and accessories to achieve the best results in every situation. They also have a thorough understanding of the technical aspects of photography such as aperture, shutter speed, and ISO, which are crucial for achieving the perfect shot in any lighting condition.
High-Quality Images
Professional photographers use high-end cameras, lenses, and editing tools to ensure that each image is sharp, well-composed, and true to the original moment. This results in high-resolution photos that look beautiful in prints, albums, and digital formats. After your wedding, your photographer will edit the images to enhance them further. Image Care Photography will likely apply subtle edits, such as color correction, skin tone adjustments, and retouching, while maintaining the natural look of your special moments. This skill ensures your images stand out while keeping them authentic to the day’s vibe.
Personalized Approach
Before the wedding, Image Care Photography would typically take time to understand your preferences, style, and the atmosphere you want for your photos. This personalized approach ensures that they are in tune with what you want, from the types of shots to the overall mood of the images. You might have a specific list of moments you want to be captured, such as family portraits, candid shots, or certain wedding traditions. Image Care Photography will ensure that these are incorporated into the shoot while also remaining flexible enough to capture spontaneous, beautiful moments as they unfold.
Professionalism and Reliability
A professional wedding photographer understands the importance of timeliness. Image Care Photography will ensure they arrive on time, are prepared with backups for equipment, and keep to the schedule. While capturing beautiful shots, the photographer should remain unobtrusive, ensuring they are always in the right place at the right time without disturbing the ceremony or celebration. A seasoned photographer knows how to blend in, allowing the natural flow of events to unfold while ensuring they don't miss a moment.
Comprehensive Packages
Image Care Photography often offers different packages tailored to various needs and budgets. Whether you want a full-day photography package, including getting ready shots, ceremony, and reception coverage, or something more minimal, they are likely to provide flexible options. Many photographers include or offer the option to purchase beautifully crafted wedding albums, prints, and canvases. These physical keepsakes are perfect for preserving memories and sharing with family and friends. By choosing Image Care Photography, you ensure that your wedding day is captured by skilled, experienced, and professional photographers who genuinely care about the preservation of your memories. With personalized service, attention to detail, technical expertise, and a passion for storytelling, Image Care Photography offers not just beautiful photos, but a seamless, enjoyable experience that leaves you with treasured memories for a lifetime.
0 notes
Text
Travel Photography: How to Capture the Essence of a Destination
ravel photography is more than just snapping pictures of beautiful landscapes and iconic landmarks; it's about capturing the essence of a destination—the culture, the people, the emotions, and the stories.
As a photographer, your goal is to create images that resonate with viewers and evoke a sense of place, allowing them to experience the world through your lens. This article will delve into the art of travel photography, offering insights, tips, and techniques to help you create compelling photographs that tell a story.
Understanding Your Destination
Research and Preparation
Before embarking on your journey, it's crucial to research your destination. Understanding the culture, customs, and history of a place can significantly influence your photography. Familiarize yourself with local traditions, popular spots, and hidden gems. Online resources, travel blogs, and photography forums can provide invaluable insights. Consider the following aspects during your research:
Cultural Significance: Learn about local festivals, rituals, and events. Understanding what makes a place unique will help you capture its spirit.
Geography and Climate: Know the best times to visit certain locations and how weather can affect your photography. For example, golden hour (the time shortly after sunrise or before sunset) can drastically change the mood of your images.
Local Laws and Customs: Be aware of any regulations regarding photography in public spaces or religious sites. Respecting local customs can help you gain trust and access to more intimate moments.
Creating a Shot List
While spontaneity is a significant part of travel photography, having a shot list can help you focus on key elements you want to capture. A shot list might include:
Iconic landmarks
Street scenes
Local cuisine
Portraits of locals
Landscape vistas
Cultural events
By creating a diverse shot list, you ensure that your portfolio showcases various aspects of the destination, providing a well-rounded visual story.
The Technical Aspects of Travel Photography
Choosing the Right Gear
Selecting the right gear is essential for travel photography. Here are some important considerations:
Camera: While DSLR and mirrorless cameras are popular for their versatility and image quality, compact cameras and even smartphones can produce excellent results. Choose a camera that suits your style and level of comfort.
Lenses: A variety of lenses can enhance your photography. A wide-angle lens is perfect for landscapes, while a zoom lens is ideal for capturing distant subjects. A prime lens with a large aperture can help you create stunning portraits.
Tripod: A sturdy tripod can help stabilize your shots, especially in low-light conditions or for long exposures. Consider a lightweight option for easy transport.
Accessories: Don't forget essential accessories like extra batteries, memory cards, a lens cleaning kit, and ND filters for controlling exposure in bright conditions.
Mastering Exposure and Composition
Understanding exposure settings—aperture, shutter speed, and ISO—is crucial for achieving the desired effect in your photographs. Here are some tips to help you master these elements:
Aperture: A wider aperture (lower f-stop number) creates a shallow depth of field, isolating your subject and blurring the background. This is ideal for portraits. Conversely, a smaller aperture (higher f-stop number) increases depth of field, ensuring more of the scene is in focus—great for landscapes.
Shutter Speed: Fast shutter speeds freeze action, while slow shutter speeds can create motion blur, ideal for capturing flowing water or busy streets. Experiment with different speeds to convey movement.
ISO: Use a lower ISO in bright conditions to reduce noise and maintain image quality. In low-light situations, increase the ISO, but be cautious of graininess. Modern cameras handle high ISO levels better, but it’s still wise to test your camera’s limits.
Composition Techniques: Employ the rule of thirds, leading lines, and framing to create balanced and dynamic images. Experiment with different angles and perspectives to add interest to your shots.
Capturing the People and Culture
Engaging with Locals
To truly capture the essence of a destination, connecting with its people is vital. Here are some tips for engaging with locals:
Be Respectful: Approach people with respect and politeness. A friendly smile and a genuine interest in their culture can open doors to authentic moments.
Ask for Permission: Always ask before photographing someone, especially in intimate settings. This shows respect and can often lead to more engaging portraits.
Learn Basic Phrases: Knowing a few words in the local language can create goodwill and facilitate communication. Simple greetings or expressions of gratitude can go a long way.
Candid vs. Posed Shots
Both candid and posed shots have their place in travel photography. Candid shots capture genuine moments, often reflecting the mood and character of a place. On the other hand, posed shots allow for more control over composition and lighting. Aim for a balance between the two to create a diverse portfolio.
Candid Photography: Stay observant and ready to capture fleeting moments. Use a longer lens to maintain distance, allowing subjects to act naturally without feeling posed.
Posed Photography: When photographing people, consider the background and lighting. Position your subject in a way that complements the setting and enhances the story you want to tell.
Emphasizing Local Cuisine and Traditions
Food Photography
Food is an integral part of any culture, and capturing local cuisine can add depth to your travel narrative. Here are some tips for food photography:
Natural Light: Whenever possible, use natural light to showcase the colors and textures of the food. Position your subject near a window or outdoors.
Angles and Framing: Experiment with different angles—overhead shots work well for flat lays, while eye-level shots can create a more intimate feel. Pay attention to the composition and surrounding elements.
Styling: Consider how to present the food. Use simple props like utensils or table settings to enhance the image without overwhelming the subject.
Documenting Traditions
Capturing local traditions and festivals provides a unique insight into a culture. To effectively document these moments:
Be Prepared: Research local events happening during your visit and plan your shooting schedule accordingly. Arrive early to find the best spots for photographing the action. Top 10 wedding photographer in Dehradun
Emphasize Emotion: Look for moments that convey emotion—joy, excitement, or contemplation. These images often resonate more deeply with viewers.
Include Context: Show the setting and surroundings to provide context. This helps viewers understand the significance of the event and its relation to the culture.
Telling a Story Through Your Photos
Creating a Narrative
Every destination has a story to tell, and your photographs can help narrate that tale. Consider the following strategies:
Thematic Series: Create a series of images focused on a particular theme—daily life, architecture, or nature. This allows for a deeper exploration of the subject matter.
Photo Essays: A photo essay combines images and captions to tell a story. Choose a central theme, such as “A Day in the Life,” and capture images that highlight various aspects of that theme.
Sequential Storytelling: Capture images that work together to form a narrative. For instance, document the journey from preparation to consumption at a local market, allowing viewers to experience the process.
Editing and Post-Processing
Post-processing is an essential part of modern photography. Use editing software to enhance your images while maintaining authenticity. Here are some tips for effective editing:
Color Correction: Adjust white balance, contrast, and saturation to ensure your images accurately represent the scene.
Cropping and Composition: Crop your images to enhance composition and eliminate distractions. Make sure the focus remains on the subject.
Consistency: Aim for a consistent editing style across your portfolio. This can help unify your body of work and make your photography recognizable.
Sharing Your Travel Photography
Building an Online Presence
In today’s digital age, sharing your travel photography is easier than ever. Consider these platforms:
Social Media: Utilize platforms like Instagram, Facebook, and Pinterest to showcase your work. Engage with your audience through captions, stories, and behind-the-scenes content.
Photography Websites and Blogs: Create a personal website to display your portfolio and Best Wedding Photographer In india share travel stories. Blogging allows for deeper engagement with your audience, offering insights into your experiences.
Online Communities: Join photography forums or social media groups to connect with fellow photographers, share tips, and receive feedback on your work.
Submitting to Publications
If you aspire to have your work published, research travel magazines, websites, or photography contests that accept submissions. Craft a compelling pitch and include your best work. Be prepared for rejection, as it’s a common part of the process, but persistence can lead to opportunities.
Conclusion
Travel photography is a powerful medium that allows you to share your experiences and the essence of the places you visit. By researching your destination, mastering technical skills, engaging with locals, and crafting compelling narratives, you can create images that resonate with viewers and evoke the spirit of a place. As you continue your photographic journey, remember to embrace spontaneity, respect cultural differences, and, most importantly, enjoy the process of capturing the beauty of our diverse world. Through your lens, you have the power to inspire others to explore, appreciate, and connect with the global community. Happy travels and happy shooting!
0 notes
Text
Innovative Techniques for Capturing NYC Cityscapes

When we think about capturing the iconic cityscapes of NYC, it’s clear that innovative techniques can elevate our photography. By choosing the right gear and mastering our camera settings, we can create images that not only represent the city but also evoke its unique energy. Experimenting with composition and understanding how natural light interacts with our scenes can lead to striking results. As we explore these approaches, we might discover some surprising tips that could transform our urban photography into something truly remarkable. What techniques have you found most effective?
Essential Gear for Cityscapes
When we set out to capture the stunning cityscapes of NYC, choosing the right gear is crucial for transforming our vision into reality. The essential gear for cityscapes starts with a reliable camera; both DSLRs and mirrorless options offer excellent image quality.
To truly embrace the expansive urban scenes, we should invest in wide-angle lenses, ideally with a focal length of 16-35mm, to capture those towering skyscrapers.
Next, sturdy tripods become our best friends, especially in low-light situations. Lightweight models make transportation easier without sacrificing stability.
We also shouldn’t overlook filters and accessories; polarizing filters reduce reflections while enhancing colors, and neutral density filters allow for long exposure shots, giving our images that dreamy feel.
Finally, once we’ve captured our shots, editing software is essential for polishing our images. Programs like Adobe Lightroom and Photoshop help us enhance details, correct colors, and create a cohesive look.
Mastering Camera Settings

Having the right gear sets the stage, but mastering camera settings is what truly elevates our cityscape photography.
When we’re out capturing the vibrant energy of New York City, understanding our camera’s settings is crucial. Here are some key points to consider:
Shutter Speed: Adjusting shutter speed allows us to control how motion is captured. A slower speed can create beautiful light trails from moving vehicles, while a faster speed freezes action.
Aperture Priority: Using aperture priority mode helps us maintain a sharp focus across the cityscape. Setting a smaller aperture lets us capture more details, especially in expansive scenes.
Using a Tripod: To achieve stability, especially during the blue hour, we should always consider using a tripod. It helps eliminate camera shake and enables longer exposures without blur.
Wide-Angle Lens: A wide-angle lens is a must for cityscapes. It allows us to capture more of the skyline and dramatic architectural elements in one frame.
Creative Composition Techniques

In the heart of the city, we can harness creative composition techniques to elevate our cityscape photography. By employing the rule of thirds, we can position our subjects in a way that draws the viewer’s eye, creating a more dynamic image.
We should also consider using leading lines, like streets or railings, to guide the viewer through our photos, adding depth and interest.
Black and white photography can dramatically enhance our cityscapes, emphasizing contrast and texture that color sometimes dilutes. It helps us focus on the shapes and forms of the urban landscape, allowing for more abstract compositions.
As cityscape photographers, we can isolate elements within the bustling environment, creating powerful focal points that resonate with our audience.
Experimenting with different angles and perspectives will challenge us to step outside our comfort zones. We can also play with framing elements, like windows or arches, to add layers to our compositions.
The unpredictability of the city means we’ll capture unique moments that reflect its vibrant energy. Embracing these techniques will help us transform ordinary scenes into extraordinary works of art.
Let’s get out there and explore!
Leveraging Natural Light

Natural light plays a crucial role in transforming our cityscape photography into captivating narratives. By understanding how to leverage natural light, we can create images that resonate with emotional quality and visual depth.
Here are some essential tips to enhance our cityscape photography:
Golden Hour: Shooting during the golden hour, just after sunrise or before sunset, bathes our subjects in soft, warm light, creating stunning shadows and highlights.
Experiment with Angles: Changing our perspective can dramatically alter how natural light interacts with the environment, offering unique compositions that showcase the city’s character.
Seek Daylight Studios: Utilizing daylight studios in NYC can provide controlled lighting conditions while minimizing distractions, allowing us to focus on the interplay of light and subject.
Weather Wonders: Embrace varied weather conditions; overcast days can produce soft, diffused light, while rain can create reflections that add depth and mood to our photographs.
Editing and Post-Processing Tips
When it comes to transforming our cityscape images into striking visuals, effective editing and post-processing are essential tools in our arsenal. We should start by utilizing software that allows for non-destructive editing, giving us the freedom to adjust exposure, contrast, and color without altering our original images.
Focusing on enhancing shadows and highlights can add depth and dimension, ensuring our final images reflect the vibrancy of the city.
It’s crucial to aim for subtlety in our color adjustments; over-saturation can lead to unrealistic results. By using the histogram in our editing software, we can easily identify areas that may be overexposed or underexposed, allowing for targeted adjustments that enhance overall image quality.
Experimenting with presets and filters can help us develop a consistent editing style, but we must remember to tweak them for each specific image to ensure optimal results.
Additionally, incorporating image stabilization techniques during editing can help sharpen our cityscape images, making them even more captivating.
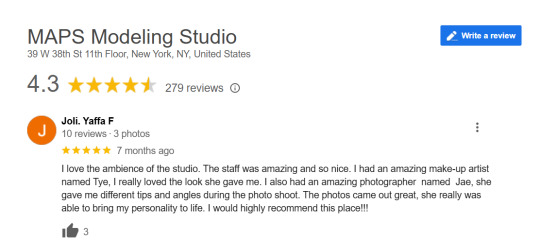
What Our Customers Are Saying
At Maps studio, we value the feedback from our wonderful users. We’re excited to share screenshots of reviews from various platforms like Google My Business that highlight our commitment to capturing the essence of NYC cityscapes. These testimonials reflect our dedication to quality and creativity, showing how our work resonates with those who experience it. Check out the reviews for a glimpse into our impact. For more information, visit Mapsstudio.

Frequently Asked Questions
What Time of Year Is Best for Capturing NYC Cityscapes?
We believe autumn’s the best time for capturing NYC cityscapes. The vibrant foliage adds color, and the crisp air enhances clarity. Plus, the golden hour light creates stunning contrasts, making every shot truly magical.
How Do I Choose the Right Location for Cityscape Photography?
When choosing the right location for cityscape photography, we should explore high vantage points, iconic landmarks, and unique perspectives. Let’s consider the time of day and lighting conditions to enhance our compositions effectively.
Are There Specific Safety Tips for Photographing in NYC?
When photographing in NYC, we should stay aware of our surroundings, avoid isolated areas, and keep our gear secure. It’s wise to blend in and choose well-lit spots, especially at night, to ensure our safety.
What Is the Best Way to Deal With Crowds While Shooting?
To deal with crowds while shooting, we can arrive early or choose off-peak times. Using a wide-angle lens helps capture more, and patience allows us to wait for the perfect moment without distractions.
Can I Use a Smartphone for High-Quality Cityscape Photography?
Absolutely, we can use our smartphones for high-quality cityscape photography! With the right apps and techniques, we’re able to capture stunning images that rival those taken with professional cameras. Let’s explore our options!
Conclusion
In conclusion, capturing the vibrant essence of NYC cityscapes is all about blending the right gear, mastering our camera settings, and experimenting with creative compositions. By leveraging natural light and honing our editing skills, we can produce stunning images that reflect the city’s unique energy. So, let’s get out there, explore new perspectives, and elevate our photography together. With these innovative techniques in hand, we’re ready to showcase the incredible beauty of New York City!
Visit Mapsstudio for more information about photography.
#map design studio#maps modeling studio photos#maps modeling studio reviews#maps nyc modeling#maps studio nyc#maps studios boston#film#modeling photography studio#modeling studio#maps modeling studio#photography#photographer#photographers on tumblr#NYC cityscapes#Photographing in NYC
0 notes
Text
Exposure work shop
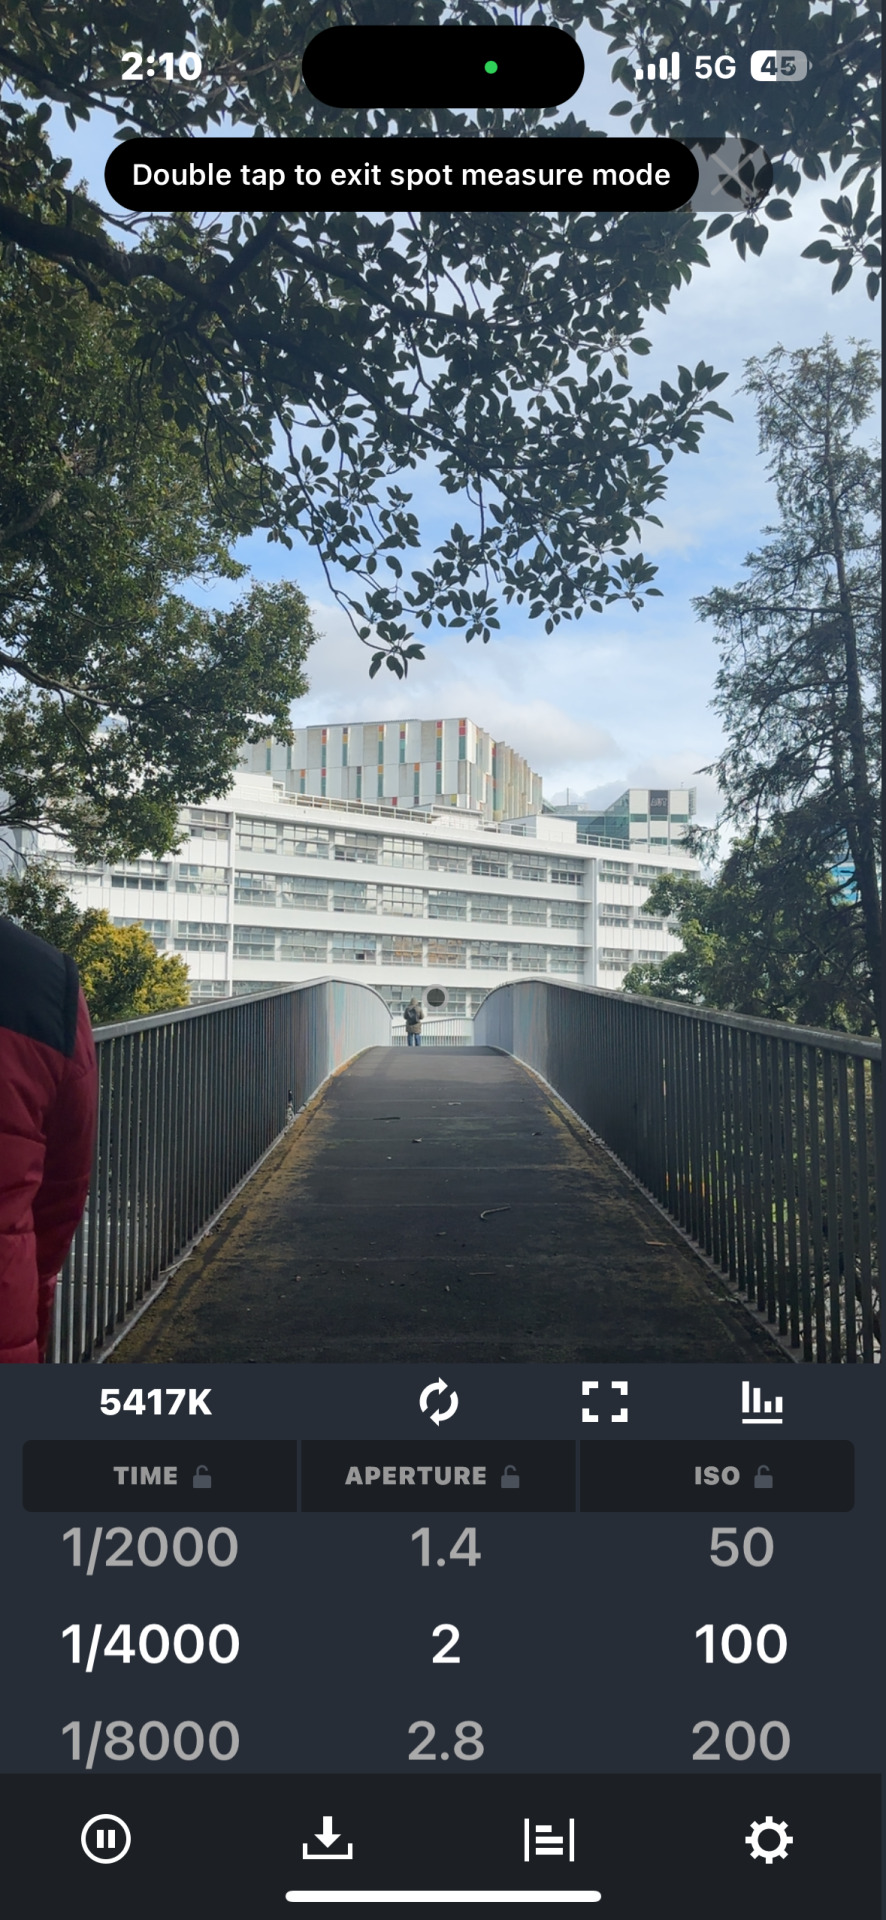
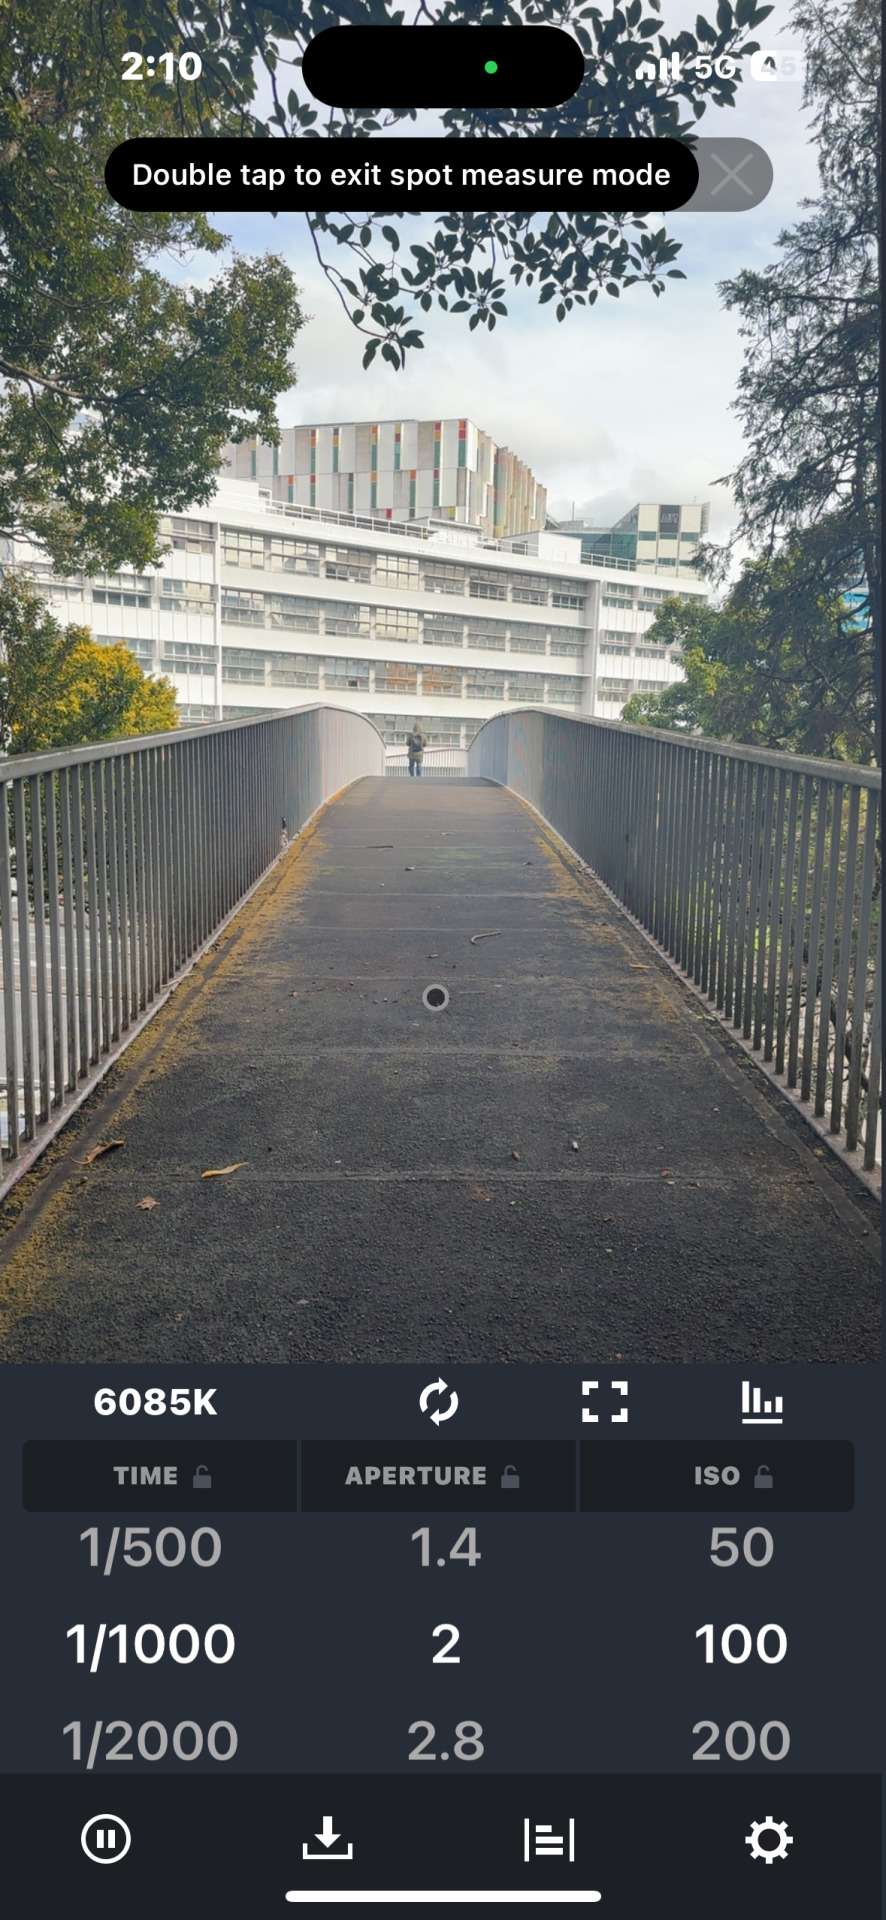
Produce 3 photographs of the same scene taking an exposure reading from the highlight, mid-tone, and shadow. How do these different light qualities impact on your image?
The different light qualities in the setting would impact my image because of how they all take the light qualities in and average them to determine a proper exposure best for the image.
shutter 1/80 aperture f/9 ISO: 3200
2. Produce a correctly exposed image (that is different to what you did for the first exercise) using an aperture of f16 and whatever shutter speed corresponds to the lighting situation. Now produce two more of the same image again, but this time adjust your aperture to f8 and then to f5.6 – how will you ensure a correct exposure even though you are using a different aperture/shutter speed combination?

Even though I used different apertures/shutter speed I was able to make the correct exposure using the evaluative metering mode. Checking with the needle to see if it rested on 0 to ensure the exposure was correct everytime before taking the picture.
3. Set the ISO on your camera to 100, and take an in focus (i.e.: no camera shake) photograph at 9pm somewhere inside your home, using the smallest aperture your lens allows. How will you determine if the shutter speed is too slow and thereby will cause camera shake? Will you need a tripod?
shutter 5 aperture 5.6 ISO: 100
A good rule of thumb is to have a higher shutter than your aperture or focal length. It was difficult to take a photo without camera shake as it's very cold in my area at 9pm and my hands tend to get shakey in cold weather. I think for next time I should prop my camera on something sturdy like my flat mailbox or borrow a tripod.
4. Produce a series of images (in a low light situation which you determine) utilizing an ISO of 100, 200, 400, 800, 1600. All of your images need to be f11 and whatever corresponding shutter speed. Will you need a tripod?


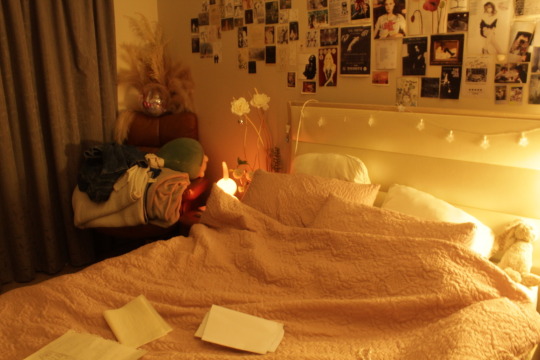
As I have increased the ISO from 100 to 1600 the quality of the picture has developed clearer. To avoid the camera shake in the earlier photos a tripod would have made this experiment much cleaner.
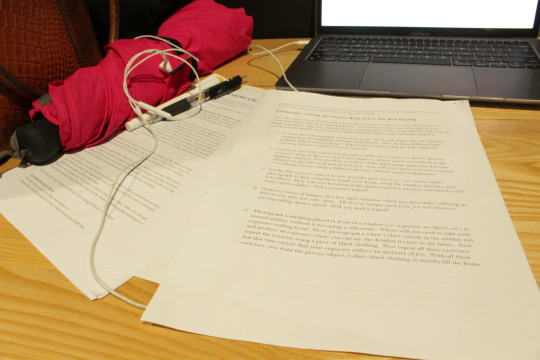
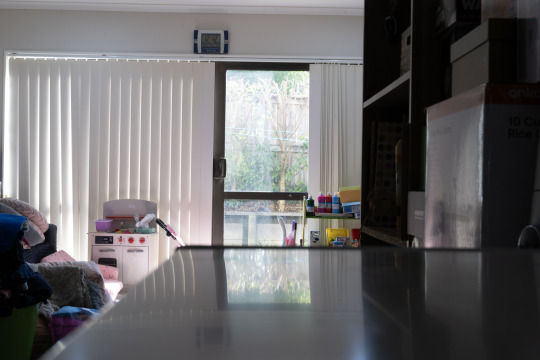
5. Photograph something placed in front of a window (i.e.: a person, an object, etc.) at around midday without it becoming a silhouette. Where will you need to take your exposure reading from? Next, photograph a white t-shirt outside in the midday sun and produce an exposure where you can see the detailed texture in the fabric. Now repeat the exercise using a piece of black clothing. Now repeat all three exercises, but this time ensure that your exposure utilizes an aperture of f16. With all these exercises, you want the person/object, t-shirt, black clothing to mostly fill the frame.

for the window picture I was able to avoid making my dog a silhouette by using flash and finding the middle tone in the picture.


To be able to see the details on the black and white shirts I used zoom and aperture to make the picture clearer to see the details and whatever correspondent shutter and ISO.
0 notes
Text
Week One In-Class assignments.
Task One:
Produce three photographs of the same scene. With each image take an exposure reading from the highlight, mid-tone and shadow. How do these different light qualities impact on your image? Repeat this exercise using all of the different metering systems available on your camera.
Task Two:
Produce a correctly exposed image (that is different to what you did for the first exercise) using an aperture of f16 and whatever shutter speed corresponds to the lighting situation. Now produce two more of the same image again, but this time adjust your aperture to f8 and then to f5.6 – how will you ensure a correct exposure even though you are using a different aperture/shutter speed combination?
f/16

f/8

f/5.6
Whilst on mirrorless, its far easier to know when you think you have the right exposure through your own eyes, I still used the built in light meter to determine when the camera sees the scene being captured live and shows + 0.0 on the light meter.
Task Three:
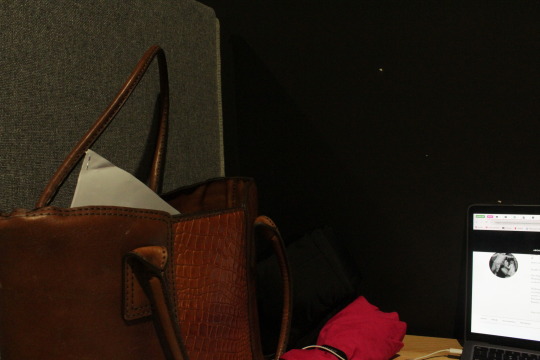
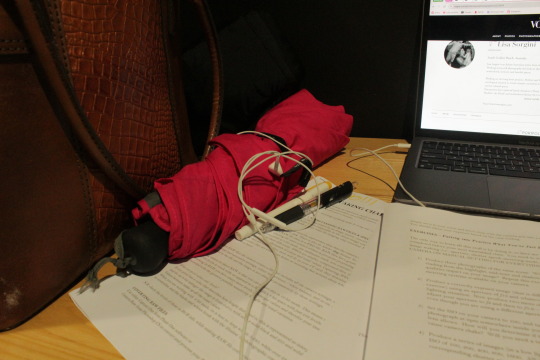
Set the ISO on your camera to 100, and take an in focus (i.e.: no camera shake) photograph at 9pm somewhere inside your home, using the smallest aperture your lens allows. How will you determine if the shutter speed is too slow and thereby will cause camera shake? Will you need a tripod?
For my lens, the smallest apeature that I can go down is F/22. In my bedroom at approx 9:00pm, its obviously very dark, and the only thing keeping it illuminated is the light coming from my laptop screen.
Even with my laptop screen at full brightness, i'd still need the maximum amount of time (30s) that the sensor would need to be exposed without resorting to using bulb mode in order to get a somewhat exposed image. I placed my camera on top of one of my cupboards facing my bedroom window to prevent any movement during the period when the sensor is exposed.

This is what my camera looks like when doing long exposure.
This is what the image came out looking like. Can see what is in the picture frame, but this shows that I either need to raise my ISO, or use a tripod to get a better exposure in dark situations.
Task 4:
Produce a series of images (in a low light situation which you determine) utilizing an ISO of 100, 200, 400, 800, 1600. All of your images need to be f11 and whatever corresponding shutter speed. Will you need a tripod?

From the top 2 to the bottom photo, from iso 100 up to 1600.
iso 100: 0.6s
iso 200: 1/4s
iso 400: 1/8s
iso 800: 1/15s
iso 1600: 1/30s
The images may look bright, but in reality that environment was really dark. This is a place where a tripod would be ideal. Some pictures even have motion blur, despite my best to be as stable as I could taking those shots.
Task 5:
Photograph something placed in front of a window (i.e.: a person, an object, etc.) at around midday without it becoming a silhouette. Where will you need to take your exposure reading from? Next, photograph a white t-shirt outside in the midday sun and produce an exposure where you can see the detailed texture in the fabric. Now repeat the exercise using a piece of black clothing. Now repeat all three exercises, but this time ensure that your exposure utilizes an aperture of f16. With all these exercises, you want the person/object, t-shirt, black clothing to mostly fill the frame.
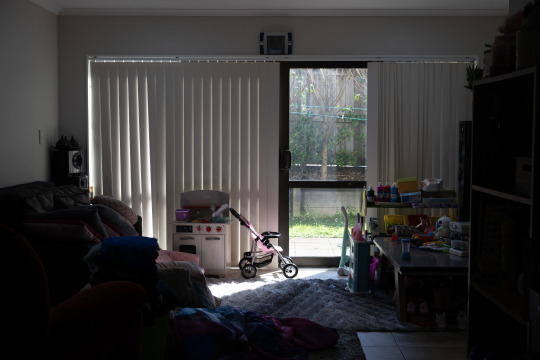
The light here in the living room is clearly shining on the stroller, so i'll use that as "something placed in front of a window".
With modern advances in camera technology, it's ideal to shoot for the highlights (this photo, it would be the window itself). Raw files can recover a lot of detail, even when pushed in post.

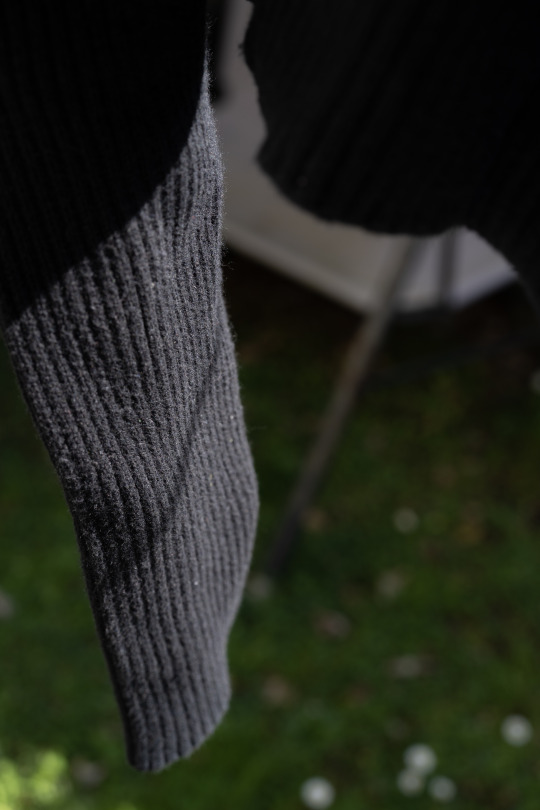
these ones taken at f/8
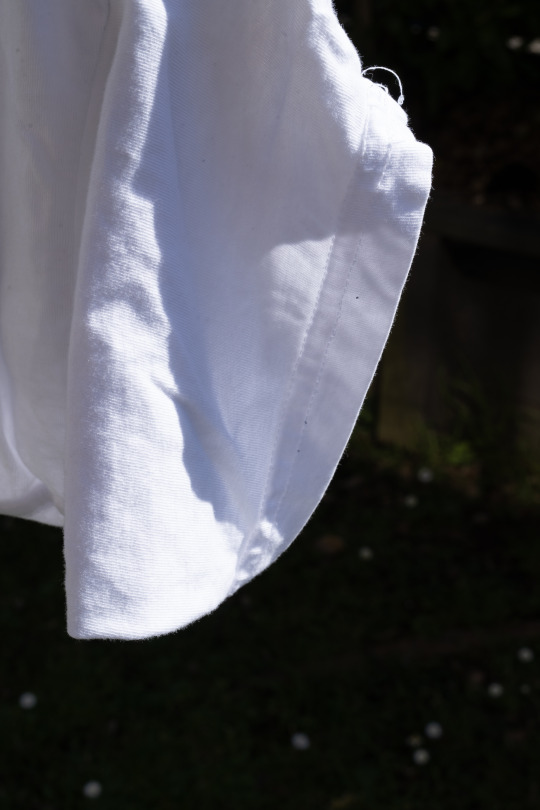
These ones taken at f/16.
It's hard to tell in Tumblr because of compression, but at f/16 there is less detail to be seen of the fabrics on both the white and black shirts. This is due to defraction that occurs on the lens because we have stopped down beyond the lenses peak sharpness.
0 notes
Text
Best Street Photography in Kuala Lumpur Photo Collection #2
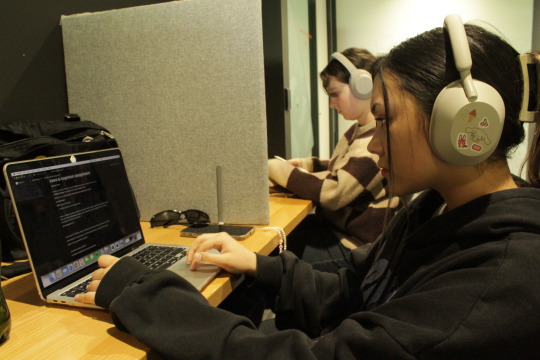
Exploring street photography in Kuala Lumpur and walking through the busy streets with my camera, here I handpicked the best moments to share in this 2024 series. I roamed from the lively Chinatown KL to the cultural richness of Masjid India, the tranquil Thean Hou Temple, and the scenic wonders of Genting Highlands with my friend Dom – capturing both indoor and outdoor scenes. My tools of choice were the Samyang 12mm f2 and the beloved SIRUI Sniper 23mm f1.2 lenses for the Fujifilm X-Mount.Using wide-angle lenses posed a challenge when transitioning from expansive views to close-up shots. To simplify, I mostly relied on Aperture Priority mode, letting the camera handle settings like ISO and shutter speed, except for tricky situations like capturing fast movements or handling harsh sunlight.Previously, I shared my experiences with the Samyang lens during adventures in Pudu and Chinatown KL. I'm drawn to creating visually appealing compositions using leading lines, and I experimented with Fujifilm settings like Teal Obscure and Neon Obscura, avoiding extensive post-processing as I shot in SOOC JPEG.Beyond the technicalities, street photography is a delightful way to express creativity. Trying out different lenses allows me to discover unique moments on the streets and observe how each lens captures the essence of Kuala Lumpur. It's an enjoyable exploration, each photograph telling a story of the city's vibrant life through my lens.
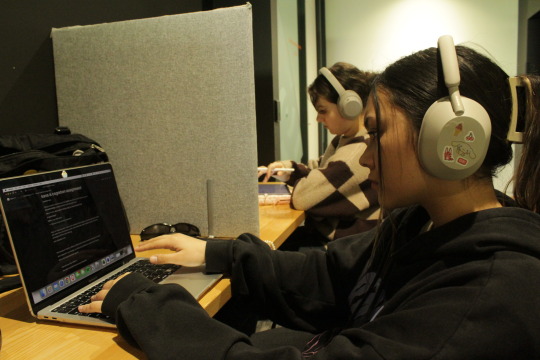
Shooting in Low-Light, Indoor Street Photography. What?
Fujifilm X-T4 - Pudu KL // January 2024 I enjoy taking pictures in low light using my SIRUI Sniper 23mm f1.2, especially when I'm indoors. It allows me to experiment with my Fujifilm film simulation settings, creating some cool effects. Even though I'm not an expert in street photography in Kuala Lumpur, I love searching for interesting moments. Typically, I only end up with 2 or 3 good photos out of 200, but that's what makes it enjoyable for me. Every time I go out to Kuala Lumpur for street photography, I'm still learning.Using the SIRUI Sniper 23mm f1.2 can be a bit challenging for me. Sometimes, the view is too wide unless I get close to my subjects. It depends on the scene I'm capturing. Despite the challenges, it adds a bit of excitement and unpredictability to my street photography adventures in Kuala Lumpur.I tried something new with my SIRUI Sniper 23mm f1.2 lens – I took neon light portraits in the dark. The results were amazing! The colorful glow from the neon lights made the pictures look cool and exciting. The way the shadows and lights played together, along with the lens's wide aperture, helped create awesome and unforgettable photos. It was a fun experiment that showed how creative you can get with the SIRUI Sniper lens. I'm looking forward to trying more cool photo ideas soon!
Shooting Street Photography in Kuala Lumpur With Telephoto Lens
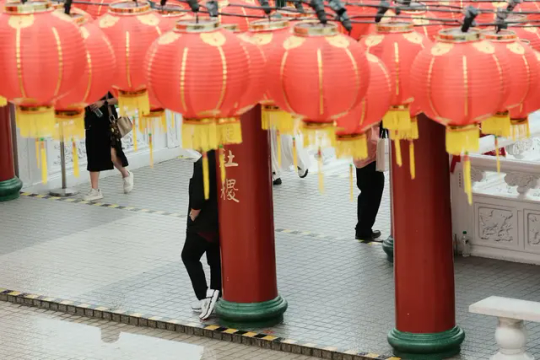
Fujifilm X-T4 - Thean Hou Temple KL // January 2024 Exploring street photography in Kuala Lumpur with a telephoto lens was a completely new experience for me, and I must say, it was a lot of fun! What I found most enjoyable was the convenience that comes with using a telephoto lens. It makes capturing shots from a distance a breeze, eliminating the need to get up close and personal with strangers. This not only makes composition easier but also ensures I can capture the exact shot I have in mind without any awkward encounters.One of the perks I discovered was the reduced anxiety about approaching potentially unfriendly-looking individuals. As an INFJ-T, I tend to be a bit reserved, and the telephoto lens provided a comforting buffer. I could capture intriguing moments without feeling the need to intrude into someone's personal space or risk awkward glances from passersby. It allowed me to observe and document without becoming the center of attention.However, as much as I enjoyed the convenience of the telephoto lens, I still have a soft spot for shooting with my prime lenses up close. There's a different level of intimacy and connection when you're right there in the midst of the action. So, while the telephoto lens opened up new possibilities and made the process less intimidating, I find joy in both approaches, each offering its own unique perspective on the vibrant streets of Kuala Lumpur.
Petaling Street - Street Photography in Kuala Lumpur
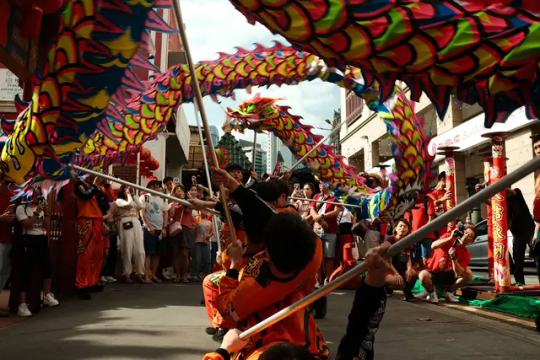
Fujifilm X-T4 // SIRUI Sniper 23mm f1.2 // YOLO Vision recipe I took this picture on the second day of Chinese New Year in 2024, and I love it. The background was a bit busy, but I enjoyed how the 'dragon dancers' lying down—if that's what they're called—were swinging the pole, creating the illusion of the dragon moving quickly. The people in the middle, looking amazed, add to the magic of the moment, making this one of my favorite photos from this year. I used the SIRUI Sniper 23mm at f8 to capture this photo, and the lighting at that moment was just perfect!This is where I usually go – exploring Petaling Street almost every weekend to capture moments. Just a reminder, I'm no expert, and I often face challenges whenever I'm out on the street. LOL! Petaling Street is widely recognized as one of the best street photography locations in Kuala Lumpur. It's a fantastic spot to capture vibrant moments. Plus, you're likely to meet and make new friends while exploring this iconic street.I've been taking pictures at Petaling Street since 2020, and you know what? I can't say if my street photography has gotten better or not. Maybe a bit, maybe not at all. What I do know is the basic techniques, which is useful for shooting street photography in Kuala Lumpur like how to frame a shot, use the rule of thirds, and all that. These things help me take what I think are good photos, at least in my own opinion.
Exploring Masjid India - Street Photography in Kuala Lumpur
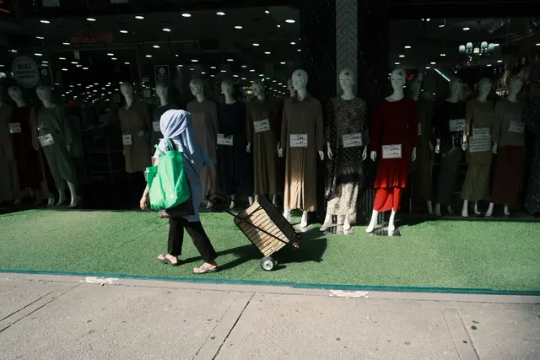
Fujifilm X-T4 - Masjid India KL // January 2024 I decided to extensively explore every nook and cranny of the hidden areas in Masjid India. Capturing photos here posed a significant challenge for me, shooting face to face with subjects, only works if you are brave enough or use the fishing techniques—a recent trend in the street photography Malaysia community.Interestingly, I have yet to try using this street photography technique in Kuala Lumpur due to the scorching weather and my attempt to avoid sunburn. LOL! So far, I've only experimented with this technique at the Thean Hou Temple. This approach adds a unique perspective to my street photography adventures, and I'm excited to continue experimenting with it in the future.
'Camping & Fishing' At The Thean Hou Temple in Kuala Lumpur
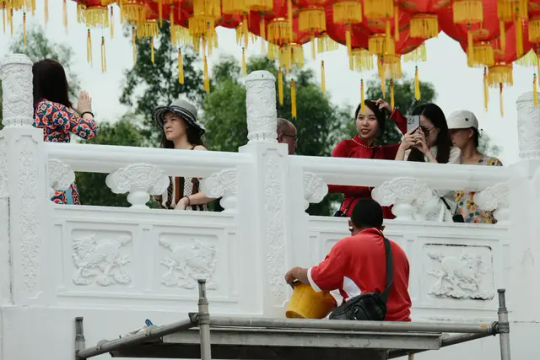
Fujifilm X-T4 - Thean Hou Temple KL // January 2024 I'm considering introducing a new topic on street photography fishing techniques in my blog soon, complete with some sample photos, of course. Well again, I'm no expert, I'll just write what I have experienced. But before diving into that, let me share my camping and fishing experience at the Thean Hou Temple for capturing some amazing shots. I spent about 2-3 hours there, camping out to make the most of my Fujinon XC50-230mm telephoto lens. It was a unique adventure, and the results were well worth the time spent.There are numerous 'camping spots,' whether positioned below or above, that provide ample opportunities to employ this technique at the location. The use of a telephoto lens further simplifies the process, allowing for easy zooming from a distance without causing any disturbance to others. This approach not only offers a unique perspective but also ensures the capture of candid moments without intruding on the natural flow of the surroundings.
Conclusion

Shot with Ricoh GR III Wow! Such a great experience so far. I got to try out the Ricoh GR III for street photography in Kuala Lumpur, and I got some cool shots! It was mostly luck and timing. I called it one of the best street photography cameras. LOL! Don't you think? For a first-timer trying street photography with the Ricoh GR III, it was challenging, and you might end up with a bunch of snapshots like I did!In conclusion, this journey through Kuala Lumpur's vibrant streets has been a delightful exploration of moments captured through my lens. From the lively Chinatown KL to the cultural richness of Masjid India, the tranquil Thien Hou Temple, and the scenic wonders of Genting Highlands, each location brought a unique charm to the series.The choice of lenses, such as the Samyang 12mm f2 and the SIRUI Sniper 23mm f1.2, added a technical layer to the creative process. Overcoming challenges, particularly with wide-angle lenses and experimenting with various Fujifilm settings, further enriched the storytelling aspect of the photographs.Engaging in street photography in Kuala Lumpur, whether with the SIRUI Sniper 23mm f1.2, a telephoto lens, or the Ricoh GR III, presented different perspectives and challenges. From low-light shots to neon light experiments, each endeavor contributed to the diversity of the collection.
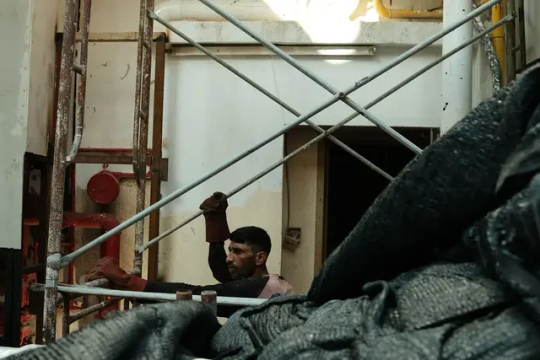
Fujifilm X-T4 - Pasar Karat KL // January 2024 To enhance your street photography skills, consider enrolling in online courses, drawing inspiration from the best street photography photo books, and hitting the streets to capture more moments. Online photography courses provide valuable insights and techniques, while photo books offer a visual feast of diverse styles. However, the most significant growth comes from hands-on experience, so get out there, observe, and shoot to refine your craft and develop a unique perspective.While the learning curve was evident, whether using a telephoto lens for distance shots or facing the unpredictability of a wide-angle lens, each experience added a layer of excitement to the street photography journey. The spontaneity and unpredictability became integral elements, fostering a connection between the lens and the lively streets of Kuala Lumpur.Despite the technical aspects and varied lens experiments, at its core, street photography remained an avenue for expressing creativity. Whether shooting up close or from a distance, the essence of capturing unique moments and stories unfolded naturally.Reflecting on Petaling Street, a renowned location for the best street photography in Kuala Lumpur, the journey continued. While acknowledging personal growth in basic techniques, the heart of the matter remained the enjoyment of capturing moments. The challenges faced in each shot, the excitement of trying new lenses, and the exploration of different settings encapsulated the joy found in the art of street photography.As the photographic journey unfolds, it becomes a testament to the evolving connection between the photographer and the vibrant life of Kuala Lumpur's streets. Each photograph encapsulates a story, a moment frozen in time, and a reflection of the photographer's unique perspective on the dynamic tapestry of the city's life.
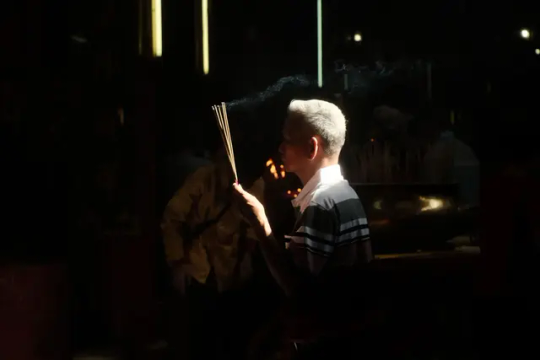
Fujifilm X-T4 - Chinatown KL // January 2024 Read the full article
0 notes
Text
Mastering the Art of Portrait Photography: Part 2
Welcome back to Marcus Hart Images, your trusted source for stunning photographic imagery, especially captivating portraits. This blog serves as a continuation of our previous installment, "Tips for a Great Portrait Photography, Part – 1." Our dedicated professional photographer Melbourne team at Marcus Hart Images is committed to delivering exceptional portrait photographs for all our clients, whether seasoned professionals or aspiring enthusiasts. We firmly believe that portrait photography transcends mere clicking of pictures; it's about delving into the deeper understanding and nuances of this art form—a process that ignites emotions in those who view it.
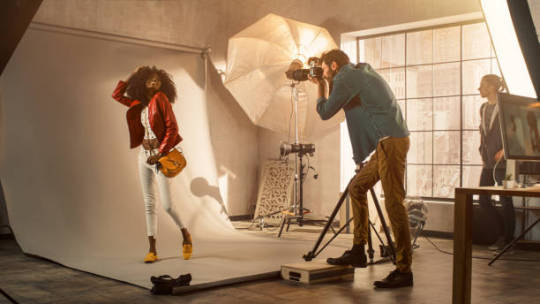
In this blog, we're excited to share more tips and insights into the realm of portrait photography, helping you hone your craft further.
Choosing the Right Tool: Investing in the best camera can undoubtedly elevate your photography game. However, if budget constraints are a concern, remember the age-old wisdom among photographers: "The best camera is the one you own." Nowadays, most cameras are more than capable of capturing stunning portraits. The key is to understand your equipment and use it to your advantage. While smartphones can deliver crisp shots, they often come with limitations in terms of aperture, exposure, and control over settings like shutter speed. Therefore, we recommend opting for a basic camera over a smartphone for photography. Cameras, whether you're a novice or a seasoned pro, offer creative freedom and the ability to capture high-resolution images suitable for prints. In fact, action cameras are increasingly being used to capture playful, dynamic, and wide-angled portraits. Finding the right camera for your needs is a matter of personal preference and the type of results you desire. Once you've chosen your camera, the next step is to experiment with settings to find what works best for your unique style as a portrait photographer Melbourne. Keep in mind that there's no one-size-fits-all answer when it comes to camera settings for portraits; different situations call for different adjustments.
Visual References: Our commercial photographer Melbourne team recommends keeping visual samples readily available, whether saved on your mobile phone or printed as reference pegs. These samples serve as a reminder of the desired image you have in mind. Sharing these references with your team and model can help align everyone's vision, leading to ideal results. We advocate for a realistic approach, especially for beginners. Simple portraits shot in ample natural light often yield stunning results without the need for extensive editing.
The Window to the Soul: One crucial tip from our team is to capture the brilliance of the eyes. In portrait photography, the eyes are the most expressive and captivating feature. Unfortunately, this detail is often overlooked by many beginners. Neglecting or obscuring the eyes can diminish the impact of the entire portrait. A portrait's essence hinges on the eyes being captured with precision and proper lighting. Sharpening the focus on those captivating eyes will infuse life into your shot, resulting in a perfect portrait photograph. It would be a missed opportunity not to make the most of a model's captivating eyes. Stay tuned for more invaluable tips in our upcoming blogs.
For all your portrait photography needs, don't hesitate to visit https://marcushartimages.com/ to enlist the services of Marcus Hart. Let us transform your vision into a flawless portrait that tells a captivating story through the lens.
#commercial photographer Melbourne#portrait photographer Melbourne#professional photographer Melbourne
0 notes