#VXDIAG VCX NANO GM
Explore tagged Tumblr posts
Visit Tumblr Blog
Explore Tumblr blogs with no restrictions, modern design and the best experience.
Last Seen Tumblr Blogs


Fun Fact
Tumblr has 16.74 million mobile monthly users in the US.
Text
VNCI MDI2 GMs Diagnostic Interface Use Tutorial
What is VNCI MDI2 GMs Diagnostic Interface? What is the difference between it and other GM MDI2 multiple diagnostic interfaces?
VNCI MDI2 will come soon before the end of this month at eobdtool.co.uk! It’s a GM diagnostic interface which is compatible with the original driver and can be replaced genuine GM MDI2 interface. MDI2 is applicable to General Motors Global A platform and global B platform series models.

VNCI MDI2 highlights:
100% support CAN FD communication, 100% support DoIP communication
Support TLC online software, synchronization compatible with the latest MDI2 driver
Simulate the original GM MDI2 hardware device without worrying about hardware verification
Support B platform offline programming, decrypt 27 security check algorithm
Support GDS2, DPS, and Tech2win offline software
Unlimited computer can be installed to any computer
Support USB and wifi direct connection and base station connection
Faster and safer
Cost-effective, 100% original performance, only need less than 10% of the price
No registration required for direct use.
VNCI MDI2 supports three connection modes: USB, WiFi, LAN connection

VNCI MDI2 vs. VXDIAG VCX NANO/VCX SE GM vs. GM MDI2

In conclusion:
They use different drivers.
Only VNCI MDI2 GM supports CAN FD & DoIP protocols, all three connections (USB, WiFi and WLAN), and GM vehicles till 2023.
All GM diagnostic interfaces support firmware and software update. GM MDI2 clone update by HDD, the other two devices update by link.
VNCI MDI2 and vxdiag devices can be used without activation, but GM MDI2 clone needs activation.
VNCI MDI2 diagnostic interface is more expensive as it has more functions.
Therefore, VNCI MDI2 is worth buying for GM vehicle diagnosis.
0 notes
Text
USB Version VXDIAG VCX NANO for GM GDS2 Tech2Win Diagnostic Scan Tool
✅ Dual Software: GM GDS2 V2022.05 & Tech2Win 16.02.24 ✅ Multi-language Support: Tech2Win in English, GDS2 in 11 languages ✅ PC & Laptop Compatibility: Easily connect via USB ✅ Quick and Accurate: Instantly access vehicle data for maintenance or reports ✅ All-in-One Tool: Diagnose engines, transmissions, ABS ✅ Swift Software Update: Online update for the latest features ✅ Fully Compliant: CE and FCC approved for safe usage
💡 Highlights:
Perform diagnostics on GM Global Architecture Vehicles Supports PC-based diagnostics with Global Diagnostic System (GDS) & GDS2 Faster Reprogramming: 20-70% quicker than Tech 2 Wide Compatibility: Works with both old and new vehicle models Tech2Win Functionality: Enjoy all Tech 2 features with a larger screen


0 notes
Text
Vmware ford ids download

#Vmware ford ids download how to#
#Vmware ford ids download install#
#Vmware ford ids download zip file#
#Vmware ford ids download drivers#
( VXDIAG Ford IDS Native Installation Guide) Support online programming function also included calibration file Native installation not vmware or other virtual software This version also has the ability to download the very latest calibration/software files from Ford’s server if you have an internet connection available at the time of connecting to vehicles.Ĭompatible with vxdiag vcx nano Ford USB/ WiFi, vxdiag vcx plus, vxdiag full
#Vmware ford ids download how to#
How to Choose the Right Clone Tactrix Openport 2.The 2019 latest version IDS V116.01 has been tested and verified working no issue with VXDIAG diagnostic scanner for Ford and Mazda.
Repair Carprog A1 Adapter for CAN BUS cummunicationīMW INPA 6.4.3, 5.0.6,5.0.2 freeload How to use BMW INPA software and cable K+DCAN
#Vmware ford ids download install#
How to install TIS2000 for GM Tech 2 scanner
#Vmware ford ids download drivers#
Install BMW INPA on WinXP Win7 Win8 Win10įree Download BMW E-sys V3.22.5 v3.2.61 v3.2.71įree ECM Titanium 1.61 with 26000 drivers How to Install Toyota TIS Techstream 14.10.028 Make sure you have disable both local area and wireless network connectionĬheck language options, programming modules and options Open Network and Sharing center->Change adapter settings Open Computer->Manager->Device Manger->Network adapters->ETAS VCI USB RNDIS Device Select Remove Bosch VIC software from your computer, click NextĬlick Start menu->VCI Manger (Ford-VCM-II)Ĭonnect VCMII with computer follow the diagram below Open Disk C/Progam Files/Ford Motor Company->IDS->Runtime->install3rdparty-> If system prompt PC software initialization error, press OK to ignore Module programming has been extended to 2018/05.26Ĭlick on Start menu->All Program->Bosch->VCM Manager (Ford-VCM-II) Run Ford Module Programming Limit as Administrator Recover system, choose destination D:/Ford 108/ford108.GHD
#Vmware ford ids download zip file#
If your computer hard drive only has one partition, please prepare a 16 GB U flash drive, if has 2 partitions, please unzip the software of CD into another partition except disk CĬopy all zip file on Ford 108-2 software CD to Ford 108 folderĮject Ford 108-2 DVD-ROM to DVD/CD-RW DriveĬopy all contents to Ford 108 folder againĮxtract ford108.part01 zip files to Ford 108 folder Please backup the important files on the desktop and disk C because the next operation will cover the content in the disk C.Ģ.Disable both local area and wireless network connectionģ. How to install Ford IDS V108 step by step?ġ. Q: Whether it can work with Ford VCM 1 Clone?Ī: Yes, it can work with Ford VCM 1 cloneĪ: This is native, install on new and clean windows xp/7 Online programming: Supported! but you should have an account yourself.ġ.Able to download the very latest calibration files/software from Ford server if the network connection available at the time of connecting to vehiclesĤ.Display System current parameters in digital formĦ.Logs Keeping: write and keep of digital parameters in memoryħ.Special functions: changing of permissible seeting of blocks, programming etc. Tested with all VCM2 SP177 series, Ford VCM2 2-in-1 clone and VXDIAG VCX NANO Ford: Never failed!! Operating system: Windows XP/Windows 7 32/64 bit Software Version: 108.01, no need activation Note: The software update to newer V112.01 (December, 2018) without activation. Latest Ford IDS V108.01 Full Software for Ford VCM II support online programming released on Jan.
0 notes
Text
Free Download VCX NANO GDS2 2021 Version and Installation Guide
This article is to share the Free Download VXDIAG VCX NANO GDS2 2021 Version and Installation Guide
All the installation package and download link needed, totally free!
GDS2 2021 Installation package: https://mega.nz/#F!jN4lSYaA!5Q_p4sZEySxLu6HVPP418A GDS2 Patcher(2021.03.01)https://mega.nz/file/oZ820RCJ#BXRW3mOGCC7mfMjtaJ71AzjwghBlCogoM7RNGWi9KmE Tech2Win: https://mega.nz/#!tIFWUIxT!XBAFZWEFPhQ3A9MtyPYfT1wojVgB1sEmt2T62nrmQcM
How to Install it on Windows 10 pro version operating system?
After download this GDS2 2021 software on PC,
Right click this launch application “GDS2AutoInstall” and select “Start” until it appears “Close” box.
📷 📷
Then, you have to make sure the VX Manager has been already downloaded and installed on your PC.
If not, click this to free download the VX Manager V1.8.4 0315: https://mega.nz/file/yMYD3IqD#ZZ0LpwRvOZi7Y7K7g2JPaEsvMqTrTXQ9rZHNYlzPqi0
At this moment, connect your VCX device and run “VCX Manager”.
Click “Vehicle Diagnosis” and “GM GDS2/T2W”.
Install this software: GM GDS2/T2W.
📷 📷
Open up GM GDS2 software and click “Diagnostics”>> MDI 2>>Confirm SN and click “Continue”
📷 📷
Test ECU(Buick - BCM Module):
Click “Enter”>>2010>>Buick>>Excelle>>Module Diagnostics>>Body Control Module>>Data Display
Data list will be displayed as below.
For example, choose “Chassis Control Data”, we will see this:
📷
Back to check the DTC, DTC displays like this:
📷 📷
Come here to get more auto diagnostic tools in cardiagtool.co.uk:
https://www.cardiagtool.co.uk/wholesale/auto-diagnostic-tools/
Source: http://blog.cardiagtool.co.uk/free-download-vcx-nano-gds2-2021-version-and-installation-guide/
0 notes
Text
Free Download gm tech2 tis2000 software and install on WIN XP/7/8
This blog show you how to download free tis2000 software and install on WIN XP/7/8, take your own risk, shared by customer, big thanks.
TIS2000 Software download:
http://www.mediafire.com/file/bc92by7ao7fp1la/GM+2000NAO.7z Tis2000 Dongle Crack
http://rg.to/file/a081c4c028aa1fb80ea98e15a540b9a9/TIS2000_Dongle_Crack.7z.html
Tested version:
TIS2000 with crack file (working perfect)
http://www.chinacardiags.com/wholesale/tis2000-cd-and-usb-key-for-gm-tech2-gm-and-opel-car-model-706.html
How to install TIS2000 software:
Customer solutions.. here you go…try on your own risk
TIS2000 Window XP:
Installed a fresh copy of Windows XP SP3. I didn’t bother with updating anything else as far as security updates to Windows or install a virus scan because this computer will never be connected to the Internet or used for anything else.
Installed ALL the required drivers until there were no more yellow check marks in Device Manager. I failed to do this at first and caused a lot of headaches later, including a BSOD during software installation.
If you’re using a USB to serial adapter, plug it in now and set it up. Go into Device Manager and make note of the COM port used by the adapter.3. Install the Tis2000 software from the CD included with the Tech2. During the install, it will ask you to specify the COM port. If you have a serial port on the computer, it’s probably COM 1 or use the one from the USB adapter.
Before you can use Tis2000 with your Tech2, you have to make it “think” that there is a dongle connected that authorizes it. You can download the crack below. Follow the read me file for instructions on how to use it.
That’s it.

TIS2000 Windows 8 32 bit:
However, if you have a 32-bit copy of Windows 8 installed (I don’t wanna know why you do), running 16-bit applications are disabled by default. You can enable it by going to Control Panel and clicking on 16-bit Application Support then clicking Enable.
TIS2000 Windows 7 with XP Virtual PC:
For those of you with genuine copies of Windows 7 Professional, Enterprise, or Ultimate with a multi-core processor (who doesn’t run Win7 on a multi-core these days); these versions of Windows 7 allow you to use Windows Virtual PC, which lets you virtually run Windows XP Pro without a disc or OS installation. You need to install Windows XP Mode and Windows Virtual PC in order to use it. Before you can download these updates, M$ makes you run a little .exe that checks if your OS install is legitimate. Anyway, after you get that all installed and XP Mode is booted, you can copy the OP’s cracked TIS2000.zip over to the WinXP Desktop and follow the README.txt inside to install it. Here is a link with the cracked TIS2000
http://www.chinacardiags.com/wholesale/tis2000-cd-and-usb-key-for-gm-tech2-gm-and-opel-car-model-706.html
…I have tested this on my desktop running Windows 7 Ultimate 64-bit and the cracked copy of TIS2000 the OP posted installed and ran with no problems. Instructions for Win7 XP Pro virtualization mode here: http://windows.microsoft.com/en-us/w…e-in-windows-7
TIS2000 software Window 64 bit or 32 bit:
64-bit versions of Windows contain backwards compatibility with 32-bit applications, but not with 16-bit applications. And 32-bit versions of Windows are backwards compatible with 16-bit applications. The problem with installing TIS2000 on newer machines is that, while the TIS2000 program itself is 32-bit, the installer and drivers are 16-bit. Therefore, you are able to install TIS2000 natively on ANY 32-bit Windows system. This will just work, without having to run anything in compatibility mode.
Now to the most common problem:
If you are running a 64-bit version of Windows XP, Windows Vista, Windows 7 Home Premium or lower, or ALL versions of Windows 8 and 8.1, I guess any version of Mac or Linux too, you have a couple of more involved and more risky options…
You can obtain a copy of Windows 2000 or XP Pro 32-bit. It includes two programs for making a bootable CD or USB drive. Pop the bootable device you created into your laptop, reboot to the device, then install that operating system onto a seperate partition of your hard drive, or a different hdd altogether. Or you can install Virtualbox (free software), and run the cracked Windows copy via a virtual machine… The method I took to test this was to create a separate partition on my ssd and install it there. When the computer reboots, it will ask you what OS you would like to run. Select Windows XP Pro, then continue installing TIS2000 software. If you’re gonna be writing to the main drive on your computer, I suggest first creating a bootable USB with Clonezilla on it and creating a drive backup with that http://clonezilla.org/downloads.php …This allows you to make a complete backup image of your hard drive, and allows you to flash it back to that drive at any time. A good thing to have around anyway.
VXDIAG VCX NANO GM + TIS2000:
IT works!! ok for anyone trying to use the VXDIAG GM nano with SPS this is what you need to do (order is important):
*** please note you cannot use the VM that the VXDIAG package comes with (GDS2 VM). It’s configured in such a way it won’t work with the dongle crack and caused me a lot of head scratching to find this out.
Create awindowsXP 32bit VM using VMWare Player
Make sure you add an LPT port (set to auto, not connected on startup). It doesn’t matter if your actual PC has an LPT port or not this is needed for the dongle crack later.
Install VMWare tools for your VM
After you have the windows VM up and running install the BOSH MDI drivers found here: http://www.boschdiagnostics.com/pro/soft…-and-mdi-2(the MDI drivers on the driver disk andvxmanagerinstaller wouldn’t install on myxp32bit VM but the one from bosh does).
From the driver disk or from allscanner.com install the VXDIAG MDI package with pass thru driver (VXDIAG MDI manager or VXDIAG Manager)
Download tis_data_1.iso, tis_data_2.iso, GM-NAO-TIS200-3_2008.iso, TIS2000DongleCrack.rar from this: http://auto-professionals.co/?dl=5847273d53a0b0635724a7b3e1626ef7(password: mhhauto) or buy a tested TIS2000 crack such as http://www.chinacardiags.com/wholesale/tis2000-cd-and-usb-key-for-gm-tech2-gm-and-opel-car-model-706.html and the like
(files / instructionsin the updated.txt you may need to click the link more than once if you get an error when downloading)
Mount the tis_data_1.iso in your VM (use the virtual cdrom in vmware player and attach to iso file) this will start the auto install of the TIS2000 2007.3 software)
All options can be installed using the default selectionshowevermake sure you check the install checkbox above the parallel security device on the one screen.
After installation is complete you can extract the TIS2000DongleCrack.rar and copy the folder to the desktop of your VM
Go into the TIS2000DongleCrack folder locate the drivers folder and open it, run the DDINST32.EXE (if you get a registry error you didn’t install an LPT port in your VM), select Express and it should install the files then click ok / Exit to close.
Go back to the main TIS2000DongleCrack folder and copy SCAControlUI.exe and Id.dll to c:\Program Files\cosids\bin\ (it will prompt to replace id.dll select yes).
Go back to the main TIS2000DongleCrack folder into the Dongle folder and copy the 2 files in there to c:\windows\system32\ (the dongle crack is now installed)
Now mount the tis_data_2.iso in your VM (use the virtual cdrom in vmware player and attach to iso file) and open TIS2000 (double click the icon on your desktop) when TIS opens it will ask you if you want to upgrade click yes.
After the upgrade completes mount the GM-NAO-TIS200-3_2008.iso in your VM (use the virtual cdrom in vmwareplayer and attach to iso file) and open TIS2000 ( double click the icon on your desktop) when TIS opens it will ask you if you want to upgrade click yes.
After the upgrade completes you have successfully installed TIS2000 2008.3 and the Dongle crack, now we need to configure TIS to use the VXDIAG GM nano
Open TIS2000 from the icon on your desktop, select Configuration menu from the top and select IO Management.
Click the Driver button, click the Browse button, locate the j2534.dll file in the window and click open (installs the J2534Pass Thru Driver)
Now click the Add button (in IO management) enter exacly “Generic Pass Thru” in Logical Name and select “J2534Pass Thru Driver” in the Driver drop down, click OK.
Select Generic Pass Thru in the list and click Properties, in the Device Name drop down select VXDIAG, (ALLScanner) and click ok then click close to close IO Management.
Now TIS2000 software is installed and configured all you have to do is connect your VXDIAG device to the PC / VM. To do this first use a usb and connect it to the PC then in the VMWare player menu go in removable devices and connect the Future Devices USB to serial converter. At this step my windows install didn’t have the basic usb to serial drivers so I connected the VM to the network (if not connected use the VMWare player menu to connect the network) and windows downloaded them from the net and installed the device as com3. you are now good to go.
At this point you can now click on SPS in TIS2000 select Generic Pass Thru as your device and your good to program!!
Satisfied, VXDIAG VCX NANO GM device works as a clone to the GM MDI.
0 notes
Text
VNCI J2534 Nano and other J2534 devices, how to choose?
There are many J2534 devices in the market, and VNCI J2534 Nano is one of them, offering a more budget-friendly price. Therefore, is it the first choice for price-conscious buyers?
Customers should make the choice based on two aspects:
a) It only supports J2534.
b) It not only supports J2534 but also has the capability to emulate OEM VCIs.
So, let's check which J2534 device is right for you among the VNCI J2534 Nano, AUTEL MaxiFlash VCI, and VXDIAG VCX SE.
VNCI J2534 Nano

It only supports J2534, compatible with J2534 Passthru and ELM327 for J1979 diagnostics.
VNCI J2534 Nano supports the following protocol configurations:
ISO15765 (Standard/Extended frame).
ISO9141.
ISO14230.
J1850 PWM (Supports IFR and 2X speed mode).
J1850 VPW (Supports 4X speed mode).
Programming voltage.
Short to ground.
ELM327 with command set version 1.3a.
VNCI J2534 Nano function list

AUTEL MaxiFlash VCI
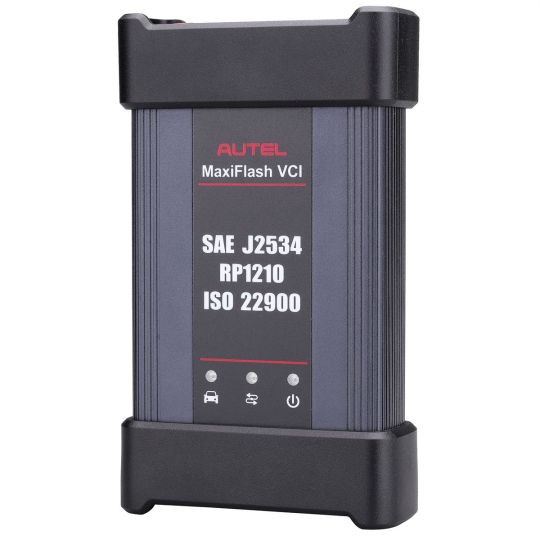
MaxiFlash VCI only supports J2534. It also supports CAN FD, has 4 CAN channels, D-PDU, IS 022900-1 (j2534-1), and ISO 22900-2 (j2534-2) protocols. Additionally, it is RP1210 compliant and can be utilized with a Windows computer when paired with required OE subscription for vehicle module programming.
Autel J2534 is compatible with a wide range of OEM software.

3. VXDIAG VCX SE
In addition to supporting J2534, it has the capability to emulate OEM VCIs.
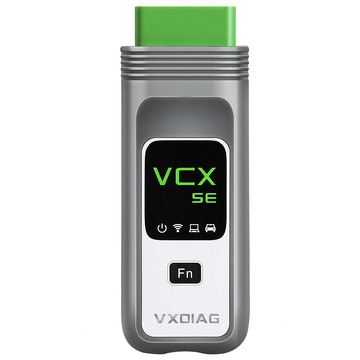
VXDIAG VCI is capable of emulating the following software:
Toyota Techstream
Honda HDS
Benz Xentry
BMW ISTA
Subaru SSM3/SSM4
JLR SDD Pathfinder
Porsche PIWIS II/PIWIS III
Ford/Mazda IDS
Renault Clip
Volvo VIDA
GM GDS2/Tech2win
VAG ODIS
Furthermore, VXDIAG VCX SE can also serve as a J2534 passthrough device for Hyundai/Kia J2534. It is compatible with various software applications such as Techstream official, FDRS, FJDS, Techline Connect SPS2, pcmflash, bitbox, alexflasher, gromcalc, and many others.
In summary, please consider your needs when choosing between VNCI J2534 Nano, AUTEL MaxiFlash VCI, and VXDIAG VCX SE. VNCI J2534 Nano offers budget-friendly J2534 support, while AUTEL MaxiFlash VCI exclusively supports J2534 with additional features. The VXDIAG VCX SE supports J2534 and emulates OEM VCIs for compatibility with various software. You can choose based on your specific requirements.
0 notes
Text
Should I Buy a VXDIAG VCX NANO with Laptop and HDD?
Question:
I am specifically looking for a scanner that will do gauge sweeps on the instrument cluster. Other than the Tech II, what other bi-directional scanners work well with our GMs?
I have seen a Youtube video of an Autel MS906BT doing exactly what I want, but $1000 is kinda steep.
I am looking for something in the $500 +/- range.
Grateful for any recommendations.
GM user feedback:
I have a vxdiag vcx nano for gm and can confirm it works great. Software was a pain to setup, found out what I was given required 32bit windows for some reason. It will do anything a tech 2 can do. ABS bleeding, BCM and ECU programming.
Many people feel pain to setup GDS2/tech2win software. So it is necessary to get a vcx nano with a laptop and software pre-installed?
Look at what people saying:
look on vxdiag shop for the vxdiag nano if you buy that and have a tablet it works as a tech2win (software based tech2), the vxdiagshop also sells some interesting stuff and you can buy a older t440 lenovo or x220 laptop on ebay for $200 or less and then buy the $200 hard drive from vxdiag and have all kinds of automotive software it’s plug-n-play, they sell it with a laptop, better deal to get the laptop and then the hard drive and I guess the vxdiag. I have the vxdiag and a tablet works fine for tech2win. I got gds2 to run I just have to fix a bug in it still, If I get the laptop and hard drive it wont have the bug’s I have ran into with gds2 on the tablet. interesting stuff and cheaper than spending $1000+ on a bosch.
0 notes
Text
VXDIAG VCX NANO JLR SDD V160.00 Software Installation Tutorial
This VXDIAG VCX NANO JLR SDD V160.00 Software Install Tutorial is available with the VXDIAG professional tools as follows:
1.VXDIAG VCX NANO For Ford/Mazda 2 in 1 Diagnostic Tool XP/WIN 7/WIN8/WIN10
2.VXDIAG VCX NANO For GM/OPEL GDS2 Diagnostic Tool WIFI XP/WIN 7/WIN8/WIN10
Check the core of this article.
Detailed operation procedures:
Open the App “SDD 160.00_Full”>> Click “Run”>> English(United States)
It will automatically begin “Preparing Setup”.
📷 📷 📷
Welcome to the “InstallShield Wizard for SDD”, click “Next”>> accept the License>> Click “Next” on the screen>> click “Install” to begin the installation
Under “Setup Status”, in informs you that the SDD is configuring your new software installation. This will take several minutes, please wait with patience.
📷 📷 📷
Welcome to the HV Safety Installer Setup Wizard>> click “Next”
The following application is being installed.
📷 📷 📷
Welcome to the MOXA Uport 1110/1130/1150 windows driver setup wizard>> click “Next”>> select “Destination Location”>> click “Install”
📷 📷 📷
When appearing the “Self Registration Error”, click “OK” to continue.
📷
Still, you will see “SDD is configuring your new software installation”. No choice but to wait.
It informs you to restart your computer to make sure you can use the program.
Recommend you to tick “Yes” and click “Finish”. The computer will restart automatically.
📷
That's all. Thank you for sharing your time with us!
Don't forget to contact us at:
Email: [email protected] Skype: cardiag.co.uk Whatsapp: +86 15002705698
Or leave a message at https://www.cardiagtool.co.uk/
to tell us what suggestions or questions you have about our products
Source:http://blog.cardiagtool.co.uk/vxdiag-vcx-nano-jlr-sdd-v160-00-software-installation-tutorial/
0 notes
Text
VXDIAG NANO GM Software Installation Guide
VXDIAG NANO GM MDI Interface with Tech2win Software replace GM MDI, GM Tech 2 Scanner work for Opel Saab GM cars, how to installed VXDIAG NANO GM Software? Eobdtool.com share VXDIAG NANO GM Software Installation Guide as follow.
VXDIAG GM VCX NANO Multiple GM/OPEL GDS2 Diagnostic Tool WIth GDS2 and Tech2Win Software

Eobdtool.com VXDIAG NANO GM Software Installation Guide:
ON the VX nano, sometimes you can get Tech2win to run on win 10 (maybe if you have an AMD chip or not, but have not figured that one out yet), while on my i7 machine, Tech 2 win will not run in win 10 instead. Tech2win is the program that works just like a Tech II, but the program running on a laptop for the MDI (clone MDI device which the Nano is). GDS2 is the program for the C7, like the tech II and tech2win with midi is for the C6 instead. On the VM GDS 2, you don’t need an account with GM to use it, short of needing to do SPS programming, which you will need a TDS SPS subscription instead ($40 for 2 years per car). So the low down for most laptops, Wants to be running in win 10 for TDS SPS programming. Needs to be running a multi core chip in win 7 or above to run VM player for VM GDS2. Need to be running in Win 7 native (32 or 64 bit) to run Tech2win (will not work in a VM shell). Tis2000 needs to run in WinXP or built vmXP shell, so it can be native in XP or in a VM shell so long as you have a multicore processor.
So the way I do it, since Tech2win will not run native on my machine with an I7 process in win 10, I have a dual boot up in win 7 and win 10 both.
Win 10 is used to run pretty much everything I run, short of the Tech2win, which I use the win 7 64 boot up to run it.
So in the Win 7 dual boot up (small 40 gig partition off the drive), have tech2win to use the Nano as a Tech II, plus VM GMSI, and Tis2000 in a VM shell since I may need them as well for the VX nano running as a tech II when running in win 7.
In win 10 boot up, VM GDS2 V17 TDS using internet explorer native with account Vm Tis2000 built on a full XP OS with account VM GMSI
If you want to just run a single OS system, instead of a dual boot up machine since you can’t get the Tech2win to run in win10, then you can run pretty much run everything in win 7 (32 or 64 bit), so long as you have a CPU that has multicores. Hence you going to need to run at least VM player for the VM shells, and it take as multi-core processor to run VM player (or VM workstation). Note, I have VM workstation, instead of just VM player, since I build other VM shells to run in windows as well.
So again, it really just depends on your machine, and if you Tech2win will run correctly on it or not. Hence the problem is when you open Tech2win, you need to get three pop up screens once Tech2win start the program.
The first screen will ask you what country, and you select North America.
The second pop up will ask you if the device is a MDI 1 or MDI 2, and you select Mdi 1.
The third pop up screen will ask you if you want to select the USB device (the nano plugged into a USB port), you select it, then it will take you to the Tech2win start screen.
So if you open Tech2win, and you don’t get the three pop up screens but just goes directly to tech2win main start screen below instead, then Tech2win is not going to work on your machines win 10 . Hence the problem is a glitch in midi and tech2 win interface to select the nano to begin with (what the pop up screens are), and if you can’t select the nano via the pop up screens, tech2win will not connect to the nano in the first place.
Again don’t know if this is a AMD verse Intel CPU problem in win 10, but the only laptops that I have seen run Tech2win in windows 10, just happened to be laptops running a AMD CPU instead. And yes, have tried to skin the cat many way with added drivers and compatibility modes, and it’s driver/code line that win 10 does not have for the intel CPU (but seems to to have for the AMD CPU that is a carry over from the win 7 days to make the AMD chip work with win 10 instead).
Need VXDIAG GM VCX NANO Multiple GM/OPEL GDS2 Diagnostic Tool WIth GDS2 and Tech2Win just contact us freely.
Focus On OBD Tool Since 2008
Follow Us:www.facebook.com/eobdtool
Skype:eobdtool02
Wechat/WhatsApp:(+86)13728823411
Email:[email protected]
Website:www.eobdtool.com
0 notes
Text
How to use the VXDIAG GM Nano with SPS?
This using guide is trying to use the VXDIAG VCX NANO GM nano with SPS this is what you need to do (order is important):
I have a newly purchased VXDIAG GM Nano Wifi device. It’s supposed to work as a clone to the GM MDI. Using windows 7 and the software that came with it I can use it with TECH2WIN to diagnose GM trucks (tested on silverado 2500 trucks of varying years 2001 – 2007).
Using the Windows XP vm with installed GDS2 that comes with it I was able to diagnose a 2015 silverado truck.
Using windows 7 and a 3 day subscription to acdelco TDS SPS I was able to flash the HMI module of a 2015 silverado to add a factory reverse camera to the truck.
I recently downloaded a copy of GM TIS2000 2008 and installed it into the VM that came with the device that has GDS2 already installed. I’m trying to attempt SPS programming on my 2007 truck without getting a TDS 3 day SPS subscription. I see sites list that the device is only compatible with online SPS programming and not TIS2000 offline programming however if it works for GDS2 and as a pass through device for SPS tis2web it should work for TIS2000. After all it’s an MDI clone and they made Drivers that make the device look like an MDI device.
I added the j2534 driver to TIS2000 and set it to use MDI 2, at first when I went through SPS programming at the step where it says to connect the device to the truck (after selecting make, model, year etc.) , I have everything connected and when I click next I get License expired. then it won’t connect.
Finally it works.
*** please note you cannot use the VM that the VXDIAG package comes with (GDS2 VM). It’s configured in such a way it won’t work with the dongle crack and caused me a lot of head scratching to find this out.
Create a windows XP 32bit VM using VMWare Player
Make sure you add an LPT port (set to auto, not connected on startup). It doesn’t matter if your actual PC has an LPT port or not this is needed for the dongle crack later.
Install VMWare tools for your VM
After you have the windows VM up and running install the BOSH MDI drivers found here: https://www.boschdiagnostics.com/pro/software-gm-mdi-and-mdi-2 (the MDI drivers on the driver disk and vxmanager installer wouldn’t install on my xp 32bit VM but the one from bosh does).
From the driver disk or from allscanner.com install the VXDIAG MDI package with pass thru driver (VXDIAG MDI manager or VXDIAG Manager)
Download tis_data_1.iso, tis_data_2.iso, GM-NAO-TIS200-3_2008.iso, TIS2000DongleCrack.rar from this thread: http://mhhauto.com/Thread-GM-NAO-TIS2000-3-2008?highlight=TIS2000 (files / instructions in the updated.txt you may need to click the link more than once if you get an error when downloading)
Mount the tis_data_1.iso in your VM (use the virtual cdrom in vmware player and attach to iso file) this will start the auto install of the TIS2000 2007.3 software)
8.All options can be installed using the default selections however make sure you check the install checkbox above the parallel security device on the one screen.
After installation is complete you can extract the TIS2000DongleCrack.rar and copy the folder to the desktop of your VM
Go into the TIS2000DongleCrack folder locate the drivers folder and open it, run the DDINST32.EXE (if you get a registry error you didn’t install an LPT port in your VM), select Express and it should install the files then click ok / Exit to close.
Go back to the main TIS2000DongleCrack folder and copy SCAControlUI.exe and Id.dll to c:\Program Files\cosids\bin\ (it will prompt to replace id.dll select yes).
Go back to the main TIS2000DongleCrack folder into the Dongle folder and copy the 2 files in there to c:\windows\system32\ (the dongle crack is now installed)
Now mount the tis_data_2.iso in your VM (use the virtual cdrom in vmware player and attach to iso file) and open TIS2000 (double click the icon on your desktop) when TIS opens it will ask you if you want to upgrade click yes.
After the upgrade completes mount the GM-NAO-TIS200-3_2008.iso in your VM (use the virtual cdrom in vmware player and attach to iso file) and open TIS2000 (double click the icon on your desktop) when TIS opens it will ask you if you want to upgrade click yes.
After the upgrade completes you have successfully installed TIS2000 2008.3 and the Dongle crack, now we need to configure TIS to use the VXDIAG GM nano
Open TIS2000 from the icon on your desktop, select Configuration menu from the top and select IO Management.
Click the Driver button, click the Browse button, locate the j2534.dll file in the window and click open (installs the J2534 Pass Thru Driver)
Now click the Add button (in IO management) enter exacly “Generic Pass Thru” in Logical Name and select “J2534 Pass Thru Driver” in the Driver drop down, click OK.
Select Generic Pass Thru in the list and click Properties, in the Device Name drop down select VXDIAG, (ALLScanner) and click ok then click close to close IO Management.
Now TIS2000 is installed and configured all you have to do is connect your VXDIAG VCX NANO to the PC / VM. To do this first use a usb and connect it to the PC then in the VMWare player menu go in removable devices and connect the Future Devices USB to serial converter. At this step my windows install didn’t have the basic usb to serial drivers so I connected the VM to the network (if not connected use the VMWare player menu to connect the network) and windows downloaded them from the net and installed the device as com3. you are now good to go.
At this point you can now click on SPS in TIS2000 select Generic Pass Thru as your device and your good to program!!
Thanks to @wizzardsl (MH forum member)
VXDIAG GM Nano Wifi device for sale:
http://www.fobdii.com/wholesale-100-vxdiag-vcx-nano-for-gm-opel-gds2-wifi-version.html
0 notes
Text
How to use VXDIAG VCX NANO Pro 3 In 1
How to use VXDIAG VCX NANO Pro 3 In 1
VXDIAG VCX NANO Pro is a vehicle diagnostic tool that support programming and installation of new ECUs. It woud be used for GM/FORD/AZDA/VW/HONDA/VOLVO/TO YOTA/JLR
VXDIAG VCX NANO Pro;gm: Software Version:2016.02 PC-based diagnostics…YES, via GDS & GDS2 Online programming…YES, via GM TIS2WEB SPS Tech 2 tool functionality…YES, via Tech2Win application
VXDIAG VCX NANO Pro;ford: Ford IDS 101 vxdiag…
View On WordPress
0 notes
Text
Rdi Technology (shenzhen) Driver Download For Windows 10

Install Shenzhen UTLEMC90 laptop drivers for Windows 10 x64, or download DriverPack Solution software for automatic drivers intallation and update.
Operating System Driver Provider Driver Version; Download Driver: Windows XP (64 bit) Shenzhen Huiding Technology Co.,Ltd. 1.2.2.5 (9/10/2014) Download Driver.
How to install VXDIAG VCX NANO GM Tech2Win on Windows 10 Tech2Win is the Diagnostic Software for 1991-2013 GM vehicles including passenger cars, light and medium duty trucks and saturn vehicles. It is the Windows PC version of the Tech2 handheld diagnostic tool.
Engineer: Zhen'R Tel:0755-2788 6063-322 Phone:135 1034 2412 Q Q: 3001 0212 99 E-mail:@qq.com.


Download Dericam PC for free at BrowserCam. Shenzhen Dericam Technology Co., Ltd published the Dericam App for Android operating system mobile devices, but it is possible to download and install Dericam for PC or Computer with operating systems such as Windows 7, 8, 8.1, 10 and Mac.
Rdi Technology (shenzhen) Driver Download For Windows 10 7

Let's find out the prerequisites to install Dericam on Windows PC or MAC computer without much delay.
Driver download No. 03 drivers have two versions of Window 7/8/10 and Window XP, which can be downloaded and used according to the user's own computer system. Only support Windows 7/8/10/XPComputer ONLY (NO MAC/LinuxVISTA); 2. Make sure plug in USB 3.0 port ( 1920.1080 ), since the resolution of USB 2.0 is only 800.
Select an Android emulator: There are many free and paid Android emulators available for PC and MAC, few of the popular ones are Bluestacks, Andy OS, Nox, MeMu and there are more you can find from Google.
Compatibility: Before downloading them take a look at the minimum system requirements to install the emulator on your PC.
Rdi Technology (shenzhen) Driver Download For Windows 10
For example, BlueStacks requires OS: Windows 10, Windows 8.1, Windows 8, Windows 7, Windows Vista SP2, Windows XP SP3 (32-bit only), Mac OS Sierra(10.12), High Sierra (10.13) and Mojave(10.14), 2-4GB of RAM, 4GB of disk space for storing Android apps/games, updated graphics drivers.
Rdi Technology (shenzhen) Driver Download For Windows 10 Pro
Finally, download and install the emulator which will work well with your PC's hardware/software.
How to Download and Install Dericam for PC or MAC:
Open the emulator software from the start menu or desktop shortcut in your PC.
Associate or set up your Google account with the emulator.
You can either install the App from Google PlayStore inside the emulator or download Dericam APK file from the below link from our site and open the APK file with the emulator or drag the file into the emulator window to install Dericam App for pc.
Rdi Technology (shenzhen) Driver Download For Windows 10 32-bit
You can follow above instructions to install Dericam for pc with any of the Android emulators out there.
1 note
·
View note
Text
VXDIAG VCX Nano won’t Connect to GM Corvette C6
Car model: GM Corvette C6
Device: VXDIAG VCX Nano GM with USB cable not Wifi
Error: Won’t connect to the car Can’t get the licensee to load
How to solve?
Problem with WI-Fi unit, is that the Nano needs to be connected to the car so the nano has power to begin with. Also, OBDII port needs to be powered up, so on a C5, car has to be in run postion before the OBDII has power itself.
Because of that, even on the Wifi unit I have, I still use it with a cable so the laptop powers up the nano to begin with, and don’t have to worry about the OBDII power instead..
When you load it make sure you run the installed updates from tech2win.
You also cant use a 64bit OS system it has to to be a 32bit device. The newer units (if bought on amazon) are 32bit and cant run from a Vm image that is 32bit OS.
I had the same issue. I pulled out a old laptop and installed win10 32bit and ran the updated add-ons from tech2win.
Load VX manager first, plug in the Nano, and get it working in VX manager. Hence click on firmware icon to update the firmware, then click on licence icon to install the licenses.
Now with the VX manager open and the nano plugged in, now load that auto install.exe of Tech2win to load it from the White disc that came with the Nano to your machine. Hence the autoinstall.exe will need to over ride some VX manager files when it installs, so VX manager has to be open with the Nano connected/being seen in VX manager when you load tech2 win auto install from the disc. Installing tech2 win, with VX manager not open and the nano not plugged into the machine will end up with install problems every time with Win 64bit system.
Lastly, if you are loading in the Newer VX manager, you have to go in and install the needed programs from inside VX manager (no long load into VX manger from the white disc). So Tech2, GDS2 and SPS have to be installed from within VX manager. If you check in VX manager and these are loaded already, uninstall and reload them from VX manager again if you are having problems. When you have done these three reloads, go back in the licence tab in VX manager and make sure you are showing licences for all three of these. If not, then go back to the main page and click on the licence ion to update the licences on the refreshed installed. I bring this up, since if you are using the last right hand top tab in VX manager to download the latest VX manager, you will have to install Tech2win/gds2/SPS from within VX manager (will still use the white disc to install Tech2win to the laptop to get the the desk top icon.
Now the glitch with A/C Delco TBS.
If you are using the older VX manager and older firmware on the Nano, when you get the screen to install the Bosch Tech2win driver and GDS2 in TBS (will be a pop up screen), you want to skip these installs each time you use TBS.
If you are using the latest VX manager and latest Nano firmware, then you want to install these two Bosch drivers from TBS instead.
Trust is, for TBS now, you want to be using the latest VX manager and firmware. When you load the two Bosch drivers, it going to to load another program that is needed to get the Nano to work (TBS changed about a year ago, and its this third driver that loads with the Bosch drivers that is needed to get the Nano to work with the system.
0 notes
Text
VXDIAG VCX NANO vs. VCX Pro with Multi Brands
What's the difference between VXDIAG VCX NANO series and VCX Pro (green interface with multi-brand software)?
1. VCX NANO interface supports single car brand software only. You cannot add other license to the device.
While you are able to add other car brand software to VXDIAG VCX Pro scanner.
Avaliable car software are: Toyota Techstream, Honda HDS, Ford/Mazda IDS, Volvo VIDA, JLR SDD, GM GDS2/Tech2win,VW ODIS
2.VCX NANO has USB and WiFi version, VCX Pro has USB version only.
Note: Both NANO series and VCX Pro cannot work with BMW, Benz, Subaru SSM, Porsche PIWIS license. For these license, you need VXDIAG Multi Tool series hardware.
0 notes
Text
New VXDIAG VCX Pro adds JLR DoIP and Subaru
Vxdiagshop.com rolls out the upgrade version VXDIAG VCX NANO Pro with 3 car brand software optional. Check the difference between the new and old vcx pro.
Similarities:
1. Able to add more 1 software license to the vcx pro. Comes with 3 software in default.
The old and new vcx pro both have following software optional license: GM GDS2, FORD/MAZDA IDS, VW ODIS, HONDA HDS, VOLVO VIDA, TOYOTA Techstream, JLR SDD
Difference:
1. Outlook.
The new VCX Pro adds Bluetooth connection and a “Fn” firmware reset button.
While the old vcx pro supports USB connection only.
2.The new vcx pro adds JLR DoIP and Subaru license which the old one does not support.
New vcx pro supports up to 8 car brands.
The old vcx pro supports up to 6 car brands.
FYI:
VCX Pro does not come with software CD. Software can be downloaded free. If you don’t want to install software one by one, buy a software HDD in our website.
0 notes
Text
GM Nano Review Success with Global & TIS2000 on XP VWmare
Yep, I set up both GlobalTis and Tis2000 in a new XP machine to get it working with the GM VXDIAG VCX NANO.
So if one is tech savvy, GM Nano is not a bad deal, since it also comes with GDS2 as well to work on newer cars.
The downfall, unless you have everything loads on say a small tablet wit touch screen, then most laptops are too bulky to be used while you are in the car instead.
Plus, still have not figured out the problem of why the Tech2win software is not working on my machine, and still running it, and all the other software on a older 32bit windows machine instead.
So I still giving the Tech II clone the better thumbs up for working on the C6, since its a perfect size when you are in the car, plus the TIS200 software that comes with it, it one click loading from the disc instead.
To add, when you are doing the above to VM into SD, once you have the VXDiag manager program installed in 4, make sure open the manager program, update your license key, then down load both the apt programs so it will install the needed VXDIAG scanner select in step 19. Hence if all you get with the “generic Pass Thru diver is just MDI and MDI2 only, then you can need to cancel back out of Tis2000, go into the VC manager program, update your license on the Nano, then install both the pass through and GM/GDS2 program from that same screen. Once you have done such, then you can go back into Tis2000, go to IO, select Generic pass thru, and now you would have the VXDIAD scanner under the MDI and MDI2 selections to select.
Also, the SDS program in Tis2000 is the only one that will work the Nano in pass through mode. The rest are for a Tech II hand unit that your not using instead.
So tech2win running native with any luck on a Win 64bit machine ( may have better luck with an AMD machine, since I gave up trying on an intel 7 machine, and just running that on a win 7 machine Next you run GDS2 in a VM machine using the two file you have, the another vm machine running a full version XP, with the the above way to set up Tis200. And no, you can’t install tech2win on the full XP VM machine, since it want to run in Win 7 32bit instead.
And just a FYI, to try to pull off the two VM version in Win 7 running in the free virtal PC you can download from MS , if you used to the speed of the new win 10 machines (SSD drive and more power/memory that you can really use short of gaming), VM’g on an older 7 32 bit machine with a M processor, its brutally slow to say the least.
VERY GOOD TIP might help you if you don’t have good luck with GM Nano:
Don’t feel bad, since I pulled my clone apart to just take a look at the solder joints to clean them up when I first got it so they would not cause problems, saw the cheap knock off DC to DC converter then, and have a back up to replace mine when it goes bad as well.
If nothing else, when you go auto bleed the brakes, you don’t have the huge GM Nano hanging down that you have to sneak your foot under it as you cycle the ADS pump and ride the brake pedal. Hence going to be a bitch to do driving data runs with the Nano plugged in, since it hangs down so low and really gets in the way if you are trying to drive the car.
Hell trust is, for checking the engine and doing engine data logs, find it easy to just run my low profile wifi Elm 327 and run scan master elm via the laptop on the bench. Hence the low profile wifi elm327 came with a copy of scan master via OBD2TOOL for $19, and also works with my Iphone running dashcommand for driving, since the elm327 wifi device only site about an inch below the OBDI port when plugged in.
Where the tech II comes in (and GM Nano), is the rest of the car, since the scan master/other types of basic scanners can not get into the body modules to pull and clear those codes, nor get you into the special options as well.
As for HPtuner over EFI live, have both and can’t really say for sure which is the better tuning software. Hp tuner has come a long way with extra options, while EFI gave you access to all the options from the start instead. Also, these are both good devices to use to do driving data runs like the Tech II clone as well, since when plugged in, the the cords can be tucked up to not get in the way either.
Hence still not sold if the GM Nano will stay plugged in/your not going to knock it out of the port for driving data runs
And up against my wifi elm327 that I use more often with Scan master or dash command for driving data logging runs instead.
So lets add in a obd2 extender cable that should be thrown in the mix for the GM Nano for driving data logging that going to be needed as well.
0 notes