#Ubuntu vs Debian
Explore tagged Tumblr posts
Visit Tumblr Blog
Explore Tumblr blogs with no restrictions, modern design and the best experience.
Last Seen Tumblr Blogs


Fun Fact
The Tumblr office adopted Tommy, an 11-year-old Pomeranian.
Text
Guía sobre Ubuntu: La Distribución Linux para Todos
1. Introducción
Presentación de Ubuntu
Ubuntu es una de las distribuciones Linux más populares y accesibles, diseñada para ser fácil de usar tanto para principiantes como para usuarios avanzados. Lanzada por primera vez en 2004 por Canonical Ltd., Ubuntu ha logrado una gran aceptación en la comunidad Linux debido a su enfoque en la usabilidad y su amplia comunidad de soporte.
Importancia de Ubuntu en el ecosistema Linux
Ubuntu ha sido fundamental en la popularización de Linux en el escritorio, además de ser ampliamente utilizada en servidores y en la nube. Su facilidad de uso y la disponibilidad de una gran cantidad de software han hecho que muchos usuarios hagan su primera incursión en Linux a través de Ubuntu.
2. Historia y Filosofía de Ubuntu
Origen y evolución de Ubuntu
Ubuntu se basa en Debian y fue creado con el objetivo de proporcionar una distribución que fuera más fácil de instalar y usar. Canonical, la empresa detrás de Ubuntu, ha lanzado versiones nuevas de Ubuntu cada seis meses, garantizando así la disponibilidad de software actualizado.
Filosofía de Ubuntu y el software libre
Ubuntu sigue la filosofía de ofrecer software libre y de código abierto, pero a diferencia de Debian, incluye software propietario y controladores para garantizar una experiencia de usuario más fluida. El lema de Ubuntu, "Linux for Human Beings" (Linux para seres humanos), refleja su compromiso con la accesibilidad.
3. Características Clave de Ubuntu
Facilidad de uso
Ubuntu está diseñado para ser intuitivo y fácil de usar, con un instalador gráfico simple y una experiencia de usuario amigable desde el primer momento. Esto lo convierte en una excelente opción para quienes son nuevos en Linux.
Gestor de paquetes
APT (Advanced Package Tool) es el gestor de paquetes principal de Ubuntu, heredado de Debian. APT facilita la instalación, actualización y eliminación de software desde los repositorios de Ubuntu.
Comandos básicos: sudo apt update, sudo apt install [paquete], sudo apt remove [paquete].
Formatos de paquetes soportados
Ubuntu es compatible con varios formatos de paquetes:
.deb: El formato de paquetes nativo de Debian y Ubuntu.
.snap: Un formato de paquetes universal desarrollado por Canonical que facilita la instalación de software con todas sus dependencias.
.appimage: Archivos portátiles que pueden ejecutarse directamente sin necesidad de instalación.
.flatpak: Aunque no es nativo, se puede instalar soporte para Flatpak en Ubuntu.
Soporte a largo plazo (LTS)
Cada dos años, Ubuntu lanza una versión de soporte a largo plazo (LTS), que recibe actualizaciones de seguridad y mantenimiento durante cinco años. Estas versiones LTS son ideales para entornos donde la estabilidad es crítica.
Amplia compatibilidad de hardware
Ubuntu tiene un excelente soporte de hardware, con controladores propietarios y de código abierto, lo que asegura la compatibilidad con la mayoría de los dispositivos y periféricos.
4. Proceso de Instalación de Ubuntu
Requisitos mínimos del sistema
Procesador: Procesador de 2 GHz o superior.
Memoria RAM: 2 GB como mínimo, 4 GB o más recomendados para un rendimiento óptimo.
Espacio en disco: 25 GB de espacio libre en disco.
Tarjeta gráfica: Soporte para una resolución mínima de 1024x768.
Unidad de DVD o puerto USB para la instalación.
Descarga y preparación del medio de instalación
Ubuntu se puede descargar desde el sitio web oficial. Se puede preparar un USB booteable utilizando herramientas como balenaEtcher o Rufus.
Guía paso a paso para la instalación
Selección del entorno de instalación: El instalador Ubiquity de Ubuntu es simple y directo, con opciones para probar Ubuntu antes de instalarlo o proceder directamente con la instalación.
Configuración de particiones: Ubuntu ofrece un particionado automático, aunque los usuarios avanzados pueden optar por el particionado manual.
Configuración de la red y selección de software: Durante la instalación, se configuran las opciones de red y se pueden elegir aplicaciones adicionales, como la instalación de controladores de terceros.
Primeros pasos post-instalación
Actualización del sistema: Se recomienda ejecutar sudo apt update && sudo apt upgrade después de la instalación para asegurarse de que todo el software esté actualizado.
Instalación de controladores adicionales y software: Ubuntu puede detectar e instalar automáticamente controladores adicionales para tu hardware.
5. Entornos de Escritorio en Ubuntu
GNOME (predeterminado)
GNOME es el entorno de escritorio predeterminado de Ubuntu desde la versión 17.10. Es moderno, elegante y diseñado para ser fácil de usar.
Kubuntu (KDE Plasma)
Una versión de Ubuntu que utiliza el entorno de escritorio KDE Plasma, conocido por su alta personalización y características avanzadas.
Xubuntu (Xfce)
Xubuntu utiliza el entorno de escritorio Xfce, que es ligero y adecuado para sistemas con recursos limitados.
Lubuntu (LXQt)
Lubuntu utiliza LXQt, un entorno de escritorio muy ligero, ideal para hardware antiguo o menos potente.
Ubuntu MATE
Una versión de Ubuntu con el entorno de escritorio MATE, que ofrece una experiencia más tradicional de escritorio.
6. Gestión de Paquetes en Ubuntu
APT: El gestor de paquetes de Ubuntu
Comandos básicos: apt-get, apt-cache, aptitude.
Instalación y eliminación de paquetes: sudo apt install [paquete], sudo apt remove [paquete].
Snap: Paquetes universales
Comandos básicos de Snap: sudo snap install [paquete], sudo snap remove [paquete].
Snap permite instalar software que incluye todas sus dependencias en un solo paquete, asegurando la compatibilidad entre diferentes versiones de Ubuntu.
Repositorios PPA (Personal Package Archives)
Los usuarios de Ubuntu pueden añadir repositorios PPA para acceder a versiones más recientes de software o a aplicaciones que no están disponibles en los repositorios oficiales.
Comandos para añadir un PPA: sudo add-apt-repository ppa:[nombre_del_ppa].
7. Ubuntu en el Entorno Empresarial y Servidores
Uso de Ubuntu en servidores
Ubuntu Server es una opción popular para servidores debido a su facilidad de uso y a la disponibilidad de soporte de Canonical. Es ampliamente utilizado en la nube, especialmente en plataformas como AWS, Azure y Google Cloud.
Soporte a largo plazo (LTS)
Las versiones LTS de Ubuntu son especialmente valoradas en entornos empresariales por su estabilidad y soporte extendido de cinco años.
Herramientas de administración y automatización
Ubuntu Server se integra bien con herramientas como Juju, MAAS, y Ansible, que facilitan la administración de infraestructuras y la implementación de servicios.
8. Comparativa de Ubuntu con Otras Distribuciones
Ubuntu vs. Debian
Objetivo: Ubuntu se basa en Debian pero está más orientado al usuario final, con una instalación más fácil y soporte para software propietario.
Filosofía: Ubuntu incluye software propietario y está más enfocado en la experiencia del usuario, mientras que Debian sigue estrictamente los principios del software libre.
Ubuntu vs. Fedora
Objetivo: Fedora es una distribución vanguardista que integra las últimas tecnologías de Linux, mientras que Ubuntu se centra en la facilidad de uso y la estabilidad.
Filosofía: Fedora es patrocinada por Red Hat y sigue una filosofía de integración de tecnologías nuevas, mientras que Ubuntu se enfoca en proporcionar una experiencia de usuario pulida.
Ubuntu vs. Arch Linux
Objetivo: Arch Linux es para usuarios avanzados que buscan un sistema minimalista y personalizado, mientras que Ubuntu es más amigable para principiantes.
Filosofía: Arch sigue la filosofía KISS (Keep It Simple, Stupid) y el modelo de actualización continua (rolling release), mientras que Ubuntu ofrece versiones estables y preconfiguradas para un uso inmediato.
9. Conclusión
Ubuntu como una opción accesible y versátil
Ubuntu sigue siendo una de las distribuciones Linux más accesibles y versátiles, adecuada para una amplia gama de usuarios, desde principiantes hasta administradores de sistemas.
Recomendaciones finales para quienes consideran usar Ubuntu
Ubuntu es una excelente opción para quienes buscan una distribución Linux fácil de usar con un sólido respaldo comunitario y empresarial. Su enfoque en la usabilidad y la accesibilidad lo convierte en una opción ideal para usuarios de escritorio y para implementaciones en servidores.
10. Preguntas Frecuentes (FAQ)
¿Ubuntu es adecuado para principiantes?
Sí, Ubuntu es una de las mejores opciones para quienes son nuevos en Linux debido a su facilidad de uso y amplia documentación.
¿Cómo actualizo mi sistema Ubuntu?
Ejecutando sudo apt update && sudo apt upgrade mantendrás tu sistema actualizado.
¿Es Ubuntu una buena opción para servidores?
Sí, Ubuntu es muy utilizado en servidores, especialmente en entornos de nube, debido a su facilidad de uso y soporte a largo plazo.
#Ubuntu#distribución Linux#Linux#servidor Ubuntu#instalación Ubuntu#software libre#GNOME#KDE#APT#Snap#gestión de paquetes#Ubuntu LTS#Ubuntu Server#comunidad Ubuntu#recursos Ubuntu#seguridad en Ubuntu#soporte a largo plazo#Ubuntu vs Debian#Ubuntu vs Fedora#Ubuntu vs Arch Linux#formatos de paquetes#.deb#.snap#.appimage#.flatpak
2 notes
·
View notes
Text
Linux distros - what is the difference, which one should I choose?
Caution, VERY long post.
With more and more simmers looking into linux lately, I've been seeing the same questions over and over again: Which distro should I choose? Is distro xyz newbie-friendly? Does this program work on that distro?
So I thought I'd explain the concept of "distros" and clear some of that up.
What are the key differences between distros?
Linux distros are NOT different operating systems (they're all still linux!) and the differences between them aren't actually as big as you think.
Update philosophy: Some distros, like Ubuntu, (supposedly) focus more on stability than being up-to-date. These distros will release one big update once every year or every other year and they are thoroughly tested. However, because the updates are so huge, they inevitably tend to break stuff anyway. On the other end of the spectrum are so-called "rolling release" distros like Arch. They don't do big annual updates, but instead release smaller updates very frequently. They are what's called "bleeding edge" - if there is something new out there, they will be the first ones to get it. This can of course impact stability, but on the other hand, stuff gets improved and fixed very fast. Third, there are also "middle of the road" distros like Fedora, which kind of do... both. Fedora gets big version updates like Ubuntu, but they happen more frequently and are comparably smaller, thus being both stable and reasonably up-to-date.
Package manager: Different distros come with different package managers (APT on ubuntu, DNF on Fedora, etc.). Package managers keep track of all the installed programs on your PC and allow you to update/install/remove programs. You'll often work with the package manager in the terminal: For example, if you want to install lutris on Fedora, you'd type in "sudo dnf install lutris" ("sudo" stands for "super user do", it's the equivalent of administrator rights on Windows). Different package managers come with different pros and cons.
Core utilities and programs: 99% of distros use the same stuff in the background (you don’t even directly interact with it, e.g. background process managing). The 1% that do NOT use the same stuff are obscure distros like VoidLinux, Artix, Alpine, Gentoo, Devuan. If you are not a Linux expert, AVOID THOSE AT ALL COST.
Installation process: Some distros are easier to install than others. Arch is infamous for being a bit difficult to install, but at the same time, its documentation is unparalleled. If you have patience and good reading comprehension, installing arch would literally teach you all you ever need to know about Linux. If you want to go an easier and safer route for now, anything with an installer like Mint or Fedora would suit you better.
Community: Pick a distro with an active community and lots of good documentation! You’ll need help. If you are looking at derivatives (e.g. ZorinOS, which is based on Ubuntu which is based on Debian), ask yourself: Does this derivative give you enough benefits to potentially give up community support of the larger distro it is based on? Usually, the answer is no.
Okay, but what EDITION of this distro should I choose?
"Editions" or “spins” usually refer to variations of the same distro with different desktop environments. The three most common ones you should know are GNOME, KDE Plasma and Cinnamon.
GNOME's UI is more similar to MacOS, but not exactly the same.
KDE Plasma looks and feels a lot like Windows' UI, but with more customization options.
Cinnamon is also pretty windows-y, but more restricted in terms of customization and generally deemed to be "stuck in 2010".
Mint vs. Pop!_OS vs. Fedora
Currently, the most popular distros within the Sims community seem to be Mint and Fedora (and Pop!_OS to some extent). They are praised for being "beginner friendly". So what's the difference between them?
Both Mint and Pop!_OS are based on Ubuntu, whereas Fedora is a "standalone" upstream distro, meaning it is not based on another distro.
Personally, I recommend Fedora over Mint and Pop!_OS for several reasons. To name only a few:
I mentioned above that Ubuntu's update philosophy tends to break things once a big update rolls around every two years. Since both Mint and Pop!_OS are based on Ubuntu, they are also affected by this.
Ubuntu, Mint and Pop!_OS like to modify their stuff regularly for theming/branding purposes, but this ALSO tends to break things. It is apparently so bad that there is an initiative to stop this.
Pop!_OS uses the GNOME desktop environment, which I would not recommend if you are switching from Windows. Mint offers Cinnamon, which is visually and technically outdated (they use the x11 windowing system standard from 1984), but still beloved by a lot of people. Fedora offers the more modern KDE Plasma.
Personal observation: Most simmers I've encountered who had severe issues with setting up Linux went with an Ubuntu-based distro. There's just something about it that's fucked up, man.
And this doesn't even get into the whole Snaps vs. Flatpak controvery, but I will skip this for brevity.
Does SimPE (or any other program) work on this distro?
If it works on Fedora, then it works on Mint/Ubuntu/Arch/etc., and vice versa. This is all just a question of having the necessary dependencies installed and installing the program itself properly. Some distros may have certain prerequisites pre-installed, while others don't, but you can always just install those yourself. Like I said, different distros are NOT different operating systems. It's all still Linux and you can ultimately customize it however you want.
In short: Yeah, all Sims 2-related programs work. Yes, ReShade too. It ultimately doesn't really matter what distro you use as long as it is not part of the obscure 1% I mentioned above.
A little piece of advice
Whatever distro you end up choosing: get used to googling stuff and practice reading comprehension! There are numerous forums, discord servers and subreddits where you can ask people for help. Generally speaking, the linux community is very open to helping newbies. HOWEVER, they are not as tolerant to nagging and laziness as the Sims community tends to be. Show initiative, use google search & common sense, try things out before screaming for help and be detailed and respectful when explaining your problems. They appreciate that. Also, use the arch wiki even if you do not use Arch Linux – most of it is applicable to other distros as well.
#simming on linux#bnb.txt#if anyone wants to use this as a base for a video feel free#i don't feel like like recording and editing lol
79 notes
·
View notes
Note
whats the status of like. using linux on a phone. it feels like there are two parallel universes, one that kde lives in where people use linux on phones, and one where if you google linux phones you discover theyre almost usable but they can barely make phone calls or send texts and they only run on like 4 models of phone
don't have much experience with linux on phone so anyone please correct me if i'm wrong but
one of the problems with phones is that every vendor and manufacturer adds their own proprietary driver blob to it and these have to be extracted and integrated into the kernel in order for the hardware to function.
as companies don't like to share their magic of "how does plastic slab make light", reverse engineering all your hardware is quite a difficult task. Sometimes there just isn't a driver for the camera of a phone model yet because no one was able to make it work.
So naturally, this takes a lot of time and tech is evolving fast so by the time a phone is completely compatible, next generations are already out and your new model obsolete.
Also important to note: most of this work is made by volunteers, people with a love for programming who put a lot of their own time into these things, most of them after their daytime jobs as a hobby.
Of course, there are companies and associations out there who build linux phones for a living. But the consumer hardware providers, like Pinephone, Fairphone and others out there aren't as big and don't have this much of a lobby behind them so they can't get their prices cheap. Also the manufacturers are actively working against our right to repair so we need more activism.
To make the phones still affordable (and because of said above driver issues) they have to use older hardware, sometimes even used phones from other manufacturers that they have to fix up, so you can't really expect a modern experience. At least you can revive some older phones. As everything Linux.
Then there's the software providers who many of are non-profits. KDE has Plasma Mobile, Canonical works on Ubuntu Touch, Debian has the Mobian Project and among some others there's also the Arch Linux ARM Project.
That's right baby, ARM. We're not talking about your fancy PC or ThinkPad with their sometimes even up to 64-bit processors. No no no, this is the future, fucking chrome jellyfishes and everything.
This is the stuff Apple just started building their fancy line of over-priced and over-engineered Fisher-Price laptop-desktops on and Microsoft started (Windows 10X), discontinued and beat into the smush of ChatGPT Nano Bing Open AI chips in all your new surface hp dell asus laptops.
What I was trying to say is, that program support even for the market dominating monopoles out there is still limited and.... (from my own experience from the workplace) buggy. Which, in these times of enshittification is a bad news. And the good projects you gotta emulate afterwards anyways so yay extra steps!
Speaking of extra steps: In order to turn their phone into a true freedom phone, users need to free themselves off their phones warranty, lose their shackles of not gaining root access, installing a custom recovery onto their phone (like TWRP for example), and also have more technical know-how as the typical user, which doesn't quite sounds commercial-ready to me.
So is there no hope at all?
Fret not, my friend!
If we can't put the Linux into the phone, why don't we put the phone around the Linux? You know... Like a container?
Thanks to EU regulations-
(US consumers, please buy the European versions of your phones! They are sometimes a bit more expensive, but used models of the same generation or one below usually still have warranty, are around the same price as over there in Freedom Valley, and (another side tangent incoming - because of better European consumer protection laws) sometimes have other advantages, such as faster charging and data transfer (USB-C vs lightning ports) or less bloated systems)
- it is made easier now to virtualize Linux on your phone.
You can download a terminal emulator, create a headless Linux VM and get A VNC client running. This comes with a performance limit though, as a app with standard user permissions is containerized inside of Android itself so it can't use the whole hardware.
If you have root access on your phone, you can assign more RAM and CPU to your VM.
Also things like SDL just released a new version so emulation is getting better.
And didn't you hear the news? You can run other things inside a VM on an iPhone now! Yup, and I got Debian with Xfce running on my Xiaomi phone. Didn't do much with it tho. Also Windows XP and playing Sims 1 on mobile. Was fun, but battery draining. Maybe something more for tablets for now.
Things will get interesting now that Google officially is a monopoly. It funds a lot of that stuff.
I really want a Steam Deck.
Steam phones would be cool.
#asks#linux#linuxposting#kde plasma#kde#:3#kde desktop environment#arch linux#windows#microsoft#mobile phones#linux mobile#ubuntu#debian#arch#steam#gabe newell#my lord and savior
14 notes
·
View notes
Note
Ahrah: @dragongirlcock encouraged us to tell you that we've recently made the permanent jump from Windows to Linux. Your post on the topic on top of the usual Microsoft bullshit was one of the catalysts to just do it now. We did play around with several different distros in 2013 in a dual boot system, so we already had a feel for a few different ones and what we prefer in a DE and whatnot. They were all Debian based, but then we happened to stumble across Garuda KDE Dr460nized, and aside from that we really like KDE Plasma, couldn't possibly pass up on a distro with that name XD Plus it has been nice having most gaming things working out of the box and generally saved us some floundering in figuring out what all we needed, bc things have come a long way since 2013.
We've been having bit of a time trying to learn the terminal and all, and have been running into miscellaneous issues, but it has been comforting to have more expirienced people we know look at them and go, "that problem is Weird wtf???"
Sometimes we'll go looking for info and the internet is like, "Ubuntu = Linux, especially if you're a newbie, and here's how to do things without having to touch the big scary terminal :) " and anything that might be helpful it feels like there's the expectation that you know everything already if you're on Arch. *angry dragon noises*
We feel like we've somehow happened to slip through the cracks of what people "typically" do or are encouraged to do when it comes to transitioning to Linux, why is this? Bc I feel that us having more of an interest in learning more shouldn't be that odd, it seems stranger to me that there seems to be a Windows vs Mac parallel with Debian vs Arch in terms of the general information available and expectations??? Also any recommentions on ways to just stumble upon things would be helpful. Bc sure we can got to the AUR, but you have to kind of already know what you're looking for.
hell yeah !!! welcome to The Community !! (programmer socks optional d: )
oooooohhh garuda !! recognised the name and is bc it's built atop arch !!
yeag, the ubuntu-as-default assumptions (which, annoyingly, even affects debian users sometimes) are frustrating. also the "commands scawy uwu" attitude (which also seems to include "just paste this magic command in the terminal dw it's totally fine :))))" from time to time) is frustrating as well.
i don't expect every single person to manually install arch, or like gentoo or smth, spend a week configuring it, and fuckign write an emacs port to run it as a full wayland compositor, but treating computers as Magical Boxes and users as Inherently Inept really gets my goat.
idk what good communities look like anymore bc i'm not part of any and solve shit myself or by asking friends/partners, but for arch, the official wiki tends to have most things well-explained. it's not a complete solution but it should help 🩷
in conjunction w/ the arch wiki, we use stackoverflow, man pages (documentation that doesn't require a website 7 months pregnant w/ javascript octuplets ? gooodddsss it feels good), package manager search, chaotic-aur (has most aur packages pre-compiled as an additional repo, so pacman can search and install them), tldr which is simplified man pages (very handy for example commands !!)
linux systems really are a thousand rats in a trench coat, so understanding what rats ya got helps but can take time. the best way round that is have a system you can break.
for like getting from ubuntu-coded to arch-coded, we're planning some GUIDEs that may be handy. wanna cover basic terminal and shell stuff, standard unix commands, what some of the bigger trenchcoat rats are and why.
until then, if there's any specific questions feel free to drop a message here or in DMs or wherever 🩷
3 notes
·
View notes
Note
I've also been trying to get on the linux train and I'm so with you re: the lack of beginner's guides, it's actually shocking. Like, stop bickering about what distros are better for beginners, I want to know if switching is gonna wipe my data and thus if I should be more careful with my back-ups 😭 had to jump in the deep end and figure out my meagre knowledge thru fucking osmosis
Still haven't fully made the switch, but trying out different distros (aka types: what people are talking about when they say 'linux mint vs debian vs ubuntu vs gentoo vs arch'. I think there's some differences in software availability but I mostly focused on the layout differences) on a live USB was easy enough. If you look up '[distro] live install', you'll find a page on their website where you can download a file called a live image. Then you download a program called rufus and use it to burn the file to a USB (pretty sure you can reverse the process and use the USB again but I've never done that 🤷♀️). Then if you stick the USB in a USB slot and then power on your computer, it should come up with a menu to test out the distro or run a live image. Then you can play around in it and see what it feels like, though turning off your computer does end the session and reset anything you did in the session. Windows files are still available to use and look at, they're just in a seperate directory, as if on a USB stick in file explorer.
Windows fucked up so I've been living off of a live image of debian for a while, and albeit as a user with pretty low demands (basically just internet + office programs), it's been serving me pretty well.
Sadly it pretty much is a lot of figuring stuff out as you go along (plus a lot of googling things people reference), but since I'm still looking around for a proper guide before I fully commit to linux, I'll send any good ones your way.
thank u for this. i want to not use windows bc fuck microsoft and their military contracts and it's frustrating how horribly inaccessible this is while the users pretend it's easy and simple. someday ill figure it out i guess
3 notes
·
View notes
Text


Ubuntu’s homepage vs Debian’s home page.
2 notes
·
View notes
Text
I use Arch, BTW
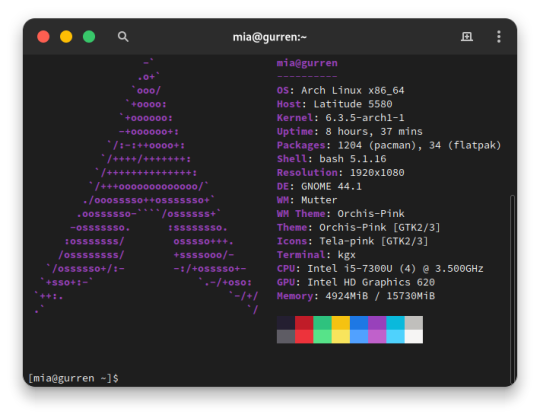
I made the switch from Ubuntu 23.04 to Arch Linux. I embraced the meme. After over a decade since my last failed attempt at daily driving Arch, I'm gonna put this as bluntly as I can possibly make it:
Arch is a solid Linux distribution, but some assembly is required.
But why?
Hear me out here Debian and Fedora family enjoyers. I have long had the Debian family as my go-to distros and also swallowed the RHEL pill and switched my server over to Rocky Linux from Ubuntu LTS. on another machine. More on that in a later post when I'm more acclimated with that. But for my personal primary laptop, a Dell Latitude 5580, after being continually frustrated with Canonical's decision to move commonly used applications, particularly the web browsers, exclusively to Snap packages and the additional overhead and just weird issues that came with those being containerized instead of just running on the bare metal was ultimately my reason for switching. Now I understand the reason for this move from deb repo to Snap, but the way Snap implements these kinds of things just leaves a sour taste in my mouth, especially compared to its alternative from the Fedora family, Flatpak. So for what I needed and wanted, something up to date and with good support and documentation that I didn't have to deal with 1 particular vendors bullshit, I really only had 2 options: Arch and Gentoo (Fedora is currently dealing with some H264 licensing issues and quite honestly I didn't want to bother with that for 2 machines).
Arch and Gentoo are very much the same but different. And ultimately Arch won over the 4chan /g/ shitpost that has become Gentoo Linux. So why Arch? Quite honestly, time. Arch has massive repositories of both Arch team maintained and community software, the majority of what I need already packaged in binary form. Gentoo is much the same way, minus the precompiled binary aspect as the Portage package manager downloads source code packages and compiles things on the fly specifically for your hardware. While yes this can make things perform better than precompiled binaries, the reality is the difference is negligible at best and placebo at worst depending on your compiler settings. I can take a weekend to install everything and do the fine tuning but if half or more of that time is just waiting for packages to compile, no thanks. That plus the massive resource that is the Arch User Repository (AUR), Arch was a no-brainer, and Vanilla arch was probably the best way to go. It's a Lego set vs 3D printer files and a list of hardware to order from McMaster-Carr to screw it together, metaphorically speaking.
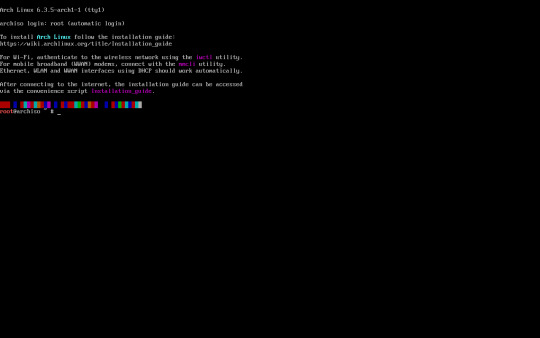
So what's the Arch experience like then?
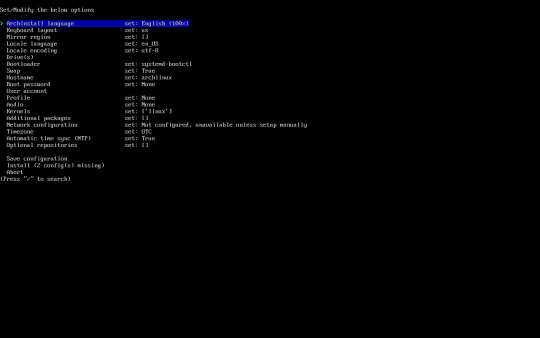
As I said in the intro, some assembly is required. To start, the installer image you typically download is incredibly barebones. All you get is a simple bash shell as the root user in the live USB/CD environment. From there we need to do 2 things, 1) get the thing online, the nmcli command came in help here as this is on a laptop and I primarily use it wirelessly, and 2) run the archinstall script. At the time I downloaded my Arch installer, archinstall was broken on the base image but you can update it with a quick pacman -S archinstall once you have it online. Arch install does pretty much all the heavy lifting for you, all the primary options you can choose: Desktop environment/window manager, boot loader, audio system, language options, the whole works. I chose Gnome, GRUB bootloader, Pipewire audio system, and EN-US for just about everything. Even then, it's a minimal installation once you do have.
Post-install experience is straightforward, albeit just repetitive. Right off the archinstall script what you get is relatively barebones, a lot more barebones than I was used to with Ubuntu and Debian Linux. I seemingly constantly was missing one thing for another, checking the wiki, checking the AUR, asking friends who had been using arch for even longer than I ever have how to address dumb issues. Going back to the Lego set analogy, archinstall is just the first bag of a larger set. It is the foundation for which you can make it your own further. Everything after that point is the second and onward parts bags, all of the additional media codecs, supporting applications, visual tweaks like a boot animation instead of text mode verbose boot, and things that most distributions such as Ubuntu or Fedora have off the rip, you have to add on yourself. This isn't entirely a bad thing though, as at the end if you're left with what you need and at most very little of what you don't. Keep going through the motions, one application at a time, pulling from the standard pacman repos, AUR, and Flatpak, and eventually you'll have a full fledged desktop with all your usual odds and ends.
And at the end of all of that, what you're left with is any other Linux distro. I admit previously I wrote Arch off as super unstable and only for the diehard masochists after my last attempt at running Arch when I was a teenager went sideways, but daily driving it on my personal Dell Latitude for the last few months has legitimately been far better than any recent experiences I've had with Ubuntu now. I get it. I get why people use this, why people daily drive this on their work or gaming machines, why people swear off other distros in favor of Arch as their go to Linux distribution. It is only what you want it to be. That said, I will not be switching to Arch any time soon on mission critical systems or devices that will have a high run time with very specific purposes in mind, things like servers or my Raspberry Pi's will get some flavor of RHEL or Debian stable still, and since Arch is one of the most bleeding edge distros, I know my chance of breakage is non zero. But so far the seas have been smooth sailing, and I hope to daily this for many more months to come.
36 notes
·
View notes
Text
Price Comparison: DigitalOcean vs. Linode vs. Vultr vs. Amazon Lightsail vs. SSD Nodes vs. Many Others
Whew! That's quite a tough headline to swallow. But choosing the right cloud hosting provider for your next virtual private server (VPS) shouldn't be difficult, too. Sometimes, it just comes down to price. Whether you're a cash-strapped student or just someone who wants to run a few essential applications without emptying our your wallet, you're in luck—there are a lot of low-cost options these days. That's why we're breaking down a bunch of 1GB RAM KVM plans in this new cloud hosting price comparison.
An unmanaged hosting service means that you have to install applications and administer the server yourself. KVM offers more flexibility than other options, like OpenVZ, but comes at a slight cost increase. Still, we recommend KVM for most users. At the very least, each of these providers offers Ubuntu, Debian, and CentOS. Read more...
2 notes
·
View notes
Link
0 notes
Text
Red Hat Enterprise Linux
Red Hat Linux was one of the most popular Linux distributions (distros) for both servers and desktops before it was discontinued. It played a key role in the development of Linux as a mainstream operating system. Here's a breakdown of Red Hat Linux and its modern successor:
1. Red Hat Linux (1994–2004):
Initial Release: Red Hat Linux was first released in 1994 by Red Hat, Inc., founded by Marc Ewing and Bob Young. It became one of the most widely used distributions, known for its stability and reliability, which made it popular in enterprise environments.
Package Management: It used the Red Hat Package Manager (RPM) format for installing and managing software, which became one of the most common package management systems in the Linux world.
Discontinuation: Red Hat discontinued Red Hat Linux in 2004, transitioning to a more enterprise-focused distribution—Red Hat Enterprise Linux (RHEL).
2. Red Hat Enterprise Linux (RHEL):
Enterprise-Focused: RHEL was launched to focus on businesses and large organizations. It is a paid, subscription-based Linux distribution that offers long-term support, regular security updates, and extensive hardware certification.
Key Features:
Stability: RHEL is designed for mission-critical environments, ensuring a stable platform for servers, databases, and applications.
Security: Features like SELinux (Security-Enhanced Linux) provide an additional layer of security for enterprise environments.
Long-Term Support: Each major version of RHEL is supported for around 10 years (with 5 years of full support and 5 years of maintenance support).
Software Repositories: RHEL includes official repositories containing enterprise-grade software and has commercial support from Red Hat.
RHEL vs. Fedora vs. CentOS:
Fedora: This is the upstream, community-driven version that serves as a testing ground for RHEL features.
CentOS: CentOS was originally a free, community-supported clone of RHEL. However, Red Hat shifted its focus in late 2020 to CentOS Stream, which serves as a rolling-release version that is positioned between Fedora and RHEL.
3. Modern Usage:
RHEL is widely used in enterprise environments, especially for web servers, application servers, cloud computing, and more. Red Hat also offers a variety of tools and services around RHEL, including automation, containerization (via OpenShift), and Kubernetes support.
4. Red Hat's Role in the Linux Ecosystem:
Open Source Commitment: Red Hat has been a significant contributor to the open-source community, funding many projects and sponsoring key development initiatives.
Acquisition by IBM: In 2019, IBM acquired Red Hat for $34 billion, further strengthening Red Hat's position as a leader in enterprise Linux solutions.
5. Alternatives:
Other Linux Distros: While Red Hat (and its enterprise variants) is quite popular, there are many alternatives such as Ubuntu, Debian, SUSE, and Arch Linux, each with different goals, community support, and use cases.
for more details please visit
www.qcsdclabs.com,
www.hawkstack.com
0 notes
Text
Ubuntu 20.04 LTS vs. Linux Mint 20: Welches soll ich installieren?
Einblick: Ubuntu 20.04 LTS vs. Linux Mint 20: Welches soll ich installieren? Werfen wir einen Blick auf die Liste der Funktionen, die beide Betriebssysteme besitzen. Beide Linux-Betriebssysteme sind sehr beliebt und werden oft als perfekte Alternative zu Windows-Betriebssystemen angesehen. Ubuntu vs. Linux Mint Ubuntu basiert auf Debian Linux. Die erste Version oder Initialversion, Ubuntu 4.10…
0 notes
Text
Guía sobre Debian: El Pilar de las Distribuciones Linux
1. Introducción
Presentación de Debian
Debian es una de las distribuciones Linux más antiguas y respetadas, conocida por su estabilidad, seguridad y adherencia a los principios del software libre. Fundada en 1993 por Ian Murdock, Debian ha servido como base para muchas otras distribuciones populares, incluyendo Ubuntu.
Importancia y legado de Debian en el ecosistema Linux
Como una de las "distribuciones madre", Debian ha jugado un papel crucial en el desarrollo y popularización de Linux. Su robustez y compromiso con el software libre lo han convertido en una elección preferida tanto para servidores como para entornos de escritorio.
2. Historia y Filosofía de Debian
Origen y evolución de Debian
Debian fue creado con la intención de ser una distribución gestionada de manera abierta y colaborativa. Desde su lanzamiento, ha tenido múltiples versiones, cada una con nombres basados en personajes de la película "Toy Story".
Filosofía y compromiso con el software libre
Debian sigue estrictamente las Directrices de Software Libre de Debian (DFSG), lo que significa que todo el software incluido en la distribución debe ser libre. Además, su contrato social garantiza la transparencia y la cooperación dentro de la comunidad.
3. Características Clave de Debian
Estabilidad y seguridad
Debian es conocido por su estabilidad, lo que lo convierte en una opción confiable para servidores y sistemas de producción. Las actualizaciones y nuevos paquetes se prueban rigurosamente antes de ser lanzados en la versión estable.
Gestor de paquetes
APT (Advanced Package Tool) es el gestor de paquetes principal de Debian. APT facilita la instalación, actualización y eliminación de software desde los repositorios de Debian.
Comandos básicos: sudo apt update, sudo apt install [paquete], sudo apt remove [paquete].
Formatos de paquetes soportados
Debian soporta varios tipos de archivos para la instalación de software:
.deb: El formato nativo de Debian para la instalación de paquetes.
.appimage: Formato portátil que puede ejecutarse directamente sin necesidad de instalación.
.snap: Aunque no es nativo de Debian, se puede habilitar soporte para instalar paquetes Snap.
.flatpak: Otro formato universal que puede ser instalado en Debian, aunque requiere la instalación previa de Flatpak.
Ramas de desarrollo
Stable (Estable): Ideal para entornos donde la estabilidad es crítica.
Testing (Pruebas): Contiene paquetes más recientes y es una buena opción para usuarios que desean un equilibrio entre estabilidad y novedades.
Unstable (Inestable/Sid): Donde se introduce el software más nuevo y experimental.
Amplia compatibilidad de hardware
Debian soporta una amplia gama de arquitecturas de hardware, desde las más comunes como x86 y ARM, hasta plataformas más especializadas.
4. Proceso de Instalación de Debian
Requisitos mínimos del sistema
Procesador: Pentium 4 o posterior.
Memoria RAM: 512 MB para un sistema básico, 1 GB o más recomendado para un entorno de escritorio completo.
Espacio en disco: 10 GB mínimo, 20 GB o más recomendados para una instalación con múltiples aplicaciones y entornos de escritorio.
Tarjeta gráfica: Compatible con X Window System.
Unidad de CD/DVD o puerto USB para la instalación.
Descarga y preparación del medio de instalación
El sitio web oficial de Debian ofrece imágenes ISO para descargar. Se puede preparar un USB booteable usando herramientas como Rufus o balenaEtcher.
Guía paso a paso para la instalación
Selección del entorno de instalación: Debian ofrece opciones de instalación tanto gráfica como en modo texto.
Configuración de particiones: Se puede optar por particionado automático o manual, dependiendo de las necesidades del usuario.
Configuración de la red y selección de paquetes: Durante la instalación, se configuran las opciones de red y se seleccionan los paquetes de software esenciales.
Primeros pasos post-instalación
Actualización del sistema: Es recomendable ejecutar sudo apt update && sudo apt upgrade para asegurarse de que el sistema esté completamente actualizado.
Instalación de controladores y software adicional: Dependiendo del hardware, puede ser necesario instalar controladores específicos. Además, se pueden instalar entornos de escritorio adicionales o programas específicos.
5. Entornos de Escritorio en Debian
Gnome (predeterminado)
Gnome es el entorno de escritorio predeterminado en Debian, conocido por su simplicidad y enfoque en la productividad.
KDE Plasma
Un entorno de escritorio altamente personalizable que ofrece una experiencia visualmente atractiva.
Xfce
Ligero y eficiente, ideal para sistemas con recursos limitados.
LXQt y otros
Alternativas para quienes buscan un entorno aún más ligero o con diferentes características.
6. Gestión de Paquetes en Debian
APT: El gestor de paquetes de Debian
Comandos básicos: apt-get, apt-cache, aptitude.
Instalación y eliminación de paquetes: sudo apt install [paquete], sudo apt remove [paquete].
Repositorios y backports
Debian ofrece diferentes repositorios: stable, testing, y unstable, así como backports que permiten instalar versiones más recientes de software en la rama estable.
Configuración de repositorios adicionales
Los usuarios pueden añadir repositorios adicionales en el archivo /etc/apt/sources.list para acceder a más software.
7. Debian en el Entorno Empresarial y Servidores
Uso de Debian en servidores
Debian es ampliamente utilizado en servidores debido a su estabilidad y seguridad. Es ideal para aplicaciones web, bases de datos, y como servidor de correo, entre otros.
Mantenimiento y soporte a largo plazo
Debian ofrece soporte a largo plazo (LTS) para sus versiones estables, garantizando actualizaciones de seguridad por al menos cinco años.
Herramientas de administración y automatización
Debian se integra bien con herramientas como Ansible, Puppet, y Docker, facilitando la gestión de infraestructuras complejas.
8. Comparativa de Debian con Otras Distribuciones
Debian vs. Ubuntu
Objetivo: Ubuntu se basa en Debian y se orienta más hacia el usuario final, con actualizaciones más frecuentes y un enfoque en la facilidad de uso.
Filosofía: Mientras que Debian sigue estrictamente los principios del software libre, Ubuntu incluye software propietario para mejorar la compatibilidad y experiencia del usuario.
Debian vs. CentOS
Objetivo: CentOS, basado en Red Hat, es otra opción popular para servidores, enfocada en la estabilidad y soporte a largo plazo en entornos empresariales.
Filosofía: CentOS es más conservador en cuanto a actualizaciones, mientras que Debian, aunque estable, ofrece más flexibilidad en la gestión de paquetes.
Debian vs. Arch Linux
Objetivo: Arch Linux es para usuarios avanzados que desean un sistema minimalista y personalizado, con un modelo de actualización continua (rolling release).
Filosofía: Debian prioriza la estabilidad, mientras que Arch sigue la filosofía KISS (Keep It Simple, Stupid) y proporciona control total al usuario.
9. Conclusión
Debian como una opción sólida y confiable
Debian sigue siendo una de las distribuciones más confiables y seguras disponibles. Su enfoque en la estabilidad y el software libre lo convierte en una elección excelente para usuarios, administradores de sistemas y desarrolladores.
Recomendaciones finales para quienes consideran usar Debian
Debian es ideal para aquellos que valoran la estabilidad sobre la última tecnología y están dispuestos a invertir tiempo en aprender sobre su gestión y mantenimiento.
10. Preguntas Frecuentes (FAQ)
¿Debian es adecuado para principiantes?
Aunque Debian es más técnico que distribuciones como Ubuntu, es accesible para principiantes con paciencia y disposición para aprender.
¿Cómo actualizo mi sistema Debian?
Ejecutando sudo apt update && sudo apt upgrade mantendrás tu sistema actualizado.
¿Es Debian una buena opción para servidores?
Sí, Debian es muy utilizado en servidores debido a su estabilidad, seguridad y soporte a largo plazo.
#Debian#distribución Linux#Linux#servidor Debian#instalación Debian#software libre#GNOME#KDE#APT#gestión de paquetes#Debian Stable#Debian Testing#Debian Sid#comunidad Debian#recursos Debian#seguridad en Debian#soporte a largo plazo#Debian vs Ubuntu#Debian vs CentOS#Debian vs Arch Linux#formatos de paquetes#.deb#.appimage#.snap#.flatpak
11 notes
·
View notes
Text
Debian vs. Ubuntu
Pierwszy artykuł z nowej serii Distro vs. Distro postanowiłem poświęcić dystrybucjom Debian i Ubuntu https://linuxiarze.pl/debian-vs-ubuntu/

1 note
·
View note
Text
visual studio code สุดยอดเครื่องมือสร้างเว็บแห่งยุคนี้
ในการสร้างเว็บไซต์ในยุคปัจจุบัน เครื่องมือที่ได้รับความนิยมและเราอยากขอแนะนำอย่างมากนั้นก็คือ visual studio code สุดยอดของ Code Editor ที่ให้ใช้งานได้แบบฟรีๆจากค่าย ไมโครซอฟท์ รองรับการใช้งานได้หลากหลายภาษามากๆ ไม่ว่าจะเป็น python , c++ , html , javascript , php , typescript หรือ css เป็นต้น รองรับได้เยอะมากๆ ทำให้เกิดความสะดวกต่อนักพัฒนาโปรแกรม

สามารถปรับแต่ง หรือลงตัวเสริมที่เหมาะสมได้ อย่างเช่น PHP Debug เป็นตัวที่ช่วย Debug โค้ด PHP ที่ ไม่ถูกต้อ�� หรือ error ออกมายังตัว vscode และแจ้งให้เราทราบได้ว่ามีการทำอะไรผิดลงไป อย่างเช่น ใส่โค้ดไม่ถูก syntax เป็นต้น ซึ่งตัว PHP Debug เป็นหนึ่งใน Extension ของ visualstudiocode นั้นเอง และยังมีอีกหลาย extenstion ที่เปิดให้ดาว์นโหลดได้แบบฟรีๆ โดยเพื่อนๆสามารถลงและลบออกได้ทันทีหากไม่ถูกใจในตัว extension นั้นๆ ในการสอนสร้างเว็บไซต์ของเรา ก็ขอแนะนำให้ใช้งานvscodeในการพัฒนาเว็บไซต์ ส่วนรายละเอียดจะมีอะไรบ้างนั้น สามารถติดตามในบทความนี้กันได้เลย
วิธีdownload visual studio code ฟรีๆไม่มีค่าใช้ง่าย

รูปภาพที่1.1 หน้าจอเว็บไซต์หลักของvscode อันดับแรกที่จะกล่าวถึงนั้นก็คือการdownloadโปรแกรมvscodeนั้นเอง โดยเข้าไปที่หน้าเว็บไซต์หลักvscodeและจะเห็นปุ่มสำหรับ download โปรแกรมตามรูปภาพที่1.1 รูปภาพที่1.2 รายชื่อ os สำหรับดาว์นโหลด หากผู้ใช้งานใช้ os ของ Window สามารถกดที่ปุ่มสีน้ำเงิน "Download for Windows" ตามรูปภาพที่1.2 ได้เลย แต่หากใช้ระบบปฏิบัติการอื่นอย่าง Mac และ Linux ก็ให้กดปุ่มลุกศร และจะเห็นรายชื่อ Mac และ Linux ให้ดาวน์โหลด แต่หากใช้ OS อื่นอย่างเช่น Ubuntu หรือ Debian ให้กดที่ลิงค์ "OTher downloads" และจะเห็นรายชื่อOSอื่นที่สามารถดาวน์โหลดได้เพิ่มเติมตามรูปภาพที่1.3

รูปภาพที่1.3 รายการ other downloads หลังจากดาวน์โหลดและติดตั้งเรียบร้อยแล้ว เราจะได้ตัวเข้าโปรแกรมตามรูปภาพที่1.4 ให้ทำการลองกดเข้าไปใช้งาน หากโปรแกรมทำงานได้อย่างไม่มีปัญหาหรือมี error ใดๆ ก็เป็นอันเสร็จสิ้นการดาวน์โหลดและติดตั้งโปรแกรมครับ

รูปภาพที่1.4 logo โปรแกรม
วิธีเริ่มต้นใข้งาน
หลังจากติดตั้งโปรแกรมแล้วก็จะมาถึงการเริ่มใช้งานตัวโปรแกรม vs code โดยให้กดที่ตัวโปรแกรมระบบจะรันตัวโปรแกรมขึ้นมาดังรูปภาพด้านล่าง โดยมีรายละเอียดคร่าวๆ ดังนี้

หน้าจอเริ่มต้น visual studio code - จะเกี่ยวกับการจัดการไฟล์ต่าง เช่น การเปิดไฟล์ การสร้างไฟล์ใหม่ หรือการเปิดจากโฟลเดอร์จากคอมพิวเตอร์ของเรา - แถบเมนูบาร์ - ตัวจัดการโปรเจกค์ อย่างเช่น การเพิ่ม extension จัดการไฟล์โปรเจกค์ เป็นต้น
ข้อดี และ ข้อเสีย ของ vscode
ถึงจะมีข้อดีมากมายแต่ vscode ก็ยังมีข้อเสียเช่นเดียวกัน โดยเราได้รวบรวมมาจาก��ารใช้งานเองโดยตรง และจากผู้ใช้หลายอื่นๆอีกมากดังนี้ ข้อดี - หน้าจอของแอฟ(UX/UI) ออกแบบดี ใช้งานง่าย - การค้นหาข้อผิดพลาด (Error) หาได้ง่าย - มี Terminal สำหรับรันโค้ดได้ (เหมือน Command Line) - ใช้งานได้หลากหลายภาษามาก อาทิเช่น python, java, c, c++ ข้อเสีย - บาง plugin/extension หากติดตั้งด้วยกันจะทำให้เกิดปัญหาขึ้นได้ ซึ่งยากในการตรวจสอบก่อนในการติดตั้ง - การจัดการ Entension ก็ยากที่จะทำความเข้าใจได้ - ตัวโปรแกรม visual studiocode บางครั้งใข้ทรัพยากรในเครื่องคอมพิวเตอร์มากเกินความจำเป็น ถึงจะใช้การเปิด/ปิดโปรแกรมใหม่ก็จะช่วยได้ก็ตาม - ไม่มี git merging Read the full article
0 notes
Note
so i've used linux as a daily driver all my life - kid me was *very* into free stuff i could do with a computer - but I've mostly kept to the 'user-friendly' debian-based distros like ubuntu and mint. I'm probably going to build an arch system next time I need to do a reinstall on my daily driver, but now's not the time. That said, I finally made the switch from pulse to pipewire and I'm losing my mind why did we live like that for so long?
and pulseaudio, despite receiving a ton of backlash for its issues, was already a huge improvement for home users over your options of rawdogging ALSA (exclusive device access so no sharing between applications), or old OSS which lacked Bluetooth support (though did support per-application volume control). New OSS is apparently alright but haven't used it.
ALSA + pulseaudio was my first experience of functioning sound (we tried so hard to get onboard sound working in the mid 00s and it just wasn't).
but pipewire ?? all the power and flexibility of JACK while being simple and integrating into anything supporting pulseaudio. I could never go back !!
glad you made the switch and are enjoying it !! also both arch and void have installers now that still shoe you what they're doing but walk you through it vs doing a manual install. and you can absolutely slap your usual DE and applications on top of it if you want something that Just Works :3
12 notes
·
View notes
Text
7 Days until Game Maker R:Evolution is released: My OS-tan re-interest
I remember losing interest on OS-tan after Neptunia Sisters Vs Sisters introduced Maho and Anri, the personifications of Mobile phones and Android/iOS operating systems respectively (though I prefer them being the Android and iOS/iPhone representation). This of course caused some coexistent problems with the Windows and Mac OS-tans, as it's stated that Maho's sister represents PC as a whole... which every version of Windows comes from.
Naturally this caused me to merge the OS-tan project into the Neptunia canon, even having CPUs based around operating systems (Windows, macOS, Linux, and ChromeOS), but that would mean I would have to create individual CPUs based around specific operating systems (like Linux having several distributions like Ubuntu and Debian) and develop them all out once, which would create a bloated cast. This lead be to abandoning that concept and putting a hold to the OS-tan project in favor of developing my Channel-tan project.
But as the months followed, I decided to revisit the series for nostalgia purposes, and honestly, I'm pleasantly surprised how this series still has a following. Sure, Microsoft Japan stopped advertising it, and the Futaba and Nijiura boards most likely lost interest in it, but it still has an active social media following on Pixiv, Reddit, and even this site itself. In fact, there is a dedicated wiki made by the fans:
OS-tan.moe, which was created after the previous wiki, OS-tan collections, was abandoned, having last updated on January 18, 2017. The wiki covers more about the OS-tan lore and establishes the "Futabaverse" (Futaba/Nijiura created OS-tans) and "Madobeverse" (Microsoft Asia/Japan created OS-tans) as separate universes. Case in point...
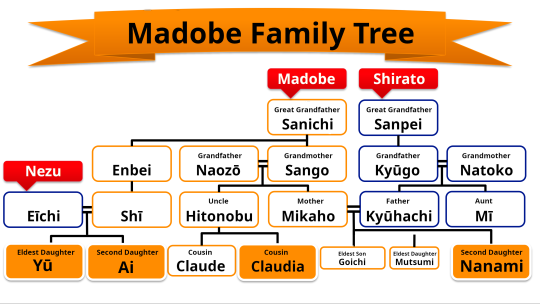
The Madobe family tree! According to its article on the moe wiki, there are 3 lineages of the tree - Madobe, Nezu, and Shirato. The surname Nezu is an anagram of Zune (Microsoft's defunct iPod competitor). Each of the family's names are based around each version of Windows, e.g. Goichi's name is derived from Windows NT 5.1 (Windows XP's kernel name); the Kanjis in his name are a translations of 5 (Go) and 1 (Ichi). I actually like this concept, having a family tree of descendant from a different generation representing a real-life product (hardware or software) or broadcast station from a different decade, rather than having 11 or so woman in one house being taken care of a parental figure who seems to represent the company who made them. It's a shame we never get to see their faces aside from Claude and Mutsumi nor does the family tree lore go beyond that.
So ahh, I don't know how to end this one, but yeah potato patato that's the end of this post. Bye.
#os tan#neptunia#hyperdimension neptunia#neptunia sisters vs sisters#neptunia gamemaker r:evolution#hyperdimension neptunia gamemaker r:evolution
0 notes