#Tomlinson Bomberger
Explore tagged Tumblr posts
Visit Tumblr Blog
Explore Tumblr blogs with no restrictions, modern design and the best experience.
Last Seen Tumblr Blogs


Fun Fact
Tumblr was acquired by Yahoo for $1.1B in 2013.
Text
How to Improve Curb Appeal
The main objective of most landscaping is to improve curb appeal, since we all want to be the envy of the neighborhood. Here are a few things to remember when planning out your next landscaping project.
Have a Clear Path
Remember that the path to your front door should be immediately visible from the street. This will draw people’s eyes towards your home and give it an inviting feel. When lining the walkway with plants choose something low-growing. Also, stay away from larger trees or shrubs that will make guests feel enclosed. You can switch things up by replacing your concrete walkway with pavers, stepping stones or maybe bluestone treads.
Plan a Focal Point
Be aware of not doing too much when designing your new landscape. Properties with great curb appeal should involve an element that catches the eye of people passing by. This could be an ornamental tree or shrub, garden feature or the home itself. Its important that all of the other things making up your landscape supports the main focus – not take away from it. Utilize various elements to create a pattern that will be natural looking and pleasing to the eye. You can read more about focal points here.
Coordinate Colors for Curb Appeal
If your home is a neutral color, or has natural colored stone or brick, plant colorful plants. Make sure to stick to a limited color pallet, as too many colors can be overwhelming. One of the best ways to enhance your curb appeal is to add a few accents. You may also consider adding a more permanent pop of color by adding color to shutters or doors. If your home has a lot going on out front you may want to try sticking to neutrals that complement the home’s color scheme.
Don’t Forget the House!
Design a landscape that is appropriate to your home. Size, color and lawn size should all be considered when planning your new landscape. If you have a one-story house you may want to consider using lower to the ground trees, shrubs and other plant material that won’t dwarf your home. Sometimes less is more.
Consider Budget and Maintenance
It is a good idea to make a budget for your project. Creating this in the beginning can help prevent you from having to go back and remove items from your design. Remember to give yourself a buffer, just in case prices change or you run into unplanned issues.
This is also a good time to take maintenance into consideration. If you don’t plan on having the time or know how to keep up with your landscape, make sure to select low-maintenance trees and shrubs. This is a good way to ensure that your plants will look good year-round.
Need Help Getting Started?
At Tomlinson Bomberger, we help our Central PA neighbors re-imagine their property’s landscape through design and installation, hardscaping, edging and mulching, trimming, irrigation, and lighting. Our landscape service team – made up of highly trained, certified, and skilled workers – is committed to high-quality workmanship and customer service. Our landscape team will help you maintain your landscape and transform your dreams into a reality. Contact Us for a free consultation!
The post How to Improve Curb Appeal appeared first on Tomlinson Bomberger.
from Tomlinson Bomberger https://ift.tt/3gT50mX
0 notes
Text
Tomlinson Bomberger shares tips for summer landscape, pest control - ABC27 https://t.co/GNVAx1dhQY
Tomlinson Bomberger shares tips for summer landscape, pest control - ABC27 https://t.co/GNVAx1dhQY
— Canadian Pest Solutions (@PestCanadian) June 17, 2020
from Twitter https://twitter.com/PestCanadian June 17, 2020 at 12:16AM http://twitter.com/PestCanadian/status/1273197808540176384
0 notes
Text
How to Get Rid of Clover and Keep Your Lawn Pristine
bgfoto/iStock
You have a beautiful lawn, but you’ve noticed lately that that magnificent green expanse is interrupted by clumps of sprouting clover. You tried mowing, but the small, white-flowered weeds keep coming back—and bringing bees with them.
Clover, or trefoil, is one of the most common weeds found on poorly maintained and undernourished lawns.
“Clover is a tough weed to control because of its small size and numerous leaves that make it harder to hit with granular weed killers,” says Phil Dwyer, turf grass scientist for Scotts Miracle-Gro.
Tired of fighting this weed? Here are some ways to get rid of it for good, so your lawn can look picture-perfect.
Keep a well-fertilized lawn
The best defense against any weed is a thick, healthy lawn, so you’ll need to keep it well fed. Experts recommend fertilizing four times per year.
“The ideal turf density is so thick that weeds don’t have a chance to make contact with the soil, or get the sunlight they need to begin to germinate,” says Jay Worth, marketing coordinator for Tomlinson Bomberger, a Pennsylvania lawn care company.
“A regular schedule of fertilizer applications will aid in maintaining and strengthening your lawn,” says Jon Shuey, operations manager of Green Lawn Fertilizing, in West Chester, PA.
Thick grass is able to crowd out clover and become the dominant plant once more.
Mow high
When clover goes low, we mow high (thanks, Michelle Obama!). Shuey says it’s important to raise your mower deck, since clover grows low to the ground and has a shallow root system.
“Raising your mowing height and allowing your grass to grow taller will block sunlight exposure to the clover and aid in preventing the growth and spread of it throughout your lawn,” says Shuey.
Experts say to cut your grass no shorter than 3 inches.
Remove it by hand
Sometimes you have to get to the root of the problem. Yanking out weeds can be the quickest solution to bring your lawn back to gorgeous greenery. The moment you see clover growing, get on your hands and knees and remove it by gently loosening the soil around it to get all of the root.
“Obviously this is not the most popular of the control methods because it involves the most labor, but if you get to the clover early, before it flowers and begins to spread, you can remove small areas of clover by hand,” says Shuey.
Shuey says clover does spread through seed and has stems that creep and spread their roots along the ground, “so it is imperative to pull it earlier rather than waiting until you have a full infestation.”
Weed control
If your clover problem is really out of hand, look for a liquid weedkiller. Dwyer prefers Ortho Weed B Gon Chickweed, Clover & Oxalis Killer for Lawns, which is available in either a hose-end ready-to-spray or concentrate form.
Shuey says to look for products containing 2,4-D, and to make sure the label states it is a selective herbicide that will control clover.
“The last thing you want to do is harm your lawn and have to seed areas due to chemical burn,” he explains.
You can also take preventive measures with preemergents that attack weed seeds before they germinate.
“It is best to put down preemergent in the fall and spring to help slow down the spread of weeds,” says Neal Kezar of Magic Pest and Lawn, in Austin, TX.
Attack organically
For those seeking an organic approach to clover growth, there are options such as Herbanatur’s A.D.I.O.S. Eco-Friendly Weed Control or Bonide’s Weed Beater.
Chris Lintner, client experience manager with Good Nature Organic Lawn Care, in Cleveland, says A.D.I.O.S. is essentially salt that dries out and burns the leaves of the clover, taking away the plant’s ability to create its own food. Weed Beater is mainly various forms of liquid iron, which coats the leaves of the clover and burns them over a few days. He says both are safe to use on lawns and will not harm the grass when instructions are followed.
“As with most weedkillers, organic or chemical, you can burn the lawn out if it’s applied when the average temperate is above a certain point. So these products are best used in spring and fall, when the average temperature is significantly lower than the summer,” says Lintner.
Use a DIY natural remedy
Sometimes a little DIY concoction can come in handy when combating clover. Spraying vinegar mixed with some dish soap can spot-treat clover patches.
Leslie Rutland, who runs the SeasonedHomeMaker.com blog, says she uses a mixture of 30% vinegar, 70% water, and 2 tablespoons horticultural orange oil in a heavy-duty spray bottle, and spot-treats clover in her Central Texas yard.
“But here’s the key: It should be applied in the heat of the day, above 75 degrees on plants that don’t have any dew or rain on their leaves,” says Rutland.
There’s also corn gluten meal, which works as a natural preemergent herbicide by inhibiting the seedlings of clover. And it doesn’t hurt established grass.
“To keep the winter and spring weeds to a minimum, I apply corn gluten as a preemergent in September and February. If the Texas weather is unusually warm and wet, I will reapply after four to six weeks,” says Rutland.
The post How to Get Rid of Clover and Keep Your Lawn Pristine appeared first on Real Estate News & Insights | realtor.com®.
0 notes
Text
Four Tips to Get Rid of Spotted Lanternfly
Lots of homeowners are concerned about the Spotted Lanternfly lately. There are several ways you can help control the spread of this invasive pest. Here are four tips to get rid of Spotted Lanternfly.
Removing Ailanthus trees
Spotted Lanternfly requires the ailanthus altissima to reproduce. This tree is the spotted lanternfly's primary target. Because of this, the first step you should take to get rid of this pest is removing these trees from your property. This is a must for managing this pest!
Control for ailanthus trees is never simple – they're very hardy plants! What is generally recognized as the most effective control method is called “hack and squirt,” and involves cutting notches in the bark around the circumference of the tree. Herbicide should be applied directly into the wound, once these notches have been cut into the tree.
A selective herbicide containing the chemical triclopyr may be used without damage to plants around the ailanthus tree. However, if you are not a registered pesticide applicator in Pennsylvania and want to DIY this, a product with glyphosate (like Roundup) will work. Use caution, however – not only are you applying an herbicide, but glyphosate is non-selective, meaning it kills any plant it touches. If you don't want to damage other plants around the tree, you may want to contract a professional to help.
Removing Spotted Lanternfly egg masses

During Fall and Winter months, and after a hard freeze, it's a great idea to inspect your property. Look closely at the siding on your home, your cars, your grill, the trailer or RV, mailbox, trees and shrubs on the property, old piles of debris – give it a thorough inspection!
You should also inspect your cars any time you're leaving the quarantine zone for egg masses. If you're going to be travelling to York, Dauphin, Cumberland, or Perry Counties, you should be inspecting your vehicle before you travel to ensure you're not transporting SLF outside the quarantine zone.
If you see the eggs masses from Spotted Lanternfly, scrape them into a bottle or sandwich bag containing rubbing alcohol or hand sanitizer. This will kill the eggs so they do not hatch. If using a sandwich bag, we recommend that you “double bag,” just to be safe. Scraped egg masses should be thrown away immediately.

Sticky bands to catch nymphs
When nymphs first hatch in late Spring or early Summer, they tend to migrate to the fresher, greener parts of the tree where the new growth is to begin feeding. And this makes sense; it could their piercing/sucking mouthparts may not be as developed yet, and unable to penetrate more mature bark. Whatever the reason, it gives people trying to control their spread another tool in the arsenal – “sticky bands.”
The basic idea is simple: wrap the trunk of the tree in a sticky material that the nymphs will get stuck on. If they can't get free and feed, they'll certainly never reach adulthood! The Spotted Lanternfly Management for Homeowners published by Penn State even recommends simply using duct tape, and wrapping in backwards, tightly around the tree as an effective method for controlling nymphs.
Homeowners who are concerned about slowing the spread of this pest should target the trees we've mentioned first. Then, move on to other trees on their property with this same method. Sticky bands should be re-applied weekly during nymph stages (late May to September) for best results.
Note: “Sticky band” picture supplied by Heather Leach at Penn State University, and used with permission.
Chemical control
This should be considered a final “backstop” to the other control methods we've outlined so far in this post. There isn't a ton of information about what's really effective on this pest right now. While experts agree that their nervous system is disrupted by available pesticides, none are presently labelled for use on the Spotted Lanternfly.

What seems to be working for now is a combination of two different pesticide approaches. These are commonly referred to as systemic and contact pesticides. Systemic pesticides are products that the plant material absorbs, and it stays inside the plant itself. This is how products like grub control work for your lawn. The product is absorbed into the plant. Then when an insect feeds on the plant, they ingest that product.
By contrast, contact pesticides are just what they sound like – they work on contact with the bug. Examples of contact products most homeowners are familiar with are Raid and Black Flag for things like spiders and ants. And, like those over-the-counter products, many contact pesticides also include a residual effect. This means that they'll continue to kill bugs for a period of time (depending on the product used, rate of application, rainfall, etc.) after the application is completed.
Systemic products seem to be having a really good results with the nymph stage of the Spotted Lanternfly right now. The adults are better controlled by contact products with regular follow up applications, because they're far more mobile.
If you have questions about protecting your trees from this pest, please Contact Us. We'd be happy to discuss your concerns.
The post Four Tips to Get Rid of Spotted Lanternfly appeared first on Tomlinson Bomberger.
0 notes
Text
Prepare like a Pro – 4 Winter Landscaping Tips
As the temperatures continue to fall, daylight hours get shorter, and the final leaves begin to fall off the trees. One might think this marks the end to another season in the landscape. In one aspect, this is correct; the growing season is over. But, there is still much you should do to the landscape to prepare it for the stresses of Winter. Here's 4 Winter landscaping tips from a pro.
Winter Landscaping Tip #1 – Dormant Season Pruning

Pruning of your trees and shrubs during the growing season, in most cases, is a must. To keep the plant clean and shaped, cut back some of the new growth that comes out as it grows.
Once the plant goes dormant however, one would think that there is no need to prune anymore. That is not the case! When there are no longer any leaves on the trees and shrubs, you can easily see up into the plants. This inspection may reveal a very thick and densely branched tree or shrub. In most cases, this is not an ideal growth habit for the plant. Thinning to reduce that density of the branches will help the overall health of the tree or shrub.
Another benefit that dormant season pruning has for you is that the debris that you create from the pruning is substantially less because there are no leaves to worry about. In some cases, this translates to a lower cost to have a professional do the job. Less debris means less for them to haul away.
Winter Landscaping Tip #2 – Perennial Cut Back
Another type of plant that benefits from pruning are perennials. As freezing temperatures hit, most Spring, Summer and Fall blooming perennials begin to store their energy for the Winter down in their root system. The result is a brown plant on top. You could leave these ugly, brown remnants of the perennial in your landscape, but that isn't very visually appealing. Also, having a lot of dead foliage in your garden provides great places for rodents to hide and feed on the root system of your plants. The best thing to do is to cut back the foliage remnants of your perennials. Your final result will be plants cut to a few inches above ground level.
Winter Landscaping Tip #3 – Fertilization of Trees and Shrubs

Giving your trees and shrubs the proper nutrition is vital to the success of their growth and structure. With a low amount of nutrition in the soil, many plants will struggle to stay healthy. Plants will lack the proper color foliage and have limited blooms. Additionally, having a stressed tree or shrubs increases the chance of disease or insect infestations. There are two main type of fertilization that can be done in the Fall that help the landscape. A liquid fertilization can be performed around the drip line of a tree or shrub and instantly puts the nutrients into the soil. A granular fertilization is also placed around the drip line of the tree or shrub and the product will slowly dissolve into the soil.
Either option is a good choice for the Fall. The vital nutrients that are in the fertilizers will remain in the soil until the Spring time. This means these nutrients are ready be there to be taken up once the plant emerges from Winter. Fertilization can be done in the Spring time for trees and shrubs too, but it can take some time in order for nutrients to be absorbed. So, having the greatest impact starting the Spring season off would be a Fall fertilization.
Winter Landscaping Tip #4 – Fall Planting
Once you have gone through your landscape pruning your trees and shrubs, cutting back your perennials, and fertilized the beds, you may begin to starting thinking about what next Spring could bring and what you could do now to fill in a few areas that just seem to be missing something. A good thing to do in the fall is planting of perennials, trees and shrubs.

A large benefit of planting in the fall is the reduced amount of watering you will need to do. When you plant something in the spring or early summer, the foliage and root system are actively growing. This means a large amount of water to keep them going. When you plant in the Fall, perennials, trees and shrubs are just about dormant. Because the ground stays moist with more frequent rainfalls it takes the watering labor away from you.
Also, when planting in the Fall make sure to provide your new and existing plants with a good layer of mulch to help insulate the soil. This practice helps reduce the chance of heaving from the alternating freezing and thawing of the ground.
Being outside in late Fall weather may not always be pleasant, but making sure your trees and shrubs are protected from the potential damages of the Winter are necessary. Making sure you tackle each of these steps above will help to ensure that your landscape is properly protected this Winter. If you'd like a free consultation about Winter landscaping, please Contact Us.
The post Prepare like a Pro – 4 Winter Landscaping Tips appeared first on Tomlinson Bomberger.
0 notes
Text
Effective Termite Treatment
Pennsylvania…Home Sweet Home. Roughly translated, Pennsylvania means “Penn’s Woods”. It has been called home by William Penn, the Quakers, and many generations of Pennsylvanians since. The heavily wooded land that was given to William Penn by King Charles II was rich in hunting ground and farmland for the early settlers. Unfortunately, Penn’s Woods also came loaded with more. The soil was rich with subterranean termites.
Importance
Americans are known to go to great lengths to protect their homes. We hire alarm companies, place locks on all of our doors, install early fire detection, keep tree branches away from home, and take other safety precautions to make sure our homes are safe.
Termites cause about five billion dollars-worth of damage to homes in the United States every year. Unfortunately, home owner’s insurance does not help to cover the cost of those repairs in most cases.
Subterranean Termites
Subterranean termites are a secretive pest that actually lives in the soil. They randomly forage looking for wood that has fallen to the ground. Once the wood hits the ground it’s game on! Each termite colony is equipped with thousands of scouts. 24 hours a day, 7 days a week these scouts are charged with the task of finding new food sources. Once they find a suitable source, they lay a pheromone trail connecting the colony to the food.
Termite Baiting
The colony has one primary task; gather enough food to feed its 60,000 – 1,000,000 members. Since termites are basically blind (they can make out some light, but that’s it) and can’t use logic, they can’t tell the difference between a fallen log and your home.
Understanding the foraging behavior of the termite scouts was a key element in the development of termite baiting systems. These systems provide today’s homeowner with options when choosing how to prevent or solve their termite issues.
Termite control professionals can install a termite baiting system around your home. By strategically placing termite bait stations, the professional gives termite scouts something to look for, and when they find it, it’s game over!
How it Works
The stations are filled with a bait that is scientifically proven to be preferred by termites over real wood. The active ingredient in the bait is an Insect Growth Regulator (IGR). The IGR is designed to harden the shell of the young developing termites. Young termites need to molt (think of a snake shedding its skin) to reach maturity.
Worker termites share the food they gather with the entire colony, from the young termites to the Queen. Once the IGR is consumed, the outer shell of the young termite hardens and they are unable to molt. The young termites die off because they can’t complete their maturation cycle. This breaks the natural life-cycle of the colony, eventually causing colony elimination.
Whether you install a termite baiting system to eliminate an ongoing termite problem, or as a way of preventing termite invasion, Tomlinson Bomberger’s termite baiting system will give you the peace of mind and protection you are looking for. If you’d like to learn more about Tomlinson Bomberger’s termite baiting services, please contact us here.
The post Effective Termite Treatment appeared first on Tomlinson Bomberger.
from Tomlinson Bomberger https://ift.tt/36jvOrq
0 notes
Text
Tomlinson Bomberger shares tips for summer landscape, pest control - ABC27 https://t.co/GNVAx1dhQY
Tomlinson Bomberger shares tips for summer landscape, pest control - ABC27 https://t.co/GNVAx1dhQY
— Canadian Pest Solutions (@PestCanadian) June 14, 2020
from Twitter https://twitter.com/PestCanadian June 14, 2020 at 01:16AM http://twitter.com/PestCanadian/status/1272125681749630976
0 notes
Text
Prepare like a Pro – 4 Winter Landscaping Tips
As the temperatures continue to fall, daylight hours get shorter, and the final leaves begin to fall off the trees. One might think this marks the end to another season in the landscape. In one aspect, this is correct; the growing season is over. But, there is still much you should do to the landscape to prepare it for the stresses of Winter. Here's 4 Winter landscaping tips from a pro.
Winter Landscaping Tip #1 – Dormant Season Pruning

Pruning of your trees and shrubs during the growing season, in most cases, is a must. To keep the plant clean and shaped, cut back some of the new growth that comes out as it grows.
Once the plant goes dormant however, one would think that there is no need to prune anymore. That is not the case! When there are no longer any leaves on the trees and shrubs, you can easily see up into the plants. This inspection may reveal a very thick and densely branched tree or shrub. In most cases, this is not an ideal growth habit for the plant. Thinning to reduce that density of the branches will help the overall health of the tree or shrub.
Another benefit that dormant season pruning has for you is that the debris that you create from the pruning is substantially less because there are no leaves to worry about. In some cases, this translates to a lower cost to have a professional do the job. Less debris means less for them to haul away.
Winter Landscaping Tip #2 – Perennial Cut Back
Another type of plant that benefits from pruning are perennials. As freezing temperatures hit, most Spring, Summer and Fall blooming perennials begin to store their energy for the Winter down in their root system. The result is a brown plant on top. You could leave these ugly, brown remnants of the perennial in your landscape, but that isn't very visually appealing. Also, having a lot of dead foliage in your garden provides great places for rodents to hide and feed on the root system of your plants. The best thing to do is to cut back the foliage remnants of your perennials. Your final result will be plants cut to a few inches above ground level.
Winter Landscaping Tip #3 – Fertilization of Trees and Shrubs

Giving your trees and shrubs the proper nutrition is vital to the success of their growth and structure. With a low amount of nutrition in the soil, many plants will struggle to stay healthy. Plants will lack the proper color foliage and have limited blooms. Additionally, having a stressed tree or shrubs increases the chance of disease or insect infestations. There are two main type of fertilization that can be done in the Fall that help the landscape. A liquid fertilization can be performed around the drip line of a tree or shrub and instantly puts the nutrients into the soil. A granular fertilization is also placed around the drip line of the tree or shrub and the product will slowly dissolve into the soil.
Either option is a good choice for the Fall. The vital nutrients that are in the fertilizers will remain in the soil until the Spring time. This means these nutrients are ready be there to be taken up once the plant emerges from Winter. Fertilization can be done in the Spring time for trees and shrubs too, but it can take some time in order for nutrients to be absorbed. So, having the greatest impact starting the Spring season off would be a Fall fertilization.
Winter Landscaping Tip #4 – Fall Planting
Once you have gone through your landscape pruning your trees and shrubs, cutting back your perennials, and fertilized the beds, you may begin to starting thinking about what next Spring could bring and what you could do now to fill in a few areas that just seem to be missing something. A good thing to do in the fall is planting of perennials, trees and shrubs.
A large benefit of planting in the fall is the reduced amount of watering you will need to do. When you plant something in the spring or early summer, the foliage and root system are actively growing. This means a large amount of water to keep them going. When you plant in the Fall, perennials, trees and shrubs are just about dormant. Because the ground stays moist with more frequent rainfalls it takes the watering labor away from you.
Also, when planting in the Fall make sure to provide your new and existing plants with a good layer of mulch to help insulate the soil. This practice helps reduce the chance of heaving from the alternating freezing and thawing of the ground.
Being outside in late Fall weather may not always be pleasant, but making sure your trees and shrubs are protected from the potential damages of the Winter are necessary. Making sure you tackle each of these steps above will help to ensure that your landscape is properly protected this Winter. If you'd like a free consultation about Winter landscaping, please Contact Us.
The post Prepare like a Pro – 4 Winter Landscaping Tips appeared first on Tomlinson Bomberger.
0 notes
Text
Prepare like a Pro – 4 Winter Landscaping Tips
As the temperatures continue to fall, daylight hours get shorter, and the final leaves begin to fall off the trees. One might think this marks the end to another season in the landscape. In one aspect, this is correct; the growing season is over. But, there is still much you should do to the landscape to prepare it for the stresses of Winter. Here's 4 Winter landscaping tips from a pro.
Winter Landscaping Tip #1 – Dormant Season Pruning

Pruning of your trees and shrubs during the growing season, in most cases, is a must. To keep the plant clean and shaped, cut back some of the new growth that comes out as it grows.
Once the plant goes dormant however, one would think that there is no need to prune anymore. That is not the case! When there are no longer any leaves on the trees and shrubs, you can easily see up into the plants. This inspection may reveal a very thick and densely branched tree or shrub. In most cases, this is not an ideal growth habit for the plant. Thinning to reduce that density of the branches will help the overall health of the tree or shrub.
Another benefit that dormant season pruning has for you is that the debris that you create from the pruning is substantially less because there are no leaves to worry about. In some cases, this translates to a lower cost to have a professional do the job. Less debris means less for them to haul away.
Winter Landscaping Tip #2 – Perennial Cut Back
Another type of plant that benefits from pruning are perennials. As freezing temperatures hit, most Spring, Summer and Fall blooming perennials begin to store their energy for the Winter down in their root system. The result is a brown plant on top. You could leave these ugly, brown remnants of the perennial in your landscape, but that isn't very visually appealing. Also, having a lot of dead foliage in your garden provides great places for rodents to hide and feed on the root system of your plants. The best thing to do is to cut back the foliage remnants of your perennials. Your final result will be plants cut to a few inches above ground level.
Winter Landscaping Tip #3 – Fertilization of Trees and Shrubs

Giving your trees and shrubs the proper nutrition is vital to the success of their growth and structure. With a low amount of nutrition in the soil, many plants will struggle to stay healthy. Plants will lack the proper color foliage and have limited blooms. Additionally, having a stressed tree or shrubs increases the chance of disease or insect infestations. There are two main type of fertilization that can be done in the Fall that help the landscape. A liquid fertilization can be performed around the drip line of a tree or shrub and instantly puts the nutrients into the soil. A granular fertilization is also placed around the drip line of the tree or shrub and the product will slowly dissolve into the soil.
Either option is a good choice for the Fall. The vital nutrients that are in the fertilizers will remain in the soil until the Spring time. This means these nutrients are ready be there to be taken up once the plant emerges from Winter. Fertilization can be done in the Spring time for trees and shrubs too, but it can take some time in order for nutrients to be absorbed. So, having the greatest impact starting the Spring season off would be a Fall fertilization.
Winter Landscaping Tip #4 – Fall Planting
Once you have gone through your landscape pruning your trees and shrubs, cutting back your perennials, and fertilized the beds, you may begin to starting thinking about what next Spring could bring and what you could do now to fill in a few areas that just seem to be missing something. A good thing to do in the fall is planting of perennials, trees and shrubs.

A large benefit of planting in the fall is the reduced amount of watering you will need to do. When you plant something in the spring or early summer, the foliage and root system are actively growing. This means a large amount of water to keep them going. When you plant in the Fall, perennials, trees and shrubs are just about dormant. Because the ground stays moist with more frequent rainfalls it takes the watering labor away from you.
Also, when planting in the Fall make sure to provide your new and existing plants with a good layer of mulch to help insulate the soil. This practice helps reduce the chance of heaving from the alternating freezing and thawing of the ground.
Being outside in late Fall weather may not always be pleasant, but making sure your trees and shrubs are protected from the potential damages of the Winter are necessary. Making sure you tackle each of these steps above will help to ensure that your landscape is properly protected this Winter. If you'd like a free consultation about Winter landscaping, please Contact Us.
The post Prepare like a Pro – 4 Winter Landscaping Tips appeared first on Tomlinson Bomberger.
0 notes
Text
Reconnect With Customers Mid-Summer
The communication is flowing between your lawn care company and your customers early in the season. Folks want you to green up their lawns and keep crabgrass at bay. This momentum keeps up until the hazy days of summer.
But, how do you stay top of mind with your lawn care or landscaping customers in July?
Strategy is Key
Six lawn care and landscaping companies were interviewed to share how they touch base with their clients in mid-summer. Overall, these companies educate their clients, whether it’s about turf disease or upcoming fall services.
All companies were purposeful in their outreach approach and some have specific strategies to reach out to their customers about their summer landscaping. For example, Jay Worth of Tomlinson and Bomberger in Lancaster, PA, says, “We strategically send out email blasts. Since turf diseases were rampant last summer in Pennsylvania because of all of the rain, we also posted blogs raising awareness of turf diseases.”
Stacie Callaghan of Gachina Landscape Management located in Menlo Park, CA, shares: “(I) do my best to schedule regular social media posts highlighting seasonal tasks. It’s important to schedule more than one (social media post), so it sticks. (I) space them out far enough that it doesn’t seem repetitive.”
Photo: Tomlinson and Bomberger
Becoming Customer-Centric
Many lawn care operators educate their clients based on what the customers see in their lawns. For example, Mike Sisti of FMC Global Solutions in Philadelphia, PA, has 25 years in the green industry, including 13 years as an lawn care operator. So, he’s an expert on mid-season communication with customers.
Sisti would send educational newsletters out to his customers. For example, using the Northeast’s rainy summers over the past few years, Sisti would send out newsletters focusing on turf diseases, such as red thread and dollar spot.
And he would teach his customers about smart cultural practices they could use right away, such as sharp mowing blades, cut at 3″, and good irrigation practices.
“These tips, along with images of the diseases, help the homeowner more readily identify the issue, but also help establish your business as a resource,” Sisti says.
Mark Kelbacher of Stay Green Lawn Services of Chicopee, MA, offers these three tips for communicating with your clients mid-season:
Proactively reach out via phone or personal email asking your clients how their lawn is doing. “The goal here is to open up the lines of communication with your customers and address any potential concerns sooner than later.”
Keep communicating through information and educational emails. “Keep a close eye on the weather patterns in your market and send an email talking about potential issues the customer may see in their lawns.”
Send an email the month before an important service, such as core aeration and seeding. “One step further would be to break (down) this email into a couple of groups — those without aeration and overseeding, and those with aeration to upsell the seed(ing),” Sisti states.
Photo: McCoy Horticultural Services, Inc.
Other Ways to Communicate Your Services
Richard A. McCoy, owner and president of McCoy Horticultural Services, Inc., in Ringoes, NJ, educates his clients on his organic lawn and landscape services.
“We’re in continuous contact with our clients via the nature of our frequent services to their properties, and with that, we speak directly to our clients. Additionally, we encourage them to contact us whenever they have questions or concerns.”
Instead of using blogs, social media, or print marketing, McCoy relies on word-of-mouth referrals, which works perfectly for him.
“Due to the success of our programs and our broad range of environmental services, most of our business has been secured by word-of-mouth referrals. We have a detailed website, but we currently don’t have a blog or social media.”
Photo: Spring Green Lawn Care
Direct mail is another way to stay in touch with your customers. Spring Green Lawn Care, a green industry franchise with headquarters located in Naperville, IL, uses it as part of reconnecting with their customers.
“We send out mail to current and potential customers,” says Rachel Gawel, marketing coordinator at Spring Green.
“Potential customers are sent mail that advertise(s) our lawn care programs, whereas current customers receive information on our additional services, such as Total Home Pest Control, Mosquito Control, etc.
“”We leave these to encourage customers to sign up for additional services. A message is also left on the customer’s invoice,” Gawel says.
Stay connected this summer with your clients by educating and reminding them of your services, whether it’s through face-to-face contact, newsletters, social media, or door hangers. You’ll be glad you did this fall.
Komancheck has a passion for helping small- to medium-sized companies succeed. She writes blogs, website content, and other digital marketing pieces for the lawn care and landscape industries. You can learn more about her at www.landscapewriter.com.
The post Reconnect With Customers Mid-Summer appeared first on Turf.
from RSSMix.com Mix ID 8230377 http://bit.ly/2WSpml2 via IFTTT
0 notes
Text
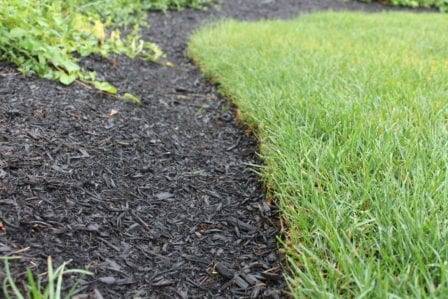
Reasons Why Landscape Gravel And Mulch Is Getting More Popular In The Past Decade | landscape gravel and mulch
Reasons Why Landscape Gravel And Mulch Is Getting More Popular In The Past Decade | landscape gravel and mulch – landscape gravel and mulch | Delightful to be able to my website, with this time period I’ll show you regarding keyword. And from now on, this can be the 1st image:
gravel-mulch-slice | Semco Outdoor Landscaping & Natural Stone Supply – landscape gravel and mulch | landscape gravel and mulch
How about picture earlier mentioned? is usually that will wonderful???. if you feel consequently, I’l l show you a few picture yet again beneath:
So, if you want to obtain all of these fantastic pictures related to (Reasons Why Landscape Gravel And Mulch Is Getting More Popular In The Past Decade | landscape gravel and mulch), simply click save link to store these photos to your personal pc. These are prepared for down load, if you’d rather and wish to grab it, click save symbol on the post, and it’ll be directly downloaded to your pc.} At last if you would like secure unique and recent picture related to (Reasons Why Landscape Gravel And Mulch Is Getting More Popular In The Past Decade | landscape gravel and mulch), please follow us on google plus or book mark this site, we try our best to give you regular update with all new and fresh pics. Hope you like staying here. For most updates and latest news about (Reasons Why Landscape Gravel And Mulch Is Getting More Popular In The Past Decade | landscape gravel and mulch) images, please kindly follow us on tweets, path, Instagram and google plus, or you mark this page on book mark section, We try to present you up grade regularly with all new and fresh shots, enjoy your searching, and find the right for you.
Here you are at our website, articleabove (Reasons Why Landscape Gravel And Mulch Is Getting More Popular In The Past Decade | landscape gravel and mulch) published . At this time we are pleased to announce that we have found an incrediblyinteresting nicheto be reviewed, that is (Reasons Why Landscape Gravel And Mulch Is Getting More Popular In The Past Decade | landscape gravel and mulch) Lots of people searching for details about(Reasons Why Landscape Gravel And Mulch Is Getting More Popular In The Past Decade | landscape gravel and mulch) and definitely one of them is you, is not it?
Landscaping Pros and Cons of Rocks Vs. Mulch | Davey Blog – landscape gravel and mulch | landscape gravel and mulch
Pea Gravel vs. Mulch – landscape gravel and mulch | landscape gravel and mulch
Austin Landscape Supplies | Organic Landscape Supplies … – landscape gravel and mulch | landscape gravel and mulch
Using Stone Mulch for Landscaping | Melvin Mulch – landscape gravel and mulch | landscape gravel and mulch
Glass Mulch Landscaping Ideas That Will Impress You – landscape gravel and mulch | landscape gravel and mulch
Backdrop Garden: 1-3 River Rock, Black Beauty Mulch … – landscape gravel and mulch | landscape gravel and mulch
18 Precautions You Must Take Before Attending Garden Landscape Supply | garden landscape supply – landscape gravel and mulch | landscape gravel and mulch
July Special-Decorative Stone 10% OFF – Mulching with … – landscape gravel and mulch | landscape gravel and mulch
Stone or Mulch in Your Landscaping? | Tomlinson Bomberger – landscape gravel and mulch | landscape gravel and mulch
How to Save a Ton of Money on Mulch and Gravel • Ugly Duckling House – landscape gravel and mulch | landscape gravel and mulch
Deep edges, perennials, barberrys, River gravel and mulch … – landscape gravel and mulch | landscape gravel and mulch
Amazing Green Landscaping Ideas Mulch And Rock With Shrubs … – landscape gravel and mulch | landscape gravel and mulch
Backdrop Garden: 25-25 River Rock, Black Beauty Mulch – Zarcon … – landscape gravel and mulch | landscape gravel and mulch
Landscape Materials Near Me – Newest Home Lansdscaping Ideas – landscape gravel and mulch | landscape gravel and mulch
Landscape Materials Near Me – Newest Home Lansdscaping Ideas – landscape gravel and mulch | landscape gravel and mulch
Landscaping Rocks | Mulch | Victoria, MN – landscape gravel and mulch | landscape gravel and mulch
Landscape Materials Near Me – Newest Home Lansdscaping Ideas – landscape gravel and mulch | landscape gravel and mulch
Landscaping Rocks | Mulch | Victoria, MN – landscape gravel and mulch | landscape gravel and mulch
Stone & Gravel – DeWitt Landscape Supplies : Stone, Sand … – landscape gravel and mulch | landscape gravel and mulch
25 Gravel Yard Green Mulch, Landscaping With Rocks And Mulch Home … – landscape gravel and mulch | landscape gravel and mulch
25 Gravel Yard Green Mulch, Landscaping With Rocks And Mulch Home … – landscape gravel and mulch | landscape gravel and mulch
Gettysburg Landscape Supply Yard :: Gettysburg, Pennsylvania – landscape gravel and mulch | landscape gravel and mulch
25 Gravel Yard Green Mulch, Landscaping With Rocks And Mulch Home … – landscape gravel and mulch | landscape gravel and mulch
Gettysburg Landscape Supply Yard :: Gettysburg, Pennsylvania – landscape gravel and mulch | landscape gravel and mulch
from WordPress https://landscapeusa.club/reasons-why-landscape-gravel-and-mulch-is-getting-more-popular-in-the-past-decade-landscape-gravel-and-mulch/
0 notes
Text
Prepare like a Pro – 4 Winter Landscaping Tips
As the temperatures continue to fall, daylight hours get shorter, and the final leaves begin to fall off the trees. One might think this marks the end to another season in the landscape. In one aspect, this is correct; the growing season is over. But, there is still much you should do to the landscape to prepare it for the stresses of Winter. Here's 4 Winter landscaping tips from a pro.
Winter Landscaping Tip #1 – Dormant Season Pruning

Pruning of your trees and shrubs during the growing season, in most cases, is a must. To keep the plant clean and shaped, cut back some of the new growth that comes out as it grows.
Once the plant goes dormant however, one would think that there is no need to prune anymore. That is not the case! When there are no longer any leaves on the trees and shrubs, you can easily see up into the plants. This inspection may reveal a very thick and densely branched tree or shrub. In most cases, this is not an ideal growth habit for the plant. Thinning to reduce that density of the branches will help the overall health of the tree or shrub.
Another benefit that dormant season pruning has for you is that the debris that you create from the pruning is substantially less because there are no leaves to worry about. In some cases, this translates to a lower cost to have a professional do the job. Less debris means less for them to haul away.
Winter Landscaping Tip #2 – Perennial Cut Back
Another type of plant that benefits from pruning are perennials. As freezing temperatures hit, most Spring, Summer and Fall blooming perennials begin to store their energy for the Winter down in their root system. The result is a brown plant on top. You could leave these ugly, brown remnants of the perennial in your landscape, but that isn't very visually appealing. Also, having a lot of dead foliage in your garden provides great places for rodents to hide and feed on the root system of your plants. The best thing to do is to cut back the foliage remnants of your perennials. Your final result will be plants cut to a few inches above ground level.
Winter Landscaping Tip #3 – Fertilization of Trees and Shrubs

Giving your trees and shrubs the proper nutrition is vital to the success of their growth and structure. With a low amount of nutrition in the soil, many plants will struggle to stay healthy. Plants will lack the proper color foliage and have limited blooms. Additionally, having a stressed tree or shrubs increases the chance of disease or insect infestations. There are two main type of fertilization that can be done in the Fall that help the landscape. A liquid fertilization can be performed around the drip line of a tree or shrub and instantly puts the nutrients into the soil. A granular fertilization is also placed around the drip line of the tree or shrub and the product will slowly dissolve into the soil.
Either option is a good choice for the Fall. The vital nutrients that are in the fertilizers will remain in the soil until the Spring time. This means these nutrients are ready be there to be taken up once the plant emerges from Winter. Fertilization can be done in the Spring time for trees and shrubs too, but it can take some time in order for nutrients to be absorbed. So, having the greatest impact starting the Spring season off would be a Fall fertilization.
Winter Landscaping Tip #4 – Fall Planting
Once you have gone through your landscape pruning your trees and shrubs, cutting back your perennials, and fertilized the beds, you may begin to starting thinking about what next Spring could bring and what you could do now to fill in a few areas that just seem to be missing something. A good thing to do in the fall is planting of perennials, trees and shrubs.

A large benefit of planting in the fall is the reduced amount of watering you will need to do. When you plant something in the spring or early summer, the foliage and root system are actively growing. This means a large amount of water to keep them going. When you plant in the Fall, perennials, trees and shrubs are just about dormant. Because the ground stays moist with more frequent rainfalls it takes the watering labor away from you.
Also, when planting in the Fall make sure to provide your new and existing plants with a good layer of mulch to help insulate the soil. This practice helps reduce the chance of heaving from the alternating freezing and thawing of the ground.
Being outside in late Fall weather may not always be pleasant, but making sure your trees and shrubs are protected from the potential damages of the Winter are necessary. Making sure you tackle each of these steps above will help to ensure that your landscape is properly protected this Winter. If you'd like a free consultation about Winter landscaping, please Contact Us.
The post Prepare like a Pro – 4 Winter Landscaping Tips appeared first on Tomlinson Bomberger.
0 notes