#Step by step Vexel Arts
Explore tagged Tumblr posts
Text
youtube
0 notes
Text
DIGITAL ARTS TUTORIAL 🎨
INTRODUCTION
Magandang umaga, hapon, gabi sainyong lahat! Welcome sakin first blog! Siguro nagtataka kayo kung bakit yon first blog ko is about digi arts. So here's a little story about it. Natuto ako mag digital arts noon 2020 dahil yon isang friend ko marunong siya mag digi art and na influence ako sakanya. Naging pandemic hobby ko siya parang mas na-explore ko yon creative side ko thru learning digital arts. And hoping sa pamamagitan ng blog na ito may matutunan kayo (hopefully 😩) at mag interesado rin kayo sa vexel or digital arts. So let's start na!
APPS THAT YOU NEED FOR DIGITAL ARTS
1. REMINI
Remini is a photo enhancing app.
Ginagamit ko ito para high quality yon reference photo na gagamitin ko. Kasi meron mga reference photo na medyo blurry and medyo mahirap siya sa mga outlines and shade.
DIFFERENCE BETWEEN ORIG PIC AND ENHANCED PIC
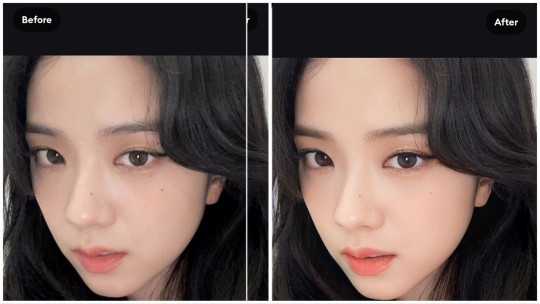
- Kaya importante na i-remini niyo yon reference photo para hindi ka malito sa shade niya at malinaw yon mga parts na i-outline sa reference.
2. INFINITE PAINTER
Dito ako gumagawa ng mga digital arts kasi madali siya gamitin for me. Pero pwede ka rin naman gumawa sa Ibis Paint and other apps.
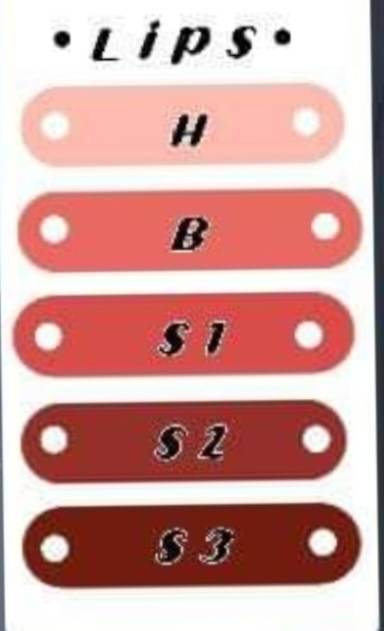
SKIN AND LIPS PALLETE

TUTORIAL
STEP 1: I-open ang Infinite Painter at pindutin ang NEW button at magcreate nang 2000 x 2000 canvas at pindutin ang CREATE.
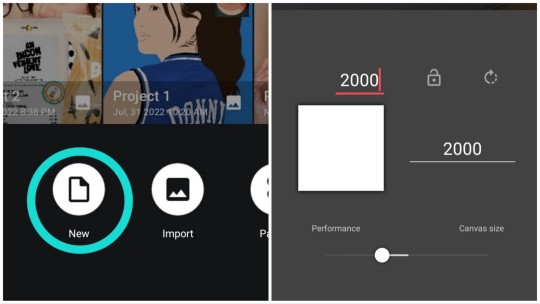
STEP 1.5: I-import ang reference photo sa atin canvas.

STEP 2: I-lower ang opacity nang reference photo. I-click yon compass icon and pindutin ang Lazy. Ito ang maga-guide satin para maging smooth yon mga lines para sa outline.
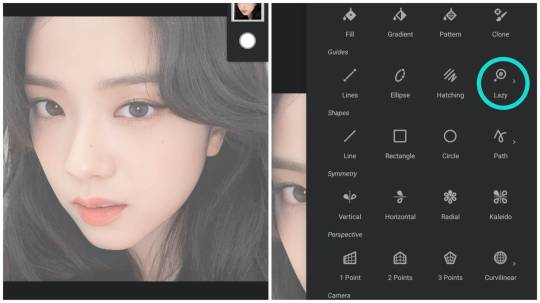
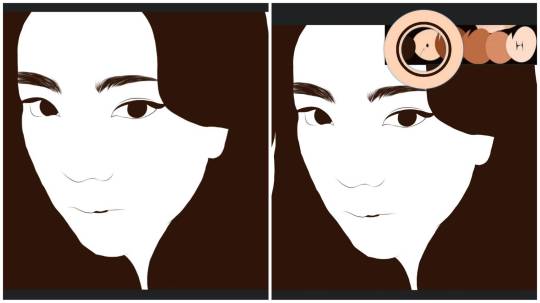
STEP 2.5: Pagkatapos add layer and i-trace mo na siya. Ang i-ttrace mo lang naman ay yon eyes, eyebrows, lips and hair. Ito yon magiging foundation natin kumbaga. Ganito itsura niya. (Brush used: Alexis).

STEP 3: Add layer and I-fill ang outline pagkatapos ay i-pick color ang base color at i-fill na ito sa face (Brush used: Beatrix).
EYE PART
STEP 4:Add layer at I-fill nang color white ang eyes para maging base siya.
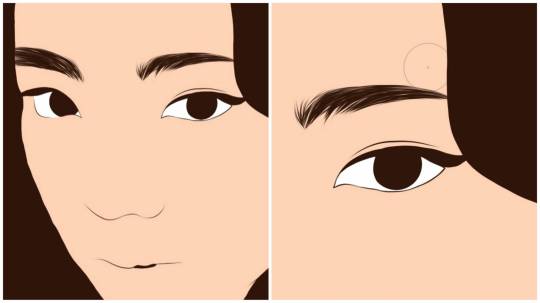
STEP 4.1: Add layer above the eyes base tapos maglagay nang first shadow. (Medyo light na shade dapat ang first shadow).
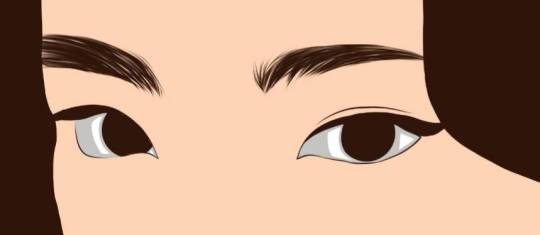
Tapos i-soft erase na siya. (Brused used for soft erase: Mirando) (Settings: Opacity: 65, Flow: 31, Softness: 79) Like this and then clip mo siya at add new layer for 2nd shadow.
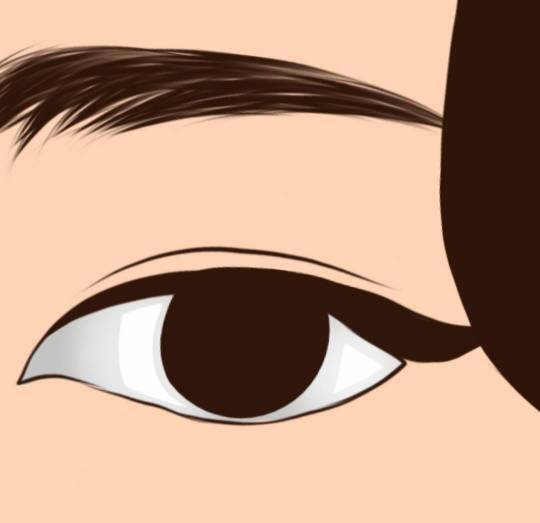
STEP 4.2: Add second shadow (medyo dark shade) tapos i-soft erase.
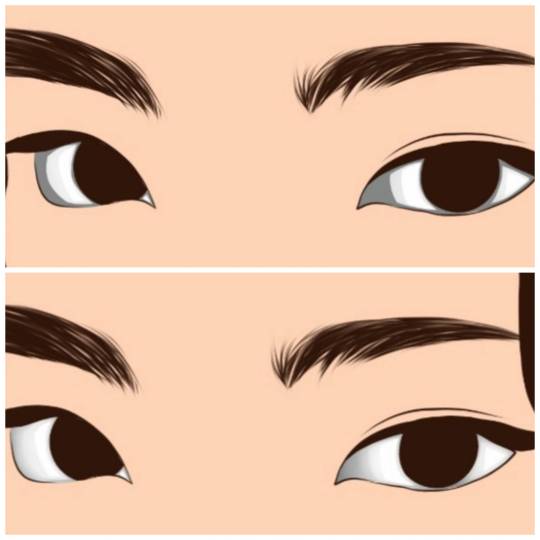
STEP 4.3: Add new layer. Add third shadow (dark shade) tapos i-soft erase.
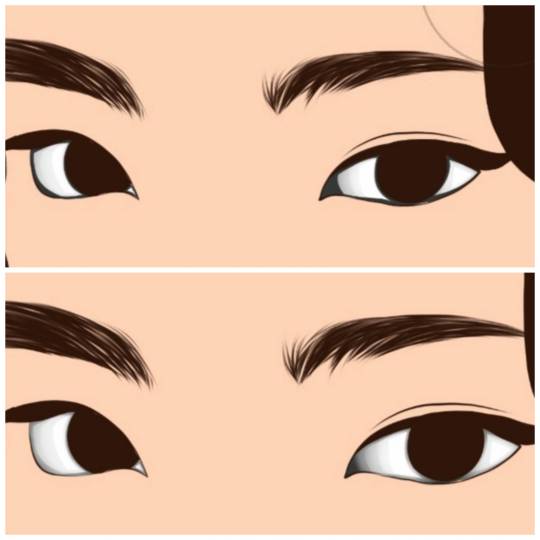
STEP 4.4: ‼️OPTIONAL‼️
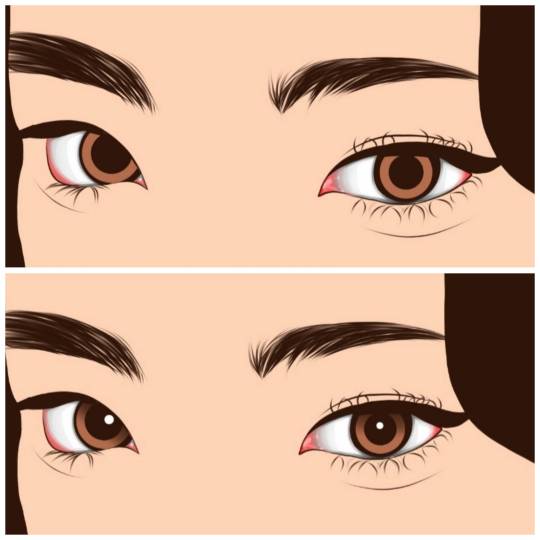
Add layer and add sclera tapos soft erase. Optional rin na mag-add nang highlights sa eyes. I feel like mas realistic yon eyes pag may sclera and highlights pero okay lang din naman na wala siya.
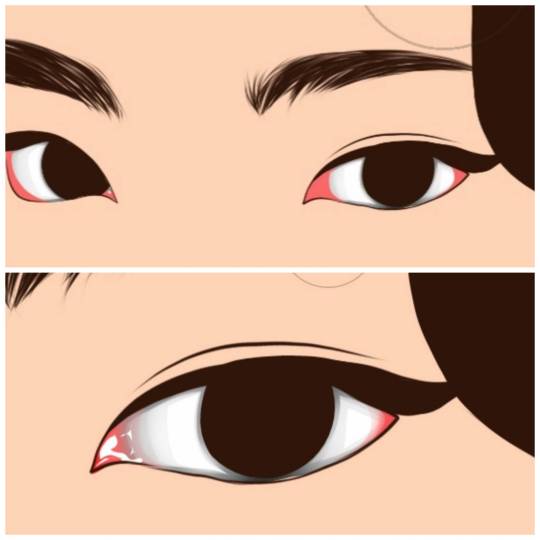
STEP 4.5: Add new layer. Click yon parang compass icon and click circle at maglagay nang iris and i-soft erase siya. Pagkatapos i-soft erase ay lagyan nang highlight.
LIPS PART
STEP 5: I-outline ang lips at i-fill ito.
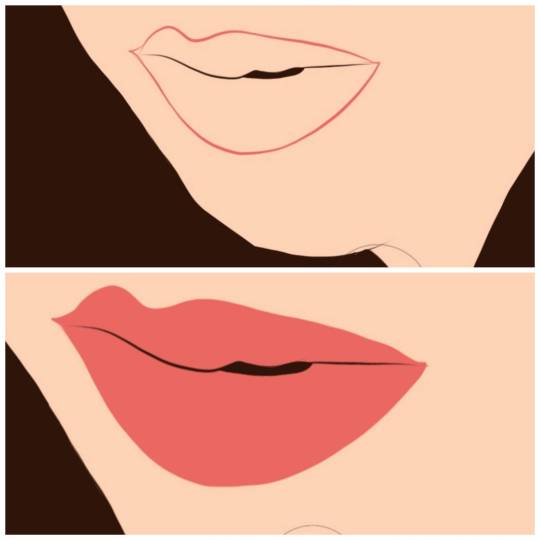
STEP 5.1: Add layer. Color pick first color and i-fill ang light part at i-soft erase.
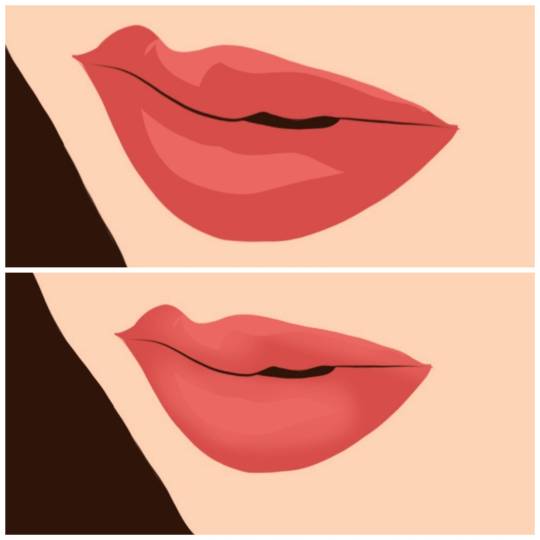
STEP 5.2: Add layer. Color pick second color and i-fill ang medyo dark shade at i-soft erase.
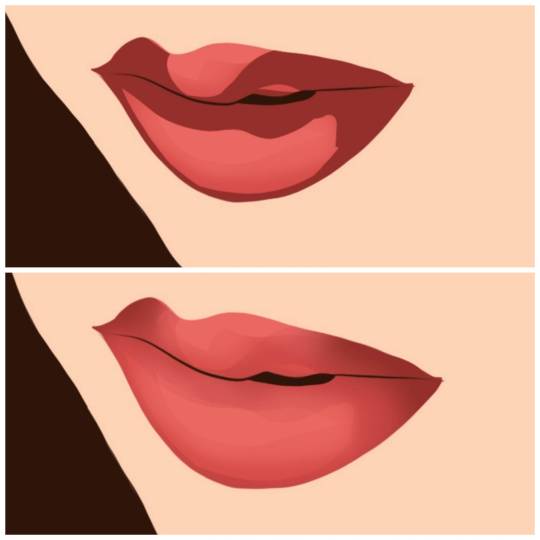
STEP 5.3: Add layer. Color pick third color and i-fill ang dark shade at i-soft erase.
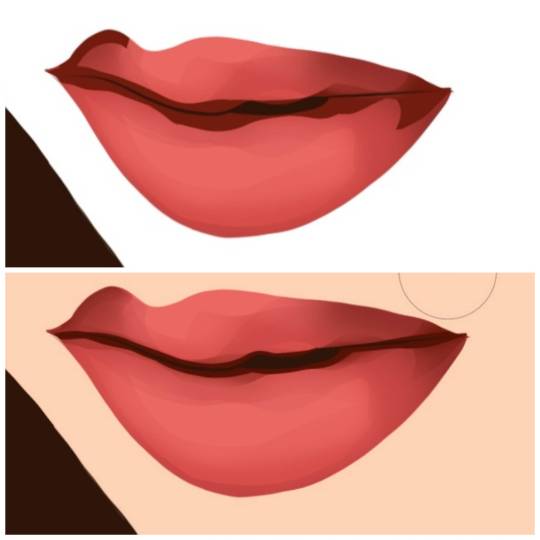
STEP 5.4: Add layer. Add highlights and soft erase and done!
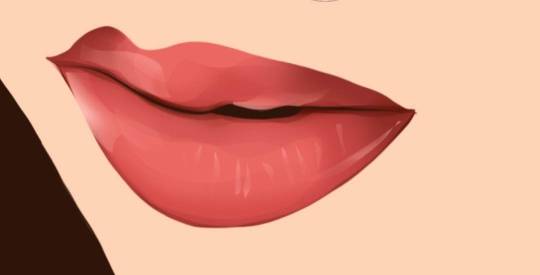
SKIN PART
STEP 6: Add layer. Color pick dark shade and i-fill ang dark part at i-soft erase (Brush used: Beatrix)
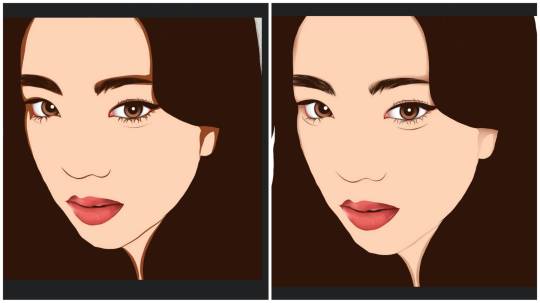
STEP 6.1: Add layer. Color pick medyo dark shade and i-fill ang medyo dark part at i-soft erase (Brush used: Beatrix)
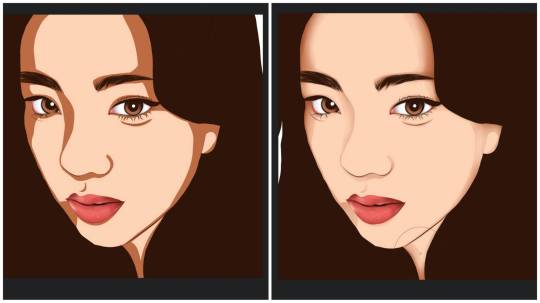
STEP 6.2: Add layer. Color pick light shade and i-fill ang light part at i-soft erase (Brush used: Beatrix) P.S: Nakalimutan ko i-ss yon nakasoft erase huhu
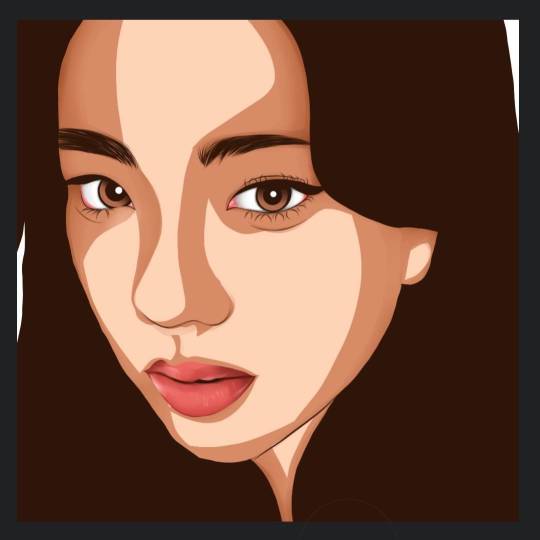
STEP 6.3: ‼️OPTIONAL‼️
Add layer. Color pick light shade again and i-fill ang light part tapos babaan ang opacity ng 50% at i-soft erase (Brush used: Beatrix). As you can see (wow) mas parang realistic siya pag may another layer pero optional lang siya gawin kasi meron mga iba na hindi na need mag add ng new layer.
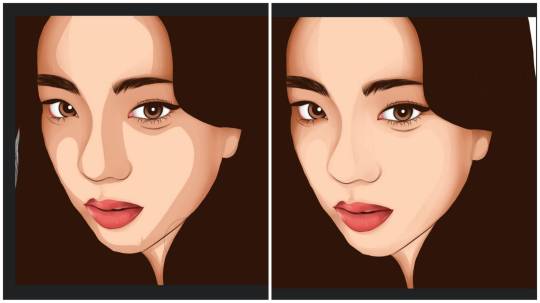
STEP 6.4: Add layer. Color pick highlight and i-fill ang super light part yon parang need i-highlight at i-soft erase (Brush used: Beatrix)

STEP 6.5: Add layer. Color pick lineart color para sa shadow and i-fill ang lahat ng dark parts sa face at babaan ang opacity at i-soft erase (Brush used: Beatrix) And Done!!!
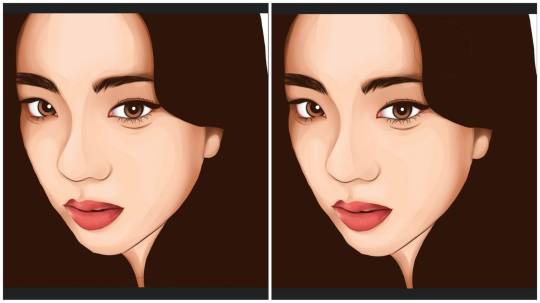
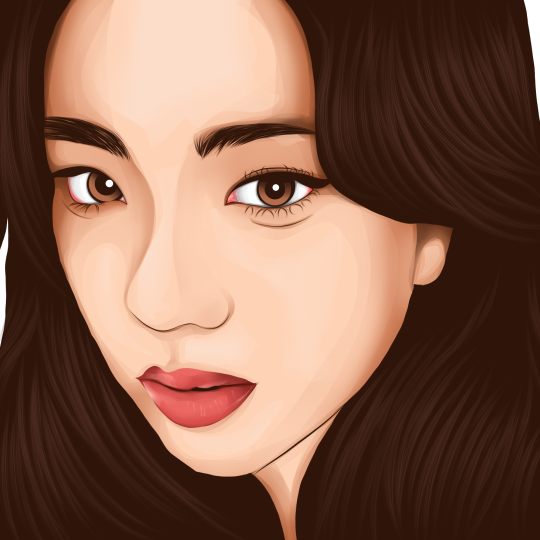
FINISH PRODUCT:
OUTRO
So it's a wrap! Thank you sa mga nagbasa ng blog na ito and i hope na may natutunan kayo dito sa tutorial na ito. Sorry kung medyo magulo siya please bear with me medyo nangagapa pa ako sa blogging HAHAHAHAHA! Looking forward sa mga next blog na i-upload ko. XOXO Anika <333
2 notes
·
View notes
Photo

GIVEAWAYS ALERT ‼️RINGLIGHT, VEXEL ARTS AND LIGHTROOM PRESETS GIVEAWAY ‼️ Just follow this steps: 1️⃣FOLLOW @pinky.giveaways , @j.abbyxel_arts and @presetspremiumapps 2️⃣FOLLOW ALL ACCOUNTS @pinky.giveaways is following! (As we always check!) ✅ 3️⃣Like this main post ❤️ Tag a friends in comment below‼️ 📍Important Tip: Tag your friends as many as you can; more comment + tagged friends = more chances of winning. 🎊🎉 GOODLUCK! _____________________________________________________ Users who unfollow will no longer be eligible to join future giveaways. Winner will be selected through a random picker. Giveaway closes on September 7, 2020 at 8:00pm. Winner will be draw on September 8,2020 at 8:00pm. Winner will be posted on @pinky.giveaways and will have 48 hours to claim their prize. Accounts must be public, no private account. MUST 13+ years of age, released Instagram of Responsibility. https://www.instagram.com/p/CEmK3Uxh934/?igshid=yzboxayti4nx
0 notes
Photo

"When you step out of the cave, you won’t always know what you’re going to find, and that’s okay. Life is far more wonderful outside of that cave" __________ Original design-@rafya88 __________ #photoshop #photography #art #photooftheday #photographer #graphicdesign #digitalart #design #photo #lightroom #adobe #artist #photoshoot #picoftheday #instagood #canon #illustrator #creative #illustration #artwork #camera #portrait #visuals#graphicdesigner#designer#vexel https://www.instagram.com/p/CB8JYDpByid/?igshid=i0s0dpz2kd6v
#photoshop#photography#art#photooftheday#photographer#graphicdesign#digitalart#design#photo#lightroom#adobe#artist#photoshoot#picoftheday#instagood#canon#illustrator#creative#illustration#artwork#camera#portrait#visuals#graphicdesigner#designer#vexel
0 notes
Text
youtube
1 note
·
View note