#Spray Dried Tender coconut water Powder
Explore tagged Tumblr posts
Text
What are the products covered under the coconut board?
The Coconut Development Board (CDB) encompasses various coconut-based products, including:
Kernel-based coconut products:
Copra
Coconut oil
Coconut milk
Coconut cream
Virgin coconut oil
Desiccated coconut
Coconut skimmed milk
Spray-dried coconut milk powder
Coconut water-based products:
Nata-de-coco
Coconut squash
Tender coconut water
Coconut-based vinegar
Coconut inflorescence-based products:
Neera
Coconut jaggery
Coconut palm sugar
Coconut flower syrup
Coconut convenience food products:
Coconut burfi
Coconut candy
Coconut biscuits
Coconut chocolate
Coconut shell-based products:
Activated carbon
Coconut shell powder
Coconut shell charcoal
0 notes
Text
SAMOSAS AND CURRY
Welcome to another episode of Cooking My Way Through Carry On. Today I tackle one of the iconic meals in the book--Simon’s dinner the night he and Baz go after the vampires and the night where everything changes between them.
I made these samosas and this curry for dinner the other night and it was a rousing success. I’ll share the samosa recipe here and a link for the keema curry recipe I used!
“I’ve finished my curry and two orders of samosas, and I’m watching him read–I swear he sucks on his fangs when he’s thinking–when he snaps the book shut with one hand and stands up. ‘Come on, Snow. Let’s go find a vampire.’”
Carry On, Chapter 60.
These are baked samosas, since I didn’t want to deal with deep frying anything. They’re also vegan. I am a big fan of Isa Chandra Moskowitz and this recipe is from her book Vegan with a Vengeance, one of my favorite vegan cookbooks.
The keema curry recipe is one I got from a friend and it is so close to the one my father-in-law used to make for me that it brought back a lot of memories for us.
Samosas
Ingredients:
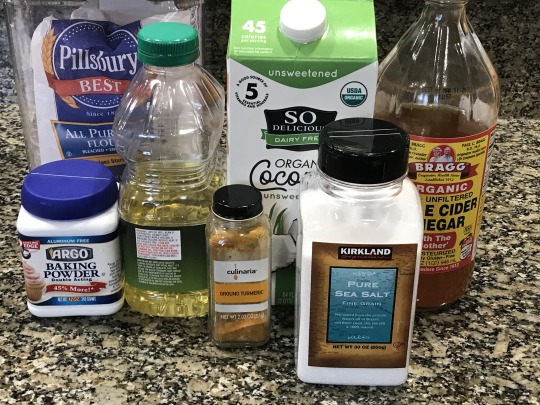
Dough Ingredients:
3/4 cup rice or soy milk (I used coconut milk--any of them work)
1/4 cup vegetable oil
1 tablespoon apple cider vinegar (any mild vinegar is fine, really)
1/4 teaspoon ground turmeric
1/4 teaspoon baking powder
1 teaspoon salt
about 3 cups of flour
Filling Ingredients: (sorry forgot to get photo)
3-4 medium size russet potatoes, peeled and cut into one inch chunks
2 tablespoons vegetable oil plus extra for brushing the samosas before baking
3/4 teaspoon ground cumin (the recipe called for cumin seeds which I didn't have and this worked fine)
1 teaspoon mustard powder (the recipe called for mustard seeds which I didn't have and this worked fine)
1 medium sized onion, very finely chopped
2 cloves garlic (or two teaspoons chopped garlic if that’s what you have)
1 tablespoon fresh ginger
! teaspoon ground coriander
1.2 teaspoon ground turmeric
pinch of cayenne pepper
1 teaspoon salt
juice of 1 lemon (or whatever equivalent is if you have lemon juice and not a lemon--it usually will say on the bottle)
3/4 cup frozen green peas
Method:
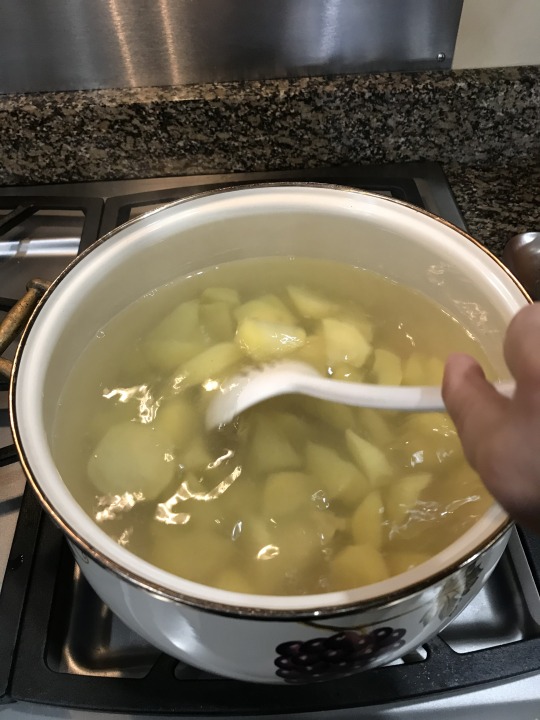
In a large saucepan, boil the potatoes for about 20-25 minutes, until they are tender (use a fork to poke them to check). When they are done drain them and set them aside.
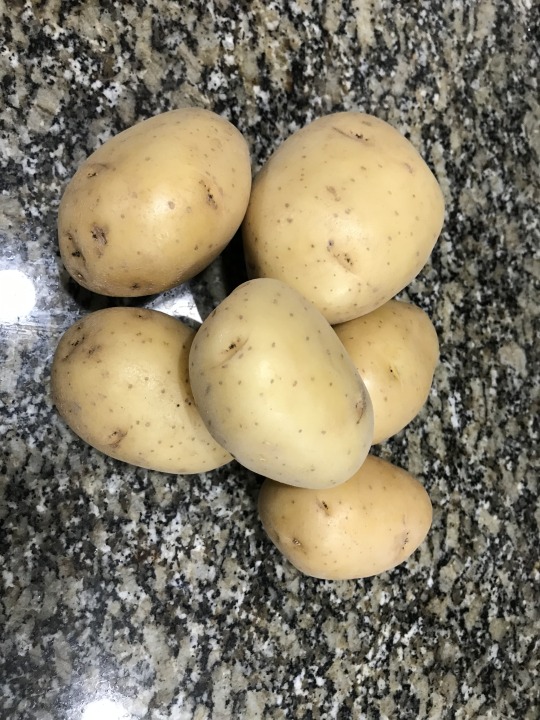
Po-tay-toes (boil ‘em, mash ‘em, stick ‘em in a stew) In this case they are to be mashed!
Make the dough:
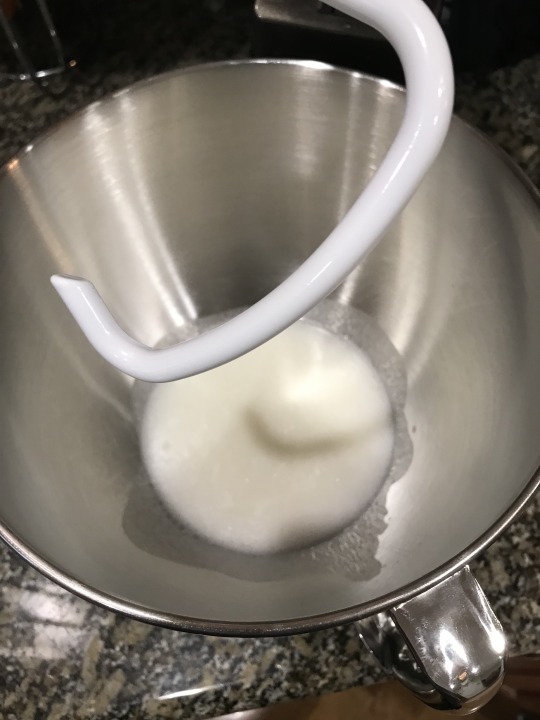
Pour the wet dough ingredients into a mixing bowl.
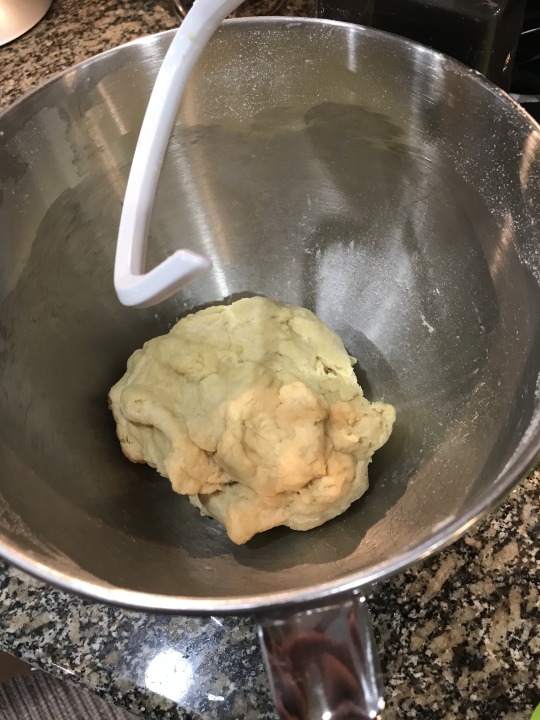
Add 2 cups flour and the turmeric, baking powder, and salt. Knead the mixture until well mixed, adding the rest of the flour bit by bit until a smooth but not sticky dough is formed, Maybe 10 minutes by hand?
I cheated and used the dough attachment on my KitchenAid so it was a bit under that time. (I kneaded it a bit by hand when the mixer was done too.) (Something something about the gluten, per Paul Hollywood and GBBO.)
set the dough aside, cover with a damp cloth or plastic wrap and begin working on the filling.
Preheat over to 400F somewhere in here
Filling:
Saute the onions with oil in the skillet on medium high for about 7-8 minutes or until the onions begin to brown.
add the garlic, cumin, mustard powder, ginger, coriander, turmeric, cayenne, salt, and lemon juice, and saute a minute more.
Add the potatoes (honestly it pains me to not type ‘po-tay-toes’ in true LOTR style)
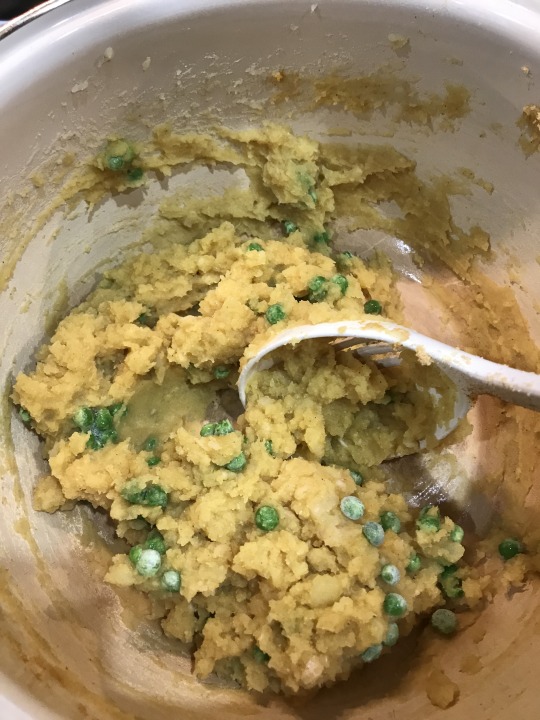
Mash the potatoes with a spatula or potato masher until it’s all a big mash of potatoes and spices (taters, precious)
When the potatoes are well mashed and the whole mixture is warm then add the frozen peas to the mix. Mix well.
Back to the dough:
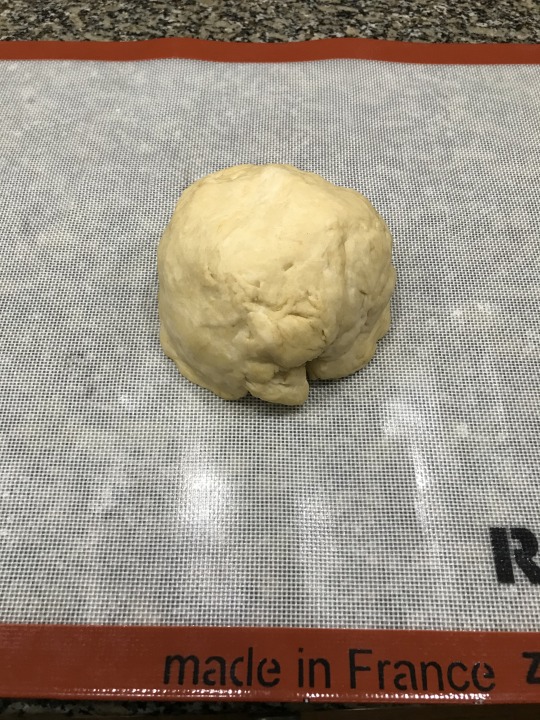
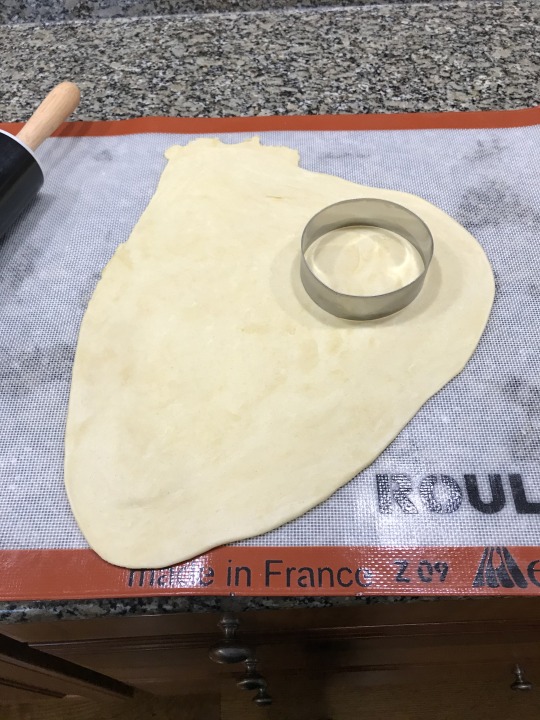
divide the dough in half and roll one half of it out on a floured surface until thin (I use a big silo pat as my surface)
Now cut out circles of dough. I used a 4 inch round cookie cutter ( 4 inch circumference not diameter).
Have a small bowl of water nearby
Cut out 8 circles
I rolled them out a bit once I cut them out, because they tended contract a bit when I cut them. Keep the shape circular.
Place 1 1/2 tablespoons of potato mixture into the centre of the dough circle, the dab the edges of the circle with water, fold over the edges to form a triangle shaped wedge and seal with your fingers.
Repeat until you have 8 roughly symmetrical samosas
Repeat process with second half of dough
Place filled samosas on a baking sheet that has been sprayed with non-stick cooking spray or use a silo pat on the baking sheet and then brush each side of the samosa with vegetable oil
Bake at 400F for 15 minutes. Flip the samosas over and then bake them for 10 more minutes or until lightly browned.
Take out of the oven and let them sit for about 5-7 minutes to cool.
These may be frozen and reheated in the oven. They never had a chance at our house because the family descended on them like a ravenous pack of wolves.
Tumlbr is being stupid about letting me put photos between the steps today so here are all the photos in a row.
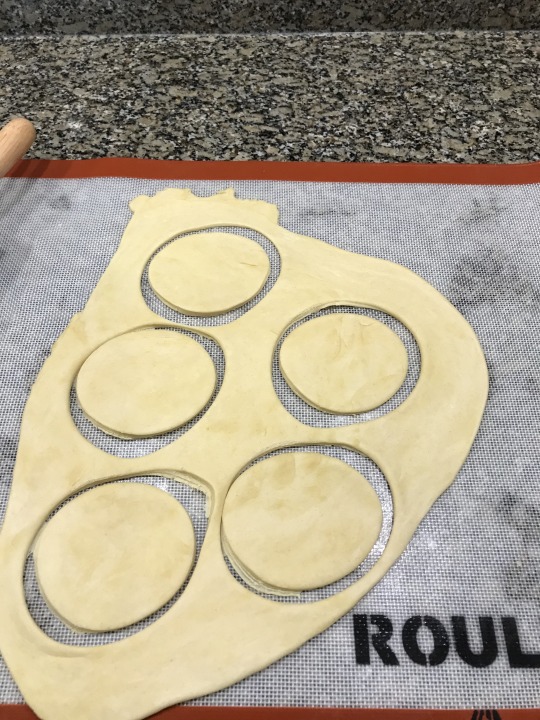
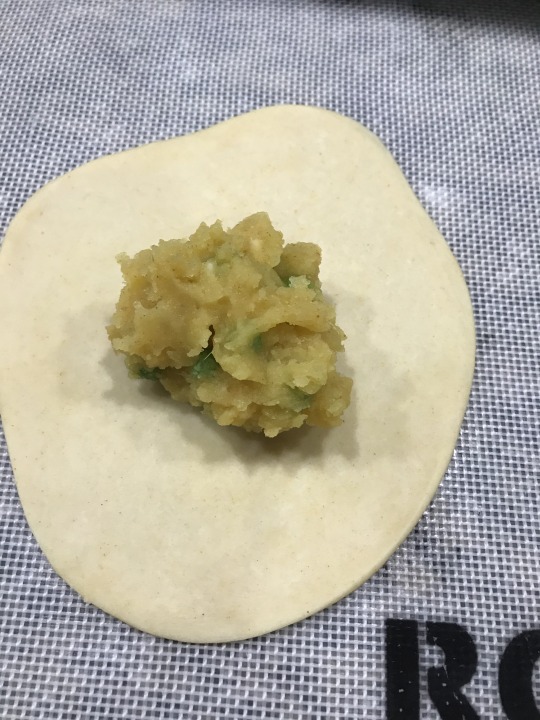
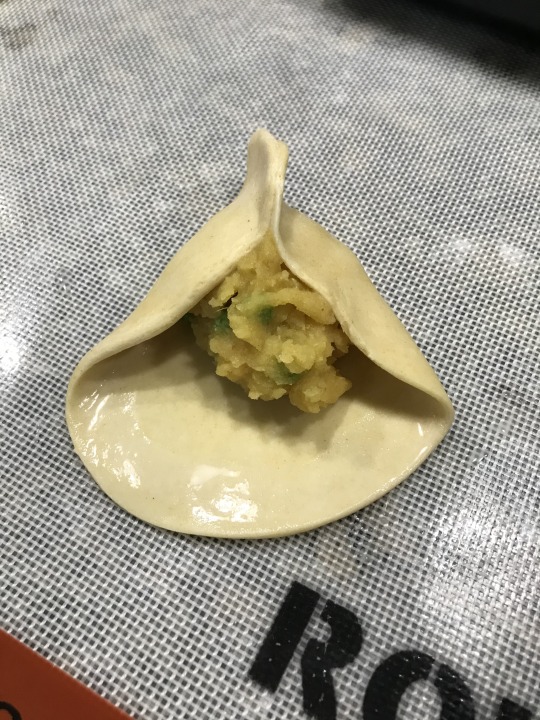


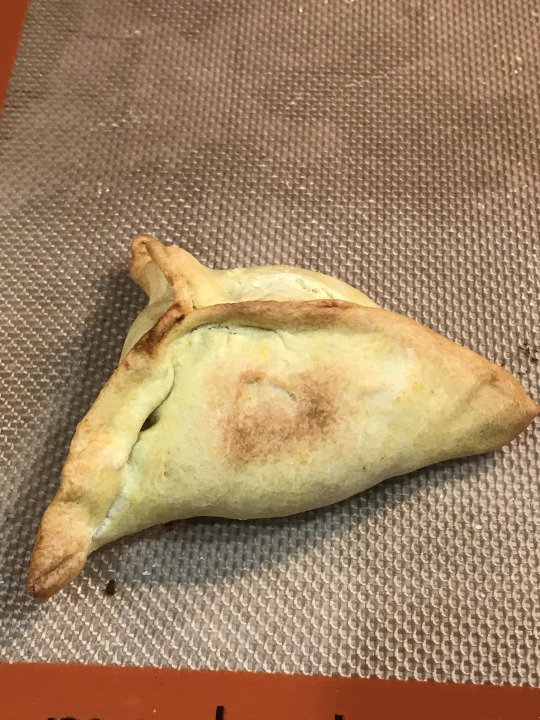

We had chutney in the fridge to go with the samosas. If you don’t have chutney here’s a quick recipe from the same cookbook:
chutney
1/2 cup coconut milk
1/3 cup finely chopped fresh mint or rehydrated dried mint in these times of pandemic
1/3 cup finely chopped fresh coriander. I don't know what to sub for this other than perhaps some ground coriander to taste
1 clove mince garlic
1 teaspoon maple syrup
1 teaspoon fresh lime juice
1/4 tsp salt
These were some work but the result was definitely worth the effort! Highly recommended. We also had curry along with the samosas, to really recreate the meal Simon had that night with Baz. The curry recipe is here and it is EXCELLENT!
And here is the recipe without the photos:
Samosas
Ingredients:
Dough Ingredients:
3/4 cup rice or soy milk (I used coconut milk--any of them work)
1/4 cup vegetable oil
1 tablespoon apple cider vinegar (any mild vinegar is fine, really)
1/4 teaspoon ground turmeric
1/4 teaspoon baking powder
1 teaspoon salt
about 3 cups of flour
Filling Ingredients:
3-4 medium size russet potatoes, peeled and cut into one inch chunks
2 tablespoons vegetable oil plus extra for brushing the samosas before baking
3/4 teaspoon ground cumin (the recipe called for cumin seeds which I didn't have and this worked fine)
1 teaspoon mustard powder (the recipe called for mustard seeds which I didn't have and this worked fine)
1 medium sized onion, very finely chopped
2 cloves garlic (or two teaspoons chopped garlic if that’s what you have)
1 tablespoon fresh ginger
! teaspoon ground coriander
1.2 teaspoon ground turmeric
pinch of cayenne pepper
1 teaspoon salt
juice of 1 lemon (or whatever equivalent is if you have lemon juice and not a lemon--it usually will say on the bottle)
3/4 cup frozen green peas
Method:
Pour the wet dough ingredients into a mixing bowl.
Add 2 cups flour and the turmeric, baking powder, and salt. Knead the mixture until well mixed, adding the rest of the flour bit by bit until a smooth but not sticky dough is formed, Maybe 10 minutes by hand?
I cheated and used the dough attachment on my KitchenAid so it was a bit under that time. (I kneaded it a bit by hand when the mixer was done too.) (Something something about the gluten, per Paul Hollywood and GBBO.)
set the dough aside, cover with a damp cloth or plastic wrap and begin working on the filling.
Preheat over to 400F somewhere in here
Saute the onions with oil in the skillet on medium high for about 7-8 minutes or until the onions begin to brown.
add the garlic, cumin, mustard powder, ginger, coriander, turmeric, cayenne, salt, and lemon juice, and saute a minute more.
Add the potatoes (honestly it pains me to not type ‘po-tay-toes’ in true LOTR style)
Mash the potatoes with a spatula or potato masher until it’s all a big mash of potatoes and spices (taters, precious)
When the potatoes are well mashed and the whole mixture is warm then add the frozen peas to the mix. Mix well.
divide the dough in half and roll one half of it out on a floured surface until thin (I use a big silo pat as my surface)
Now cut out circles of dough. I used a 4 inch round cookie cutter ( 4 inch circumference not diameter).
Have a small bowl of water nearby
Cut out 8 circles
Place 1 1/2 tablespoons of potato mixture into the centre of the dough circle, the dab the edges of the circle with water, fold over the edges to form a triangle shaped wedge and seal with your fingers.
Repeat until you have 8 roughly symmetrical samosas
Repeat process with second half of dough
Place filled samosas on a baking sheet that has been sprayed with non-stick cooking spray or use a silo pat on the baking sheet and then brush each side of the samosa with vegetable oil
Bake at 400F for 15 minutes. Flip the samosas over and then bake them for 10 more minutes or until lightly browned.
Take out of the oven and let them sit for about 5-7 minutes to cool.
These may be frozen and reheated in the oven. They never had a chance at our house because the family descended on them like a ravenous pack of wolves.
We had chutney in the fridge and it goes so well with the samosas but if you don’t here is a quick recipe:
1/2 cup coconut milk
1/3 cup finely chopped fresh mint or rehydrated dried mint in these times of pandemic
1/3 cup finely chopped fresh coriander. I don't know what to sub for this other than perhaps some ground coriander to taste
1 clove mince garlic
1 teaspoon maple syrup
1 teaspoon fresh lime juice
1/4 tsp salt
These were some work but the result was definitely worth the effort! Highly recommended. We also had curry along with the samosas, to really recreate the meal Simon had that night with Baz. The curry recipe is here and it is EXCELLENT!
#cooking my way through carry on#the food of Carry On#carry on cooking#samosas#curry#iconic vampire hunting power meal#their first date
131 notes
·
View notes
Text
Superfills Pure Tender Coconut Water Powder – 10 gm. x 10 sachets
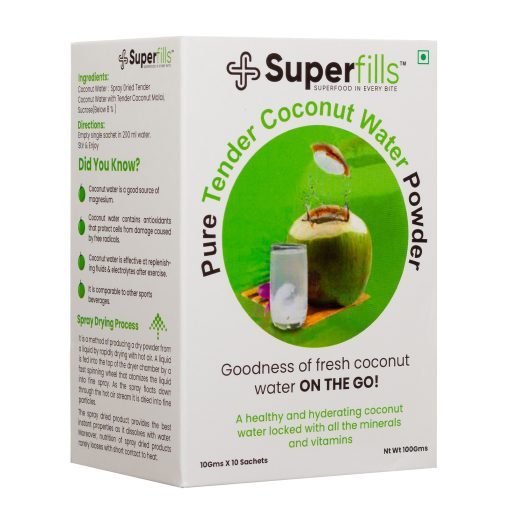
The powder is pure tender coconut water along with tender coconut malai which has been spray dried to atomize and be produced in a powdered form.
The spray dried product provides the best instant properties as it dissolves with water. Moreover, nutrition of spray dried products rarely looses with short contact to heat. Click : https://superfills.co.in/product/superfills-pure-tender-coconut-water-powder-10-gm-x-10-sachets/
0 notes
Text
Coconut Oil Plant
Coconut meat tastes good, as sweet and delicious as most other fruits, and is rich in nutrition. Studies have shown that crude fibers and proteins in coconut meat are very effective in reducing cholesterol absorption in vivo, which can help digestion and absorption, reduce blood lipids and greatly benefit human metabolism. At the same time, coconut meat is rich in magnesium and potassium, and magnesium ions can reduce the content of LDL. Potassium examples can maintain the body’s water balance, osmotic pressure balance and acid-base balance. Balance, prevent metabolic disorders. Coconut meat can be eaten raw, but also processed into coconut sugar, coconut powder, coconut cake and other coconut snacks, a variety of types, and preserve the unique fragrance and taste of coconut. In China, coconut meat is mainly used for processing various coconut snacks.
Coconut trees are mainly produced in islands in Asia and the Pacific, in Africa and in the south-central part of the Americas, and have high yields. Coconut meat is usually dried into dried coconut. Coconut oil is extracted from dried coconut. Fresh coconut meat contains 30%-40% oil and 50% water. Dryed coconut contains 60%-70% oil and 4%-7% water. Coconut oil has special fragrance. In 2000, the world coconut oil output was 3.31 million tons. The Philippines was the largest supplier of coconut oil in the world, followed by Indonesia, Malaysia, Papua New and Guinea.
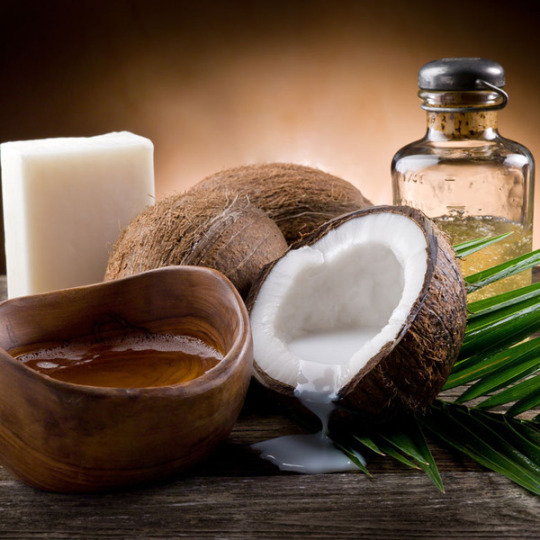
Coconut Oil Plant:
The melting point of coconut oil is only 24-27 C, although its saturated fatty acid content is more than 90%. It is semi-solid at room temperature. The melting points of lauric acid, myristic acid and palmitic acid are 44 C, 54 C and 63 C respectively. The difference between the highest melting point and the lowest melting point is only 19 C, and the melting point of triglycerides is only 19 C. The main components of coconut oil are lauric acid, myristic acid and palmitic acid. The plastic range of coconut oil is narrow. The hard part of coconut oil extracted is often used as the raw material of cocoa butter and margarine. The flavor of coconut oil is mainly attributed to the trace presence of delta-lactone and gamma-lactone, which makes coconut oil have a creamy flavor.
The efficient operation of the screw oil press requires steaming and tempering to control the temperature of coconut billet between 91 and 93 degrees C. Under the condition of moisture below 91 degrees C and above 4%, the oil yield of coconut billet is low, while over 93 degrees C and moisture content below 3%, the oil yield of dark oil and tar cake from coconut billet is low. The fines screened out and precipitated should not exceed 10% of fresh raw materials in order to avoid the formation of fines in the steaming and tempering stage and then press.
Coconut meat processing methods are mainly divided into dry processing technology and wet processing technology. Dry processing technology is a traditional processing method, which first dehydrates coconut meat into coconut dried, and then extracts coconut oil from coconut dried. The wet processing technology is based on fresh coconut meat as raw material, directly processed into coconut oil or other useful ingredients. Compared with the traditional processing methods, wet processing has the advantages of high investment and complex technology, but it can extract all kinds of effective ingredients of coconut directly, and the product or yield is high and the quality is high.

Oil Plant:
The mature coconut is shelled, the separated coconut meat is peeled and the outer seed coat is removed. The seed coat was extracted as a by-product. Cut coconut meat is crushed by wedge, dental plate crusher and drum crusher. The coconut juice is extracted from the ground powder by a screw press. The coconut juice is filtered through the sieve conveyer and centrifuged to separate the oil layer. The air is heated to reduce a small amount of water in the oil to 0.1% to 0.2%. Generally speaking, 6.8t “natural” coconut oil can be extracted from fresh coconut meat of 25t, and the milk is removed by spray drying to recover protein and carbohydrates. The screw press is used to grind the residue into powder to recover oil and make coconut powder.
Post-pressing process: oil from screw press is transported to screen and clarifying tank, and particles are separated. The latter will be mixed with raw materials into the system for reprocessing. The upper clean oil per ton should be mixed with 10 kg of clay. After cleaning through safety filter, coconut oil (cake) filtered is stored or further processed, and the filtered coconut oil is put into granulation, bagged and sent to animal feed. Material factory.
Wet processing: In the process of wet processing, raw materials are fresh coconut meat. In addition to product oil, other edible by-products obtained from coconut oil include coconut powder, protein, carbohydrates and vitamins. In order to make this process more widely commercialized, it is important to emphasize the following advantages: high quality oil can be obtained and nutritious (ingredient) by-products can be recovered, while the latter is lost in coconut drying.

Coconut water has the medicinal value of digestion, diuresis, anti-bacterial and anti-inflammatory. It can be used to treat hepatitis, gastroenteritis, malaria, skin rash and varicella in clinic. In medicine, coconut water helps digestion and is a detergent for the body. The dehydration caused by gastroenteritis can be transfused directly with tender coconut water instead of saline water. In some countries, the cholera epidemic is that many patients use coconut water for intravenous injection. During the war, Hainan soldiers also used coconut water for intravenous injection to maintain physical strength. When mineral poisoning occurs, toxins can be excreted by drinking coconut water.Coconut water can be used as fresh-keeping agent. It can prolong the vase life of cut flowers. It is safe, simple and economical. It is a natural fresh-keeping agent for flowers. Experiments show that coconut water contains cytokines or hormones, which can preserve vegetable green and slow down the drying rate [9]. In the fresh-keeping of flowers, the coconut water solution with 40%-60% concentration is better than that with chemical agents.
Coconut Oil Plant
0 notes
Text
Kitchen Confidential
We’re unveiling some secret ingredients that take simple dishes from good to great. And—surprise!—they’re all grocery staples you might already have on hand.

Creamy Basil-Rosemary Chicken and Rice
SERVINGS: 4 (1 cup each) CARB. PER SERVING: 21 g PREP: 25 minutes COOK: 30 minutes
INGREDIENTS:
1 teaspoon canola oil 1.5 cups chopped yellow onions (2 to 3 medium) 1 cup thinly sliced celery (2 stalks) 1 14.5-ounce can reduced sodium chicken broth 1 cup instant brown rice 2 cups chopped cooked chicken breast 4 ounces light semisoft cheese with garlic and fine herbs, such as The Laughing Cow brand 1⁄4 cup water 1 clove garlic, minced 1⁄4 cup snipped fresh basil 1 tablespoon snipped fresh rosemary
1. In a medium nonstick skillet heat oil over medium-low heat. Add onions; cook for about 15 minutes or until golden brown. Stir in celery; cook for about 4 minutes more or until celery is
tender. Stir in broth and rice. Bring to boil; reduce heat. Simmer, covered, for about 10 minutes or until liquid is absorbed. 2. Stir in chicken, cheese, water and garlic; heat through, stirring occasionally. Stir in basil, rosemary, and 1⁄8 teaspoon salt. If desired, sprinkle with additional fresh basil and/ or rosemary.
PER SERVING: 294 cal., 10 g total fat (5 g sat. fat), 80 mg chol., 559 mg sodium, 21 g carb. (3 g fibre, 4 g sugars), 29 g pro.
EXCHANGES: 1 vegetable, 1 starch, 3.5 lean meat, 0.5 fat.
Yellow Onions: Once they’re cooked, the onions melt into the base of this dish to help create a creamy texture and add a sweet richness to the flavour.
Smoky-Hot Raspberry Shrimp
SERVINGS: 4 (6 to 8 cooked shrimp, 1 cup lettuce, 1⁄4 cup jicama, and 1 tablespoon sauce each) CARB. PER SERVING: 29 g START TO FINISH: 30 minutes
INGREDIENTS: 12 ounces fresh or frozen medium shrimp 1 8-ounce can pineapple chunks (juice pack) 2 teaspoons chili powder 1 teaspoon ground cumin 1 ⁄3 cup raspberry spreadable fruit 1 1 ⁄2 teaspoons Worcestershire sauce 1 teaspoon chopped canned chipotle chile peppers in adobo sauce* 4 cups shredded lettuce 1 ⁄2 of a small jicama, peeled and cut into matchstick-size strips (1 cup) 1 tablespoon shredded coconut, toasted.
1. Thaw shrimp, if frozen. Peel and devein shrimp, leaving tails intact if desired. Rinse shrimp; pat dry with paper towels. Drain pineapple, reserving 3 tablespoons of the juice; set aside. In a small bowl combine chili powder, cumin, and 1 ⁄2 teaspoon black pepper. Sprinkle mixture evenly over shrimp; rub in with your fingers. 2. For sauce, in a small microwavesafe bowl combine spreadable fruit, 2 tablespoons of the reserved pineapple juice, the Worcestershire sauce, and chopped chipotle chile peppers. Microwave on high about 1 minute or until spreadable fruit is melted. Stir until smooth. Set aside 1 ⁄4 cup of the sauce for drizzling. 3. Lightly coat a grill pan with nonstick cooking spray; heat over medium-high heat. Add the shrimp; cook for about 5 minutes or until nearly opaque, turning occasionally. Brush the remaining sauce over both sides of the shrimp. Add pineapple to pan; cook shrimp and pineapple for 1 minute more. Discard any remaining sauce used as a brush-on. 4. Divide lettuce and jicama among four serving plates. Top each with 1 ⁄4 of the shrimp and pineapple. Stir the remaining 1 tablespoon pineapple juice into the reserved sauce; drizzle over servings. Sprinkle with coconut.
*TEST KITCHEN TIP: Because chile peppers contain volatile oils that can burn your skin and eyes, avoid direct contact with them as much as possible. When working with chile peppers, wear plastic or rubber gloves. If your bare hands do touch the peppers, wash your hands and nails well with soap and warm water.
PER SERVING: 180 cal., 2 g total fat (1 g sat. fat), 107 mg chol., 536 mg sodium, 29 g carb. (4 g fibre, 21 g sugars), 13 g pro.
EXCHANGES: 1 vegetable, 1.5 fruit, 2 lean meat.
Chipotle Chiles: A chipotle is a dried and smoked red jalapeño, which often comes canned in a spicy sauce called adobo. Even a small amount of chipotle adds tremendous smoky and spicy flavors to a dish.
http://www.diabeticlivingonline.in/food/kitchen-confidential
1 note
·
View note
Text
Barbecue Better for Labor Day
Barbecue Better for Labor Day
Labor Day marks the unofficial end of summer, when many of us enjoy a long weekend with friends and family and toast the season with a backyard barbecue. The traditional meat-heavy barbecue menu can be hazardous to your health, but it doesn’t have to be. Some of the most popular barbecue foods are well-known to increase the risk of type 2 diabetes (and a number of other diseases, too!), like steak, pork ribs, processed red meats (hot dogs), refined grains (traditional pasta salads, rolls, potato chips), and processed, added sugars (sodas, desserts). But we can help you make over your Labor Day celebration menu with healthy options for a feel better BBQ!
“Pulled” Mushrooms in Barbecue Sauce over Whole Roasted Sweet Potatoes with Pickled Onions and Peppers (Gluten-Free, Vegan)
Maybe you usually go for traditional fare like pulled barbecue pork on a roll, but now you want to do better for your body. Boston-area chef de cuisine Cassidy Salus (Steel and Rye, Prairie Fire) makes a meatless version of this dish using Maitake mushrooms, also known as Hen of the Woods: “They are a much more meaty mushroom because of their lower water content, and have much more flavor… Mushrooms sautéed and then braised in barbecue sauce are delicious.” And it’s true, nothing has more healthy umami than mushrooms! Mushrooms sautéed to tender and simmered in a simple, wholesome homemade barbecue sauce, and served over steaming-hot grilled sweet potatoes and topped with tangy, low-sugar low-salt pickled onions and peppers? Even better! Sweetness comes from nutrient-rich blackstrap molasses, which contains many nutrients, including potassium and iron. As a matter of fact, one serving of this meal gets you all the vitamin D you need for the whole week (over 1,000 times the recommended daily value). Skip your supplement! If you can’t find Maitakes then any mushrooms can be used in this recipe. The sauce and pickled onions can be made ahead of time.
Barbecue Sauce
1/2 cup apple cider vinegar
1/2 cup dark preferred ((though any will do))
1 can tomato paste
1/2 cup blackstrap molasses
2 tbsp Dijon mustard
2 tbsp coconut aminos ((you can also use low-sodium soy sauce))
1 tsp garlic powder
1/2 tsp onion powder
1/2 tsp black pepper
Pulled Mushrooms
6 cups mushrooms, sliced very thin ((about 2 pounds) )
1 tsp olive oil
Whole Roasted Sweet Potatoes
6 sweet potatoes, about equal size, washed
Pickled Onions and Peppers
1 cup apple cider vinegar
1 tbsp honey ((or agave syrup, for vegan))
1/2 tsp salt
1 tsp black pepper
1 small red onion, sliced very thin
1/2 cup thinly sliced pepper of your choice
2 tbsp chopped fresh herbs, such as dill
Barbecue Sauce
Mix all ingredients together in a small saucepan, and bring to a boil. Reduce heat and simmer, stirring occasionally, for thirty minutes, until sauce is thickened. This will keep, covered in the refrigerator, for up to a week.
Pulled Mushrooms
You can use any mushrooms for this vegan recipe– Baby Bellas, Portobellas, or even button mushrooms will work fine. It may seem a large amount of mushrooms, but these cook way down.
Heat a large deep saucepan or saute pan and add oil.
When oil is very hot but not smoking, add mushrooms and turn heat to medium-low.
Sautee mushrooms, stirring frequently, until quite soft and browned, about ten minutes.
Add enough sauce to almost cover mushrooms, and reduce heat to simmer.
Simmer for about twenty minutes, until very soft and sauce is thickened.
Serve hot, over whole roasted sweet potatoes, with pickled onions and peppers on top.
Whole Roasted Sweet Potatoes
Aluminum foil
Wrap each potato in foil and place on a medium-hot grill or an oven at 400 degrees, and allow to cook for about thirty to forty minutes, until very soft.
Pickled Onions and Peppers
You can make this spicy, or not. For not spicy, use half of a bell pepper. For spicy, use a jalapeno pepper. For super-spicy, use a habanero pepper. For fresh spices, I usually use dill, but you can use cilantro, oregano, mint, or a combination.
Heat vinegar, honey, salt, and pepper in a small saucepan until simmering. Add sliced onion, peppers and herbs, and simmer for five minutes, until soft. Turn off heat. Let sit covered for at least an hour. These can be served right away, or placed in a covered container and stored in the refrigerator for up to a week.
Cajun Style Shrimp Broil Foil Packets (Gluten-Free, Vegan)
This is a really impressive-appearing and popular healthified barbecue meal that is actually really easy as well. The homemade Cajun seasoning is low sodium, and you will not miss the salt at all, it’s that flavorful. Corn on the cob is a whole grain you can feel good about, especially when paired with summer green beans, and steamed with fresh lemon. And of course, we’re not using sausage in this version. This steamed dish will be a stealth-health hit of your next backyard party!
Homemade Cajun Seasoning
2 tbsp paprika
2 tbsp garlic powder
1 tbsp onion powder
1 tbsp dried oregano
1 tsp cayenne powder
1 tsp black pepper
1 tsp red pepper flakes
1/2 tsp salt
Packets
4 large ears corn on the cob, cut into four rounds each ( (This is easy using a large, heavy chef’s knife. Or you can buy frozen ones already cut.))
4 cups green beans ((a little over a pound))
1 large lemon, cut into six wedges
24 very large shrimp, peeled, deveined ((About a pound and a half))
Homemade Cajun Seasoning
This will make extra, which I serve out in a little bowl with a small spoon so folks can add extra if they like the spice.
Mix all spices together in a small jar or other container and shake. This will keep for weeks.
Packets
I like to use peeled and deveined shrimp, because it’s less messy for guests.
A large roll of aluminum foil
Cut a piece of foil about a foot and a half long.
Place 3 corns, a handful of green beans, and four shrimp in the center of the foil, arranged in a sort of rectangular pile. Lightly squirt with a lemon wedge and then add the lemon wedge to the pile. Sprinkle with about a half teaspoon of Cajun seasoning, or more if desired. Fold edges over so liquid produced while cooking will not leak out, and top is covered.
Heat grill to high, and place packets directly onto grill.
Do not flip.
Cook for about fifteen minutes, until corn and shrimp are cooked.
Serve in packets, with plenty of napkins!
Red and Green Summer Salad
Grilled red peppers, red onions, and fresh tomatoes are tossed with leafy red lettuce, mint, and cucumber and sprinkled with toasted pistachios. This is a light, bright, fresh salad perfect for accompanying grilled food. Grilling red onion to a nice soft char tones down its strong flavor and brings out its natural sweetness.
Salad
1 red onion, cut into quarters
2 red peppers, sliced into quarters or sixths and seeded ((keeping pieces long so they won’t fall into the grill) )
Olive oil (for brushing or spraying)
1 cup tomatoes, sliced ((I like cherry tomatoes, but can use any ripe, red tomatoes))
6 cups red lettuce, washed well and torn into bite-size pieces ((or other leafy green lettuce) (about 5 ounces, or a large head of lettuce))
1 bunch fresh mint, washed well, stems removed, and chopped ((about a cup))
1 cucumber, peeled, chopped into small pieces
1/4 cup roasted unsalted pistachios
Dressing
1/4 cup extra-virgin olive oil
1/4 cup red wine vinegar
1 finely chopped garlic clove
1/2 tsp salt
1/2 tsp black pepper
1/2 tsp dried oregano
1/2 tsp red pepper flakes ((optional))
Salad
Heat grill to medium high.
Lightly brush or spray the peppers and red onions with olive oil.
Using tongs, set the onion quarters and red peppers slices cross-wise on the grill bars (so they don’t fall in. Another option is to use a grill pan, in which case you can chop the onion and red pepper as small as you like.)
Grill, flipping once, until well-browned or charred, per your preference.
Remove from heat and allow to cool.
Place all ingredients into a large attractive bowl and toss with dressing, below.
Sprinkle with pistachios.
Dressing
Mix all ingredients in a small bowl and toss with salad when ready.
https://ift.tt/2opZiP7
0 notes
Text
Barbecue Better for Labor Day
Barbecue Better for Labor Day
Labor Day marks the unofficial end of summer, when many of us enjoy a long weekend with friends and family and toast the season with a backyard barbecue. The traditional meat-heavy barbecue menu can be hazardous to your health, but it doesn’t have to be. Some of the most popular barbecue foods are well-known to increase the risk of type 2 diabetes (and a number of other diseases, too!), like steak, pork ribs, processed red meats (hot dogs), refined grains (traditional pasta salads, rolls, potato chips), and processed, added sugars (sodas, desserts). But we can help you make over your Labor Day celebration menu with healthy options for a feel better BBQ!
“Pulled” Mushrooms in Barbecue Sauce over Whole Roasted Sweet Potatoes with Pickled Onions and Peppers (Gluten-Free, Vegan)
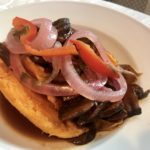
Maybe you usually go for traditional fare like pulled barbecue pork on a roll, but now you want to do better for your body. Boston-area chef de cuisine Cassidy Salus (Steel and Rye, Prairie Fire) makes a meatless version of this dish using Maitake mushrooms, also known as Hen of the Woods: “They are a much more meaty mushroom because of their lower water content, and have much more flavor… Mushrooms sautéed and then braised in barbecue sauce are delicious.” And it’s true, nothing has more healthy umami than mushrooms! Mushrooms sautéed to tender and simmered in a simple, wholesome homemade barbecue sauce, and served over steaming-hot grilled sweet potatoes and topped with tangy, low-sugar low-salt pickled onions and peppers? Even better! Sweetness comes from nutrient-rich blackstrap molasses, which contains many nutrients, including potassium and iron. As a matter of fact, one serving of this meal gets you all the vitamin D you need for the whole week (over 1,000 times the recommended daily value). Skip your supplement! If you can’t find Maitakes then any mushrooms can be used in this recipe. The sauce and pickled onions can be made ahead of time.
Barbecue Sauce
1/2 cup apple cider vinegar
1/2 cup dark preferred ((though any will do))
1 can tomato paste
1/2 cup blackstrap molasses
2 tbsp Dijon mustard
2 tbsp coconut aminos ((you can also use low-sodium soy sauce))
1 tsp garlic powder
1/2 tsp onion powder
1/2 tsp black pepper
Pulled Mushrooms
6 cups mushrooms, sliced very thin ((about 2 pounds) )
1 tsp olive oil
Whole Roasted Sweet Potatoes
6 sweet potatoes, about equal size, washed
Pickled Onions and Peppers
1 cup apple cider vinegar
1 tbsp honey ((or agave syrup, for vegan))
1/2 tsp salt
1 tsp black pepper
1 small red onion, sliced very thin
1/2 cup thinly sliced pepper of your choice
2 tbsp chopped fresh herbs, such as dill
Barbecue Sauce
Mix all ingredients together in a small saucepan, and bring to a boil. Reduce heat and simmer, stirring occasionally, for thirty minutes, until sauce is thickened. This will keep, covered in the refrigerator, for up to a week.
Pulled Mushrooms
You can use any mushrooms for this vegan recipe– Baby Bellas, Portobellas, or even button mushrooms will work fine. It may seem a large amount of mushrooms, but these cook way down.
Heat a large deep saucepan or saute pan and add oil.
When oil is very hot but not smoking, add mushrooms and turn heat to medium-low.
Sautee mushrooms, stirring frequently, until quite soft and browned, about ten minutes.
Add enough sauce to almost cover mushrooms, and reduce heat to simmer.
Simmer for about twenty minutes, until very soft and sauce is thickened.
Serve hot, over whole roasted sweet potatoes, with pickled onions and peppers on top.
Whole Roasted Sweet Potatoes
Aluminum foil
Wrap each potato in foil and place on a medium-hot grill or an oven at 400 degrees, and allow to cook for about thirty to forty minutes, until very soft.
Pickled Onions and Peppers
You can make this spicy, or not. For not spicy, use half of a bell pepper. For spicy, use a jalapeno pepper. For super-spicy, use a habanero pepper. For fresh spices, I usually use dill, but you can use cilantro, oregano, mint, or a combination.
Heat vinegar, honey, salt, and pepper in a small saucepan until simmering. Add sliced onion, peppers and herbs, and simmer for five minutes, until soft. Turn off heat. Let sit covered for at least an hour. These can be served right away, or placed in a covered container and stored in the refrigerator for up to a week.
Cajun Style Shrimp Broil Foil Packets (Gluten-Free, Vegan)
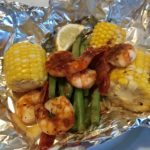
This is a really impressive-appearing and popular healthified barbecue meal that is actually really easy as well. The homemade Cajun seasoning is low sodium, and you will not miss the salt at all, it’s that flavorful. Corn on the cob is a whole grain you can feel good about, especially when paired with summer green beans, and steamed with fresh lemon. And of course, we’re not using sausage in this version. This steamed dish will be a stealth-health hit of your next backyard party!
Homemade Cajun Seasoning
2 tbsp paprika
2 tbsp garlic powder
1 tbsp onion powder
1 tbsp dried oregano
1 tsp cayenne powder
1 tsp black pepper
1 tsp red pepper flakes
1/2 tsp salt
Packets
4 large ears corn on the cob, cut into four rounds each ( (This is easy using a large, heavy chef’s knife. Or you can buy frozen ones already cut.))
4 cups green beans ((a little over a pound))
1 large lemon, cut into six wedges
24 very large shrimp, peeled, deveined ((About a pound and a half))
Homemade Cajun Seasoning
This will make extra, which I serve out in a little bowl with a small spoon so folks can add extra if they like the spice.
Mix all spices together in a small jar or other container and shake. This will keep for weeks.
Packets
I like to use peeled and deveined shrimp, because it’s less messy for guests.
A large roll of aluminum foil
Cut a piece of foil about a foot and a half long.
Place 3 corns, a handful of green beans, and four shrimp in the center of the foil, arranged in a sort of rectangular pile. Lightly squirt with a lemon wedge and then add the lemon wedge to the pile. Sprinkle with about a half teaspoon of Cajun seasoning, or more if desired. Fold edges over so liquid produced while cooking will not leak out, and top is covered.
Heat grill to high, and place packets directly onto grill.
Do not flip.
Cook for about fifteen minutes, until corn and shrimp are cooked.
Serve in packets, with plenty of napkins!
Red and Green Summer Salad
Grilled red peppers, red onions, and fresh tomatoes are tossed with leafy red lettuce, mint, and cucumber and sprinkled with toasted pistachios. This is a light, bright, fresh salad perfect for accompanying grilled food. Grilling red onion to a nice soft char tones down its strong flavor and brings out its natural sweetness.
Salad
1 red onion, cut into quarters
2 red peppers, sliced into quarters or sixths and seeded ((keeping pieces long so they won’t fall into the grill) )
Olive oil (for brushing or spraying)
1 cup tomatoes, sliced ((I like cherry tomatoes, but can use any ripe, red tomatoes))
6 cups red lettuce, washed well and torn into bite-size pieces ((or other leafy green lettuce) (about 5 ounces, or a large head of lettuce))
1 bunch fresh mint, washed well, stems removed, and chopped ((about a cup))
1 cucumber, peeled, chopped into small pieces
1/4 cup roasted unsalted pistachios
Dressing
1/4 cup extra-virgin olive oil
1/4 cup red wine vinegar
1 finely chopped garlic clove
1/2 tsp salt
1/2 tsp black pepper
1/2 tsp dried oregano
1/2 tsp red pepper flakes ((optional))
Salad
Heat grill to medium high.
Lightly brush or spray the peppers and red onions with olive oil.
Using tongs, set the onion quarters and red peppers slices cross-wise on the grill bars (so they don’t fall in. Another option is to use a grill pan, in which case you can chop the onion and red pepper as small as you like.)
Grill, flipping once, until well-browned or charred, per your preference.
Remove from heat and allow to cool.
Place all ingredients into a large attractive bowl and toss with dressing, below.
Sprinkle with pistachios.
Dressing
Mix all ingredients in a small bowl and toss with salad when ready.
https://ift.tt/2opZiP7
0 notes
Text
Barbecue Better for Labor Day
Barbecue Better for Labor Day
Labor Day marks the unofficial end of summer, when many of us enjoy a long weekend with friends and family and toast the season with a backyard barbecue. The traditional meat-heavy barbecue menu can be hazardous to your health, but it doesn’t have to be. Some of the most popular barbecue foods are well-known to increase the risk of type 2 diabetes (and a number of other diseases, too!), like steak, pork ribs, processed red meats (hot dogs), refined grains (traditional pasta salads, rolls, potato chips), and processed, added sugars (sodas, desserts). But we can help you make over your Labor Day celebration menu with healthy options for a feel better BBQ!
“Pulled” Mushrooms in Barbecue Sauce over Whole Roasted Sweet Potatoes with Pickled Onions and Peppers (Gluten-Free, Vegan)
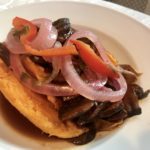
Maybe you usually go for traditional fare like pulled barbecue pork on a roll, but now you want to do better for your body. Boston-area chef de cuisine Cassidy Salus (Steel and Rye, Prairie Fire) makes a meatless version of this dish using Maitake mushrooms, also known as Hen of the Woods: “They are a much more meaty mushroom because of their lower water content, and have much more flavor… Mushrooms sautéed and then braised in barbecue sauce are delicious.” And it’s true, nothing has more healthy umami than mushrooms! Mushrooms sautéed to tender and simmered in a simple, wholesome homemade barbecue sauce, and served over steaming-hot grilled sweet potatoes and topped with tangy, low-sugar low-salt pickled onions and peppers? Even better! Sweetness comes from nutrient-rich blackstrap molasses, which contains many nutrients, including potassium and iron. As a matter of fact, one serving of this meal gets you all the vitamin D you need for the whole week (over 1,000 times the recommended daily value). Skip your supplement! If you can’t find Maitakes then any mushrooms can be used in this recipe. The sauce and pickled onions can be made ahead of time.
Barbecue Sauce
1/2 cup apple cider vinegar
1/2 cup dark preferred ((though any will do))
1 can tomato paste
1/2 cup blackstrap molasses
2 tbsp Dijon mustard
2 tbsp coconut aminos ((you can also use low-sodium soy sauce))
1 tsp garlic powder
1/2 tsp onion powder
1/2 tsp black pepper
Pulled Mushrooms
6 cups mushrooms, sliced very thin ((about 2 pounds) )
1 tsp olive oil
Whole Roasted Sweet Potatoes
6 sweet potatoes, about equal size, washed
Pickled Onions and Peppers
1 cup apple cider vinegar
1 tbsp honey ((or agave syrup, for vegan))
1/2 tsp salt
1 tsp black pepper
1 small red onion, sliced very thin
1/2 cup thinly sliced pepper of your choice
2 tbsp chopped fresh herbs, such as dill
Barbecue Sauce
Mix all ingredients together in a small saucepan, and bring to a boil. Reduce heat and simmer, stirring occasionally, for thirty minutes, until sauce is thickened. This will keep, covered in the refrigerator, for up to a week.
Pulled Mushrooms
You can use any mushrooms for this vegan recipe– Baby Bellas, Portobellas, or even button mushrooms will work fine. It may seem a large amount of mushrooms, but these cook way down.
Heat a large deep saucepan or saute pan and add oil.
When oil is very hot but not smoking, add mushrooms and turn heat to medium-low.
Sautee mushrooms, stirring frequently, until quite soft and browned, about ten minutes.
Add enough sauce to almost cover mushrooms, and reduce heat to simmer.
Simmer for about twenty minutes, until very soft and sauce is thickened.
Serve hot, over whole roasted sweet potatoes, with pickled onions and peppers on top.
Whole Roasted Sweet Potatoes
Aluminum foil
Wrap each potato in foil and place on a medium-hot grill or an oven at 400 degrees, and allow to cook for about thirty to forty minutes, until very soft.
Pickled Onions and Peppers
You can make this spicy, or not. For not spicy, use half of a bell pepper. For spicy, use a jalapeno pepper. For super-spicy, use a habanero pepper. For fresh spices, I usually use dill, but you can use cilantro, oregano, mint, or a combination.
Heat vinegar, honey, salt, and pepper in a small saucepan until simmering. Add sliced onion, peppers and herbs, and simmer for five minutes, until soft. Turn off heat. Let sit covered for at least an hour. These can be served right away, or placed in a covered container and stored in the refrigerator for up to a week.
Cajun Style Shrimp Broil Foil Packets (Gluten-Free, Vegan)
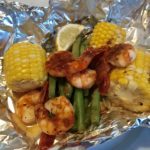
This is a really impressive-appearing and popular healthified barbecue meal that is actually really easy as well. The homemade Cajun seasoning is low sodium, and you will not miss the salt at all, it’s that flavorful. Corn on the cob is a whole grain you can feel good about, especially when paired with summer green beans, and steamed with fresh lemon. And of course, we’re not using sausage in this version. This steamed dish will be a stealth-health hit of your next backyard party!
Homemade Cajun Seasoning
2 tbsp paprika
2 tbsp garlic powder
1 tbsp onion powder
1 tbsp dried oregano
1 tsp cayenne powder
1 tsp black pepper
1 tsp red pepper flakes
1/2 tsp salt
Packets
4 large ears corn on the cob, cut into four rounds each ( (This is easy using a large, heavy chef’s knife. Or you can buy frozen ones already cut.))
4 cups green beans ((a little over a pound))
1 large lemon, cut into six wedges
24 very large shrimp, peeled, deveined ((About a pound and a half))
Homemade Cajun Seasoning
This will make extra, which I serve out in a little bowl with a small spoon so folks can add extra if they like the spice.
Mix all spices together in a small jar or other container and shake. This will keep for weeks.
Packets
I like to use peeled and deveined shrimp, because it’s less messy for guests.
A large roll of aluminum foil
Cut a piece of foil about a foot and a half long.
Place 3 corns, a handful of green beans, and four shrimp in the center of the foil, arranged in a sort of rectangular pile. Lightly squirt with a lemon wedge and then add the lemon wedge to the pile. Sprinkle with about a half teaspoon of Cajun seasoning, or more if desired. Fold edges over so liquid produced while cooking will not leak out, and top is covered.
Heat grill to high, and place packets directly onto grill.
Do not flip.
Cook for about fifteen minutes, until corn and shrimp are cooked.
Serve in packets, with plenty of napkins!
Red and Green Summer Salad
Grilled red peppers, red onions, and fresh tomatoes are tossed with leafy red lettuce, mint, and cucumber and sprinkled with toasted pistachios. This is a light, bright, fresh salad perfect for accompanying grilled food. Grilling red onion to a nice soft char tones down its strong flavor and brings out its natural sweetness.
Salad
1 red onion, cut into quarters
2 red peppers, sliced into quarters or sixths and seeded ((keeping pieces long so they won’t fall into the grill) )
Olive oil (for brushing or spraying)
1 cup tomatoes, sliced ((I like cherry tomatoes, but can use any ripe, red tomatoes))
6 cups red lettuce, washed well and torn into bite-size pieces ((or other leafy green lettuce) (about 5 ounces, or a large head of lettuce))
1 bunch fresh mint, washed well, stems removed, and chopped ((about a cup))
1 cucumber, peeled, chopped into small pieces
1/4 cup roasted unsalted pistachios
Dressing
1/4 cup extra-virgin olive oil
1/4 cup red wine vinegar
1 finely chopped garlic clove
1/2 tsp salt
1/2 tsp black pepper
1/2 tsp dried oregano
1/2 tsp red pepper flakes ((optional))
Salad
Heat grill to medium high.
Lightly brush or spray the peppers and red onions with olive oil.
Using tongs, set the onion quarters and red peppers slices cross-wise on the grill bars (so they don’t fall in. Another option is to use a grill pan, in which case you can chop the onion and red pepper as small as you like.)
Grill, flipping once, until well-browned or charred, per your preference.
Remove from heat and allow to cool.
Place all ingredients into a large attractive bowl and toss with dressing, below.
Sprinkle with pistachios.
Dressing
Mix all ingredients in a small bowl and toss with salad when ready.
https://ift.tt/2opZiP7
0 notes
Text
Barbecue Better for Labor Day
Barbecue Better for Labor Day
Labor Day marks the unofficial end of summer, when many of us enjoy a long weekend with friends and family and toast the season with a backyard barbecue. The traditional meat-heavy barbecue menu can be hazardous to your health, but it doesn’t have to be. Some of the most popular barbecue foods are well-known to increase the risk of type 2 diabetes (and a number of other diseases, too!), like steak, pork ribs, processed red meats (hot dogs), refined grains (traditional pasta salads, rolls, potato chips), and processed, added sugars (sodas, desserts). But we can help you make over your Labor Day celebration menu with healthy options for a feel better BBQ!
“Pulled” Mushrooms in Barbecue Sauce over Whole Roasted Sweet Potatoes with Pickled Onions and Peppers (Gluten-Free, Vegan)
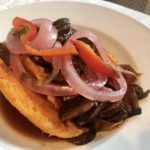
Maybe you usually go for traditional fare like pulled barbecue pork on a roll, but now you want to do better for your body. Boston-area chef de cuisine Cassidy Salus (Steel and Rye, Prairie Fire) makes a meatless version of this dish using Maitake mushrooms, also known as Hen of the Woods: “They are a much more meaty mushroom because of their lower water content, and have much more flavor… Mushrooms sautéed and then braised in barbecue sauce are delicious.” And it’s true, nothing has more healthy umami than mushrooms! Mushrooms sautéed to tender and simmered in a simple, wholesome homemade barbecue sauce, and served over steaming-hot grilled sweet potatoes and topped with tangy, low-sugar low-salt pickled onions and peppers? Even better! Sweetness comes from nutrient-rich blackstrap molasses, which contains many nutrients, including potassium and iron. As a matter of fact, one serving of this meal gets you all the vitamin D you need for the whole week (over 1,000 times the recommended daily value). Skip your supplement! If you can’t find Maitakes then any mushrooms can be used in this recipe. The sauce and pickled onions can be made ahead of time.
Barbecue Sauce
1/2 cup apple cider vinegar
1/2 cup dark preferred ((though any will do))
1 can tomato paste
1/2 cup blackstrap molasses
2 tbsp Dijon mustard
2 tbsp coconut aminos ((you can also use low-sodium soy sauce))
1 tsp garlic powder
1/2 tsp onion powder
1/2 tsp black pepper
Pulled Mushrooms
6 cups mushrooms, sliced very thin ((about 2 pounds) )
1 tsp olive oil
Whole Roasted Sweet Potatoes
6 sweet potatoes, about equal size, washed
Pickled Onions and Peppers
1 cup apple cider vinegar
1 tbsp honey ((or agave syrup, for vegan))
1/2 tsp salt
1 tsp black pepper
1 small red onion, sliced very thin
1/2 cup thinly sliced pepper of your choice
2 tbsp chopped fresh herbs, such as dill
Barbecue Sauce
Mix all ingredients together in a small saucepan, and bring to a boil. Reduce heat and simmer, stirring occasionally, for thirty minutes, until sauce is thickened. This will keep, covered in the refrigerator, for up to a week.
Pulled Mushrooms
You can use any mushrooms for this vegan recipe– Baby Bellas, Portobellas, or even button mushrooms will work fine. It may seem a large amount of mushrooms, but these cook way down.
Heat a large deep saucepan or saute pan and add oil.
When oil is very hot but not smoking, add mushrooms and turn heat to medium-low.
Sautee mushrooms, stirring frequently, until quite soft and browned, about ten minutes.
Add enough sauce to almost cover mushrooms, and reduce heat to simmer.
Simmer for about twenty minutes, until very soft and sauce is thickened.
Serve hot, over whole roasted sweet potatoes, with pickled onions and peppers on top.
Whole Roasted Sweet Potatoes
Aluminum foil
Wrap each potato in foil and place on a medium-hot grill or an oven at 400 degrees, and allow to cook for about thirty to forty minutes, until very soft.
Pickled Onions and Peppers
You can make this spicy, or not. For not spicy, use half of a bell pepper. For spicy, use a jalapeno pepper. For super-spicy, use a habanero pepper. For fresh spices, I usually use dill, but you can use cilantro, oregano, mint, or a combination.
Heat vinegar, honey, salt, and pepper in a small saucepan until simmering. Add sliced onion, peppers and herbs, and simmer for five minutes, until soft. Turn off heat. Let sit covered for at least an hour. These can be served right away, or placed in a covered container and stored in the refrigerator for up to a week.
Cajun Style Shrimp Broil Foil Packets (Gluten-Free, Vegan)
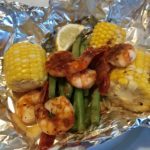
This is a really impressive-appearing and popular healthified barbecue meal that is actually really easy as well. The homemade Cajun seasoning is low sodium, and you will not miss the salt at all, it’s that flavorful. Corn on the cob is a whole grain you can feel good about, especially when paired with summer green beans, and steamed with fresh lemon. And of course, we’re not using sausage in this version. This steamed dish will be a stealth-health hit of your next backyard party!
Homemade Cajun Seasoning
2 tbsp paprika
2 tbsp garlic powder
1 tbsp onion powder
1 tbsp dried oregano
1 tsp cayenne powder
1 tsp black pepper
1 tsp red pepper flakes
1/2 tsp salt
Packets
4 large ears corn on the cob, cut into four rounds each ( (This is easy using a large, heavy chef’s knife. Or you can buy frozen ones already cut.))
4 cups green beans ((a little over a pound))
1 large lemon, cut into six wedges
24 very large shrimp, peeled, deveined ((About a pound and a half))
Homemade Cajun Seasoning
This will make extra, which I serve out in a little bowl with a small spoon so folks can add extra if they like the spice.
Mix all spices together in a small jar or other container and shake. This will keep for weeks.
Packets
I like to use peeled and deveined shrimp, because it’s less messy for guests.
A large roll of aluminum foil
Cut a piece of foil about a foot and a half long.
Place 3 corns, a handful of green beans, and four shrimp in the center of the foil, arranged in a sort of rectangular pile. Lightly squirt with a lemon wedge and then add the lemon wedge to the pile. Sprinkle with about a half teaspoon of Cajun seasoning, or more if desired. Fold edges over so liquid produced while cooking will not leak out, and top is covered.
Heat grill to high, and place packets directly onto grill.
Do not flip.
Cook for about fifteen minutes, until corn and shrimp are cooked.
Serve in packets, with plenty of napkins!
Red and Green Summer Salad
Grilled red peppers, red onions, and fresh tomatoes are tossed with leafy red lettuce, mint, and cucumber and sprinkled with toasted pistachios. This is a light, bright, fresh salad perfect for accompanying grilled food. Grilling red onion to a nice soft char tones down its strong flavor and brings out its natural sweetness.
Salad
1 red onion, cut into quarters
2 red peppers, sliced into quarters or sixths and seeded ((keeping pieces long so they won’t fall into the grill) )
Olive oil (for brushing or spraying)
1 cup tomatoes, sliced ((I like cherry tomatoes, but can use any ripe, red tomatoes))
6 cups red lettuce, washed well and torn into bite-size pieces ((or other leafy green lettuce) (about 5 ounces, or a large head of lettuce))
1 bunch fresh mint, washed well, stems removed, and chopped ((about a cup))
1 cucumber, peeled, chopped into small pieces
1/4 cup roasted unsalted pistachios
Dressing
1/4 cup extra-virgin olive oil
1/4 cup red wine vinegar
1 finely chopped garlic clove
1/2 tsp salt
1/2 tsp black pepper
1/2 tsp dried oregano
1/2 tsp red pepper flakes ((optional))
Salad
Heat grill to medium high.
Lightly brush or spray the peppers and red onions with olive oil.
Using tongs, set the onion quarters and red peppers slices cross-wise on the grill bars (so they don’t fall in. Another option is to use a grill pan, in which case you can chop the onion and red pepper as small as you like.)
Grill, flipping once, until well-browned or charred, per your preference.
Remove from heat and allow to cool.
Place all ingredients into a large attractive bowl and toss with dressing, below.
Sprinkle with pistachios.
Dressing
Mix all ingredients in a small bowl and toss with salad when ready.
https://ift.tt/2opZiP7
0 notes
Text
Panko-Crusted Eggplant Fries with Curried Cashew Aioli
This vegan Panko-Crusted Eggplant Fries recipe uses ground flax instead of egg. Serve these fried with Curried Cashew Aioli for dipping!
Miraculous Flax Eggs
Can we talk about the miracle of flax eggs? You might not be able to whip them into an omelet or use them in a quiche, but I’ve been experimenting with them a lot in vegan baking lately and they work really well. Better than I expected, even. I rarely have eggs on hand because we just don’t eat them very often, so now when I bake something, I usually make it vegan by substituting ground flax and water for the eggs, almond or coconut milk for the dairy milk, and coconut oil for the butter. Unlike traditional baking ingredients, which I’d have to add to my shopping list, these are all things that I always have on hand nearly all the time—which I guess might be a bad thing because the fact that I have these things on hand all the time is encouraging me to bake more.
So how does flax work as an egg substitute? It’s magic! Okay, I’m lying, it’s not magic. I don’t really know exactly how it works. But when you whisk ground flax seeds with water and let the mixture sit for a few minutes, it gels up and feels a little bit eggy. It’s not quite as strong when it comes to binding ingredients together, and it can’t be substituted for eggs in every recipe (like the aforementioned omelets), but it’s a nice, natural way to replace eggs in a lot of different dishes.
About the Recipe
Having tackled using flax eggs in baking, I wanted to see how they would work to bind panko to baked eggplant fries. I was worried it would be a massive failure, but overjoyed when it actually worked. It worked! And it worked well! These vegan Panko-Crusted Eggplant Fries are crispy and delicious on the outside and tender on the inside. I used baby eggplant because I find smaller eggplants to be less bitter, so I can cut out the step of salting them. Older eggplant can be bitter too, so buy local if you can because it’s spent less time traveling to your grocery store.
It would be a travesty to serve delicious, crispy eggplant fries without a sauce, so I whipped up a Curried Cashew Aioli for dipping. It’s kind of the same idea of my Cashew Mayo recipe, except with a heaping teaspoon of sweet curry powder added to it. If you don’t want to bother with the dipping sauce, jarred marinara sauce works too.
Print
Panko-Crusted Eggplant Fries with Curried Cashew Aioli
Crispy vegan baked eggplant fries served with Curried Cashew Aioli.
Prep Time: 30 minutes
Cook Time: 25 minutes
Total Time: 55 minutes
Yield: 4 servings
Ingredients
Panko-Crusted Eggplant Fries
Curried Cashew Aioli
1/2 cup raw cashews, soaked in water for 4 hours and drained
1/4 cup water
1 tbsp fresh lemon juice
1 clove garlic
1 tsp sweet curry powder
salt and pepper, to taste
Instructions
Panko-Crusted Eggplant Fries
Preheat oven to 400°F. Spray a large baking sheet with oil or cooking spray.
Whisk together the warm water and flax seeds in a shallow bowl; set aside.
Cut the ends off of each eggplant, then cut them into thirds lengthwise. Cut each third into fries. (Mine are about 1/2-inch thick.)
Stir a healthy pinch of salt and cayenne into the flax mixture. Place the panko crumbs on a plate, then roll each eggplant fry in the flax mixture, followed by the panko crumbs. Transfer the finished fries to the prepared baking sheet and spray the tops with additional oil.
Bake for about 25 minutes, or until the fries are tender and golden brown on the outside.
Serve with Curried Cashew Aioli.
Curried Cashew Aioli
Place the cashews, water, lemon juice, garlic, and curry powder in a food processor or blender. Process until smooth, then season to taste with salt and pepper.
Notes
I don’t like wasting breadcrumbs, so one cup of panko is the exact amount I used for this recipe—you might need a little bit more, depending on the size of your eggplant. If the flax mixture dries up, add another tablespoon of warm water, give it a good whisking, and let it sit for a minute or two until it gels up again.
This post was originally published on 22 August 2013.
About Kiersten
Kiersten is the founder and editor of Oh My Veggies.
from http://easyveganrecipes.info/panko-crusted-eggplant-fries-with-curried-cashew-aioli/?utm_source=rss&utm_medium=rss&utm_campaign=panko-crusted-eggplant-fries-with-curried-cashew-aioli from http://easyveganbreakfasts.blogspot.com/2020/09/panko-crusted-eggplant-fries-with.html
0 notes
Text
Panko-Crusted Eggplant Fries with Curried Cashew Aioli
This vegan Panko-Crusted Eggplant Fries recipe uses ground flax instead of egg. Serve these fried with Curried Cashew Aioli for dipping!
Miraculous Flax Eggs
Can we talk about the miracle of flax eggs? You might not be able to whip them into an omelet or use them in a quiche, but I’ve been experimenting with them a lot in vegan baking lately and they work really well. Better than I expected, even. I rarely have eggs on hand because we just don’t eat them very often, so now when I bake something, I usually make it vegan by substituting ground flax and water for the eggs, almond or coconut milk for the dairy milk, and coconut oil for the butter. Unlike traditional baking ingredients, which I’d have to add to my shopping list, these are all things that I always have on hand nearly all the time—which I guess might be a bad thing because the fact that I have these things on hand all the time is encouraging me to bake more.
So how does flax work as an egg substitute? It’s magic! Okay, I’m lying, it’s not magic. I don’t really know exactly how it works. But when you whisk ground flax seeds with water and let the mixture sit for a few minutes, it gels up and feels a little bit eggy. It’s not quite as strong when it comes to binding ingredients together, and it can’t be substituted for eggs in every recipe (like the aforementioned omelets), but it’s a nice, natural way to replace eggs in a lot of different dishes.
About the Recipe
Having tackled using flax eggs in baking, I wanted to see how they would work to bind panko to baked eggplant fries. I was worried it would be a massive failure, but overjoyed when it actually worked. It worked! And it worked well! These vegan Panko-Crusted Eggplant Fries are crispy and delicious on the outside and tender on the inside. I used baby eggplant because I find smaller eggplants to be less bitter, so I can cut out the step of salting them. Older eggplant can be bitter too, so buy local if you can because it’s spent less time traveling to your grocery store.
It would be a travesty to serve delicious, crispy eggplant fries without a sauce, so I whipped up a Curried Cashew Aioli for dipping. It’s kind of the same idea of my Cashew Mayo recipe, except with a heaping teaspoon of sweet curry powder added to it. If you don’t want to bother with the dipping sauce, jarred marinara sauce works too.
Print
Panko-Crusted Eggplant Fries with Curried Cashew Aioli
Crispy vegan baked eggplant fries served with Curried Cashew Aioli.
Prep Time: 30 minutes
Cook Time: 25 minutes
Total Time: 55 minutes
Yield: 4 servings
Ingredients
Panko-Crusted Eggplant Fries
Curried Cashew Aioli
1/2 cup raw cashews, soaked in water for 4 hours and drained
1/4 cup water
1 tbsp fresh lemon juice
1 clove garlic
1 tsp sweet curry powder
salt and pepper, to taste
Instructions
Panko-Crusted Eggplant Fries
Preheat oven to 400°F. Spray a large baking sheet with oil or cooking spray.
Whisk together the warm water and flax seeds in a shallow bowl; set aside.
Cut the ends off of each eggplant, then cut them into thirds lengthwise. Cut each third into fries. (Mine are about 1/2-inch thick.)
Stir a healthy pinch of salt and cayenne into the flax mixture. Place the panko crumbs on a plate, then roll each eggplant fry in the flax mixture, followed by the panko crumbs. Transfer the finished fries to the prepared baking sheet and spray the tops with additional oil.
Bake for about 25 minutes, or until the fries are tender and golden brown on the outside.
Serve with Curried Cashew Aioli.
Curried Cashew Aioli
Place the cashews, water, lemon juice, garlic, and curry powder in a food processor or blender. Process until smooth, then season to taste with salt and pepper.
Notes
I don’t like wasting breadcrumbs, so one cup of panko is the exact amount I used for this recipe—you might need a little bit more, depending on the size of your eggplant. If the flax mixture dries up, add another tablespoon of warm water, give it a good whisking, and let it sit for a minute or two until it gels up again.
This post was originally published on 22 August 2013.
About Kiersten
Kiersten is the founder and editor of Oh My Veggies.
from http://easyveganrecipes.info/panko-crusted-eggplant-fries-with-curried-cashew-aioli/?utm_source=rss&utm_medium=rss&utm_campaign=panko-crusted-eggplant-fries-with-curried-cashew-aioli
0 notes
Text
Coconut Water Powder
Coconut Water Powder is made from the electrolyte rich juices found inside coconuts. The liquid inside coconuts is spray dried and made into powder. Coconut Water Powder is used in beverages, sports drinks, and supplements.
Coconut water powder is made by evaporating and freeze-drying the liquid so that it becomes a powder, which can then be re hydrated simply by adding plain water or another liquid back to the mix.
Coconut Water Powder is made from the nutritious juice found inside fresh organic coconuts. The electrolyte-rich liquid inside the coconut has been removed and freeze-dried to preserve the flavor and nutrients in the powder.
Coconut water has long been a staple drink in Southeast Asian nations and is one of nature's most refreshing drinks consumed worldwide for its nutritious and health benefiting properties.
Coconut's delicious water is obtained by opening a tender, green, healthy, and undamaged coconut. The liquid is clear, sweet, and sterile and composed of unique compounds such as simple sugars, vitamins, minerals, electrolytes, enzymes, amino acids, and cytokine. Buy Coconut Water online from pushmycart.com
Coconut Water Powder provides an abundance of 5 electrolytes that are known to support rapid hydration: sodium, magnesium, calcium, potassium, and phosphorus.
Benefits of Coconut Water
Coconuts have been used as a source of hydration in tropical countries. For centuries people have been using the ultra-hydrating beverage.
Coconut water is a great source of calcium, iron, and Vitamin D, which are all essential in your diet.
As a fantastic source of antioxidants, coconut water helps your body neutralize free radicals, protecting you from damaged cells that can turn into anything from signs of aging to life-threatening cancer and other chronic diseases.
Coconuts, in general, are also considered very heart-healthy, since it lowers blood pressure and helps balance cholesterol levels.
Drinking coconut water regularly can also help keep you regular, in the digestive sense. Even though it’s a liquid, coconut water is a great source of fiber, which is one of the nutrients absolutely crucial to our overall health and well-being.
Staying well hydrated has many other benefits, such as clear skin, improved mental focus, higher energy levels, and better muscle maintenance.
It is loaded with Nutrients called Antioxidant that are good for you.
Research has shown that coconut water can lower blood sugar levels and improve other health markers in diabetic animals.
Drinking enough fluids is important for kidney stone prevention.
Drinking coconut water may be helpful to reduce heart disease risk.
Coconut water may be great for controlling blood pressure.
Coconut water may be the perfect beverage for restoring hydration and replenishing electrolytes lost during exercise. Electrolytes are minerals that play several important roles in your body.
Coconut water is slightly sweet with a subtle, nutty flavor. It's also fairly low in calories and carbs.
It is natural source of electrolytes and may support healthy circulation and PH levels.
It may support a healthy detoxification response and support proper hydration of the body.
It is low in carbohydrates, sugars, & fat, Revitalizing your cells.
It is helpful in reducing kidney & urethral stones.
It helps in digestion & metabolism because of many bioactive enzymes such as acid phosphatase, catalase, dehydrogenase, diastase, peroxidase, RNA-polymerases.
0 notes
Text
Gluten Free Cinnamon Rolls
Sweet, tender gluten free cinnamon rolls made with an all purpose gluten free flour and instant yeast. Make weekend mornings special!
A family tradition
Rolls a lot like these warm, fluffy gluten free cinnamon rolls were a family staple of mine growing up. They were homemade, but we didn’t make them. 🤔
I had an aunt from Sweden who made the best cinnamon rolls. They used to call them “Bia’s buns,” and everyone thought that was hysterical. I had no clue why, but I laughed like I was in on it (I got the “Bia part, because that was her name). I just wanted the rolls.
Bia’s buns were packed with cinnamon and cardamom, and she used to make them in these round disposable tins. She’d parbake them about halfway, and we’d stick them in the deep freezer when they were nice and cool.
Then, we’d defrost them at room temperature and then finish baking until they were piping hot. Bia’s buns most definitely had plenty of gluten in them. This recipe is adapted from a very early recipe on this site for gluten free pretzel rolls, and they remind me of those buns from long ago…
It’s easy (promise)
Are you reluctant to bake with yeast? Maybe you’re afraid you won’t get it to rise or that it just won’t taste good to you. I get it. If you just can’t take the plunge, I have a recipe for yeast free gluten free cinnamon rolls that you’ll love. Start there.
If you’re ready to make the leap to yeasted dough, though, there are some secrets to success that I’ll share with you. I think that will help. I also have a full page of Yeasted Bread FAQs, but most of those questions are about the type of recipes in Gluten Free on a Shoestring Bakes Bread.
They use my recipe for “gluten free bread flour” which combines an all purpose gluten free flour blend (usually Better Batter or my mock Better Batter) with whey protein isolate and Expandex modified tapioca starch. This recipe for gluten free cinnamon rolls is in the old school style, the one that relies upon a batter-style dough.
This cinnamon roll dough is an enriched dough, with an egg and butter. An enriched dough is much easier to handle than a so-called lean dough, which is mostly just flour, water, and yeast.
Secrets to making a yeasted dough
Patience
If you only take away one piece of advice about baking with yeast, it’s should be the importance of patience. Of course, you don’t want your rolls to overproof (or over-rise), as they’ll break apart even before they bake in the oven. But yeast takes time to grow.
Baking with yeast is also very environment-dependent. If the environment is cooler, the yeast will continue to grow, albeit much slower.
Temperature and time
Extremely high temperatures and extremely low temperatures can kill the yeast. But if the air temperature in your kitchen is either that high or that low, you probably aren’t spending time baking cinnamon rolls!
Once the dough is about 50% larger than when it started rising, it’s considered fully risen. Unlike my recipes that call for gluten free bread flour, this batter-style gluten free yeast dough won’t usually double in size during the rising phase. Before it reaches a true doubling, it will start to get pock-marked and overly soft.
The bulk rise, which is the only necessary rise for this dough, should take about 1 hour. I usually turn on my oven to 300°F and set the covered and shaped dough on top. But if it takes longer than an hour, let it go longer.
Overproofing happens when the dough has proofed too much, not when it’s sat for “too long.” There is no “too long” for proofing unless the dough has over-proofed. But if you don’t let the dough rise for long enough before baking, it will be dense after baking.
One more note about temperature: this dough is easiest to work with when it’s cold. If you can, place the raw dough in a tightly sealed container (plastic is fine) and refrigerate it for at least 30 minutes before working with it.
When the dough is cold, you’ll be much less likely to incorporate a lot of extra flour into it during shaping. And that will help with our next tip (moisture)…
Moisture
Another key to successful baking with yeast is moisture content. If the dough isn’t moist enough, the yeast simply won’t grow. Yeast thrives in a wet environment.
That’s why we always cover the shaped dough with oiled plastic wrap as it rises. If it dries out during the rise, it will simply stop rising.
Since these batter-style doughs are pretty moist by nature, even if you live in a dry climate you should be fine with the exact amount of liquid specified in the recipe below.
If you’re at all worried that your climate is very dry, try adding an extra tablespoonful of water to the dough initially. And be sure not to work very much additional flour into the dough during shaping.
I’m concerned that my kitchen is a bit dry, especially in the middle of the winter, I’ll spray the shaped rolls with a bit of water before covering them and allowing them to rise. It certainly doesn’t hurt their rise.
Measuring by weight
Another one of the reasons that baking with yeast can seem so intimidating is the precision that is necessary for (really all) successful baking. But since moisture is so important in yeast bread baking, precision in measurement becomes even more important than usual.
Water is the one liquid for which the volume measurement is equivalent to the weighted measurement. So 1 fluid ounce of water (a volume measurement) is equal to 1 ounce (a weight measurement) of water. I measure water on a digital kitchen scale, by weight.
Volume measurements are inherently unreliable. They aren’t standardized, so 1 “cup” from one manufacturer can be significantly larger or smaller than another. Plus, user error is inevitable. For all of us! It’s not a judgment, just a statement of fact.
So measure by weight if at all possible. Trust the recipe, and trust yourself. I promise you can do this, and the yeasted flavor and tenderness of these amazing, tender and fluffy gluten free cinnamon rolls makes it all worthwhile.
Ingredients and substitutions
Flour blend: You really must use one of my recommended gluten free flour blends for this recipe. All of my gluten free recipes are designed to be made with one of my recommended blends, but yeast bread in particular is even more sensitive to flour substitutions.
My preference in this recipe is for Better Batter (or my mock Better Batter) gluten free flour blend. I have successfully made this recipe with both Cup4Cup and my Better Than Cup4Cup blends, though, and the rolls just don’t brown quite as much but the recipe still works.
Dairy-free: The buttermilk blend can be replaced with powdered coconut milk. The butter in both the rolls and the filling can be replaced with a vegan butter that softens nicely at room temperature, like Melt brand or even Earth Balance buttery spread.
Earth Balance is pretty high in moisture, though, so the filling is more likely to leak out of the rolls during baking.
Cider vinegar: The cider vinegar and the baking soda combine during baking to give the rolls a bit more lift along with the yeast. Think of them like insurance. In place of apple cider vinegar, you can use freshly squeezed lemon juice.
Source: https://glutenfreeonashoestring.com/gluten-free-cinnamon-rolls/
0 notes
Link
Labor Day marks the unofficial end of summer, when many of us enjoy a long weekend with friends and family and toast the season with a backyard barbecue. The traditional meat-heavy barbecue menu can be hazardous to your health, but it doesn’t have to be. Some of the most popular barbecue foods are well-known to increase the risk of type 2 diabetes (and a number of other diseases, too!), like steak, pork ribs, processed red meats (hot dogs), refined grains (traditional pasta salads, rolls, potato chips), and processed, added sugars (sodas, desserts). But we can help you make over your Labor Day celebration menu with healthy options for a feel better BBQ!
“Pulled” Mushrooms in Barbecue Sauce over Whole Roasted Sweet Potatoes with Pickled Onions and Peppers (Gluten-Free, Vegan)
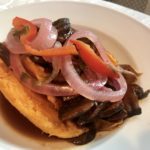
Maybe you usually go for traditional fare like pulled barbecue pork on a roll, but now you want to do better for your body. Boston-area chef de cuisine Cassidy Salus (Steel and Rye, Prairie Fire) makes a meatless version of this dish using Maitake mushrooms, also known as Hen of the Woods: “They are a much more meaty mushroom because of their lower water content, and have much more flavor… Mushrooms sautéed and then braised in barbecue sauce are delicious.” And it’s true, nothing has more healthy umami than mushrooms! Mushrooms sautéed to tender and simmered in a simple, wholesome homemade barbecue sauce, and served over steaming-hot grilled sweet potatoes and topped with tangy, low-sugar low-salt pickled onions and peppers? Even better! Sweetness comes from nutrient-rich blackstrap molasses, which contains many nutrients, including potassium and iron. As a matter of fact, one serving of this meal gets you all the vitamin D you need for the whole week (over 1,000 times the recommended daily value). Skip your supplement! If you can’t find Maitakes then any mushrooms can be used in this recipe. The sauce and pickled onions can be made ahead of time.
Barbecue Sauce
1/2 cup apple cider vinegar
1/2 cup dark preferred ((though any will do))
1 can tomato paste
1/2 cup blackstrap molasses
2 tbsp Dijon mustard
2 tbsp coconut aminos ((you can also use low-sodium soy sauce))
1 tsp garlic powder
1/2 tsp onion powder
1/2 tsp black pepper
Pulled Mushrooms
6 cups mushrooms, sliced very thin ((about 2 pounds) )
1 tsp olive oil
Whole Roasted Sweet Potatoes
6 sweet potatoes, about equal size, washed
Pickled Onions and Peppers
1 cup apple cider vinegar
1 tbsp honey ((or agave syrup, for vegan))
1/2 tsp salt
1 tsp black pepper
1 small red onion, sliced very thin
1/2 cup thinly sliced pepper of your choice
2 tbsp chopped fresh herbs, such as dill
Barbecue Sauce
Mix all ingredients together in a small saucepan, and bring to a boil. Reduce heat and simmer, stirring occasionally, for thirty minutes, until sauce is thickened. This will keep, covered in the refrigerator, for up to a week.
Pulled Mushrooms
You can use any mushrooms for this vegan recipe– Baby Bellas, Portobellas, or even button mushrooms will work fine. It may seem a large amount of mushrooms, but these cook way down.
Heat a large deep saucepan or saute pan and add oil.
When oil is very hot but not smoking, add mushrooms and turn heat to medium-low.
Sautee mushrooms, stirring frequently, until quite soft and browned, about ten minutes.
Add enough sauce to almost cover mushrooms, and reduce heat to simmer.
Simmer for about twenty minutes, until very soft and sauce is thickened.
Serve hot, over whole roasted sweet potatoes, with pickled onions and peppers on top.
Whole Roasted Sweet Potatoes
Aluminum foil
Wrap each potato in foil and place on a medium-hot grill or an oven at 400 degrees, and allow to cook for about thirty to forty minutes, until very soft.
Pickled Onions and Peppers
You can make this spicy, or not. For not spicy, use half of a bell pepper. For spicy, use a jalapeno pepper. For super-spicy, use a habanero pepper. For fresh spices, I usually use dill, but you can use cilantro, oregano, mint, or a combination.
Heat vinegar, honey, salt, and pepper in a small saucepan until simmering. Add sliced onion, peppers and herbs, and simmer for five minutes, until soft. Turn off heat. Let sit covered for at least an hour. These can be served right away, or placed in a covered container and stored in the refrigerator for up to a week.
Cajun Style Shrimp Broil Foil Packets (Gluten-Free, Vegan)
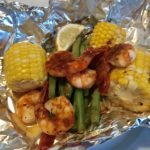
This is a really impressive-appearing and popular healthified barbecue meal that is actually really easy as well. The homemade Cajun seasoning is low sodium, and you will not miss the salt at all, it’s that flavorful. Corn on the cob is a whole grain you can feel good about, especially when paired with summer green beans, and steamed with fresh lemon. And of course, we’re not using sausage in this version. This steamed dish will be a stealth-health hit of your next backyard party!
Homemade Cajun Seasoning
2 tbsp paprika
2 tbsp garlic powder
1 tbsp onion powder
1 tbsp dried oregano
1 tsp cayenne powder
1 tsp black pepper
1 tsp red pepper flakes
1/2 tsp salt
Packets
4 large ears corn on the cob, cut into four rounds each ( (This is easy using a large, heavy chef’s knife. Or you can buy frozen ones already cut.))
4 cups green beans ((a little over a pound))
1 large lemon, cut into six wedges
24 very large shrimp, peeled, deveined ((About a pound and a half))
Homemade Cajun Seasoning
This will make extra, which I serve out in a little bowl with a small spoon so folks can add extra if they like the spice.
Mix all spices together in a small jar or other container and shake. This will keep for weeks.
Packets
I like to use peeled and deveined shrimp, because it’s less messy for guests.
A large roll of aluminum foil
Cut a piece of foil about a foot and a half long.
Place 3 corns, a handful of green beans, and four shrimp in the center of the foil, arranged in a sort of rectangular pile. Lightly squirt with a lemon wedge and then add the lemon wedge to the pile. Sprinkle with about a half teaspoon of Cajun seasoning, or more if desired. Fold edges over so liquid produced while cooking will not leak out, and top is covered.
Heat grill to high, and place packets directly onto grill.
Do not flip.
Cook for about fifteen minutes, until corn and shrimp are cooked.
Serve in packets, with plenty of napkins!
Red and Green Summer Salad
Grilled red peppers, red onions, and fresh tomatoes are tossed with leafy red lettuce, mint, and cucumber and sprinkled with toasted pistachios. This is a light, bright, fresh salad perfect for accompanying grilled food. Grilling red onion to a nice soft char tones down its strong flavor and brings out its natural sweetness.
Salad
1 red onion, cut into quarters
2 red peppers, sliced into quarters or sixths and seeded ((keeping pieces long so they won’t fall into the grill) )
Olive oil (for brushing or spraying)
1 cup tomatoes, sliced ((I like cherry tomatoes, but can use any ripe, red tomatoes))
6 cups red lettuce, washed well and torn into bite-size pieces ((or other leafy green lettuce) (about 5 ounces, or a large head of lettuce))
1 bunch fresh mint, washed well, stems removed, and chopped ((about a cup))
1 cucumber, peeled, chopped into small pieces
1/4 cup roasted unsalted pistachios
Dressing
1/4 cup extra-virgin olive oil
1/4 cup red wine vinegar
1 finely chopped garlic clove
1/2 tsp salt
1/2 tsp black pepper
1/2 tsp dried oregano
1/2 tsp red pepper flakes ((optional))
Salad
Heat grill to medium high.
Lightly brush or spray the peppers and red onions with olive oil.
Using tongs, set the onion quarters and red peppers slices cross-wise on the grill bars (so they don’t fall in. Another option is to use a grill pan, in which case you can chop the onion and red pepper as small as you like.)
Grill, flipping once, until well-browned or charred, per your preference.
Remove from heat and allow to cool.
Place all ingredients into a large attractive bowl and toss with dressing, below.
Sprinkle with pistachios.
Dressing
Mix all ingredients in a small bowl and toss with salad when ready.
The post Barbecue Better for Labor Day appeared first on Harvard Health Blog.
from Harvard Health Blog https://ift.tt/2opZiP7 Original Content By : https://ift.tt/1UayBFY
0 notes
Text
Copra Oil Plant
Coconut trees are mainly produced in islands in Asia and the Pacific, in Africa and in the south-central part of the Americas, and have high yields. Coconut meat is usually dried into dried coconut. Coconut oil is extracted from dried coconut. Fresh coconut meat contains 30%-40% oil and 50% water. Dryed coconut contains 60%-70% oil and 4%-7% water. Coconut oil has special fragrance. In 2000, the world coconut oil output was 3.31 million tons. The Philippines was the largest supplier of coconut oil in the world, followed by Indonesia, Malaysia, Papua New and Guinea.
Coconut meat tastes good, as sweet and delicious as most other fruits, and is rich in nutrition. Studies have shown that crude fibers and proteins in coconut meat are very effective in reducing cholesterol absorption in vivo, which can help digestion and absorption, reduce blood lipids and greatly benefit human metabolism. At the same time, coconut meat is rich in magnesium and potassium, and magnesium ions can reduce the content of LDL. Potassium examples can maintain the body’s water balance, osmotic pressure balance and acid-base balance. Balance, prevent metabolic disorders. Coconut meat can be eaten raw, but also processed into coconut sugar, coconut powder, coconut cake and other coconut snacks, a variety of types, and preserve the unique fragrance and taste of coconut. In China, coconut meat is mainly used for processing various coconut snacks.

Copra Oil Plant:
The melting point of coconut oil is only 24-27 C, although its saturated fatty acid content is more than 90%. It is semi-solid at room temperature. The melting points of lauric acid, myristic acid and palmitic acid are 44 C, 54 C and 63 C respectively. The difference between the highest melting point and the lowest melting point is only 19 C, and the melting point of triglycerides is only 19 C. The main components of coconut oil are lauric acid, myristic acid and palmitic acid. The plastic range of coconut oil is narrow. The hard part of coconut oil extracted is often used as the raw material of cocoa butter and margarine. The flavor of coconut oil is mainly attributed to the trace presence of delta-lactone and gamma-lactone, which makes coconut oil have a creamy flavor.
The efficient operation of the screw oil press requires steaming and tempering to control the temperature of coconut billet between 91 and 93 degrees C. Under the condition of moisture below 91 degrees C and above 4%, the oil yield of coconut billet is low, while over 93 degrees C and moisture content below 3%, the oil yield of dark oil and tar cake from coconut billet is low. The fines screened out and precipitated should not exceed 10% of fresh raw materials in order to avoid the formation of fines in the steaming and tempering stage and then press.

Coconut meat processing methods are mainly divided into dry processing technology and wet processing technology. Dry processing technology is a traditional processing method, which first dehydrates coconut meat into coconut dried, and then extracts coconut oil from coconut dried. The wet processing technology is based on fresh coconut meat as raw material, directly processed into coconut oil or other useful ingredients. Compared with the traditional processing methods, wet processing has the advantages of high investment and complex technology, but it can extract all kinds of effective ingredients of coconut directly, and the product or yield is high and the quality is high.
Oil Plant:
Post-pressing process: oil from screw press is transported to screen and clarifying tank, and particles are separated. The latter will be mixed with raw materials into the system for reprocessing. The upper clean oil per ton should be mixed with 10 kg of clay. After cleaning through safety filter, coconut oil (cake) filtered is stored or further processed, and the filtered coconut oil is put into granulation, bagged and sent to animal feed. Material factory.
Wet processing: In the process of wet processing, raw materials are fresh coconut meat. In addition to product oil, other edible by-products obtained from coconut oil include coconut powder, protein, carbohydrates and vitamins. In order to make this process more widely commercialized, it is important to emphasize the following advantages: high quality oil can be obtained and nutritious (ingredient) by-products can be recovered, while the latter is lost in coconut drying.
The mature coconut is shelled, the separated coconut meat is peeled and the outer seed coat is removed. The seed coat was extracted as a by-product. Cut coconut meat is crushed by wedge, dental plate crusher and drum crusher. The coconut juice is extracted from the ground powder by a screw press. The coconut juice is filtered through the sieve conveyer and centrifuged to separate the oil layer. The air is heated to reduce a small amount of water in the oil to 0.1% to 0.2%. Generally speaking, 6.8t “natural” coconut oil can be extracted from fresh coconut meat of 25t, and the milk is removed by spray drying to recover protein and carbohydrates. The screw press is used to grind the residue into powder to recover oil and make coconut powder.
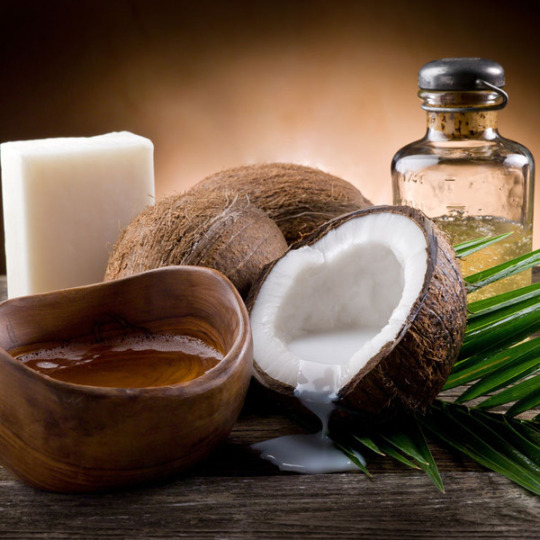
Refining: The refining of crude oils includes a series of steps to remove impurities in glycerin. Make the product edible and extend shelf life. Impurities include fatty acids, phospholipids, metal ions, pigments, oxides, solid particles and annoying volatile gases. Coconut oil can be refined by any of the following methods: chemical refinement (intermittent or continuous) and physical refinement.
Coconut water has the medicinal value of digestion, diuresis, anti-bacterial and anti-inflammatory. It can be used to treat hepatitis, gastroenteritis, malaria, skin rash and varicella in clinic. In medicine, coconut water helps digestion and is a detergent for the body. The dehydration caused by gastroenteritis can be transfused directly with tender coconut water instead of saline water. In some countries, the cholera epidemic is that many patients use coconut water for intravenous injection. During the war, Hainan soldiers also used coconut water for intravenous injection to maintain physical strength. When mineral poisoning occurs, toxins can be excreted by drinking coconut water.Coconut water can be used as fresh-keeping agent. It can prolong the vase life of cut flowers. It is safe, simple and economical. It is a natural fresh-keeping agent for flowers. Experiments show that coconut water contains cytokines or hormones, which can preserve vegetable green and slow down the drying rate [9]. In the fresh-keeping of flowers, the coconut water solution with 40%-60% concentration is better than that with chemical agents.
Copra Oil Plant
0 notes
Text
Barbecue Better for Labor Day
Barbecue Better for Labor Day
Labor Day marks the unofficial end of summer, when many of us enjoy a long weekend with friends and family and toast the season with a backyard barbecue. The traditional meat-heavy barbecue menu can be hazardous to your health, but it doesn’t have to be. Some of the most popular barbecue foods are well-known to increase the risk of type 2 diabetes (and a number of other diseases, too!), like steak, pork ribs, processed red meats (hot dogs), refined grains (traditional pasta salads, rolls, potato chips), and processed, added sugars (sodas, desserts). But we can help you make over your Labor Day celebration menu with healthy options for a feel better BBQ!
“Pulled” Mushrooms in Barbecue Sauce over Whole Roasted Sweet Potatoes with Pickled Onions and Peppers (Gluten-Free, Vegan)

Maybe you usually go for traditional fare like pulled barbecue pork on a roll, but now you want to do better for your body. Boston-area chef de cuisine Cassidy Salus (Steel and Rye, Prairie Fire) makes a meatless version of this dish using Maitake mushrooms, also known as Hen of the Woods: “They are a much more meaty mushroom because of their lower water content, and have much more flavor… Mushrooms sautéed and then braised in barbecue sauce are delicious.” And it’s true, nothing has more healthy umami than mushrooms! Mushrooms sautéed to tender and simmered in a simple, wholesome homemade barbecue sauce, and served over steaming-hot grilled sweet potatoes and topped with tangy, low-sugar low-salt pickled onions and peppers? Even better! Sweetness comes from nutrient-rich blackstrap molasses, which contains many nutrients, including potassium and iron. As a matter of fact, one serving of this meal gets you all the vitamin D you need for the whole week (over 1,000 times the recommended daily value). Skip your supplement! If you can’t find Maitakes then any mushrooms can be used in this recipe. The sauce and pickled onions can be made ahead of time.
Barbecue Sauce
1/2 cup apple cider vinegar
1/2 cup dark preferred ((though any will do))
1 can tomato paste
1/2 cup blackstrap molasses
2 tbsp Dijon mustard
2 tbsp coconut aminos ((you can also use low-sodium soy sauce))
1 tsp garlic powder
1/2 tsp onion powder
1/2 tsp black pepper
Pulled Mushrooms
6 cups mushrooms, sliced very thin ((about 2 pounds) )
1 tsp olive oil
Whole Roasted Sweet Potatoes
6 sweet potatoes, about equal size, washed
Pickled Onions and Peppers
1 cup apple cider vinegar
1 tbsp honey ((or agave syrup, for vegan))
1/2 tsp salt
1 tsp black pepper
1 small red onion, sliced very thin
1/2 cup thinly sliced pepper of your choice
2 tbsp chopped fresh herbs, such as dill
Barbecue Sauce
Mix all ingredients together in a small saucepan, and bring to a boil. Reduce heat and simmer, stirring occasionally, for thirty minutes, until sauce is thickened. This will keep, covered in the refrigerator, for up to a week.
Pulled Mushrooms
You can use any mushrooms for this vegan recipe– Baby Bellas, Portobellas, or even button mushrooms will work fine. It may seem a large amount of mushrooms, but these cook way down.
Heat a large deep saucepan or saute pan and add oil.
When oil is very hot but not smoking, add mushrooms and turn heat to medium-low.
Sautee mushrooms, stirring frequently, until quite soft and browned, about ten minutes.
Add enough sauce to almost cover mushrooms, and reduce heat to simmer.
Simmer for about twenty minutes, until very soft and sauce is thickened.
Serve hot, over whole roasted sweet potatoes, with pickled onions and peppers on top.
Whole Roasted Sweet Potatoes
Aluminum foil
Wrap each potato in foil and place on a medium-hot grill or an oven at 400 degrees, and allow to cook for about thirty to forty minutes, until very soft.
Pickled Onions and Peppers
You can make this spicy, or not. For not spicy, use half of a bell pepper. For spicy, use a jalapeno pepper. For super-spicy, use a habanero pepper. For fresh spices, I usually use dill, but you can use cilantro, oregano, mint, or a combination.
Heat vinegar, honey, salt, and pepper in a small saucepan until simmering. Add sliced onion, peppers and herbs, and simmer for five minutes, until soft. Turn off heat. Let sit covered for at least an hour. These can be served right away, or placed in a covered container and stored in the refrigerator for up to a week.
Cajun Style Shrimp Broil Foil Packets (Gluten-Free, Vegan)

This is a really impressive-appearing and popular healthified barbecue meal that is actually really easy as well. The homemade Cajun seasoning is low sodium, and you will not miss the salt at all, it’s that flavorful. Corn on the cob is a whole grain you can feel good about, especially when paired with summer green beans, and steamed with fresh lemon. And of course, we’re not using sausage in this version. This steamed dish will be a stealth-health hit of your next backyard party!
Homemade Cajun Seasoning
2 tbsp paprika
2 tbsp garlic powder
1 tbsp onion powder
1 tbsp dried oregano
1 tsp cayenne powder
1 tsp black pepper
1 tsp red pepper flakes
1/2 tsp salt
Packets
4 large ears corn on the cob, cut into four rounds each ( (This is easy using a large, heavy chef’s knife. Or you can buy frozen ones already cut.))
4 cups green beans ((a little over a pound))
1 large lemon, cut into six wedges
24 very large shrimp, peeled, deveined ((About a pound and a half))
Homemade Cajun Seasoning
This will make extra, which I serve out in a little bowl with a small spoon so folks can add extra if they like the spice.
Mix all spices together in a small jar or other container and shake. This will keep for weeks.
Packets
I like to use peeled and deveined shrimp, because it’s less messy for guests.
A large roll of aluminum foil
Cut a piece of foil about a foot and a half long.
Place 3 corns, a handful of green beans, and four shrimp in the center of the foil, arranged in a sort of rectangular pile. Lightly squirt with a lemon wedge and then add the lemon wedge to the pile. Sprinkle with about a half teaspoon of Cajun seasoning, or more if desired. Fold edges over so liquid produced while cooking will not leak out, and top is covered.
Heat grill to high, and place packets directly onto grill.
Do not flip.
Cook for about fifteen minutes, until corn and shrimp are cooked.
Serve in packets, with plenty of napkins!
Red and Green Summer Salad
Grilled red peppers, red onions, and fresh tomatoes are tossed with leafy red lettuce, mint, and cucumber and sprinkled with toasted pistachios. This is a light, bright, fresh salad perfect for accompanying grilled food. Grilling red onion to a nice soft char tones down its strong flavor and brings out its natural sweetness.
Salad
1 red onion, cut into quarters
2 red peppers, sliced into quarters or sixths and seeded ((keeping pieces long so they won’t fall into the grill) )
Olive oil (for brushing or spraying)
1 cup tomatoes, sliced ((I like cherry tomatoes, but can use any ripe, red tomatoes))
6 cups red lettuce, washed well and torn into bite-size pieces ((or other leafy green lettuce) (about 5 ounces, or a large head of lettuce))
1 bunch fresh mint, washed well, stems removed, and chopped ((about a cup))
1 cucumber, peeled, chopped into small pieces
1/4 cup roasted unsalted pistachios
Dressing
1/4 cup extra-virgin olive oil
1/4 cup red wine vinegar
1 finely chopped garlic clove
1/2 tsp salt
1/2 tsp black pepper
1/2 tsp dried oregano
1/2 tsp red pepper flakes ((optional))
Salad
Heat grill to medium high.
Lightly brush or spray the peppers and red onions with olive oil.
Using tongs, set the onion quarters and red peppers slices cross-wise on the grill bars (so they don’t fall in. Another option is to use a grill pan, in which case you can chop the onion and red pepper as small as you like.)
Grill, flipping once, until well-browned or charred, per your preference.
Remove from heat and allow to cool.
Place all ingredients into a large attractive bowl and toss with dressing, below.
Sprinkle with pistachios.
Dressing
Mix all ingredients in a small bowl and toss with salad when ready.
https://ift.tt/2opZiP7
0 notes