#SketchUp Modeling Services
Text
SketchUp Modeling Services | Chudasama Outsourcing
Chudasama Outsourcing provides comprehensive support for Architectural SketchUp Modelling Services, To the fullest extent possible. Additionally, we offer affordable custom design generation. Our skilled team creates precise floor plans and in-depth designs that give clients numerous options. We are leaders in the field. Through experience, we have attained greatness. Now that we can handle clients, we can work closely with them.

0 notes
Text
Top 5 Free Tools for Beginners in 3D Visualization

3D visualization has become an essential skill across various industries, from game development and animation to architectural design and engineering. As a beginner, navigating the myriad of available tools can be overwhelming. Fortunately, several free tools offer robust features to help you get started on your 3D visualization journey. In this blog, we will discuss the top 5 free tools for beginners in 3D visualization, focusing on ease of use, features, community support, and versatility.
1. Blender
Key Points:
Ease of Use: While Blender has a steep learning curve, its extensive tutorial resources make it accessible to beginners.
Features: Blender is a comprehensive tool for 3D modeling, animation, simulation, rendering, and more.
Community Support: One of Blender's strengths is its active community, which offers tutorials, forums, and plugins.
Versatility: Suitable for various applications including animation, game design, and visual effects.
Blender is arguably the most popular free 3D visualization tool available. It offers a wide range of features that rival those of expensive professional software. Whether you're interested in modeling, texturing, animation, or rendering, Blender has you covered. One significant advantage is the wealth of resources available for learning, including extensive documentation, video tutorials, and forums. For a more advanced perspective, you might consider how a 3D Visualization Company in Mumbai utilizes Blender for professional projects.
2. SketchUp Free
Key Points:
Ease of Use: Known for its intuitive interface, making it ideal for beginners.
Features: Offers basic 3D modeling tools with an emphasis on architectural design.
Community Support: Strong community with numerous tutorials and a large 3D Warehouse for models.
Versatility: Primarily geared towards architectural and interior design but can be adapted for other uses.
SketchUp Free is a user-friendly 3D modeling tool that operates directly in your web browser. It is especially popular among architects and interior designers but can be used for a variety of design projects. Its intuitive interface allows beginners to start creating models quickly. Additionally, its large online repository, known as the 3D Warehouse, provides thousands of pre-made models that can be imported into your projects. For more specialized needs, a 3D Visualization Company in Mumbai might offer additional tools and support.
3. Tinkercad
Key Points:
Ease of Use: Highly user-friendly and designed specifically for beginners.
Features: Simplified tools for basic 3D modeling and electronic circuit design.
Community Support: Active community with abundant tutorials and project ideas.
Versatility: Ideal for 3D printing and educational purposes.
Tinkercad is an online 3D modeling and CAD tool from Autodesk designed with simplicity in mind. It is a fantastic starting point for those new to 3D visualization, especially kids and educators. While it lacks the advanced features of more sophisticated tools, its drag-and-drop interface is perfect for getting a handle on the basics of 3D design. Tinkercad is also linked to popular 3D printing services, making it a great choice for designing objects to be printed. Many beginners start with Tinkercad before progressing to more advanced tools used by a 3D Visualization Company in Mumbai.
4. Fusion 360 for Personal Use
Key Points:
Ease of Use: User-friendly for beginners, though more complex than Tinkercad.
Features: Comprehensive CAD, CAM, and CAE tool with advanced features.
Community Support: Strong support community with official tutorials and user forums.
Versatility: Suitable for product design, engineering, and hobbyist projects.
Autodesk's Fusion 360 is a powerful tool that offers a free version for personal, non-commercial use. While it's more advanced than Tinkercad, it's still accessible to beginners thanks to its well-designed tutorials and learning resources. Fusion 360 combines CAD, CAM, and CAE capabilities, making it highly versatile for various types of design and engineering projects. Professionals often use Fusion 360 in conjunction with services offered by a 3D Visualization Company in Mumbai for more intricate projects.
5. FreeCAD
Key Points:
Ease of Use: Moderate learning curve, best suited for those with some technical background.
Features: Strong parametric 3D CAD modeling capabilities.
Community Support: Active open-source community with extensive documentation and forums.
Versatility: Ideal for mechanical engineering and product design.
FreeCAD is an open-source parametric 3D CAD modeler that supports a wide range of uses, from product design to mechanical engineering. Its parametric modeling capability allows users to easily modify design parameters, making it a powerful tool for those with a bit of technical expertise. FreeCAD's open-source nature means it's continually being improved by its community of users and developers. For a more comprehensive approach, you can see how FreeCAD integrates with the offerings of a 3D Visualization Company in Mumbai.
Conclusion
Starting with free tools is a great way for beginners to dive into the world of 3D visualization without a financial commitment. Each of these tools—Blender, SketchUp Free, Tinkercad, Fusion 360 for Personal Use, and FreeCAD—offers unique features and benefits to suit different needs and levels of expertise. By exploring these options, you can find the right tool to kickstart your 3D visualization journey. If you're looking for professional insights or advanced applications, consider consulting a 3D Visualization Company in Mumbai for further guidance. Happy modeling!
#3dvisualization#3dvisualization in india#3darchitecturalvisualization#visualization3d#interiorrendering#interior#interiorvisualization#3darchitecturalrendering
0 notes
Text
The process of creating 3D representations from 3D models is called 3D rendering. In addition to being a great tool for designers, it allows them to experiment with new ideas and develop market worthy pieces that are second to none. If you do not use 3D rendering services & 3D design professionals for your real estate business, you will miss out on many exciting opportunities.
A new design can be perfected with this technology, and you can attract new clients using it. A revolution is taking place in the real estate industry as competition gets more intense. Utilizing 3D rendering to its fullest potential can give you a competitive edge. You can take your real estate business to the next level with 3D real estate rendering services.
3D Rendering Benefits for Real Estate Marketing
Advertising: Prospective clients can be captured by 3D rendering services. Your advertising campaigns and marketing materials will be more effective with 3D rendering. In comparison to 2D renderings of flat and simple images, 3D renders produce more impressive effects.
You can show a potential client exactly how long a property or space is and how deep the design goes through carefully executed 3D renderings. Real estate projects can be represented more realistically with 3D renderings. The lifelike appearance of your marketing materials will also make them more effective, compared to overly rough sketches.
Property Surroundings: The people of today want to live a well organized life, as such they need easy access to all of the things they need. When presenting a development project, 3D presentations help clients see what the surrounding area offers. You can display the neighborhood's amenities and comforts more realistically through 3D renderings. Investing or buying a property can be made more appealing if this is done.
3D Architectural Visualization Service: A business's success depends on client satisfaction and contentment, no matter what it sells. A 3D architectural visualization service can be beneficial to realtors in the real estate business.
3D rendering and 3D architectural modeling make it possible to show your clients a future real estate design that does not exist yet or cannot be explained without visualization. Human beings are attracted to dimensions, styles, shapes, and colors in 3D design. 3D designs provide clients with a better understanding of potential reality than traditional blueprints or diagrams.
Read more
0 notes
Text
From 3D to 2D: The Art of Furniture Design

Introduction to Furniture Design
The Evolution of Furniture Design
Furniture design has always been a reflection of the times, evolving alongside changes in culture, technology, and societal needs. From the ornate designs of the Baroque period to the sleek lines of mid-century modern, furniture design tells the story of human creativity and ingenuity. Today, as we witness a shift from traditional 3D furniture design to the more streamlined and accessible 2D approach, it's clear that this evolution is far from over.
Importance of Design in Furniture
Design is the heart and soul of furniture. It’s what transforms a simple chair into a statement piece, a table into the centerpiece of a room. Good design combines aesthetics with functionality, ensuring that the furniture not only looks good but also serves its intended purpose. In a world where consumer preferences are increasingly leaning towards minimalism and sustainability, design plays a crucial role in meeting these demands.
From 3D to 2D: A New Perspective
The transition from 3D to 2D design in furniture might seem like a step back, but in reality, it’s a forward-thinking approach that aligns with contemporary trends. By stripping away the excess, 2D design emphasizes the essentials, offering a minimalist yet impactful aesthetic that resonates with modern consumers.
The Basics of 3D Furniture Design
What is 3D Furniture Design?
3D furniture design involves creating three-dimensional models of furniture pieces using specialized software. These models allow designers to visualize the final product from every angle, making it easier to refine details and ensure accuracy before production begins. This method has been the standard in the industry for years, offering unparalleled precision and the ability to create complex, intricate designs.
Tools and Software Used in 3D Design
The most common tools used in 3D furniture design include software like AutoCAD, SketchUp, and Blender. These programs enable designers to create detailed models, complete with textures, colors, and materials. They also allow for easy modifications, making it possible to experiment with different design elements until the perfect balance is achieved.
Advantages of 3D Furniture Design
One of the main advantages of 3D design is the ability to create highly detailed and complex pieces. Designers can experiment with various shapes, materials, and finishes, all while visualizing the end product in a realistic manner. This approach also allows for precise measurements and proportions, reducing the likelihood of errors during production.
Challenges in 3D Furniture Design
However, 3D furniture design is not without its challenges. The process can be time-consuming and requires a high level of expertise. Additionally, the software used can be expensive, making it less accessible to smaller design studios or individual designers. There’s also the issue of over-designing, where the focus on detail and complexity can sometimes lead to impractical or overly elaborate pieces.
The Transition from 3D to 2D Design
Why Transition from 3D to 2D?
The shift from 3D to 2D furniture design is driven by a variety of factors, including the growing popularity of minimalism, cost considerations, and environmental concerns. In a world where less is more, 2D design offers a way to create visually appealing and functional furniture without the complexities and expenses associated with 3D design.
The Role of Minimalism in Modern Design
Minimalism is more than just a trend; it’s a lifestyle choice that emphasizes simplicity, functionality, and the elimination of unnecessary elements. In furniture design services, this translates to clean lines, simple shapes, and a focus on the essentials. 2D design fits perfectly within this aesthetic, offering a straightforward and uncluttered approach that appeals to modern consumers.
Cost Efficiency and Accessibility
One of the major advantages of 2D design is its cost efficiency. Without the need for expensive software or advanced technical skills, 2D design is more accessible to a wider range of designers. This democratization of design allows for greater creativity and innovation, as more people can participate in the process.
Environmental Impact
In addition to being cost-effective, 2D design is also more environmentally friendly. By reducing the need for physical prototypes and minimizing material waste, 2D design aligns with the growing demand for sustainable practices in the furniture industry. It’s a small but significant step towards reducing the industry’s carbon footprint.
Understanding 2D Furniture Design
What is 2D Furniture Design?
2D furniture design involves creating flat, two-dimensional representations of furniture pieces. These designs often focus on the front, side, and top views, providing a clear and simple visual of the piece. While less detailed than 3D models, 2D designs are highly effective in conveying the essential elements of a piece, making them a popular choice for minimalist and modern furniture.
Characteristics of 2D Furniture Design
The defining characteristic of 2D furniture design is its simplicity. These designs strip away unnecessary details, focusing instead on clean lines and geometric shapes. The result is a minimalist aesthetic that is both modern and timeless, offering a fresh take on traditional furniture design.
Tools and Techniques in 2D Design
While 2D design may seem simpler than 3D, it still requires a good understanding of design principles and techniques. Common tools for 2D design include Adobe Illustrator, CorelDRAW, and even hand-drawing techniques. These tools allow designers to create precise and clean designs that can easily be translated into physical products.
Notable Examples of 2D Furniture
Some of the most iconic pieces of modern furniture are based on 2D design principles. The Eames Lounge Chair, for example, is known for its clean lines and simple shapes, making it a perfect example of 2D design in action. Other notable examples include the Barcelona Chair by Mies van der Rohe and the Wassily Chair by Marcel Breuer, both of which emphasize simplicity and functionality.
Comparing 3D and 2D Furniture Design
Design Complexity
When comparing 3D and 2D furniture design, one of the most obvious differences is the level of complexity. 3D designs are often more intricate, with a focus on detail and realism. In contrast, 2D designs prioritize simplicity and clarity, offering a more streamlined and accessible approach.
Detailing and Precision
While 3D designs allow for greater precision and detail, 2D designs excel in their ability to convey the essence of a piece with minimal information. This makes 2D designs particularly effective for certain types of furniture, such as those that rely on clean lines and geometric shapes.
Production Processes
The production process for 3D and 2D designs also differs significantly. 3D designs often require advanced manufacturing techniques, such as CNC machining or 3D printing, to bring the designs to life. 2D designs, on the other hand, can be produced using more traditional methods, such as woodworking or metalworking, making them more accessible to smaller workshops and independent designers.
Consumer Preferences
Ultimately, the choice between 3D and 2D design comes down to consumer preferences. While some consumers may prefer the complexity and realism of 3D designs, others may be drawn to the simplicity and elegance of 2D designs. The growing popularity of minimalism suggests that 2D design may have a bright future in the furniture industry.
The Artistic Expression in 2D Furniture Design
Simplicity as an Art Form
In 2D furniture design, simplicity is not just a design choice; it’s an art form. By focusing on the essentials and eliminating unnecessary details, 2D design allows the inherent beauty of the materials and forms to shine through. This approach results in furniture that is both functional and aesthetically pleasing, offering a timeless appeal that transcends trends.
Geometric Patterns and Shapes
One of the key elements of 2D design is the use of geometric patterns and shapes. These simple yet striking designs can create a powerful visual impact, turning a basic piece of furniture into a work of art. Whether it’s a table with a circular top or a chair with a square backrest, geometric shapes add a sense of order and harmony to the design.
The Influence of Culture and History
2D furniture CAD design is also heavily influenced by culture and history. Many modern 2D designs draw inspiration from traditional Japanese furniture, which is known for its simplicity and focus on natural materials. Other influences include the Bauhaus movement, which emphasized function over form, and Scandinavian design, which is characterized by clean lines and minimalism.
The Future of Furniture Design
Trends in 2D Furniture Design
As we look to the future, it’s clear that 2D furniture design is here to stay. The trend towards minimalism shows no signs of slowing down, and 2D design is perfectly suited to meet the demands of this aesthetic. We can expect to see more innovative and creative 2D designs in the coming years, as designers continue to push the boundaries of what is possible with this approach.
Technological Innovations
While 2D design may be rooted in simplicity, that doesn’t mean it’s immune to technological advancements. New tools and software are constantly being developed, making it easier than ever for designers to create precise and detailed 2D designs. Additionally, advancements in manufacturing techniques, such as laser cutting and CNC routing, are making it possible to produce 2D designs with greater accuracy and efficiency.
Sustainability and Eco-friendly Designs
Sustainability is a major concern in the furniture industry, and 2D design offers a way to address this issue. By minimizing material waste and reducing the need for physical prototypes, 2D design aligns with the growing demand for eco-friendly products. This focus on sustainability is likely to drive the continued popularity of 2D design in the coming years.
Customization and Personalization
Another trend that is likely to shape the future of furniture design services is customization. With the rise of digital tools and online platforms, it’s becoming easier for consumers to personalize their furniture, choosing everything from the size and shape to the materials and finishes. This trend towards customization is likely to increase the demand for 2D designs, as they offer a simple and flexible base that can be easily adapted to individual preferences.
Conclusion
The Journey from 3D to 2D in Furniture Design
The shift from 3D to 2D in furniture design represents a significant evolution in the industry. While 3D design offers the ability to create complex and detailed pieces, 2D design provides a simpler, more accessible alternative that aligns with modern trends. As consumer preferences continue to evolve, it’s clear that 2D design will play an increasingly important role in the future of furniture design.
Final Thoughts on the Evolution
In many ways, the move from 3D to 2D design is a return to the basics. By focusing on simplicity, functionality, and sustainability, 2D design offers a fresh perspective that resonates with contemporary consumers. Whether you’re a designer looking to explore new approaches or a consumer in search of the perfect piece, 2D furniture design offers a world of possibilities.
The Impact on Future Design Trends
As we look to the future, it’s clear that 2D furniture design will continue to influence trends in the industry. From the rise of minimalism to the growing demand for sustainable products, 2D design offers a way to meet these challenges head-on. By embracing this approach, designers can create furniture that is not only beautiful and functional but also aligned with the values of the modern consumer.
Frequently Asked Questions
Why is 2D furniture design gaining popularity?
2D furniture design is gaining popularity due to its simplicity, cost efficiency, and alignment with modern trends such as minimalism and sustainability. It offers a straightforward approach that appeals to contemporary consumers looking for clean lines and functional designs.
How does 2D design impact the environment?
2D design has a lower environmental impact compared to 3D design, as it reduces material waste and minimizes the need for physical prototypes. This makes it a more sustainable option for furniture production.
Is 3D furniture design still relevant?
Yes, 3D furniture design remains relevant, especially for complex and intricate designs that require a high level of detail and precision. However, 2D design offers a simpler alternative that is better suited to certain styles and consumer preferences.
What software is commonly used for 2D design?
Common software for 2D furniture design includes Adobe Illustrator, CorelDRAW, and various CAD programs. These tools allow designers to create precise and clean designs that can be easily translated into physical products.
Can 2D design be as functional as 3D design?
Absolutely! While 2D design may lack the complexity of 3D models, it can be just as functional, particularly for furniture that relies on simple shapes and clean lines. The key is to focus on the essentials and ensure that the design meets the intended purpose.
#2D Drafting#2D Drawing#CAD Drafting Services#3D Furniture Design Services#Furniture Design Services#2D Design Service#CAD Design Services#shalin designs
0 notes
Text
How to Pick the Finest 3D Modelling Program for Your Needs in Engineering and Design

Selecting the appropriate 3D modeling software for your engineering and design projects is essential for achieving efficiency and maximizing productivity. Here’s a guide to assist you in making a well-informed choice among the leading software options available:
Scrutinize your project's needs: Start by identifying the specific requirements for your projects. Are you focused on architectural design, mechanical engineering, electrical systems, or structural analysis? Each software has its own strengths:
SketchUp: Ideal for rapid and intuitive 3D modeling in architecture, product design, and urban planning.
Spectron: Excels in advanced engineering simulations, supporting structural analysis and material science.
Rhino Software: Perfect for intricate mechanical parts and 3D printing, offering flexibility and precision.
Materialize: Specializes in 3D printing and additive manufacturing, providing tools for production-ready designs.
CSI Products (SAP2000, ETABS, SAFE): Tailored for structural analysis and design of buildings and bridges.
Siemens: Offers a variety of tools (NX, Solid Edge) for comprehensive CAD, CAM, and CAE applications in product development.
MI Power: Designed for electrical power system analysis, focusing on modeling, analyzing, and optimizing power grids.
Learning Curve Consideration: Consider how quickly your team can adapt to and use the software proficiently. Some software is straightforward, while others require more effort to master due to their complexity.
Integration and Compatibility Analysis: Evaluate how the software fits into your existing workflow and systems. Certain tools are noted for their seamless integration with a variety of platforms.
Cost and Licensing Analysis: Examine your budget and the licensing terms of each software. Many software solutions offer different pricing structures that are advantageous for smaller groups or solo practitioners.
Performance and Feature Testing: Use demo versions or trials to assess the software’s capabilities in your work environment. This hands-on experience will guide your decision-making process.
Seek Insights and Reviews: Collect feedback from colleagues and other users. Forums and discussion boards can provide in-depth insights into each software’s pros and cons.
Future-Proofing: Consider the scalability of the software and its ability to meet future project demands. Choose a solution that can grow alongside your projects.
Concerned about the ideal software for your project or in need of advice? For more assistance with similar services, get in touch with Tridax (tridaxsolutions.com), and their professionals would be pleased to help!
1 note
·
View note
Text
How to Choose the Right 3D Rendering Technology for Your Project
When embarking on a new design or construction project, selecting the appropriate 3D Rendering Technology is a crucial decision that can significantly impact the quality, efficiency, and success of the final outcome. With a variety of options available in the market, it’s important to understand the factors that should guide your choice. Here’s a comprehensive guide to help you choose the right 3D rendering technology for your project.
1. Understand Your Project Needs
The first step in choosing the right 3D Rendering Technology is to clearly define your project requirements. Are you working on an architectural design, interior design, product visualization, or something else entirely? The complexity of your project, the level of detail required, and the intended use of the final renderings will influence your choice.
For instance, if your project involves high-end architectural visualization, you might need a rendering technology that can produce photorealistic images with intricate details. On the other hand, for simpler designs or conceptual visualizations, a more basic rendering tool might suffice.
2. Evaluate Software Capabilities
Different 3D rendering software offers varying capabilities, and it's important to match these with your project’s demands. Some key features to consider include:
Photorealism: If achieving lifelike visuals is essential, opt for software that excels in photorealistic rendering. Tools like V-Ray, Lumion, and Blender are known for their ability to create stunningly realistic images.
Real-Time Rendering: For projects that require immediate feedback and iterative design processes, real-time rendering software like Twinmotion or Unreal Engine can be invaluable. These tools allow you to make changes and see the results instantly, which can save time and enhance creativity.
Animation and Walkthroughs: If your project involves creating animated sequences or virtual walkthroughs, ensure the chosen technology supports these features. Some rendering tools offer advanced animation capabilities that can bring your designs to life.
3. Consider Compatibility with Existing Tools
Another critical factor is compatibility. The 3D Rendering Technology you choose should integrate seamlessly with the software and tools you’re already using. For example, if your design team works with Autodesk Revit, selecting a rendering tool that can easily import Revit files will streamline your workflow.
Compatibility also extends to hardware requirements. High-end rendering software may require powerful computers with advanced graphics capabilities. Before making a decision, assess whether your current hardware can handle the rendering software you’re considering, or if an upgrade is necessary.
4. Assess the Learning Curve
Ease of use is an important consideration, especially if you or your team are new to 3D rendering. Some 3D Rendering Technology platforms are more intuitive and user-friendly than others. For instance, tools like SketchUp are known for their simplicity and are ideal for beginners, while others like 3ds Max might have a steeper learning curve.
If time is of the essence, you may want to choose software that your team can quickly become proficient with, even if it means sacrificing some advanced features.
5. Budget Constraints
Finally, consider your budget. 3D Rendering Technology can vary widely in cost, from free open-source options to high-end commercial software with expensive licensing fees. Determine what you’re willing to invest and balance that against the features you need.
It’s also worth considering whether the software offers a one-time purchase or a subscription model. Some projects might benefit from a subscription service that allows access to the latest updates, while others might prefer the cost savings of a one-time purchase.
Conclusion
Choosing the right 3D Rendering Technology is a critical decision that can influence the success of your project. By understanding your project’s needs, evaluating software capabilities, ensuring compatibility, considering the learning curve, and factoring in your budget, you can select the technology that best suits your requirements. With the right tool in hand, you’ll be well-equipped to bring your vision to life with stunning, precise, and effective renderings.
0 notes
Text
From Concept to Reality: The Evolution of 3D Rendering for Interiors
In the dynamic world of interior design and architecture, 3D rendering has become an indispensable tool, transforming abstract concepts into tangible realities. This technology, which once seemed futuristic, now plays a crucial role in planning, visualizing, and executing interior design projects. Let's explore the fascinating journey of 3D rendering for interiors, from its inception to its current state, highlighting its impact on the industry.

The Birth of 3D Interior Rendering
The roots of 3D interior rendering trace back to the early days of computer graphics. Initially, 3D modeling and rendering were primarily used in industries like gaming and animation. However, as technology advanced, architects and interior designers began to recognize its potential. Early 3D interior renderings were rudimentary, often limited by hardware capabilities and software constraints. Despite these limitations, the seeds of transformation were sown.
Evolution of Interior Rendering Technology
As computer technology evolved, so did 3D interior rendering. Enhanced processing power and sophisticated software enabled designers to create more detailed and realistic renderings. Software like AutoCAD, SketchUp, and 3ds Max revolutionized the field, offering tools to create intricate models and realistic textures. The advent of these tools marked the beginning of a new era in interior rendering, allowing designers to experiment with various designs before actual construction.
Key Milestones in 3D Rendering for Interiors
Introduction of Photorealistic 3D Interior Rendering: The leap from basic renderings to photorealistic 3D interior rendering was monumental. This advancement allowed designers to produce images that were nearly indistinguishable from real photographs, helping clients visualize the final outcome with incredible accuracy.
Rise of Architectural Interior Rendering: As 3D rendering became more sophisticated, it found widespread use in architectural interior rendering. Architects could now showcase their designs in a realistic context, considering factors like lighting, materials, and spatial relationships.
Emergence of 3D Commercial Rendering Services: The commercial sector quickly adopted 3D rendering technology. From retail spaces to office interiors, 3D commercial rendering services offered businesses a way to plan and visualize their spaces efficiently. High-quality 3D interior renderings became essential in the competitive commercial real estate market.
Integration of VR and AR: Virtual Reality (VR) and Augmented Reality (AR) have further pushed the boundaries of 3D rendering for interiors. These technologies provide immersive experiences, allowing clients to "walk through" their future spaces. This integration marks the latest evolution in interior rendering, enhancing client engagement and decision-making.
Impact on Interior Design and Architecture
The evolution of 3D rendering for interiors has profoundly impacted the design and architecture industry. Here are some key benefits:
Enhanced Visualization and Communication
3D interior rendering bridges the gap between designers and clients. It provides a clear, visual representation of ideas, ensuring that both parties have a mutual understanding of the project. This enhanced communication reduces misunderstandings and ensures that the final result aligns with the client's vision.
Efficient Project Planning and Execution
With 3D commercial rendering, designers can experiment with different layouts, materials, and lighting conditions before any physical work begins. This capability allows for more efficient project planning and minimizes costly changes during construction. Architectural interior rendering ensures that every detail is meticulously planned, leading to smoother execution.
Marketing and Presentation
High-quality 3D interior renderings are invaluable marketing tools. Real estate developers, interior designers, and architects use these images to showcase their work, attract clients, and secure projects. Photorealistic 3D interior rendering can make a significant difference in presentations, providing a competitive edge in the market.
Sustainability and Cost Savings
By visualizing spaces in detail, designers can make informed decisions about materials and layouts, leading to more sustainable choices. Additionally, 3D rendering reduces the need for physical prototypes, saving time and resources. This sustainable approach aligns with the growing demand for environmentally conscious design practices.
The Future of 3D Interior Rendering
As technology continues to advance, the future of 3D rendering for interiors looks promising. Innovations in artificial intelligence, machine learning, and real-time rendering are set to revolutionize the field further. These advancements will enable even more realistic and interactive renderings, pushing the boundaries of what's possible in interior design and architecture.
Conclusion
In conclusion, the journey from concept to reality in interior design has been profoundly transformed by 3D rendering. From early, basic models to sophisticated, photorealistic images and immersive VR experiences, 3D interior rendering has become an essential tool in the industry. Its impact on visualization, project planning, marketing, and sustainability underscores its importance and promises an exciting future for designers and architects alike.
#3D Interior Rendering#Interior Rendering#3D Rendering for Interiors#3D Commercial Renders#Commercial Rendering#3D Commercial Rendering#Commercial 3D Rendering Services#Architectural Interior Rendering#Photorealistic 3D Interior Rendering#High-Quality 3D Interior Renderings
0 notes
Text
Revolutionizing Architectural Projects with Design Visualization & 3D Rendering Services
In the fast-evolving Architecture, Engineering, and Construction (AEC) industry, visualization plays a pivotal role in the design process. The ability to see and understand a project's intricacies before it is built can significantly impact its success. Architectural Design Visualization and 3D Rendering Services are transforming how architects and designers approach projects, providing tools that enhance precision, creativity, and client communication. This blog explores the transformative impact of these services on architectural projects, detailing their benefits, applications, and future trends.

Understanding Design Visualization & 3D Rendering
Definition and Scope of Design Visualization & 3D Rendering
Design Visualization and 3D Rendering involve creating detailed visual representations of architectural projects using advanced software tools. These services include photorealistic images, walkthroughs, and virtual tours that bring architectural concepts to life. They enable stakeholders to experience and interact with the design in a virtual environment, providing a comprehensive understanding of the project's scope and potential.
Key Components
- Photorealistic Images: High-quality images that depict the project with realistic lighting, textures, and materials.
- Walkthroughs: Animated sequences that guide viewers through the virtual space, simulating a real-life experience.
- Virtual Tours: Interactive experiences that allow users to explore the design from various angles and perspectives.
Role of Software Tools
Software tools like 3ds Max, V-Ray, and SketchUp are instrumental in creating detailed visualizations. These tools offer advanced features for modeling, texturing, lighting, and rendering, enabling architects to produce highly realistic and detailed representations of their designs.
Benefits of Design Visualization & 3D Rendering Services
Enhanced Client Communication
One of the most significant benefits of design visualization and 3D rendering services is improved client communication. These services provide clients with a clear, realistic view of the project, facilitating better decision-making and faster approvals. Clients can visualize the end product, ask informed questions, and provide precise feedback, ensuring that the final design aligns with their expectations.
Improved Design Accuracy
3D rendering helps visualize complex design elements and spatial relationships, allowing architects to identify and address potential issues early in the design process. This proactive approach reduces the likelihood of errors and rework, enhancing the overall accuracy of the project.
Marketing and Presentation
High-quality visualizations are powerful tools for marketing and presentations. They create impactful visual content that can be used in promotional materials, investor pitches, and stakeholder meetings. Stunning visuals capture attention, convey the project's value, and help secure funding and approvals.
Sector-Specific Applications
Residential Projects
In residential architecture, detailed visualizations of interior and exterior spaces enhance client engagement and satisfaction. Clients can see their future homes in realistic detail, making it easier to visualize customizations and design elements. This clarity helps ensure that the final design meets their needs and preferences.
Commercial Buildings
Commercial projects often involve complex layouts and space planning. 3D rendering services provide detailed visualizations that address these complexities, ensuring compliance with commercial standards and regulations. Accurate visualizations help stakeholders understand the design's functionality and aesthetic appeal, leading to better planning and execution.
Healthcare Facilities
Healthcare facilities have unique requirements that must comply with stringent regulations and standards. Visualization and 3D rendering services help create functional and compliant medical facilities by providing detailed and realistic representations of the design. These visualizations ensure that all standards are met and that the facility is designed for optimal efficiency and patient care.
Educational Institutions
In educational architecture, accurate visualizations are essential for creating effective learning environments. 3D renderings help incorporate modern educational facility requirements, such as flexible learning spaces, accessibility features, and sustainable design elements. These visualizations ensure that the design supports the educational goals and enhances the learning experience.
Implementing Visualization & 3D Rendering in Projects
Initial Design Phase
The implementation of visualization and 3D rendering services begins with creating conceptual visualizations. These initial renderings set the design direction and provide a foundation for further development. They help communicate the design concept to clients and stakeholders, ensuring alignment from the project's outset.
Detailed Rendering Phase
In the detailed rendering phase, high-quality 3D models and renderings are developed. These detailed visualizations provide a comprehensive view of the project, showcasing all design elements with precision and clarity. They are used for in-depth reviews and presentations, facilitating better decision-making and approvals.
Review and Feedback
The visualization process is iterative, involving multiple rounds of review and feedback. Clients and stakeholders provide input on the visualizations, which are then refined to address their comments and concerns. This collaborative approach ensures that the final design meets all requirements and expectations.
Challenges and Solutions in Visualization & 3D Rendering
Managing Large Projects
Handling large and complex projects can be challenging in terms of visualization. Techniques such as dividing the project into manageable sections and using advanced rendering tools can help manage these complexities effectively, ensuring that all elements are accurately represented.
Ensuring Realism
Achieving photorealism in renderings requires advanced techniques and attention to detail. Using high-quality textures, accurate lighting, and realistic materials are essential for creating lifelike images. Continuous learning and adopting new rendering technologies can enhance the realism of visualizations.
Balancing Costs and Quality
Creating high-quality visualizations can be costly, but strategies for balancing costs and quality include optimizing rendering settings, using efficient workflows, and leveraging cloud-based rendering solutions. These approaches help produce high-quality visualizations within budget constraints.
Future Trends in Design Visualization & 3D Rendering
Advancements in Rendering Technology
Rendering technology continues to evolve, with new features and capabilities emerging regularly. Advancements such as real-time rendering, AI-driven enhancements, and improved rendering engines are making it possible to create more detailed and realistic visualizations faster and more efficiently.
Integration with VR/AR
The integration of 3D rendering with Virtual Reality (VR) and Augmented Reality (AR) is providing immersive design experiences. These technologies allow clients and stakeholders to interact with the design in new ways, offering deeper insights and better decision-making.
Sustainable Visualization Practices
Sustainability is becoming a priority in architectural design, and visualization practices are evolving to support this trend. Incorporating eco-friendly elements in visualizations, such as green roofs, energy-efficient systems, and sustainable materials, helps promote sustainable design practices and educate clients about the benefits of green architecture.
Conclusion
Architectural Design Visualization and 3D Rendering Services are revolutionizing the AEC industry by enhancing precision, creativity, and client communication. These services provide clear and realistic representations of architectural designs, facilitating better decision-making and project outcomes. As the industry continues to evolve, adopting these advanced tools and methodologies will be essential for achieving successful architectural projects. Embracing visualization and 3D rendering services can help architects deliver innovative, efficient, and client-focused designs.
0 notes
Text
Architectural SketchUp Modeling Services - Chudasama Outsourcing
Chudasama Outsourcing offers in-depth assistance and direction for providing Architectural SketchUp Modeling services to their full potential. We also provide cost-effective custom design generation. Our talented team develops exact layouts and thorough blueprints that offer clients a wide range of possibilities. In the field, we are pioneers. We have achieved excellence via experience. We can now manage clients and collaborate directly with them. For more information, visit our website:
0 notes
Text
As designers, we often become so carried away with designing that we end up with a Sketchup file that is 300+ Megabytes and has over 2 Million edges, or at least that is the case with most of the beginners in SketchUp modeling.
This can cause problems as the file becomes too large and unwieldy to work with. It can also cause slowdowns in system performance and render times. To avoid this, it is important to be mindful of the number of edges in your model and optimize where necessary.
Though VRay is an excellent and powerful rendering service you do not want to make your models with rough edges and incomplete format. It not only makes your models complicated but also takes much longer time and a more complicated process to complete rendering.
That is why we are here to help you and others who have just got a little comfortable while designing your models and have not yet experienced the complications while rendering large files using V-Ray.
Read more
0 notes
Text
Furniture Detailing Services Provider - CAD Outsourcing Company
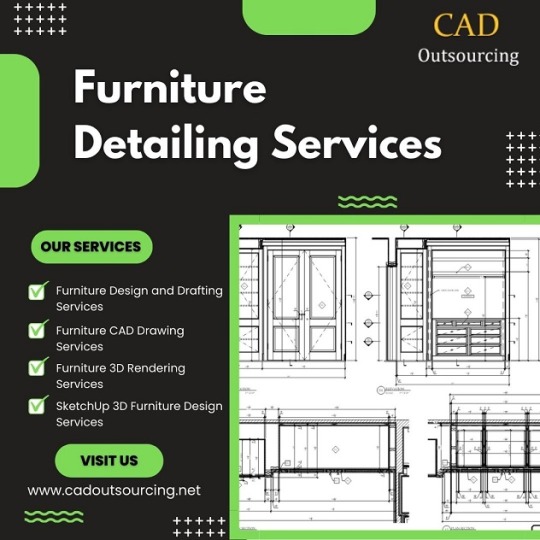
Looking for affordable Furniture Detailing Services in USA? Look no further than CAD Outsourcing Consultant. We offer exceptional Furniture Design and Drafting Services, along with Furniture CAD Drawing Services, to bring your visions to life. Our team specializes in 3D Rendering Services for Furniture, ensuring realistic visualizations. Our expertise extends to SketchUp 3D Furniture Design Services, ensuring your concepts are brought to life with stunning realism. Need Millwork Shop Drawings in Inventor? We deliver with precision and efficiency. As trusted Furniture Detailing Consultants, we excel in CAD Services, utilizing industry-leading software such as AutoCAD, Inventor and SketchUp. Partner with CAD Outsourcing Consultant for top quality results in Furniture Detailing.
Our Furniture Detailing Outsourcing Services are:
- Furniture Design and Drafting Services
- Furniture CAD Drawing Services
- Furniture 3D Rendering Services
- SketchUp 3D Furniture Design Services
- Millwork Shop Drawings in Inventor
We offer our Furniture Detailing Services Oklahoma and covered other cities: Ohio, Utah, Montana, Idaho, Nevada, California, Delaware, Wyoming and Georgia.
Visit Us:
https://www.cadoutsourcing.net/shop-drawing-services/oklahoma-shop-drawings-service.html
License User:
AutoDesk AutoCAD, Revit, Tekla Structures, STAAD.Pro, SOLIDWORKS, ZWCAD, AutoDesk Navisworks, 3Ds Max, Inventor, Showcase, ReCap, Infraworks 360, Civil 3D.
For more Information:
Website: https://www.cadoutsourcing.net/shop-drawing-services/millwork-shop-drawings.html
Experience excellence in Furniture Detailing Services with CAD Outsourcing Consultant. Elevate your designs today.
Check Out my Latest Article "The Role of Building Information Modeling in Millwork Shop Drawings Project" is now available on
#FurnitureDetailing#FurnitureDesign#SketchUp#MillworkShopDrawing#CADServices#Building#Architecture#Structure#BIM#B1M#Engineering#Construction#CadOutsourcing#CAD#CADD#CADDesign#Architect#Engineer#CADDraftman#AutoCAD#Revit#TeklaStructures#Inventor#SolidWorks
2 notes
·
View notes
Text
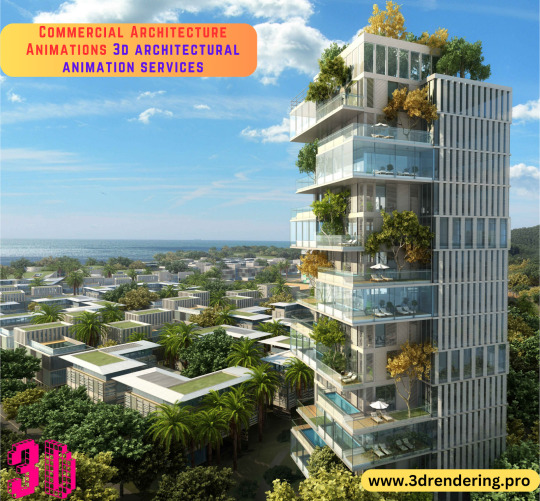
Guide to Creating 3D Architectural Animations
Creating stunning 3D architectural animations involves a combination of creativity, technical skills, and a deep understanding of architectural design. Whether you're aiming to enhance client presentations, market real estate, or bring a commercial project to life, mastering the art of 3D architecture animation can set you apart in the industry. This step-by-step guide will walk you through the essential stages of producing captivating 3D architectural animations, with a focus on keywords such as commercial architecture animations, 3d animation architecture design, 3d architecture animation, architecture animation, animation architecture, 3d architectural animation services, and 3d animation architecture.
Step 1: Understand the Project Requirements
Before diving into the animation process, it’s crucial to have a clear understanding of the project requirements. This involves:
Client Briefing: Discuss with the client to understand their vision, objectives, and expectations.
Project Scope: Determine the scope of the project, including the level of detail, the type of animation (e.g., walkthroughs, flyovers, or static views), and the target audience.
Gathering References: Collect references, such as architectural drawings, sketches, mood boards, and any existing 3D models.
Understanding these aspects will ensure that your animation aligns with the client’s vision and serves its intended purpose effectively.
Step 2: Conceptualize and Plan the Animation
With a clear understanding of the project, the next step is to conceptualize and plan the animation. This involves:
Storyboarding: Create a storyboard to outline the sequence of scenes and camera movements. This helps in visualizing the flow of the animation and ensures a coherent narrative.
Scriptwriting: If the animation includes voiceovers or textual information, draft a script to accompany the visuals.
Planning the Shots: Decide on the key shots and camera angles that will best showcase the architectural design.
Proper planning at this stage will save time and effort during the production phase and ensure a smoother workflow.
Step 3: Create the 3D Model
The foundation of any 3D architectural animation is a detailed and accurate 3D model. Here’s how to go about it:
Software Selection: Choose the right 3D modeling software. Popular options include Autodesk Revit, SketchUp, and Rhino. For more detailed animations, you might use software like 3ds Max or Blender.
Modeling the Structure: Start by modeling the primary structure, paying attention to accuracy and detail. Ensure that all architectural elements, such as walls, roofs, windows, and doors, are properly represented.
Adding Details: Once the basic structure is in place, add finer details such as furniture, fixtures, and landscaping. These elements add realism and depth to the animation.
For commercial architecture animations, it’s essential to maintain a high level of detail to accurately represent the design.
Step 4: Apply Textures and Materials
Textures and materials bring the 3D model to life by adding realism and depth. Follow these steps:
Material Library: Utilize a material library to apply realistic textures to different surfaces. This includes materials for walls, floors, roofs, and furniture.
Custom Textures: Create custom textures if needed, especially for unique architectural elements or finishes.
UV Mapping: Ensure that textures are correctly aligned and scaled using UV mapping techniques. This prevents distortion and ensures a polished look.
For a 3d animation architecture design, accurate texturing is crucial to achieve a believable and visually appealing result.
Step 5: Set Up Lighting
Lighting plays a critical role in 3D architecture animation. It affects the mood, atmosphere, and overall visual quality of the animation. Here’s how to set up effective lighting:
Natural Lighting: Simulate natural lighting by setting up sunlight and skylight. Consider the position of the sun, time of day, and weather conditions.
Artificial Lighting: Add artificial lighting to highlight specific areas or features of the architecture. This includes interior lights, spotlights, and ambient lighting.
Light Bounces and Shadows: Adjust light bounces and shadows to add realism. Ensure that shadows are soft and natural-looking.
Proper lighting can significantly enhance the realism and aesthetic appeal of your 3D architecture animation.
Step 6: Animate the Camera and Objects
With the model and lighting in place, it’s time to animate the camera and any moving objects. Follow these steps:
Camera Path: Define the camera path and movements. This includes panning, zooming, and rotating to showcase different angles and perspectives.
Object Animation: If there are moving elements, such as doors opening or vehicles moving, animate these objects to add dynamism to the scene.
Timing and Pacing: Pay attention to the timing and pacing of the animation. Ensure that the camera movements are smooth and that the transitions between scenes are seamless.
Effective animation of the camera and objects is essential for creating an engaging and immersive experience.
Step 7: Render the Animation
Rendering is the process of generating the final animation frames from the 3D model. Here’s how to ensure a high-quality render:
Render Settings: Choose appropriate render settings, including resolution, frame rate, and quality. Higher settings result in better quality but may increase render time.
Render Engine: Select a render engine that suits your needs. Popular options include V-Ray, Arnold, and Blender’s Cycles.
Test Renders: Perform test renders to check for any issues and make necessary adjustments.
Rendering can be time-consuming, but it’s crucial for achieving a polished and professional final product.
Step 8: Post-Production
Post-production involves refining the rendered animation and adding final touches. This includes:
Editing Software: Use editing software like Adobe Premiere Pro or After Effects to compile the rendered frames, add transitions, and synchronize with audio.
Color Correction: Adjust the color balance, contrast, and saturation to enhance the visual appeal.
Special Effects: Add special effects, such as motion blur, depth of field, and lens flares, to enhance realism.
Sound Design: Incorporate background music, sound effects, and voiceovers to create an immersive experience.
Post-production is the final step to ensure that your 3d architecture animation meets professional standards.
Conclusion
Creating stunning 3D architectural animations requires a combination of technical skills, artistic vision, and meticulous planning. By following this step-by-step guide, you can produce high-quality animations that effectively showcase architectural designs and captivate your audience. Whether you’re working on commercial architecture animations or 3d animation architecture design for residential projects, mastering these techniques will set you apart in the competitive field of architecture animation. For those looking to streamline their workflow or achieve even higher levels of detail and realism, partnering with professional 3d architectural animation services can provide the expertise and resources needed to bring your vision to life. Embrace the power of 3D animation architecture and elevate your architectural presentations to new heights.
#commercial architecture animations#3d animation architecture design#3d architecture animation#architecture animation#animation architecture#3d architectural animation services#3d animation architecture
0 notes
Text
Importance of CAD Design Services in Plant Engineering and other Verticals
CAD design services are important in engineering and manufacturing. The 3D models created using different software enhance efficiency and precision. CAD design is used for various E&C operations like plant engineering, construction engineering, and more.
By leveraging CAD design and drafting services, businesses can streamline their workflows, reduce errors, and ultimately save time and costs
CAD design services are used to create precise and comprehensive engineering drawings. These services utilize CAD software like AutoCAD, SketchUp, and more to create detailed 2D and 3D models that are used in projects.
In plant engineering, accuracy and detail and important. Be it equipment modeling, piping support, or pipe routing, CAD drafting services ensure that every aspect of the plant’s design is well planned and executed.
Benefits of CAD Drafting Services
Implementing CAD drafting services offers numerous advantages for plant engineering projects. First, CAD enables the creation of highly detailed models and drawings. This boosts accuracy and reduces the likelihood of errors, which is crucial since minor mistakes in drawings can lead to significant delays and increased costs.
Moreover, leveraging CAD design services enhances collaboration and communication within teams. Engineers, architects, and other stakeholders can easily share and review designs, ensuring that everyone is on the same page. This collaborative approach enhances communication and helps identify issues early in the process, preventing costly revisions later.
This efficiency translates to faster project turnaround times and reduced labour costs. Additionally, the ability to quickly make modifications to designs is invaluable, especially when dealing with changes in project scope or unexpected challenges. CAD drafting services provide the flexibility needed to adapt to these changes without compromising on quality or accuracy.
Future Trends in CAD Design
The future of CAD design services is promising with continuous advancements in technology. Innovations such as BIM (Building Information Modeling) and VR (Virtual Reality), plant designing, and other designing processes are set to evolve.
Moreover, the increasing integration of AI (Artificial Intelligence) and generative designs, which is basically putting in text to get the desired output is enhancing design efficiency. AI-powered tools can automate complex calculations, suggest design improvements, and predict issues before they arise.
CAD design services are crucial to Plant engineering services and other services. By providing precise, detailed, and efficient design solutions. These services ensure that projects are completed on time with highest standards of quality. The evolution of technology will only benefit these services, driving innovation and growth.
0 notes
Text
Shalin Designs Launches Comprehensive Furniture Design Services

[United Kingdom, 25 July 2024] – Shalin Designs, a leader in innovative CAD solutions, proudly announces the launch of its Furniture Design Services. This new offering aims to transform 3D models into precise 2D furniture design drawings, streamlining the manufacturing, assembly, and installation of custom-built furniture joinery products.
Furniture plays a critical role in both residential and commercial spaces, enhancing usability and aesthetic appeal. Traditional manual design methods often prove cumbersome, lacking the efficiency and precision needed for modern demands. Shalin Designs leverages advanced CAD technology to provide clients with the freedom, comfort, and numerous advantages of digital design.
Why Custom Furniture Design Services are Essential:
Creativity: Unlock boundless creative potential with versatile design options.
Precision: Achieve unmatched accuracy in every detail.
Productivity: Boost efficiency with streamlined processes.
Space Utility: Maximize the use of available space.
Cost-effectiveness: Reduce costs with optimized design solutions.
Full-Service Furniture Design Process:
Inquiry & Research: We begin with a thorough understanding of your requirements.
Estimation & Quotation: We provide a detailed quote tailored to your needs.
Modeling & Drafting: Our team explores various alternatives to fit your context.
Quality Check: Rigorous checks ensure high-quality final designs.
Delivery & Revisions: Timely delivery in agreed formats with scope for revisions.
Shalin Designs caters to product designers, custom-made furniture manufacturers, construction contractors, and owners seeking meticulous furniture joinery drawings. Our designs cover a wide range of categories including office furnishings, storage solutions, living room designs, dining and kitchen modular furnishings, and more. We serve a global clientele across the USA, UK, Canada, Australia, Europe, Singapore, Norway, Ireland, and the UAE.
Service Offerings:
Residential Furniture CAD Design Service
Landscape Furniture CAD Design Service
Commercial Furniture CAD Design Service
Architectural Furniture CAD Design Service
Casework Furniture CAD Design Service
3D Furniture Design Modeling
Advanced Furniture Modeling Tools:
Shalin Designs employs a suite of cutting-edge CAD software/tools such as AutoCAD, Inventor, Woodworks in Inventor, SketchUp, Pytha CAD, Revit, and 3Ds Max to deliver top-notch furniture joinery designs.
About Shalin Designs:
Shalin Designs specializes in providing innovative CAD solutions for a variety of design needs. With a focus on transforming spaces from dream to reality, our expertise spans dining room designs, living room transformations, and more. Our commitment to quality and precision ensures that our clients receive the best possible solutions tailored to their unique requirements.
For more information about Shalin Designs Furniture Design Services, please visit https://shalindesigns.com/furniture-design/
Shalin Designs
+44 7540215955
[email protected]
0 notes
Text
SketchUp Software Subscriptions Plans in India - PI Software
If you're new to SketchUp and want to understand how to subscribe to this powerful 3D modeling software in India, you've come to the right place. This guide will take you through the process step-by-step, ensuring you have all the information you need to get started.
Step 1: Understand SketchUp's Subscription Plans
SketchUp offers various subscription plans tailored to different needs. The main plans available are:
SketchUp Free: A web-based version with limited features, suitable for hobbyists.
SketchUp Shop: For personal projects and makers, offering more tools than the free version.
SketchUp Pro: For professional use, with a full suite of tools and features.
SketchUp Studio: Includes advanced tools like Sefaira for energy analysis and other premium features.
When choosing a SketchUp subscription plan, it's important to understand the features and benefits of each option to select the one that best suits your needs. Here’s a detailed breakdown of the available subscription plans:
1. SketchUp Free
Best For: Hobbyists and beginners exploring 3D modeling.
Features:
Web-based application, no installation required.
Basic 3D modeling tools.
Limited cloud storage (Trimble Connect).
Access to the 3D Warehouse for free models.
No commercial use allowed.
Limitations:
No access to advanced tools and features.
Limited file export options (only .SKP files).
Cannot use extensions or plugins.
2. SketchUp Shop
Best For: DIY enthusiasts, woodworkers, and makers who need more functionality than the free version.
Price: Approximately ₹7,000/year (check PI Software for current pricing).
Features:
Web-based application with enhanced capabilities.
Advanced 3D modeling tools compared to SketchUp Free.
Increased cloud storage (Trimble Connect).
Access to the 3D Warehouse.
Export options to various file formats (including .STL and .DWG).
Use for personal projects and small-scale commercial use.
Limitations:
Still web-based, so requires an internet connection.
Limited in comparison to SketchUp Pro and Studio in terms of professional features and tools.
3. SketchUp Pro
Best For: Professionals in architecture, engineering, construction, and other design industries.
Price: Approximately ₹22,000/year (check PI Software for current pricing).
Features:
Desktop application for both Windows and Mac.
Full suite of professional 3D modeling tools.
Advanced drawing and documentation tools (LayOut).
Style Builder for custom edge styles.
High-quality, customizable materials and textures.
Extensive import/export options (including .DWG, .DXF, .STL, .OBJ, and more).
Full access to the Extension Warehouse for plugins.
Use for commercial projects.
Higher cloud storage (Trimble Connect).
Limitations:
Requires installation on your device.
Higher cost compared to Free and Shop versions.
4. SketchUp Studio
Best For: Professionals and studios needing advanced features, particularly for performance analysis and large projects.
Price: Approximately ₹70,000/year (check PI Software for current pricing).
Features:
All features included in SketchUp Pro.
Includes Sefaira for energy analysis and building performance.
Real-time collaboration and model sharing.
Access to advanced rendering tools.
Higher level of technical support and customer service.
Enhanced cloud storage capacity (Trimble Connect).
Ideal for large-scale projects and comprehensive analysis.
Limitations:
Higher cost, suitable for users who need the advanced features.
Requires installation and higher system specifications.
Conclusion
Choosing the right SketchUp subscription plan depends on your specific needs and how you intend to use the software. Here's a quick summary to help you decide:
SketchUp Free: Ideal for casual users and beginners who want to explore 3D modeling without any cost.
SketchUp Shop: Great for hobbyists and makers who need more features than the free version offers.
SketchUp Pro: Perfect for professionals who require a comprehensive set of tools for detailed and complex projects.
SketchUp Studio: Best for advanced users and studios needing performance analysis and premium features.
By understanding the features and limitations of each plan, you can make an informed decision that aligns with your 3D modeling needs.
0 notes
Text
Revit vs SketchUp: Top 10 Differences You Should Know

When it comes to 3D modeling and design, two of the most popular software options are Autodesk Revit and SketchUp. Both are powerful tools used by architects, engineers, and designers worldwide, but they have distinct differences that make each suitable for different types of projects and workflows. Here are the top 10 differences you should know between Revit and SketchUp (Revit vs Sketchup).
1. Purpose and Specialization
Revit is a Building Information Modeling (BIM) software specifically designed for architects, engineers, and construction professionals. Its primary focus is on detailed architectural design, structural engineering, and MEP (mechanical, electrical, and plumbing) systems.
SketchUp, on the other hand, is a 3D modeling tool that’s more versatile and user-friendly, catering to a broader audience, including architects, interior designers, landscape architects, and even hobbyists. Its simplicity makes it ideal for quick concept modeling and visualization.
2. Ease of Use
SketchUp is known for its intuitive and user-friendly interface. It allows users to quickly create 3D models without needing extensive training. Its learning curve is relatively shallow, making it accessible to beginners.
Revit, however, has a steeper learning curve due to its comprehensive feature set and technical complexity. It requires more training and practice to master, but this investment in time can pay off for professionals needing detailed, data-rich models.
3. Level of Detail
Revit excels in producing highly detailed and accurate models. It allows for precise documentation and construction details, making it ideal for creating construction documents, schedules, and specifications. Revit’s BIM capabilities mean that every change made to the model updates automatically across all views and documents.
SketchUp is great for conceptual designs and early-stage project visualization. While it can produce detailed models, it’s generally used for more basic representations compared to the intricate detailing possible in Revit.
4. Collaboration and Workflow Integration
Revit is designed for collaboration. It supports multi-user environments, allowing several team members to work on the same project simultaneously. Its integration with other Autodesk products and BIM 360 enhances project coordination and collaboration.
SketchUp supports collaboration through cloud services like Trimble Connect, but it doesn’t have the same level of multi-user support and workflow integration as Revit. It’s more commonly used for individual work or smaller team collaborations.
5. Rendering Capabilities
Revit includes built-in rendering capabilities and supports advanced rendering through Autodesk’s cloud rendering service. This allows for the creation of photorealistic images directly within the software.
SketchUp requires third-party rendering plugins, such as V-Ray, Lumion, or Enscape, to achieve photorealistic rendering. While this provides flexibility, it can also mean additional costs and learning additional software.
6. Cost and Licensing
SketchUp offers a free version (SketchUp Free) with limited features, making it accessible to hobbyists and small projects. The paid versions, SketchUp Pro and SketchUp Studio, offer more advanced features at a relatively affordable price point.
Revit is a high-end, professional-grade tool with a corresponding price tag. It’s available through subscription, which can be a significant investment for firms and individuals, but it includes extensive features and support.
7. Customization and Extensions
SketchUp has a large library of extensions and plugins available through the Extension Warehouse, allowing users to customize the software to their needs. This makes SketchUp highly adaptable for different types of projects.
Revit also supports customization through plugins and scripts, but its ecosystem is not as extensive or user-friendly as SketchUp’s. However, the available plugins are highly specialized and often focused on professional BIM workflows.
8. File Compatibility
Revit uses proprietary file formats (.rvt for project files, .rfa for families). It integrates well with other Autodesk products and supports various export formats for interoperability with other software, including IFC for BIM data exchange.
SketchUp uses the .skp file format but supports a wide range of import and export formats, making it versatile for use with other 3D modeling and CAD software. Its compatibility with other design tools is one of its strengths.
9. Performance
SketchUp is less resource-intensive compared to Revit, running smoothly on less powerful hardware. This makes it a good choice for users with limited hardware capabilities.
Revit requires more robust hardware due to its complex and detailed modeling capabilities. It can be demanding on system resources, especially for large projects.
10. Target Audience
Revit is aimed at professionals in architecture, engineering, and construction who need a comprehensive tool for detailed design and documentation. Its BIM capabilities make it essential for large-scale projects and collaborative environments.
SketchUp is ideal for designers who need a quick, easy-to-use tool for creating and visualizing concepts. Its versatility makes it popular among a wide range of design professionals, including architects, interior designers, and landscape architects.
Conclusion
Choosing between Revit and SketchUp depends on your specific needs and project requirements. Revit is the go-to choice for detailed, data-rich architectural and engineering projects, while SketchUp excels in simplicity and quick, intuitive 3D modeling. Understanding these differences can help you make an informed decision and select the best tool for your design workflow.
0 notes
Last Seen Blogs

holiday-post
Holiday-Postcards

noodlenood
NOODLE

rocksteady81
rock.steady

timelessstudio1
Time Less Studio

naturelinkartbyruth
Nature Link