#RotaryEncoders
Explore tagged Tumblr posts
Visit Tumblr Blog
Explore Tumblr blogs with no restrictions, modern design and the best experience.
Last Seen Tumblr Blogs


Fun Fact
When “GIF” was named word of the year in 2012, Oxford Dictionaries U.S.A. credited Tumblr for pushing the word.
Text
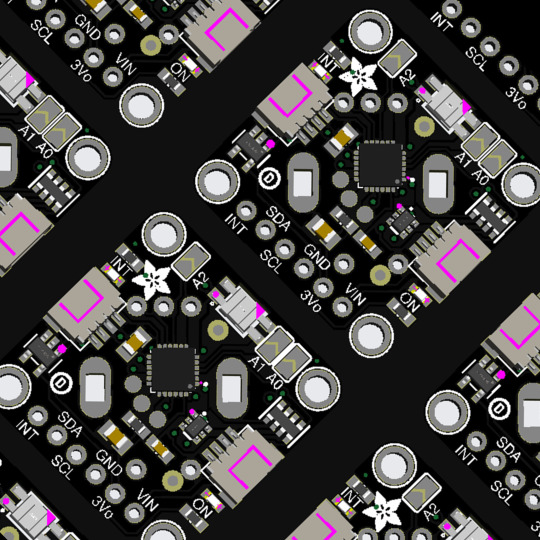
quad-rotary board is getting ready to stock 🔁🎛️💻🔄🔌
this seesaw board converts 4 rotary encoders to I2C for adding a ton of twists. like our other attiny8xx boards, we use a metro m0 to do the programming of the UPDI interface, then communicate over I2C to check each pin is not shorted or open. this will be in the shop soon so don't get your knickers in a twist! https://www.adafruit.com/product/5752
4 notes
·
View notes
Text
Jayashree Encoders provides Rotary Encoder, hollow shaft rotary encoder, incremental encoder, htl encoder at best price. It is the best rotary encoder Supplier, Manufacturer, Exporter, Dealer company in Pune, Mumbai, Kolkata, Bangalore, Gujrat, Amravati, Nashik, Chennai, Tamilnadu, Nagpur, Ahmednagar, Satara, Sangli, Delhi, UP, MP, Madhya Pradesh, India. With over 25 years of expertise, we are proud to be leaders in the manufacturing of optical encoders. As a trusted industry expert, we have a proven track record of delivering high-quality, reliable, and precise optical encoders for various industries and applications. Explore our website to learn more about our optical encoders, capabilities, and services. Contact us today to discuss your optical encoder needs and experience the expertise and quality that sets us apart.
0 notes
Video
tumblr
absolute optical encoder #servoencoder #hollowshaftencoder #incrementalencoder #rotaryencoder absolute optical encoder,servo encoder, hollow shaft encoder, incremental encoder,rotary encoder, motor speed encoder Changchun Rongde Optics Co.,Ltd www.roundssencoder.com [email protected]
0 notes
Video
youtube
What type of rotary encoder of our LED display a rotary encoder able to support? with an LED display panel in the context of a manufacturing execution system (MPM). Rotary encoders are input devices that can be used to control various parameters or functions in industrial settings, including LED display panels. specifics of programming and hardware setup can vary based on the brand and model of your LED display panel, as well as the type of rotary encoder you are using. Always refer to the user manuals and technical documentation provided by the manufacturers for detailed guidance specific to your equipment.
Program the control system of Custronics LED MPM/PPM display panel to interpret the signals from the rotary encoder correctly. you may program according shown in the video on type of the signals from the encoder.
#custronics #mpmdisplay #rotaryencoder #ppmdisplay #spmdisplay #cpmdisplay #malaysiamade
https://youtu.be/k9oed-8IwMg
0 notes
Link
At SR Indus Electro Systems, we strive to be the most efficient in the field of supplying various industrial automation components to the Power, Industry, Transportation, Communication, and Energy sectors. We provide industrial automation services, achieving maximum productivity with minimum wasted effort or expense. And we are one among the top distributors of Harting, Weidmuller, Hengstler and Partex in the country. SRIE provides the best industrial automation solutions and are leading automation tool providers from branded companies. SR Indus Electro Systems is your one-stop-shop for industrial networking products, power supply products, connectors, cables, cable systems, encoders, and timers.
#rotaryencoders#SRINDUS#ElectroSystem#industrialautomation#toolsdistributors#manufacturing#suppliers#weidmullerterminalblocksdistributorsinIndia#MaxondistributorsIndia#hartingsuppliers#cableassemblies#hengstlerencoders
0 notes
Text
Review Komponen Elektronik Hollow Shaft

Concave shaft Poros-salah satu dasar paling penting dari teknik mesin Tidak ada keraguan bahwa poros-dalam semua jenis dan konstruksi khusus mereka-adalah salah satu faktor yang paling penting dalam teknik mesin. Ini adalah kemampuan mereka untuk melakukan kalung dan mendukung koridor berputar yang membuat mereka begitu integral dengan hampir semua jenis mesin. Dari segi tampilan visualnya, poros menyerupai batang atau batang memanjang dan diproduksi dalam berbagai ukuran. Bahan dari mana itu dibuat pertama dan terutama dinamai sesuai dengan operasi yang dimaksudkan dan tuntutan yang harus dipenuhi dalam penggunaan. Kondisi pendahuluan yang serupa dengan kekuatan material, kemampuan mengeras dan kekakuan dipenuhi oleh jenis pedang struktural yang berwarna-warni. Juga, merek hardened & tempered atau case hardening secara substansial digunakan dalam operasi di mana poros harus cocok untuk menolak situasi kargo tinggi dan memenuhi kondisi segar. Baik dari segi struktur maupun fungsinya, yang disebut poros cekung adalah konstruksi yang sangat diperlukan yang memiliki karakteristik yang sama dengan model konvensional.
Namun, dalam perbedaan dengan poros padat yang khas, fakta bahwa poros itu cekung memberinya sejumlah atribut positif yang membuat poros jenis ini menjadi elemen yang populer dan luas dari berbagai jenis mesin. Karakteristik dan manfaat poros cekung Keuntungan utama dari konstruksi karakteristik poros cekung adalah penghematan berat yang sangat besar yang dihasilkannya, yang menguntungkan tidak hanya dari segi teknik tetapi juga dari sudut pandang fungsional. Cekung faktual itu sendiri memiliki keuntungan lain-menghemat ruang, seperti pundi-pundi operasi, media, atau bahkan dasar-dasar mekanis yang sama seperti as dan poros TRD-NH600-RZ KOYO ELECTRONICS dapat ditampung di dalamnya atau mereka menggunakan ruang kerja sebagai saluran. Selain itu, poros cekung umumnya memiliki frekuensi dengung yang cukup tinggi. Drive servo seri CanisDrive ® dari Harmonic Drive AG juga memiliki poros cekung tengah yang besar, yang merupakan salah satu aspek utama dari variasi operasi seri produk. Proses produksi poros cekung jauh lebih kompleks daripada poros padat konvensional. Selain konsistensi dinding, bahan, menjadi kargo dan kalung kerja, batas-batas yang mirip dengan pinggiran dan panjang memiliki pengaruh besar pada stabilitas poros cekung. Namun, untuk kasus, konsistensi dinding dan pinggiran tidak saling dikonfigurasi dalam hubungan yang sesuai dengan hukum fisika, Jika. Dibandingkan dengan poros padat dari pinggiran yang sama, kalung yang dapat ditransmisikan dari poros cekung hanya sedikit lebih rendah. Poros cekung merupakan elemen penting dari motor poros cekung, yang digunakan pada kendaraan bertenaga listrik, seperti kereta api. Poros cekung juga cocok untuk konstruksi tipu muslihat dan institusi serta mesin otomatis.
Perbedaan antara poros dan poros Meskipun istilah poros dan poros sering digunakan secara sinonim dalam bahasa sehari-hari, di lingkungan dasar kementerian, mereka memiliki karakteristik yang berbeda – termasuk dalam hal fungsinya. Tidak seperti poros, as tidak mengirimkan kalung, tetapi hanya memberikan dukungan untuk berputar atau berosilasi koridor. Tugas utama poros apa pun adalah berfungsi sebagai bantalan untuk faktor mekanis yang berputar. Mereka umumnya dipasang di rangka mesin dan sering kali mengalami tekanan besar dari gaya silang dan momen lentur. Dalam satu aspek fungsinya, as dan poros memang memiliki komoditas yang sama. Keduanya cocok untuk mendukung faktor lain. Dalam perbedaan, hanya poros padat dan konstruksi terkait yang serupa dengan poros cekung yang cocok untuk mengirimkan kalung. Alasan lain mengapa kedua dasar ini terus-menerus dikacaukan adalah karena tampilannya serupa—baik as dan poros memiliki bentuk pengantar batang atau batang memanjang. Bentuk poros khusus lainnya Poros cekung bukan satu-satunya bentuk konstruksi kehendak. Ada yang lain, yang umumnya dirancang untuk bidang operasi tertentu dan memenuhi kondisi area ini berdasarkan konstruksi spesifiknya. Salah satu ilustrasi bentuk konstruksi khusus untuk poros disebut poros fleksibel. Sejauh menyangkut fungsi pengantar, mereka tidak berbeda dengan poros padat atau cekung, karena mereka bertanggung jawab untuk melakukan transmisi daya elektromekanis. Namun, ada perbedaan yang signifikan dalam konstruksi poros jenis ini. Sebuah poros fleksibel terdiri dari garis inti, di mana garis lain, yang mirip dengan garis pedang pegas, retak. Kabel ini berputar sebagai kabel, juga disebut sebagai inti poros, diikat oleh kaus kaki pelindung. Keuntungan khusus dari konstruksi poros fleksibel berperan di mana transmisi daya langsung tidak memungkinkan atau poros penggerak dan lepas landas daya tidak diselaraskan secara memadai. Pakaian operasi bergerak mirip seperti dril.
Sumber : https://teramitra.com/shop/trd-nh600-rz-koyo-electronics/
1 note
·
View note
Photo

. در ادامه پست قبلی در مورد انواع انکودر ها از نظر ساختار و عملکرد، به توضیح مفصلی در مورد انکودر های مغناطیسی و دو نوع هال افکت و مگنتو رزیستیو به همراه بخش ها و اجزاء آن ها می پردازیم. همچنین از مزایا و معایب این انکودر ها نسبت به انکودر نوری و کاربرد هایشان اشاره نموده ایم. در صورت نیاز که هر گونه سوال و مشاوره فنی با شماره های داخل بیو تماس حاصل نمایید. . فروشگاه اینترنتی "تجهیزات کنترل حرکت ایران"، تنها راه ایمن برای خرید تجهیزات شما برای مشاهده محصولات کافیست به وبسایت ما مراجعه یا با ما در تماس باشید. http://iranmotioncontrol.ir/ مهندس پدرام . . . . . . . . . . . . #autonicsencoder #انکودر_افزایشی #هیدرولیک_و_پنوماتیک #برق_صنعتی #سنسور_القایی #تعمیرات_Cnc #زیمنس_آلمان #زیمنس #siemens #Schneider #اشنایدر #اینکودر #heidenhain #rotaryencoder #آتونیکس #اتونیکس #ترنسمیتر #ترانسفورماتور #سروموتور #انکودر #انکدر #صنعت #برق #idencoder #encoder #baumer #Motioncontrol #motion_control (at Iran Tehran) https://www.instagram.com/p/CTJ9grMDJVJ/?utm_medium=tumblr
#autonicsencoder#انکودر_افزایشی#هیدرولیک_و_پنوماتیک#برق_صنعتی#سنسور_القایی#تعمیرات_cnc#زیمنس_آلمان#زیمنس#siemens#schneider#اشنایدر#اینکودر#heidenhain#rotaryencoder#آتونیکس#اتونیکس#ترنسمیتر#ترانسفورماتور#سروموتور#انکودر#انکدر#صنعت#برق#idencoder#encoder#baumer#motioncontrol#motion_control
0 notes
Text
Jayashree Encoders provides ip65 rotary encoder, photoelectric rotary encoder, rotary encoder 1024, rotary encoder 600 pulse, rotary encoder pins at best price. It is the best rotary encoder Supplier, Manufacturer, Exporter, Dealer company in Pune, Mumbai, Kolkata, Bangalore, Gujrat, Amravati, Nashik, Chennai, Tamilnadu, Nagpur, Ahmednagar, Satara, Sangli, Delhi, UP, MP, Madhya Pradesh, India. With over 25 years of expertise, we are proud to be leaders in the manufacturing of optical encoders. As a trusted industry expert, we have a proven track record of delivering high-quality, reliable, and precise optical encoders for various industries and applications. Explore our website to learn more about our optical encoders, capabilities, and services. Contact us today to discuss your optical encoder needs and experience the expertise and quality that sets us apart.
0 notes
Text
Activity board: It's all about the code!

With the activity board controller finally in place and tested. It's time to throw together the actual firmware. Let's fire up VSCode!
VSCode has been my code editor of choice for quite a while now. Microsoft did a great job in developing a light weight but super powerful code editor. And with the advent of a PlatformIO VSCode extension, this makes for THE perfect Arduino IDE.

That being said, It's time to start working on the final firmware. Or actually: the final firmware for now. Because the Activity Board will probably be a project which will receive some (software) updates over time.

All the board's functionality will be seperated into a bunch of controllers. There is no particular reason why I called them controllers, It just sounds like I know what I'm doing. For now, the code consists of the following 5 controller classes:
InputController: Responsible for reading all the switch states by communicating with the MCP23017 over I2C.
SevenSegmentController: Controls the 7-segment display by communicating with the MAX7219 seven segment display.
NeopixelController: Controls all the WS2812B RGB-LEDs using the FastLED library.
LedController: Controls all the regular LEDs (incorporated in some of the buttons) using the Arduino GPIO pins.
CommunicationController: Sends JSON commands (like the buttons state updates) to a Raspberry Pi using the ArduinoJson library.
All of the controller classes have a setup() method which is called in the main.cpp setup routine, and most of the controllers have an update() method which is being called during the main run loop.
All of the update() methods are non blocking, to make sure the Activity Board stays responsive. Any necessary delays are implemented by using the elapsedMillis library. But every so often, I just simply count the update ticks to check if I need to do something.
if (tick++ % 100 == 0) { // do something every 100th cycle. }

Most of the controllers are pretty straight forward, and are just there as an easy to use wrapper for the respective libraries. The only controller that is a bit more exotic, is the InputController. To be honest, this controller gave me some headaches.
Don't interrupt me!
The MCP23017 I2C IO expander is capable of firing interrupts whenever one of the inputs changes. Because of this, I connected the two interrupt outputs of the MCP23017 to the Arduino interrupt pins (Pin 2 & 3). It turned out I only needed to connect one, since the MCP23017 can mirror the interrupt signal on both pins. Luckily this was just resulted in a redundant connection, and didn't caused any issues.
Unfortunately there was a bigger problem which I didn't forsee. While the MCP23017 is capable of triggering the Arduino's interrupt pin(s), I'm not able to read out the pin states in the interrupt service routines, since I2C uses interrupts itself, which aren't available in the interrupt service routines.

This means I can set a flag to request an update in the main loop, but I can never act on any input change in the service routine itself. Now for most of the inputs this is absolutely no problem, but for the rotary encoder I really need to check the state for both pin A and B. Now, if these two pins were both connected to the two different MCP23017 registers, I could have solved this with the two Arduino Interrupt pins. Or better yet. If I would have just connected the Rotary encoder directly to the Arduino's interrupt pins, it would have been even easier. But of course ... I didn't.
So after a lot of grumbling, I decided to give up on the interrupts for the rotary encoder (for now), and simply read out the MCP23017 data every run loop. I might mean the encoder wouldn't react as expected, but I could always make some hardware modifications later.
And with taking this easy route, reading the MCP23017 state was pretty straight forward, using Mizraith's fork of the Adafruit MCP23017 library:
// Initialize the library. Adafruit_MCP23017 mcp; // Configure the MCP23017. mcp.begin(); // Use default address 0. mcp.setGPIOABMode(0xFFFF); // All ports input. mcp.setGPIOABPullUp(0xFFFF); // All ports pull up. // Read out the 16 bits. unsigned int newState = mcp.readGPIOAB();
And then it turned out I spent way to much time in overthinking it. Since non of my other controllers is blocking the main run loop, fetching the current state up the buttons every loop is easily fast enough to handle any rotary encoder input. Once again, it turns out KISS is the best approach: Keep It Simple, Stupid!
And with that issue out the way, it was a matter of hooking up all the controllers in my main.cpp file. Whenever an input change, execute an action for that specific input.

This setup really enables me to easily add more actions to any of the buttons. Now and in the future.
And by sending any input change as a json object over the serial port, I can continue using the inputs in my future Raspberry Pi implementation.
For now, it just resulted in one awesome looking activity board with a lot of light effects!
Enjoy the show!
youtube
Now, if you are interested in all the fine detail of the code, you can check out the full source code on GitHub. Of course it's fully supplied with unit and integration tests (NOPE!). And it's fully and well documented (NOPE!). Check it it out in the ActivityBoardController repository!
Read all posts in this series:
Part 1: Enzo’s Control Room Part 2: Building the Box Part 3: Fire up the Lasers! Part 4: Spray Away! Part 5: Push the button! Part 6: Assembling the panel Part 7: The dial on the board goes round and round Part 8: Take control! Part 9: It’s all about the code! Part 10: Bake me some Pi! Part 11: The Final Touch
#vscode#platformio#activity#board#activityboard#arduino#mcp23017#max7219#ws2812b#ws2812#neopixel#raspberrypi#led#rotaryencoder#interrupts
4 notes
·
View notes
Link

Dubai Sensor is offering Rotary Encoder For complete info and technical information Email Address: [email protected] Toll-Free Number: 800 6001 (For UAE Resident) Landline 1 : +971-4-2595133 Landline 2 : +971-4-3377738 Mobile: +971-50 435 5693
0 notes
Photo

Sort the Rainbow with an Algorithm Machine #Algorithm #ESP32 #microcontrollers #RotaryEncoder https://t.co/RnCDc1ediS http://twitter.com/iandroideu1/status/1226853649235640321
Sort the Rainbow with an Algorithm Machine #Algorithm #ESP32 #microcontrollers #RotaryEncoder https://t.co/RnCDc1ediS
— iAndroid.eu (@iandroideu1) February 10, 2020
0 notes
Text
Yuk Simak Penjelasan Menarik Tentang Encoder

Bagaimana mengukur kuantum girasi dan kecepatan putar? Ada instrumen kesempurnaan warna-warni di sekitar kita. Peralatan Rumah Tangga, robot tanaman, dan mesin. Bias ini pada prinsipnya dikonfigurasi sebagai berikut.Detektor yang menjelaskan pergerakan dan status perangkat. Regulator yang membuat penilaian dan proses berdasarkan sinyal dari detektor Selektor yang memindahkan bias didasarkan pada informasi yang digunakan kembali oleh regulator. Untuk mengontrol bias ini secara langsung dan cepat, penting untuk mendeskripsikan pergerakan dan kondisi. Dengan demikian, faktor elektronik yang disebut encoder digunakan untuk menggambarkan sudut girasi, jarak gerak, dan girasi/kecepatan gerak.
Jadi apa itu encoder?
Apa itu pembuat enkoder ?Encoder adalah detektor yang membuat sudut girasi dan degradasi langsung. Encoder yang mendeteksi gyration disebut rotary encoder, dan encoder yang mendeteksi degradasi langsung disebut direct encoder.Faktanya, karena tipe putar digunakan dalam banyak kasus, ketika orang mengatakan hanya encoder Omron Rotary Encoder E6C2-CWZ6C , itu sering mengacu pada rotary encoder. Dalam seri ini, kami terutama akan berkonsentrasi pada rotary encoder.1-3. Di mana encoder digunakan?Seperti disebutkan di pagi hari, encoder digunakan dalam bias yang perlu beroperasi dengan cepat dengan kehalusan tinggi. Secara khusus, ini adalah perangkat yang ditenagai oleh motor. Sebagai ilustrasi, encoder banyak digunakan dalam robot buatan yang digunakan di pabrik serupa seperti robot perakitan, robot las, mesin berpemandu otomatis, dan pusat permesinan.Namun, sebagian besar orang sekarang telah melihat pabrik paling belakang di mana robot buatan bekerja sepanjang waktu. Mari kita telusuri beberapa kasus di mana encoder benar-benar digunakan. Instalasi produk warna-warni digunakan di pabrik-pabrik yang memproduksi peralatan listrik dan mobil. Komputer mengontrol peralatan mesin yang membuat koridor dari esensi, dan satu mesin dapat melakukan efek warna-warni seperti memotong cangkang datar, mengebor lubang, dan memotong alur. Peralatan mesin serupa disebut pusat permesinan. Koridor yang dihasilkan dipindahkan ke pabrik perakitan dan secara otomatis dirakit oleh robot buatan yang serupa dengan mesin perakitan khusus atau robot tipe lengan.Pabrik paling belakang sepenuhnya otomatis dan menggunakan komputer dan jaringan untuk semua proses manufaktur desain, pemrosesan suku cadang, gudang, operasi, transportasi, dan perakitan. Konsepsi "pabrik yang terhubung" ini disebut Industry4.0, dan pabrik serupa disebut pabrik pintar.Robot buatanRobot industri membebaskan manusia dari pekerjaan yang berbahaya dan menuntut ( yang disebut pekerjaan 3D), meningkatkan produktivitas pabrik, dan menstabilkan kualitas produk. Robot buatan yang paling banyak digunakan dan sebagian besar praktis adalah robot artikulasi dengan banyak sendi yang berasal dari bahu, siku, dan pergelangan tangan manusia. Ia bekerja seperti lengan fana dengan gerakan pivot, gyration dan slide. Sinyal input dari regulator diubah menjadi stir oleh selektor, dan robot digerakkan dengan tepat.Bagian yang sesuai dengan "lengan" dari bahu fana ke pergelangan tangan disebut manipulator, dan bagian yang sesuai dengan "tangan" dari pergelangan tangan fana ke irisan daging disebut efektor akhir. Dalam robot buatan, dengan mengubah efektor ujung, dimungkinkan untuk menangani tidak hanya perampasan tetapi juga minyak dan pengelasan. Namun, Anda benar-benar dapat melihat robot artikulasi yang dipajang oleh perusahaan warna-warni, Jika Anda mengunjungi pameran robot atau peralatan mesin.
Pemilih Motor digunakan sebagai penyeleksi robot karena mudah diminiaturisasi dan memiliki tingkat kelezatan yang tinggi. Dalam kasus nyata, orang menggunakan selektor dengan peningkatan gaya rotasi ( kalung) dengan mengintegrasikan gigi reduksi yang bekerja sama seperti transmisi sepeda ke poros motor dan memperlambat kecepatan putaran motor.Ada juga penggeser listrik yang menghasilkan gaya besar ke arah gerakan dengan mengubah gerakan dari rotasi ke arah langsung dengan sekrup. Anda juga dapat melihat ini di pameran. Servo motorAda begitu banyak jenis motor, dan sangat membingungkan. Kami akan berkonsentrasi pada motor yang menggunakan encoder dalam komposisi ini.Salah satu ilustrasinya adalah servomotor. Servomotor adalah motor yang digunakan dalam mekanisme servo. Servomechanism adalah media yang menjaga kecepatan rotasi nonstop atau direct stir konstan, atau secara tepat mengontrol sudut girasi dan jarak trip dari satu gerakan. Motor servo terdiri dari motor DC atau AC tanpa sikat, encoder, dan penguat servo (juga disebut pengendara).Untuk menjaga kecepatan putaran motor DC brushless atau motor AC konstan, encoder mendeteksi kecepatan putaran sumber :https://alfa.elektrindo.co.id/part/omron-rotary-encoder-e6c2-cwz6c/
0 notes
Video
tumblr
How to make"Automatic Watering System" part1 如何自己動手做"自動定時澆水器"Part1 #icshop #diy #arduino #lcd #rotaryencoder#ds3231 #moter #controller #modules#buzzer #rs385
1 note
·
View note
Text
Sensores y Conectividad Arduino
Sensores Keyes
Keyes 040 . Decoder
https://playground.arduino.cc/Main/RotaryEncoders
Keyes 022. Receptor Infrarojo
https://arduinomodules.info/ky-022-infrared-receiver-module/
Modulo IR receptor KY-022, reacciona a luz infraroja de 38kHz.
Utiliza la librería: http://z3.t0.github.io/Arduino-IRremote/
Especificaciones: This module consists of a 1838 IR receiver, a 1kΩ resistor and a LED. It works together with the KY-005 IR transmitter module. Compatible with popular electronic platforms like Arduino, Raspberry Pi and ESP8266.
Connection Diagram: Connect the Power line (middle) and ground (-) to +5 and GND respectively. Connect signal (S) to pin 11 on the Arduino. Line un IR receiver and transmitter.
KY-012 to Arduino
S Pin 11 middle +5V - GND
Keyes 005 Emisor Infrarrojo
Los sensores que estoy explorando son para el manejo de este aparato, switch para controlar el disparo de la cámara, como forma de exploración de los sensores.
http://www.andreadicastro.com/academia/electronica/arduino2html/foto.html

(Encoder y led)
Conexión Ableton Live 9 y Arduino.
En segundo término quiero integrarlos con la conectividad de la computadora.
Estoy checando la conectividad de Arduino con la computadora, una de las formas es con programas específicos, como Ableton Live 9, para el control de diferentes parámetros de los sonidos, a travez de sliders, knobs o botones.
https://ask.audio/articles/creating-an-analog-arduino-controller-for-ableton-live
Arduino integra estas funciones en los Ejemplos del propio arduino, como FIRMATA (File > Examples > Firmata > StandardFirmata). Mientras que Ableton Live los integra a travez de su Connection Kit, un paquete permite integrar facilmente Arduino con Abletone Live, a travez de Max (Max for Live).
https://www.ableton.com/en/packs/connection-kit/

0 notes
Text
PCB of the day! Adafruit I2C Stemma QT Rotary Encoder Breakout with NeoPixel - STEMMA QT / Qwiic 🔧🔄🎛️
Rotary encoders are soooo much fun! Twist them this way, then twist them that way. Unlike potentiometers, they go all the way around and often have little detents for tactile feedback. But, if you've ever tried to add encoders to your project, you know they're a real challenge to use: timers, interrupts, debouncing…
This Stemma QT breakout makes all that frustration disappear - solder in any 'standard' PEC11-pinout rotary encoder with or without a push switch. The onboard microcontroller is programmed with our seesaw firmware and will track all pulses and pins for you and then save the incremental value for querying over I2C. Plug it in with a Stemma QT cable for instant rotary goodness with any microcontroller from an Arduino UNO up to a Raspberry Pi.
You can use our Arduino library to control and read data with any compatible microcontroller. We also have CircuitPython/Python code for use with computers or single-board Linux boards.
#adafruit#electronics#pcb#opensource#opensourcehardware#pcboftheday#arduino#raspberrypi#circuitpython#python#linux#rotaryencoder#stemmaqt#neopixel#i2c#breakoutboard#engineering#hardware#microcontroller#diy#technology
35 notes
·
View notes