#RV roof inspected
Explore tagged Tumblr posts
Visit Tumblr Blog
Explore Tumblr blogs with no restrictions, modern design and the best experience.
Last Seen Tumblr Blogs


Fun Fact
Tumblr has a low social media market share in South America.
Text
Say Goodbye to Bubbles: A Step-by-Step Guide on How to Fix Bubbles in Your RV Roof
As an RV owner, there's nothing more frustrating than discovering bubbles on your RV roof, especially knowing how much it costs to replace it. These bubbles are not only unsightly, but they can also lead to more serious problems if left unattended. Fortunately, fixing bubbles in your RV roof is not as difficult as you might think. Here’s what you need to know.
Why do bubbles form in an RV roof?
Before we dive into the process of fixing bubbles in your RV roof, it's essential to understand why they form in the first place. Bubbles usually form when the adhesive bond between the roof membrane and the substrate fails, causing air to become trapped between the two layers. This can be caused by a variety of factors, including poor installation, aging and weathering.
How to know when it's time for a repair
The first step in fixing bubbles in your RV roof is to determine when it's time for a repair on the roof seam. If you notice bubbles on your RV roof, it's essential to act quickly to prevent further damage. The longer you wait, the more difficult and costly the repair will be. Some signs that it's time for a repair include:
Bubbles on the roof
Soft spots on the roof
Cracks or tears in the roof membrane
Water leaks inside the RV
How to fix bubbles in your RV roof
Now that you know why bubbles form and when it's time for a repair, let's dive into the step-by-step process of fixing bubbles in your RV roof.
Step 1: Clean the Roof
The first step in fixing bubbles in your RV roof is to clean the roof thoroughly. Begin by removing any debris or loose material from the roof. Next, wash the roof with a mixture of warm water and soap. Rinse the roof thoroughly with clean water and allow it to dry completely before moving on to the next step.
Step 2: Remove the Bubbles
Once the roof is clean and dry, it's time to remove the bubbles. To do this, use a utility knife or razor blade to cut an X-shaped slit in the center of each bubble. Be careful not to cut through the roof membrane. Use your hands to peel back the edges of the cut and remove the trapped air.
Step 3: Repair the Roof
With the bubbles removed, it's time to repair the roof. Apply a thin layer of RV roof sealant to the area where the bubble was located. Smooth the sealant out with a putty knife or roller. Allow the sealant to dry completely before moving on to the next step.
Step 4: Apply a Protective Coating
Once the sealant has dried, it's time to apply a protective coating to the roof. There are many different types of coatings available, but Liquid Rubber is an excellent choice for RV roofs. Liquid Rubber is easy to apply, long-lasting, and provides excellent protection against the elements.
How to prevent them from coming back
Now that you've fixed the bubbles in your RV roof, it's essential to take steps to prevent them from coming back. Here are some tips to help you prevent bubbles from forming in the future:
Have your RV roof inspected regularly by a professional
Avoid parking under trees or other objects that can fall on the roof
Keep your RV roof clean and free of debris
Avoid using harsh chemicals or cleaners on the roof
Use a protective coating, such as Liquid Rubber, to prevent damage from the elements
Why Liquid Rubber is the answer
As mentioned earlier, Liquid Rubber is an excellent choice for protecting your RV roof. Liquid Rubber is a thick, rubberized coating that provides excellent protection against the elements. It's easy to apply, long-lasting, and can be used on a variety of surfaces.
Here are some of the benefits of using Liquid Rubber on your RV roof:
Provides excellent protection against the elements
Easy to apply
Long-lasting
Can be used on a variety of surfaces
Resistant to UV rays and extreme temperatures
Helps prevent bubbles from forming
By using Liquid Rubber on your RV roof, you can help prevent bubbles from forming and protect your roof from the elements.
By following the step-by-step process outlined in this guide, you can fix bubbles in your RV roof and prevent them from coming back. Remember to have your RV roof inspected regularly, keep it clean and free of debris, and use a protective coating like Liquid Rubber to protect against the elements. With these tips, you can keep your RV roof in excellent condition for years to come.
#fix bubbles in your RV roof#RV roof inspected#protecting your RV roof#liquid rubber#RV roof sealant
0 notes
Text
Graveyard
TW: Guns, killing, general violence
Maroon and Dante: ZeddyZi
Gram: Me
Dante inspects his newly-acquired shotgun while Maroon also placed a can with sharp objects sticking out of it “Avi taught me this one” Maroon chuckled “Its called a nailbomb and it blows up anything or anyone standing nearby” She said
“Yeah, I've seen your handiwork” Dante grumbled “Pretty good, huh?” Maroon snickered as Dante carefully picked up the nailbomb and hesitantly put it in his backpack “Dont worry ya gotta pull a peice off to trigger it, It basically works as grenade” Maroon reassured him
“So we got shotguns and bombs. What the hell are we doing with 'em?” Dante asked
“Well, every few weeks this military caravan rides through town. I assume they're out looking for supplies. I mean, you'd be amazed at the shit they overlook. Anyway. Few months back, they were rolling through and they get overrun by this horde of infected. They were all over the truck. It plows right into the side of the high school. Still sitting there with the battery in it” Maroon explained
“So we take that battery and put it in another car?” Dante replied “Bingo. I wanted to get it, but it seemed too dangerous with all the infected on that part of town. But, fuck it… Dante needs a car” Maroon exclaimed
Maroon and Dante walk over to Gram, sitting on the stairs leading to the first floor of the safe house “Dante, you are keeping an eye on them, right?” Maroon asked “Like a hawk” Dante shrugged
Maroon leads the group upstairs to the second floor where she opens a window and climbs out “Move it” She demanded “Gram, c'mon” Dante mumbled leading Gram over to the window and helping him climb out
They climb outside onto a roof overlooking the nearby graveyard then Maroon points into the distance “There's the school” She said beforeThey jump down to ground level and start walking towards the graveyard's gate
Maroon paused “Past this gate, it's all new territory to me” She told them hesitantly unlocking the gate and entering the graveyard where they heard a clicking sound, They enter the next area where many clickers wander
Maroon grabbed a bottle and threw it in the distance to distract all the clickers before she points at another gate and gives Dante the ey for him to unlock him, He unlocks the gate and peeks around the corner
Maroon closes the gate and locks it again as They enter an alley leading to a residential neighborhood where Several infected lurk in the area “You weren't kidding' about this place, were ya?” Dante whispered while They make their way to the end of the street, which is blocked by a large truck
After cutting through the backyards, they enter a garage on the other end of the street. Dante goes to open the side door then He tries to open the door, but it's tied shut “It's tied on the other side” He said
“What about going through here?” Gram asked pointing at the doggy door that was nail shut “What, the doggy door?” Maroon scoffed, Dante pries the plank off the lower flap and Gram crawls through
“Be careful…” Dante mumbled “Maybe you should've given them a gun” Maroon chuckled as Gram unlocks the door and opens it for the two then They it to the other side of the house nearby
“All right, c'mon, let's get up. On the RV and over. We should be clear” Maroon said climbing up onto an RV and helping Gram up as Dante climbed up then cross a plank between a treehouse and the RV “Who the hell left this here? You got friends in town?” Gram asked
“No. Although I have got idea who mighta come through here. School's on the other side of this house. Let's get inside” Maroon replied while they drop out of the treehouse and into another backyard
“Nobody's bitten, right?” Maroon looked back at Gram blinked “Nah-” “Kid’s fine” Dante said before They enter the house and rummage for suppliesuntil they enter the garage “Gimme a hand with this” Maroon said
They both raise the garage door and the trio takes cover behind a car overlooking the Lincoln High School. A large sum of runners roam the parking lot “What'd I tell ya. There's that truck” Maroon pointed at a truck sticking out of the side of the school
“C'mon. There's a bunch of 'em up there, so try not to make a sound” They start sneaking their way through the parking lot but As they pass between two buses, the runners become aware of the group's presence and attacks them
“Gram, run! Run!” “Oh, they're coming from everywhere!” “Christ!”
A Runner ran up to Maroon and was about to attack her from behind but Gram tackled it to the ground stabbing it in the eye with his switchblade and Dante shot one runner in the head, Maroon sliced another’s head off
Soon all the infected were dead “Well, that was easier than I thought it'd be. They must be holed up somewhere else…” Maroon muttered “Well, let's not test our luck. How do we get inside?” Dante asked Gram pointed at a ladder on top of the bus “Someone left a ladder on the bus. Here, get me up there and I'll drop it to you” Gram said, Dante boosts Gram onto the bus who struggles with climbing with a second
“Don't get killed up there” Maroon said “Thanks, Maroon” Gram rolled his eyes dropping the ladder down allowing the two adults to climb
They drop down the other side of the bus and hear an incoming swarm of infected in the distance “Shit. You hear that? They're coming. Move it, kid!” Maroon shouted “All right, we're gonna get in quick. We're gonna get the battery. We're gonna get the hell outta here!” She added
Maroon and Dante run towards the main doors and tries to open them. Gram notices the horde of infected beginning to run towards the fence “Oh, fuck. They're piling on this fence over here!” Gram yelled
Dante tried to open the doors but they were locked “Goddammit. They're locked!” He shouted as the three around to the side of the school. There, they find a nearby window. Dante runs to the window and opens it
“Go, go, go, you two! Go!” Maroon climbed through the window then helped Gram climb through, Just as Dante goes to follow them through the window, a clicker jumps on his back “Dante!” Gram exclaimed
Maroon grabs Dante and pulls him through the window, then kills the clicker with her shotgun while Gram closes the window “Maroon, make it fast!” Dante said as The infected start banging on the main doors
Dante and Gram barricade the main doors with a metal shelf and hold it in place while Maroon attempts to open the truck's hood “Please tell me you're done!” Dante groaned before Maroon uses her shotgun to break open the hood and She looks inside
“It's empty…”
“What?!” Dante yelled moving over to the truck, seeing it is empty “It's fuckin' empty!” Maroon told him “Guys!” Gram shouted still holding back the barricade “Maroon, where to?” Dante asked
“Uh-” Maroon paused “Maroon, where?!” Dante repeated as Maroon hesitated “Anywhere but here!” She replied while Dante runs over to Gram and grabs his arm dragging him away from the door
“Get ready to haul ass. C'mon!” Maroon shouted…
Prev / Next
#ramshackle#ramshackle dante#ramshackle maroon#ramshackle gram#ramshackle au#tlou au#ramshackle x tlou#au writing#au post
4 notes
·
View notes
Text
RV Maintenance Tips for Traveling Through Crawfordville, Georgia
Traveling through Georgia, especially near areas like Crawfordville, offers picturesque views, tranquil surroundings, and the ultimate escape into nature. As you journey, it’s crucial to ensure your RV is in tip-top shape. Whether you’re staying at Sunrise River RV Park or passing through RV parks near Augusta, GA, maintaining your RV is vital to ensure a smooth and enjoyable trip. Below are some essential RV maintenance tips to keep in mind as you explore this beautiful region.

1. Regular Tire Inspections
One of the most critical aspects of RV maintenance is tire care. Before heading to any RV park near Augusta, GA, check your tires for proper inflation, wear, and tear. The varied terrain in Georgia, from highways to forest trails, can strain your tires. Ensure they are inflated to the manufacturer's recommended pressure. Also, inspect the treads for any signs of excessive wear, and replace tires if necessary. A blowout on the road can be dangerous and inconvenient, so this simple check can save you a lot of trouble.
2. Check and Maintain Brakes
Given the hilly landscapes around Crawfordville, ensuring your brakes are in excellent condition is essential. Regularly check the brake pads, rotors, and fluid levels. If you notice any squeaking, grinding, or decreased braking efficiency, get them serviced immediately. The peace of mind knowing your brakes are functioning correctly will make your travel through Georgia’s scenic routes much safer.
3. Inspect Roof Seals and Vents
Georgia’s climate can be unpredictable, with sudden rain showers even in sunny conditions. To avoid leaks and water damage, inspect the seals around your RV's roof, windows, and vents. Look for any cracks or deteriorated seals, and reapply sealant if necessary. This small step can prevent costly repairs later, especially if you're planning to stay at Sunrise River RV Park, where the natural surroundings are best enjoyed dry and leak-free!
4. Keep the Electrical System in Check
Your RV’s electrical system is its lifeline, powering everything from the refrigerator to the air conditioning. Before you park at any RV park near Augusta, GA, inspect your batteries, wires, and connections. Make sure your batteries are fully charged and in good condition. Test your generator to ensure it’s functioning properly, especially if you plan to camp in more remote areas like Crawfordville. Keeping a multimeter handy can help you diagnose any electrical issues that may arise on the road.
5. Monitor Your Water System
Georgia’s humidity and temperatures can lead to unique challenges for your RV’s water system. Regularly check your freshwater, gray, and black water tanks for leaks or signs of wear. Ensure that the hoses are in good condition and securely connected. If you plan on staying at Sunrise River RV Park, you’ll appreciate having a fully functional water system for showers and kitchen use. Additionally, consider investing in a water pressure regulator to prevent high-pressure water at certain campsites from damaging your RV’s plumbing.
6. Keep Your HVAC System Clean
The summer heat in Georgia can be intense, making your RV’s HVAC system essential for comfort. Clean the filters regularly and ensure that the air conditioning unit is functioning properly. If you're visiting Crawfordville during the warmer months, you’ll want to stay cool and comfortable after a day of exploring. Routine maintenance of your HVAC system will keep you and your family comfortable throughout your journey.
7. Stock Up on Essential Supplies
Crawfordville offers natural beauty and serenity, but it’s also essential to be prepared for any situation. Ensure you have a well-stocked toolkit that includes wrenches, screwdrivers, pliers, and any other tools specific to your RV model. Carry spare fuses, bulbs, and essential fluids like oil, coolant, and windshield washer fluid. Being prepared will ensure that minor issues don’t escalate into significant problems, allowing you to enjoy your stay at any RV park near Augusta, GA, or beyond.
8. Plan for Waste Disposal
Responsible waste management is vital for the environment and the longevity of your RV’s sanitation system. Before arriving at Sunrise River RV Park, familiarize yourself with the park's waste disposal facilities. Ensure that your black and gray water tanks are emptied and clean. Carry appropriate chemicals to treat your tanks, reducing odors and buildup. Keeping your waste management system in top shape ensures a pleasant experience for you and your fellow campers.
9. Check Your Propane System
Propane is essential for cooking, heating, and refrigeration in many RVs. Before embarking on your journey through Georgia, inspect your propane tanks and lines for leaks. Make sure your tanks are securely mounted and that your regulator is functioning correctly. It’s also wise to keep a carbon monoxide detector in your RV for safety. Regularly inspecting your propane system will allow you to enjoy meals and hot showers without worry during your stay.
10. Protect Against Pests
Crawfordville, with its lush landscapes and natural beauty, can also be a haven for insects and small animals. To protect your RV from unwanted guests, seal any gaps or cracks where pests might enter. Regularly clean your RV’s interior, removing food crumbs and trash that could attract pests. If you’re staying at Sunrise River RV Park, you’ll want to focus on the natural beauty of the area, not on dealing with ants or mice inside your RV!
11. Keep Your RV Clean
Traveling through Georgia can expose your RV to dust, dirt, and debris. Regularly wash your RV to maintain its appearance and protect its exterior from damage. Pay special attention to the undercarriage, especially after traveling on dirt roads or through muddy areas. Cleaning your RV not only keeps it looking good but also helps prevent rust and corrosion, ensuring it stays in excellent condition for years to come.
12. Stay Informed About Local Road Conditions
As you travel through Georgia, staying informed about local road conditions can help you avoid unexpected delays or hazards. Check weather forecasts and road reports, especially during the rainy season, when roads can become slick or flooded. Knowing the conditions ahead of time allows you to plan your route and adjust your driving to ensure a safe journey to Sunrise River RV Park or any other destination in the area.
Conclusion
Maintaining your RV is essential to ensure a safe, comfortable, and enjoyable journey through Crawfordville and the surrounding areas of Georgia. Whether you’re heading to Sunrise River RV Park or exploring RV parks near Augusta, GA, following these maintenance tips will keep your RV in top condition, allowing you to focus on the adventure ahead.

From regular tire checks to ensuring your water and electrical systems are functioning properly, taking the time to maintain your RV will enhance your travel experience. By being proactive with your maintenance routine, you can enjoy the natural beauty and serene landscapes of Crawfordville, Georgia, without worry. Safe travels!
2 notes
·
View notes
Text
Liquid Roof: A Complete Guide for RV Owners
When it comes to protecting your RV from harsh weather, leaks, and general wear and tear, having a reliable roof coating is essential. One of the most effective solutions available today is a liquid roof. This versatile product not only protects but also extends the life of your RV roof.
What is a Liquid Roof?
A liquid roof is a type of coating designed to protect and seal RV roofs. It is usually made from liquid rubber, which forms a durable, waterproof membrane once it cures. This seamless layer helps prevent leaks, resists UV damage, and withstands extreme temperatures.
Unlike traditional roofing materials, a liquid roof is easy to apply and can be used on various surfaces, including metal, fiberglass, and rubber. It’s a cost-effective solution for RV owners looking to maintain or restore their roofs without a complete replacement.
Benefits of Using Liquid Roof for RVs
Waterproof Protection:
Liquid roof coatings create a watertight seal that prevents leaks, even in heavy rain.
UV Resistance:
The coating reflects UV rays, reducing heat buildup inside the RV and preventing roof material degradation.
Flexibility:
It expands and contracts with temperature changes, preventing cracks and splits.
Cost-Effective:
Applying a liquid roof is much cheaper than replacing the entire roof. It also reduces future maintenance costs.
Easy Application:
With simple tools like a roller or brush, you can apply the coating yourself, saving on labor costs.
Durability:
High-quality liquid roof coatings can last for years with minimal maintenance.
How to Apply Liquid Roof Coating
Applying a liquid roof coating is a straightforward process. Here are the basic steps:

Preparation:
Clean the RV roof thoroughly to remove dirt, debris, and old sealant.
Repair any existing damage, such as holes or cracks.
Ensure the surface is dry before application.
Application:
Stir the liquid roof coating well.
Use a roller or brush to apply an even layer across the roof.
Apply additional coats if recommended by the manufacturer.
Curing:
Allow the coating to cure as per the instructions, usually 24-48 hours.
Avoid exposure to rain during the curing period.
For the best results, consider using products like liquid RV roof sealant that are specifically designed for RV applications.
Why Choose RV Liquid Rubber Roof Coating?
RV liquid rubber roof coatings are designed to provide superior protection. The rubber formulation ensures flexibility and durability, making it ideal for RV roofs that face constant movement and temperature changes. This type of coating adheres well to various surfaces and provides long-lasting protection against leaks and environmental damage.
Maintenance Tips for Liquid Roof Coating
Regular Inspections: Check your roof at least twice a year for any signs of damage or wear.
Clean Gently: Use mild soap and water to clean the roof; avoid harsh chemicals.
Touch-Ups: Reapply a liquid rubber roof sealant if you notice any thin areas or cracks.
Remove Debris: Clear leaves and debris regularly to prevent mold and mildew buildup.
Common Issues and How to Avoid Them
Poor Adhesion: Ensure the roof is clean and dry before application to avoid peeling.
Bubbling: Apply the coating in recommended weather conditions to prevent bubbles.
Uneven Coverage: Use a consistent application technique for an even finish.
Conclusion
A liquid roof is an excellent investment for any RV owner. It provides superior protection against leaks, UV rays, and harsh weather conditions. Whether you’re dealing with an old, worn-out roof or just want to add an extra layer of security, products like liquid RV roof sealant, RV liquid rubber roof, and liquid rubber roof sealant offer the durability and performance you need.
Regular maintenance and timely application can help you enjoy worry-free adventures, knowing your RV roof is well-protected.
0 notes
Text
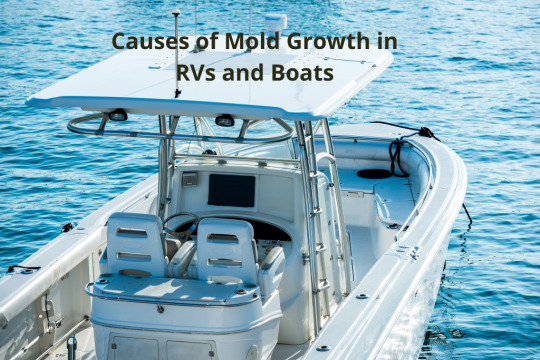
How Can You Prevent Mold in Your RV or Boat?
Mold is a common issue in RVs and boats, particularly because of the damp, enclosed spaces these vehicles often provide. Whether you're on the road or enjoying a day at sea, mold can quickly become a problem if not properly managed. This blog post will explore various methods to prevent mold from invading your RV or boat, ensuring that your travels are both enjoyable and mold-free.
1. Understanding the Causes of Mold Growth in RVs and Boats
Mold thrives in environments that are damp, warm, and lack proper ventilation. For RVs and boats, the combination of high humidity, limited airflow, and moisture buildup from rain, spills, or even condensation makes these spaces particularly vulnerable. Mold spores can land on surfaces and begin to grow if these conditions persist.
Common causes of mold in RVs and boats include:
Leaky roofs or windows that allow water to seep in.
Condensation from temperature changes inside the vehicle.
Moisture accumulation from wet clothes, towels, or even cooking.
Recognizing these triggers is key to preventing mold growth in the first place.
2. Regular Inspection and Maintenance
The first step in preventing mold is to conduct regular inspections of your RV or boat. Look for any signs of leaks, such as water stains or damp spots on walls, ceilings, or floors. Pay particular attention to areas like window seals, vents, and the roof, as these are common places for water to enter.
Make sure that drains, gutters, and other water management systems are functioning properly. Regular maintenance of these systems can prevent excess moisture buildup, which could lead to mold formation.
3. Improve Ventilation to Combat Humidity
One of the most effective ways to prevent mold growth is to reduce humidity levels inside your RV or boat. Proper ventilation is key to achieving this. When moisture has nowhere to escape, it condenses on surfaces, promoting mold growth.
Open windows when possible to allow fresh air to circulate.
Use dehumidifiers or moisture absorbers to keep humidity levels low.
Install ventilation fans in areas prone to moisture buildup, such as kitchens and bathrooms.
Creating airflow throughout the space helps to keep mold at bay by allowing moisture to evaporate instead of settling on surfaces.
4. Use Mold-Resistant Materials
Consider using mold-resistant materials in areas that are frequently exposed to moisture. In boats and RVs, this could include mold-resistant fabrics for upholstery or mold-resistant paints for walls. Additionally, you can use moisture-resistant flooring materials, which are particularly important in areas like bathrooms and kitchens where water is commonly used.
5. Keep the Interior Dry and Clean
Water is one of the primary culprits when it comes to mold growth, so it's essential to keep your RV or boat dry. After every trip, make sure that towels, blankets, and any wet items are thoroughly dried or stored in moisture-proof containers. Don't leave standing water in sinks, bathtubs, or showers for prolonged periods.
Clean up spills immediately to prevent moisture from accumulating.
Use absorbent towels to dry surfaces after using water in your RV or boat.
Check under seats and storage areas regularly for hidden moisture buildup.
6. Proper Storage and Winterization
When you're not using your RV or boat, ensure that they are stored properly to prevent mold growth. During the off-season, it's especially important to keep the vehicle dry and well-ventilated.
Winterize your RV or boat by draining any water systems and ensuring that no moisture is left behind.
Use silica gel packs or other moisture-absorbing products to keep the interior dry while it's in storage.
Cover the vehicle with a breathable tarp to prevent moisture from accumulating while still allowing airflow.
7. What to Do if You Discover Mold in Your RV or Boat
Despite your best efforts, mold may still appear in your RV or boat. If this happens, it's crucial to act quickly to prevent further damage. Small patches of mold can often be cleaned using a mixture of vinegar and water, or a commercial mold remover. However, if the mold problem is widespread or if it has penetrated deep into the materials, it's best to contact a Mold removal service near me for professional help. Mold specialists have the equipment and knowledge to safely and effectively remove mold, preventing future outbreaks.
0 notes
Text
A Comprehensive Guide to RV Roof Repair
The roof of your RV plays a crucial role in protecting your vehicle and ensuring a safe and comfortable travel experience. However, constant exposure to sun, rain, and debris can take a toll on your roof over time. Proper care and timely repairs are essential to keep it in top condition.
This guide will help you understand everything about RV roof repair, including how to maintain it, identify issues, and address them effectively.
Common RV Roof Problems
RV roofs face unique challenges due to constant exposure to the elements. Here are some common problems:
Cracks and leaks: UV rays and weather changes can create cracks in the roof material, leading to leaks.
Punctures: Tree branches, falling debris, or even walking on the roof can cause punctures.
Damaged seals: Seals around vents, edges, and skylights can weaken, allowing water to seep in.
Wear and tear: Over time, aging roof materials like rubber or fiberglass can deteriorate.
Regular RV roof maintenance is key to preventing these issues.
How to Perform RV Roof Maintenance
Proper maintenance is the foundation of keeping your RV roof in good shape. Here are some steps you can follow:
Inspect Your Roof Regularly
Check your roof every three to six months for cracks, tears, or water damage. Pay close attention to areas around vents, skylights, and edges.
Clean Your Roof
Dirt and debris can degrade your roof material. Use a gentle cleaner and a soft-bristle brush to remove buildup without causing damage.
Reseal Seams and Joints
Seams are a common weak point on RV roofs. Apply a high-quality sealant to keep water out and extend your roof’s lifespan.
Protect Against UV Damage
UV rays can wear down your roof over time. Apply a UV-resistant coating to shield it from the sun’s harsh rays.
For reliable maintenance products, visit RV Roof Magic. Their solutions are designed to make RV roof maintenance simple and effective.

How to Fix an RV Roof Leak
Leaks are among the most common issues faced by RV owners. Here’s a step-by-step guide to fix an RV roof leak:
Identify the Leak
Look for water stains, soft spots, or visible cracks on the roof. These are common indicators of a leak.
Clean the Affected Area
Clean the damaged area thoroughly, removing all dirt, debris, and moisture. This ensures the sealant or patch adheres properly.
Seal or Patch the Leak
For minor cracks, use a liquid sealant specifically designed for RV roofs. For larger leaks, apply a patch with sealant for extra durability.
Inspect the Repair
Once the repair is complete, inspect the area to ensure the leak has been fully resolved.
For the best products to fix an RV roof leak, consider RV Roof Magic. Their trusted solutions are long-lasting and easy to apply.
Camper Roof Repair: When to Call a Professional
While many RV roof repairs can be done yourself, some situations require professional assistance. Consider calling an expert if:
The damage is extensive: If more than 30% of your roof is damaged, professional repair might be necessary.
You see structural issues: Soft spots or sagging indicate significant water damage that needs expert attention.
Your RV is under warranty: DIY repairs may void your warranty, so check your terms before proceeding.
Professional help ensures your camper roof repair is thorough and long-lasting.
Preventative Tips for RV Roof Longevity
Clean and Inspect Regularly: Routine cleaning and inspections can help catch problems early.
Use a Cover: Protect your RV roof from harsh weather by covering it when not in use.
Repair Small Issues Immediately: Addressing minor cracks or leaks promptly can prevent bigger problems.
Invest in Quality Products: High-quality repair and maintenance products, like those from RV Roof Magic, can extend the life of your roof.
Why Choose RV Roof Magic?
When it comes to RV roof repair, using reliable products is essential. RV Roof Magic offers top-notch solutions for everything from maintenance to repairs. Their products are:
Easy to Use: Perfect for DIY repairs.
Durable: Long-lasting protection against leaks and damage.
Specialized for RVs: Designed specifically for RV roofs, ensuring excellent performance.
Whether you need to maintain your roof, fix an RV roof leak, or handle a camper roof repair, RV Roof Magic has you covered.
Conclusion
Your RV roof is an essential part of your vehicle, and taking care of it is crucial for a safe and enjoyable travel experience. Regular RV roof maintenance, timely repairs, and using high-quality products can save you time, money, and stress in the long run. For all your RV roof repair needs, visit RV Roof Magic and discover solutions that make maintenance and repairs simple and effective.
0 notes
Text
How to Spot Leaks and Prevent Water Damage on Your RV Roof

Owning an RV brings the freedom of adventure, but it also comes with the responsibility of regular maintenance, especially when it comes to the roof. One of the most common problems RV owners face is water damage due to roof leaks. Understanding how to spot leaks early and prevent them can save you from expensive repairs and long-term structural damage. In this guide, we’ll explore how to identify leaks on your RV roof and share effective strategies for preventing water damage.
Why RV Roof Leaks are a Major Concern?
Water damage can quickly compromise the integrity of your RV. Over time, leaks can lead to mold, mildew, rust, and even structural failures. The roof is the primary defense against rain, snow, and the elements, and even the smallest crack or tear can allow water to seep in. By catching leaks early and addressing them promptly, you can avoid costly repairs and ensure the longevity of your RV.
Signs of Leaks on Your RV Roof:
Before you can prevent water damage, it’s essential to learn how to spot leaks early. While some leaks are visible, others may be subtle and hidden beneath layers of insulation or roofing materials. Here are some common signs to look out for:
Water Stains Inside the RV If you notice water stains on the ceiling or walls inside your RV, it’s a sign that there may be a roof leak. These stains can range from small spots to large discolorations. If you catch them early, you might be able to address the issue before it becomes worse.
Soft or Sagging Roof A soft or sagging roof is often a sign of water infiltration. If you notice that parts of the roof are giving way when pressure is applied, it could mean that the underlying materials have been damaged by water over time.
Musty Odors Persistent musty or damp odors inside your RV can indicate mold or mildew growth, which thrives in moist environments. Mold can grow inside the walls and ceiling due to a roof leak that has been left unchecked.
Puddles or Dampness If you find puddles or wet spots inside your RV, especially after a rainfall, it’s a clear sign that water is getting in. This could be from a leak in the roof, or from poorly sealed areas around vents, skylights, or the roof seams.
Cracks or Holes on the Roof Surface Inspecting the roof for visible damage is the first step in identifying potential leaks. Cracks, holes, or damaged areas are prime locations where water can enter. Pay attention to the condition of the roof seals, seams, and caulking around roof features such as vents and air conditioners.
Steps to Inspect and Spot Leaks on Your RV Roof:
Regular inspection of your RV roof is critical to prevent water damage. Here are the steps you can take to identify leaks:
Start with a Clean Roof : Before inspecting the roof, ensure it’s clean. A dirty roof can obscure cracks and damage. Use a gentle brush or cloth to remove dirt, debris, and leaves from the surface. Cleaning the roof will help you get a clear view of any potential problem areas.
Inspect Roof Seams and Edges : Pay special attention to the seams where the roof meets the walls and around windows, vents, and other penetrations. These are common spots for leaks to develop. Look for gaps, cracks, or areas where the sealant may have degraded or peeled away.
Check for Cracks in the Roof Membrane : The roof membrane, often made of rubber or fiberglass, is vulnerable to cracking. Walk around the roof and check for any visible cracks, bubbles, or tears. Even small damage can lead to significant water intrusion over time, so be sure to address any issues you find.
Examine Vents and Air Conditioners: Vents, skylights, and air conditioners are common sources of leaks. Check the seals around these fixtures to ensure they’re intact and not compromised. The caulking around vents can degrade, leading to leaks, especially in areas exposed to high temperatures or intense weather conditions.
Look for Signs of Moisture Inside: Once you’ve inspected the exterior, it’s time to check the interior. Look for any signs of moisture, water stains, or mildew around ceiling corners, walls, and windows. These could be telltale signs that the roof has been leaking.
How to Prevent Water Damage on Your RV Roof?
Preventing water damage requires regular maintenance and taking proactive steps to protect the roof from the elements. Here are some tips to help you safeguard your RV:
Regularly Inspect and Clean the Roof: The first step in prevention is a thorough roof inspection and cleaning. Check the roof at least once a month, and clean it regularly to remove debris. Keeping the roof free of debris will also prevent mold and algae growth that can lead to further damage.
Reapply Roof Sealant: Over time, the sealant around your RV roof can break down due to UV exposure and weather conditions. Reapply roof sealant every year or as recommended by the manufacturer. Be sure to apply sealant to all seams, around vents, and any areas where the roof may be vulnerable to leaks.
Use a Protective Roof Cover: Consider using a protective roof cover when your RV is parked for an extended period. A roof cover will protect the roof from UV damage, rain, and other elements that can cause wear and tear. This will extend the lifespan of the roof and reduce the need for frequent repairs.
Repair Minor Issues Immediately: If you notice any cracks, holes, or other signs of damage, address them as soon as possible. A small issue today can quickly escalate into a major leak if left untreated. Whether it’s a simple crack or a peeling sealant, take the time to repair it before it worsens.
Address Issues with RV Roof Repair Michigan Professionals: If you notice significant damage or cannot identify the source of a leak, it’s best to consult professionals who specialize in RV Roof Repair Michigan. These experts can thoroughly inspect your roof, provide the necessary repairs, and ensure that your roof is fully sealed and protected from water damage.
Long-Term Maintenance to Avoid Future Leaks:
To prevent future leaks and water damage, it’s crucial to establish a long-term maintenance routine for your RV roof. Regular care and attention to detail can help you identify minor issues before they become major problems. Here are a few long-term strategies:
Regular Professional Inspections: While DIY inspections are important, professional inspections are even more thorough. Having an experienced RV roof repair specialist perform routine checks can ensure that your roof is in optimal condition. RV Roof Repair Michigan professionals have the expertise to identify issues that might go unnoticed by the untrained eye.
Invest in Roof Upgrades: If your RV roof is older or prone to frequent leaks, consider upgrading to a more durable roofing material. Some modern materials are designed to withstand the elements better than traditional rubber or fiberglass, reducing the likelihood of leaks and requiring less maintenance.
Maintain Proper Ventilation: Adequate ventilation is key to preventing moisture buildup in your RV. Poor ventilation can lead to condensation inside, which over time may contribute to roof damage. Ensure that your RV is properly ventilated to reduce the risk of internal moisture accumulation.
Conclusion:
Spotting leaks and preventing water damage on your RV roof is an essential part of maintaining the longevity of your vehicle. By regularly inspecting your roof, reapplying sealant, and addressing minor issues promptly, you can significantly reduce the risk of water damage. Always keep an eye out for signs like water stains, musty odors, or soft spots on the roof, and take immediate action if you find anything suspicious.
If you’re unable to manage the repairs yourself or find significant damage, don’t hesitate to reach out to experts in RV Roof Repair Michigan. Professional services can provide the necessary repairs and peace of mind, ensuring that your RV is fully protected from water damage. Regular roof maintenance and timely repairs are your best defense against the costly repercussions of leaks. By staying on top of your roof’s health, you’ll enjoy your RV adventures without worrying about the damage caused by a leaky roof.
#rvrepair#camperrepair#rvrenovation#motorhomelife#rv#rvlife#rving#vintage#michigan#rvfulltime#camper roof repair#rv roof repair#roof replacement#roofing
0 notes
Text
RV Roof Material: Choosing the Best for Durability and Performance
Your RV roof is one of the most critical components of your vehicle, offering protection from the elements and ensuring your mobile home remains comfortable and functional. Choosing the right RV roof material is essential for maintaining your RV’s structural integrity and enhancing its lifespan. Let’s dive into the different types of RV roof materials, their benefits, and why proper maintenance is crucial.
Types of RV Roof Materials
There are three primary materials used for RV roofs:
Rubber Roofs
EPDM (Ethylene Propylene Diene Monomer): A durable, synthetic rubber material widely used for RV roofs. EPDM is lightweight, cost-effective, and resistant to UV rays and weather damage.
TPO: Another popular rubber roof material, TPO offers greater resistance to punctures and tears compared to EPDM. It also reflects heat better, making it ideal for warmer climates.
Fiberglass Roofs
Fiberglass roofs are made from reinforced plastic and are known for their durability and low maintenance. They are resistant to cracks and scratches but can be heavier and more expensive than rubber roofs.
Aluminum Roofs
Aluminum is a long-lasting and highly durable material for RV roofs. It is lightweight and resistant to rust, though it may dent easily and provide less insulation compared to other materials.
Benefits of Rubber Roofs
Rubber roofs are among the most popular options for RV owners. Here are some reasons why:
Affordability: Rubber roofs, especially EPDM, are cost-effective.
Flexibility: These roofs can expand and contract with temperature changes without cracking.
Ease of Repair: Rubber roofs are easy to patch and maintain using products like the best RV roof coating.
Lightweight: Their low weight makes them ideal for RVs, as they don’t add unnecessary strain to the vehicle.

Maintenance Tips for RV Roofs
Proper maintenance ensures that your RV roof lasts for years. Follow these simple steps:
Regular Cleaning
Clean your RV roof at least twice a year with mild soap and water to remove dirt, debris, and mold.
Inspect for Damage
Check your roof for cracks, tears, or leaks regularly, especially after long trips or severe weather conditions.
Use Coatings for Protection
Applying a protective coating like rv rubber roof coating can help extend the life of your roof and prevent damage from UV rays and water.
Seal Seams and Edges
Regularly inspect and reseal seams and edges with appropriate sealants to prevent leaks.
Repair Immediately
Address any damage immediately to avoid costly repairs down the road. A product like mobile RV roof coating is perfect for quick and effective fixes.
Advantages of Using RV Roof Coatings
RV roof coatings provide an additional layer of protection to your roof, enhancing its durability and performance. Here are some benefits:
Prevents Leaks: Coatings seal cracks and seams, keeping water out.
UV Protection: Protects against harmful UV rays that can degrade the roof material over time.
Cost-Effective: Coating your roof is cheaper than replacing it entirely.
Easy Application: Most coatings are easy to apply, even for DIY enthusiasts.
Using a high-quality product like the best RV roof coating ensures that your RV remains leak-free and well-protected.
When to Replace Your RV Roof Material
Despite proper maintenance, there comes a time when your RV roof material may need to be replaced. Signs include:
Persistent leaks that coatings can no longer fix.
Extensive cracking or bubbling of the roof material.
Sagging areas or water pooling.
Visible damage after a severe storm.
If you notice these signs, it’s time to consider replacing the roof or seeking professional assistance.
Conclusion
Choosing the right RV roof material and maintaining it properly is vital for the longevity of your RV. Rubber roofs, fiberglass, and aluminum each have unique benefits, but rubber remains a popular choice for its flexibility and affordability. To enhance the life of your roof, consider using high-quality products like the best RV roof coating, rv rubber roof coating, or mobile RV roof coating. Regular maintenance, timely repairs, and protective coatings will ensure that your RV remains in excellent condition for years to come.
0 notes
Text
The Ultimate Guide to RV Roof Sealant
Maintaining your RV roof is one of the most important things you can do to protect your investment. Over time, exposure to the elements can cause wear and tear, leading to leaks and other problems. Using a high-quality RV roof sealant can extend the lifespan of your RV roof, prevent water damage, and ensure a safe and comfortable experience on the road.
Why Do You Need an RV Roof Sealant?
Your RV’s roof is constantly exposed to harsh weather conditions like rain, sun, wind, and even snow. Over time, these factors can lead to cracks, leaks, and damage. Using a camper roof sealant provides a protective barrier that:
Prevents Leaks: Seals any cracks or gaps, keeping water out.
Extends Roof Life: Protects against UV rays and other environmental factors.
Improves Energy Efficiency: Reflective sealants can reduce heat absorption, keeping your RV cooler.
Saves Money: Regular maintenance with a sealant can prevent costly roof repairs or replacements.
Types of RV Roof Sealants
There are several types of RV roof sealants available, each designed for specific materials and applications. Here’s a breakdown of the most common options:
Liquid Roof Coatings
These are applied like paint and create a seamless, waterproof membrane. Liquid coatings are an excellent choice for larger surfaces and provide long-lasting protection.
Tape Sealants
Perfect for small repairs, tape sealants are easy to use and ideal for sealing seams and joints.
Caulking Sealants
Used for detailed applications, caulking sealants are great for sealing around vents, skylights, and edges.

Silicone-Based Sealants
Known for their flexibility and durability, silicone sealants are suitable for various climates.
When choosing the best sealant for RV roof, it’s important to consider your roof’s material—whether it’s EPDM rubber, TPO, fiberglass, or metal.
How to Apply RV Roof Sealant
Applying RV roof sealant doesn’t have to be a daunting task. Follow these simple steps for a hassle-free application:
Clean the Roof
Remove dirt, debris, and any old sealant. A clean surface ensures the sealant adheres properly.
Inspect for Damage
Check for cracks, holes, or other issues. Repair any significant damage before applying the sealant.
Choose the Right Product
Make sure you select a sealant compatible with your roof material.
Apply the Sealant
Follow the manufacturer’s instructions. Most liquid coatings can be applied with a brush, roller, or sprayer. For caulking sealants, use a caulking gun to apply the product precisely.
Allow It to Cure
Let the sealant dry completely. This may take a few hours to a couple of days, depending on the product and weather conditions.
Benefits of Choosing the Right RV Roof Sealer
Using the right RV roof sealer can make all the difference. Here are some key advantages:
Weather Resistance: High-quality sealants withstand extreme temperatures, rain, and UV rays.
Longevity: Durable products provide protection for years, reducing the need for frequent reapplications.
Ease of Use: Modern sealants are designed for DIY application, saving you time and labor costs.
Versatility: Many sealants are suitable for various roof materials, ensuring a secure bond and long-lasting performance.
Conclusion
Taking care of your RV roof doesn’t have to be complicated. With the right camper roof sealant, you can protect your RV from leaks, extend its lifespan, and enjoy worry-free travels. Whether you’re sealing small cracks or applying a full roof coating, products from RV Roof Magic are a dependable choice.
0 notes
Text
RV Repair in Citrus Heights Essential Maintenance Tips for Smooth Road Trips

Hitting the open road in your RV is an amazing experience. But before you embark on your next adventure from Citrus Heights ensure your trusty steed is in tip-top shape. Regular maintenance not only prevents those dreaded roadside breakdowns but also extends the life of your RV. Think of it as a spa day for your home on wheels. Let's dive into some essential maintenance tips to keep your RV running smoothly and your adventures worry-free.
Tire TLC
Your RV's tires are its literal foundation. Maintaining proper tire pressure is crucial for safety and fuel efficiency. Underinflated tires can overheat and increase the risk of a blowout while overinflated tires can lead to a bumpy and uncomfortable ride. Check your tire pressure regularly including the spare and adjust it according to the recommendations in your owner's manual. Don't forget to inspect your tires for signs of wear and tear such as cracks bulges or uneven tread wear.
Fluid Feast
Your RV relies on various fluids to keep its systems running smoothly. Regularly check and change engine oil coolant transmission fluid brake fluid and power steering fluid. Refer to your owner's manual for recommended intervals but as a general rule most fluids should be changed at least once a year or more frequently if you travel extensively.
Brake Inspection
Your RV's brakes are critical for safety especially when navigating steep descents or making sudden stops. Inspect your brakes regularly for any signs of wear or damage. Listen for squeaking or grinding noises and feel for vibrations in the brake pedal. If you notice any issues have your brakes inspected and serviced by a qualified RV Repair technician.
Roof and Sealant Check
Your RV's roof is its first line of defense against the elements. Regularly inspect the roof for any cracks or damage to the sealant. Reseal any areas as needed to prevent water leaks which can cause significant damage to your RV's interior. Consider applying a protective coating to your roof to extend its life and prevent UV damage.
Battery Care
Your RV's battery powers everything from lights to appliances. Keep your battery terminals clean and free of corrosion. Check the electrolyte level regularly and top it off with distilled water as needed. If you plan to store your RV for an extended period disconnect the battery to prevent it from draining.
Appliance Attention
Your RV's appliances such as the refrigerator air conditioner furnace and water heater also require regular maintenance. Clean and inspect them regularly and address any issues promptly. Refer to the appliance manuals for specific maintenance instructions.
Why Choose Us for Your RV Repair Needs?
Experienced Technicians: Our technicians are highly skilled in all aspects of RV repair and maintenance.
Comprehensive Service: We offer a wide range of repair and maintenance services for all types of RVs like Isuzu.
Convenient Location: Our Truck Repair is conveniently located in Sacramento near Citrus Heights.
Competitive Pricing: We offer fair and transparent pricing on all our services.
Customer Satisfaction: We're committed to providing excellent service and ensuring your RV is in top condition.
Mobile Service: We offer Mobile RV Repair services for your convenience.
FAQs about Mobile Truck Repair
Q: Do you offer Mobile RV Repair services in Citrus Heights?
A: Yes, we offer mobile repair services throughout Citrus Heights and the surrounding areas.
Q: My RV has a Peterbilt chassis. Can you service it?
A: Absolutely! We service all types of RVs including those built on Peterbilt chassis.
Q: I'm planning a trip to Folsom Lake. Should I have my RV checked before I go?
A: It's always a good idea to have your RV checked before a long trip to ensure everything is in good working order.
Q: What types of preventative maintenance services do you offer for RVs?
A: We offer a variety of preventative maintenance services including fluid checks inspections tire rotations brake inspections and more.
Q: How often should I have my RV's roof inspected?
A: It's generally recommended to inspect your RV's roof at least twice a year or more frequently if you travel extensively or encounter harsh weather conditions.
Q: Can you repair my RV's air conditioner?
A: Yes, we can diagnose and repair RV air conditioners.
Services We Offer
We offer a wide range of Truck Repair and RV Repair services including:
Preventative Maintenance
Mobile RV Repair
Engine Repair and Replacement
Transmission Repair
Brake Repair
Electrical System Repair
And much more!
By following these essential maintenance tips and addressing any issues promptly you can ensure your RV stays in top condition for countless adventures. Regular maintenance not only prevents breakdowns but also enhances safety and extends the life of your RV. So before you hit the road from Citrus Heights give your RV the care it deserves and enjoy peace of mind on your journey.
Contact Details:
Affordable Truck Repair Inc. DBA Mechanic On Road
Phone : +1 (916) 912-7912
Address: 4705 Crimson Ct, Sacramento, CA 95842, United States
0 notes
Text
Expert Boat and RV Repairs at Shoreline Boat & RV
When it comes to maintaining your boat or RV, having a reliable, professional service provider is crucial. Whether you're a seasoned boating enthusiast or an RV adventurer, keeping your vessel in top condition ensures that your experiences remain enjoyable and safe. At shoreline boat repair, we specialize in expert boat repairs and RV maintenance to help you keep your equipment running smoothly, ensuring that every adventure is one to remember.
Comprehensive Boat Repair Services
At Shoreline Boat & RV, we understand the importance of your boat as an investment and a source of joy. A malfunctioning boat can disrupt your plans, but with the help of our experienced specialists, you can get back on the water in no time. Our team is equipped with advanced tools and skills to handle all types of boat repairs, whether they involve the engine, electrical systems, or hull integrity.
We offer a wide range of repair services, including:
Engine Diagnostics and Repair: Whether it’s an outboard or inboard engine, our team can quickly diagnose and repair any engine issues to ensure smooth operation.
Hull and Structural Repairs: From minor damages to extensive repairs, we have the expertise to restore your boat’s hull and structure to its original condition.
Electrical Systems: Boat electrical systems can be complex, but our specialists can handle everything from wiring issues to battery replacements and much more.
Propeller and Drive Train Repairs: Ensuring your propeller and drive train are in working order is crucial for safe navigation. We offer repair services to keep these essential components in optimal condition.
Winterization and Storage: We also provide winterization services, ensuring your boat is properly stored and protected from the elements during the off-season.
When you visit Shoreline Boat & RV, you can rest assured knowing that your boat is in capable hands. Our team is dedicated to providing timely, reliable repairs to get you back on the water faster.
Reliable RV Repair and Maintenance
In addition to boats, we are also specialists in RV repairs and maintenance. Whether you’re planning a road trip or need to store your RV for the winter, maintaining your RV in peak condition is essential for safe and enjoyable travel. Our skilled technicians are well-versed in a wide variety of RV repair services, ensuring that your vehicle is ready for any adventure.

Our RV repair services include:
Engine and Transmission Repairs: RVs are complex vehicles with large engines that require specialized knowledge. Our experts can diagnose and repair any engine or transmission issues, ensuring your RV runs smoothly.
Electrical and Plumbing Systems: RVs are equipped with unique electrical and plumbing systems that require careful attention. Whether it’s a lighting issue or a plumbing leak, our specialists are equipped to handle repairs and maintenance.
HVAC Systems: We understand the importance of climate control when traveling in your RV. Our team can repair or maintain your HVAC system to ensure it works efficiently and keeps you comfortable on your journey.
Roof and Exterior Repairs: Protecting the exterior of your RV from weather conditions is vital. Our team can inspect and repair your RV’s roof, seals, and exterior to prevent leaks or damage.
Interior Repairs: From furniture repairs to kitchen appliance issues, we offer comprehensive interior repairs, ensuring that your RV is as comfortable and functional as possible.
Why Choose Shoreline Boat & RV?
At Shoreline Boat & RV, we pride ourselves on offering the highest standard of repair services for both boats and RVs. Our skilled specialists have years of experience in the field, ensuring that your vessel or vehicle is in capable hands. Here’s why we stand out:
Expert Technicians: Our team is highly trained and experienced, capable of handling a wide range of repairs and maintenance tasks.
Timely Service: We understand that your time is valuable. We strive to provide efficient services to minimize downtime and ensure that you can get back to your adventures as quickly as possible.
Comprehensive Services: We offer a full range of repair and maintenance services for boats and RVs, ensuring that all your needs are met in one convenient location.
Customer Satisfaction: Your satisfaction is our priority. We work with you to ensure that repairs are completed to your standards, and we’re always ready to answer any questions you may have.
Call Us for Your Boat and RV Repair Needs
No matter the issue with your boat or RV, shoreline rv repair is here to help. Our team of experts is ready to provide you with the best boat and RV repair services in the area. Whether you need routine maintenance or complex repairs, we have the knowledge and tools to get the job done right.
Don’t wait for a small issue to turn into a bigger problem. Stop by Shoreline Boat & RV today for all your boat and RV repair needs. Our specialists are ready to help you keep your boat or RV in perfect shape. Call us now!
0 notes
Text
DIY Maintenance Tips Before Opting for RV Repair Bakersfield, CA
Owning an RV is an adventure-filled experience, allowing you to explore the open road with comfort and style. However, like any vehicle, RVs require regular maintenance to keep them running smoothly. Before considering professional RV repair in Bakersfield, CA, there are several DIY maintenance tasks you can undertake to save time and money. Here are some practical tips to help you maintain your RV and address minor issues yourself.
Inspect and Maintain Tires
Tires are among your RV's most critical components. Regularly check tyre pressure and ensure it matches the manufacturer's recommendations. Look for signs of wear, cracks, or punctures. Uneven tread wear may indicate alignment issues that need attention. Keeping your tyres in good condition ensures safety and prevents costly breakdowns.
Check the Roof for Leaks
The roof of an RV is prone to damage due to constant exposure to the elements. Inspect the roof for cracks, punctures, or areas where the sealant has deteriorated. Use RV-specific sealants to address minor leaks before they become significant issues.
Test the Battery
A fully charged and functional battery is essential for an RV's electrical systems. Use a multimeter to check the battery's voltage and ensure it is within the optimal range. Clean the terminals to remove corrosion and ensure proper connections.
Maintain the Plumbing System
Inspect the water system for leaks or clogs. Ensure the water heater is functioning correctly and flush it periodically to remove sediment buildup. During colder months, use RV-safe antifreeze in the plumbing system to prevent freezing and damage.
Clean and Inspect the Exterior
Regularly washing your RV helps protect the paint and prevents rust. Inspect the exterior for damage, such as dents or scratches, and address them promptly. Check windows and doors to ensure seals are intact, preventing water intrusion.
Service the Generator
If your RV has a generator, ensure it is well-maintained. Change the oil and filters as recommended by the manufacturer. Test the generator periodically to ensure it starts and runs smoothly.
Examine the Braking System
The braking system is crucial for your safety. Inspect the brake pads, rotors, and fluid levels regularly. Listen for unusual noises when braking, as this could indicate wear or other issues requiring attention.
Check the Air Conditioning and Heating Systems
Comfort is essential during your travels, so ensure the air conditioning and heating systems are functioning correctly. Clean or replace filters and test the systems to verify they are working efficiently.
Inspect the Propane System
Safety is a top priority for RVs with propane systems. Check connections and fittings for leaks using a soapy water solution. Ensure the propane detector is functional and replace it if necessary.
Perform Regular Lubrication
Lubricate hinges, locks, and moving parts to prevent rust and ensure smooth operation. Use RV-specific lubricants to maintain optimal performance.
Conclusion
While these DIY maintenance tips can help you keep your RV in good shape, it's essential to know when to seek professional assistance. If you encounter complex issues or lack the tools and expertise, consider reaching out to reliable RV repair services in Bakersfield CA. Regular maintenance not only saves you money but also ensures a safer and more enjoyable travel experience. By addressing minor problems early, you can avoid costly repairs and extend the life of your RV, making every road trip a smooth and memorable journey.
For expert assistance, contact us today and let our experienced team help you get back on the road with confidence!
0 notes
Text
Everything You Need to Know About Liquid RV Roof
If you own an RV, you know how important it is to keep the roof in excellent condition. A damaged or leaky roof can quickly ruin your travel experience. Thankfully, there is a reliable solution: liquid RV roof coatings. This innovative product offers a simple, effective way to maintain and protect your RV roof for years to come.
In this guide, we’ll explore everything you need to know about liquid RV roof solutions, including their benefits, application process, and why they are the best option for your recreational vehicle.
What is a Liquid RV Roof?
A liquid RV roof is a coating applied to the surface of your RV’s roof to create a seamless, waterproof barrier. Made from advanced materials such as liquid rubber, these coatings are designed to:
Protect your roof from leaks and water damage.
Shield it from UV rays and extreme weather.
Extend the life of your RV’s roof.
One of the most popular products in this category is the liquid rubber roof for RV, known for its durability and versatility. These coatings are an excellent choice for any RV owner looking to enhance their vehicle’s longevity.
Benefits of Liquid RV Roof Coatings
Choosing a liquid RV roof coating offers numerous advantages:
Waterproof Protection
A liquid RV roof sealant forms a seamless layer that prevents water from seeping through cracks or seams. This is particularly important for RVs that are exposed to rain or snow.
UV Resistance
Prolonged exposure to the sun can cause traditional roofs to crack or fade. Liquid roof coatings provide a protective shield against harmful UV rays, keeping your roof in great condition.
Cost-Effective
Repairing or replacing an RV roof can be expensive. By applying a liquid coating, you can save money while protecting your roof from costly damage.

Easy Application
Unlike other roofing solutions, liquid coatings are simple to apply. With basic tools and minimal effort, you can achieve professional-grade results.
Long-Lasting Results
High-quality liquid coatings, such as liquid RV roof sealant, can last for several years, ensuring you get the most value for your investment.
How to Apply Liquid Roof Coatings
Applying a liquid roof coating is straightforward and can often be done as a DIY project. Here’s a step-by-step guide:
Clean the Roof
Before applying the coating, ensure your roof is clean and free from dirt, debris, and grease. Use a mild detergent and water, then let the surface dry completely.
Inspect for Damage
Check your roof for cracks, holes, or other damage. Repair these issues before proceeding with the coating application.
Apply the Primer
Some liquid coatings require a primer to improve adhesion. Follow the manufacturer’s instructions for this step.
Apply the Coating
Pour the liquid rubber roof for RV onto the surface and spread it evenly using a roller or brush. Be sure to cover all seams and edges thoroughly.
Allow to Cure
Allow the coating to cure according to the manufacturer’s guidelines. This typically takes 24-48 hours.
Inspect the Results
Once the coating has cured, inspect your roof to ensure complete coverage and a smooth finish.
Why Choose Liquid Roof Coatings for Your RV?
Liquid roof coatings are an ideal solution for RV owners for several reasons:
Seamless Protection: Unlike traditional roofing materials, liquid coatings create a seamless layer that eliminates potential weak points.
Versatility: They work on a variety of roof materials, including metal, fiberglass, and rubber.
Eco-Friendly Options: Many products are low in VOCs (volatile organic compounds), making them safe for the environment.
When you choose a product like liquid roof coatings, you’re investing in a reliable and efficient way to protect your RV.
Maintenance Tips for Your RV Roof
To get the most out of your liquid RV roof coating, follow these maintenance tips:
Inspect Regularly: Check your roof for damage or wear every few months.
Clean the Surface: Remove dirt and debris to keep your roof looking and performing its best.
Address Issues Quickly: Repair any cracks or holes immediately to prevent further damage.
Conclusion
Investing in a liquid rubber roof for RV is one of the best decisions you can make to protect your vehicle. With benefits like waterproofing, UV resistance, and long-lasting durability, these coatings are a must-have for RV owners. If you’re ready to give your RV the care it deserves, explore trusted products like liquid RV roof sealant and liquid roof coatings from RV Roof Magic. With the right solution, you can enjoy worry-free travels for years to com.
0 notes
Text
RV Roof Repair: Everything You Need to Know
Owning an RV is a wonderful experience that brings the freedom of exploring new places while enjoying the comforts of home. However, maintaining an RV requires regular care, especially when it comes to the roof. Your RV’s roof is its first line of defense against the elements, and over time, wear and tear can lead to issues like leaks or damage. In this guide, we’ll walk you through the essentials of RV roof repair, including tips for RV roof maintenance, how to fix RV roof leaks, and when to consider camper roof repair.
Importance of RV Roof Maintenance
The roof of your RV is constantly exposed to harsh weather conditions like sun, rain, and wind. Over time, these elements can cause cracks, punctures, or other forms of damage. Regular RV roof maintenance is crucial to extend the lifespan of your RV and prevent costly repairs. Here are a few maintenance tips to keep in mind:
Inspect Your Roof Regularly: Check your RV’s roof at least once every three months for signs of damage, such as cracks or bubbling.
Clean Your Roof: Dirt and debris can trap moisture, leading to mold or mildew. Clean your roof with mild soap and water to keep it in good condition.
Sealants Matter: Use high-quality sealants to ensure the roof is watertight. This prevents leaks and further damage.
How to Fix RV Roof Leaks
Discovering a leak in your RV’s roof can be stressful, but addressing it promptly will save you from more significant damage. Here’s a step-by-step guide to fix RV roof leaks:
Identify the Leak:
Inspect the roof thoroughly, paying attention to seams and joints.
Look for water stains inside the RV as these often indicate the location of the leak.
Clean the Area:
Remove any dirt or debris around the damaged area.
Use a non-abrasive cleaner to prepare the surface for repair.

Apply a Roof Patch or Sealant:
Use a specialized roof sealant or patch to cover the damaged area.
Make sure the sealant is compatible with your roof type, whether it’s rubber, fiberglass, or metal.
Test the Repair:
Once the sealant has dried, test the area with water to ensure the leak is fully sealed.
For products and tips on repairing RV roof leaks, check out RV Roof Magic.
Camper Roof Repair: When to Call a Professional
While many minor repairs can be done yourself, some situations require professional assistance. Here are signs that you might need expert help for camper roof repair:
Extensive Damage: If large portions of the roof are damaged or if the structural integrity is compromised.
Recurring Leaks: Persistent leaks despite repeated DIY repairs indicate underlying issues.
Old Roof: If your RV’s roof is more than 10 years old, it may need professional assessment or replacement.
Professionals have the tools and expertise to ensure your roof is repaired correctly.
Preventing Future Roof Damage
Preventing damage to your RV’s roof is always better than repairing it. Here are some practical steps:
Use a Roof Cover: When not in use, cover your RV to protect it from UV rays and weather damage.
Avoid Parking Under Trees: Falling branches can puncture or damage your roof.
Regular Maintenance: Stay consistent with inspections and cleaning to catch potential problems early.
Conclusion
Maintaining and repairing your RV’s roof is essential to ensure a safe and enjoyable travel experience. Whether it’s routine RV roof maintenance, addressing leaks, or seeking camper roof repair, taking care of your roof will protect your investment and keep your RV in top shape.
0 notes
Text
How to Repair Camper Roof Seams Like a Professional in Michigan

Maintaining your camper's roof is essential to prevent leaks and extend its lifespan. For expert camper roofing in Michigan, start by inspecting the roof seams for cracks or damage. Clean the area thoroughly to ensure proper adhesion of sealants. Use a high-quality RV roof sealant designed for your roof type, applying it evenly over the seams. For larger issues, consider adding seam tape for extra durability.
Regular maintenance and professional techniques will keep your camper safe from Michigan’s unpredictable weather. Stay ahead of repairs with these simple steps!
In this comprehensive guide, we’ll walk you through the process of repairing camper roof seams like a professional.
0 notes
Text
RV Roof Coating: A Complete Guide
Your RV roof protects you from the elements while you’re on the road, but it also faces constant exposure to sun, rain, wind, and debris. Over time, wear and tear can compromise its durability, leading to leaks and damage. This is where RV roof coatings come to the rescue. They provide a protective layer, extend the lifespan of your roof, and improve overall performance.
In this article, we’ll explore why RV roof coatings are essential, how they work, and what to consider when choosing the best solution for your RV.
What Is an RV Roof Coating?
An RV roof coating is a specially formulated liquid that is applied to the surface of your RV’s roof. Once dried, it creates a seamless, waterproof barrier that protects against UV rays, water damage, and other environmental factors. These coatings can also reflect heat, helping to keep the interior of your RV cooler.
Why Is RV Roof Coating Important?
Protects Against Leaks
Leaks can cause significant damage to your RV’s interior. A high-quality roof coating seals cracks and seams, preventing water from seeping in.
Extends Roof Lifespan
By providing a durable protective layer, roof coatings reduce wear and tear, helping your RV roof last longer.
Energy Efficiency
Many coatings are designed to reflect sunlight, which reduces heat buildup inside your RV. This can lower cooling costs and make your trips more comfortable.
Cost-Effective Maintenance
Regularly applying a roof coating is far less expensive than replacing the entire roof. It’s a small investment that can save you significant money in the long run.
Types of RV Roof Coatings
There are several types of RV roof coatings available, each with unique benefits:
Rubber Roof Coatings
Rubber roofs are common in RVs, and specialized rubber roof coatings are designed to adhere to these surfaces. RV rubber roof coatings are excellent for sealing and protecting rubber roofs from UV rays and weather damage.

Liquid Rubber Coatings
Liquid rubber RV roof coatings are versatile, easy to apply, and provide a seamless finish. They are highly durable and ideal for repairing leaks or adding an extra layer of protection.
Elastomeric Coatings
These coatings are flexible and stretch with your RV roof’s movement, making them a great option for roofs that expand and contract due to temperature changes.
How to Apply an RV Roof Coating
Applying an RV roof coating is a straightforward process that you can often do yourself with the right tools and preparation. Here’s a step-by-step guide:
Clean the Roof
Start by thoroughly cleaning your RV roof to remove dirt, debris, and any old coatings. Use a mild detergent and scrub gently.
Inspect for Damage
Check the roof for cracks, holes, or other damage. Repair any issues before applying the coating.
Choose the Right Coating
Select a coating that matches your roof material. For instance, RV rubber roof coatings are ideal for rubber roofs.
Apply the Coating
Follow the manufacturer’s instructions for application. Use a brush, roller, or sprayer to evenly apply the coating. Ensure complete coverage and allow it to dry as directed.
Inspect the Finished Surface
Once the coating has dried, inspect the surface to ensure there are no missed spots or imperfections.
Tips for Choosing the Best RV Roof Coating
When selecting the best RV roof coatings for your vehicle, consider the following factors:
Material Compatibility: Ensure the coating is suitable for your RV roof material (e.g., rubber, metal, or fiberglass).
Durability: Look for coatings with long-lasting protection against UV rays, water, and other elements.
Ease of Application: Some coatings are easier to apply than others, making them more convenient for DIY projects.
Reflectivity: Coatings with high reflectivity can help reduce heat buildup inside your RV.
Cost: While affordability is important, prioritize quality and durability over cheap solutions.
Conclusion
Maintaining your RV roof is essential for protecting your investment and ensuring a comfortable travel experience. Applying a high-quality RV rubber roof coating or liquid rubber RV roof coating can prevent leaks, extend the life of your roof, and keep your RV in top condition.
By choosing the right product and applying it correctly, you’ll enjoy peace of mind on every journey. Don’t wait until damage occurs—invest in a roof coating today to protect your RV and enhance its performance for years to come.
0 notes