#Quality Control using High Speed Cameras
Explore tagged Tumblr posts
Visit Tumblr Blog
Explore Tumblr blogs with no restrictions, modern design and the best experience.
Last Seen Tumblr Blogs


Fun Fact
Mobile US users spent an average of 115.8 minutes on Tumblr app monthly.
Text
Vidu and the Quest to Make More Toons
So, a ways back I talked about Minmax, but I've been trying out basically all the video generators looking for the tools I need, and low and behold this week I find out I've been accepted into the Vidu Artists program now, wherein I get credits and access to access their cooler features in in exchange for... talking about the tech and how I use it.
Well twist my arm. I shall endeavor to be objective and informative despite free stuff (a challenge my spirit needs practice withstanding if anyone else wishes to test me)
So let's talk Vidu.
(outside of being converted to gif, no animations in this post have been cut or edited)

Also, everyone say hi to Maureen the Lizard Queen, every hero needs an evil queen that really wants in his pteruges, and she's that for TyrannoMax.
Vidu's got a bit more oomph under the hood than MinMax (no shade to MinMax, they're brand new and very promising) and it's way too early to be picking winners when it comes to video.
Anyhow, basic features that are nice include the options to upload start and end frames, options for a 4 or 8 second duration (more about that later), and a cleanup/upscale. Credits line up more or less with seconds. 4 credits for a 4 second clip, 8 for an 8 second, and again at upscale. It's straightforward in a way a lot of services aren't.

Apetomic Pyle, done on the fast settings. (not to shabby still, and it gave him monkey legs which a lot of systems balk at)
If you're on the $30/mo tier, you can choose to do a double-cost "quality" over "speed" option. Thankfully, the artist program gets me access. Since there's not yet a seed option it's hard to do a direct comparison, but the quality is going to be a must if you're doing anything that looks like cel. Much cleaner, much smoother.


(4 and 8 second quality gens)
One of the nicest features is the character reference feature. Basically it's like Midjourney's --cref, but with a very strict adherence to character details.
The above images used reference shots of Maureen and Dr. Underfang, and it got the stripes on Underfang's tie right in basically every gen. That's a ridiculous level of character model adherence and, for my purposes, all but essential.
It did misinterpret Maureen's undertail coloration for a sort of fin or drape, but the shot I used was oddly cropped, and sometimes stuff like that happens with gen AI. Given my measuring stick for errors is the era of animation I'm emulating, whatever does slip through is only going to make it more authentic.


There is a limitation in that character-reference and text-only prompts default to 16:9 presently with no options to adjust, but some room to pan is always handy and most people are going to be outputting for phone and not outdated CRT televisions, so, it's understandable it'd be a lower priority feature for the devs.


Walk cycles! By Saint Eniac it's a miracle!
On the left we have one prompted with TyrannoMax's control art, and on the right we have one using that art as the starting frame (4 and 8 seconds, respectively).
Way More details under the fold.
Vidu likes a hefty prompt.
A lot of detail and evocative language helps, and older prompting tricks like mojo-jojoing important concepts are back. For the Max walk cycles above I used:
1986 vintage cel-shaded cartoon character walk cycle. The orange dinosaur-anthro wearing blue gladiator armor walks toward screen right, the camera tracks him, holding him in center-frame. He completes a full, brisk walk cycles from the side view. He walks boldly, back straight, head high, heroic. His tail sways behind him as he moves. The whole clip has the look and feel of vintage 1986 action adventure cel-animated cartoons. The animation quality is high, with flawless motion and anatomy. animated by Tokyo Movie Shinsha, studio Ghibli, don bluth. BluRay remaster. flat chroma-key green screen background
The potential for use with my Filmation-inspired technique is readily apparent. Both versions are on-model as much as any two shots in a 1980s action-figure shilling cartoon would be, some minor blurring to clean up in post but nothing serious. It should be pretty easy to extract the needed frames for looping and compositing.
Some Extra Points
There are the usual issues with hands, though more often than not it corrects my four-fingered anthros to having a human five-fingered hand. Buzby Spurlock animation was known for those kinds of inconsistencies, though. So an opening credits video is much less far off than it was at the last post.
It's also generally impressive how well it does with my dinosaur characters. Non-humanoid dinosaurs are difficult for most image generators, much less anthrosaurs in a vintage aesthetic. Vidu has yet to override the character art to give Underfang or Max the Jurassic Park style t-rex jaw, which is something both MJ and Dall-E 3 have trouble with.


Human characters like Kitty Concolor here, much more stable.
As always, clips are curated. I didn't choose my absolute best ones (gotta have something for the videos), and I'm working on a fun series of jank reels across all the generators.
#vidu#vidu artist plan#ai video#ai animation#tyrannomax#ai tutorial#ai assisted art#cartoons#80s nostalgia#unreality#maureen the lizard queen#dr. underfang#ApeTromic Pyle
65 notes
·
View notes
Text
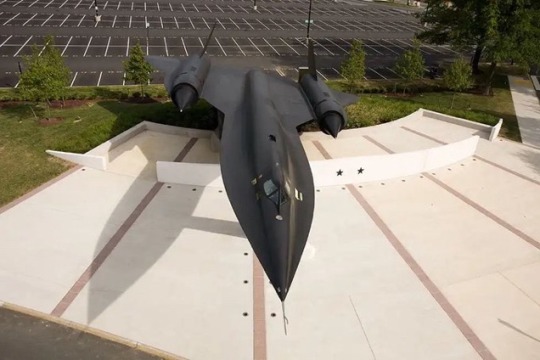
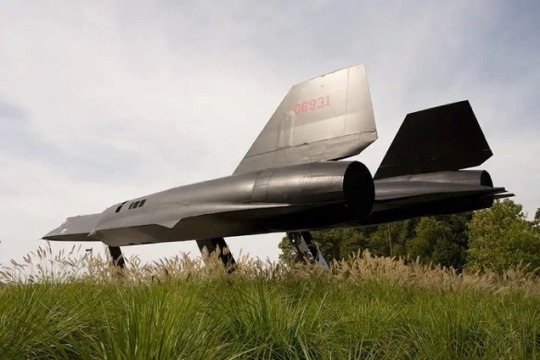
About the A-12 Oxcart
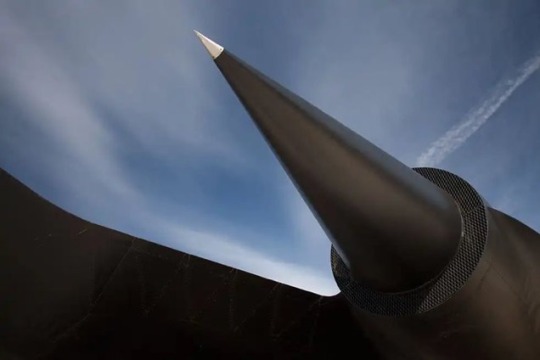
CIA developed the highly secret A-12 OXCART as the U-2’s successor, intended to meet the nation’s need for a very fast, very high-flying reconnaissance aircraft that could avoid Soviet air defenses. CIA awarded the OXCART contract to Lockheed (builder of the U-2) in 1959. In meeting the A-12’s extreme speed and altitude requirements, Lockheed — led by legendary engineer Clarence “Kelly” Johnson — overcame numerous technical challenges with cutting-edge innovations in titanium fabrication, lubricants, jet engines, fuel, navigation, flight control, electronic countermeasures, radar stealthiness, and pilot life-support systems. In 1965, after hundreds of hours flown at high personal risk by the elite team of CIA and Lockheed pilots, the A-12 was declared fully operational, attaining the design specifications of a sustained speed of Mach 3.2 at 90,000 feet altitude.
CIA’s operational use of the A-12 was beset by not only many technical problems but also political sensitivity to aircraft flights over denied areas and competition from imaging satellites. After the U-2 piloted by Francis Gary Powers was shot down over the Soviet Union in May 1960, all Soviet overflights were halted, thus blocking the A-12’s original mission to monitor the Soviet Bloc. By the time of the CIA’s first A-12 deployment in 1967, CORONA satellites were being launched regularly to collect thousands of images worldwide each year. Although its imagery was less timely and of poorer resolution than the A-12’s, CORONA was invulnerable to anti-aircraft missiles and much less provocative than A-12 overflights. At the same time, the US Air Force was developing the SR-71, a modified version of the A-12. Seeing little value in maintaining both overt SR-71 and covert A-12 fleets with similar capabilities, President Johnson ordered the retirement of the A-12 in 1968.
The only A-12 reconnaissance operation codenamed BLACK SHIELD, took place from May 1967 to May 1968. A detachment of six pilots and three A-12s based at Kadena Air Force Base in Okinawa flew 29 missions over East Asia. The panoramic stereo camera aboard each aircraft yielded considerable high-quality imagery that within hours of landing was processed. From the images, photointerpreters provided key intelligence information in support of US military operations during the Vietnam War.
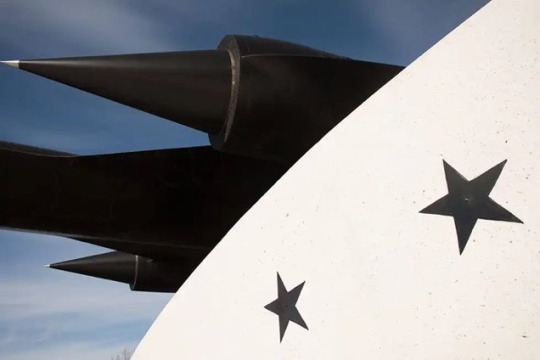
The A-12 on display at CIA Headquarters — number eight in production of the 15 A-12s built — was the first of the operational fleet to be certified for Mach 3. No piloted operational jet aircraft has ever flown faster or higher.
I found this article on the CIA website. This is the Central Intelligence Agency's opinion about the Oxcart. Interestingly, the A-12 was taken from the Minnesota Air Guard to be placed in front of the CIA headquarters in Langley, Virginia. The pictures are of that very A-12 that used to be in Minnesota.
CIA did not give up the A-12s without a fight. They wanted to keep them. They did insist that for about a year during the transition from the A-12 to the SR 71s to have civilians from the CIA fly the SR 71 on covert missions if necessary. I have a paper called “ Memorandum for the President” from my father‘s book “The Very First’’ about the CIA flying the SR 71. What was decided during that congressional committee with Senator Russell as a key person on this matter was to reduce the overall fleet size by mothballing eleven A-12 aircraft and phase out the CIA fleet capability by January 1968 with all missions assigned to the SR 71 fleet under Air Force management with the possible use of civilian crews. The date on this document is December 26, 1966 . ~Linda Sheffield
@Habubrats71 via X
42 notes
·
View notes
Note
quick question! what camera do you use to take pictures with you and teddy? you've inspired me to take pictures of my plushies when we go out but i'm always in awe of the quality of your photos! i appreciate any and all advice given. have a wonderful day!
Thank you! Maybe a not so quick answer.
All the photos of Teddy here have been taken on a Canon t2i, most all on the stock lens. At this point you could get the body for pretty cheap as it's such an older model.
I always shoot in manual so I'm deciding the settings for each shot. I started off shooting in aperture so I picked the depth of field/amount of light coming in (think small aperture more light with smaller depth, large aperture less light more depth) and the camera chose the shutter speed (how long the shutter is open exposing the frame - light) for me. I have always chosen my own ISO (light again) in part because if you get too high on that your photos will get pretty grainy. As I gained knowledge of the camera and figured out a feel for things (maybe 20k frames later?) I started shooting all in manual. I decided that I needed more control of my shots. Definitely still a work in progress but as I'm getting to over 200k frames on this camera and it's thinking about dying on me I feel pretty comfortable looking at a scene and having a decent idea of what my settings should be before I take a shot. Then if needed I end up dialing in the settings a bit. The most important thing when starting is go take a ton of photos! Play around with the camera and get comfortable! Practice, practice, practice, 10,000 hours to mastery, all the sayings that all come back to: do something a ton to get good at it.
There is something to be said for having an 'eye' for a shot. The Rule of Thirds can definitely help guide you to better photos. Paying attention to lines in the shots, seeing where your eye is drawn naturally and trying to set things up to play on that. I have a few shots that I am extremely proud of, a lot that I am happy with and still others that bother me because they are just not quite right. Then untold numbers that are for me to remember a place but aren't worth sharing away from my eyes.
Doing some color correction in Photoshop can help photos to the next level too, personally I try to keep things pretty natural and don't like a photo when it's been touched too much. But everyone has their own style. To be blunt you don't really see photos anymore, at least ones that are widely consumed, that haven't been touched up in some way.
I could probably ramble away for a lot longer and would happily dive deeper on anything that you want more information on. Keep a sense of wonder in the world, explore and know that there is always more to learn and you'll be off to a good start!
#teddy#adventures with teddy#Canon#photographers on tumblr#original photographers#photography#adventureswithteddy#bear#travel#plushie#plush#Ask#Answer#answered#Canon t2i#Sorry it's a long one
37 notes
·
View notes
Text
so many interesting things Jean-Luc has been saying - i wish he'd be hired to do this at every event - comparing Fabbri/Ayer to Hubbell Donahue in their power. giving very high praise to Davis/Smolkin in their FD for the difficulty and their good skating skills
this morning he's saying how going fast makes it easier to balance, that going slower to an extent takes more control, like in a step sequence for cleaner and deeper turns. he said at one of the other practices that difficult turns came originally from figures, which were done practically standing still - and that doing them at speed covering ice is a new thing
he mentions good partnering, clarity and spacing a lot. that if the camera zooms out when a team's doing twizzles, it's usually not a good sign about how far apart they are. that you want to see a team keeping the same space between them rather than push/pull accordioning
he keeps talking about valuing dance in ice dance - love that - said with Tkachenko/Kiliakov that there's a fine line between creativity vs keeping the integrity of the build of the dance, and how it can go either way with judges, whether they value seeing something new
and things like, is a team looking down at their feet like they're focusing on if their turns are clean - how that can make them look unsure. is someone giving face all the way through, or stopping to concentrate on something and going in and out of using their face to express
technical sheets/scores - how sometimes it aligns with how you feel in a skate - like sometimes you feel you did great but get a level 1, and another you're not sure but you get level 3 or 4 - and sometimes not
wants to see every detail be intentional, purposeful, quality - Michelin stars, not just delivering food - effortlessness in the partnering, how you do a change of edge, how you lift your foot off the ice - every detail needs to be taken into account
in a rhythm dance, want to see and feel the rhythm - that the skater doesn't need to know the count to feel it and understand how it makes them want to move
praised N/M's rotational lift in the RD - their strongest element in that program
Mrazeks - went whoa - the power - doesn't know another team besides the Taschlers with that kind of power - he was talking about how they suddenly generated speed out of nowhere with two crossovers coming out of a corner. they know how to push - at times it's exciting. with a team like them, he sees it sometimes too much (vs dancing). their RD has a stiffness that works for clarity and with the music in some sections. assertiveness of edge - very grounded. "power band of this team is unreal"
Lauriault/LeGac - it's musical, but being closer together would create a whoaa factor. when you create a precise image for [the audience/judges] to see, that's when the whoaa happens
Fear/Gibson - he said they've had an issue with the wrong music being played, or a glitch when it started at every single practice so far, and how that potentially can get in your head. (Lewis had a fall in that move where he goes through her legs) they're performers - exquisite at their craft of clarity - every beat is hit, every accent. so clear - makes it easy to watch
he talks a lot about vulnerability when you perform - being able to connect with someone, eye contact, to create and share the experience with your partner, and the way he speaks of Kaitlin says respect and a lot of care - it's nice to hear
8 notes
·
View notes
Text
Welcome to the home of ultra high quality reference screenshots for Sigma aka Dr. Siebren de Kuiper from Overwatch.
I'm the Sigmatographer.
== CLICK HERE FOR THE FULL TAG LIST FOR NAVIGATION ==
You will be able to search by:
skins + weapon customizations
victory poses + highlight intros + emotes
actions + featured body parts + visual effects
special screenshot types including starwatch, goofy shots, transparents, sprays, and the april fools googly eyes shots
You know, a normal level of detail--
== CLICK HERE FOR THE HIGH RESOLUTION DISCLAIMER ==
Because you should try zooming in on these screenshots, really. For most of these, you can see the pores on his nose. And you should know that for any with the high res disclaimer, I have even higher resolution available.
== HOW DO I FILTER YOU OUT FROM THE SIGMA TAG??? ==
Glad you asked!
Settings > Account Settings > Content You See > Filtered Tags > add #siebren de kuiper screenshots
This will cut down my posts to a little grey box you can un-filter at any time without blocking me!
More info about the blog in general below the cut, for the curious.
== WHY?? WHY IS THIS BLOG ==
because i have, ahem, a hobby.

Anyway, I figured that artists who want to draw Sigma should benefit from this uh. habit? of mine, of course.
== ...HOW?? ==
Settings > Video > Graphics Quality > Screenshot Quality > 5X Resolution
This applies a rendering multiplier on the in-game screenshot feature that activates when you hit your [print screen] button on your keyboard, temporarily straining your graphics card for a little more processing power to produce a screenshot at, in this case, 5x the resolution of the window you're playing in. These screenshots are rendered this way during recent highlights [including intros] [not including saved highlights], the hero gallery, and replays.
Almost all of my non-gallery and non-highlight screenshots are taken during replays using the 3rd person camera, replay speed at 0.1x to really control capturing the coolest moments, player outline at 0%, and covering about 5min of gameplay over the course of 3hrs on average, constantly pausing and flying around Sigma to capture his various skins + weapon customizations in various lightings, maps, settings, effects, poses, abilities, and angles.
For skins that I do not own, I am merely capturing opportune moments when I happen to play a game when a Sigma with a skin I do not own is playing, and pinning/importing that replay for screenshotting. It's mere happenstance to catch those moments, for the most part.
Skins I've screenshotted without actually owning them:
Maestro [when will my husband return from war]
Beholder
Carbon Fiber [and then they re-released him so i have him now!]
Draik [which I then bought on re-release]
(As far as the Drowned Warrior skin is concerned, I hate it on principle for the fact that they released such a garbage and lazy recoloring for $60. I will not screenshot this garbage skin.)
#sigma overwatch#overwatch screenshots#siebren de kuiper#siebren de kuiper screenshots#overwatch sigma#sigmatographer nonsense
9 notes
·
View notes
Text
Yvette Heiser - Phone Photography Essentials without Formal Education
In today's digital world, the art of photography has become more accessible than ever. You no longer need a formal education or expensive camera equipment to create stunning images. With advancements in smartphone technology, your phone can be a powerful tool for capturing professional-quality photos. Here’s everything you need to know to excel in phone photography without a formal education.

Understanding Your Phone’s Camera
Before diving into photography, it’s essential to understand the capabilities of your phone’s camera. Modern smartphones are equipped with high-resolution sensors, multiple lenses, and advanced image processing software. Take some time to familiarize yourself with the various settings and features available on your phone's camera, including HDR, portrait mode, night mode, and manual controls for ISO, shutter speed, and white balance. For more detailed insights, consider exploring resources like Yvette Heiser Texas – All You Need to Know about Phone Photography.
Mastering the Basics of Photography
Even without formal education, you can learn the fundamental principles of photography. Start with the basics:
Composition: The rule of thirds, leading lines, and framing are essential techniques that can help you create balanced and visually appealing photos.
Lighting: Excellent lighting is essential for taking outstanding photos. Natural light is your greatest ally, so it's important to learn how to use it effectively. Understand the differences between soft and hard lighting and how to leverage shadows and highlights to enhance your images.
Focus and Exposure: Ensure your subject is in sharp focus. Most smartphones allow you to tap the screen to set the focus point. Adjusting exposure can help you manage the brightness and contrast of your photos.
Leveraging Photography Apps
One of the advantages of phone photography is the plethora of apps available to enhance your images. Here are a few must-have apps:
Editing Apps: Tools like Adobe Lightroom, Snapseed, and VSCO provide robust features for tweaking exposure, contrast, saturation, and other elements. They also come with presets and filters that can add unique and creative touches to your photos.
Camera Apps: Apps like ProCamera and Camera+ offer advanced manual controls, allowing you to fine-tune settings like ISO, shutter speed, and white balance.
Special Effects: Apps such as Lens Distortions and Afterlight can add unique effects and overlays to your photos, helping them stand out.
Building a Strong Portfolio
Your portfolio is your introduction in the photography world. Create a diverse collection of your best work to showcase your skills and style. Include different subjects such as landscapes, portraits, and macro shots. Regularly refresh your portfolio with updated and enhanced photographs. Sharing your portfolio on social media platforms like Instagram, Facebook, and Pinterest can help you reach a wider audience and attract potential clients.
Networking and Marketing
Building a successful photography career requires more than just taking great photos. Networking and marketing are essential components:
Networking: Join online photography communities, attend local meetups, and participate in photography challenges. Networking with other photographers can lead to collaborations, referrals, and learning opportunities.
Social Media Marketing: Use social media to market your photography services. Regularly post your work, engage with your audience, and share behind-the-scenes content. Consider creating a website to establish an online presence and make it easy for clients to find and contact you.
Continuous Learning and Experimentation
Photography is an ever-evolving field, and staying updated with the latest trends and techniques is crucial. Follow industry leaders, read photography blogs, and watch tutorial videos. Don’t be afraid to experiment with new styles and subjects. Continuous learning and experimentation will help you grow as a photographer and keep your work fresh and innovative.
Conclusion
Excelling in phone photography without formal education is entirely achievable with dedication and practice. By understanding your phone’s camera, mastering photography basics, leveraging apps, building a strong portfolio, networking, and continuously learning, you can create stunning images and establish a successful photography career. Yvette Heiser- Is it possible to start a career in photography without formal education? Embrace the journey, and let your creativity shine through your lens!
#wedding#moments#camera#pictures#photographer#photography#childphotography#yvette heiser#photographytips#events
7 notes
·
View notes
Text
Life and Pictures: Entry #5
The Science of Light: Mastering Illumination in Photography

Building on our exploration of memories, narratives, and emotions in photography, let's delve into a fundamental yet often underappreciated element: light. Understanding and mastering light can transform your photography, adding depth, texture, and mood to your images.
Why Light in Photography Matters Light is the essence of photography. The word "photography" itself means "drawing with light." Light determines the visibility, contrast, color, and mood of a photograph. Mastering light enables you to control these aspects, enhancing the storytelling and emotional impact of your images.
Elements of Light in Photography
Quality of Light:
Soft Light: Produced by diffuse sources like overcast skies or softboxes, soft light creates gentle shadows and a flattering effect, ideal for portraits.

Hard Light: Created by direct, undiffused sources like the sun on a clear day or a bare bulb, hard light produces sharp shadows and high contrast, emphasizing texture and details.

Direction of Light:
Front Light: Illuminates the subject from the front, reducing shadows and creating a flat, even effect.

Side Light: Comes from the side, adding depth and texture by casting shadows and highlighting contours.

Back Light: Illuminates the subject from behind, creating silhouettes and dramatic effects.

Top and Bottom Light: Light from above or below can create unusual and striking effects, often used for dramatic or artistic purposes.

Color Temperature:
Warm Light: Light with a yellow or orange hue (e.g., golden hour sunlight), evoking warmth and intimacy.

Cool Light: Light with a blue hue (e.g., shade or overcast daylight), creating a calm or somber mood.

Intensity of Light:
Bright Light: High-intensity light creates vivid, high-contrast images.

Low Light: Low-intensity light can produce soft, moody, or atmospheric images.

Techniques for Mastering Light
Natural Light Photography: Utilize different times of the day to capture various lighting effects. Early morning and late afternoon offer soft, warm light, while midday sun provides harsh, direct light. Use reflectors to bounce light onto your subject, filling in shadows and balancing exposure.

Artificial Light Photography: Experiment with studio lighting setups, such as using multiple light sources, softboxes, and diffusers to control light quality and direction. Use colored gels to alter the color temperature and create creative lighting effects.

Understanding Exposure: Master the exposure triangle (aperture, shutter speed, ISO) to control how much light enters the camera and how it affects the final image. Use exposure compensation to adjust the brightness of your image in challenging lighting conditions.
youtube
Light Modifiers: Employ tools like reflectors, diffusers, and flags to modify and control light. Reflectors can bounce light, diffusers can soften it, and flags can block or shape it.
youtube
Practical Applications and Projects
Golden Hour Project: Photograph the same subject at different times during the golden hour to study how changing light affects the mood and appearance of your photos.

Shadow Play: Focus on capturing shadows and light patterns. Experiment with side lighting to create dramatic effects and highlight textures.

Night Photography: Explore low-light photography by shooting at night. Use long exposures, and experiment with artificial light sources like streetlights, car headlights, or flash.

Portrait Lighting: Practice different lighting setups in portrait photography. Use natural light, studio lights, and reflectors to create various moods and effects.

Light is a powerful tool in photography. By understanding and mastering its different aspects, you can significantly enhance the visual impact and emotional depth of your images. Embrace the science of light, experiment with its many facets, and let it elevate your photographic artistry.
Next time you pick up your camera, pay close attention to the light. Observe how it interacts with your subject, how it changes throughout the day, and how you can manipulate it to create the desired effect. Master the art of illumination and watch your photography transform.
#photography#original photographers#blackandwhitephotography#photographers on tumblr#film photography#photo#photoblog#photographer#life#lifestyle#perspective#leisure#hobbies#hobby#picture#nature#life experiences#my experiences#self expression#expressionism#abstract expressionist art#freedom of expression#35mm#35mm film#35mm photography#Youtube
3 notes
·
View notes
Text
Meet the Panasonic Lumix S9

Lumix fans, rejoice - Panasonic has finally announced the latest addition to its Lumix camera range, the Lumix S9. Available starting in June 2024 for £1499.99, the camera packs some neat hardware within, which should make it ideal for content creators, professionals, or even users just starting out on their journey with photography. In any case, Panasonic has included a ton of great features with the S9, and looks to give competitors a run for their money. CHECK OUT: Say Cheese: Fujifilm Expands its Mirrorless Camera Lineup We were actually able to go hands-on with the Lumix S9 in Japan during Panasonic's Lumix Summit for 2024, and explore the camera in all its glory, including its many photographic and video features, ease of controls, and more. You can check out the video below. https://www.youtube.com/watch?v=U1dZZMM-4jY Available in several colours including Jet Black, Crimson Red, Dark Olive, and Classical Blue, the LUMIX S9 is equipped with a 24.2-megapixel full-frame sensor and the latest engine which allows for high-quality content capture with a natural balance in tones. The camera features PDAF (Phase Detection Auto-Focus) for subject tracking, as well as built-in image stabilization to reduce camera shake during filming sessions, making it a versatile companion for various shooting scenarios. It's clear that Panasonic has designed the Lumix S9 to cater to creators, thanks to the added benefit of giving users the change to customize the look of their photos and videos. The camera comes with a REAL TIME LUT function, that's easy to access with a dedicated button for applying various colour styles instantly. Additionally, the new LUMIX Lab app allows users to create their own unique LUTs on their smartphone, allowing for a more streamlined editing process. The app also lets users to generate and share content on the fly without the need for a computer, with improved data transfer speeds between the camera and smartphone. Given the popularity of online content nowadays, Panasonic has also designed the Lumix S9 with a focus on providing content creators a seamless user experience. The camera introduces a new "MP4 Lite" recording format for capturing high-quality videos, which are well-suited for smartphones. Social media optimization is also made easy with the LUMIX Lab app, allowing creators to resize aspect ratios for various online content platforms. With all that being said, the Lumix S9 definitely makes a case for itself thanks to useful features like on-the-go LUT switching, easy content editing for social media, useful connectivity for smart devices, all packed in a compact, sleek and smart-looking design. Read the full article
2 notes
·
View notes
Text
Black Falcon Drone Reviews, Work Or Not?
╰┈➤ Product Name:⇢ Black Falcon Drone
╰┈➤ Features:⇢
Quadcopter Design
Long Battery Life
App Control
Foldable Design
Flying Trajectories
HD Images and Videos
Ease and Portability
GPS-Assisted Navigation
╰┈➤ Rating:⇢ ★★★★★ (5.0)
╰┈➤ Offer:⇢ 90-Day Money Back Guarantee
╰┈➤ Availability:⇢ In Stock
╰┈➤ Official Website:⇢ Visit The Official Website Here to Place Your Order!
ORDER HERE:- http://worldtrade24x7.com/black-falcon-drone-buy/
Black Falcon Drone:- The stay streaming function thru WiFi connectivity is a completely unique feature that complements actual-time monitoring, probably giving the Black Falcon Drone an area for users interested in stay events or immediate sharing of footage.Ground and impediment detecting sensors contribute to strong and clever flight, a function that might not be present in all drones inside the equal price class.The drone's aerodynamic design and functionality to attain speeds of up to 30 mph might offer superior overall performance in comparison to different drones in a comparable class.The inclusion of a sluggish-motion mode and a 12-megapixel camera for excessive-decision pictures should make the Black Falcon Drone stand out for users who prioritize creative videography and pictures.
╰┈➤[MUST READ] Read Customer Reviews and Their Journey – CHECK OUT!!!✔️
The practical foldable layout for smooth storage and transportation contributes to the drone's portability, doubtlessly making it more convenient than non-foldable alternatives.The drone's sturdy 500mAh battery offering over half-hour of flight time on a single price ought to outperform different drones in phrases of battery toughness inside a comparable rate range.The potential to operate quietly may additionally distinguish the Black Falcon Drone for customers who need to seize photos in noise-touchy environments, where noise discount is vital.
The panoramic characteristic with the high-quality 4K digital camera may additionally set the Black Falcon Drone apart in terms of shooting expansive and breathtaking pictures as compared to drones without this capability.The Black Falcon Drone's person-pleasant design, featuring a easy one-button manipulate machine, may want to make it more reachable for customers of all ability degrees compared to drones with extra complex controls.
╰┈➤[MUST READ] Read Customer Reviews and Their Journey – CHECK OUT!!!✔️
Black Falcon Drone is exclusively available on the reliable website. There isn't always physical shop where you should buy your Black Falcon Drone. Buy Black Falcon Drone at once from the official internet site through using the hyperlink on this text. The suitable news is that Black Falcon Drone is currently promoting at discounted price simplest at the authentic website.
FACEBOOK PAGES:-
#black falcon 4k drone for sale#black falcon 4k drone amazon#black falcon 4k drone price#falcon drone website
2 notes
·
View notes
Text
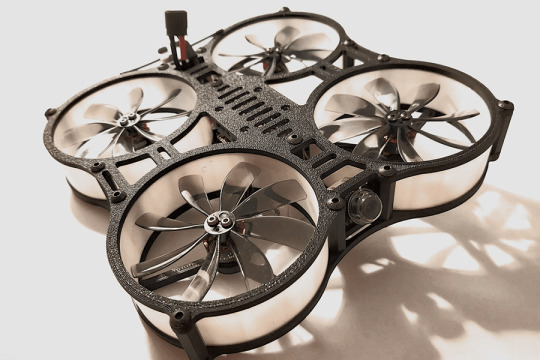
Choosing the Best Indoor Drone and Parts in 2023: A Comprehensive Guide
Why Fly Indoor Drones?
Flying indoor drones offers a range of compelling reasons. There are different types of indoor drones suitable for various purposes. Here are some common justifications for indoor drone flying and the best indoor drone for each scenario:
For Fun: Toy drones, often referred to as microdrones, are ideal for fun indoor flights.
For Practice: Toy indoor drones are great for practice. You can also use commercial drones with add-on cages to practice flying.
For Racing: Racing drones are designed for high-speed, competitive indoor flying.
For Work: Professional indoor drones are essential for work-related tasks like inspections, data collection, or 3D modeling.
What Are the Benefits of Indoor Drones? Indoor FPV flying offers several advantages, including:
All-Weather Flying: Indoor drones can be flown regardless of the weather conditions, making them ideal for areas with inclement weather.
Improved Control: Indoor flying allows for precise control in a controlled environment.
Skill Enhancement: It's an excellent option for beginners to practice and improve their flying skills.
Year-Round Activity: Indoor FPV flying is not weather-dependent, making it a year-round hobby.
Safety: Flying indoors reduces the risks associated with outdoor flights, such as collisions with structures or power lines.
Best Mini Indoor Drone Kit
Mini indoor drones, often called "toothpicks," are lightweight and suitable for indoor flying. They typically weigh under 60 grams without the battery and use 2.5" triblade or 65mm bi-blade propellers. Here are some key considerations for choosing a mini indoor drone:
Cost
Component quality and selection
Overall design
Ease of setup
Flight performance
Happymodel Sailfly-X 2.5 Inch Toothpick
The Happymodel Sailfly-X is an excellent choice for a 2.5-inch toothpick indoor FPV drone. It's known for its lightweight design, versatility, and speed. The option to use both 2S and 3S batteries provides flexibility in terms of speed and agility. However, the range is somewhat limited due to the integrated SPI receiver. The fixed camera angle may be too aggressive for tight courses, but it offers good value for the price.
T-Motor Feather120 3 Inch Toothpick
The T-Motor Feather120 stands out for its quiet operation, making it an excellent choice for indoor flying. It offers ample power, high efficiency, and longer flight times. However, the low KV motors and heavy, high-pitch propellers make it less responsive.
Best Indoor Micro Drone Parts
For indoor micro drones, you need the right components for optimal performance. Here are some essential parts for 65mm and 75mm micro drones:
Battery (1S or 2S, depending on your drone)
Motor (suggested models)
Frame
Propeller
Flight Controller
ExpressLRS Receivers
Essential 65mm Micro Drone Parts
Battery: Consider LiHV batteries with the PH2.0 connector.
Motor: MEPS 0802 motors offer a good balance of size and power.
Frame: Options like BetaFPV Meteor65 Frame and NewBeeDrone V2 Cockroach Frame are robust choices.
Propeller: Gemfan 1208 Triblade 1mm Shaft props are suitable for 65mm tiny whoops.
Essential 75mm Micro Drone Parts
Battery: Choose 1S or 2S batteries, such as BetaFPV 1S 450mAh (BT2) or GNB 1S 450mAh (PH2).
Motor: MEPS SZ1103 motors are efficient and generate minimal heat.
Frame: The HAPPYMODEL MOBULA7 75MM / 1S ANALOG frame is a solid option.
Propeller: HQProp 40MM 3-Blade Micro 1.5mm Shaft props are excellent for 75mm tiny whoops.
Flight Controllers
A compact AIO flight controller, like the BetaFPV F4 FC, offers low latency ExpressLRS and reliable performance. It includes a blackbox chip for easy tuning and detachable motor plugs.
ExpressLRS Receivers
ExpressLRS is an excellent choice for Tiny Whoops, offering long-range capabilities and telemetry support. While it may have a learning curve, its performance and flexibility make it worth the effort.
Best Indoor Drones for Filming
For indoor filming, you have two options:
2 Inch Cinewhoop: The GEPRC Cinelog 20 is a favorite among FPV drone enthusiasts. It comes in analog and digital versions, with the latter offering better image quality. Its compact design and dampened camera platform ensure high-quality video.
2.5 Inch Cinewhoop: The SpeedyBee Flex25 features an innovative frame design with overlapping propellers. It can fit a 2.5" cinewhoop into a 2-inch form factor and offers a simple wireless Betaflight setup through a mobile app.
Indoor Flights Using Throttle Expo
Applying throttle expo for indoor drone flights enhances control and precision. Throttle expo, or exponential throttle curve changes, allows for more precise control, especially with high-KV motors. A 20-30 throttle expo near the hovering throttle range can improve control in confined spaces.
Which Is Better: Indoor FPV Drone or Outdoor FPV Drone?
The choice between indoor and outdoor FPV drones depends on your preferences and intended use. Outdoor FPV drones are ideal for aerial photography and longer distances. Indoor FPV drones are better for confined spaces and all-weather flying. Consider your specific needs and the type of flying you enjoy the most.
4 notes
·
View notes
Text
Canon EOS Rebel T7 DSLR Camera

Brand: Canon
Model Name: EOS REBEL T7 18-55mm f/3.5-5.6 IS II Kit
Photo Sensor Size: APS-H
Image Stabilization: true
Max Shutter Speed: 30 seconds
Min Shutter Speed: 1/4000 seconds
Metering Description: average,center-weighted,multi-zone,partial,spot
Exposure Control Type: Manual
Form Factor: DSLR
Effective Still Resolution: 24.1 MP

About this item
24.1 Megapixel CMOS (APS-C) sensor with is 100–6400 (H: 12800)
Built-in Wi-Fi and NFC technology
9-Point AF system and AI Servo AF
Optical Viewfinder with approx 95% viewing coverage
Use the EOS Utility Webcam Beta Software (Mac and Windows) to turn your compatible Canon camera into a high-quality webcam. Compatible Lenses- Canon EF Lenses (including EF-S lenses, excluding EF-M lenses)

Product Description
Perfect for beginners, this camera bundle offers the essential tools needed to take your SLR skills to new heights, all in one convenient package. No matter where your next adventure takes you, count on the EOS Rebel t7's impressive 24.1 Megapixel CMOS sensor and wide ISO range of 100-6400 (H: 12800) to capture high-quality images, even in low-light situations.

3 notes
·
View notes
Text
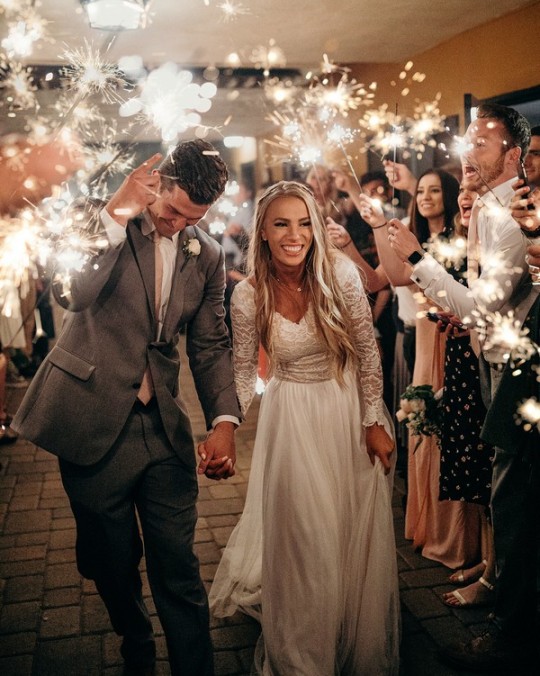
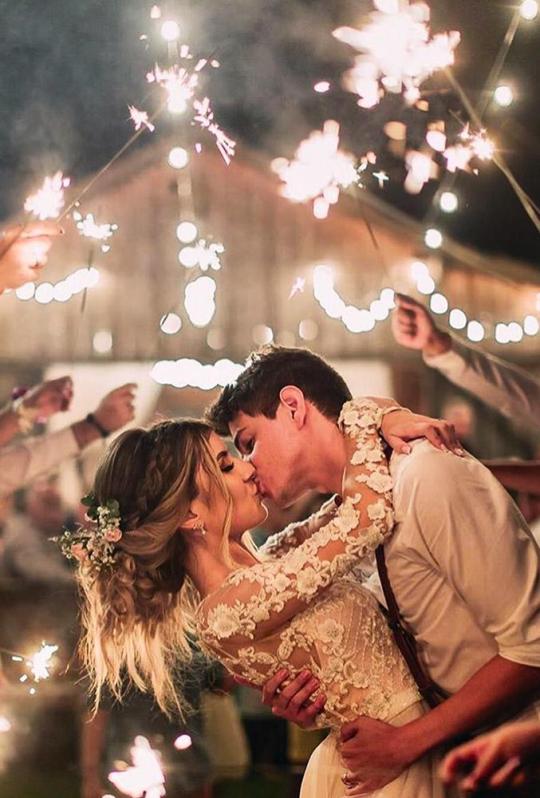
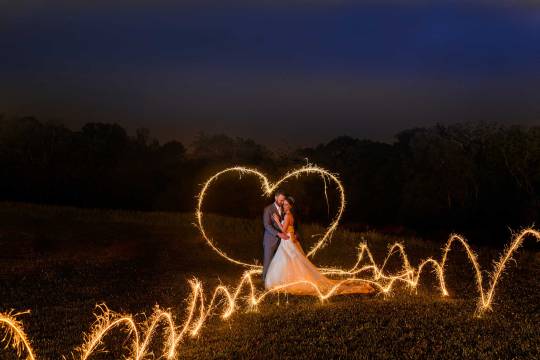
Sparklers Photography – Tips and Trends
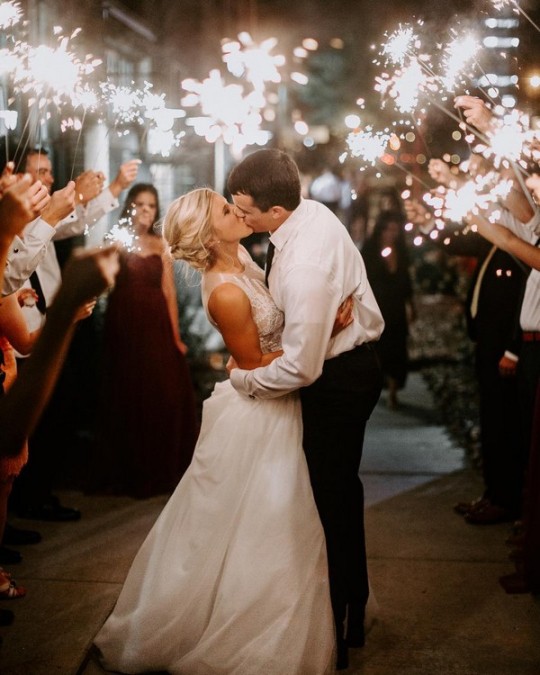
Your special events are around the corner which means celebrations, lot of fun, family gatherings, and fireworks would be a part of your joy. Grab your camera for sparkler photography. Sparkler photos would be as fun as they are beautiful. Most people make it more interesting to know how to take a sparkler photo with an iPhone or any camera.
Based on your attendees, sparkler photos logistics demand a bit of preparation than a typical night shot. A magnificent scene might be created with proper planning or fizzle out with a dismal conclusion. Photography of Sparklers is the ideal method to brighten up the evening even without hazards and rules. Because they’re a safer, easier substitute for consumer explosives that are more dangerous and unsuitable for use around children and families.
Nowadays photography is a prominent part of any event because these events are always memorable not just by your brain’s memories but also by photographs. For photographers, automatic or moderate controls must be abandoned. A tripod and a slow frame rate are essential for getting the shot.
You can master the art of taking sparkler pictures with a little creativity, persistence, and enjoyment. Sparklers are ideal for many occasions, including weddings, Fourth of July celebrations, birthday parties, and fun at the beach. Use the advice above to be ready and discover how to snap stunning sparkler shots. Just make sure you are utilizing the fireworks in a secure and open area, and keep in mind that it’s acceptable to experience some trial and error.
Essential Equipment for Sparklers Photography
1. Camera
Camera Shutter speed settings that you’ll fiddle with the most. Also, the kind of photo you’re aiming to get will influence how long you need your shutter to be open. The optimal shutter speed for capturing motionless sparklers is about 2 to 5 seconds faster. Nevertheless, depending on your layout, you’ll need a frame rate of the design you’re making, and you’ll need a speed of somewhere between 15 and 30 seconds if you wish to depict the activity of a sparkler. To prevent your photo from being very blurry, set your ISO to around 100. If that’s too black, then can increase the ISO to 400 to lighten the picture without making it excessively bright.
2. Tripod
Professional photographers suggest staying still while taking pictures with sparklers. For this purpose, you need a tripod stand with adjustable length settings. Go for a budget-friendly, good-quality frame that can firmly hold your camera setup. A cheap quality tripod can make your camera moveable in high windy weather. In another case, you can get a camera holding hand, so choose which one is friendly for you before buying.
3. Sparklers
If you want to capture stunning wedding sparkler photos or any other event photography, it is essential to determine the most suitable sparklers for your occasion. Opting for longer-lasting, larger sparklers of 36 inches will produce better firework effects than smaller 20-inch or 10-inch sparklers. With bigger sparklers, everyone can take their time to position themselves and light their sparklers for communal activities such as wedding sparkler send-offs.
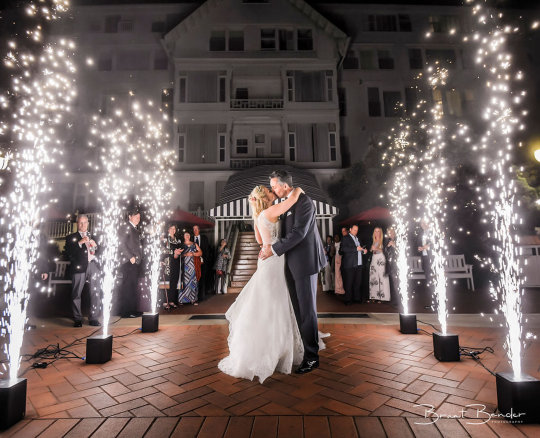
4. Lighting
It would be beneficial to include additional lighting during sparkler photo sessions, particularly during the bridal entrance and exits at weddings. It is important to direct the light towards the couple, focusing on illuminating the bride's sides to enhance her appearance. Both individuals should ideally be bathed in a flattering light, with the bride typically receiving more attention. For other events, it is recommended to utilize natural lighting in the background.
Creative Ideas for Sparkler Photography: Capturing the Magic of Light and Motion.
You can bring new ideas for taking pictures with firecrackers at your events. Ask your clients to share their thoughts and then choose those that will challenge you more. Some examples are, drawing and writing with sparklers in photography. But for that purpose, you have to guide your clients properly with safety precautions.
Capturing Moments with Family
The results of shooting the kids and your family with a sparkler after dark are usually not very impressive. So because the light out from the sparkler by itself is typically not bright enough to light your guest’s face, you can choose the sparkler writing technique for this photo shoot. However, the flash on your camera will either pop up and wipe out all the ambient light or focus on the firework and reveal that, has left a tiny dot of light in the shadows.
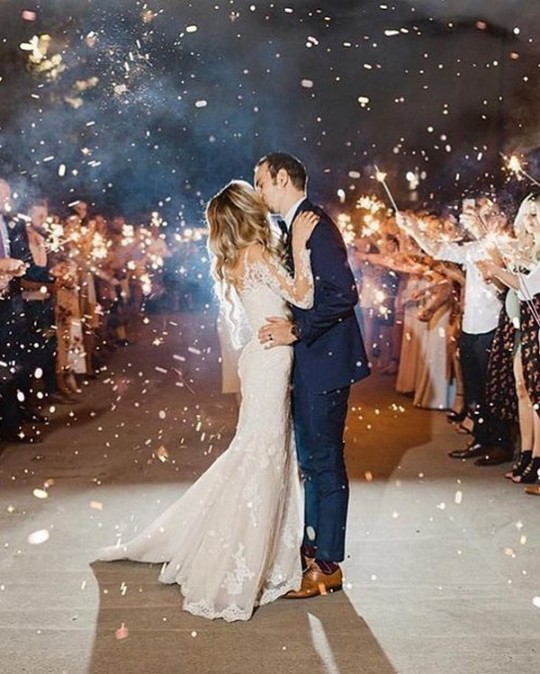
Sparklers Wedding Photos
A professional wedding photographer can use a long exposure camera lens. He or She can use it with an off flashlight which develops some stunning wedding portraits. It does take some time to prepare for this kind of picture. However, not all shooters have the talent to accomplish this. Alternatively, if either you lack the expertise or simply prefer something more manageable. Verify that an overlay is available to your photographer. The fastest method for taking a sparkler image is this one. Hence, you can explore more Photography ideas of sparklers.

Tips for Capturing Sparkler Photography
Planning and Preparation
Before starting your big events you need to plan and prepare the setup, time, and location for your photography with sparklers. While taking pictures of sparklers, the set locations are a priority to consider. It’s critical to locate a location with as little background light as possible to produce a clean image. That is a result of blur caused by artificial light. Both the configuration and the location you choose are crucial. You must need a tripod on priority. This is crucial when using sparklers to make words or designs because of a higher number of successive demands of absolute immobility.
Setting Cameras
If you want to capture stunning sparkler photos, setting up your camera correctly is essential. Follow these key steps to learn how
Put your camera in manual control if necessary.
The shutter should be set at f.22.
Image quality should be set between 15 to 30 seconds.
Use a 100 ISO setting.
The camera should be in auto-focus.
Sparklers in sunlight have an amber tinge to them; by setting your camera’s white balance toward sunlight, you can capture this orange glow more precisely.
Sparklers placement for shooting
Holding sparklers or firecrackers either for your wedding day or other special events would be a stunning moment for you. Remember to follow safety rules before setting up for photography with sparklers. The people behind you at your wedding or the crew in the background can hold these fireworks and make a swirl. Set up the photograph with enough speed to catch the sparkler’s desired motion. Finally, use a flash to light and freeze the subject immediately before the time is finished.
Light Painting in Photographing Sparklers
As you know that when the weather warms up people prefer to do events at night which is a great time to light up sparklers. So burn out those light sticks, and firecrackers and light up your stunning night. Light painting occurs when your camera clicks the lighting moment of the sparks of fireworks.
But there is a technique to capture such light painting. After morning peak hours, the sunlight is meager, but you should still have a fair bit to illuminate your scene. Since it isn’t completely dark, the light of your fireworks won’t be as powerful, but that’s okay. So it’s not recommended to take photos in complete darkness if this was your first attempt at it until you have mastered light painting using your lens.
Long Exposure Sparklers Photography
Longer exposure Photographic photography is a process in which the lens of the camera is left open for a sizable amount of time. The final image shows still objects in sharp detail while also capturing the path of moving stuff ahead of the cameras. For a long-exposure camera, settings keep the ISO low. Longer exposure will give you enough light to capture sparkling moments. Set your lens aperture at f8, giving you more depth of the lens field without getting technical.

Writing with Sparklers
Writing with sparklers is another way of creating fun with words. To make your photography more stunning you can make words with fireworks and click photos. You need to stay still while the camera lens clicks. Your lens will be wide for a longer period, which means that any move will look fuzzy.
They must remain entirely motionless if you wish your content to be seen. To ensure that the words are correctly seen by the camera, write the letters backward. If writing the letters back is too challenging, you can simply reverse the final picture in editing software.
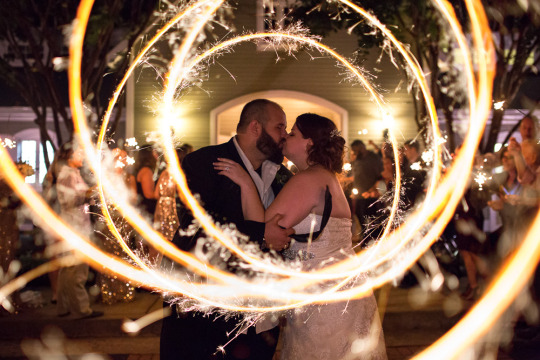
Sparklers Light Trails
Light trails capture a moving light source with an exposure speed that is too slow to stop it in its tracks. As a result, a point of light appears with a trail that extends from its origin to its final location inside the image. This effect would be called the light trail of sparklers by creating or drawing with such illumination, such as sparklers, and having the image taken by a camera with a long exposure time.
If you are doing this photograph at night you need light for focusing your client’s image. But turn it off when your camera shutter clicks. You need to slow down the speed of your lens so that your camera can focus on the sparkling object. To get this kind of slow-speed shutter clicks you need to adjust the lens placement at the f site accordingly. You have to do some trials before making final wedding pictures with sparklers and light trails.
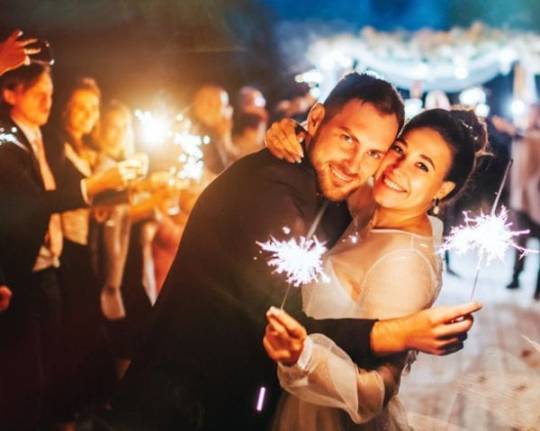
Sparkler Portraits
Photographing sparklers on your big days, weddings, and other festivals would enhance the beauty of your day. But unfortunately, if your camera and photographer are not professional you might face some trouble. Sparkler portraits are fortunately redeeming yourself for making your day memorable. The key behind clicking these portraits is the speed of your camera lens. Leave everything behind and adjust the shutter speed in the following pattern.
Auto mode
3-second camera speed
Opening: f/8
ISO: 100
White equilibrium: Sunlight
After concentrating on the target, change to manual focus.
Sparklers Safety Tips
Use of Large Firecrackers
As they light for a long time and kids won’t feel the sparks going too near to their palms, they are great for photographs and also for security purposes.
Under Supervision
Make sure kids understand to avoid touching, tossing, or approaching another person too closely. Naturally, keep in mind the abilities of your kids and only provide sparklers to those who can handle them securely.
Keep Water Bucket
Keep a cold water steel bucket nearby to your fireworks to put the sparklers after using them.
Conclusion
To conclude this topic about sparkler photography or sparkler wedding pictures you are now well aware of how to make your event memorable with stunning photo shoots. You can take and produce a unique set of shots that your client will treasure. And then ideally, promote on their social networking sites with a small time commitment to learning how to create sparkler photos. Remember to follow the photographic tips and safety precautions before setting up your camera.
What are the best camera settings for fire?
Try taking this photo in manual control with the following settings: camera sensor at 1/100 sec, lens at f/1.8 (or whatever your lens’s widest aperture is), and ISO Auto. To enhance the image brighter or dimmer, use exposure correction, and select a low angle to set the fire against the dusk-sky background.
Do you light up a sparkler from top to bottom?
While lighting, hold the firework vertically or keep the tip slightly lowered. The sparkler should always be lit at the tip that is farthest from the wire loop.
What is the best ISO to shoot at?
The ideal ISO for a clear day or for a light environment with a lot of sunlight is 100 or 200. For inside or overcast shooting, use 400 ISO. For indoor use without additional lighting, 800 ISO for dim light conditions, 1600+ ISO.
How do I take sparkler photos with an iPhone?
Adjust the ISO & shutter settings as needed. On an iPhone, you could also snap sparkler images in Live mode. After taking the picture, swipe up to show the available effects, then select “Long Exposure” for a rapid sparkler photo.
** You can find smokeless high quality sparklers at Sparklers online
2 notes
·
View notes
Text
Podcast Shoots In Hyderabad | Green Matte Studio In Hyderabad
Maximizing Your Photoshoot: Top Amenities at (Studio to Shoot)
Introduction:
In the world of photography and videography, Podcast Studios In Hyderabad having access to a well-equipped and professional studio can make all the difference in achieving outstanding results. Whether you're a professional photographer, an aspiring filmmaker, or a brand looking to create stunning visuals, Studio To Shoot offers a top-tier experience with a range of amenities designed to enhance every aspect of your project. This article explores the essential facilities provided by Video Shoot Studio In Hyderabad Studio To Shoot that help you maximize your photoshoot.

State-of-the-Art Studio Spaces
One of the standout features of Studio To Shoot is its versatile and modular studio spaces. Designed to cater to different types of shoots, the studios are spacious, well-lit, and fully customizable to suit your specific needs. Whether you are working on product photography, fashion shoots, interviews, or cinematic projects, the studio offers adaptable spaces that enhance creativity and efficiency.
Key Features:
Large, open studio spaces with high ceilings for optimal lighting
Customizable backgrounds to match various themes
Climate-controlled environments to ensure comfort during long shoots
Professional-Grade Equipment
A major advantage of using a fully equipped studio is access to high-end photography and videography gear. Green Matte Studio in Hyderabad Studio To Shoot provides professional equipment that eliminates the need for additional rentals, allowing you to focus entirely on your creative process.
Available Equipment:
High-resolution cameras and lenses for stunning image quality
Advanced lighting setups, including softboxes, LED panels, and strobes
Tripods, gimbals, and stabilizers for smooth video recording
Professional sound recording equipment, including microphones and boom poles
Green Chroma Key Setup
For those working on commercial productions, music videos, or digital content requiring background replacement, Studio To Shoot features a high-quality green chroma key setup. This facility enables seamless background changes in post-production, allowing for creative freedom in visual storytelling.
Benefits of a Green Screen Studio:
Enables professional-grade special effects
Allows for dynamic background customization
Perfect for commercials, VFX-heavy shoots, and creative branding
Makeup and Styling Rooms
A well-prepared look is crucial for a successful shoot, and Studio to Shoot offers fully furnished makeup and styling rooms to ensure that models and actors are camera-ready. These spaces are designed for comfort and convenience, complete with proper lighting and professional salon setups.
Key Amenities:
Well-lit mirrors for precise makeup application
Comfortable seating areas for hair and wardrobe styling
Storage facilities for costumes and accessories
Dedicated Editing and Post-Production Suites
Chroma Studio In Hyderabad Post-production is an integral part of photography and videography, and having an in-house editing suite enhances workflow efficiency. Studio To Shoot provides fully equipped editing suites with industry-standard software and high-performance workstations.
Why This Matters:
Speeds up the production process by allowing immediate review and editing
Ensures a seamless transition from raw footage to the final product
Reduces the need for external editing facilities
High-Speed Internet and Connectivity
Modern productions often require real-time collaboration and online connectivity. Studio To Shoot ensures seamless internet access to facilitate live streaming, remote approvals, and cloud-based file transfers.
Advantages:
Enables real-time remote direction and approvals
Supports live streaming for virtual events and webinars
Facilitates instant data transfers to cloud storage
On-Site Assistance and Support Staff
Having professional support on-site can significantly enhance productivity and efficiency. Studio To Shoot provides skilled technicians and assistants who can help with equipment setup, lighting arrangements, and troubleshooting technical issues. Podcast Shoots in Hyderabad
How This Helps:
Reduces setup time and ensures smooth operation
Provides expert assistance for complex shoots
Allows photographers and filmmakers to focus on creativity
Conclusion
Maximizing your photoshoot experience is all about having access to the right tools, spaces, and support. Studio to Shoot offers an all-in-one solution for photographers, videographers, brands, and content creators looking for a professional-grade environment. With its advanced equipment, modular studio spaces, dedicated styling rooms, and on-site support, the studio ensures that every production runs smoothly and efficiently. Whether you're shooting an advertisement, a fashion campaign, or a corporate video, the top-notch amenities at Studio To Shoot will elevate the quality of your work, making every project a success.
Studio to Shoot provides Podcast Shoots in Hyderabad. fully equipped studio space for photo shoots, video shoots, and podcast recordings. Whether you need a creative studio for fashion photography, product shoots, and Green Matte Studio in Hyderabad. We offer the perfect setup with high-quality lighting, backdrops, and soundproofing.
Call Now: 91001 05888
Visit: https://www.studiotoshoot.com/
#Photography Studio Rental In Hyderabad#Chroma Studio In Hyderabad#Video Shoot Studio In Hyderabad#Podcast Studios In Hyderabad#Green Matte Studio In Hyderabad#Podcast Shoots In Hyderabad
0 notes
Text
How to Use Your Camera in Manual Mode (Step-by-Step Guide)
Switching to manual mode can be intimidating for beginners, but once you master it, you'll have full creative control over your photography. This step-by-step guide will help you understand the key settings and how to adjust them to take amazing photos.
Step 1: Understanding the Exposure Triangle
Manual mode requires adjusting three main settings that control light and exposure:
Aperture (f/stop): Controls how much light enters the camera. A lower f-number (e.g., f/1.8) creates a shallow depth of field, perfect for portraits by keeping the subject in focus and blurring the background. A higher f-number (e.g., f/11) keeps more of the image in focus, making it ideal for landscapes and architectural shots. Additionally, aperture affects the amount of light entering the sensor, meaning a wide aperture lets in more light, useful for low-light photography.
Shutter Speed: Determines how long the sensor is exposed to light. A fast shutter speed (e.g., 1/1000s) freezes motion, which is great for sports and wildlife photography. A slower shutter speed (e.g., 1/10s) allows for motion blur, often used in creative photography such as light trails or waterfall shots. Stabilizing your camera with a tripod for slow shutter speeds is crucial to avoid unwanted blurring.
ISO: Controls the camera sensor’s sensitivity to light. A low ISO (100-200) is best for bright environments and produces the clearest image. A high ISO (800-3200) is useful for darker conditions, but increasing ISO too much can introduce digital noise, making the image grainy. Understanding your camera’s ISO performance will help you balance sensitivity and image clarity.
Step 2: Setting Your Aperture
Aperture directly affects both exposure and depth of field. The f-number (f/stop) determines the size of the lens opening:
For portraits, use a wide aperture (low f-number, like f/2.8) to create a soft, blurred background that isolates the subject. This helps draw attention to your subject while keeping distractions minimal.
For landscapes, use a narrow aperture (high f-number, like f/11 to f/16) to ensure everything from the foreground to the background remains in focus. This is ideal for scenic shots where clarity across the image is necessary.
For low-light photography, a wider aperture (f/1.8 or lower) allows more light into the camera, reducing the need for higher ISO settings and resulting in cleaner images with less noise.
Step 3: Adjusting Shutter Speed
Shutter speed influences how motion is captured in an image:
For fast-moving subjects (sports, wildlife), use a fast shutter speed (1/500s or faster) to freeze action and avoid motion blur. The faster the subject, the higher the shutter speed should be.
For long exposure shots (night photography, waterfalls), use a slow shutter speed (1/10s or slower) to capture smooth motion effects. Using a tripod is essential to prevent unwanted camera shake and blur.
General rule: If you’re shooting handheld, your shutter speed should be at least as fast as the reciprocal of your focal length. For example, with a 50mm lens, use at least 1/50s to avoid blur caused by hand movements.
Step 4: Setting the ISO
ISO determines how sensitive your camera sensor is to light:
Keep it low (100-400) in daylight for the best image quality with minimal noise and maximum sharpness.
Increase it (800-3200) in low light to make the sensor more sensitive to light, but be mindful of increased graininess. Many modern cameras handle high ISO well, so test your camera’s limits.
Use Auto ISO if you’re in changing lighting conditions. Some cameras allow you to set a maximum ISO limit, ensuring noise levels stay manageable while adjusting automatically for the best exposure.
Step 5: Using the Light Meter
Your camera’s built-in light meter helps determine the correct exposure. When looking through the viewfinder or screen, you’ll see a scale ranging from negative to positive (-2 to +2 or more).
Balanced exposure: Adjust your settings until the indicator is around 0. This means the exposure is correct according to the camera’s metering system.
Underexposed (- side): Increase aperture size (lower f-number), decrease shutter speed, or raise ISO to allow more light in.
Overexposed (+ side): Decrease aperture size (higher f-number), increase shutter speed, or lower ISO to reduce the light entering the sensor.
Use different metering modes (spot, center-weighted, evaluative) depending on the scene to achieve the best results. Spot metering, for instance, is ideal for high-contrast scenes where you want precise control over exposure.
Step 6: Practice and Adjust
The key to mastering manual mode is practice. Here are some exercises to build confidence:
Experiment with different lighting conditions: Try shooting in daylight, indoors, and at night to see how settings need adjustment. Take notes on how different exposures affect the final image.
Take the same photo at different aperture, shutter speed, and ISO settings: Compare results to understand their impact. This exercise helps reinforce the relationship between these settings.
Use a light meter app or histogram: This helps fine-tune exposure beyond what the camera’s built-in meter shows. The histogram ensures details aren’t lost in highlights or shadows.
Challenge yourself with manual focus: This improves precision, especially in low-light or macro photography where autofocus may struggle.
Shoot in RAW format: This gives you greater flexibility in post-processing, allowing you to adjust exposure and correct minor errors without loss of image quality.
By mastering manual mode, you’ll unlock endless creative possibilities in your photography. Keep practicing, and experimenting with different settings, and soon, adjusting exposure will become second nature!
Consider taking the Basic Photography Course, which is available at eltonbrownephotography.com
0 notes
Text
5 Essential Skills for a Thriving Drone Pilot Career with Drone Pilot Training
The drone industry is experiencing rapid growth, with applications spanning aerial photography, surveying, agriculture, real estate, and public safety. A successful career as a drone pilot requires a combination of technical proficiency, legal knowledge, and practical experience. Whether you are an aspiring pilot or looking to enhance your skillset, the right drone pilot training is crucial.
1. In-Depth Knowledge of Drone Technology
Understanding the mechanics and electronics of drones is fundamental. Drone pilots must be well-versed in:
Flight controllers and GPS systems – Knowing how these components work enhances flight stability and navigation accuracy.
Battery management – Maximizing battery life and ensuring safe power management during operations.
Payload integration – Operating different cameras and sensors based on industry requirements.
Firmware and software updates – Keeping drones updated to ensure compliance and optimal performance.
2. Mastering Flight Operations and Maneuverability
To be an expert drone pilot, mastering flight control is non-negotiable. This involves:
Manual and autonomous flight control – Switching between modes for different operational requirements.
Precision flying – Executing stable, controlled movements for photography, surveying, or inspections.
Weather adaptation – Adjusting flight patterns based on wind speed, temperature, and precipitation.
Emergency handling – Managing system failures, GPS loss, or battery depletion effectively.
How Drone Pilot Training Enhances Flight Skills
Quality training programs provide simulated and real-world flight exercises to help pilots develop these critical skills, ensuring they can operate in various environments safely and efficiently.
3. Regulatory Compliance and Safety Awareness
Every drone pilot must have a strong grasp of aviation laws and safety protocols. Key aspects include:
Understanding airspace classifications – Knowing restricted zones, controlled airspaces, and no-fly areas.
Regulatory certifications – Obtaining necessary licenses, such as the FAA Part 107 in the U.S. or CASA certification in Australia.
Pre-flight safety checks – Conducting thorough inspections before every flight to minimize risks.
Incident management – Knowing how to respond to crashes, privacy concerns, or legal violations.
Importance of Drone Pilot Training for Compliance
Drone training programs often include regulatory education, ensuring pilots meet legal standards and operate within the law.
4. Data Processing and Analysis Skills
Many drone operations involve data collection and analysis. A skilled pilot must be proficient in:
Aerial mapping and photogrammetry – Creating accurate maps and 3D models for industries like construction and agriculture.
Thermal imaging interpretation – Using drones equipped with infrared cameras for search and rescue, inspections, and security.
Post-processing software – Handling tools like Pix4D, DroneDeploy, and GIS software to refine and analyze collected data.
How Training Helps Develop Analytical Skills
Professional drone training includes practical exercises in data acquisition and processing, equipping pilots with the skills needed for advanced projects.
5. Business and Client Management Acumen
For those looking to turn their drone piloting skills into a profitable business, strong entrepreneurial abilities are essential. This includes:
Marketing and branding – Positioning your drone services effectively through SEO, social media, and networking.
Client relations – Understanding customer needs and delivering professional services tailored to different industries.
Project management – Handling multiple contracts, meeting deadlines, and ensuring high-quality results.
Insurance and liability management – Understanding the risks associated with drone operations and securing proper coverage.
The Role of Drone Pilot Training in Business Development
Many training programs offer insights into business strategies, helping drone pilots scale their operations successfully.
Conclusion
A career as a professional drone pilot demands technical expertise, legal knowledge, and business skills. Investing in drone pilot training enhances flight proficiency, regulatory compliance, data analysis, and business acumen. By mastering these five essential skills, aspiring drone pilots can position themselves for success in a competitive industry.
1 note
·
View note
Text
Yvette Heiser’s Guide to Photography: Easy Tips for Stunning Results
If you’re looking to improve your photography skills, Yvette Heiser offers valuable insights that can help you capture stunning images with ease. As a seasoned photographer based in Texas, Heiser has shared her expertise on simple photography ideas and tips to follow that can elevate your photography game. Whether you’re a beginner or looking to refine your skills, these straightforward techniques, inspired by Yvette Heiser’s simple photography ideas and tips to follow, are designed to help you achieve impressive results.

Understanding the Fundamentals
Before diving into advanced techniques, it’s crucial to grasp the fundamentals of photography emphasizes the importance of mastering basic concepts such as exposure, composition, and lighting. Understanding these principles will lay a strong foundation for creating beautiful photographs.
1. Exposure: Exposure determines how light or dark your image will appear. It’s controlled by three main elements: aperture, shutter speed, and ISO. Heiser advises beginners to start by experimenting with these settings to see how they affect your photos. For instance, a larger aperture (lower f-number) allows more light to enter the camera, which is ideal for low-light conditions or creating a shallow depth of field.
2. Composition: Composition refers to how elements are arranged within your frame. Heiser suggests using techniques like the rule of thirds, where you divide the image into nine equal parts and place key elements along these lines or at their intersections. This approach often results in a more balanced and engaging photograph.
3. Lighting: Proper lighting is essential for capturing great images. Heiser highlights the significance of natural light and how it can enhance your photos. For outdoor photography, the golden hours—shortly after sunrise and before sunset—offer soft, warm light that can add a magical quality to your images. For indoor photography, consider using diffusers to soften harsh light sources and create a more flattering effect.
Simple Photography Ideas
Yvette Heiser’s approach to photography includes several simple yet effective ideas that can make a big difference in your results. Here are a few suggestions to try:
1. Experiment with Perspectives: Changing your perspective can dramatically alter the look and feel of your photos. Heiser recommends trying different angles, such as shooting from a low or high vantage point, to find unique compositions. This technique can add depth and interest to your images.
2. Focus on Details: Paying attention to small details can elevate your photography. Whether it’s the texture of a surface or the intricate patterns in a scene, capturing these elements can create visually compelling photos. Heiser encourages focusing on these details to bring out the character and uniqueness of your subjects.
3. Use Leading Lines: Leading lines are compositional elements that guide the viewer’s eye through the photograph. These can be natural lines like roads, fences, or rivers, or man-made lines such as architectural features. Heiser suggests incorporating leading lines to create a sense of movement and draw attention to the focal point of your image.
Practice and Patience
In summary, Yvette Heiser’s simple photography ideas and tips provide a practical approach for anyone looking to enhance their skills. By understanding the fundamentals with Yvette Heiser – Learn the fundamentals of photography with Yvette Heiser Texas, experimenting with perspectives, focusing on details, and using leading lines, you can achieve stunning results. Remember, photography is an art form that improves with practice, so keep honing your craft and enjoy the creative process.
#camera#wedding#photographer#moments#photography#yvette heiser#pictures#childphotography#photographytips#events
6 notes
·
View notes