#Otis_Inf
Explore tagged Tumblr posts
Text


—- “sam porter bridges, in the dark — about everything.”
#sam porter bridges#death stranding#higgs monaghan#sam x higgs#samhiggs#sam bridges#photography#otis_inf#modding#artistic nude
28 notes
·
View notes
Text

"all right, we can do this. we have to do this."
22 notes
·
View notes
Text
Otis IGCS DoF Tutorial for BG3
Today we're going to go over how to utilize Otis_Inf's IGCS DoF generator for BG3, available over on his Patreon along with his excellent camera tools suite (and many other suites for many other games, it's worth the sub imo.) While the camera tools themselves are pretty self explanatory if you look through the hotkeys, the DoF generator might be a little more confusing if you're not already familiar with how these types of filters work.
In case you find configuring the settings for this DoF generator a bit daunting, I put together this little toot to show you the options and what exactly they do. We're going to take a base frame and then show the steps for configuring and the differences between some of the settings. Let's start with our base shot:
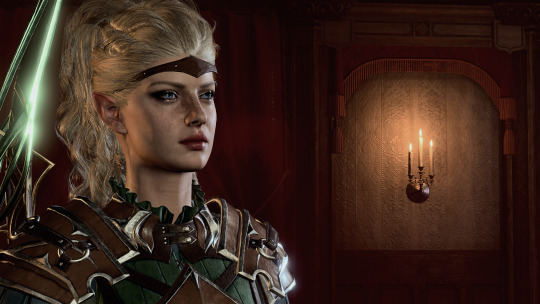
Pardon the coloring/contrast, I had the Reshade set up for different lighting so it's a bit stark here, but that's not the focus of this tutorial.
Now let's take a look at the DoF session options and what they do:
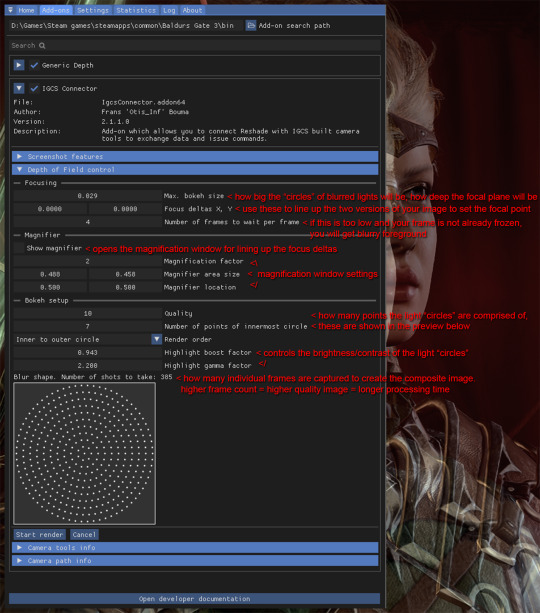
Detailed breakdown of the options & process below the cut:
So the first thing you're going to do is set your bokeh size, as how far the deltas are from each other will change based on this size. When I say, "light circles", I'm referring to this effect:
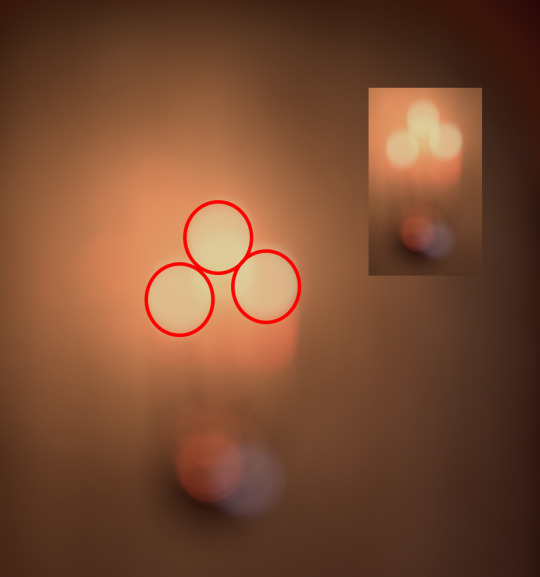
Changing bokeh size will change how big these circles get, basically making the image appear more or less blurry in the distance. It also in effect changes how wide or narrow your focal depth is. I usually go for somewhere between .2-.4, but you can play around with it to find the setting you like. Just be aware that if you change it you will have to realign the focus deltas so try to do this first in your process so you don't have to realign over and over.
Next, on to focus deltas. WTF am I even talking about? Well, the way this generator works is it captures frames between multiple different angles and combines them to generate the field depth. When you first start the DoF session, you are going to see two versions of your image overlapped and offset from each other, each one from the opposite "end" of the angles the generator will be using, like this:
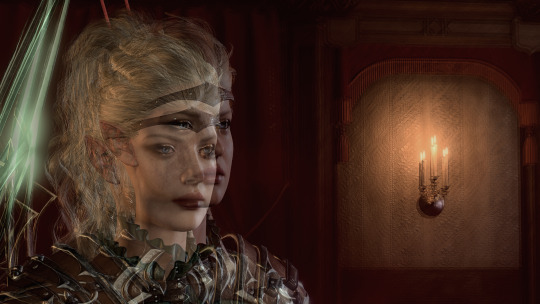
Aligning the focus deltas to match up with each other is how you pick where your image is focused. In most cases you will be using a character's eyes as your focal point, but you can make it anywhere, whatever spot you align the focus deltas on is what will be in focus. Here's the generated image with the focus on the character:
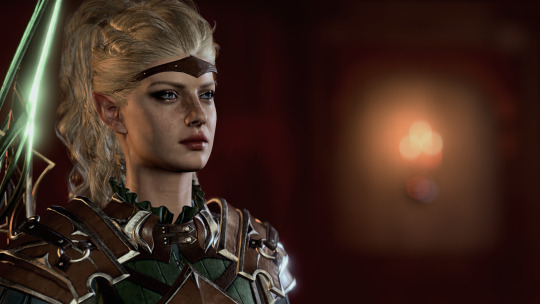
And here with the focus on the candle holder in the background:
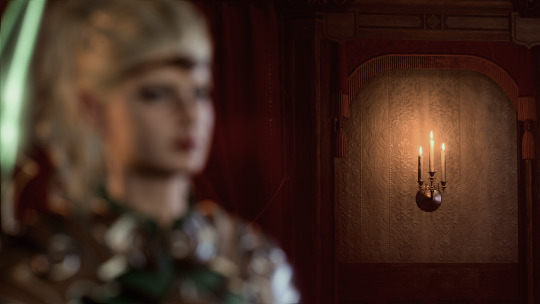
As you can see, wherever you align the focal deltas is where the camera will be focused.
Now let's take a look at the magnifier tool:
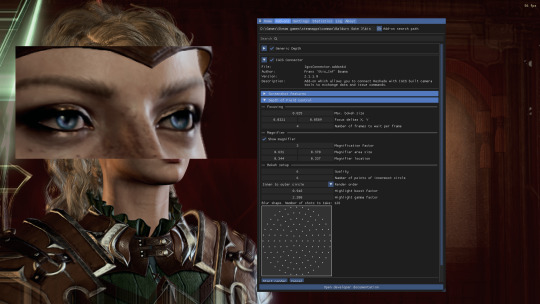
This is basically just a zoom-in window so you can align the focus deltas more precisely. You can change its size and position to get it to where you're trying to adjust the focus. Move and resize it however you need so the point you want to focus on is in the window. Then move the focus delta values around until both versions of your focal point are aligned with each other. Now your image will focus on what you've chosen as the focal point.
Now, one thing with focus deltas is that if your focal "point" is spread across more than a single focal depth, you may need to "split the difference". For instance, due to the 3/4ths angle, the eyes here are at slightly different depths, so if you look at the edge of the face in the magnifier window you will see some slight pixel overlapping instead of it being lined up perfectly. Usually in the generated image this isn't noticeable, but you can exaggerate it using large bokeh size and focusing on a single point instead of splitting the difference if you want to get a super narrow DoF, where, for instance, only one side of the face is fully in focus.
So you've aligned your deltas. Now what does the rest of this stuff do? The rest of the settings affect the "light circles" created by the bokeh effect. This generator creates them by rendering tiny points of light in a circular formation. The first two settings affect how many points are in each circle. Let's take a look at how they compare when using lower quality settings vs higher:
Low quality:
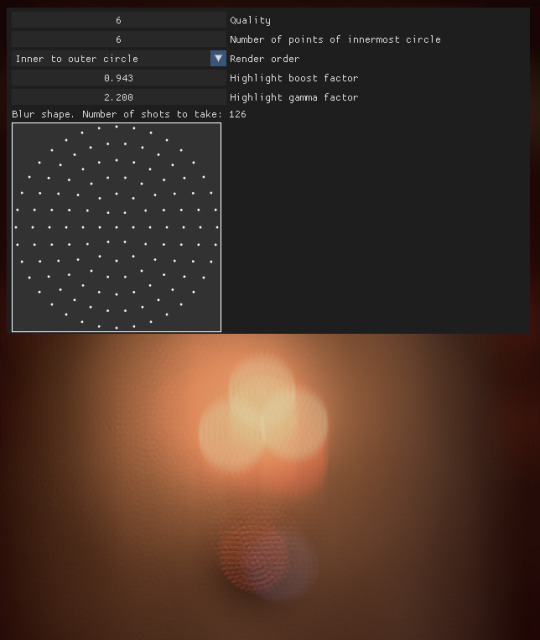
vs high quality:
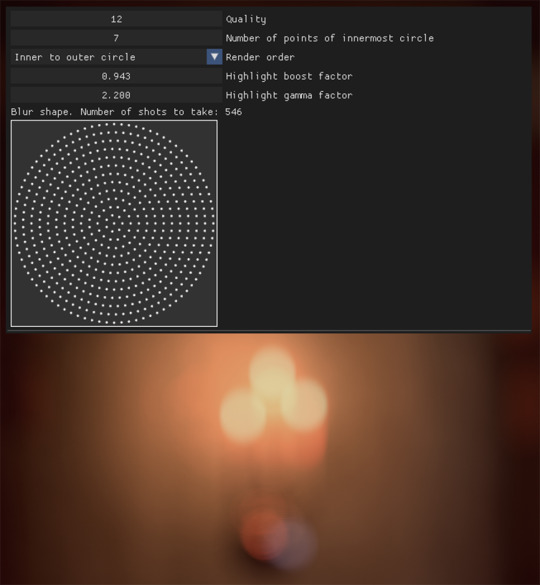
As you can see, in the lower quality image the "points" are clearly visible. However, higher quality settings take significantly longer to process as they utilize many more individual frames than lower quality. You can mess with these to find a balance of speed vs. quality that you prefer. Render order just changes the order the points are generated in, but I haven't found changing this to make too much of a difference.
Last two settings affect the brightness/contrast of the "light circles". Here are some examples of the same lights with different settings:

Not a huge difference, but I find that a sharper, more pronounced bokeh will give the image more of a "cinematic" feel since it's such a distinct effect caused by the way real cameras work.
Finally, let's go back to the setting I skipped over- the "Frames per frame" setting. If you are freezing the image with the camera tools beforehand, you will probably not need to mess with this setting. If you are taking screenshots without freezing the game, however, you may need to increase this setting slightly, otherwise the generator may not compensate for, say, your character shifting slightly during their idle animation, and the foreground will come out just as blurry as the background.
That's pretty much it. Hopefully this helps!
51 notes
·
View notes
Text


I used Otis_Inf's camera mod to grab some unique screenshot angles from Heartman's first cutscene. Edited in Photoshop~!
#death stranding#heartman#kojima productions#camera mod#Otis_inf#death stranding photography#game cutscene
37 notes
·
View notes
Photo


Finally, finally Raya Lucaria. Honestly not my favourite legacy dungeon to play, but visually I think it is wonderful. The atmosphere really is palpable.
#elden ring#gaming screenshot#Gaming Photography#photo mode#Otis_Inf#raya lucaria#glintstone academy
41 notes
·
View notes
Text


Randoms. Using Universal Unreal Engine 4 Unlocker by Otis_Inf on Patreon.
#hogwarts legacy#joyce king#mods#forbidden forest#UUU#Otis_Inf#sunrise at hogwarts#photo mode#room of requirement#aesthetic screenshots
3 notes
·
View notes
Text
Question to my fellow Otis_Inf camera mod users
Did your FoV (field of view) zoom too stopped working while in conversations/cutscenes? Or is it a "me" problem?
All it does now is refocus the camera without changing the actual zoom and/or FoV (looks like she shadows "run" back and forth).
Turning off mods doesn't help.
Help...? ;_;
0 notes
Text


Dragon Age: The Veilguad ━ 1 / ?
#dragon age#dragon age: the veilguard#veilguardedit#daedit#datvedit#gaming edit#miyku#gamingnetwork#gamingedit#myedit#not sure if i should tag with spoilers or not.. just scenery from the arlathan forest#veilguard spoilers#for any gifmakers out there otis_inf released the camera tools on his patreon!!
550 notes
·
View notes
Text
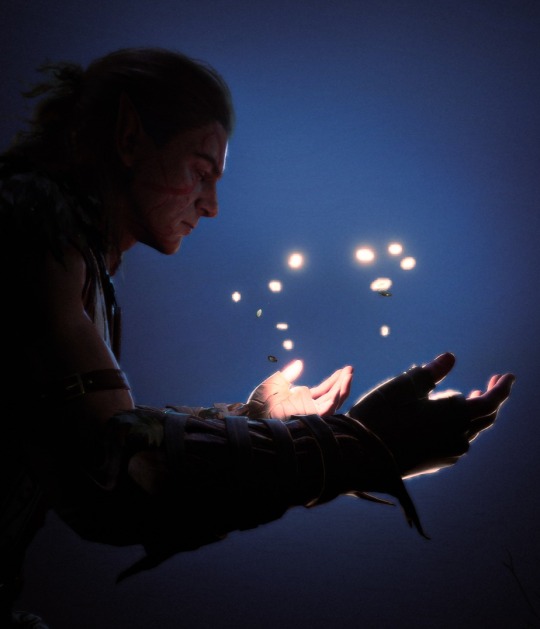
Oak Father, hear me, aid me. Force open the jaws of Darkness. Make passage for your vessel of Light.
#baldur's gate 3#bg3#halsin#bg3 photography#virtual photography#using otis_inf's camera tools#reg wishes she had magic
1K notes
·
View notes
Photo
Cool
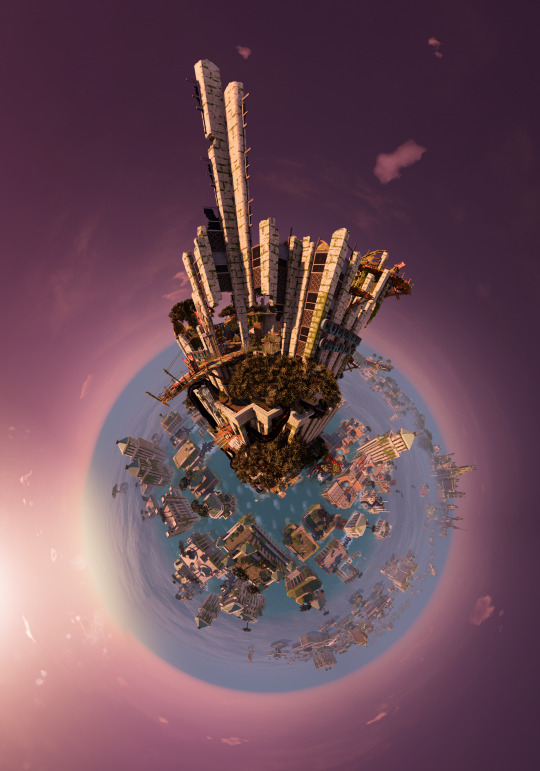
Bulb of Lavender
#submerged hidden depths#Uppercut Games#Unreal Engine 4#Otis_Inf#uuu#tiny planet#high resolution screenshots#virtual photography#video game photography#Gaming Photography
6 notes
·
View notes
Text


Dellamorte Amore
#Spite#Lucanis Dellamorte#Dragon Age The Veilguard#DATV#DAV#virtual photography#malwa1216#pic#Dragon Age: The Veilguard photomode tools by Otis_Inf#Dellamorte Amore#Wall of Fame
108 notes
·
View notes
Text


—- yearning. “but i wonder, when you look death in the eye — will you, blink?”
all real screenshots. couldn’t do this without otis_infs freecam mod! gonna go back in my saves to get more cutscenes — expect different angles of when he first gets to edge knot city
i can only upload so many photos here with lower resolution! if you like, join my discord to have access to all of them and at the same resolution i took them at for backgrounds or just to have
—> https://discord.gg/xENCmgJM
#death stranding#sam porter bridges#sam x higgs#higgs monaghan#higgs art#samhiggs#death stranding 2#death stranding higgs#otis_inf#freecam mod#photography#screenshots#my gameplay#my game screenshots#goldenbridges#death stranding fanart#let’s talk death stranding#samporterbridgesart#higgs#ds higgs
13 notes
·
View notes
Text
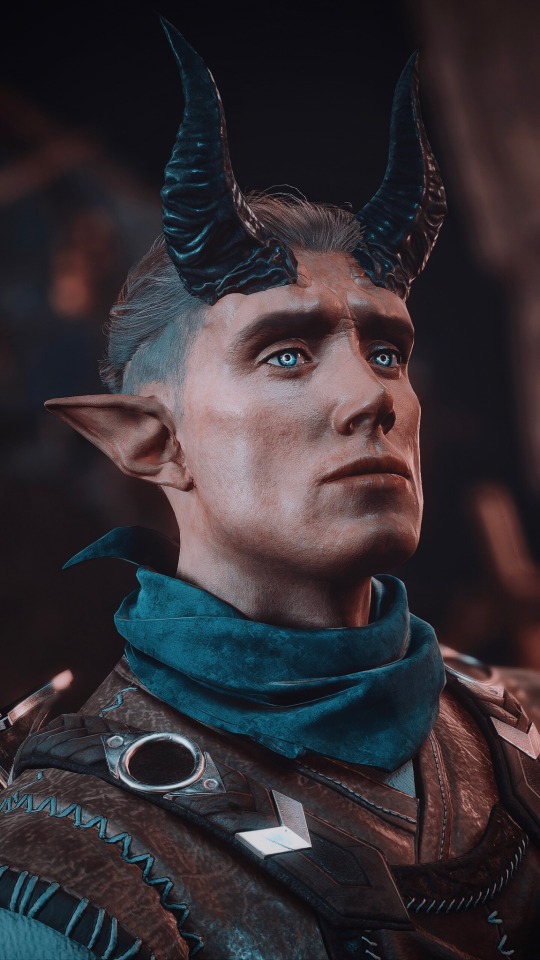
Dammon, the infernal blacksmith
#dammon#dammon bg3#dammon baldur’s gate 3#baldur’s gate 3 npc#bg3 npcs#baldur’s gate 3#bg3#bg3 vp#bg3 virtual photography#baldur’s gate 3 virtual photography#baldur’s gate 3 vp#virtual photography#screenarchery#screenshot#my screenshots#my screenies#my screengrabs#my screencaps#CT by Frans Bouma#CT by Otis_Inf
796 notes
·
View notes
Text


dragon age: the veilguard | neve gallus
#neve gallus#dragon age the veilguard#datv#dav#dragon age#da#neve#i think i spent 15 minutes dragging various shots around/trying different crops to try to make a nice photoset#but the whole thing just looked so busy and bleh i gave up lolcry#(these are from cutscenes using otis_inf's photomode mod btw)#i made this
55 notes
·
View notes
Photo


Red Wolf, Dead Wolf. Aesthetically one of my favourite bosses in the game. Can’t go wrong with Dog With Sword imo.
#gaming screenshot#Gaming Photography#photo mode#elden ring#Otis_Inf#raya lucaria#red wolf of radagon
20 notes
·
View notes

