#Oil drain plug seal.
Explore tagged Tumblr posts
Visit Tumblr Blog
Explore Tumblr blogs with no restrictions, modern design and the best experience.
Last Seen Tumblr Blogs


Fun Fact
In 2020, 27% of US Tumblr users had an annual household income of over $100,000.
Text
Miight be on a bit of a goofy high rn after watching a few hundred auto mechanics on FB lose their mind over torque seal on a car oil drain plug 🤣
Yall so sillay. We do this & torque on EVERYTHING on planes :p

7 notes
·
View notes
Text
Why Does My Mercedes Only Leak Oil When Parked?
Leakage of oil is not a good sign at all. If you own a car, then you might be knowing that how important is oil for machines. The mechanical parts in machines require lubrication which would make the friction low and allow the machine to work freely. Friction in machines are one of the enemies of performance as it opposes the work done by the machine. So the machine has to use more energy to overcome the friction and work, but in such process, the machine lose energy. A vehicle is a machine which has various mechanical parts and they too require lubrication. Oil provides the lubrication but as it is a fluid, any damage or hole in its system would cause the oil to flow out. In this article, you’ll know what causes the fluid to leak out while Mercedes is parked.
Oil importance and leakage
Oil is very useful for car because it makes the engine to work smoothly, freely. Engine is such an important part which generates power by burning the fuel. Oil lubricates the engine parts, hence the engine has to give a very less effort against the friction while working. So the losses would be very less and the engine would be more efficient, there would be less fuel requirement. You have to top up fuel less which would save your time and money. Oil saves energy and time too.
Oil prevents overheating to some extent. More the friction, more would be the unwanted heat generated when work is done against it. This heat remain in the engine and more and more heat would be produced in the same manner which would overheat the engine. Overheating is highly dangerous because it damages the vital parts of car. Oil is used in every cars, but there are many people that complain that their car is showing low performance, overheating and many other engine issues. So how this is caused while oil is there in your car? Even if your car has oil, such problems would occur if there is leaking of oil or bad oil.
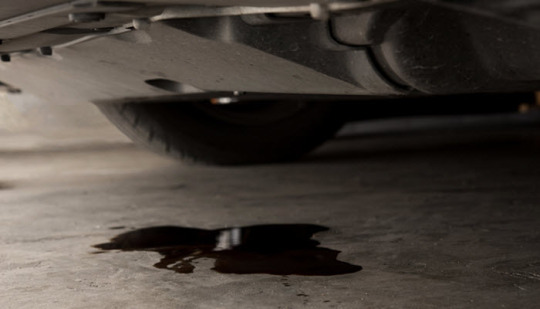
When leakage occurs, the oil stored in the car escapes out. So the oil is wasted, leaving your car out of oil. Engine needs a definite amount of oil for proper lubrication. The leakage of oil can be easily identified by the puddles of oil formed under the car, burning oil smell, gray smoke, etc. But here I’m discussing more about the leakage occurring during the car is parked. While parked, the sign of oil leakage found mostly is the oil puddles at the ground under the car.
What would cause oil to leak out while your Mercedes is parked?
The leakage of oil has to be stopped or else you’ll be the sufferer. But before fixing, you need to know the source of leakage, or which part makes the oil to leak out.
Gaskets are damaged
There are various seals or gaskets present at the engine through which the oil flows. Such gaskets are located at the underneath of car. These are vulnerable to damages as these are exposed to extreme weather conditions, moisture, road debris, dust, etc. So they wear and oil leaks through them.
Leaking oil pan
The oil pan is located at the underneath of car and is an essential components that take part in the supply of oil to engine. These are durable, but get exposed to road debris, punctures and many other things from roads which can damage the oil pan gradually. Damage of the oil pan makes the oil to leak out especially while the car is parked.
Some components not installed properly
Mostly, the oil drain plug located under the car get such issues. It is provided to drain out bad oil. People sometimes forget to install the drain plug properly, so they leave it loose or unaligned which make the oil to flow out while parked.
Leaking valve seals
The oil flows to the various valves present in the engine and camshafts and crankshaft to lubricate them. There is a seal that prevents the oil to leak into the cylinders. Such seals develop cracks and holes which make the oil to go into cylinders so that when the car is again made to run, the engine simply misfires.
Conclusion
By having regular maintenance, you can prevent oil leaks in Mercedes. Immediately take your car for diagnosis at Mercedes service center if you get signs of oil leaks.
2 notes
·
View notes
Link
This engine oil drain plug is designed to match the fit and function of an original equipment plug on specified vehicles. It is engineered to replace a missing or damaged plug and help ensure a secure seal. Direct replacement – this engine oil drain plug is designed to match the fit and function of an […] The post Dorman 65430 Oil Drain Plug Pilot Point M12-1.75, Head Size 15mm Compatible with Select Models appeared first on Automotive Parts.
0 notes
Text
The Essential Tool For Clean And Hassle-Free Oil Changes
Changing your engine oil is a crucial part of vehicle maintenance, helping to extend the lifespan of your car and keep it running smoothly. However, without the right tools, the process can become messy and difficult. One of the most important items for a successful oil change is an oil drain pan, which allows you to collect and dispose of used oil safely and efficiently.
In this article, we’ll explore the benefits of using this tool, the different types available, and how to choose the best one for your needs.

1. Why You Need One for Oil Changes
1.1 Preventing Mess and Spills
Changing oil can result in leaks and spills that stain floors and create a difficult cleanup process. Using a proper container to collect the liquid ensures that you can complete the job without unnecessary mess.
1.2 Safe and Responsible Disposal
Used engine oil is considered hazardous waste and should never be poured down drains or into the environment. A collection container makes it easier to transport the oil to a recycling facility.
1.3 Cost-Effective and Convenient
Performing your own vehicle maintenance saves money on professional services while allowing you to change the oil whenever it suits you. Having a designated collection tool simplifies the process, making it more efficient and manageable.
2. Types Available
2.1 Open-Top Containers
These simple and affordable options feature a shallow, wide design that makes collecting oil easy. They are best suited for smaller vehicles and motorcycles.
2.2 Closed Containers with Spouts
A sealed design with a built-in spout allows for spill-free storage and easy transfer into a recycling container. This type is ideal for frequent users who require a more practical disposal method.
2.3 Large-Capacity Models
For those working with larger vehicles or in professional settings, high-capacity options with wheels provide extra convenience. These models can hold greater volumes and are often used in garages and workshops.
3. Choosing the Right One
Size and Capacity – Make sure to choose one that matches the oil volume of your vehicle.
Material and Durability – Plastic is lightweight and resistant to corrosion, while metal provides added durability.
Design and Features – Look for additional benefits like built-in funnels, spouts, or handles for ease of use.
4. Using It Properly
Park the vehicle on a level surface and let the engine cool.
Position the container directly under the drain plug.
Remove the plug and allow the oil to fully drain.
Once complete, transfer the collected oil to a recycling container.
5. Conclusion
An oil drain pan is an indispensable tool for anyone who performs regular vehicle maintenance, whether at home or in a professional setting. It plays a crucial role in ensuring that oil changes are conducted in a clean, efficient, and environmentally responsible manner. Without a proper collection system, used oil can easily spill onto floors, driveways, and other surfaces, creating stubborn stains and posing a significant cleanup challenge. Additionally, improper disposal of used oil can have serious environmental consequences, contaminating soil and water sources.
0 notes
Text
Dos and Don’ts if your Volkswagen leaks oil

Oil is the vital parts of the engine and every knows about how oil is very precious and how it helps the engine in performing better. So, like other fluids, the oil also has the tendency to escape out when there are some problems in its system. When this happens, then more amount of oil is leaked out and cannot be used again. This is the loss of oil which would cost your engine more. To protect the engine, you will have to again top up the oil into your engine. Again, this oil would last for very less time and it will also get leaked and again you have to top up and this process goes on while you are frequently buying more oil and putting it into its pan. This is unnecessary wastage of money. If you have to prevent the leakage, then you have to take some steps to get the leakage fixed in Volkswagen.
The oil leakage causes
You know what is the purpose of oil in engine, it is the lubricant for all the moving mechanical parts of the engine and prevent their damage. The oil lowers the friction between the parts and help them to run smoothly. By making them run smoothly, the oil also helps to reduce the production of heat. The engine is the most useful component of the car and oil makes it function. There is a need to protect the oil and prevent its leaks. But before that you need to know about the causes of the oil leaks. So here we will discuss it.
Worn drain plugs
The drain plugs are located near the oil pan and allow the users to drain out old or bad oil out of the car. After drain, the drain plugs block the oil to go out of the pan. This plug may be come worn with time and become loose to cause the leakage.
Oil filler cap
The oil filler cap is removed to put new oil into the car for use and then the cap is replaced to prevent any other things to enter into the oil system.
The valve cover gasket fault
This is the gasket which prevent the leakage of oil into the combustion chambers. If the gasket has damages, then the oil may leak internally and get burned.
Oil overfills
If the oil is filled in a quantity that is higher than the maximum capacity of the oil system, then possibly the oil would spill out of the tank to the engine.
What to do and not to do to fix or prevent the oil leaks at your VW?
Do’s
The bolts are to be checked. The loose bolts can cause the leakage of oil. So, get them tightened.
Get your car to a safe place as soon as possible you get the signs of oil leaks.
Get the oil color and the level checked by the help of the dipstick. The Oil color is generally a very yellowish or amber. If the color is found to the little brownish or any dark color, then you have to replace the oil immediately. From the level of oil, you can know how safe is your car for driving the distance you have to.
The oil has to be changed after 3000 miles.
Check the dashboard for any warning related to oil to be sure if there are serious oil leaks.
Check the drain plug, if it is leaking, then get it tightened.
Get the oil system checked. And get the lines replaced if they are worn. These worn lines can start leaking oil at any time.
Check the filler cap for oil, if it is loose, then try to tighten it.
If the caps are lose and to be replaced, then contact your dealer or VW service center. Get the valve gasket seals and other interior components replaced at VW service centers.
Don’ts
Do not overlook the spills or the leaked oil at the parts of the car, get them cleaned as soon as possible so that your car would remain safe.
Do not hesitate to get the oil checked after too much use of the oil.
Do not make the overflow of the oil while top up of the oil.
Avoid driving too much while the oil is continuously leaking.
Conclusion
You have to be careful while filling or draining the oil to prevent any oil spillage. Also get the oil system well maintained regularly at an authorized service center.
#volkswagen car#volkswagen oil leakage#volkswagen car engine oil change#volkswagen car maintenance#volkswagen car mechanic
0 notes
Text
Maintenance points of organic fertilizer equipment
The maintenance of organic fertilizer equipment is the key to ensure its long-term stable operation. The following are some key points of organic fertilizer equipment maintenance:
1. Regular cleaning: The residue and dust on the equipment should be cleaned regularly during the use of the equipment, especially in the transmission parts and sealing parts, to avoid premature wear and failure of the equipment.
2. Lubrication maintenance: Add lubricating oil to the transmission parts and friction parts of the equipment regularly to reduce the coefficient of friction and ensure the normal operation of the equipment.
3. Fastening check: Check whether the connection bolts, nuts and oil drain plugs are loose to ensure the stability and safety of the equipment.
4. Electrical performance testing: Regularly test the electrical system, including power supply voltage, power plug and socket, etc., to ensure the normal operation of the electrical system.
5. Temperature monitoring: For equipment requiring specific temperature conditions, such as fermentation equipment, the temperature should be monitored in real time and adjusted as needed.
6. Regular replacement: for wearing parts and aging parts, such as transmission belts, seals, bearings, etc., should be replaced regularly to ensure the performance and stability of the equipment.
7. Spare parts management: Establish a sound spare parts management system to ensure the timely supply of key spare parts.
8. Safety inspection: Regularly check the safety device of the organic fertilizer production line to ensure that it is sensitive and reliable to prevent accidents.
9. Record maintenance: Establish equipment usage records, including equipment inspection, repair, maintenance and other historical records, in order to keep track of equipment status.
Through these maintenance measures, the service life of organic fertilizer equipment can be effectively extended and production efficiency and product quality can be improved.

0 notes
Text
How to Unclog Drains in Buchanan Dam, TX Without Causing Damage
Buchanan Dam homeowners have been facing clogged drains. With the kitchen or the bathroom clogged drain, it will only cause inconvenience and lead to pooling water inside your house. As tempting as the chemical drain cleaner may be, you ought to know that there is a better way to ensure that your plumbing is not destroyed without having to empty those hazardous chemicals. The proper way to unclog a drain with care is presented here: If you are also looking for residential plumbing repairs in Buchanan Dam, TX, stay in the loop with us through this blog post.
Boiling Water
The first remedy you should try is boiling water. If the blockade of the drain is clogged due to grease, soap, and food particles, hot water will break them up and loosen them away. Then boil water and pour it slowly into the drain. It is important that water perform its job before a fresh pour is made. This method works well on a small kitchen sink block.
Plunge
With the use of a simple plunger, the toughest of clogs can be easily cleared away. When the plunger makes a vacuum over the hole of your kitchen or bathroom sink, it will allow siphoning debris to be loosened. Always plug the overflow drain with a wet rag to seal in the suction, then plunge like a madman, forcing it up and down together with great suction. The plunger is cheap and can't do any harm to the pipes, unlike drain cleaners.
Drain Snake or Auger
A drain snake or plumbing auger could come in handy for removing stubborn blockages. This tool is able to twist flexible wire linked to the drain, thereby either ripping large blockages to pieces or dragging them out. You may buy a drain snake from a hardware store, and it is likely to bring about the desired results. Clogged drains service in Buchanan Dam, TX is something terrifying to touch on your own, then simply seek the help of a plumbing expert.

Baking Soda and Vinegar
Another option is baking soda and vinegar. Harsh chemicals could be attractive, but they are not beneficial. Pour half a cup of baking soda directly down the drain, followed by half a cup of vinegar. Plug the hole with a damp cloth to keep the fizzing inside, and put up with this for roughly 30 minutes. Next, flush out the drain with hot water. This method is good for the break up of grease and other organic materials while being fragile on the pipes.
Maintenance
Here are some steps to follow once the clog is cleared out. Get hair catchers to stop hair, food particles, and other debris from getting down. Do not put grease or oils down the drain. Regularly flush hot water down the pipes to avoid the formation of buildup.
Call a Professional
If you have tried these measures and still have an obstructed drain, let the professionals handle it. In Buchanan Dam, TX, reputable plumbers use the latest technologies to unblock the drain without causing damage to your plumbing system. They can solve virtually any kind of drain problem.
For a skilled plumber to perform the installation of faucets along with repairs and drain cleaning service in Buchanan Dam, TX, dependent on professional plumbing services, get in touch with Wilcoxen Plumbing. They offer trustworthy services for plumbing repair in Buchanan Dam, TX to keep your drains clear and properly functional.
#clogged drains service in Buchanan Dam#plumbing repair in Buchanan Dam#residential plumbing repairs in Buchanan Dam
0 notes
Text
are you dehydrated?
The Elkay EZS8L Barrier Free ADA Water Cooler is a self-contained, wall-mounted, refrigerated drinking fountain with a chilling capacity of 50��F, based upon 80°F inlet water and 90°F ambient. The unit has self-closing Easy-Touch Controls on the front, and on the left and right side. The drinkable water stream requires less than 3 pounds of force to activate by a commercial-grade solenoid based flow control, and has a patented valve with built-in flow regulator to provide a constant stream from 20 to 105 psi water pressure. The drinking fountain has a Flexi-Guard StreamSaver Bubbler, which provides a flexible antimicrobial mouth guard to protect against injury and microorganisms. The EZS8L meets ADA guidelines for frontal or parallel approach, has a lead free design which meets Safe Drinking Water Act, and is certified to NSF/ANSI 61 and California AB1953, as well as UL399 and CAN/CSA 22.2 No. 120.
Features:
Replacement for the EZFS8 drinking fountain.
Attractive, contemporary design matches modern architecture.
Exclusive fastener-less integrated drain reduces debris accumulation and is easy to clean.
Vinyl clad finish is durable and attractive.
Electronic push-bars for easy bubbler activation.
Flexi-Guard bubbler provides a flexible antimicrobial mouth guard to protect against injury and microorganisms.
Rated for indoor use.
Cooling System:
Motor Compressor: Hermetically sealed, reciprocating type, 115V, 60 Hz single phase. Sealed-in lifetime oil supply. Equipped with electric cord and three prong molded rubber plug (domestic models).
Condenser: Fan cooled, copper tube with aluminum fins. Fan motor is permanently lubricated.
Cooling Unit: Combination tube-tank type. Self cleansing. Tube portion is continuous coil of copper tubing. Tank is stainless steel. Fully insulated with EPS foam which meets Underwriters Laboratories Inc. requirements for self-extinguishing material.
Refrigerant Control: Refrigerant HFC-134a is controlled by accurately calibrated capillary tube for positively trouble-free operation.
Temperature Control: Enclosed adjustable thermostat is factory preset. Requires no adjustment other than for altitude requirements. Easily accessible.
Construction:
Frame: One piece polished to a uniform Elkay bright luster finish. Basin has integral drain grid, embossed bubbler pad. No exposed fasteners.
Stainless Steel Basin: Galvanized structural steel chassis supports refrigeration system and fastens to wall. Provides increased structural integrity and rigidity to cooler.
Exclusive Flexi-Guard Safety Bubbler: Innovative design utilizes an infused anti-microbial pliable polyester elastomer to prevent accidental mouth injuries. Flexes on impact, then returns to original position. Strong. Abrasion-resistant. Anti-sweat. Keyed in location to prevent rotation.
Upper Shroud: Contoured shock-absorbing, provides additional protection against accidental injury. No exposed fasteners.
Lower Shroud: One piece easy to remove and replace. Allows access to internal components from three sides.
Cabinet: Cabinet design allows for flush to wall mounting. No recess space is required.
Color Selection: Unless otherwise specified cabinet is two-tone gray on upper shroud with textured gray lower shroud. Stainless Steel lower shroud available at extra cost.
source link:
0 notes
Text
How to Properly Change Your 5W30 Engine Oil: A Step-by-Step Guide
Maintaining your vehicle's engine oil is critical to ensuring its longevity and optimal performance. Properly changing your 5W30 engine oil not only enhances engine efficiency but also prevents wear and tear. Follow this comprehensive guide for a step-by-step approach to changing your engine oil correctly.
What You’ll Need Before Starting
Before getting started, gather the following tools and materials to make the oil-changing process smooth and hassle-free:
5W30 Engine Oil (check your car’s manual for the required quantity)
Oil Filter (ensure compatibility with your vehicle)
Oil Filter Wrench
Socket Wrench or Spanner
Drain Pan
Funnel
Gloves and Safety Goggles
Shop Towels or Rags
Car Jack and Jack Stands or Ramps
Step 1: Prepare Your Vehicle
Park Safely: Ensure the vehicle is parked on a flat surface and engage the parking brake.
Warm the Engine: Start the engine and let it run for 5–10 minutes. Warm oil drains more easily. Turn off the engine before proceeding.
Raise the Vehicle: Use a jack to lift the car and secure it with jack stands. Alternatively, drive the vehicle onto ramps for better access to the underside.
Step 2: Locate the Drain Plug and Oil Filter
Consult Your Owner’s Manual: Find the exact location of the oil drain plug and filter.
Position the Drain Pan: Place the pan directly beneath the drain plug to catch the used oil.
Step 3: Drain the Old Oil
Loosen the Drain Plug: Using a socket wrench, slowly unscrew the drain plug counterclockwise. Be cautious as the oil may be hot.
Allow the Oil to Drain: Let all the old oil drain into the pan. This process may take several minutes.
Remove the Oil Filter: Use an oil filter wrench to unscrew the old filter. Be prepared for additional oil to spill.
Step 4: Replace the Oil Filter
Lubricate the New Filter’s Gasket: Apply a small amount of fresh 5W30 oil to the rubber gasket on the new filter.
Install the New Filter: Screw the filter onto the engine by hand until snug, then tighten it an additional ¾ turn. Avoid over-tightening.
Step 5: Install the Drain Plug
Inspect the Drain Plug: Check for damage and clean it thoroughly. Replace the washer if necessary.
Reinstall the Plug: Securely tighten the drain plug using a socket wrench, but do not over-tighten, as this can strip the threads.
Step 6: Add Fresh 5W30 Engine Oil
Locate the Oil Fill Cap: It’s usually marked with an oil can symbol. Remove the cap.
Pour the Oil: Using a funnel, pour the recommended amount of 5W30 engine oil into the engine.
Check the Level: After adding oil, use the dipstick to check the oil level. Add more if necessary, ensuring not to overfill.
Step 7: Start the Engine and Check for Leaks
Start the Vehicle: Run the engine for a couple of minutes and observe for any oil leaks around the drain plug or oil filter.
Turn Off the Engine: Allow the oil to settle for a few minutes.
Recheck the Oil Level: Use the dipstick to ensure the oil is at the correct level. Add more if needed.
Step 8: Dispose of Used Oil Properly
Transfer the Oil: Pour the used oil from the drain pan into a sealed container.
Recycle the Oil: Take the used oil and filter to a local recycling center or auto shop that accepts oil waste.
Pro Tips for Changing Your 5W30 Engine Oil
Use Quality Oil: Always purchase high-quality 5W30 oil from reputable brands to ensure optimal performance.
Stick to Your Maintenance Schedule: Regular oil changes, as recommended by your vehicle’s manufacturer, are essential.
Inspect While You’re Underneath: Check for leaks or other visible issues with your vehicle while the oil is draining.
How Often Should You Change 5W30 Engine Oil?
The frequency of oil changes depends on factors such as driving conditions, vehicle make, and the type of oil used. Most manufacturers recommend changing oil every 5,000 to 7,500 miles, but always consult your vehicle’s manual for specific guidance.
Why Is Changing Engine Oil Important?
Prevents Engine Wear: Fresh oil reduces friction and protects engine components.
Enhances Fuel Efficiency: Clean oil helps the engine run smoothly, improving fuel economy.
Removes Contaminants: Over time, engine oil accumulates dirt, debris, and sludge that can damage the engine.
Common Mistakes to Avoid
Over-Tightening the Oil Filter: This can damage the gasket and cause leaks.
Using the Wrong Oil Type: Always use oil that meets your vehicle’s specifications.
Neglecting the Oil Level Check: Too much or too little oil can harm the engine.
By following this guide, you can ensure your vehicle runs smoothly and efficiently. Proper oil changes are a critical part of car maintenance, and doing it yourself saves both time and money.
0 notes
Text
How do you troubleshoot common problems in the Range Rover Engine 3.0?

The Range Rover 3.0 is an engine widely lauded for its outstanding performance and innovative design. These day's market has seen the luxury SUV gaining much market share; however, after some time, even such high-performance engines experience certain issues. Correct troubleshooting helps minor problems not develop into a costly repair. These are especially important for users of reconditioned engines, which, although reliable, can have characteristics that differ from the new. We delves into some common problems associated with the Range Rover engines 3.0 and offers practical troubleshooting tips to keep the vehicle running at its best.
Identifying Common Oil Leaks in the Range Rover 3.0 Engine
Oil leaks are a frequent issue in Range Rover engines, particularly in older or reconditioned engines. Common causes include degraded gaskets, damaged seals, or loose drain plugs. Symptoms may include visible oil puddles under the vehicle or a burning oil smell. First, check the oil pan, valve cover gasket, and oil filter housing for leaks. Use a flashlight to spot any wet or oily areas. Tighten loose components and replace any worn gaskets or seals. Regular oil changes and using the manufacturer-recommended oil grade can also prevent future leaks. For persistent issues, a professional diagnostic scan is advisable, especially for reconditioned engines where previous repairs might influence performance.
Overheating Diagnosis in Range Rover 3.0
Overheating can cause severe engine damage. Common reasons for overheating in the Range Rover 3.0 are coolant leaks, a faulty thermostat, or failure of the water pump. Inspect the coolant level and look for visible leaks from hoses and at the radiator. Test the thermostat by feeling the upper radiator hose; it should warm up slowly. A cold hose could indicate a stuck thermostat. Check the water pump for wear, including leaks or unusual noises. In rebuilt engines, the cooling system parts should have been inspected as part of the rebuild. Regularly flushing the cooling system and keeping coolant at the recommended level will eliminate overheating once and for all.
Fuel System Malfunctions in the Range Rover 3.0 Engine
Poor engine performance or stall is caused by a malfunctioning fuel system, among other reasons. It may involve clogged fuel injectors, the fuel pump starting to fail, or contaminated fuel. Troubleshooting involves observing for signs of clogging through uneven engine performance or misfire. Minor clogs can be solved by adding a fuel injector cleaner. Another step is testing the fuel pump pressure with the use of a gauge to meet manufacturer specifications. Replacement of the fuel filter is an imperative so that no debris reaches the engine. Reconditioned engines require recheck on fuel systems to confirm the calibration upon reinstallation. Sufficient-quality fuel should always be used in maintaining the system.
Clearing Noises from Timing Chain in the Range Rover 3.0 Engine
A noisy timing chain is another common problem that is seen often in high-mileage Range Rover engines. The causes can range from failure of the chain tensioner to worn-out chain guides. Begin by listening for rattling noises during engine startup, especially when the engine is cold. Inspect the timing chain and its components for wear. Replace the chain, tensioners, and guides if necessary. For reconditioned engines, ensure that the timing chain assembly was replaced or inspected during reconditioning. Regular oil changes using the recommended oil grade help maintain the timing chain's longevity and reduce noise.
How to Troubleshoot Electrical System Malfunctions of the Range Rover 3.0 Engine
Range Rovers mainly employ electronic systems that fail or become faulty at times. These include malfunctioning sensors, faulty wiring, or even software errors. The OBD-II scanner is used to scan for any error codes related to the engine. Visible damage or loose connections in the wiring harnesses are inspected. Sensors like the crankshaft position sensor and oxygen sensors are checked for proper functionality. Software updates may be needed if the problems persist. The ECU, or Engine Control Unit, in a reconditioned engine must be compatible and properly programmed. Regular diagnostic checks ensure that electrical issues are detected early and resolved quickly.
Turbocharger faults in the 3.0 Range Rover engine
The turbocharger improves engine performance but often malfunctions through low boost pressure or excessive smoke from the exhaust. Causes can be oil contamination, worn bearings, or broken turbo fins. Inspect the turbocharger for oil leaks and excessive play in the shaft. Check the intercooler and related hoses for blockages or leaks. Clean or replace the air filter regularly to prevent debris from damaging the turbo. Reconditioned engines may have replaced or refurbished turbochargers; ensure these components meet OEM standards. Timely oil changes and using high-quality engine oil can prolong turbocharger life.
Diagnosis of Exhaust System Problems in Range Rover 3.0
Exhaust system problems, for instance, high emissions or unusual noises can affect an engine's performance. The more common causes are likely to be a failing catalytic converter, exhaust leaks, or mufflers that have been damaged. Check the exhaust system for any visible damage, rust, or leaks. Listen for unusual noises, especially during acceleration. Use an emissions tester to determine if the catalytic converter is working correctly. For reconditioned engines, ensure that the exhaust system complies with emission standards and vehicle specifications. Regular maintenance and prompt repairs can prevent long-term exhaust system damage.
Low Oil Pressure in the Range Rover 3.0 Engine
Low oil pressure can cause severe damage if not addressed promptly. Common causes include a failing oil pump, clogged oil passages, or insufficient oil levels. Keep track of the oil pressure gauge for irregular readings. Examine the oil pump and all its associated parts for wear. Flush the engine to remove sludge that might be clogging oil passages. Refill with the type and amount of oil recommended. On reconditioned engines, make sure the oil pump was checked or replaced as part of the rebuild. Routine oil changes and checking oil levels can prevent pressure-related issues. Read the full article
0 notes
Text
What will happen if organic fertilizer equipment is not maintained for a long time
When using organic fertilizer equipment, maintenance is an important link to ensure the normal operation of the equipment and extend the service life. Here are some key maintenance points:
1. Regular cleaning equipment: Keep the workplace clean, after each organic fertilizer equipment test, residue and dust should be thoroughly removed, especially in the transmission parts and sealing parts of the equipment, to avoid premature wear and failure of the equipment.
2. Lubrication maintenance: the gear and worm gear in the organic fertilizer equipment should be lubricated with special butter. The upper gear and the lower gear should be added with triple butter once a season to ensure the smooth operation of the equipment.
3. Check fasteners: Regularly check whether the connection bolts, nuts and oil drain plugs are loose, and tighten them in time to prevent equipment failure during operation.
4. Monitoring equipment operation: often pay attention to the operation of organic fertilizer equipment to ensure that there is no serious abnormal sound or metal friction sound. If any abnormality is found, stop using it immediately and check it.
5. Replacement of wearing parts: For vulnerable parts, such as belts, chains, gears, etc., regularly check the degree of wear, and timely replace severely worn parts to ensure the stable operation of the equipment.
6. Record maintenance: Establish equipment maintenance records and record each maintenance and inspection in detail, so that you can keep track of the equipment status and discover and solve problems in time. By following these maintenance points, the service life of organic fertilizer equipment can be effectively extended to ensure the stability and efficiency of organic fertilizer production lines.

0 notes
Text
Why Is Your Car Leaking Oil When Parked? Causes Explained

If you've noticed oil stains on the ground where your car is parked, you're likely dealing with an engine oil leak. This common issue can cause concern for car owners, but understanding the potential causes can help you address it promptly. Let’s dive into why your car might be leaking oil when parked and what you can do about it.
1. Worn or Damaged Oil Seals
One of the most common causes of a car leaking oil when parked is worn or damaged oil seals. These seals are responsible for keeping the oil inside the engine, and over time, they can degrade due to heat, pressure, and friction. If the seals around the oil filter or oil pan become worn, oil will begin to leak out. In this case, an engine oil change combined with replacing the seals may be necessary.
2. Faulty Oil Drain Plug
Another cause could be a loose or damaged oil drain plug. The oil drain plug is located at the bottom of the oil pan and allows the oil to be drained during an oil and filter change. If the plug is not properly tightened after an oil change or if the gasket is damaged, oil can seep out when the car is parked.
3. Cracked Oil Pan
The oil pan holds the engine oil, and if it gets cracked or damaged, oil will leak. This could happen due to an impact with a road hazard or wear and tear over time. A cracked oil pan usually requires replacement, which is something a good mechanic in Perth can easily diagnose.
4. Worn Out Oil Filter
If your oil filter becomes loose or fails due to wear and tear, it can result in an engine oil leak. A faulty filter can cause oil to drip from the area around it, especially when the car is parked. If you've recently had an engine oil change, it's worth checking that the oil filter was properly installed and tightened.
5. Overfilled Oil
Sometimes, a simple mistake like overfilling the engine with oil can cause it to leak. When the oil level is too high, excess oil can escape through seals and gaskets. A car service can help you monitor the oil level and prevent overfilling in the future.
What Should You Do?
If you notice your car leaking oil when parked, it's crucial to get it checked as soon as possible. Leaking oil can lead to engine damage if left untreated. Schedule an oil and filter change to ensure your engine is running smoothly, and have a good mechanic in Perth inspect the seals, filter, and oil pan for any issues. Regular oil changes and timely maintenance will help prevent such leaks and extend the life of your engine.
If you're in Perth and need assistance with your engine oil leak or any other car issues, don't hesitate to visit a trusted car service in Perth. A quick fix now can save you from costly repairs later on.
0 notes
Text
Maintenance of the whole organic fertilizer production line
When maintaining the entire organic fertilizer production line, the following key points should be noted:
1. Equipment cleaning: regularly clean the residue and dust on the equipment, especially in the transmission parts and sealing parts of the organic fertilizer equipment, to avoid premature wear and failure of the equipment.
2. Lubrication maintenance: Add lubricating oil regularly for the transmission parts and friction parts of the equipment to reduce the coefficient of friction and ensure the normal operation of the equipment.
3. Fastening check: Check whether the connection bolts, nuts and oil drain plugs are loose, and tighten them in time.
4. Daily inspection: carry out a maintenance inspection every day, especially after 10 hours of work, check the fastening state of the connected parts. Parts replacement: For vulnerable parts, such as belts, chains, gears, etc., regularly check the degree of wear, and timely replace severely worn parts to ensure the stable operation of the equipment.
5. Electrical equipment maintenance: Check the electrical control system regularly to ensure that the line connection is intact, the electrical components are not damaged, and replace the damaged parts in time. At the same time, ensure that the equipment is well grounded to prevent electric shock accidents.
6. Safety device inspection: Regularly check the safety device of the equipment, such as protective cover, safety switch, etc., to ensure that it is sensitive and reliable to prevent accidents.
7. Equipment storage and protection: When the equipment is not used for a long time, it should be stored in a dry, ventilated and dust-free place to avoid moisture or damage to the equipment. For exposed processing surfaces and equipment components, cover them with a shield or dust cloth to prevent the intrusion of dust and debris.
Through the above measures, the organic fertilizer production line can be effectively maintained, ensure the normal operation of the equipment, and improve production efficiency and equipment service life.

0 notes
Link
Using Fonowka M12 * 1.75 magnetic aluminum oil drain plug to upgrade engine protection. 1. High quality material: This oil pan drain plug is made of high-quality aluminum, which is durable and can be used normally in high temperatures or other extreme conditions. 2. Extremely strong magnetism: It has great magnetism and can ensure the […] The post M12x1.75 Magnetic Aluminum Oil Drain Plug with 1 Pcs Copper Gasket Crush Washer Sump Drain Nut Bolt Oil Pan Bolt Anti Leakage Seal Replacement for Buick Chevrolet Cadillac GMC Ford Hummer appeared first on Automotive Parts.
0 notes
Text
Maintenance Tips for Prolonging the Life of Your Kohler Engine
Kohler engines are renowned for their durability and performance across various applications, from industrial machinery to marine vessels. To ensure these engines operate efficiently and have a prolonged lifespan, regular maintenance is crucial. At Engines, Inc., a fourth-generation, family-owned business established in 1979, we specialize in offering top-quality brands, including Kohler, and emphasize the importance of proper engine care.
Engines Power
1. Regular Oil Changes
Oil is the lifeblood of your Kohler engine, lubricating moving parts and reducing wear. Over time, oil degrades and accumulates contaminants, diminishing its effectiveness. It's essential to follow Kohler's recommended oil change intervals, typically every 100 hours of operation or annually, whichever comes first. Always use the appropriate oil grade specified in your engine's manual to maintain optimal performance.
2. Air Filter Maintenance
A clean air filter ensures that only debris-free air enters the engine, preventing internal damage. Inspect the air filter regularly and clean or replace it as needed. Operating in dusty or dirty environments may necessitate more frequent checks. A clogged air filter can lead to reduced engine efficiency and increased fuel consumption.
3. Fuel System Care
Using clean, fresh fuel is vital for engine health. Stale or contaminated fuel can cause starting issues and poor performance. Regularly inspect fuel lines for cracks or leaks and replace them if necessary. Additionally, consider using a fuel stabilizer if the engine will be stored for extended periods to prevent fuel degradation.
4. Cooling System Inspection
Overheating can severely damage an engine. Ensure the cooling system is functioning correctly by checking coolant levels and inspecting hoses for leaks or wear. For air-cooled engines, keep cooling fins clean and unobstructed to facilitate proper airflow.
5. Spark Plug Maintenance
Spark plugs are critical for efficient combustion. Regularly inspect and clean spark plugs, replacing them according to the manufacturer's recommendations. Worn or fouled spark plugs can lead to misfires, reduced power, and increased fuel consumption.
6. Battery Care
For engines equipped with electric starters, maintaining the battery is essential. Keep battery terminals clean and free of corrosion. Ensure the battery is charged, especially if the engine is not used frequently. Regularly check the electrolyte levels in non-sealed batteries and top up with distilled water as needed.
7. Regular Inspections
Conducting routine inspections can help identify potential issues before they become major problems. Look for signs of wear, leaks, or loose components. Addressing minor issues promptly can prevent costly repairs and downtime.
8. Proper Storage
If the engine will be inactive for an extended period, proper storage procedures are crucial. Drain the fuel system or add a fuel stabilizer to prevent gum formation. Store the engine in a dry, clean environment to protect it from moisture and dust. Covering the engine can also help keep it clean and ready for use.
9. Use Genuine Parts
When replacing components, always use genuine Kohler parts. Authentic parts ensure compatibility and maintain the engine's integrity. Using counterfeit or substandard parts can lead to performance issues and may void the warranty.
10. Professional Servicing
While regular maintenance can be performed by the owner, periodic professional servicing is beneficial. At Engines, Inc., we offer comprehensive engine services, including complete rebuilds, overhauls, equipment refurbishment, and maintenance contracts to help improve your downtime.
Engines Power
In conclusion, adhering to a consistent maintenance schedule is key to prolonging the life of your Kohler engine. By following these tips and partnering with experienced professionals like Engines, Inc., you can ensure your engine operates efficiently and reliably for years to come.
#diesel engine solutions#diesel engine services in odessa#diesel parts#diesel engine solution#diesel engine#kohler engine#san antonio tx#dallas#baton rouge#new orleans
0 notes
Text
Maintenance points of organic fertilizer equipment
The maintenance of organic fertilizer equipment is the key to ensure its long-term stable operation. The following are some key points of organic fertilizer equipment maintenance:
1. Regular cleaning: The residue and dust on the equipment should be cleaned regularly during the use of the equipment, especially in the transmission parts and sealing parts, to avoid premature wear and failure of the equipment.
2. Lubrication maintenance: Add lubricating oil to the transmission parts and friction parts of the equipment regularly to reduce the coefficient of friction and ensure the normal operation of the equipment.
3. Fastening check: Check whether the connection bolts, nuts and oil drain plugs are loose to ensure the stability and safety of the equipment.
4. Electrical performance testing: Regularly test the electrical system, including power supply voltage, power plug and socket, etc., to ensure the normal operation of the electrical system.
5. Temperature monitoring: For equipment requiring specific temperature conditions, such as fermentation equipment, the temperature should be monitored in real time and adjusted as needed.
6. Regular replacement: for wearing parts and aging parts, such as transmission belts, seals, bearings, etc., should be replaced regularly to ensure the performance and stability of the equipment.
7. Spare parts management: Establish a sound spare parts management system to ensure the timely supply of key spare parts.
8. Safety inspection: Regularly check the safety device of the organic fertilizer production line to ensure that it is sensitive and reliable to prevent accidents.
9. Record maintenance: Establish equipment usage records, including equipment inspection, repair, maintenance and other historical records, in order to keep track of equipment status.
Through these maintenance measures, the service life of organic fertilizer equipment can be effectively extended and production efficiency and product quality can be improved.

0 notes