#Minecraft Guide
Explore tagged Tumblr posts
Text
Copy/Paste-able Minecraft Brew Guide
Since y'all seemed to like the Basic Brew Guide, how about one you can bring in-game with you?
(Ok the main thing the last one had going for it was prettiness and this one isn't but I tried)
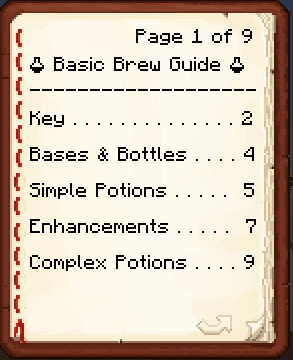
(it looks funny now but don't worry - the beakers will turn into potion bottles)
P1
🧪 Basic Brew Guide 🧪 ------------------- Key . . . . . . . . . . . . . . 2 Bases & Bottles . . . . 4 Simple Potions . . . . . 5 Enhancements . . . . . 7 Complex Potions . . . . 9
P2
Key ------------------- 🧪w = water bottle 🧪a = awkward potion 🧪[ ] = [ ] potion ⚗ = splash potion ☀ = gunpowder ✴ = redstone ✳ = glowstone
P3
Key - Cont. ------------------- ♅ = netherwart ♣ = rabbit paw ❄ = sugar ☽ = glistening melon ❦ = ferm. spider's eye ♭ = ghast tear ☉ = magma cream ☼ = pufferfish ^ = golden carrot ♯ = turtle shell ♮ = phantom membrane
P4
Bases & Bottles ------------------- Most potions require an awkward potion base: 🧪w + ♅ = 🧪a You can also add gunpowder to make it a splash potion: 🧪a + ☀ = ⚗
P5
Simple Potions ------------------- 🧪a + ♣ = 🧪leaping 🧪a + ❄ = 🧪swiftness 🧪a + ✳ = 🧪strength 🧪a + ☽ = 🧪healing 🧪a + ❦ = 🧪poison 🧪a + ♭ = 🧪regen.
P6
Simple Potions - Cont. ------------------- 🧪a + ☉ = 🧪fire res. 🧪a + ❄ = 🧪swiftness 🧪a + ☼ = 🧪w. breath 🧪a + ^ = 🧪darkvision 🧪a + ♯ = 🧪turtle 🧪a + ♮ = 🧪feather fall
P7
Enhancements ------------------- Extend time with ✴: 🧪 Poison 🧪 Swiftness/Slowness 🧪 Leaping 🧪 Strength/Weakness 🧪 Turtle 🧪 Nigiht Vision 🧪 Feather Falling 🧪 W. Breathing 🧪 Fire Resistance 🧪 Regeneration
P8
Enhancements - Cont. ------------------- Strengthen with ✳: 🧪 Poison 🧪 Swiftness/Slowness 🧪 Leaping 🧪 Strengt 🧪 Turtle 🧪 Regeneration 🧪 Healing/Harming
P9
Complex Potions ------------------- 🧪w + ❦ = 🧪weakness 🧪heal + ❦ = 🧪harm 🧪poison + ❦ = 🧪harm 🧪night + ❦ = 🧪invis. 🧪swift + ❦ = 🧪slow 🧪leap + ❦ = 🧪slow
#mineblr#minecraft#minecraft tutorial#minemath#video games#minecraft related#game guide#minecraft guide
304 notes
·
View notes
Text
Complete guide to the new Minecraft wolves

Note: the new wolf variants were added in snapshot 24w10a for update 1.20.5, this guide will not work for any earlier updates.
Where do new wolves spawn naturally?
Wolves can spawn naturally on grass blocks, dirt, corse dirt, snow blocks, and podzol.
Rusty: spawns in the Sparse Jungle biome in packs of 2 to 4.
Pale: spawns in the Taiga biome in packs of 4.
Black: spawns in the Old Growth Pine Taiga biome in packs of 2 to 4.
Striped: spawns in the Wooded Badlands biome in packs of 4 to 8.
Snowy: spawns in the Grove biome as lone wolves.
Ashen: spawns in the Snowy Taiga biome in packs of 4.
Woods: spawns in the Forest biome in packs of 4.
Spotted: spawns in the Savanna Plateau biome in packs of 4 to 8.
Chestnut: spawns in the Old Growth Spruce Taiga biome in packs of 2 to 4.
How to breed the new variants
If two tamed wolves are bred, the puppy will be the same variant as one of the parents, regardless of the biome the puppy was born in.
What collar colors make it look like the wolf isn't wearing a collar?

Rusty: brown
Pale: white
Black: gray
Striped: brown or yellow
Snowy: white
Ashen: light gray
Woods: brown
Spotted: gray
Chestnut: light gray
How to spawn wolves with spawn eggs
The variant spawned is determined by the biome the spawn egg is used in.
Rusty: will be spawned in all Jungle biomes.
Pale: will be spawned in all other biomes.
Black: will be spawned in the Old Growth Pine Taiga biome.
Striped: will be spawned in all Badlands biomes.
Snowy: will be spawned in the Grove biome.
Ashen: will be spawned in the Snowy Taiga biome.
Woods: will be spawned in the Forest biome.
Spotted: will be spawned in all Savanna biomes.
Chestnut: will be spawned in the Old Growth Spruce Taiga biome.
How to spawn wolves with commands
/summon minecraft:wolf
These will summon the specified variant regardless of biome.
/summon minecraft:wolf ~ ~ ~ {variant:rusty}
/summon minecraft:wolf ~ ~ ~ {variant:pale}
/summon minecraft:wolf ~ ~ ~ {variant:black}
/summon minecraft:wolf ~ ~ ~ {variant:striped}
/summon minecraft:wolf ~ ~ ~ {variant:snowy}
/summon minecraft:wolf ~ ~ ~ {variant:ashen}
/summon minecraft:wolf ~ ~ ~ {variant:woods}
/summon minecraft:wolf ~ ~ ~ {variant:spotted}
/summon minecraft:wolf ~ ~ ~ {variant:chestnut}
#Minecraft#Minecraft Wolf#Minecraft Wolves#New Minecraft Wolves#Minecraft Guide#Minecraft Update#Minecraft Commands#Wolves
11 notes
·
View notes
Text

How to use coordinates in both Minecraft & Zelda Tears of The Kingdom?
Yep coordinates.. I did not expect it to be such an issue where many people still don't know how to use them to navigate around.
First things first, you have to know 3 dimensional space games have got 3 normal vectors (axises) constituting an orthonormal mark generally (cartesian) noted x, y and z respectively (by the way the x, y & z may be switched up as well as the orthonormal mark's direction).

In Minecraft, the x axis represents longitude (east or west), the y axis represents the altitude (upwards or downwards) and the z axis represents latitude (north or south).


In Zelda Tears of The Kingdom, the x axis represents longitude (east or west) as well, though the y axis represents latitude (north or south) and the z axis represents the altitude (upwards or downwards).


Now by using coordinates I imply using them to find back a location or go to a specific location (with coordinates) as quickly as possible.
So the following method actually regards for both games having a set position to go to only using your current coordinates:
# 1) Do not pay attention to the altitude coordinate.
It isn't really relevant, if you're going back to place you already know/visited, you'll eventually recognize & find the way to go on your own.
# 2) Fix the longitude coordinate value.
Get your longitude coordinate value as close as the one indicated for the place you wanna go to by moving around to decrease/increase your x value to reach for the final longitude value.
# 3) Fix the lattitude coordinate value.
Do the same for your lattitude value and try to keep your longitude value not changing too much (quite constant).
# 4) Fix the altitude coordinate value.
Once you fixed and got both longitude value & lattitude value stabilized enough, you can focus on the altitude value (if you still hadn't reconize the place or are exploring/visiting the place for your first time) move up or down depending on how high or deep the place is located.
Obviously, as you keep practicing you'll end up managing to fix the longitude value and almost at the the same time ;)
For example, if we want to get to a place located at (longitude : 342, latitude : 45, altitude : -98) while we are at (longitude : -22, attitude : 112, altitude : 402).
Move around and when we see the longitude value increasing, keep the direction we're going to until you reach for about 342.
Subsequently, while we keep our longitude value constant enough, we have to decrease our latitude value.Again, as soon as it's decreasing, we have to keep about the same direction till we reach for about 45.
Finally, with longitude and latitude coordinate fixed values, we only have to look get down to -98 in altitude (in our case it may be going down a cave/hill/cliff/path...).
So that's pretty much how to use coordinates in Minecraft & in Zelda Tears of The Kingdom, I hope it helps :p
Tip: In Zelda Tears of The Kingdom, you should set your mini-map pointing towards north in order to easily tell the direction you follow (at the moment) and travel throughout the world in a more simple way.
Sidenote: I know there might be some more optimized way to travel with coordinates from a location to another.
Nevertheless, I'm only basing these explanations from my experience and from what I judge optimal and efficient to be taught.
#minecraft#zelda tears of the kingdom#totk thoughts#ztotk#zeldablr#mineblr#deep thinking#deep dive#video games#gaming#mc#minecraft bedrock#minecraft java#java edition#bedrock edition#nintendo#sony#minecraft guide#minecraft oc#minecraft coordinates#totk#tears of the kingdom#tears of the kingdom coordinates#deep thoughts#zelda fandom#game guide
7 notes
·
View notes
Text
how to play minecraft education edition
Minecraft Education Edition is a version of the popular sandbox video game Minecraft, designed specifically to be used in an educational environment. It provides an immersive, fun way to learn and explore new concepts, while also enabling teachers to assess their students' progress. In this article, we’ll provide you with a comprehensive guide on how to play Minecraft Education Edition. We’ll walk you through the basics of the game, from setting up your server to creating your first world. Additionally, we’ll cover some additional features that make this version of Minecraft unique and help you get the most out of your educational experience.
What is Minecraft Education Edition?
Minecraft: Education Edition is a version of Minecraft that was created specifically for educational purposes. It is similar to the regular version of Minecraft, but includes a number of features that make it more suitable for use in schools. Some of the key features of Minecraft: Education Edition include: -A user-friendly interface that makes it easy to get started -A library of resources, such as lesson plans and tutorials, that can be used by teachers to integrate Minecraft into their curriculum -The ability to easily connect with other players around the world, making it ideal for collaborative learning -A safe and secure environment that is monitored by staff to ensure appropriate behaviour
How to Get Started with Minecraft Education Edition
Minecraft: Education Edition is a version of the popular sandbox game designed specifically for classrooms. The game is available for free to anyone with a Microsoft account, and there are no in-app purchases. To get started with Minecraft: Education Edition, you'll need to create a class in the app. Once you've done that, you can invite students to join your class and start playing together. There are a few things to keep in mind when playing Minecraft: Education Edition. First, the game is intended for educational purposes, so there are some features that are different from the regular version of Minecraft. For example, players can't hurt each other in Minecraft: Education Edition, and there's a built-in chat system that lets students communicate with each other without leaving the game. Second, because Minecraft: Education Edition is designed for classrooms, it's important to follow the rules set by your teacher. For example, your teacher may want everyone to stay on the same level or may want players to build only certain types of structures. Third, while Minecraft: Education Edition can be played offline, it's best to play it online with other people. That way, you can take advantage of all the features the game has to offer, like collaboration and communication tools. Finally, have fun! Playing Minecraft: Education Edition is a great way to learn about teamwork, problem-solving, and digital literacy.
Tips for Using Minecraft Education Edition
Minecraft: Education Edition is a game-based learning platform that promotes creativity, collaboration, and problem-solving in an immersive environment. The game is free to download and play, and there are no in-app purchases. Here are some tips for using Minecraft: Education Edition in the classroom: 1. Establish ground rules with your students before starting to play. Discuss expectations for behavior and teamwork, and set up a system for dealing with problems that may arise during gameplay. 2. Use the built-in tutorials to introduce students to the basics of the game. These can be found in the world editor after creating a new world. 3. Encourage students to collaborate and communicate with each other while playing. One way to do this is by setting up teams of students and assigning specific tasks to each team. 4. Utilize the many resources that are available online for Minecraft: Education Edition. There are lesson plans, printables, and videos that can be used to supplement your instruction. 5. Take advantage of the feedback feature in Minecraft: Education Edition to give students immediate feedback on their work. This is a great way to help them improve their skills and understanding of the game mechanics.
Conclusion
Minecraft Education Edition is a great way to learn and have fun at the same time! By following this guide, you now know how to set up your game and make sure that it runs smoothly. With its vast array of features, Minecraft Education Edition can be an incredibly powerful tool for learning. So go ahead and start exploring new worlds with your friends or even using it in the classroom—the possibilities are endless!
platforms Facebook,Pinterest,YouTube,Twitter,Game bloggers,get the latest game guide
5 notes
·
View notes
Text
hell yeah
these are great!
Back with some more charts! :)
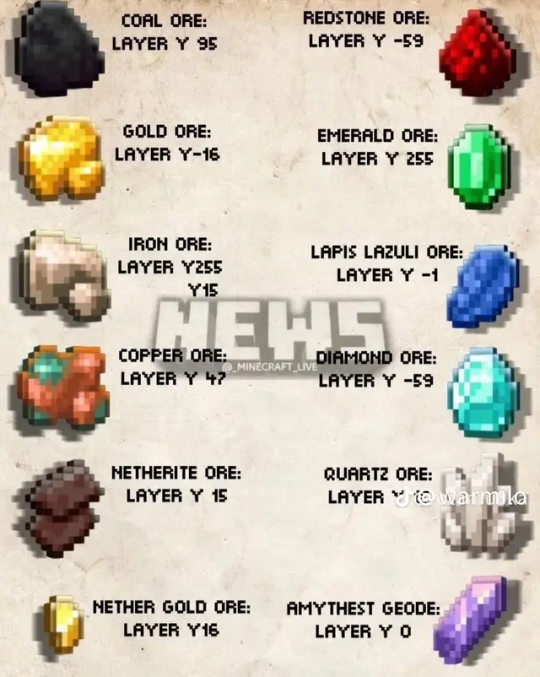
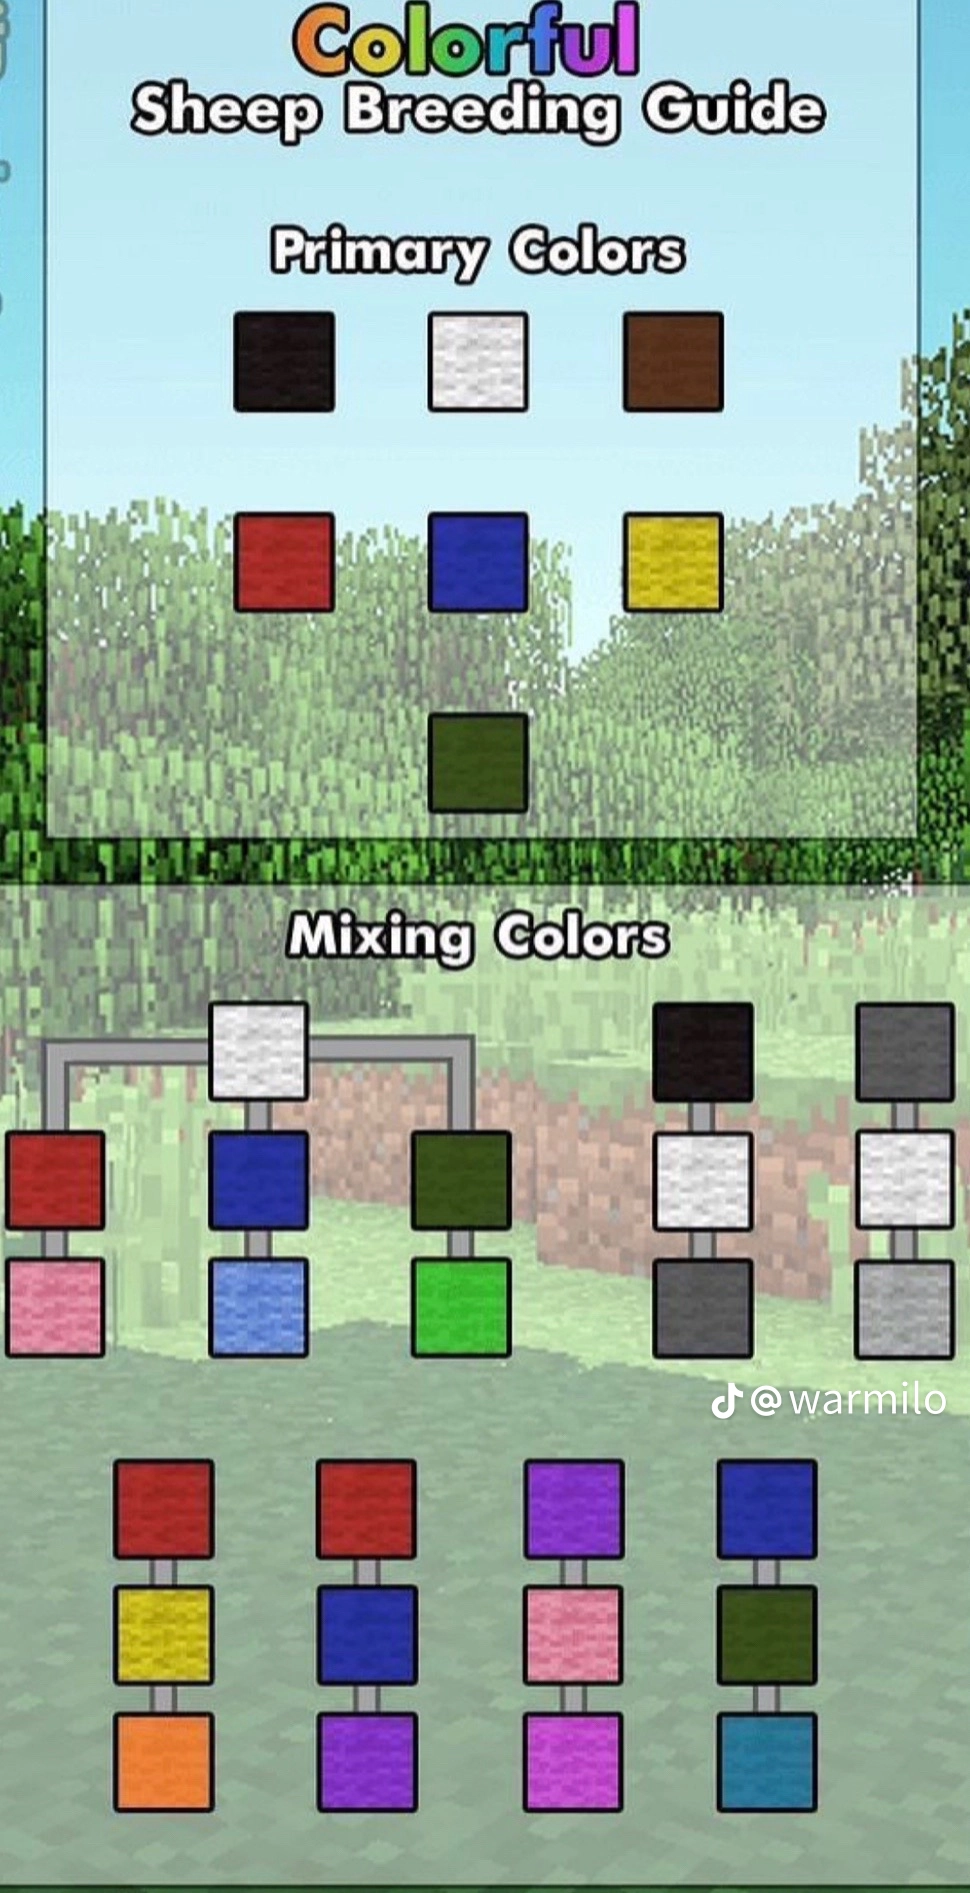
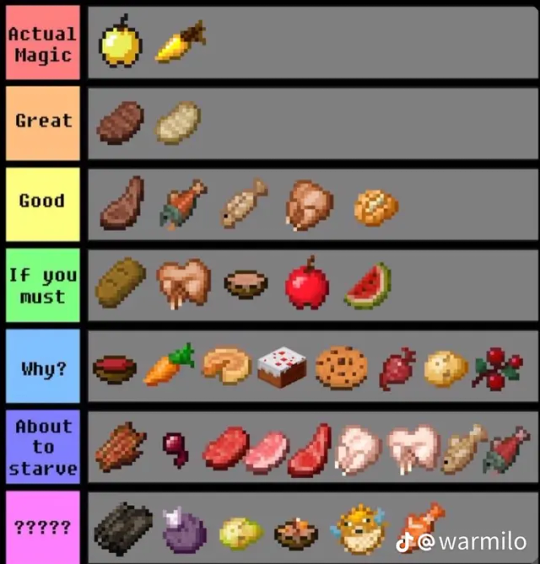

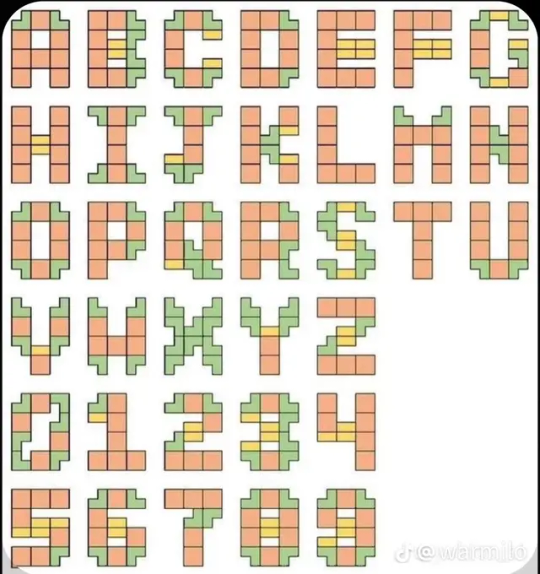
Please keep in mind that none of these are made by me- if you know or are the owner, please let me know so I can credit you properly.
Found these from @/warmilo on TikTok, but I'm not sure if they are the original owner.
Subscribe to me!
#okay; so#tbh#only the alphanumeric building guide is useful to me#but they're all still really cool!!#i'm just a weirdo#and hey#that's still handy to have as a quick reference when you need to double check and a wiki dive would take more time than is practical#minecraft#minecraft guide#minecraft infographics
2K notes
·
View notes
Text
recording this down for posterity:
If you want to transfer worlds stored externally in mcpe (on androids afaik) to new devices here is generally what you need to do.
1st, send the world files to the new device. This may be done by usb connection, wifi dircet sharing, etc. Go to your default file app and go to the "Internal storage" folder then to the "Android" folder, "data" folder, "com.mojang.minecraftpe" folder or likewise. Take the worlds you want to transfer from the "minecraftWorlds" and transfer them.
If you are unable to access folders past "Android" folder, you will need to get a laptop or similar and connect via usb to that computer to transfer the worlds. Copy to the computer from the old device and/or move the world folders (which, btw, will all end in an "="; copy the whole thing) to the new device. Place in the appropriate "minecraftWorlds" folder.
If you are unable to copy or move world folders to the "minecraftWorlds" folder then you will need to be a bit sneakier. Create a new folder on your new device in a place where it won't interfere with anything such as the download folder. add folder named "game" inside that folder. Add folder named "com.mojang" in the new "game" folder. Finally, add a new folder in the "com.mojang" folder called "minecraftWorlds". You should be able to do all of this from your computer (not sure about on the device itself). Put all the transferred world folders into the "minecraftWorlds" folder
If you have recently installed minecraft, you will be prompted on the worlds menu to see where external worlds are. Press the button there and choose the "minecraftWorlds" folder you made. This will make the game store world files there, but should not interfere with other functions.
Congrats! You transferred your minecraft worlds!
#minecraft#mcpe#minecraft guide#yeah i just had to do all this :/#anyways idk if this works if you already have worlds on the new device so uhh...good luck?
0 notes
Photo
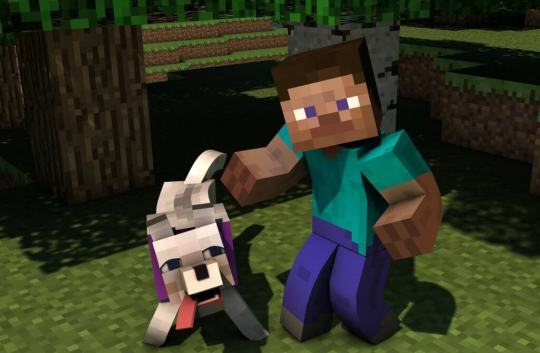
Minecraft Steve – Learn about the character
Read more about Minecraft Steve.
1 note
·
View note
Link
Read more about Minecraft steve - learn about the character.
0 notes
Text
Liking this so I can save it for later.
the 2b2t survival guide (revamped!)
are you planning to play on 2b2t? have you been playing but can’t seem to get out of spawn? or have you been waiting 12 hours in queue to no avail?
in that case, have i got some stuff for you! heres a handy guide about how to actually play, and some tips to help along the way!
step one: preparing
you can just hop right in and go, but it is smart to know a bit beforehand.
know what you’re getting into. the server has no rules to it, so you just have to expect a fuckton of disgusting shit. this includes but isnt limited to nazis, homophobes, racists, transphobes, and more, and youre bound to run into them. you need to just accept that, and ignore it.
get a hacked client. while you can just play vanilla, having a hacked client on will drastically help you survive and get out of spawn, and at the very least make it a little less stressful. id suggest impact client, a free 1.12 hacked client. do not, and i repeat DO NOT use clients advertised on 2b2t chat. only trustable clients i know of are impact, future, and wurst.
make sure your client, version, and 2b2t itself is safe. this might be me just being paranoid, but after the log4j incident id say its smart to play it safe. check the reddit and make sure whatever client youre using is safe. also, if anyone knows if 2b2t is currently safe to play rn, please send me an ask!
make a plan. although this is optional, its smart to do. you can just wing it if you wanna, but it’s helpful to have a goal for what you wanna do in the server.
check the reddit. it will tell you beforehand if the server is active, and also if there is a serious exploit going on, theres a chance youll be able to find out about it beforehand and protect yourself from being affected by it. this is how i stayed safe from log4j and the authentication exploit!
read this guide. seriously, i promise, its at least a BIT helpful!
step two: queue
queue is basically inevitable, but there are a few things you can do to make the wait less painful!
decide if you want priority. priority queue is a godsend, it takes 30 min at MOST to join the server! but on the other hand, its 20 dollars per month. if you’re planning on playing for a long time and dedicating lots of time to playing? get priority. if you just wanna check the server out? don’t worry about buying it.
join when nobody else would. the best times i’ve found are near 1-3am, or in early mornings. also, always on weekdays, its MUCH harder to join during weekends. you’ll still have to wait hours, but not as long as you would otherwise.
do something else. multitasking is the best way to wait. leave queue running in the background and check on it whenever you can, but fill your time with other stuff. i usually draw or watch videos when waiting!
pray for a server restart. when it restarts, turn on auto-reconnect (if you have that) or just keep on trying to connect. you’ll get onto the server extremely quick if you’re able to join right after a restart.
step three: common sense
you gotta use normal common sense, but also server-unique common sense.
remember: there are no rules. people are going to kill you. people are going to grief you. people are going to say gross shit. the worst kinds of people are here on the server, you have to accept that.
you aren’t safe. no matter how far away you are, or how nice that one person is. don’t get lulled into feeling secure, stay on edge. better safe than sorry.
don’t trust anyone. or at least be cautious of everybody. even if they give you gifts, even if they compliment you, dont trust anybody unless you know them personally. also, as a little sidenote, if somebody places down a bed for you and ushers you to sleep in it, DONT.
enderchests are your friend. you’re going to die, several times. so, keep any important things in your enderchest. for more space, put everything into shulker boxes and store the boxes in your enderchest. this is why silk touch pickaxes are something you’ll need: because your enderchest is the only safe place for your items.
signs are the best communication. carry a sign with you, and read all the signs you find. its not important, but its fun to read what people write, and its nice to make your own mark on the world with just a simple sign.
what you build is gonna go. no matter how nice it looks, how far out it is, how tiny it is, whatever. its how 2b2t works. when you build, you have to remember that its going to get destroyed one day. remember to take screenshots of your builds! and griefing only proposes an opportunity to rebuild it bigger and better than before.
everyone hates new players. don’t openly say you’re new. just stick to yourself for the first while of joining. dont ask for kits. if you get stuck, dont ask for help. in this case, doing it alone is safer than getting help.
you aren’t special. oh, so you watched a bunch of fit videos and know everything about the server? no you don’t, shut up. you’re gonna spam things in chat and grief a bunch of builds to become a notable player? you’re gonna become a minor annoyance, shut up. you read this guide and now know how to become the best 2b2t player ever? my guide is still shit, shut up.
step four: chat
so you’ve joined, and you connect to see.. the constant spam of chat.
hide the chat. go into settings, and turn chat off. usually chat isn’t worth looking at, except for warning about server restarts. if you wanna keep chat on, just turn down the opacity.
use /ignore. theres bots constantly flooding the chat, so if you wanna keep chat on, spend time quickly ignoring all the bots. you can also use this command to get rid of all the nasty racists and more in chat!
don’t ask for help. you dont really want to let people know youre new and need help. its rare that people will actually help you, at best you’ll probably get ignored, and at worst they’ll just kill or trap you. you can get through this by yourself!
if you have a question, ask google. like the point above, asking for help isn’t a good option. search stuff up on google or the 2b2t subreddit before asking chat. and try not to ask obvious questions either.
dont get into arguments. its like arguing in comments but… worse. and while nothing bad will probably come of it, it wont help at all in making your point heard. people will probably just laugh at you. as hard as it is, just ignore people that piss you off, and move on.
if youre an mcyt fan, dont mention it. this server hates dream stans or anything even slightly similar. so just avoid mentioning it in chat.
dont fall for stupid tricks. dont post your address even if they say itll censor it. dont press alt+f4 even if they say itll give you good hacks. if you see a message from some famous player with a bunch of symbols spammed from someone before, its probably fake.
step five: escaping spawn
five steps in and im only JUST getting to the part where you escape? how long even IS this guide?!
turn your hacks on. hacks that i personally find come in handy is storage esp, player esp, tracers, search, light, nametags, auto-reconnect, and anti-hunger. (names may vary depending on client, these are the names for impact.) dont forget to customize these hacks to your needs, such as having tracers and esp only track onto players! also, make sure you have hacks like freecam and xray set to easy keybinds.
customize your search hack. search is EXTREMELY helpful, especially with escaping spawn! id suggest having your search light up for valuables (dragon eggs, player heads, beacons) food (melons, potatos, carrots, wheat crops) and other helpful items (portals, signs, beds)
use the highways. there are highways on each 0 coordinate, as well as every diagonal coordinate. they are there for you to use, take advantage of them! once you get far enough, though, stray away from the highway. never settle down near a highway. just be aware of withers near or on the highways! id suggest going down the melon highway, which starts around (0 ~ -2630) and goes up on the -X coordinate!
save your hunger bar. be patient and try not to run or jump. its hard, but its important. most deaths are from hunger in the first while of playing, so just try not to get hungry. for this exact reason, the main thing you’re looking for is food.
collect, store, die, repeat. i never did this, but my boyfriend did, and it worked incredibly well. he would collect as many resources as he could, store them in an enderchest whenever he saw one, and then either die of hunger or something else. he’d repeat this process until he had enough stuff in his enderchest to help get him out of spawn.
don’t go into the nether right away. spawn nether is a guaranteed portal trap, and close-by to nether spawn is extremely risky, especially nowadays. at around 2000 blocks overworld minimum, you’re probably safe to travel via nether, but be careful.
use the nether highways! the nether highways, like the overworld highways, are on every 0 coordinate and diagonal coordinates, as well as a few ring roads. this is the easiest way out of spawn. but dont carry important stuff on you, as people do patrol the highways to kill new players.
if you dont want to escape by yourself, baritone is your best friend! this may be an impact-only thing, though. in chat, do “.b goto [coordinates]” (without the quotation marks) so for example: “.b goto -420 69 1000″ and the bot will move to those coordinates without your input, while you can go afk as it moves.
20000 blocks is the safer zone, but its still spawn territory. anything under 10k is bound to get griefed, and you may run into players. 10k to 20k is fairly safe, but still bound to get griefed. around 50k is the minimum for you to be making a permanent base, but even then, its very VERY smart to go 100k or farther out.
step six: outside spawn
so you’re out of the major spawn area… now what?
find food, farm food. get as much food as you can, thats the most important thing to do at this moment. make sure you have as much food as you could need, and store some in your enderchest.
make a temporary base. you can make a small house, a hole, or even just a dirt hut. just make sure you have a place to store all your extra stuff, and a place to stay for now. (sidenote, don’t put a nether portal right beside your house.)
find or make a bed. later on, beds aren’t a big deal, but at first they definitely are. try to find or make a bed, and set your spawn somewhere. i’d suggest hiding the bed somewhere near your temporary base, but don’t make it visible.
get geared up. use your xray and get some diamonds, look through dungeons or go fishing for enchanted books, make yourself tools, etc. its best to get what you need now that you’re out of spawn.
go fishing. you can get food, enchanted books, xp, etc. going fishing is actually super useful. the autofish hack is your friend right now. but don’t go afk when fishing, you can get kicked for it.
visit nether highways. if you have nothing on you, theres a small chance a high-level player could stumble upon you, take pity, and give you stuff. just make sure to be cautious the entire time, and make sure to put anything you get into your enderchest. this may not work as well anymore, since lots of players now seem to resort to killing rather than giving. but its worth a shot!
step seven: last notes
some last little tips and tricks you should know before jumping in!
make a goal if you haven’t already. if you wanna be a nomad? plan where you’re gonna wander. if you’re gonna make a huge base? plan where to build it and go out there. if you’re gonna go visit monuments? figure out which ones and their coordinates, and start walking. gonna join a group? figure out which one would be safe and fun to join, and try to get in.
get as far from spawn as possible. unless you wanna stay near spawn, try and get 100,000 blocks away or further. and if you really wanna keep a base intact, do NOT stay near any of the major highways.
take lots of screenshots! screenshots of cool bases, signs, anything! and dont forget to grab coordinates of every cool thing you screenshot as well. who knows when you’ll want to revisit those things in the future!
if you wanna be a nomad… travel in circles around spawn! 10k out in a circle, 20k, 15k… however far you feel like! you could also go back to spawn, and take a highway completely out as well! just… explore. have fun with it! make sure to read signs!
if you wanna make a group… collect all your friends who play on the server, or anyone who just seems trustworthy (psst.. like me…) and form a group by yourself! while you can join pre-existing groups, the real fun of having a group comes from shared bonds and trust among members!
visit some monuments! its very fun to go exploring, and especially to explore around important places. for example, theres wrath outpost, which is inside spawn, or ziggytown, which is close to spawn. you can just search up coordinates, and most times you’ll be able to find coordinates to whichever famous place you want to visit.
if youre interested in 2b2t lore, dont just watch fitmc! there are a LOT of other 2b2t creators! some of my personal suggestions is salc1, fastvincent1, and barrendome (not me, the youtuber!) id also suggest thecampingrusher’s videos, they genuinely show an interesting side to the server and the rusher war. a few more story oriented things are thejudgeholden’s 2b2t comic, and the 2b2t chronicles on youtube!
if youre interested in 2b2t history, heres some other sources with some really good stuff! this will be updated as time goes on. all the youtubers mentioned above have very good 2b2t history content, but theres also places like the 2b2t blog that have a lot of cool history on it! theres also a couple of 2b2t wikis, like these ones, but theyre community led, so some information on them may not be 100% correct.
have fun! as rough this server can be to play on, theres a lot of cool stuff you can find, and its important to find joy in the chaos!
i hope that this guide served to be a bit more useful than my previous one!
i STILL may have forgotten things even during the revamp, so feel free to send me anything i missed! but i hope that everything i was able to write down will be enough to help anybody that wants to join 2b2t.org, the oldest anarchy server on minecraft!
#2b2t#2builders2tools#anarchy server#minecraft#mineblr#minecraft server#mcyt#fitmc#barrendome#salc1#minecraft guide#and after a year i still dont know what to tag this as.
155 notes
·
View notes
Text


My first picture used a lot of special effects.
170 notes
·
View notes
Text


Close enough, welcome back Pippa Fitz AMOBI
#Emma Myers#pip fitz amobi#pippa fitz amobi#agggtm#a good girl's guide to murder#minecraft#Minecraft movie
90 notes
·
View notes
Text


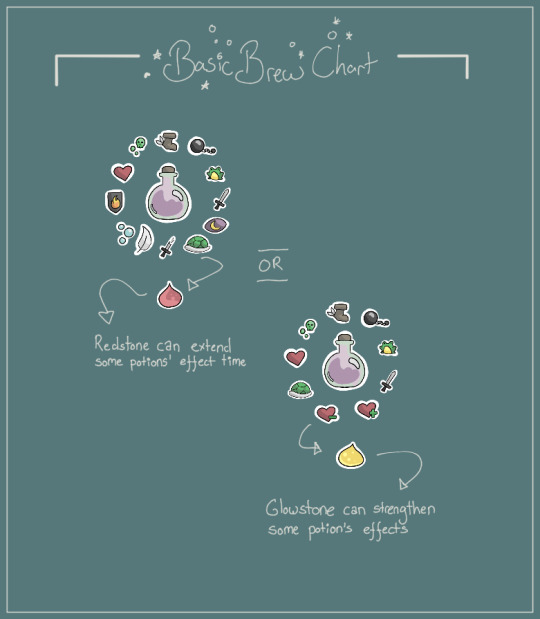
Basic Minecraft brew chart - perhaps a text version to copy/paste into in-game-books soon?
#mineblr#minecraft#minecraft oc#minecraft tutorial#minemath#video games#minecraft related#game guide#minecraft guide#ibispaintdrawing
317 notes
·
View notes
Text

*snort*
432 notes
·
View notes
Text

Mini Grapes (but also vigilante au?!)
#animation vs minecraft#avm#avm green#avm purple#orange's guide to dealing with vigilantes#ogtdwv#avm grapeduo#alan becker
143 notes
·
View notes
Text
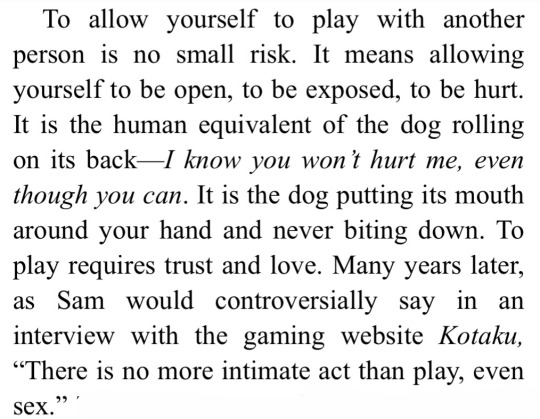
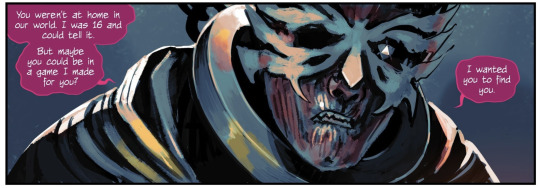
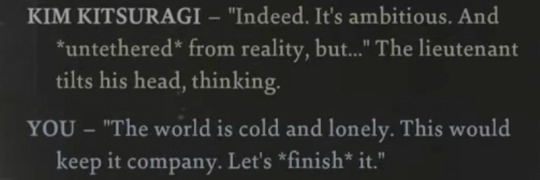

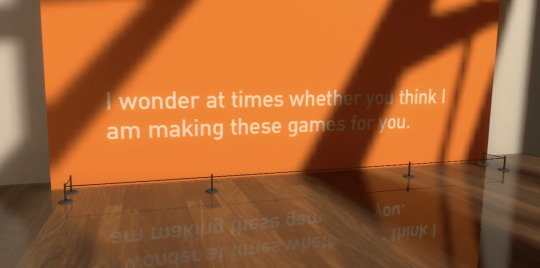


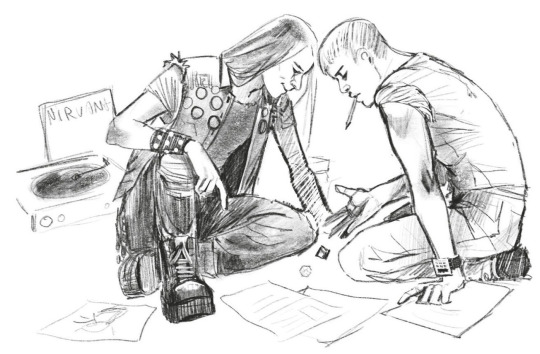
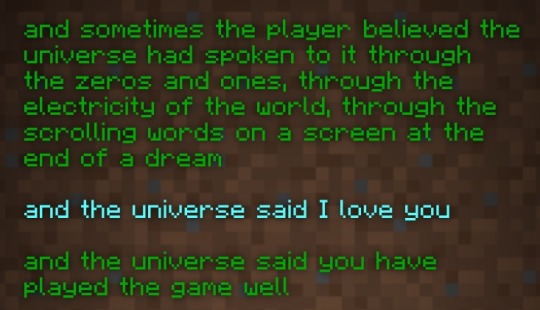
GAMES AS INTIMACY
Tomorrow and Tomorrow and Tomorrow, Gabrielle Zevin // DIE, Kieron Gillen and Stephanie Hans // Disco Elysium, ZA/UM // Existenz (1999) dir. David Cronenberg // The Beginner's Guide, Everything Unlimited Ltd // Tomorrow and Tomorrow and Tomorrow // Black Mirror "Striking Vipers," Charlie Booker // DIE concept sketches by Stephanie Hans // Minecraft End Poem, Julian Gough
#THIS HAS BEEN IN THE WORKS FOR A WHILE FUCK IT LETS POST#please support my only love having gay video game sex#tomorrow and tomorrow and tomorrow#die comic#disco elysium#existenz#the beginners guide#black mirror#minecraft#warlock wartalks#web weaving
896 notes
·
View notes