#London camera store DSLR
Explore tagged Tumblr posts
Visit Tumblr Blog
Explore Tumblr blogs with no restrictions, modern design and the best experience.
Last Seen Tumblr Blogs


Fun Fact
In 2020, 27% of US Tumblr users had an annual household income of over $100,000.
Text

0 notes
Link

Nikon DSLR Camera at Justclik. Buying online today at lowest price with free and fast shipping across UK. JustClik Limited - Trusted online electronics store in UK offering a large selection brand new Nikon Digital SLR so you can buy with confidence.
#Nikon DSLR#Buy Nikon DSLR#Online Nikon DSLR#Online Camera store#Camera Store#Best Camera Store#Uk#justclik#DSLR Camera In London#London#Camera_London#Wales#Digital SLR Camera#Online Electronics Store#Nikon DSLR Camera#photography#Camera_Lover#camera
0 notes
Text
Project Critical Evaluation
100419
Project Title
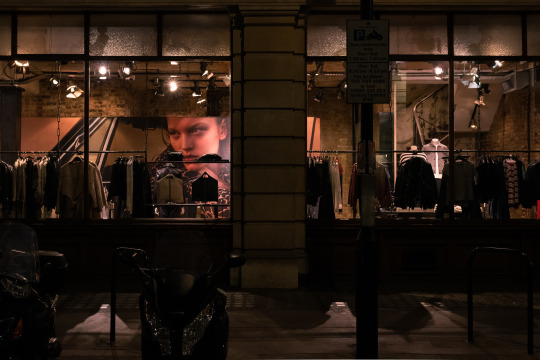
The title ‘Object / Fetish’ remained a constant throughout my project. It is a play on the terms ‘objective’ and ‘commodity fetishism’.
Subject
The Roland Barthes essay ‘The Rhetoric of the Image’ 1964 and David Campany’s critique of the subject matter provided the basis for my study. Retailers impose commodity fetishism upon consumers in the pursuit of commercial gain by making their products deceptively appealing. I decided to photograph store windows in the retail districts of London to comment upon this issue. The final outcome deviated from my proposal due to the observations that I made as each shoot progressed.
Aims / Objectives / Concept
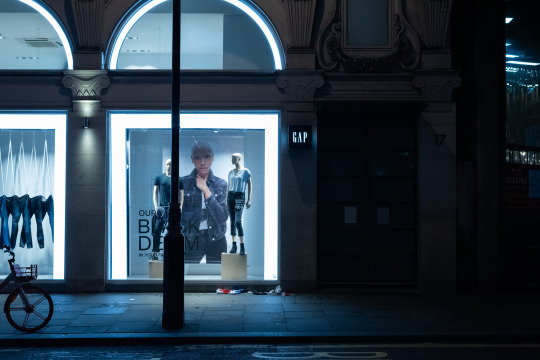
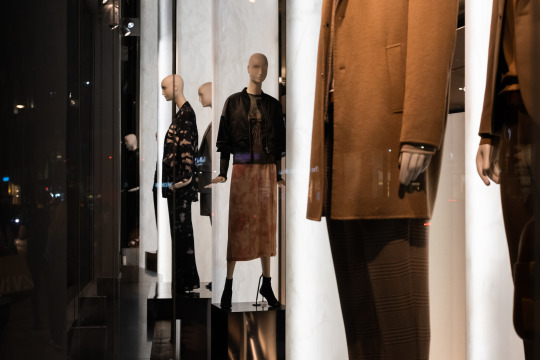
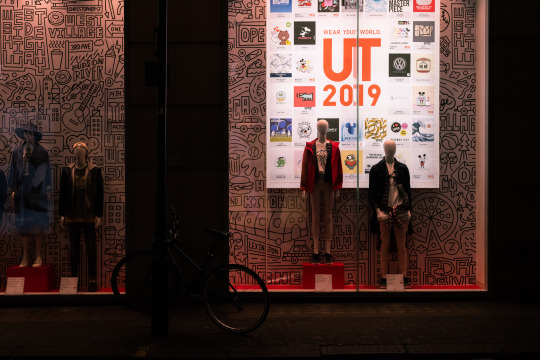
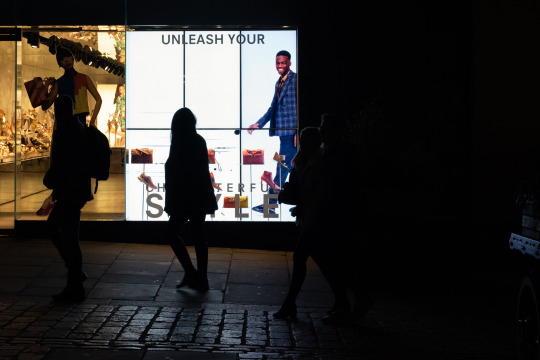
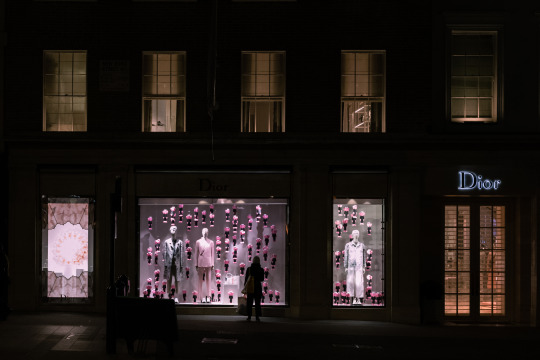
My initial objective was to reveal the realities of luxury products and the devices that retailers employ to make them appear aspirational. Oxford Street and the surrounding areas became my main location of interest. I had a brief diversion into China Town to photograph products that may be perceived as kitsch to parody luxury items. Given that our brief specified a final edit of five to nine images, I felt that these would be a distraction from the overall theme. Patterns began to form in my photographs due to the conformity of each store unit and the fluorescent presence of their signs. The function of this urban landscape is historically commodity fetishism. I felt it was fitting that the dimensions of the space, such as pavements and central islands in the roads, dictated the composition that I produced. Furthermore, the LED panels in store windows meant that many of my pieces recontextualise and distort the photographs that appear inside them.
Form / Medium / Presentation
My Nikon D750 is a full frame DSLR camera. It has an aspect ratio that resembles 35mm film and I decided to maintain a landscape format throughout the project. I collated in excess of 150 photographs over three evening sessions. The editing software Lightroom was useful to catalogue these images into collections, which automatically record the time each was made. I added a further detail, which was the location of each shoot. A simple blue tag was placed onto any photograph of interest and a collection was made that brought these all together for consideration.
An aperture of f/8.0 was a consistent choice to ensure that most of the detail I captured was sharp and in focus. Since I wanted minimal motion blur, I worked in ISO 3200. Many of the exposure histograms of my photographs were in a well exposed range. The main edits that I made in Lightroom were the addition of +30 contrast and -30 highlights. This was to counter the brightness of signs and panels. Clarity +10 was added with luminance +20, a step added to correct any digital noise that might have been problematic. Patch tool was used a few times to remove distracting reflections in areas of total darkness. Finally, lens correction and the transform modules were useful to align the horizontal and vertical features within each photograph. If any of the horizons or store features were skewed this would have been distracting. My production journal comments on specific colour saturation preferences.
Prior to printing, each image was sharpened in Photoshop with the unsharp mask function. A white border was added because the printer was not able to produce full bleed photographs. As a consequence I feel that the borders actually add to each piece, as the white contrasts the colours on display making them appear bolder. Their lustre finish is also complementary to the fluorescent nature of the works.
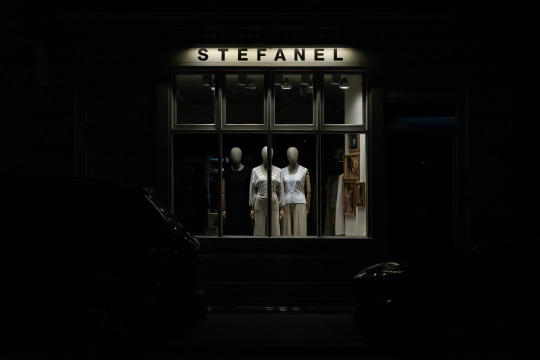
Mock up versions of each piece were printed and cut out to allow colleagues to suggest their interpretation of the final edit. Since every image is the same aspect ratio and in landscape it was a challenge to present them as a montage. A single linear formation worked well; however, since they appear all at once compositional choices regarding form, line, colour and subject matter determined their organisation. I would like to propose a book format for the final piece with the photographs appearing in linear chronological order. This would allow the viewer to appreciate each piece without distraction. Interestingly, they actually group in a sequence of three store windows with mannequins, three photographs being photographed and a final three that tie these themes together. With further time and budget the photo book would have many more entries and there would be a possibility to add the time and date as captions.
Research
The works of photographer Rut Blees Luxemburg appealed to me the most during our opening lecture. She was of particular interest to me given that she is a former Westminster graduate student. The main attraction of her take on street photography was her use of colour to imply the intonation of each piece. The Deutsche Börse Photography Foundation Prize 2019 nominee Mark Ruwedel became another reference for his objective study on the effect of historic and political agendas on a physical landscape. There was an implied parallel to my project and photographing a shopping district. Recontextualising a photograph became another theme of my series. Sherrie Levine and twins Doug and Mike Starn have approached this subject in their artwork. Please refer to my production logs for more information.
Working Edit
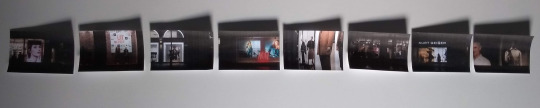
Final Edit


1 note
·
View note
Text
Buy Nikon DSLR cameras online in London.
Click your best moments of life with Nikon DSLR cameras in London from "Sunrise camera", an online store for a wide range of cameras, Lenses and accessories.Shop now for the best deal, Order Now!
0 notes
Text
London Travel Tips for an Affordable and Joyful Visit
London is one of the most beautiful cities famous for its technical achievements, elegant structures, breath-taking skyscrapers, delicious cuisine, and fashionable lifestyles. London offers countless things to adore, enjoy and relish. For an exciting holiday trip to London, you must have plenty of amounts as the city is highly expensive. But it never means that it is inaccessible for an ordinary person. In this article, you can get London travel tips that can make your vacation affordable and enjoyable.

· No Overloading
Everyone finds it difficult to plan a vacation to London. Packing is the first step in travel planning. Avoiding overloading your luggage is a sensible idea because you will have to pay for excess luggage at the airport. Only necessary items should be brought, such as clothing and a DSLR camera, as well as necessary chargers for phones, cameras, and laptops, as well as essential documents such as a passport and ID evidence. Lightweight luggage not only saves you money but also allows you to be stress-free and conveniently transport your belongings from one location to another.
· Post-flight Booking
Never understated the post-flight travel. Traveling experience is dependent on the post-flight journey. Switching to comfortable and reliable transport services can amplify your holiday experience to the next level. In London, you can easily get top-rated BMW, limousine, Bentley, Rolls-Royce, and luxury Mercedes S Class Hire for a pleasant journey. Chauffeur-driven car hire services are relaxing and stress-free as your chauffeur will manage your luggage and drive you safely to your destination.
· Accommodation
Whether you're in London for a business trip or a vocational tour, you'll need nice lodging with a pleasant environment and reasonable prices. Rather than staying in a costly and luxurious hotel, book a simple short apartment with a clean room, shower, and linen. You can extend your stay without hesitation at these low-cost hotels, which is nearly difficult if you live in more expensive areas.
· Cheap and Delicious Food
In London, you can eat well enough without spending a fortune at costly restaurants and hotels. There are several street meals or food trucks in London, including the central market outside Big Ben, Berwick Street market, Brixton Village Market, Lower Marsh Market, and many more where you can feel the taste of London.
· Places to Visit
London has a lot to offer, and you don't have to spend a lot of money to enjoy it. There are numerous famous and lovely attractions that you can visit for free, such as natural parks, museums, sanctuaries, botanical parks, zoological parks, the National Library, National gallery, the British Museum, London's tower, and the Central Market. You can visit these well-known locations in your luxury Mercedes S Class Hire from a private vehicle transfer service.
· Affordable Shopping
Although London is an expensive city, this does not prevent you from shopping at a lower cost. There are several places where you may purchase quality clothes at lower prices, such as Oxford Street, High Street Shop, Camden Market, and shopping outlets stores. These are the ideal places to go for branded but low-cost shopping.
1 note
·
View note
Text
#5yrsago BRING ME THE 3D PRINTED HEAD OF CORY DOCTOROW

A couple of weeks ago, the nice folks at Sample and Hold asked me if I'd like to drop into their east London studio to get my head 3D scanned. Not long after, my daughter's school shut for a professional development day, so I took the opportunity to bring us both down to Dalston for a 3D scanning adventure.
What followed was the most cyberpunk experience of my life, straight out of a William Gibson Sprawl novel. The Sample and Hold studio is at the bottom of a vibrant market where hand-lettered signs offer cheap money-wiring to Ghana and Nigeria amid stalls with huge displays of fresh fish on ice, dotted with more stalls selling astoundingly off-model cheap toy knockoffs -- Dora the Explorer toys that look like they cast from molds sculpted by someone who was working from a description conveyed over a crackling phone-conversation, Transformer robots that turn into random kitchen appliances and stylized skulls, logoed tees whose Disney characters look like they spent a turn in a toaster oven.
At the bottom of the market, we found a big, rotting warehouse building with a (loud, excellent) Jamaican record store on the ground floor. Ed from Sample and Hold led us up the dim, worn stairwell where there a telltale wisp of smoke spoke of one of the artist's studios where Friday night was starting early. Ed's studio was a spacious concrete box with blackout curtains and cheap desks. Half the room was taken up with a gigantic "scanning" array: a cluster of DSLRs on stands, arranged in a rough, careful sphere around an adjustable stool on a handmade wooden turntable. Next to each DSLR was a large white LED panel, all wired to a laptop on a stand.
Ed and his partner sat us each on the stool and clicked the laptop, causing all the cameras and all the light-panels to fire at once. They shot several exposures, before switching to a more traditional laser-based scanner to do the tops of our heads. Within minutes, we had a low-rez render, stitched together in software from the DSLR exposures. The Sample and Hold folks explained that a full render would take a couple of hours for the giant tower PC under one of the desks to run. They showed us around the studio, letting us see the art pieces they made, and the museum pieces they'd copied for the British Museum to lend out to sister institutions around the world.
It was an exciting look at one of the futures of 3D scanning: stitching together bitmaps and inferring the 3D spaces they described.
Last night I got the first render of my head from them. It's just a hi-rez 3D model, without the bitmap skin that the DSLRs captured (that's coming later). I've popped it up on Thingiverse under a Creative Commons Attribution-ShareAlike license (it joins the earlier scan that I had done at the BotCave in Brooklyn, using a much lower-tech, more cumbersome laser scanner -- cool to see how much the technology has progressed!). Have at it!
Cory Doctorow's head
https://boingboing.net/2012/12/13/3d-scan-of-my-head.html
4 notes
·
View notes
Text


What kit should you buy?
Ok, so you're probably expecting me to recommend cameras, tripods, lenses etc. I'm not gonna do that.
There is tonnes of content on YouTube etc to tell you all about that stuff.
So I'm going to keep it simple.
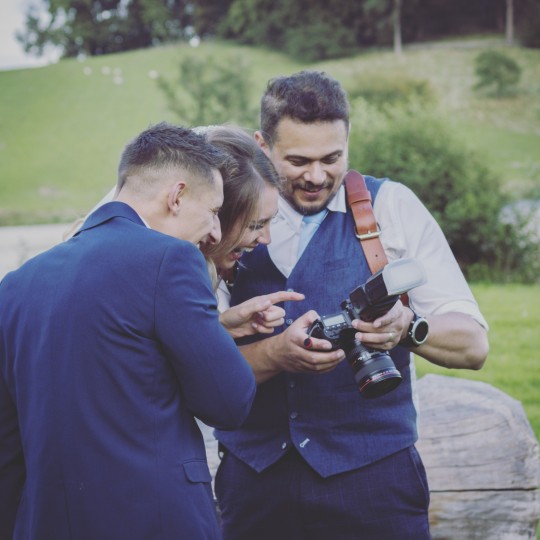
First, just scroll back up and spend a minute going through the images above. What do you notice?
I'm hoping what you'll notice are a few things.
I'm shooting different things within the images for different reasons or clients.
I have a fair few cameras (about 15 I think at my last count).
The cameras are all different. Why is that?
I'm carrying some kit on my person.
So, here is the thing.
You get to ask yourself the following questions.
What do I want to shoot?
How much kit do I want to carry?
Do I really need to carry all that kit?
So how much kit do I REALLY want to carry?
Do I want to generate an income from shooting?
Do I actually generate an income from shooting?
I have been a photographer for around 30 years now. Starting out as everyone does as a novice, then amateur, then enthusiast and progressed to a semi-pro (semi because I have another job I do I don't shoot full time but I do run my own photography and video business as well).
So my needs right now reflect the kit I buy. I've read loads of magazines with lovely flashy looking kit that I worked hard for to buy from my own day job wages. I spent a fortune. Then a year later, a new camera came out and my head was turned. Then I was lusting after that kit!
It's a never ending cycle where you can be bombarded with videos, reviews of kit and as you've probably learned,targeted adverts on Social Media.
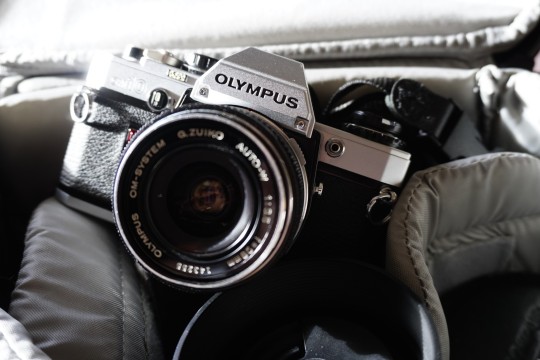
Now my film cameras are purely a purist thing and I learned on film cameras from being a very young kid. So I am attracted to the nostalgia of it. Yes there is something about film that is so super difficult to replicate on digital, but do clients demand shoots on film? Nope!
Only one client ever asked for a shoot on medium format film on my Mamiya 645 pro camera. They had a specific look they were going for. It's expensive and it takes longer to turn the images around.
Clients want high quality media that can be manipulated by graphic designers for ad campaigns etc. And they want it quickly. So digital has to be the most efficient way to go.
I've bought kit that I've used once then stored it away for years! I've learned since then.
For several years now I only buy what I need to get the job done to the high standards that I set myself and that clients demand. If I need kit I may only use once, I'll borrow from a fellow pro shooter or I'll hire it.
So if you're not making money from your photography and unless you have more money than sense, don't waste your money on buying the best money can buy.
On saying that if you buy cheap 'tat' you'll be disappointed and buy twice.
Buy the kit you know you'll use often if you're a hobbyist, or if you want to take photos better than a smart phone can.
Remember also. You have to carry it.
I only buy stuff for my business now that I know I'm happy carrying and gets the job done. I'm fit and healthy but I'm also in my late 40s now and I've put my body through a lot of stuff over the years such as a motorbike accident, bashed about in full contact martial arts and other daft stuff, so wear and tear starts to kick in. Don't buy shit loads of kit that you'll have to carry and either injure yourself or just leave at home because it becomes a chore to carry it.
The best camera in the world is the one that is with you at the time. A £10k Leica with a Summicron lens sat at home in the drawer is useless at that point because it's not with you when you find that photographic opportunity.
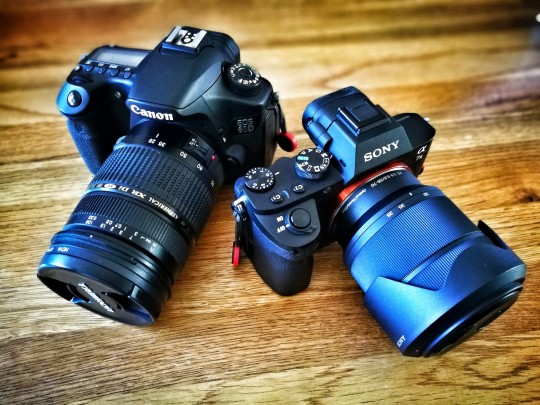
So I have been switching out from DSLR to Mirrorless cameras for the last 2 years now. I'm not gonna harp on about what brands. It doesn't matter. Find what works for you.
Finally I'd like to share with you the two most important things that I've invested into my photography that supercede any fancy kit:-
Time and mentorship/lifelong learning.
Time and Mentorship.
By time I mean putting time into practising. No amount of YouTube tutorials or books will improve your photography if you're not putting the practice in. Shoot as often as you can. Practice with light, play with it.
Learn the limits of your kit and learn your own limitations and then fill the gaps by committing to learning for the long haul.
Not one successful photographer worth their salt believes they know it all. The world's best photographers have committed to life long learning.
Leads me onto the last thing.
I currently learn from many sources. Yes I'll admit, the odd YouTube video on editing techniques as software continues to develop. I'm a Pro member of the Photographer's Guild so I have access to all sorts of workshops and learning there.
I am a member of Karl Taylor Education and I've studied with Karl's many products for about 7 years now and I pay a subscription to access his classes.
I have paid to work with some leading industry photographers such as Gary Wallis from the London Photography Institute, Steve Howdle (Elinchrom Ambassador) and the Late Andrew Appleton (Former Photographers guild panel judge and very well respected photography coach and teacher).
I have developed connections with other professionals in my area and I will work with them on projects in and out of the studio.
We'll share tips and go out to other cities to shoot together or shoot together in the studio.
I'll take myself off to London for the day to shoot and I'll get into the less touristy areas of London to do this. It's a 200+ mile trip each way for me but I'll go to the effort of hopping down for the day several times a year.
The point I am trying to make here is there are always opportunities to learn. I have had to invest time and money into them all.
However, I've learned so much that when I look back it amazes me just how far I've come and what I have learned.
Just as with anything. Improving your skills requires time and commitment.
So to summarise:
Decide what you want to shoot and where and buy the camera and kit that suits that.
Travel as light as possible. Develop your knowledge before spending lots of money on more kit.
Find a mentor and ask them to help you. It might cost you money, it might not, but it's a worthwhile investment. It's massively accelerates your learning curve, cutting down your learning duration by years. If someone told you to learn your current job from YouTube videos and books how long would it take you to become proficient at it? Compared to on the job learning/training, learning from people around who are already experts at that job? It's the same principal when you work with a good mentor. Once you have the knowledge in it weighs nothing and the more you use what you've learned the stronger you become in you're art.
As usual, if this post has been of use to you, please hit the like button, subscribe for more content and fire any questions you have in the comments below.
Speak soon.
Regards.
Neil.
#whatkit#improving#Photographymentorship#whatcamerashouldibuy#whatphotographykit#learnphotography#learn photo editing#shouldibuyapropercamera
0 notes
Text

https://www.blackrockdigital.co.uk
0 notes
Text
Top 3 Canon DSLR Camera In 2021 | London | UK
Top 3 Canon DSLR Camera In 2021 | London | UK
1. Canon EOS 1D X Mark III Body Canon EOS-1D X Mark III DSLR is being engineered and designed using feedback from the worldwide community of EOS-1D X and EOS-1D X Mark II photographers. When using this camera, professionals will have the confidence they will get ‘the shot’ and can deliver it at a competitive speed – faster than ever before – ideal for the increasingly fast-paced industry. The…

View On WordPress
#Canon EOS 1D X Mark III Body#Canon EOS 5D Mark IV Body#Canon EOS 5DS#Digital SLR Camera#Online Electronics Store#Top 3 Canon DSLR Camera#Top 3 Canon DSLR Camera In 2021#Top 3 Canon DSLR Camera In 2021 | London#Top 3 Canon DSLR Camera In 2021 | London | UK
0 notes
Text
The COVID-19 pandemic lockdown provides ample opportunity to reflect on what I am doing, how I am doing it and what I am doing it with in photography and video, and this time I am considering portraiture, close-ups and extreme macrophotography with the Venus Optics Laowa 65mm f/2.8 2x Ultra Macro Apo Prime Lens for Fujifilm X-mount cameras.
Fujifilm X-T3 with Venus Optics Laowa 65mm f/2.8 2x Ultra Macro Apo Prime Lens for Fujifilm X-Mount Cameras.
It has been a very long time since I had the pleasure of making photographs with macro lenses, dating back to my art student days when I first explored portrait photography with the school’s Nikon F and F2 cameras and Micro-Nikkor 55mm and 105mm macro lenses.
Nikon Micro-Nikkor 105mm f/2.8 manual focus, manual exposure macro lens.
Nikon Micro-Nikkor 55mm f/2.8 manual focus, manual exposure macro lens.
The legendary Nikon F3 electronic shutter-equipped 35mm DSLR with Nikkor 50mm lens, one of three Nikon cameras I owned over the years including the Nikon FM and Nikon F.
Both lenses’ extreme close-up capabilities were a revelation and I soon took up portrait photography seriously, eventually leading to a career in magazine editorial portraiture after moving to Sydney.
I did not invest in my own macro lenses despite owning a Nikon F3 for use with borrowed ultra wide-angle and long telephoto lenses as assignments demanded.
Instead, I mostly relied on one of my view cameras for portrait photography, choosing either a 210mm, 135mm or 90mm large format lens with 4″x5″ Tri-X or Ektachrome sheet film, Polaroid Type 55 instant positive/negative film or 120 roll film in a variable format magazine.
I still find shooting portraits in 3:2 and 2:3 aspect ratios irritating, mitigating against perfectly designing an image to fill the frame especially when aiming for a magazine cover, a double-page spread or a full page intro image to be supplemented with close-up detail images of a portrait subjects possessions and environment.
I so wish Fujifilm would provide its X APS-C series cameras with a choice of suitable aspect ratio frame guides in 3:4, 4:5 and 6:7 in portrait format and thus 4:3, 5:4 and 7:6 in landscape format as it does with its GFX medium format cameras.
My view cameras allowed me to use non-macro lenses with the bellows racked out to frame faces beautifully, using tilt, swing and shift camera movements to choose the precise points of the face upon which I wanted readers to most focus their attention.
My 210mm Schneider lens threw non-crucial features of face and background into a range of lush and mushy greys, a useful trait given I had to work with a variety of environments many of which had little useful to contribute to my portraits.
Small, often-messy inner-city office environments and limited back space further motivated me to rely on my set of Broncolor monobloc flash units narrowed-down with mesh grids and barndoors close to my subject, in combination with Polaroid Type 55 for its rich tonality when correctly exposed for the negative at 12 ISO.
All my analog photography equipment, with the exception of my Leica M-Series rangefinder cameras and lenses, was stolen from a Mayfair share studio during my second stint in London.
I don’t miss analog photography and the attendant severe photochemical dermatitis I acquired after a couple of decades of processing and printing my own colour and monochrome work, but I would love to come up with an affordable way of working in digital photography that is as close as possible to how I used to create my magazine editorial portraits.
One big thing that working in 4″x5″ taught me, especially when shooting close-up portraits with little to no depth of field, is that deadly accurate focus on the tiniest of facial features is crucial and auto-focus cannot be relied upon.
Manual focus is the way to go in my humble opinion, and I have learned that the best lenses to do that with is either fully manual primes, or zoom or prime lenses with manual clutch focus and dampened hard stops at near and far.
Unfortunately, Fujifilm has chosen to make only X prime lenses with that option, in 14mm, 16mm and 23mm, and not in the longer focal lengths required for non-environmental portrait photography.
I still find focus-by-wire-only lenses somewhat challenging for ultra-fine focusing, and so my interest was piqued when I spotted the Venus Optics Laowa 65mm f/2.8 2x Ultra Macro Apo prime lens online this morning.
I have not had the pleasure of trying out any of of Venus Optics’ lenses though I have read reviews of their ever-growing set of lenses with interest over the years.
If I am lucky, I may be able to find a retailer in Sydney that has this particular lens in stock so I may try it out, though the ongoing reduction in local camera retail stores is a worry.
A foray into our nearest shopping centre on the weekend revealed that the last camera store there has fallen victim to COVID-19 and I suspect more will join it soon.
Considering the Venus Optics Laowa 65mm f/2.8 2x Ultra Macro Apo Prime Lens for APS-C Fujifilm X-Mount Cameras The COVID-19 pandemic lockdown provides ample opportunity to reflect on what I am doing, how I am doing it and what I am doing it with in photography and video, and this time I am considering portraiture, close-ups and extreme macrophotography with the Venus Optics Laowa 65mm f/2.8 2x Ultra Macro Apo Prime Lens for Fujifilm X-mount cameras.
0 notes
Text
Photo police
Hello, and a warm and glorious #TravelTuesday to you all! I’m Dave Williams, I’m here every Tuesday, and I have some notices for you to begin: –
My new class is out on KelbyOne! If you want to create a cinematic look for your drone photography, go check it out!
I’m delivering a Photoshop Masterclass on November 14th in Hatfield, UK. Bag your ticket right here.
And, I’m hosting a webinar all about travel photography on the Facebook Group, Photography and Photoshop, this Saturday. Full details are here.
Finally, being unable to run a Photowalk this year for WWPW, I’m teaming up with my brother from another mother, Peter Treadway, to run a walk in London on November 18th. There are prizes on offer from KelbyOne, Platypod, and BlackRapid. Full details are here.
So, on with the show! Now, the title here is ‘photo police’ because recently I had an experience with Peter whereby we were chased down. I still get a little emotional if I’m honest, so bear with me while I recall this traumatic experience.
We were in Gatwick Airport in the UK and Peter was making a video. He had his DSLR attached with a Joby Gorillapod to the top handle of his roller case and was basically just shooting our journey through the airport, which he would then speed up in post and use as B-Roll footage to a wider, much more epic video. Whilst we were walking through the duty free shop we heard a very nervous ‘excuse me’ coming from behind us, but proceeded on our route and thought nothing of it. The ‘excuse me’ became louder and louder, and nobody else was stopping to react so perhaps it was intended for us. I say us, I mean Peter.
We both turned and saw that indeed the ‘excuse me’ had been intended for us and it was coming from a whole medley of staff wearing different uniforms, one of whom was a manager and another was security. We were told that we weren’t allowed to film in this area, so being the polite and understanding chaps that we are, we agreed to stop immediately without question. What happened next was strange… we were asked to delete the footage. We both took a brief glanced at each other and in sync we shook our heads and said, ‘No.’ I explained that, albeit we were on private property, an airport here in the UK is treated as a public place owing to it’s right of access, and there were no signs visible as a condition of entry stating that we were not allowed to take photographs or make video. After all, there are hundreds of people taking selfies and making videos in the airport all day, every day, and we weren’t making the video for anything other than personal use.
Wanting to avoid confrontation we started to walk away, but were told again to delete the footage. Once again we were told to delete the footage, once again we refused, but this time we were told that they were going to get the police involved. Both of us clearly thinking ‘yeah, sure’ we walked away again but this tie committed. You’ll never guess what happened next…
So, we were in Starbucks where I was fuelling up and getting my caffeine fix when out of nowhere two officers approached us, asked us about our video, and to whom we gave a detailed and frank explanation. The two of them had no problem whatsoever with the explanation we gave, were quite understanding, and tried to spin the reason for stopping us from a public safety point of view. I mean, I understand that there are of course safety implications, but realistically they wouldn’t come from the two of us quite overtly filming with a big rig whilst each hauling what was clearly camera bags.
The point is this: – the ‘photo police’ is a thing, and we see it all too often with tripods, so where do we draw the line? At what point does a sign expressing that no drones are to be used, for example, become enforceable? At what point does it need to be obeyed and at what point does it need to be merely considered. In Halstatt, Austria recently there were ‘no drone’ signs all over the place, but on checking the airspace in the area it was clear that these signs were effectively meaningless and they had just been put up by the locals. Similarly, the manager in this duty free store simply didn’t like the fact that we were filming – it wasn’t anything other than that. He didn’t have a firm understanding on what his position was, nor on what our rights were not only as photographers but as ‘members of society’ when he insisted we delete the footage, and subsequently got the police involved in his incorrect actions.
I guess it’s all something we need to accept as photographers, and to that end it’s important that if other people don’t understand the rules then we need to make sure we do. We need to know the laws, rules and regulations for where we live and wherever we’re visiting so that we can properly and effectively deal with these kinds of situations.
And in that endeavour, I wish you luck!
Much love
Dave
The post Photo police appeared first on Scott Kelby's Photoshop Insider.
from Photography News https://scottkelby.com/photo-police/
0 notes
Text
Phantom Camera Hire Is A Matchless Opportunity-Know Why?
It was really impossible for us to see the beauty of this world without slow motion and high-speed cameras. Isn’t it amazing to see the world through a lens? These high-end devices capture reality quickly so that one can get a chance to witness some of the most frequent actions very easily. Even one can see every flex of the human muscle and tiny ripple in cloth with naked eyes. New Phantom Slow Motion Camera is designed for broadcasters so that they can take incredible moments in the speed games and can be slow it down to 90 times to have a clear view of the action.
The Phantom VEO Camera Hire has 2K sensors which record high-resolution images at approximate 1450 frames per second and comprise 32 GB DRAM for storage and dual SDI-HD ports on the board. Just like its predecessors, VEO can simultaneously capture slow-motion clip and playback it later. This is all because this high-end camera is designed for the constant filming action instead of pausing it to swap out drives. Asides from that, unique segmented memory is an invincible feature which we can’t ignore. Due to this, we can store more than 60 clips in the memory at the time.
From traditional DSLR cameras, this high definition Phantom 4K Camera has undergone a serious change, it comes up with multi-matrix colour correction technique to the related the footage of Phantom with the regular speed cameras that broadcasters generally install alongside. After all, the intent of this camera is capturing glorious motion footage in the live events that sounds well. But, for the unusual click, the cost of this object is really high and more than your expectations.

The smart alternative to this problem
However, there is one more option, rental. Indeed, if you want to take a camera, lens, and crew on rental then there are several centres in Birmingham, Manchester, Bristo and London which provide this facility to people in easy rates.
Further, it is counted in responsible decisions. If a person acts smartly and instead of blocking his saving, he choose an alternative method which not only yields him a high-end return but also provide him an experience of the thing which he aspires to buy in near future.
Amateur photographers, students enrolled in advance photography courses and budding broadcasting agencies can take advantage of this offering as they can hire Phantom High Speed Camera like Phantom VEO 640S, Phantom VEO 4K, Arri Zeiss Master Prime lenses, Arri Alexa Mini, RED EPIC-W 8K Helium, RED Scarlet-W, Arri Alexa Mini, Arri Zeiss Ultra Prime lenses and several other feature equipment in easy rates. So don’t lag behind from time, update yourselves and gadgets, you need in this business for your long stay.
For more info :- Panny Hire - Camera Hire London
0 notes
Text
10 of the Most Trendy Photography Apps
Photography has been democratised, and while that is a strong and bold statement, the evidence behind it is pretty much true. Anyone, anywhere around the world can shoot images at any given time. With the rise of Mobile Photography, you are able to instantly share your images with the world and receive feedback – via Social Media; making mobile photography a vibrant and thriving genre within the app industry.
Millions of people have taken up photography through their smartphones as a creative hobby. In June 2018, the number of monthly active users on Instagram reached 1 billion.
There are a variety of online forums (and social media accounts) that specifically showcase mobile photographers and artists. Offline mobile photography groups organise exhibitions, photo walks, etc. And due to the popularity of the specific market, mobile photography has also become a new avenue for visual advertising.
On both the iOS and Google App Store, there are many different types of photo apps available to choose from. However, within the photography spectrum, you may only need three types of regular photography genre apps: camera apps, photo-editing apps, and photo-sharing apps.
Photography has been democratised, and while that is a strong and bold statement, the evidence behind it is pretty much true.Click To Tweet
Some of the best of all three tool types available on both the Android and iOS platforms are as follows.
1. Adobe Lightroom CC
The simple interface and great syncing features of Adobe Lightroom CC, a cloud-based tool, makes it easy for you to manage and edit your photos from anywhere. It has many features, including RAW photo support, presets, and advanced editing tools. You can download and edit photos for free but you have to pay for advanced features and photo syncing for example.
2. Adobe Photoshop Express
Adobe Photoshop Express gives you access to Adobe’s library of great editing features. The app also allows you to shoot and process RAW images directly from your phone. It offers in-app purchases for advanced pro features.
3. Snapseed
Designed by Google, Snapseed is a popular photo-editing app that not only has everyday photo-editing features, but also advanced features, such as selective editing and the healing tool. Snapseed is completely free with a simple-to-use interface, great for beginners and pros.
4. VSCO
The photo-editing app VSCO has one-tap filter presets that make your photos seem like a classic film. VSCO has many editing tools, preset packs, a built-in camera with manual controls, and a photo-sharing platform where you can publish your images and engage with other photography enthusiasts.
5. Afterlight 2
Afterlight 2 is a full-featured photo editor with RAW support. It has all of the top basic photo-editing tools, built-in filters, and frames; you can create your own filters too. You need to pay only once, meaning it doesn’t have any extra in-app purchases or subscriptions.
Want to know how you will make money from your app?
Read our FREE guide
6. Lens Distortions
Lens Distortions, which is famous for its great plugins and apps for desktop devices, now has the Lens Distortions app. It makes your photos look even more realistic. The free version has five free filters, whereas the premium version has around 250.
7. ProShot
ProShot is an advanced camera app with auto and manual modes. It gives you full control over shutter speed, exposure, ISO, etc. It also has advanced features, such as time-lapse and bracketing. Using this app is almost as good as using a DSLR camera.
8. Facetune
Facetune is known as a selfie app. Its features include blurring imperfections, adjusting colours, whitening teeth, and even completely reshaping your face, which has been a hit amongst users.
9. Snapchat
Snapchat is not just a built-in social network based on photos, videos, and messages, but it’s also one of the best selfie apps. It has many fun features, but what makes Snapchat unique from other photo-sharing tools is that the received messages disappear from a phone in a few seconds, meaning personal messages are kept safe (unless someone decides to actually save your texts).
10. Instagram
The list wouldn’t be complete without the inclusion of Instagram. The photo-sharing app with 1billion users offers you another cross-platform option. It has many editing tools and filters and a direct messaging facility. You can also use it to find photos from a broad spectrum of genres and iconic celebrities. Apart from these, there are quite a few good photography apps made solely for either one of the popular app store platforms. Photography is a forever growing market and if you are in need of the perfect app. you’re most definitely spoilt for choice! If you have an app idea, Talk To Us today!
from Top mobile App Developers in London, award winning development https://thisisglance.com/10-of-the-most-trendy-photography-apps/
0 notes
Text
Asset Production (S5)
Sourcing the media:
The media provided for the magazine MUST be fully original. The types of media that my magazine will require are:
Cover designs - Inside Out - Front Back
Written journal style articles related to the topics and artists featured.
Questionnaires for the Q/A sections of the articles.
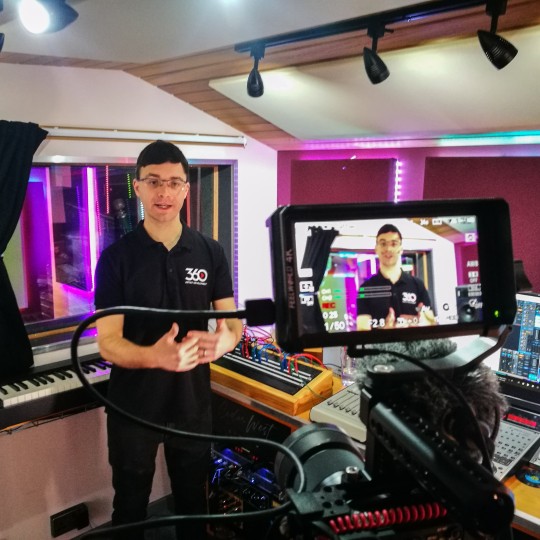
Photographs (taken by me) of their persona and areas of study/work.
Contributors’ artwork/photographs/other materials (copyright required).
Other assets (logos, artwork, photographs, location agreement form etc..)
Sourcing the materials required for the media:
For me to start creating the articles and the magazine itself, I will first have to gather as much material as I possible can, as well as make sure I do not take too long and leave the production stages until the last minute.
I will personally have to write up emails and get them sent to each one of the artists, students and businesses that I chose to be part of my magazine, and request a meeting that will involve a photo shoot, interview a quick talk with me about their chosen career. If there is any material that any of the contributors have created and it will be required to be used in the magazine, I will then create a Copyright Permission Form that will be sent to them through the Adobe Acrobat software, and will be sent digitally, followed by them signing it and sending a digital copy back to my email (this way, things become much simpler and there’ll no time wasted printing forms). Once this procedures will be over, I will then require them to send over the artwork and assets by email.
DSLR Camera - Canon EOS Kiss X5 - Clear high quality images
Gmail - Sending information over from place to place
Adobe Acrobat - Create forms (fill & sign tool)
Adobe Echo Sign - Provides statistics of the emails sent (paid membership)
Adobe Typekit - Provides Fonts (paid membership)
Adobe InDesign - Putting all the material together
BLURB.co.uk - Allows me to print and publish the magazine
Adobe Illustrator - Used for creating original artwork (in my case)
Adobe Photoshop - Allows me to readjust photographs quickly and efficiently
Printers & Paper - Allows me to Proof Print the magazine before submitting it to BLURB.co.uk
-------------------------------------------------------------------------------------------
QUESTIONNAIRES for the Featured Artists/Students
I firstly made a list of the most suitable people that I could feature in my magazine. They would be people who study/work in areas such as fashion, art, music, or have a unique personality that can reflect upon a certain culture or lifestyle (graffiti, for instance). I have written a series of different types of questions for the contributors to answer. This will allow them to talk about themselves and share their thoughts. All the answers to the answers will be published in the magazine.
How would you describe your style?
When did you start DJ’ing – and what aor who were your early passions and influences?
How many hours do you typically spend on a track?
If you could eternally be stuck in one year’s music scene, which year would it be?
What is one mistake you see a lot of up and coming DJ’s making? What advice would you give to aspiring DJ’s?
How do you communicate to your audience through your music?
What kind of projects were you doing when you first started studying Architecture?
How many projects can you expect yourself to be working on at once? Do you think it is a competitive industry?
How important is an innovative mind for such projects?
Would you say Architecture is a field for everyone?
What types of architecture do you prefer?
What are your long term goals in the Architecture industry?
What made you decide to pursue a career in fashion?
What do you think are the current and future trends in fashion?
How do you think your education is preparing you to work in fashion?
How would you describe your personal style?
What hobbies do you have that relate to the fashion industry?
What is the rewarding part for you in fashion?
What target audience would you aim for in 10 years?
How else do you present your ideas outside of clothing?
Talk to us about your experiences outside University.
-------------------------------------------------------------------------------------
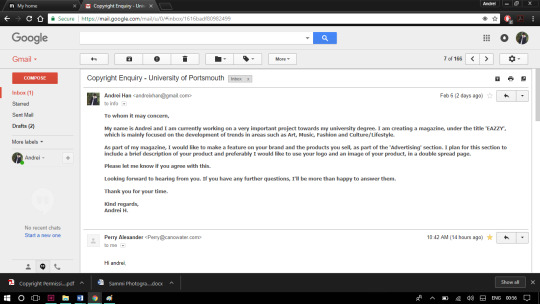
DRAFT LETTER FOR EMAILS -
“ To whom it may concern,
My name is Andrei and I am currently working on a very important project towards my degree. I am creating a magazine, under the title 'EAZZY', which is mainly focused on the development of trends in areas such as Art, Music, Fashion and Culture/Lifestyle. As part of my magazine, I would like to make a feature on ________. I would like to include photographs and an article about _________ as part of the _______ section.
I plan for this article/section to include a brief description of the works you share with the public, both in store and online, and evaluate how your brand kept it's reputation. If this is convenient for you, I would like to personally come to you and hold a 15-20 minute interview, as well as photograph your works.
The ideal date for this project would be ______________. I have attached a form, that includes further information about this project and the appropriate copyright measures. The form will be used as a backup, in case I may have to use some of your 'material' (e.g logo, photographs etc..) on your website, that has already been produced by either _______ (your brand) or other participants (e.g other employees).
Looking forward to hearing from you. If you have any further questions, I'll be more than happy to answer them.
Thank you for your time.
Kind regards,
Andrei H.”
-------------------------------------------------------------------------------------------
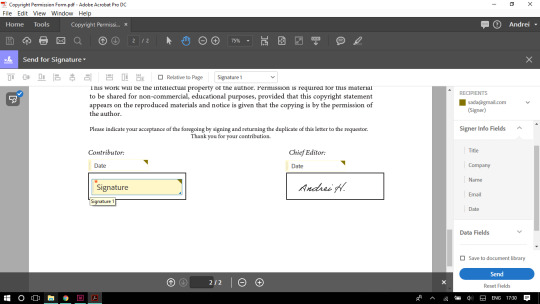
Copyright Permission Form
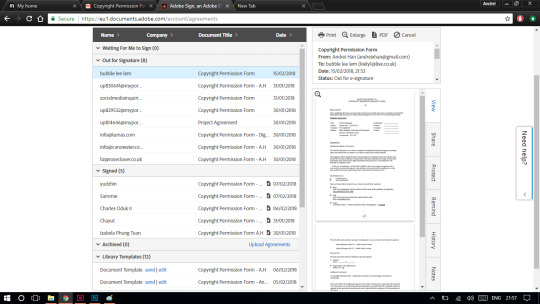
I have used Adobe Acrobat to create a Copyright Permission form. This template has been sent out using Adobe Echo Sign and contributors will be required to sign in the provided spaces.


By using the tools provided within Adobe Acrobat (Send for Signature), I managed to add signature and date fields. The email (including a title and message) can then be sent to the recipients by pressing the blue ‘Send’ button.
---------------------------------------------------------------------------------------
Adobe Echo Sign Statistics
This tool has allowed me to find out how many people have read(seen) or signed my emails.
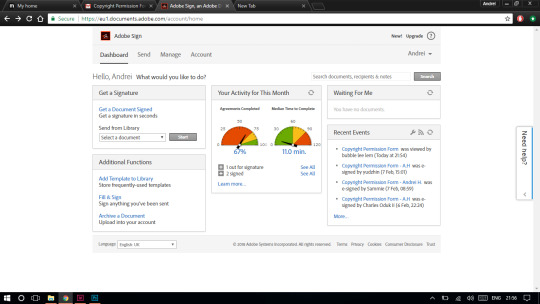
Down below, is the evidence that I have sent the email to multiple individuals. Some of them did agree, fill and sign my form and some did not.
-------------------------------------------------------------------------------------------
EVIDENCE OF CONTRIBUTORS WHO ALLOWED ME TO USE THEIR MATERIAL
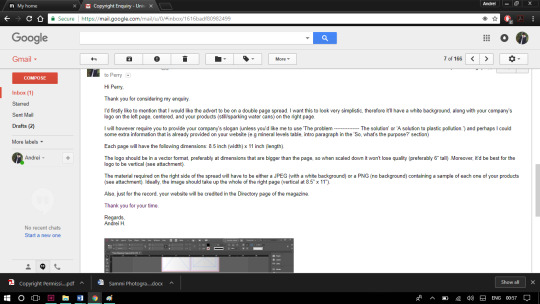
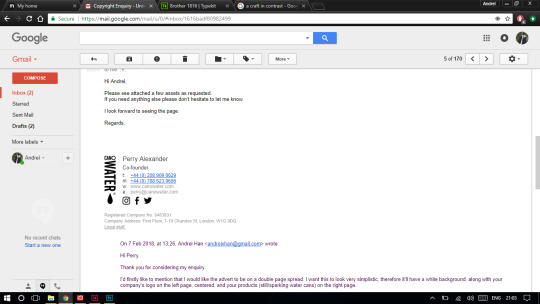
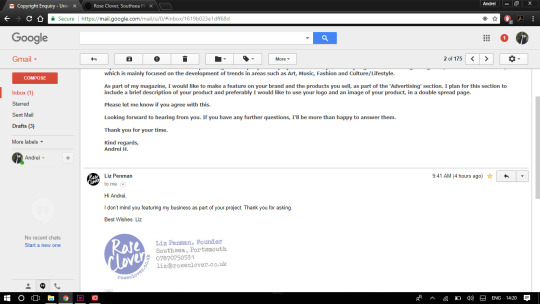
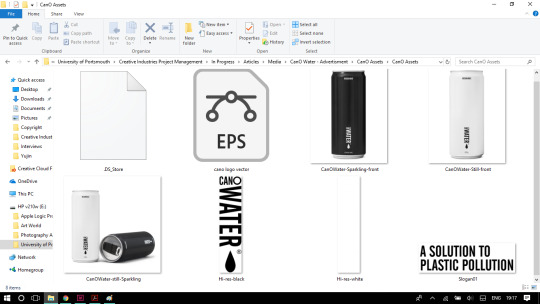
Perry Alexander - Co-Founder of ‘CanO Water’ from London has allowed me to feature his brand in my magazine.

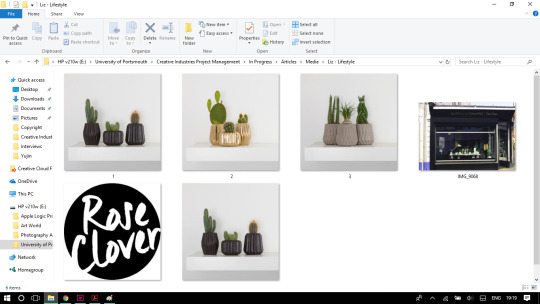
Along with Liz Penman, the owner of a plant shop called ‘Rose Clover’ situated in Southsea, Portsmouth.
It has been successful.
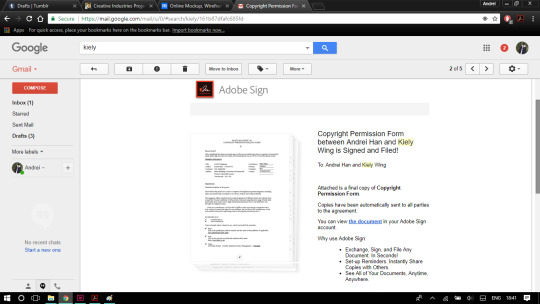
EVIDENCE OF CONTRIBUTORS WHO SIGNED THE COPYRIGHT FORM
They are the ones who have also sent over their own artwork or photographs.
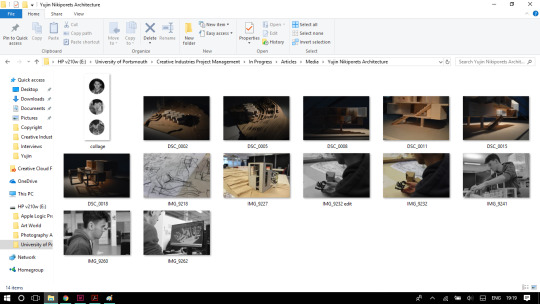
Yujin Nikiporets
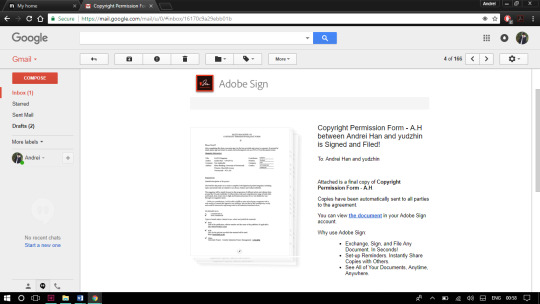
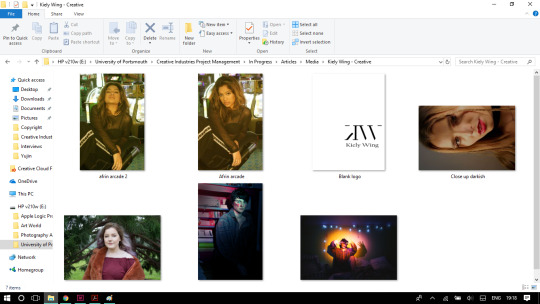
Kiely Wing
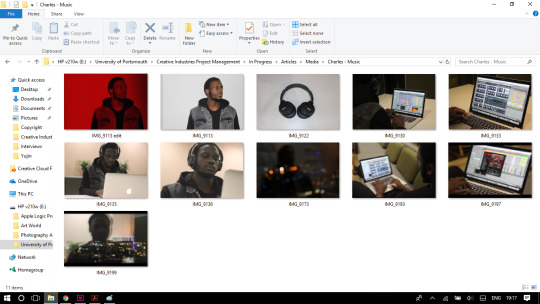
Charles Oduk II

-------------------------------------------------------------------------------------------
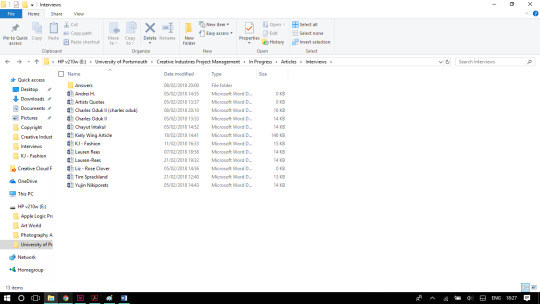
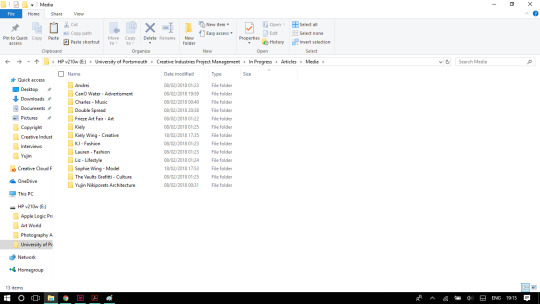
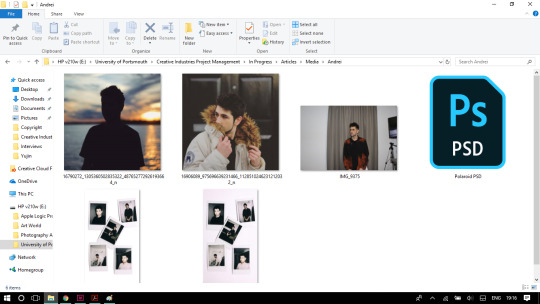
GATHERING VISUAL CONTENT FOR THE MAGAZINE (MEDIA - Images)
Some of the material MAY or MAY NOT appear in the magazine. It all has been collected before producing the magazine.
All the folders containing material
Myself - Photographs and Polaroids
CanO Water
Charles Oduk II
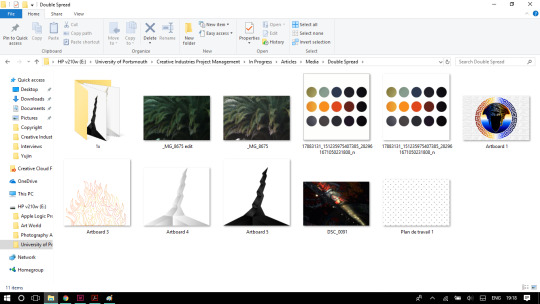
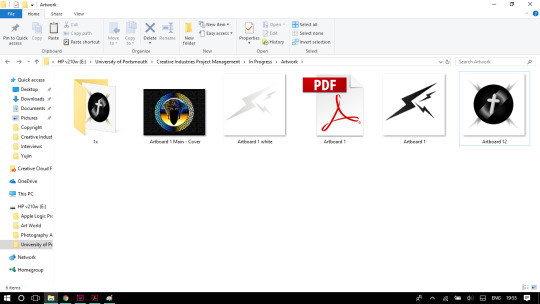
Own artwork
Kiely Wing
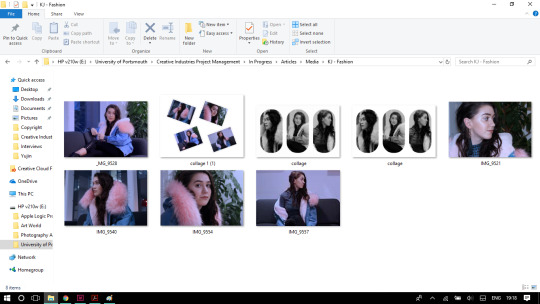
Katherine Jane Watts
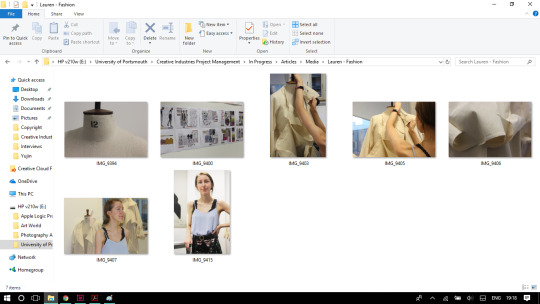
Lauren Rees
Rose Clover
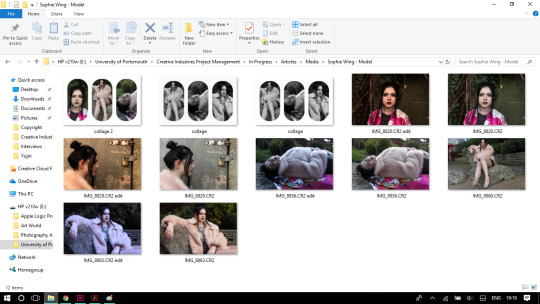
Sophie Wing
Yujin Nikiporets
General
---------------------------------------------------------------------------------------
FONTS REQUIRED FOR THE CONTENTS -
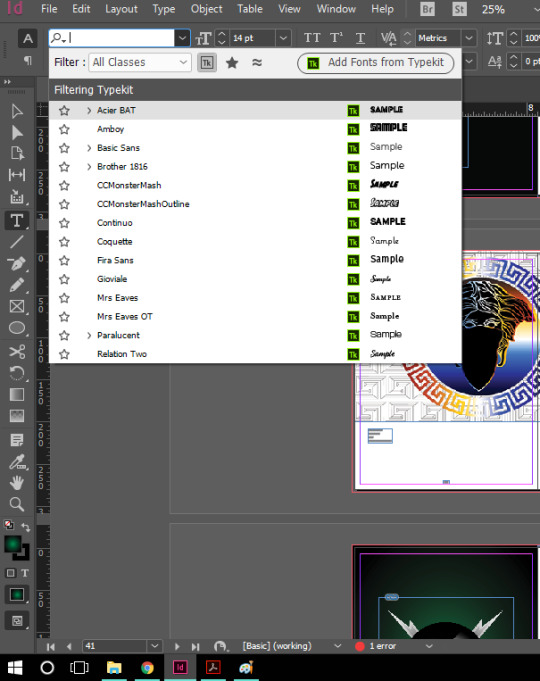
All the fonts required for my magazine can be found on Typekit, by Adobe.
Adobe Typekit interface - This page allows me to browse for suitable fonts. Has easy access and allows me to browse through a variety of classifications.
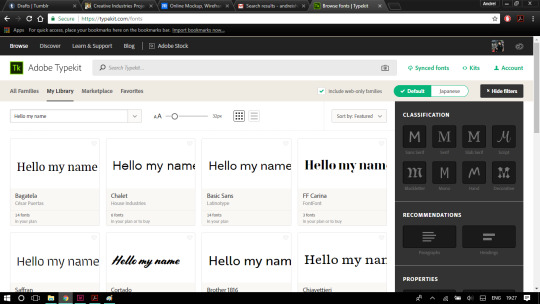
Evidence that I have downloaded a few fonts that I personally though could be suitable for the different types of paragraphs, q/a sections, logos, quotes, titles, subtitles etc...
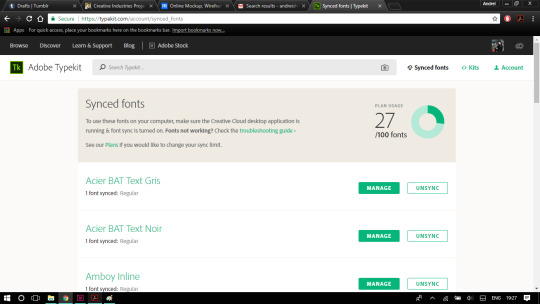
InDesign list of uploaded fonts - Syncing successful
-------------------------------------------------------------------------------------------
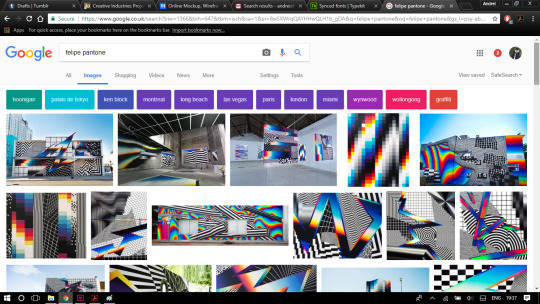
Color Palette - Preferable and Suitable for the magazine
The color palette has been inspired by ‘Felipe Pantone’, a digital artist whose work is mainly based on those primary colours.
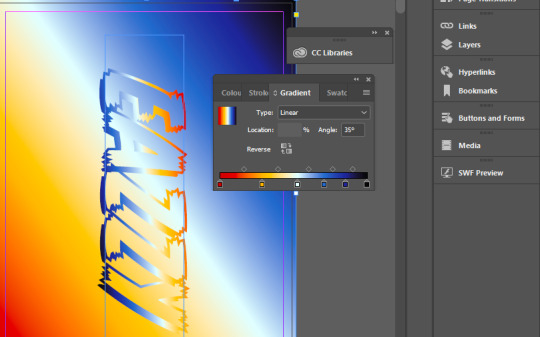
INDESIGN COLOR NUMBERS / CODES
These are the color codes I have used to obtain the effect of the single page background gradient.
Red -��ce0000
Yellow - ffb300
White - ffffff
Blue - 256bcd
Dark Blue - 1f2499
Black - 000000
-------------------------------------------------------------------------------------------
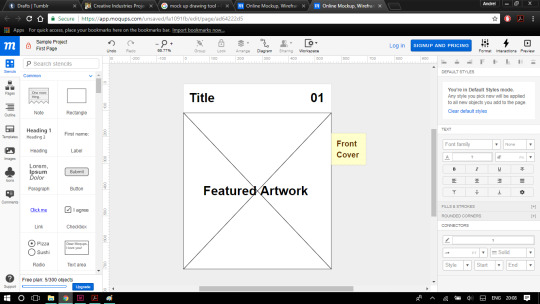
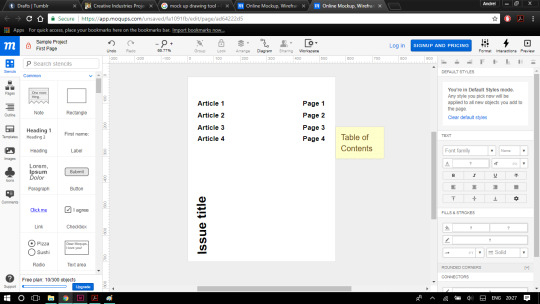
COVER MOCK UP DESIGNS
I have used a website called ‘MOQUPS’ so I can draw and design (digitally) the look and layout of the magazine covers (front, back, inside, out)
I will follow the layout of the prototypes when it comes to adding all the material collected onto the magazine.
The final outcome might be either printed black on white or white on black, depending on the overall look of the magazine.
Front Cover
The front cover will feature one of my own artworks. The title will be ‘EAZZY’ - Issue no. 01
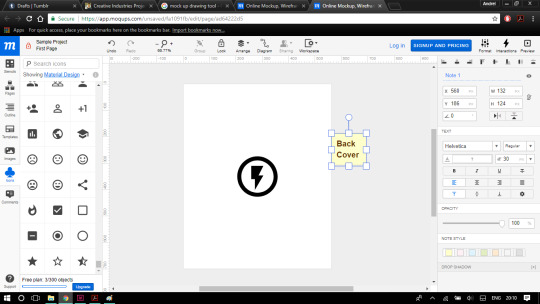
Back Cover
It’ll show the logo of the magazine (along with a bar code at the bottom which I cannot yet provide myself).
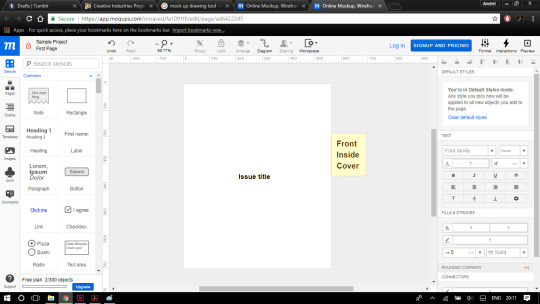
Front Inside Cover
Simple and straight forward - Users will be able to see the issue title which is a pretty important part.
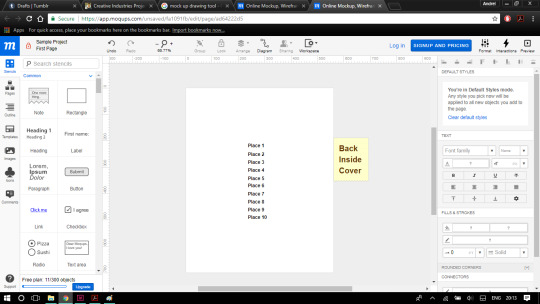
Back Inside Cover
List of a variety of cities - Relevant to places I’d like to visit in the future.
-------------------------------------------------------------------------------------------
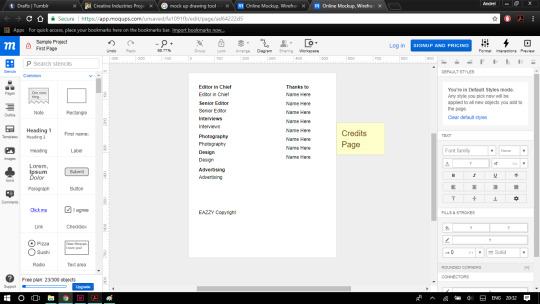
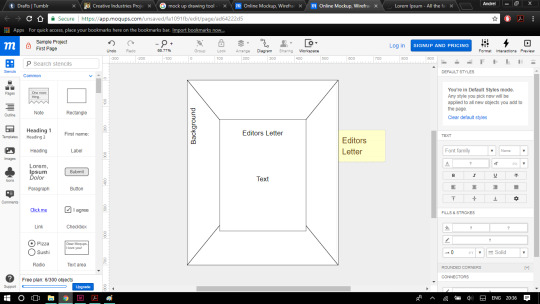
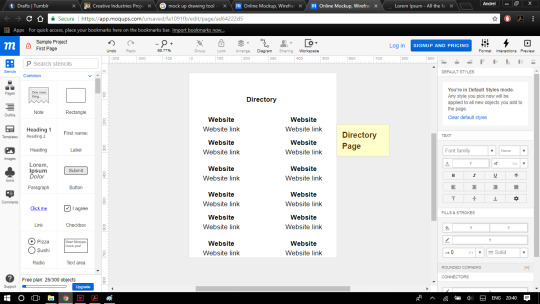
PAGE, ARTICLE AND CONTENT LAYOUTS
The templates showed below represent the most pages of the magazine, that contain the most useful information (such as article titles, page numbers, contact, credits, directories, editors letter etc..)
The structure of each article will be mainly based on a introductory double spread, including a profile picture and a few graphical elements, representing the featured person’s style and personality, followed by article styled paragraphs, in two columns, along with more images and artwork on both sides of the other double page spreads.
The portfolio pages will mainly contain either 2 or 4 images per page or double spread, including credits and extra information such as project title, date, location etc...
Table of Contents
Depending on the total number or articles, the table of contents could extend along two pages. The page design should be easy to real and visible for anybody.
Credits Page
The credits page will mainly show my name under all the roles. A ‘special thanks to’ section will be included for everyone who has contributed towards this project.
Editors Letter
The editor’s letter will be a special message from me to my audience. It will be personal, and will be placed in the middle of the page. It will be inside a box, in which case the box will be placed on a background. (yet to find out when producing the magazine)
Directory Page
This page is dedicated to the two businesses that allowed me to feature them as part as the advertising section of my magazine. Name and Website link will be provided for each one of them.
-------------------------------------------------------------------------------------------
BLURB.co.uk Plugin
This can be found at
http://www.blurb.co.uk/apps/indesign-plugin/v2-download
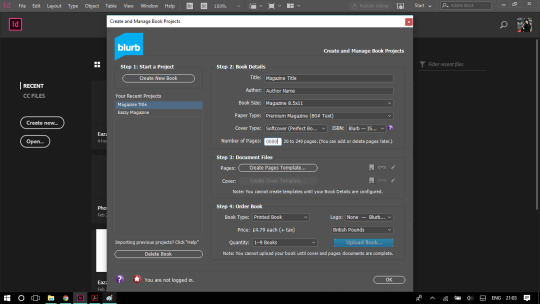
The plug in will require downloading and installing. After this is done, we can open Adobe InDesign, and a new tool box called ‘Blurb Book Creator’ will appear in the ‘File’ menu in the top left corner of the software.
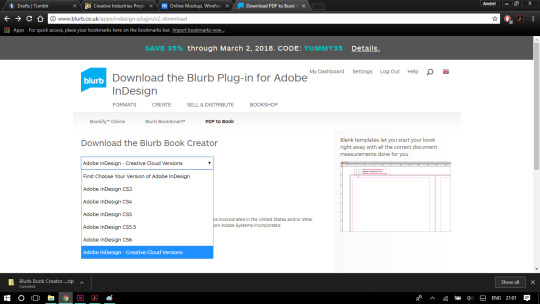
Blurb plugin - InDesign
The plugin will allow me to set my own precerences before starting to produce the magazine.
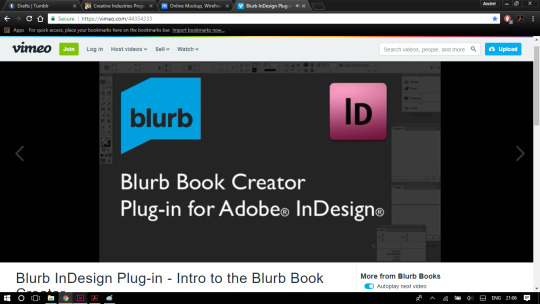
Tutorial on How to use the Blurb Plugin
This is a tutorial provided by the company to help new blurb users set up their magazine properly, along with the correct page sizes and the magazine covers. I have used this to guide me through the production process.
-------------------------------------------------------------------------------------------
I have now collected all the material and tools required for me to achieve my goal in producing a whole magazine.
The project development stages will now begin.
(Section 6 - to be continued)
0 notes
Text
The Canon EOS 4000D might be the cheapest DSLR ever launched
Canon Europe has launched the EOS 4000D, a still more cut-down version of the EOS 2000D/T7 announced earlier today. The entry-level model will launch for around £330/€380 body only, which would equate to somewhere around $385 without tax. That's the lowest launch price of any DSLR we can remember.
Canon's four-digit-D series cameras, from the 1000D (Rebel XS) onwards, have always hit aggressive price points in the market by recycling existing components and features—we called the original 1000D a "reheated" 400D/Rebel XT at the time. But the EOS 4000D takes this to a new level.
The 4000D shares its body and viewfinder with its more expensive sibling (and previous cameras of this series), but relies on a version of the 18MP sensor first introduced nine years ago in the EOS 7D, and the Digic 4+ processor that made its debut in Canon's 2014 model-year compacts. The camera's rear display is a 2.7-inch LCD that we last encountered in 2011's EOS 1100D/Rebel T3.
Finally, some kits of the camera will include the unstabilized 18-55mm F3.5-5.6 III first announced in February of 2011, although we're pretty sure the plastic lens mount is a first for a digital EOS.
That's not to say that Canon has just launched a DSLR from five years ago's parts bin. Although it loses the NFC feature of the 2000D, it does retain Wi-Fi connectivity. This feature, a more modern version of Canon's Auto modes, and its much-loved JPEG engine means the EOS 4000D is likely to be a pretty credible super-budget DSLR.
Still, we've not seen such aggressive corner cutting unit cost optimization since Sony's a3000 (which was seemingly made from upcycled yogurt containers), and can't think of a DSLR that has ever launched at a lower price.
Is there one we've overlooked? And what do you make of the EOS 4000D? Let us know in the comments.
Note: While the Canon EOS 4000D has only been launched in Europe thus far, don't rule out seeing a wall of them at your local BestBuy just as soon as Canon US has worked out which random letters to call it.
Step up to effortless DSLR storytelling with Canon’s new EOS 2000D and EOS 4000D cameras
London, UK, 26th February 2018 – Canon Europe today unveils the launch of the EOS 2000D and EOS 4000D, Canon’s latest entry-level DSLR cameras. With a wide range of practical and easy to use features, these new cameras cater to the storytelling needs of individuals taking their first steps into interchangeable lens photography and those wanting to create superbly detailed DSLR quality pictures and cinematic Full HD movies with ease.
The newest additions to Canon’s entry-level DSLR range, the EOS 2000D and EOS 4000D have been designed for people who seek out new experiences and want to share their adventures seamlessly to social media. The cameras’ powerful combination of APS-C sensor technology, DIGIC 4+ image processor, seamless Wi-Fi connectivity and straightforward in-camera feature guides enable stories to be captured and shared with highly detailed photos and Full HD movies.
With the EOS 2000D featuring a new 24.1 Megapixel APS-C sensor, and the EOS 4000D using an 18 Megapixel APS-C sensor, each camera allows for compelling storytelling with superb control over depth of field for beautifully blurred image backgrounds. Shooting rich, atmospheric photos during night-time adventures is also made possible with both models capable of low light shooting up to ISO 6400, expandable to ISO 12800.
The DIGIC 4+ image processor, used in both models, powers Canon’s Scene Intelligent Auto mode, enabling simple point and shoot photography with superb image results, as it automatically optimises every shot. The fast and responsive DIGIC 4+ image processor enables the Full HD video capabilities in both models, breathing cinematic life into captured memories.
In addition to a rear mounted LCD screen (7.5 cm on the EOS 2000D and 6.8 cm on the EOS 4000D), both cameras feature a centrally mounted optical viewfinder, providing a distinctly authentic photography experience and allowing stories to be told just as they were experienced with the naked eye. Decisive moments in unfolding stories can be captured with responsive and precise nine point auto focus and continuous shooting at 3.0 frames per second.
Both cameras are Wi-Fi enabled for seamless smartphone connectivity via the Canon Camera Connect app (iOS and Android), enabling adventurers to rapidly shoot and share their content on social media whilst on the move. New images can be conveniently backed up to Canon’s cloud storage service, irista, via a Wi-Fi connection, ensuring stories and memories shared are never lost.
These processes are made even easier for the EOS 2000D with the inclusion of Near Field Communication (NFC), which can establish a Wi-Fi connection to a smartphone by simply tapping the device on the camera (available on compatible Android devices).
Both models include simple in-camera feature guides, perfect for those looking to improve their storytelling potential as they upgrade from a smartphone. Both cameras include six image settings outside of basic auto modes and a variety of creative filters, enabling experimentation with manual control and the artistic freedom to tell dynamic and vibrant stories. Those embarking on their first DSLR adventure will also benefit from the Canon Photo Companion app, which provides the necessary tips on getting the best out of the cameras.
The EOS 2000D and EOS 4000D’s excellent battery life delivers approximately 500 pictures, or one hour 30 minutes and one hour 15 minutes of HD video respectively, allowing for peace of mind during extended outdoor adventures and the freedom to explore.
Both DSLR models are compatible with over 80 Canon EF and EF-S lenses and range of accessories, giving beginners the greatest choice of systems as they grow and develop their photography skills. The new cameras will be sold as a body only option or with a selection of lens kit options, including an 18-55mm f/3.5-5.6 IS II lens.
Canon’s latest entry-level DSLR cameras offer a fantastic gateway to the joys of interchangeable lens photography. The Canon EOS 2000D and Canon EOS 4000D provide an easy and reliable shooting experience that enable users to capture detailed images and sharp Full HD video. As people step-up from their smartphone and expand their creativity, Canon’s new DSLR cameras will intuitively capture superbly detailed professional-looking images, time after time.
The Canon EOS 2000D is available to pre-order from Canon’s online store from 26th February 2018.
For more information, please visit: Canon EOS 2000D and Canon EOS 4000D
[Read More ...]
The following post was originally published on republished from: https://www.proton-pack.com
The Canon EOS 4000D might be the cheapest DSLR ever launched was originally posted by https://www.proton-pack.com
0 notes