#I already uninstalled cleared cache and everything
Explore tagged Tumblr posts
Visit Tumblr Blog
Explore Tumblr blogs with no restrictions, modern design and the best experience.
Last Seen Tumblr Blogs


Fun Fact
China blocked Tumblr because of pornography and censorship problems in 2013.
Note
Hello! I uninstalled reshade for testing purposes & now that I've reinstalled it chaiOG, chaitones etc all seem to not be working. When I hover over them they have a yellow warning that saying already created a texture with the same name & different dimensions or a different image file. I've tried taking them out/putting back in different combos but they all say it for each other basically. And if I check them on everything looks weird like high contrast pink & green. Any ideas what happened?
i will get on my pc this weekend and see if i can find a way to replicate this issue. if you have screenshots of the error codes and/or log file i will do some research but it sounds like a reshade texture memory issue but im not really familiar with the inner working of reshade (i know post processing, not software unfortunately)
Maybe try deleting the shaders/multiluts and clearing the effect cache in reshade and reinstalling the shaders and pngs from scratch??? (you can find the cache under settings)
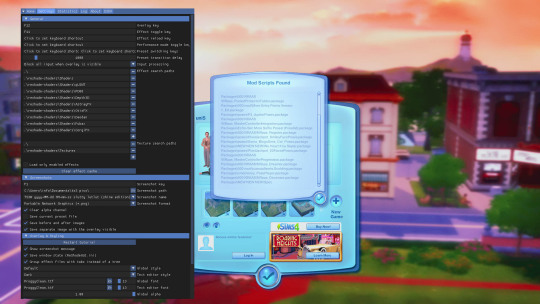
luckily you can use the chaitea presets without the multilut shaders but its a bummer i dont have a solid answer for you 😢
5 notes
·
View notes
Text
update i cried for a bit and my head hurts but I managed to do a little more work on it, I'm praying it'll be fine until I manage to finish it
I managed to run into another problem, that being that the cache is taking up most of the already limited storage space on my laptop, but i just made it take up less and when I'm done I'll clear it all and uninstall everything for the summer
I'm feeling a bit better
vent ahead
idk man i just think that maybe schools shouldn't make their students do projects in adobe at home
and yes i am just saying this because my laptop can't run after effects properly so even though i loved working on this project at school and the subject as a whole was super fun and interesting, i won't be able to get full credit for this final project because my laptop is physically unable to do some of the things i want it to do, it can't do everything the professor requires, and i had to abandon so many cool ideas i had for it
and yes maybe I'm overreacting a little bit but I've been trying to work on this for over two hours now and I barely got anything done because everything takes a million years to load or it just straight up crashes
and i've already had a horrible stressful day so this is just not fucking helping and i've been crying for an hour straight
5 notes
·
View notes
Text
-
#they raised the prices on the mega meal at pizza 73 😭#which on its own is already sad but what's worse is that i tried to press 'repeat last order' to order last night#not knowing that it'd try to replicate the order with the old price and broke the fucking website#so now i can't even order online bc trying to open the website just runs me into error popups#idk how to fix it!! i tried clearing cookies force stopping my web browser and clearing cache logging myself out of my account#everything short of uninstalling and reinstalling firefox. which i absolutely won't do i'd sooner download chrome than do that so.#auugghfghghfhfhhhhjghhhgghhh#they speak!
1 note
·
View note
Text
Got Sims 2 Ultimate Collection via Origin? Never update without backing up your game files.
I had an experience today where an Origin client update completely wrecked my Sims 2 game (or so I thought), and I don’t want this happening to anyone else. And before you ask, an EA rep walked me through clearing the cache on my computer. That didn’t work.
The Issue I Had
I updated Origin because it was touted as “mandatory” (cue eyeroll that gives me a migraine). When I went to open TS2UC after the update...The game wouldn’t open! Running the program as an administrator didn’t work, compatibility mode did nothing. I would click on TS2UC and instead of launching it would open the Sims 2 copy in my Game Library. Clicking ‘Play Game’ would make the Origin window disappear for a second or two (as if the game was about to load) only for nothing to happen. The game was not launching in the computer Task Manager either.
After much of the day trying to figure things out (with the “help” of EA/Origin Games support representatives), warning fellow Simmers on Reddit, and thinking my game was wrecked, I have a solution.
Backup Your Game Files Before All Origin Updates*
Backup your Sims 2 Ultimate Collection Folder (or specific folders like Downloads, Lot Catalog, Neighborhoods, and SC4Terrains).
Place the copy somewhere else in your computer that is not the Documents > EA Games folder.
For more information on backing up files, read about it via ModtheSims.
*The Sims 2 is a “legacy game” (read: old, geriatric, and unsupported), so support is not really available outside of the Simmer community, and Origin is not accounting for the game whatsoever when new client updates are published. Because of this, you need to back up all your game before allowing updates. Even if you have no had this happen to you and you believe it never will, backup your files anyway. If you have your Origin client set to auto-update, I recommend turning that feature off so you have time to backup TS2. In fact, putting Origin in Offline Mode may be in your best interest (read more under the Misc. section).
Please only follow this solution if clearing your Origin cache didn’t work, or you are not comfortable messing with program data and such.
The Solution
After backing up the files you want saved, uninstall the Origin client from your computer. It is not necessary to uninstall Sims 2. You can leave that alone. (In fact, don’t touch TS2 in your Uninstall Program manager unless this tutorial doesn’t work!)
Reinstall Origin.
After logging back in, go to your Game Library, and right-click on the TS2UC thumbnail.
Click ‘Repair Game’. Let it repair.
Launch TS2 and let it load.
Check if your game was switched back to the default settings (no custom content, no saved games, no custom neighborhoods, etc.).
If you find anything like this changed, that is where the backed up files come in handy! Close your game.
Go to the Documents > EA Games folder. Delete any and all files within. Place your backed up game files in that same folder. Launch. Voila!
Or are you like me and you already updated the game before you found this tutorial and backed up your files, so you “lost” everything?
Fear not!
Check your Documents > EA Games folder. Are there two files (one saying ‘The Sims 2′, the other saying ‘The Sims™ 2 Ultimate Collection’)?
Delete the folder that doesn’t have your Downloads folder (or it is not filled with your finds), has no custom neighborhood(s) in the Neighborhood folder, and/or no custom neighborhood(s) in the SC4Terrains folder. This will most likely be the most recently created folder, usually with only a few folders/files inside (instead of 16-20 total items), and/or it may be entitled simply ‘The Sims 2′.
After deleting the appropriate folder, please make sure it is named The Sims™ 2 Ultimate Collection exactly, or TS2 will create another file (more than likely named The Sims 2 only).
Misc.
You may notice that the resolution has switched to the default. You will have to re-edit the Graphics Rule information, including using the Graphics Rule Maker program from Sims Network.
For those of you who only use Origin to play Sims 2, it would be better to avoid all Origin updates by using Offline Mode. Read this thread on ModtheSims for more info.
I am not programmer extraordinaire by any means, but if you need help, please feel free to contact me and I will try my best to help. If you have a better solution, do the same - let me know! Happy Simming!
#the sims 2 ultimate collection#the sims 2#thesims2#ts2#ultimate collection#ts2uc#origin#origin games#update#won't open#back up files#tutorial#fix#fixed#custom content#cc#ts2cc#ts2 cc
17 notes
·
View notes
Text
Exit Review — LingoDeer Japanese
Hello, everyone! While I (and thus, this site) mostly focus on Korean, I do also study Japanese. A few months back I decided to check out a new-at-the-time app, LingoDeer, to use in my Japanese studies. I ended up checking out and reviewing their Korean courses and Mandarin courses as well, but Japanese is the only one I have followed to completion. Having spent the last few months—and especially the last 2~3 months; my streak is currently over 70 days!—using this app to study Japanese, I have finally finished the course! Here are my final thoughts for anyone else who might be thinking about using LingoDeer to learn Japanese.
Interface and technical stuff
I'll start by just sort of rehashing some of the points from my previous review. The app has a pretty clean, simple look that's easy on the eyes. Unlike when I first reviewed the app, you can now change the theme color. They even had a really cute special theme for the lunar new year! It's easy to navigate and use, which is great. You don't want to waste valuable learning time trying to figure out how to use the app itself!
I mentioned in my last review that the audio files in this app are excellent. I stand by that still, for the most part. The voice is very clear and not robotic, and the speeds at which words and sentences are read (words slower than sentences) are very appropriate. No complaints in this department!
Loss of data
This was a one-off thing, but it honestly upset me a bit and made me stop using the app for a while at a point. At one point the app updated, and that update resulted in the app crashing on startup and being rendered unusable for a lot of people. It seemed like the only way to be able to use the app was to uninstall and reinstall or clear the app cache or... I don't know; I just remember seeing a bunch of "fixes" being suggested when I searched online.
Ultimately, a lot of people, myself included, lost all of their data—progress, spaced repetition review records, EXP earned, and so on. By emailing the team, I was able to at least get the course unlocked up to the point I had reached, but it was really demotivating to see everything just go out the window like that. Even though all the levels I had already done were unlocked, none of the material was available in the spaced repetition review zone. I had to redo every lesson to "unlock" everything again. Now on loading screens, you sometimes see a little message reminding you to back up your data to prevent loss. I understand it was an honest error and I have of course gotten over it now, but it did sour me on the app for a bit.
Material
Concerning the actual content of the course, I feel like a lot of good, useful vocabulary and structures were introduced. I would consider myself perhaps at a high beginner level now that I have completed the LingoDeer Japanese course. However, there are some things that I wish were introduced earlier, or even introduced at all! In one of the Japanese-English Discord servers I'm a member of, some of the more advanced learners were complaining about how a lot of Japanese language learning materials start you out with the (relatively) higher-formality ますconjugations and then later teach the dictionary forms. I've realized that LingoDeer never really taught the dictionary forms, and it only taught informal past tense but not even how to make present tense informal statements.
Also, I realized that LingoDeer does not even introduce how to say the date or tell someone a phone number, both very basic things. The names of the months and the format for sharing info like phone numbers are never discussed, among other things. A lot of information was covered, but there are some pretty big holes in what I would consider basic knowledge.
Verdict
Especially at the beginning, with its really good Hiragana and Katakana charts, LingoDeer is great for helping you build a foundation for your Japanese. With an easy-to-use interface and quality audio, plus simple but easy to understand grammar explanations, it's an unintimidating place to start. However, some pretty basic daily life information is left out, and forms that would be well taught at the beginning aren't even touched on, so I'm left feeling like I know a lot on one hand and not nearly enough on the other. It's a decent app, but if it's all you use, you'll hit the end and find yourself wondering if how to fill in the empty spaces in your knowledge.
As always, happy studying~
81 notes
·
View notes
Text
Why Is My Macbook Pro Sierra Download So Slow On The Internet

How many times have you seen the spinning beachball lately while browsing Safari on your Mac?
I have been seriously struggling with my WiFi every morning in my new office and could not figure out why. Speedtest was 'very slow' on my Macbook Pro 2015 and super quick on iPhone 8, it has been painful and driving me nuts!! It usually got quicker throughout the day, but unbearable in the morning. So how to fix a slow Mac. All Macs begin to slow down with age — MacBook Pro, iMac, it doesn’t matter. Performing several heavy tasks at a time, your Mac may get slower, and it’s okay. Although, when you’re facing unresponsive windows and slow load time more often these days, your Mac definitely needs a boost. Why is my Mac running slow? Actually, Mac becomes slower and slower with the age you use it, no matter it is MacBook Pro, Air or Mac mini. To speed up your Mac, you had better find out the reasons why Mac is so slow. In this article, we will show you 5 reasons that explain why Mac is running slow and give you corresponding advice to. Check your Internet connection. For many Mac users, a slow Internet connection is synonymous with a slow computer. That’s because almost everything they do—from surfing the Web to checking. From app downloads to emails, a lot of Mac’s performance depends on the network connection — a slow Internet can spell trouble across the board. I live in The Middle of Nowhere, where the maximum speed I can get is 4 Mbps, so I need to make sure my MacBook isn’t bringing that speed down even more.
For example, Safari is slow loading pages, it stops loading halfway with text strewn across the screen and images in the wrong place. Or some webpages are loading forever before you’re able to actually read the content.
Other times, it may be just that Safari runs extremely slow after Catalina update (remember the pitfalls of a shiny new macOS?)
All of these behaviors are typical symptoms related to Apple’s signature Internet browser. While Safari is a light-weighted browser optimized for use on all Mac machines, issues like above might force you to resort to third-party browsers (perhaps Chrome, stay away from Firefox) that tend to be faster.
But for those of you who are real fans of Apple and decide to stick to Safari, we’re going to help you get to the root of your Safari issues in this guide, starting with the possible reasons why Safari is slow.
Hopefully, you’ll have Safari back to normal in no time, and be able to use the browser flawlessly.
Note: if Safari is not just slow, but keeps freezing and crashing, read this post instead for more troubleshooting tips.
Important Tips
It’s normal for Safari to run slow on certain websites – By certain websites, we mean “heavy” sites that are loaded with flash or video ads on the pages you browse. Worse yet, some even auto-play without you clicking on. They tend to have your MacBook heat up quick. The best option is to close those pages immediately when you finish reading the content on it, or you could install AdBlock Plus (Safari compatible) to block the ads from displaying.
Stop excessively multitasking – You’d be surprised how much better 90% of programs work when you don’t try and use them at the same time as a dozen other apps. It seems like a simple solution, but it is often the best one.
Take care of Safari – Some methods are a matter of habit, such as regularly clearing your cache or making sure the app is up to date. Imagine your computer as a car that needs regular maintenance to run well.
Don’t neglect the computer – Macs are not immune to viruses, despite the common perception. They also aren’t immune to file corruption or errors. Make sure you haven’t picked up anything unwanted while browsing that could be affecting Safari’s performance.
Below are some common causes directly or indirectly related to those Safari performance issues. Also, we’ll show you how to fix it step by step.
Possible Cause 1: Overworked Cache
The cache is a location on your Mac’s hard drive where Safari temporarily stores data that you use frequently. Macbook pro download folder more info. The cache allows Safari to reference this information quickly and therefore execute actions such as loading a specific page more quickly.
However, if the cache becomes full then Safari cannot add newer, more relevant material and is forced to use slower methods to respond to your demands.
Here’s how to erase the data in the cache so that Safari can work smarter rather than harder:
Start by erasing your history from Safari by navigating the menu bar along the top and choosing HISTORY > CLEAR HISTORY AND WEBSITE DATA.
Once you click this, you’ll be shown a small pop-up window. Choose “All History” from the bottom of the drop-down, and then Clear History.
The next thing you can do is clear the cache using a more advanced method. First, go the Safari menu and open Preferences.
On the preferences panel, choose “Advanced” and then look for the checkbox at the bottom of the page that says “Show Develop Menu in Menu Bar”. Make sure this box is checked, then close Preferences.
You’ll notice a new tab has been added to your menu bar, called “Develop”. Click on this, and then choose “Empty Caches” from the list. You won’t be given any confirmation, but it will clear the cache and you can restart Safari and see if this has solved your problem.
Possible Cause 2: Bad Extensions
Most people are aware that Apple doesn’t play well with Flash, but this isn’t the only plugin that could be causing Safari to lag. Any extension or plugin that is outdated or not correctly optimized could be the “culprit”, and you should disable or remove as many as possible.
The easiest way to do this is to use CleanMyMac X, go to Extensions > Safari Extensions (the screenshot below), here you just select these unwanted plugins, and click the “Remove” button at the bottom to clean them all at once.
Of course, you can also get this done manually, though the process will be a bit time-consuming if you have a list of extensions to disable or remove.
First, start by opening Safari, and then navigating to SAFARI > PREFERENCES
In the preferences menu, choose “EXTENSIONS” icon. You’ll be shown a list of all your extensions.
If you don’t use an extension, you should uninstall it with the button on the right side. If you use it but infrequently, simply uncheck the “enable” box. This should significantly speed up Safari, especially if you have been running a lot of extensions in the background.
Possible Cause 3: Outdated Version of Safari
Because Apple makes Safari, it usually receives updates when macOS has a new version released or when there is a necessary patch. If you’re running an old version of Safari, this could be part (or even all) of your problem.
If you aren’t on macOS Sierra or higher, your Safari is definitely in need of an update (all MacBook Pros made after 2009 are compatible with at least macOS Sierra). To check what you’re running, go the Apple Menu in the top left corner and choose “About this Mac”.
If you’re on an older version, your window will look something like this, displaying the version of OS X you’re running:
If you’re already on macOS Mojave, it will look like this instead:
If you aren’t on the latest macOS yet, open the App Store from Finder, and navigate to updates. There will be at least one software update available, which you can expand. This will show you the update for Safari, which you can update separately or with any other updates you may have available.
Issues Related to your Network or Computer
Possible Cause 4: Your Network
You might argue that the problems inside Safari are simpler to deal with, but sometimes it’s surprising that Safari isn’t necessarily the “culprit”. Your network can have a significant impact on Safari’s performance.
To find out whether your Mac has network issues, the best way is to use this app called Advanced Network Care — run a quick scan and it’ll display the network issues (if they exist). Vmware fusion free download for mac.
To test the Internet speed, you can also use Google Fiber. First, open the link on your Safari browser, then press the blue “play” button, and watch as your internet speed is tested. The site will first test your upload and then your download speed.
Once you have your results, you can compare them with this link, which contains charts detailing what you should expect based on the connection type. If your results are below expected, it might be time to contact your Internet Service Provider (ISP), especially if speeds fall far below what you’re paying for.
Note: if speed seems normal and falls in the expected ranges, then this probably isn’t your problem, and you should try some of our other solutions.
Possible Cause 5: Your User Account or Mac Drive
Sometimes the issue runs a bit deeper than just a full cache- you could have a corrupted user account or your macOS version isn’t operating correctly. To determine if this is your problem, start by creating a second user account on your MacBook. Fl studio mac os catalina download.
On the new user account, open Safari and try using it as you normally would. If Safari suddenly runs faster, it’s time to repair your normal user account.
Use spotlight (top right corner of the screen) to search “Disk Utility” and open it.
Inside Disk Utility, select your account’s disk and make sure you’re on the “First Aid” tab. Then select “Repair Disk” from the bottom right corner (if this is unavailable, choose “Verify Disk” first).
Note: if your MacBook Pro is with 10.10 Yosemite or earlier, you have two buttons to click on like below.
However, if your MacBook Pro is with 10.11 El Capitan or later (including latest 10.15 Catalina), just click “First Aid” and run it to check and fix any issues it may find.
The Disk Utility will repair any problems with your account. If it isn’t capable of fixing the problem, reinstalling macOS is always an alternative if a bit tedious to do.
Final Words
No one enjoys staring at the colorful loading pinwheel when they just want to browse the web or access an important page for work. Hopefully, you won’t be experiencing the Safari slow issue anytime soon with our solution guide.
Still not able to solve your problems even after using the methods we’ve outlined? A good resource is the Apple Community forum, where you can get advice from other fellow Mac fans. You may also find bug reports and similar questions from other users.
Why Is My Macbook Pro Sierra Download So Slow On The Internet Download Manager
Alternatively, if you’ve already fixed the Safari problem, write a comment and tell us about it below.
0 notes
Note
Did you try deleting cookies/caches? Maybe trying a different browser?I heard Chrome is having troubles with tumblr pics. I use firefox and it works fine for me. On mobile you could try to uninstall and install the app again but you probably did that already.
When images stopped loading for me, what helped was clearing the browser’s cache (I just clear the data cache, haven’t needed to clear cookies) then quit the browser and relaunch. If that doesn’t work, maybe a soft reset of the phone or a restart of the laptop?
(About not seeing images on tumblr) I forgot to say that I also turned off endless scrolling!
omg YEESSSS, y’all are the BEST !! i’d had endless scrolling turned off cuz that just made it impossible for anything to load, but i just cleared my cookies and cache and now everything’s loading SO much faster, thank u my lil IT geniuses :’/ what would i do without you
3 notes
·
View notes
Text
The 2020 Guide to Creating Quality Technical Screencasts, Presentations, and Remote Meetings
I've had a lot of people ask me to write up a guide to creating great technical screencasts. This is an update to my 2011 post on the same topic.
What are you doing? STOP and reassert your assumptions
Hang on. You're doing a screencast or sharing your screen in some way for a meeting, presentation, or YouTube. What does that mean and why did I suggest you stop.
This isn't a stage presentation or even a talk in a conference room. Screencasts and remote meetings have an intimacy to them. You're in someone's ear, in their headphones, you're 18 inches from their face. Consider how you want to be seen, how you want to be heard, and what is on your screen.
Try to apply a level of intentionality and deliberate practice. I'm not saying to micromanage, but I am saying don't just "share your screen." Put your empathy hat on and consider your audience and how it'll look and feel for them.
Initial setup and tools
You can use any number of tools for screen capture. They are largely the same. My preferred tool is Camtasia. Other valid tools are CamStudio (a free and open source tool) and Expression Encoder Screen Capture. You can also use OBS to record your screen and webcam.
When you're using Skype/Zoom/Teams to record live, you're already set as those tools will share for you as well as record.
Windows Look at Feel
At the risk of sounding uptight, how you setup Windows and your environment is the difference between a professional and an amateurish screencast. It's shocking how many folks will start recording a screencast without changing a thing, then wonder why their 1600x1200 screencast looks bad on YouTube at 360p or low bandwidth on a phone. If you find yourself doing screencasts a lot, considering making a custom user (maybe named Screencast?) on your machine with these settings already applied. That way you can login as Screencast and your settings will stick.
Resolution and Aspect
First, decide on your aspect ratio. Your laptop may have a ratio of width to height that is 3:2 or 4:3 but MOST people have a 16:9 Widescreen system? A VERY safe resolution in 2020 is 1280x720 (also known as 720p). That means that you'll be visible on everything from a low-end Android, any tablet, up to a desktop.
That said, statistics show that many folks now have 1920x1080 (1080p) capable systems. But again, consider your audience. If I was presenting to a rural school district, I'd use 720 or a lower resolution. It will be smoother and use less bandwidth and you'll never have issue with things being too small. If I was presenting in a professional environment I'd use 1080p. I don't present at 4k, especially if the audience is overseas from where I am. You're pushing millions of pixels that aren't needed, slowing your message and adding no additional value.
On Windows, consider your scale factor. At 1080p, 125% DPI is reasonable. At 720p (or 1366x768, using 100% scaling is reasonable).
Background Wallpaper and Icons
Choose a standard looking background photo. I prefer to use one from http://unsplash.com or the defaults that come with Windows 10 or your Mac. Avoid complex backgrounds as they don't compress well during encoding. Avoid using pictures of your kids or family unless it feeds your spirit and you don't mind mixing the professional and personal. Again - be intentional. I am neither for nor against - just be conscious and decide. Don't just accept the defaults.
Hide your desktop icons. Right click your desktop and hit View | Show Desktop Items. Also consider whether we need to see your desktop at all. If it doesn’t add value, don’t show it on the screencast.
Fonts
Try to use standard fonts and themes. While your preferred font and colors/themes offer personality, they can be distracting. Consider the message you want to present.
If you're using Visual Studio or Visual Studio Code, remember that your audience likely hasn't changed their defaults, and if you show them something fancy, they'll be thinking about how they get that fancy widget rather than your content. In Visual Studio proper, go to Tools | Options | Environment | Fonts and Colors and click "Use Defaults."
In all your text editors, consider change your fonts to Consolas Size 15. It may seem counter-intuitive to have such large fonts but in fact this will make your code viewable even on an iPhone or Tablet.
Remember, most video sites, including YouTube, restrict the embedded video player size to a maximum of around 560p height, unless you go full-screen or use a pop-out. Use the font size recommended here, and use Camtasia’s zoom and highlight features during editing to call out key bits of code.
Don’t highlight code in the editor by selecting it with the mouse UNLESS you've deliberately change the selection background color. Defaults are typically hard to read editor selections in video. Instead, zoom and highlight in post production, or use ZoomIt and practice zooming and emphasizing on screen elements.
Browser Setup
Unless your screencast is about using different browsers, pick a browser and stick to it. Hide your toolbars, clear your cache, history, and your autocomplete history. You'd be surprised how many inappropriate sites and autocomplete suggestions are published on the web forever and not noticed until it's too late. Don't view pr0n on your screencast machine. Be aware.
Toolbars
Your browser shouldn't show any, and this is a good time to uninstall or hide whatever coupon-offering nonsense or McAffee pixel waster that you've stopped being able to see after all these years. Remember, default is the word of the day. Disable any Browser Extensions that aren't adding value.
If you are using Visual Studio or an IDE (Eclipse, Photoshop, etc) be aware of your toolbars. If you have made extensive customizations to your toolbars and you use them in the screencast, you are doing a great disservice to your audience. Put things to the default. If you use hotkeys, tell the audience, and use them for a reason.
Toast
You've got mail! Yay. Yes, but not during your screencast. Turn off Outlook Gmail, GChat, Twitter, Messenger, Skype, and anything else that can "pop toast" during your screencast.
Clock and Notifications
Go to Start on Windows 10, and search for System Icons and turn off the Clock temporarily. Why? You can't easily edit a screencast if there's a convenient time code in the corner that jumps around during your edits. Also, no one needs to know you're doing your work at 3am.
Clean out your taskbar and notification area. Anything that visually distracts, or just hide the taskbar.
Audio and Voice
Use a decent microphone. I use a Samson C01U. You can also use a USB headset-style microphone but be aware that breathing and "cotton mouth" really shows up on these. Test it! Listen to yourself! Try moving the microphone above your nose so you aren't exhaling onto it directly. Use a pop filter to help eliminate 'plosives (p's and t's). You can get them cheap at a music store.
Be aware of your keyboard clicks. Some folks feel strongly about whether or not your keyboard can be heard during a screencast. Ultimately it's your choice, but you have to be aware of it first, then make a conscious decision. Don't just let whatever happens happen. Think about your keyboard sound, your typing style and your microphone, and listen to it a few times and see if you like how it comes together.
Avoid prolonged silence. There should be ebb and flow of "I'm saying this, I'm doing that" but not 10 seconds of "watch my mouse." Speak in an upbeat but authentic tone. Be real.
Also be calm and quiet. Remember you are a foot from them and you're their ear. It's a conversation with a friend, not a presentation to thousands (even if it is).
Don’t apologize or make excuses for mistakes – either work them in as something to learn from, or remove them completely.
If you are editing the presentation - If you make a mistake when speaking or demonstrating, clap your hands or cough loudly into the mic and wait a second before starting that portion over. When editing, the mistakes will show up as loud audio spikes, making it easy to find them.
Camtasia has decent automatic noise reduction. Use it. You’ll be surprised how much background noise your room has that you, but not your audience, will easily tune out.
If you must overdub a portion of the audio, sit in the same position you did while recording the original, and have the mic in the same spot. You want your voice to blend in seamlessly.
Preferred Video Output for Prerecords
Your screen capture tool should be produced at the highest reasonable quality as it will be compressed later when it's uploaded. Think of it like producing JPEGs. You can make a 5 megabyte JPG, but often a 500k one will do. You can make a 10 gig screen capture if you use uncompressed AVI encoding, but often a high bit rate MP4 will do.
The trick is to remember that your compressed screencast will be recompressed (copies of copies) when it is run through the encoding process.
Edit your screencast, if you do, in its recorded native resolution which hopefully is what you'll publish to as well. That means, record at 1080p, edit at 1080p, and publish at 1080p. Let YouTube or your final destination do the squishing to smaller resolutions.
Personally, I like to know what's going on in my production process so I always select things like "Custom production settings" in Camtasia rather than presets. Ultimately you'll need to try and find what works for you. Use an H.264 encoder with a high bitrate for the video and 44.1kHz/441000Hz 16 bit mono for the audio. Basically make a decently sized MP4 and it should work everywhere.
Do you have enough bandwidth?
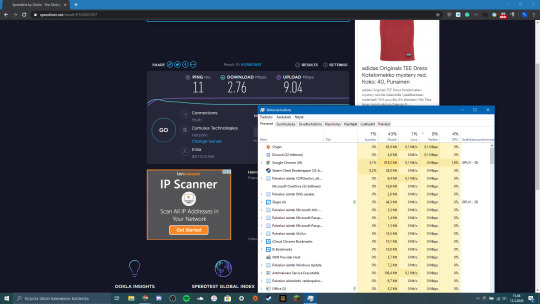
In my opinion, if you are doing a live call with Video and Screensharing and you want it to be high definition, you'll need 4 Mbps upstream from your connection. You can check this at http://speedtest.net. If you have 5-6 Mbps you've got a little more headroom. However, if someone in the house decides to get on Netflix, you could have an issue. Know your bandwidth limitations ahead of time. If it's an important stream, can you dedicate your bandwidth to just your one machine? Check out QoS (quality of service) on your router, or better yet, take your kids' iPads away! ;)
Conclusion
Take some time. I put about an hour of work into a 15 min screencast. Your mileage may vary. Watch your video! Listen to it, and have your friends listen to it. Does it look smooth? Sound smooth? Is it viewable on a small device AND a big screen? Does it FEEL good?
Sponsor: Have you tried yet? This fast and feature-rich cross-platform IDE improves your code for .NET, ASP.NET, .NET Core, Xamarin, and Unity applications on Windows, Mac, and Linux.
© 2020 Scott Hanselman. All rights reserved.


The 2020 Guide to Creating Quality Technical Screencasts, Presentations, and Remote Meetings published first on https://deskbysnafu.tumblr.com/
0 notes
Text
The 2020 Guide to Creating Quality Technical Screencasts, Presentations, and Remote Meetings
I've had a lot of people ask me to write up a guide to creating great technical screencasts. This is an update to my 2011 post on the same topic.
What are you doing? STOP and reassert your assumptions
Hang on. You're doing a screencast or sharing your screen in some way for a meeting, presentation, or YouTube. What does that mean and why did I suggest you stop.
This isn't a stage presentation or even a talk in a conference room. Screencasts and remote meetings have an intimacy to them. You're in someone's ear, in their headphones, you're 18 inches from their face. Consider how you want to be seen, how you want to be heard, and what is on your screen.
Try to apply a level of intentionality and deliberate practice. I'm not saying to micromanage, but I am saying don't just "share your screen." Put your empathy hat on and consider your audience and how it'll look and feel for them.
Initial setup and tools
You can use any number of tools for screen capture. They are largely the same. My preferred tool is Camtasia. Other valid tools are CamStudio (a free and open source tool) and Expression Encoder Screen Capture. You can also use OBS to record your screen and webcam.
When you're using Skype/Zoom/Teams to record live, you're already set as those tools will share for you as well as record.
Windows Look at Feel
At the risk of sounding uptight, how you setup Windows and your environment is the difference between a professional and an amateurish screencast. It's shocking how many folks will start recording a screencast without changing a thing, then wonder why their 1600x1200 screencast looks bad on YouTube at 360p or low bandwidth on a phone. If you find yourself doing screencasts a lot, considering making a custom user (maybe named Screencast?) on your machine with these settings already applied. That way you can login as Screencast and your settings will stick.
Resolution and Aspect
First, decide on your aspect ratio. Your laptop may have a ratio of width to height that is 3:2 or 4:3 but MOST people have a 16:9 Widescreen system? A VERY safe resolution in 2020 is 1280x720 (also known as 720p). That means that you'll be visible on everything from a low-end Android, any tablet, up to a desktop.
That said, statistics show that many folks now have 1920x1080 (1080p) capable systems. But again, consider your audience. If I was presenting to a rural school district, I'd use 720 or a lower resolution. It will be smoother and use less bandwidth and you'll never have issue with things being too small. If I was presenting in a professional environment I'd use 1080p. I don't present at 4k, especially if the audience is overseas from where I am. You're pushing millions of pixels that aren't needed, slowing your message and adding no additional value.
On Windows, consider your scale factor. At 1080p, 125% DPI is reasonable. At 720p (or 1366x768, using 100% scaling is reasonable).
Background Wallpaper and Icons
Choose a standard looking background photo. I prefer to use one from http://unsplash.com or the defaults that come with Windows 10 or your Mac. Avoid complex backgrounds as they don't compress well during encoding. Avoid using pictures of your kids or family unless it feeds your spirit and you don't mind mixing the professional and personal. Again - be intentional. I am neither for nor against - just be conscious and decide. Don't just accept the defaults.
Hide your desktop icons. Right click your desktop and hit View | Show Desktop Items. Also consider whether we need to see your desktop at all. If it doesn’t add value, don’t show it on the screencast.
Fonts
Try to use standard fonts and themes. While your preferred font and colors/themes offer personality, they can be distracting. Consider the message you want to present.
If you're using Visual Studio or Visual Studio Code, remember that your audience likely hasn't changed their defaults, and if you show them something fancy, they'll be thinking about how they get that fancy widget rather than your content. In Visual Studio proper, go to Tools | Options | Environment | Fonts and Colors and click "Use Defaults."
In all your text editors, consider change your fonts to Consolas Size 15. It may seem counter-intuitive to have such large fonts but in fact this will make your code viewable even on an iPhone or Tablet.
Remember, most video sites, including YouTube, restrict the embedded video player size to a maximum of around 560p height, unless you go full-screen or use a pop-out. Use the font size recommended here, and use Camtasia’s zoom and highlight features during editing to call out key bits of code.
Don’t highlight code in the editor by selecting it with the mouse UNLESS you've deliberately change the selection background color. Defaults are typically hard to read editor selections in video. Instead, zoom and highlight in post production, or use ZoomIt and practice zooming and emphasizing on screen elements.
Browser Setup
Unless your screencast is about using different browsers, pick a browser and stick to it. Hide your toolbars, clear your cache, history, and your autocomplete history. You'd be surprised how many inappropriate sites and autocomplete suggestions are published on the web forever and not noticed until it's too late. Don't view pr0n on your screencast machine. Be aware.
Toolbars
Your browser shouldn't show any, and this is a good time to uninstall or hide whatever coupon-offering nonsense or McAffee pixel waster that you've stopped being able to see after all these years. Remember, default is the word of the day. Disable any Browser Extensions that aren't adding value.
If you are using Visual Studio or an IDE (Eclipse, Photoshop, etc) be aware of your toolbars. If you have made extensive customizations to your toolbars and you use them in the screencast, you are doing a great disservice to your audience. Put things to the default. If you use hotkeys, tell the audience, and use them for a reason.
Toast
You've got mail! Yay. Yes, but not during your screencast. Turn off Outlook Gmail, GChat, Twitter, Messenger, Skype, and anything else that can "pop toast" during your screencast.
Clock and Notifications
Go to Start on Windows 10, and search for System Icons and turn off the Clock temporarily. Why? You can't easily edit a screencast if there's a convenient time code in the corner that jumps around during your edits. Also, no one needs to know you're doing your work at 3am.
Clean out your taskbar and notification area. Anything that visually distracts, or just hide the taskbar.
Audio and Voice
Use a decent microphone. I use a Samson C01U. You can also use a USB headset-style microphone but be aware that breathing and "cotton mouth" really shows up on these. Test it! Listen to yourself! Try moving the microphone above your nose so you aren't exhaling onto it directly. Use a pop filter to help eliminate 'plosives (p's and t's). You can get them cheap at a music store.
Be aware of your keyboard clicks. Some folks feel strongly about whether or not your keyboard can be heard during a screencast. Ultimately it's your choice, but you have to be aware of it first, then make a conscious decision. Don't just let whatever happens happen. Think about your keyboard sound, your typing style and your microphone, and listen to it a few times and see if you like how it comes together.
Avoid prolonged silence. There should be ebb and flow of "I'm saying this, I'm doing that" but not 10 seconds of "watch my mouse." Speak in an upbeat but authentic tone. Be real.
Also be calm and quiet. Remember you are a foot from them and you're their ear. It's a conversation with a friend, not a presentation to thousands (even if it is).
Don’t apologize or make excuses for mistakes – either work them in as something to learn from, or remove them completely.
If you are editing the presentation - If you make a mistake when speaking or demonstrating, clap your hands or cough loudly into the mic and wait a second before starting that portion over. When editing, the mistakes will show up as loud audio spikes, making it easy to find them.
Camtasia has decent automatic noise reduction. Use it. You’ll be surprised how much background noise your room has that you, but not your audience, will easily tune out.
If you must overdub a portion of the audio, sit in the same position you did while recording the original, and have the mic in the same spot. You want your voice to blend in seamlessly.
Preferred Video Output for Prerecords
Your screen capture tool should be produced at the highest reasonable quality as it will be compressed later when it's uploaded. Think of it like producing JPEGs. You can make a 5 megabyte JPG, but often a 500k one will do. You can make a 10 gig screen capture if you use uncompressed AVI encoding, but often a high bit rate MP4 will do.
The trick is to remember that your compressed screencast will be recompressed (copies of copies) when it is run through the encoding process.
Edit your screencast, if you do, in its recorded native resolution which hopefully is what you'll publish to as well. That means, record at 1080p, edit at 1080p, and publish at 1080p. Let YouTube or your final destination do the squishing to smaller resolutions.
Personally, I like to know what's going on in my production process so I always select things like "Custom production settings" in Camtasia rather than presets. Ultimately you'll need to try and find what works for you. Use an H.264 encoder with a high bitrate for the video and 44.1kHz/441000Hz 16 bit mono for the audio. Basically make a decently sized MP4 and it should work everywhere.
Do you have enough bandwidth?
In my opinion, if you are doing a live call with Video and Screensharing and you want it to be high definition, you'll need 4 Mbps upstream from your connection. You can check this at http://speedtest.net. If you have 5-6 Mbps you've got a little more headroom. However, if someone in the house decides to get on Netflix, you could have an issue. Know your bandwidth limitations ahead of time. If it's an important stream, can you dedicate your bandwidth to just your one machine? Check out QoS (quality of service) on your router, or better yet, take your kids' iPads away! ;)
Conclusion
Take some time. I put about an hour of work into a 15 min screencast. Your mileage may vary. Watch your video! Listen to it, and have your friends listen to it. Does it look smooth? Sound smooth? Is it viewable on a small device AND a big screen? Does it FEEL good?
Sponsor: Have you tried yet? This fast and feature-rich cross-platform IDE improves your code for .NET, ASP.NET, .NET Core, Xamarin, and Unity applications on Windows, Mac, and Linux.
© 2020 Scott Hanselman. All rights reserved.


The 2020 Guide to Creating Quality Technical Screencasts, Presentations, and Remote Meetings published first on http://7elementswd.tumblr.com/
0 notes
Text
Free Up Drive Space in Windows 10 Under Ten Minutes!
If you are getting low disk space warning on Windows 10 or you just want to free up drive space in Windows 10 then you landed on the correct page. Here I will show you how to free up disk space using different approaches.
If you need more disk space on Windows 10 without having to buy external hard drives the best way to do it is to delete unwanted data already present on your PC. The system drive on Windows 10 (C:/) drive should have enough drive space in order for your system to function normally.
Windows 10 take 20GB of space on your system drive when you install it. It takes more drive space when you install Windows 10 updates over time. We should also not forget the softwares that we install on our PC, those softwares also take up space in your C:/ drive. There are many other locations on your PC, that has data piled up years after years that needs to be trashed.
I will list all the possible methods to clear hard drive space on your Windows PC. Most of the methods mentioned in this article can also be used also used on older versions of Windows i.e. Windows 7, Windows 8, Windows 8.1 as well.
Here I am using Windows 1o as Operating System so don't be confused if you do not find the same path or location on your Windows 7, 8 PC. By the way, if you're still using the old Windows OS versions, I recommend you to upgrade to Windows 10.
Also Read: How To Get Help In Windows 10?
Not wasting any more time lets start. Do what is instructed in this article and you will free up Drive space in Windows 10 in no time. All the best!
Remove Unwanted Windows Programs & Apps
We tend to install various software on our PC. I too do the same. But many of my installed Windows software(apps) are sitting idle from a very long time as I do not need them anymore. These are the unwanted Windows apps that we need to look for.
You should do the same. Navigate to Settings app > Apps > Apps & features and closely look for any program or apps that you no longer use. I am sure you will find many of them.
You will also be able to see the amount of disk space any program or app consumes on your Windows 10 PC. Go through all the apps and programs by scrolling and Uninstall unwanted apps & programs.
Here is how you can do it.
Using Windows "Add or Remove Programs" setting:
Warning: Do look closely as you do not want to uninstall any system related Windows programs or apps like any audio drivers or any graphics driver interface.
The above method uninstalls the programs or features from your Windows 10 PC. But there are programs that leaves behind garbage Files, Folders or Registry entries even if you completely uninstall it. To take care of this you can use a third party Windows program called Revo Uninstaller. It's free.
Using Revo Uninstaller:
You need to download and install Revo Uninstaller from here. When the download and installation are finished, run Revo Uninstaller. Here is how I am removing an Unwanted Windows program with the help of this useful tool.
On the Revo Uninstaller dashboard select the program that you want to uninstall and click on the Uninstall icon above. (See screenshot)
When you do that the program will create a system restore point in case anything goes wrong. The restore point lets you roll back any changes made on the PC. Once that process is finished, you will see two popups on your screen. One of them is the default program uninstaller. Run the default program uninstaller first.
After that select the Advanced option and click on Scan.
Once the Scan is finished Select All found Leftovers Registry Items and Click Next & Than Finish.
You can repeat the same process for any unwanted application that you wish to remove from your Windows PC. Revo Uninstaller will completely remove all files and folders related to that particular software.
After doing it you will notice the storage space in Windows 10 has increased. Hold on, we are not done yet. Let's see what are the other things you can do to free up drive space in Windows 10.
Erase Windows.old folder to free up drive space in Windows 10
If you upgraded to Windows 10 in the past from older versions of Windows, you should definitely check your system drive i.e. C:/ drive. If you do not see any Windows.old folder than congratulations, you can skip this, and move to the next method. But if you have Windows.old folder sitting in the drive you must delete it.
But wait!
Let me tell you more about that folder. So, when you did an upgrade to Windows 10, your system took a backup of your older Windows OS version automatically. The folder contains all the system files and apps of the previous Windows version build.
The size of the folder may vary from 10GB to 20GB depending on the data. That's a lot of storage space, right? After the upgrade the Windows.old folder remains on your system for almost 30 days.
This is because if something went wrong or you suddenly changed your mind to roll back to the older Windows OS version, the backup is useful. With the help of Windows installer, you can roll back your upgrade. After 30 days Windows automatically deletes the folder.
So before you delete Windows.old folder make sure all your data, settings, apps are still there on the upgraded OS i.e. Windows 10 OS.
It's not simple to delete the Windows.old folder. Right clicking on the folder and selecting "Delete" will not help you in this case. You can erase
Windows.old folder using a third party software called CCleaner or using Command Prompt. I will list down both the methods with details.
Here is more about CCleaner and how to download it: Download Free CCleaner For Windows 10
Using CCleaner:
CCleaner is very easy to use Windows software. It comes in two variants Free and Paid. for our purpose, Free one is enough.
Note: Not only you can delete the Windows Old Installation directories With the help of CCleaner, you can also perform some other tasks to free up drive space in Windows 10.
For now, let's look at how to use CCleaner to delete Windows.old directory.
Download and install CCleaner from the official site.(Check above for the link).
Launch CCleaner.
As you can see in the above screenshot, make sure you selected "Cleaner" and "Windows" tab.
Scroll down all way to bottom. Under "Advanced" you will find "Old Windows Installation". Just "Checkmark" it and uncheck everything else.
Click on "Analyze" and wait for the program until you see "Analysis Complete".
After that just click on "Run Cleaner". Wait for the process to finish. That's it, the Windows.old folder and all the other older Windows installation files and folders will be erased giving you more storage space on Windows 1o.
Pro Tip: Use Ccleaner to erase other temporary files and cache data from the system. The will let you free up more space on your Windows 10.
Just check the required option, analyze and run cleaner. It's advisable to use this software once in a month to make your Windows system run fast without any lags. I just love this free software.
Using Command Prompt (CMD) Program
CMD is there from the birth of Windows operating system. Though it is mostly liked and used by computer savvy peeps, its not that hard to run some simple set of commands to get the job done.
To launch CMD on Windows 10 Press and hold the Windows Key + R Key.
Type in CMD in the run window and press Enter.
You will see a black window with some text on it.
Just copy and paste: RD /S /Q %SystemDrive%\windows.old command in that window.
Press Enter and the CMD command will be executed.
If you encountered any error in the CMD window, just make sure you are running Command prompt with administrative privileges.
Check your drive space now. You will notice a whopping change in your storage space.
Read: Setup Windows Hello In Windows 10
Free Up Drive Space in Windows 10 Using Storage Sense
Storage Sense is all you need to clear up GBs of storage space on your Windows 10 PC. This feature is only available for Windows 10 users. So if you are using an older version of Windows, this is not for you. But yes you can delete the same things manually from your PC. I will explain that too in a minute.
Many of Windows 10 consumers don't know that there is a handy setting under the System Settings in Windows 10. It lets you free up space by performing a quick scan and letting you choose what to erase. And it can also perform this operation automatically, once you have enabled it.
Let us have a look at the "Storage Sense Setting". Get ready to flush GDs of unwanted data from your computer system and make more space for your PC.
Click the Window icon located at the taskbar and click the Settings icon.
Choose System from the Windows Settings window.
Click on Storage. You will be presented with some very useful options that will never let you go out of storage. Presenting "Storage Sense":
This is where you can turn on "Storage Sense" and let Windows 10 free up space automatically.
If you don't want to use "Windows Sense" and just want to delete unwanted data and get storage space, you can easily do so. If you look at the screenshot above closely there is an option "Free up space now".
This option lets you choose and delete all sorts of data that Windows thinks as erasable without breaking your PC. The data is categorized and a short description is provided under each category for a clear understanding of the Windows 10 user.
Tip: Once you perform all the actions mentioned in this article, do restart your PC. It's not necessary but it's good.
You may select to delete data from these 13 categories:
Windows upgrade log files
System created Windows Error Reporting Files
Windows Defender Antivirus
Downloaded Files
Windows Update Cleanup
Thumbnails
Temporary Files
Delete all System Restore points
Recycle bin
One Drive Files
Temporary Internet Files
Delivery Optimization Files
DirectX Shader Cache
You should know what you are doing when performing this action.
For example,
Delete System Restore points:
Windows Create System Restore Points whenever a major change is made on to your system. Most of the time the major change is made when you install Windows updates. These restore points are like backups which can be used to rollback to the earlier build of Windows 10.
So if you are not facing any issues on your Windows 10 PC and everything is fine, go ahead and Check Mark "Delete All System Restore Points" and click on the "Remove Files" button on the top. You know I just free up 10GB of space by removing system restore points.
Delete Downloaded Files:
As said, you should be very careful while trying to free up drive space in Windows 10. You may have downloaded huge size software on your PC for your work. Whatever you download goes in the Download folder on your PC. So before you choose to delete Downloaded files, make sure you have moved your important files to another location on your PC drive.
We all agree, not everything in the Download Folder is important. It may be important when you first downloaded it but not anymore. The Download folder in Windows 10 is the first place you should look to free up storage. Setup files, PDF's, Videos, Audios and what not, all these unused items should be deleted.
Storage Sense is a great feature to use for Windows 10 users. For the users who are still on the older version of the Windows operating system like Windows 7 or 8 and do not have the Storage Sense feature, Just look for the 13 categories as I mentioned above. Remove the data manually and you will be able to clear GBs of storage space.
Read: Get Help With File Explorer In Windows 10
Over to You
[kkstarratings]
This is all you need to do to take care of your Windows 10 storage space. The above methods are enough to free up drive space in Windows 10. Just performing the above methods will claim more than 30-40GB of storage space.
Well, once you have enough storage space, you are ready to download anything you want. Maybe a few songs or movies? Do comment below how much drive space you cleared using my methods? and also let me know what is the first thing that you will download.
Isn't it awesome to claim back the storage space already available on your PC? Are you happy? If Yes, please support me by sharing this article as much as you can. And come back for some more helpful information, I update my blog regularly. Thank you!
The post Free Up Drive Space in Windows 10 Under Ten Minutes! was first published on: Windows 10 Helper
0 notes
Text
The tragedy of one use data transfer passwords...
So TsukiPara suddenly refused to load properly for me. I was playing the event and everything was fine then things started to go wrong when I went back to my home screen. The background wouldn’t load. When I pressed the buttons to go somewhere else, e.g. the present box, those other pages would either fail to load properly as well or just crash...
I restarted the game several times but the home screen still wouldn’t load properly. I checked the official Twitter to see if there was a server problem or something. Nothing. I cleared the cache, still had the same problem. Then I cleared the game data (I had set the data transfer password already), still the same home screen loading problem.
In the end, I had to uninstall the game... and the tragedy was I’d forgotten that the data transfer password was ONE USE ONLY... orz I’d already used it when I cleared my game data... T^T (The data transfer passwords can be set at the title screen for TsukiPara. I had no trouble getting to the title screen.)
Well, the consolation is I haven’t really gone too far in this game yet and don’t even have a 4 star card yet so... But, but, my event points!! And I don’t even know if the loading problem was solved or not as I just kind of put everything down when I realized I had to start from scratch...
Oh well, guess I’ll just concentrate on YumeCast and Banyaro’s events then. I’ve already given up on Dfes’s as calculated that I don’t have enough recovery potions to get my target prize.
2 notes
·
View notes
Text
zooqle and other torrent sites are still working

Zooqle is a popular torrent site used by millions to download TV series, movies, books, and everything else that is provided by a standard torrent site. However, there may be times when a site encounters certain problems for a number of reasons. Maybe you are someone who has just hired a dissertation help and wants to take some time away from your dissertation to watch a movie or two. and you thought is zooqle and other torrent sites still working In that case, if Zooqle doesn't work, it's really a drag. But don't worry, we have tips and tricks to try to reach Zooqle.
Use Zooqle VPN:

Some countries block such floodplains because they are illegal. One of the reasons why you can't open Zooqle is probably because it is restricted to your country. The best way to counteract this is to use a
VPN
. There are many free VPNs available online that can do the job you want. Try more of them. If none of them work, proceed to the next option.
Clear Your Browser Cache clean:
Usually, the easiest thing to do when you can access the Zooqle website is to restart the Internet browser, reload the site with F5, remove the web browser cache, disable newly installed browser extensions, and temporarily disable the firewall app. You may also decide to wait a while before entering the website. It can also help to restart the PC.
Change the default DNS servers:
Users also recommend that the default IP addresses used on DNS servers should also be changed. Using Google Public DNS, for example, it seems to fix Zooqle linking issues in some cases. You can bypass the DNS site filters that block Zooqle by doing this.
Try another device:
Before you can do anything else, there is something else you can do. If you do not open or can not open Zooqle on your device, you should try to unlock it on your tablet or other device. You can also ask your friend to do it for you. If Zooqle opens on a different machine, you're in trouble.
Try a different browser:
Try to find out if it is a browser-related issue or not. The Zooqle website may not be open in Internet Explorer, but it will load properly into Google Chrome or Mozilla Firefox. Since your browser may be the real cause, you should not ignore this step, and in each step, you should determine the cause of the problem with a proper diagnosis. Some browser extensions, for example, may block access to certain websites as defined by the user.
Clear Browsing History:
Go to your browser settings panel and remove your browsing history and cache completely. Cleaning the cache and browsing history of your browser can help, as your browser will try to connect to the website after cleaning, instead of returning files that were previously cached to their local repository.
Remove Your Browser Extensions:
Many browsers already support or allow users to install plugins to increase performance to the right level. Sometimes, due to certain factors such as compatibility, lousy coding, etc., these extensions can cause problems. If so, you may have a similar problem with your computer. Therefore, removing all extensions in your browser is a wise decision to make sure that the extensions are criminal or not.
Reset browser settings:
If the solution does not work for you, as described earlier, you should try resetting the browser. The method is also different, and varies from the browser you are currently using.
Scan your PC with Anti-Virus:
If there is a malware or suspicious program attacking your computer, it will prevent Zooqle from being opened on your computer. Some malware, for example, prevents users from opening any security-related pages. You need to search your computer with a reliable anti-virus like Avast or Kaspersky in that case. If you have a Malwarebyte, that would be great. It makes no sense to say that any suspicious file installed on your security shield needs to be deleted. After that, to restart, don't forget to restart your PC.
See Your Windows Firewall Settings:
Did you or anyone else on your device intentionally install and block links to the Windows firewall on certain websites, such as Torrent sites, or Adult Sites? Try disabling the default Windows firewall service from the control panel, uninstall third-party firewall applications, and check if the problem persists or not.
Switch to Google Public DNS
It is quite possible that your default DNS server had a problem downloading certain sites, so you might try using Google Public DNS or Open DNS as a test option to access Zooqle. If this option does not work again, proceed to the next option.
Disable proxy:
This is a common problem when your PC is targeted by a different adware or malware. This setting is enabled by a different adware, so users have trouble opening the site on their device. It doesn't matter what Windows you use, but you can find the solution here.
If you are using Windows 10, check the Internet options in the start menu or in the Taskbar search box. Go to the Connections tab and press LAN Settings. Remove tick operating server from your LAN option and save the update. Now, try opening Zooqle that has not been uploaded yet.
Try Adding HTTPS First:
The government has banned many places in different countries. For example, because many governments have issued regulations for ISPs to block certain sites, you may not be able to open your own sites. In several cases, however, if you install https, you can open the website smoothly at first.
Change Time for Your PC:
While there is a mystery behind this solution, it works in a variety of situations. You can change the timing of your program without difficulty, whether you are using Windows, Mac, or Linux. For Windows, press the Win + I button to open the Windows Settings screen. Go to the Time and Language tab> Date and time later. You
1 note
·
View note
Text
AVG Cleaner Pro v4.21.0 APK Cracked {Full Unlocked}
AVG CLEANER PRO APK
With AVG Cleaner, your Android device will get faster and faster, buy more records, refresh memories through junk cleaning, and charge live for longer. AVG Cleaner is a smart device manager and optimization tool that has already been installed using about 500 million mankind.
So if you are looking for AVG Cleaner Pro APK, then I have said that you have come to the right place. First of all in this post, I will bring you all the necessary facts about the most famous cleaning tool AVG Cleaner Pro.
Similarity I provide you more direct link to download AVG Cleaner Pro Apk + [No Ads] + [Premium] + [Mod] and I will show you the whole installation method.
Android is a huge running gadget. The equipments running on this running machine occupy about seventy five% of the total market area.
It is a running machine that customers can use without any difficulty. Although it has some limitations.
There is a small gap between high stop and low-drop gadgets between these devices and they become sluggish after periodic use.
Additionally, these tools generate all the junk files and so the methods gradually go down. What do you think to do now?
AVG Cleaner APK is a software to remove junk and enhance your Android phone. Sometimes cell phone manufacturers have default applications for cleaning trash. But guess what? They are not good enough. This is the only purpose you need for the best equipment.
You don't have to worry anymore. This article got your bottom back! We recommend a good utility that comes to your device quickly. That's the average cleaner pro.
Additionally AVG Cleaner Pro 2020 is a software that allows its users to clean up junk files and folders and speed up Android cellphones.
Average Cleaner Pro Modern APK
Can you now imagine if you could get things done without spending a penny? Yes! You can For this, there may be a pro model.
It’s so fascinating that not everyone can manage to pay for these large sums of money month-to-month. As we noted in this newsletter, the cutting-off mode of the AVG Cleaner Pro APK is slow.
Additionally, this newsletter tells all the steps, in a nutshell, to keep and download this unique software.
Similarly clean your smartphone to unlimited garage area, help it run smoothly and quickly, and increase its speed and overall performance. In the meantime provide more garage space for apps, pix, and various accessories to remove junk, clean caches, memory improvements, awesome first rate, similar, or reproduction image.
AVG Cleaner Top Features:
Remove pre-installed apps first - remove pre-hooked-up apps to keep the area and increase overall performance
1. Get more territory - remove antique files, uninstall apps, and delete scary or unnecessary images and movies.
2. Improve Related Performance - Use a cleaner to clear cache, cast off junk, and identify applications that are slowing down your device.
L. Long battery life - The cleaner's battery saving function allows you to improve your device's battery life.
H. Hibernate Apps - Suspend history apps to prolong battery life and save mobile data.
S. System Data - Everything you need to know about your phone in one display.
F. File Manager - Smart file manager and storage cleaner can check images, documents, and applications to help you maximize the overall performance of your Android device.
J. Junk Cleaner - Clean any junk from your equipment.
0 notes
Note
off and on in the extensions? i've literally tried everything, xkit shows up when i click on my inbox it's there, just not when i'm on my dashboard.
That is so weird wth?? Maybe like try clearing the cache and cookies on chrome? Or backup then uninstall and reinstall the app?? If you haven't already that is 😅
#ask#drisendemauryy#haven't been online all day cause ANIMAL CROSSING NEW HORIZONS IS HERE AND IM LIVINGGGGFF
0 notes
Text
Shadow Fight 3 Mod Apk Download + Unlimited Everything + Frozen Enemy
New Post has been published on https://www.apkrich.com/shadow-fight-3-mod-apk-download-unlimited-everything-frozen-enemy/
Shadow Fight 3 Mod Apk Download + Unlimited Everything + Frozen Enemy
Shadow Fight 3 Apk Mod is a popular Role Playing game which has the incomprehensible force that came out of the Gates of Shadows many years ago is now an ordinary source of power. You can play this update version in online or offline mod. Just download the latest version and PLAY!
Shadow Fight 3 Latest Version Features
1. Mighty Military Tribe
Shadow Fight 3 provides you a mighty military tribe, the Legion, has its primary purpose the elimination of hazardous energy.
2. HD Graphics
Now you can enjoy modern 3D-graphics, realistic physics and animation.
3. Different Fighting Styles
It is Combined with 3 different fighting styles into your own unique way of playing and Collection tons of different weapons and equipment.
4. Special Shadow Effects
You can Use special shadow abilities, perks, upgrades and Travel across a big world map full of spectacular places and stories. Here are some user reviews
Bidyut Kapri: I am playing this for a few months…Already I have understood that it is a very suitable game for me…Also, it is a high-quality graphics game…Moreover, it has become the world’s best to me game while I have updated it…I will not tell more words than it…Finally, I will advise all of brothers, sisters, and also my senior ones to play and enjoy such a beautiful game…
Madhav Ramini: Hello. Chapter 7 is really good and awesome. It has new types of weapons and armors. Please also add new weapon in Dynasty faction. But one flaw – the game does not open after closing it the first time. It remains stuck in the “Nekki” loading screen. Please fix so that everyone can enjoy the game. Thank You.
Harsh Jindal: Hey there, First of all, I really love the game… I have been facing an issue in the game. I am on Chapter VI, Last Level, i.e The Shadow Mind I can’t wait to proceed to the new Chapter VII. But I have beaten the Shadow Mind several times and then their itself the game freezes or hangs. It is happening after the recent update, I have tried clearing the cache, and have cleared all the data once and reinstalled the game but all in vain, the problem still persists. Please do help soon…
Nafis Morshed: The storyline is LEGENDARY. The story makes me play the game. The game mechanics are kinda complex but once you get used to it, it’s easy to understand and control everything, it’s definitely good. The graphics, gameplay, and controls are very decent. The online Duel Mode is a joke by the way. The matchmaking is a joke although they keep improving it it’s still rigged. And obviously, cool gears as always. Finish Shadow Fight 2 first to get the complete taste of the story of Shadow Fight 3.
Dennis Felton: This game is a very fun experience so far. Just reached level 2. I am currently hoping that the weapons and armor do not get “godly”. A basic truly practical deadly weapon and believable armor are what make a really good game. Keep up the good work!
Jaroslaw K: It’s a real pleasure to play the game. Well developed and good graphics:) But at some point, you have no chance to progress if you don’t pay. Normal difficulty, in fact, is impassable and all chests give you everything but not what is needed. So you are stuck with PvP challenges and hope that one day you’ll pass the mission:) Business is business but that has actually put me off a bit.
Kshitiz Gupta: Excellent game… Have played all the chapters and looking forward to completing chapter 7. But there is a thing that needs to be fixed here before that happens. With the recent update, the in-menu navigation has become really slow and the game freezes for a few seconds while switching between the screens. This has never been the case with the previous versions of the game and it really makes the game unplayable. Please fix this quickly so that I can enjoy the game again as ever.
Jhazzy Music: It’s one of the best ancient fighting game. I love it more than mortal kombat for mobile. The graphics are superb.. The only thing I want that’ll make me rate it 5 star is local Multi-player!! Pls, add that in the update.. If I can play against my friend online. It’s very okay or via WiFi locally… Please I know there are a lot of people that want this too… Please work on it.. We’re waiting.
Glen Allison: Beautiful graphics, lots of equipment/fighting style choices, lots to do and the monetization is not in your face. There is a story campaign but having not played parts 1&2 I couldn’t follow it very well. One of the most impressive games on mobile ever, the animation, style, detail, and size is spectacular.
Chef Jeffrey A Kaufman: Always a classic. The Shadow Fight legend continues. This one is even better than the previous installments. Great piece of gaming from a great developer. Love it. Still paying SF2 along with this newest edition. Great games both. The only issues I have are the following. Matches are often very poorly matched. Many times you’re matched against players 500 to 900 points above you. Making it impossible. Gems are sometimes lost while picking free items. The storyline doesn’t keep up with abilities
Felix Romanov: So, the graphics are amazing and the moves are pretty good as well, though, overall, my experience was pretty much horrible. I immediately had to download a large file before I could even open the game, then I had to download ANOTHER large file, the game lagged extremely hard between fight rounds, after the third fight, I had to download something ELSE. I eventually just gave up and uninstalled. My recommendation for the devs is to maybe make all this stuff one large packet, just like Shadow fight 2, so there would be more time between downloads. Yes, this would significantly increase the base download time and update time, but altogether it would provide more streamlined gameplay. Also, maybe add a “Low Graphics” setting at the very beginning for people on devices that aren’t so good?
prasanna spidy: I love the game…. everything about it… except you cannot challenge your friends from facebook… or you know online friends… that would be really great if you could work on it. thank you.
A Google user: Shadow Fight’s evolution is going so good. At first, it came Shadow Fight in 2001. Then Shadow Fight 1 in 2011 in only Facebook. Then the Shadow Fight 2 in 2013. After that Shadow Fight 2, Special Edition came in 2017. After all, in the same year, it came the Shadow Fight 3. The most modern, beautiful game. Its gameplay is so good. Hope that the next Shadow Fight game which is Shadow Fight 4 will be more existing, more gorgeous, more in form. I can’t wait until NEKKI publishes it.
Dylan Mantell: Awesome Update, It is great to see that legendary equipment is getting a much-needed buff. On the downside, there have been a few glitches where I am fighting an opponent AI in the gold event and it freezes where both the AI and myself stand there staring at each other, as amusing as this is it makes me have to restart the progress every time it happens by surrendering.
Karlis Pupols: Thanks for updating most of the pain points. Though this update does require still a bit of tuning. Some animations feel a bit too fast to be accurate. Also fights experienced freeze with the new Qatar item. Would like to see some bigger update information, seems as many things updated aren’t documented to the players (like items in the store). Also, still really hoping we could upgrade item tiers in future so you can equip 3 abilities on a common armor. thanks, bonomi mike:
Great gameplay, awesome graphics n tonnes of weapons pretty cool but I’d have to give 3 stars due to d ascension event update literally messed my game up can’t do many duels get stuck lost lots of tickets, can’t get past chapter v sip of war coz apparently it doesn’t load d final baddie same as side quest so basically all m doing is fighting online #lame# kinda gets boring. Pls, can this b rectify m tired of downloading large update files n still having the same issue? Pls fix this nid change my rating
Mack Tariang: A 5-star game no doubt!! good graphics gameplay and storyline compared with the previous shadow fight… sadly there are still a number of bugs glitches and a duel match can sometimes be really ridiculous.. matching against opponents who are soooooo over equipped with a rating of 500..600 above your own character!! still a highly recommended game!! enjoy
Yvanny Kadima: I loved this game. it was good quality and fast loading. Until… the update. all of my armor just disappeared after tried on a new one. I’ve tried uninstalling, reloading, and even logged out but it still won’t work. Please fix it, this was my favorite game now it’s too laggy.
Download APK
Additional Information
App Download Version Varies with device Last Updated April 20, 2019 Apk Size Varies with device Offered By NEKKI Category Role Playing Content Rating Rated for 12+ Support Android Version Android 4.1 and up Installs 10,000,000+ Play Store Available
Shadow Fight 3 App Permissions
This app has access to:
read phone status and identity
Photos/Media/Files
read the contents of your USB storage
modify or delete the contents of your USB storage
read the contents of your USB storage
modify or delete the contents of your USB storage
Wi-Fi connection information
read phone status and identity
receive data from Internet
view network connections
full network access
run at startup
use accounts on the device
control vibration
prevent device from sleeping
Google Play license check
0 notes
Link
Are you struggling to make your Android faster?
Well, you are not alone. Almost all android users face the sluggishness of their phones after using it for a couple of months.
In this article, you will get to know how to make your Android faster. If you follow the tips mentioned below your phone’s battery life will also improve.
So let’s jump into this.
Tips to make your Android faster
1. Check your phone’s internal memory
By default everything (including photos, videos, cache, downloads including OS updates, and cache) gets stored in the internal memory of your phone. Many people don’t care about changing this setting. This leads your phone to run out of memory. As your phone’s internal memory continues to fill up, it starts slowing down and you feel sluggishness in the performance.
This happens because your phone’s internal memory is a solid state drive(SSD) which slows downas it gets filled up. Your mobile’s OS and apps need minimum 1 GB free internal space to run smoothly.
what can you do to keep the adequate room in the internal memory?
Steps:
You can always clear up cache in a regular basis, maybe once in a week.
Set external memory card as default for storing camera pics and videos.
You can also set external SD card as default for all types of downloads including OS updates. It is advisable to delete the OS-update file after completion of the update.
Permanently delete all the unnecessary media files which you are never going to use again.
Delete unnecessary media files inside the WhatsApp folder in the internal storage.
Not everyone can afford to get a phone with a huge internal storage space but buying a smartphone with a good number of gigs of memory is always a wiser choice.
2. Use the latest version of Android
Many of us ignore the official OTA update for saving our mobile data quota. Well, I can understand that you always fall short of internet data. But OTA fixes many bugs and improves the stability(makes your android faster). Usually, OTA is not too big(200-300 MBS) unless you are getting a new Android version altogether. If you don’t want to spend 200-300 Mbs also to update the OS, you can always use a free WiFi connection available in your offices or your institutions you study in.
3. Keep the limited number of Apps and useful apps only
Some Apps are movable to SD card but those Apps cause hanging issues in your mobile. Some people don’t use more than 10 Apps practically but keep many Apps which they hardly use. Few Apps keep running in the background which leads to higher consumption of RAM memory. Therefore the device starts struggling to run fast. Not to mention the battery performance also tend to decrease with more number of unnecessary Apps installed on your phone. So it’s wise to make necessary Apps list and keep those installed on your phone only. Try this and you will notice a remarkable improvement in your phone’s speed.
4. Root your device and debloat every Apps you never use
The smartphone makers usually add bloatware which can become nightmares for some people who are not aware of the rooting procedure of their devices. Rooting is not advisable if your device is under warranty. Risk of bricking your device is always there if you do any mistake while rooting.
But everything comes with advantages and disadvantages and rooting is not an exception. If you successfully root your mobile you can debloat all the bloated software by using applications available on play store.
Debloating makes extra room in your phone’s internal memory and frees up some RAM memory. If you are a newbie in rooting, you can take XDA site help wherein you will find plenty of tutorials on rooting. Just search “your device name+root” and you will find many informative tutorials on rooting. Rooting makes your Android faster because it allows you to use some Apps like “Greenify” which hibernates Apps automatically and hence improve RAM management as well as increase your phone’s battery performance.
5. Flash a lightweight custom ROM
The best thing about Android-powered devices is that you get the freedom to try custom ROM if you are not satisfied with the stock ROM. Custom ROM doesn’t come with any bloatware and thus perform better than the stock one.
To flash a custom ROM, your device must be unlocked and should have a custom recovery like “Twrp” installed. You can do both in a matter of a few minutes if you are experienced. If you don’t know about unlocking your device and installing a custom recovery, just head to Xda forums. You will definitely find a solution over there.
Please remember devices with “MediaTek” processors are not supported that much and development is usually underwhelming. So you may end up getting a buggy custom ROM and you may not have many ROM options to choose from. Qualcomm-powered devices have more options when it comes to custom ROMs availability. So if you have MediaTek device, better stick with the stock ROM itself.
6. Refrain from using animations
Animations are one of the culprits which slow down your phone. Using animation don’t really make any noticeable difference in appearance much for most of the users. In case your phone is not fast enough then try to turn offWindow animation scale,Transition animation scale, andAnimator duration scale. You can find these options in the developer option in your phone. If you can’t find developer option then you can go toSettings > About phone> system >Build numberand tap it seven times. You can set these animations to 0.5x if you don’t want to turn them off completely which can help you to make your Android faster.
7. Use lite versions of important Apps
Fortunately, most famous Apps are already released in the lite version apart from the regular version of these Apps. Facebook’s regular App is too heavy for low-end phones with 2 gis or less RAM. The regular Facebook App is too big(around 70 Mbs) while the lite version is below 5 MBS. Also, the Facebook messenger comes in the lite version which allows you to take advantage of messenger without bulking your phone. Not only Facebook, Kindle, Skype, Twitter, Shazam, Line, Opera browser all come in the lite version. Try them today and I bet you, you will stick to them in the future as you will not miss the most useful functionalities these lite versions offer. Your phone speed will skyrocket like never before. Lite Apps are great alternatives to try and make your Android faster.
8. Delete cached up data
Cached data start accumulating since day one when you start using your phone. This data definitely help the respective Apps to load faster but there must be some apps you might have uninstalled. So these extra cached up data take up quite a lot of your phone’s internal storage memory. There are two ways to clear up the cached data. You can select an individual app and clean up cached data if you have relatively lesser Apps installed. In case, you have more than 30 Apps and you don’t want to do this boring work again and again then you can take help of Ccleaner. To clear up cached data individually for each app you need to go toSettings > Apps>Alltab and tap on each App and clear cache. For deleting all cached data including cached media files you can go toSettings > Storageand tap onCached dataand then pressOK.
9. Read reviews of Apps before installing them
Google has provided a review and rating system in the play store for a good reason. These reviews help new users to get an idea of how good or bad an App may be. Also, the review date is mentioned after the name of the reviewer which indicates which particular build may be having bugs. Some Apps just make your phone overloaded and make them sluggish due to bugs present in them. So make a habit of reading reviews before installing a completely new App because prevention is always better than cure. It’s better to stay away from the buggy Apps rather than installing it and again uninstalling it when your device starts behaving abnormally.
10. Do not keep unnecessary accounts and auto-sync active for all accounts
Auto-sync is a great feature which can help you to keep your contacts and important photos safe. But keeping this feature on for all the other accounts will simply use a lot of your phone’s resources for no good. Keep Auto-sync on for that account only which you always use on your phone. For other accounts, you can turn it off completely or reduce auto-sync frequency. This will also help in increasing battery performance. Try this and see the difference yourself.
11. Use static images instead of live-wallpapers
Using live wallpapers not only slows down your phone but also affects the performance of the battery. There are a lot of cool static wallpapers out there. You can check those wallpapers on Zedge. Try dark wallpapers which will help in increasing your phone’s battery performance a lot.
12. Do a factory reset as the last option
This step is recommended only as the last option if you don’t get the desired performance even after trying all the ways mentioned above. This will clean your internal storage meaning you will not have access to any data stored in the internal storage anymore including contacts, media files, and documents etc. So before you proceed to take this step, back up everything you need. You can do a factory reset by going to Settings > Backup & reset > Factory data reset. After reset, you will feel like you are using the new handset as you bought it and used for the first time. It will be that snappier.
What steps do you take when your device starts to stutter? We would love to know your suggestions to make Android faster.
https://ift.tt/2tuJkG8
0 notes