#How to Choose the Best Hiking Handheld GPS
Explore tagged Tumblr posts
Visit Tumblr Blog
Explore Tumblr blogs with no restrictions, modern design and the best experience.
Last Seen Tumblr Blogs


Fun Fact
Tumblr was created by web developers David Karp and Marco Arment.
Link

How to Choose the Best Hiking Handheld GPS
0 notes
Text
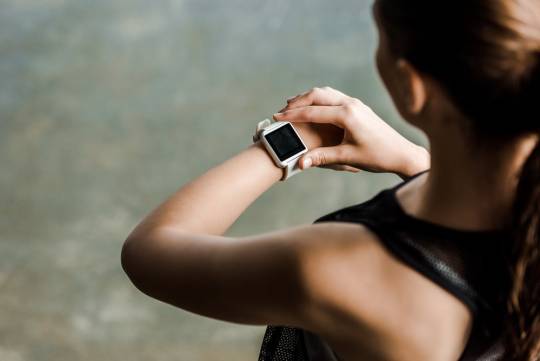
Fitness Trackers Are Becoming Very Popular Among Fitness and Health Enthusiasts
When it comes to monitoring one's health, there's no better piece of equipment than a fitness tracker. There are so many reasons to use a fitness tracker. For instance, if you're running or walking regularly and finding that you're getting no results, you should know your distance covered and the calories burned by that exercise.
By using fitness trackers, you'll know how well you're progressing. Even if you're not actively involved in any kind of fitness program, you can simply track your weight and activity performed and learn how you can make improvements in simple ways.
Increase in Popularity
These types of wearables have become incredibly popular over the last five to ten years. They've been featured in numerous home gyms and commercial gyms. Athletes in various sports are also using them. One of the main reasons that people purchase these is that they offer a lot of information.
They Come with Many Impressive Features
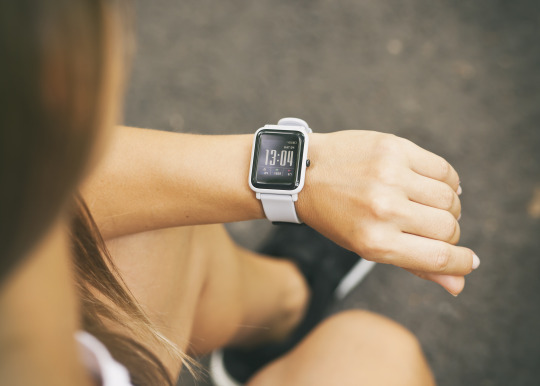
There are various kinds of fitness trackers to choose from, including those that are wristwatches and those that are handheld devices. In the case of a wristwatch, you will have an alarm that automatically goes off when your workout is completed.
There are even some types of fitness trackers that can tell you your heart rate. These devices are typically considered to be a good investment because they help people stick to an exercise plan, and they help them maintain that plan over the long term.
While it may not seem like a useful feature to you at first, some of the best fitness trackers actually offer sleep tracing features and alarms. This is useful because you can wake up early in the morning and begin your workout routine. This has to be one of the most useful features of smartwatch models.
Many wearables nowadays allow people to set up their exercise plan easily. For example, some devices provide workout plans for hiking, running, lifting weights, or other various activities. Most of these devices have pedometers, heart rate monitors, and other such features. The chances of sticking to a workout plan are much higher when you use a fitness tracker. Visit GearStarving to know more about fitness trackers.

They Are Useful for Diabetics
Of course, we live in an age of technology. This means that there are tons of other interesting medical and health wearables available to consumers today. One particular category of wearables for people with diabetes is the glucose monitor watch.
The glucose monitor watches usually come in a standard wrist band or an advanced band style. These watches allow people with diabetes to stay healthy and help them avoid the troublesome process of counting carbohydrates during the meal. For someone who has diabetes and has difficulty counting carbohydrates, this type of device can be beneficial.
Perhaps the most common type of wearables for people with diabetes is the HEMED machine. A great number of people who have had to deal with blood sugar issues over the past few years will find that the HEMED is the perfect device for them.
HEMED
As an anti-glycemic solution, the HEMED is one of the most advanced glucose monitoring devices on the market, but it is also an extremely small device. Most fitness trackers of this type are small enough to fit into a pocket.
Fitbit
There is always the Series 3 Fitness Smartwatch from Fitbit for those interested in more technologically advanced fitness trackers. Series 3 Fitness Smartwatches comes in several different models.
Mio Motivo or ThermoFit Pulse Smartwatches
You can choose from either the Mio Motivo or the ThermoFit Pulse Smartwatches, depending on your own needs. These fitness trackers come with many features, including heart rate monitors, sleep sensors, foot pods, and GPS tracking. If you are looking for the ultimate in technology, these two fitness trackers are worth checking out.
1 note
·
View note
Link
Written by Guest Contributor on The Prepper Journal.
Editors Note: An article from John Lewis to The Prepper Journal. As always, if you have information for Preppers that you would like to share and be entered into the Prepper Writing Contest with a chance to win one of three Amazon Gift Cards with the top prize being a $300 card to purchase your own prepping supplies!
A GPS is one of the important tools you must have in your bug-out bag. This is one of the most effective tool to help inform you ‘where you are’, which consist of three essential components namely your position, your orientation and the intended direction you want to go.
It is only by using the GPS effectively that you can navigate your way with ease. GPS here would refer more towards handheld hunting GPS systems rather than the Global Positioning System used in vehicle/transportation navigation per SE. While they both operate on a shared signal the end-product filtering is specific to the medium of travel – overlaid on known roads and channels vs unrestricted access to all that is in front of you, no matter which way you turn.
Utilizing Distress Signals to Keep Yourself Safe in Times of Trouble
You can choose to make use of the distress signals and navigational aids for your GPS. You can do so by utilizing the two kinds of transmitters that can give out distress signals, which are personal locator beacons and satellite messengers. The personal locator beacons are usually used only when a person is faced with extreme emergency situations. It uses the Distress Alerting Satellite System (DASS) which is controlled by NASA to track distress signals.
We would commonly utilize satellite messengers as navigational aids to inform our rescuers where we are so that can focus on rescuing us rather than ‘searching’ us. Remember to put an adapter into your GPS to allow this function because most GPS units only contain receivers which are incapable of sending out distress signals.
Do Scouting Before You Go on Your Next Trip
Scouting is one essential thing you have to know how to do because it can make your outdoor trip a success. Basically, you have to first utilize computer maps to understand how the surroundings appear. Next, you can put several markings on a path which interest you. Later, you can transfer those markings as way points into your GPS, the electronic breadcrumbs Hansel would have loved to have.
When you are outdoors hiking or hunting, you can use these waypoints as a reference on where you should go. The thing you have to make sure is that your GPS has sufficient memory to store all the waypoints you would like to put. If you employ this method and scout before you go to your next destination, you would be able to keep yourself on track while having a better understanding of your surroundings.
Adding your own Point of Interests (POI) is a relatively easy thing to do as well! Usually, the POI information in most GPS is either outdated or lacking in information that we really require.
Keep Your GPS Software Updated
Usually, your GPS manufacturer would provide firmware updates for free. These updates are really useful because it can help make your GPS function smoother than before and it can help fix some system glitches. Do keep in mind that your GPS needs a current list of all mapped places to be truly effective. Fortunately, keeping your device updated only involves a simple process.
First, you can connect your device to your computer and make sure your device is powered on. Using Garmin devices as an example, you just have to install Garmin Express in your computer and have an account to install updates. As for other units like Megellan, you can try searching its support page.
For firmware updates, the manufacturers would usually provide it for free. However, you may need to pay a fee to update maps. Also, be sure to keep you GPS in good shape. Clean the screen with an eyeglass lens cleaner as opposed to harsher chemicals and avoid abrasive paper towels or cloths for clean microfiber pads.
Explore Different Navigation Methods
With a wide spectrum of GPS systems to choose from, you can also choose how you would like to navigate from point A to point B using a GPS. You can have 3-D locations which you can navigate on your GPS screen, but this method would require a huge memory capacity on your device. Another method is to input Point of Interest in your GPS and simply follow the POI that you set.
You can employ different navigation styles to know which of them best fit you in various situations. You may want to navigate by touching the maps on screen if you want to know where a certain destination is. However, you may only want to navigate following the way points you saved in your GPS if you are on foot. This would influence how effectively you are able to move from one place to another.
Using Your GPS to Help You Get Your Game
For specific activities, a GPS can be used specifically to benefit you in carrying out those activities. For hunting, a GPS can aid you by searching direct routes to your favorite hunting spots. You can even know how to place your tree-stands by using the information given by your GPS.
Usually, it is better for us to stand on a tree-stand with north wind because it helps to push our shots forward. With a GPS, you can determine which tree-stand can give you this result at that particular time of the day. Furthermore, you can navigate your way to a tree stand in the dark using your GPS, which means that you won’t expose your honey-hole to other hunters!
Other benefits include helping you determine whether the land you are crossing is public land or private land, and, if the latter, drive you to search for either the most direct through or to a point of interest where you can seek the owners consent to hunt or pass through. All these benefits can extend to when you are mountaineering as well!
Conclusion
By understanding how to use a GPS, you would have an edge to go to the places you want in the most effective way possible. Selecting the most suitable GPS for yourself would be an important aspect as well. There are several aspects to consider including the screen size, whether you are more comfortable navigating using buttons or touch-screen and whether it is durable enough to sustain what you plan to go through. Also power consumption, a fully bright color screen is cool but it drains battery power much faster than a monochrome screen. Obviously also consider battery life, if it can be recharged by your portable charging devices, the use of solar, etc.
Other important aspects would be how good you need the satellite reception to be especially if you like to travel deep into the woods which usually has minimal reception. The map images above serve as examples of coverage in small city areas for commercial stations; true radio mapping surveys are sometimes classified, depending on what is in the area of the survey. They do serve as an example of the limits of coverage based on many factors. The “know before you go” can’t be over stressed. The memory capacity is also an important thing to consider, especially the availability of an MicroSD Card slot for your GPS. If you select the most suitable GPS for yourself and make the most out of your GPS, you can definitely navigate effectively!
John Lewis is a blogger, survivalist and outdoor enthusiast who can be reached at Epic Wilderness.
Follow The Prepper Journal on Facebook!
The post GPS Hacks: 5 essential things you must know about your GPS appeared first on The Prepper Journal.
from The Prepper Journal Don't forget to visit the store and pick up some gear at The COR Outfitters. How prepared are you for emergencies? #SurvivalFirestarter #SurvivalBugOutBackpack #PrepperSurvivalPack #SHTFGear #SHTFBag
1 note
·
View note
Photo

If you have read my previous articles on What to Pack for an Overnight Hiking Trip, and Beginners Guide to Packing a Rucksack, you should be all set to head out on your first overnight hike. But how do you prepare for an overnight hike? What do you need to think about to not only keep yourself safe but to have an enjoyable time?
As a hiking instructor, I have taken thousands of students on their first ever overnight hiking experience so keep reading below to see what I have learnt about planning an overnight hiking trip for beginners.
Keep it simple
Your first overnight hiking experience should be exactly as described, an “over-night” hike. This means heading off for just one night away or maybe two if you feel you’re up for the challenge. There is a lot to learn and get used to when overnight hiking and your body will get a bit of a shock.
Not only does your body need to get used to the physical side of walking and carrying a load. But you will need to get used to sleeping on a lightweight sleeping mat, and using all your gear. Not to mention the change in diet to lightweight foods.
By keeping your first experience short it will give you a chance to get used to the different lifestyle without being committed to an extended expedition
Keep it simple for your first trip.
Don’t walk too far!
Walking with a fully loaded pack is very different from day-walking. Even if you consider yourself to be quite fit you may find walking with a pack to be a very different experience than what you’ve had before using different muscles in different ways.
Most walks that I plan for beginners have been between 5 – 10km’s per day and usually involve beginning your walk at morning tea time and ending your walk at lunchtime the next day.
Don’t try to tackle too many km’s on your first experience. You should be able to walk at a relaxed pace, take plenty of breaks, enjoy yourself, and still stroll into camp with at least an hour of daylight left.
Start locally
Your first hike should not be far from home. Try not to hike in a remote area and do not attempt to walk off-track. A nice short walk close to your town or city with easy, marked trails and proper campsites with vehicle access is a wise move.
This not only ensures your safety but gives you the ability to make your trip easier and get assistance if you need it as you get used to this “overnight hiking thing”.
Choose a walk that is low km’s yet interesting, picturesque and remote enough that you get the full experience of being self-sufficient.
Walk with a friend
I will always recommend that your first overnight hiking experience should NOT be alone. Go with a friend, preferably an experienced friend that can offer advice and encouragement if needed.
As much as hiking alone can be a fantastic self-sufficient experience, it is much safer for beginners to go away with a friend or a group. If you do decide to travel alone you may like to arrange to meet your friends or family to camp with. Or you could at least make sure you walk in an area where you have full phone reception and sufficient vehicle access.
Take all the precautions of notifying any rangers in the area, and leave your itinerary with close family or friends.
Walk with a friend and play it safe.
Stay Hydrated
Don’t underestimate how much water you need. Unless you are an experienced walker, you may not realise just how much water your body needs.
A good rule to follow is 3 litres, per person, per day. Of course, this can add to your pack weight quickly so try to pick an area where you can fill up with water along the way or at least at your campsite.
You may need to organise a water drop to minimise the amount that you need to carry. Remember to allow extra water for cooking and cleaning.
Pick your season carefully
The weather can be quite unpredictable but try your best to arrange your walk for fair weather. Autumn and spring are the best times of year to walk. The temperatures are in the mid 20’s and the weather is mostly fine. Planning your first walk in freezing cold and wet conditions or scorching heat may not give you the amazing experience you were hoping for.
Remember that even if it’s a cool day and overcast, wear sunscreen and a hat when walking. And keep your fluids up!
Think of Safety!
As mentioned above, go for your walk in a well-marked area following well-defined tracks. You will still need to take a map and compass to ensure you are heading in the right direction so some basic map reading skills will be necessary (another benefit of walking with an experienced friend or group).
Make sure you have appropriate communication and emergency communication equipment.Try to pick an area that has good phone reception but if this is not possible you may need to consider some alternative communication devices.
This can include a UHF handheld radio, a SPOT Satellite GPS Messenger or PLB safety device or a Satellite phone. All of which can be available for hire from most good communications stores or some ranger stations.
Record your experience
One of the main reasons for going hiking in the first place is to head out and to see some amazing scenery and visit those special places that only those few people that dare to venture out into the wild on foot get to see. So take a camera to capture those beautiful scenes to share with your friends and family when you get home.
Remember to take a notepad and pen. Not only will you be able to record your thoughts as a bit of a diary of your trip, But you can make notes about what to improve on for your next trips such as details about your walk, location or gear.
Take a pen and notepad with your gear so you can write down your experiences.
Practice minimal impact hiking
Quite simply, this embraces the concept of “take only pictures and leave only footprints”. This means that you take out EVERYTHING that you take. Leave no rubbish or food scraps behind at all!
No, the animals will not enjoy your scraps, and the scraps will not just rot away. In fact, some native animals can develop diseases from eating food that is not part of their intended diet. This also extends to going to the toilet. Some areas actually require you to carry out your “droppings”. So, when you are planning your first hike, it can be a good idea to stick to an area that has toilets at the campground.
If nature does call along the trail, make sure you go at least 100m from any stream or waterway and that you dig a hole at least 15cm deep. Everything should be buried completely.
Now it’s time to explore
Lightweight overnight hiking is a fantastic experience. It can take you to some of the most untouched and picturesque places of the world. But when you are beginning remember to take it slow. Ease your way into it so your body and mind have time to adjust to the physical and mental challenges.
By following these tips, hopefully, you will have a safe and enjoyable experience, which is the best environment to learn in. There is a lot to learn, so once you get started you can then aim to explore more challenging and remote areas.
So what are you waiting for? get geared up and head out there!
The post How to Prepare for an Overnight Hike appeared first on Snowys Blog.
0 notes
Text
Download US Topo Maps Pro .APK
Easy to use outdoor/offline navigation app with free access to the best topographic maps and aerial images for the USA.
Choose between >20 map layers (topos, aerials, sea charts, flight maps, …)
Turn your Andoid Phone/Tablet into an outdoor GPS for trips into the backcountry without cell coverage. This app gives you similar mapping options as you might know from Garmin or Magellan GPS handhelds.
Premium email support – we’ll answer your questions within 24 hours
Main features for outdoor-navigation:
• Download of map tiles for OFFLINE USAGE (not for Google and Bing maps) • Display Real-Time nowCoast Weather Information and NEXRAD Weather Radar (animated) • Free access to more than 100.000 seamlessly stitched USGS topographic maps – easy to use as browsable map layer • Create and edit Waypoints • GoTo-Waypoint-Navigation • Create and edit Routes • Route-Navigation (Point-to-Point Navigation) • Track Recording (with speed, elevation and accuracy profile) • Tripmaster with fields for odometer, average speed, bearing, elevation, etc. • GPX/KML/KMZ Import/Export • Search (placenames, POIs, streets) • Customizable datafields in Map View and Tripmaster (e.g. Speed, Distance, Compass, …) • Share Waypoints, Tracks or Routes (via eMail, Dropbox, Facebook, ..) • Use coordinates in WGS84, UTM or MGRS/USNG (Military Grid/ US National Grid) • Get NWS Weather Forecast • Track Replay • and many more …
Available map layers:
• USGS DRGs: Seamless coverage of topo maps of the USA at Scales 1:250.000, 1:100.000, 1:63.000 and 1:24.000/25.000 • New US Topo maps • USGS High Resolution aerial imagery • USGS National Map • NAIP Orthoimagery for conterminous US • Google Maps (Satellite images, Road- and Terrain-Map) • Bing Maps • Open Street Maps • FSTopo Forest Maps • NOAA Nautical RNC Charts • Flight Maps • Public Land Ownership (Padus) • Earth At Night
Available map overlays:
• Hillshading • Ridge Weather Radar NWS • Wind, Temperature, Pressure • Wind Vectors • Precipitation Estimate – 1-hr • Precipitation Forecast 24h • Surface Air Temperature • Hazard Warnings • Tropical Cyclone Track • Wind Vector Forecast 24h • Max. Air Forecast 24h • Min. Air Forecast 24h
USGS DRG topographic maps: The 7.5-minute maps (1:24.000/1:25.000) are the best maps for outdoor activities in the USA. Although some of the maps are quite old, they contain many small pathes and 4WD tracks that are missing in new USTopos, Google, Bing and OSM maps. DRGs (Digital Raster Graphics) were produced from 1995 to 2001 by U.S. Geological Survey. DRGs have been made for all quadrangles in the USGS map series.
New US Topo Maps: US Topo maps are a graphic synthesis of The National Map data files and are produced in the familiar 7.5-minute by 7.5- minute geographic format. Current US Topo map layers include an orthoimage base, transportation, geographic names, topographic contours, boundaries, hydrography and woodlands. Also included are the Public Land Survey System (PLSS) and the United States National Grid.
NAIP Orthoimagery: Seamless coverage of contiguous US with 1m/pixel resolution
HRO aerial imagery: High resolution arial photos covering US urban areas and borders (up to 10cm/pixel)
Use this navigation app for outdoor activities like hiking, biking, camping, climbing, riding, skiing, canoeing, hunting, offroad 4WD tours or search&rescue (SAR).
Import/Export/Share GPS-Waypoints/Tracks/Routes in GPX or Google Earth KML/KMZ format.
View Real-time nowCoast weather information like temperature or windvectors and overlay to map.
See animated NEXRAD rain radar to make accurate predictions when raining will start/stop.
Preload FREE map data for areas without cell service.
US topographic maps are enhanced with Atlogis® hillshading and placenames.
Free version available.
Comments and feature requests to [email protected] • Configure how way-points are shown on the map • Improvements & Fixes
from APK Download https://apkdownloadd.com/download-us-topo-maps-pro-apk/
0 notes
Text
How to Navigate with a Map and a Compass
Learning how to navigate with a map and compass isn’t as complicated as you may think, and it can be a true lifesaver when you’re traveling through the backcountry and your phone or GPS device dies on you. In reality, nothing can be more reliable than a compass and a map. You won’t have to rely on electricity to keep your navigation devices charged. Instead, you’ll use your trusty compass and a hard copy map to get by on your next adventure.
How to Avoid Getting Lost
Backcountry camping can be scary. You’re traveling through hundreds of miles of rural land, some of which lack dedicated trails. So, do you rely on your phone or your GPS? You can, but if you don’t know how to use a map and a compass, then you’ll be totally at their mercy, with no hope in sight once the battery dies.
An experienced backpacker will have excellent navigational skills and will know how to use these very important tools.
Using a map and compass are simply the most reliable way to ensure you remain on course. Below, I’ll go over how to correctly use both of these tools, so you can have some much-needed peace of mind the next time you’re backpacking through unknown land.
Map Basics
Modern maps are easier to use compared to the maps we used just ten years ago and learning how to use one can prove invaluable in the woods. Maps will come in a variety of shapes and sizes. A couple of different maps on the same sized piece of paper may only cover a city or it can cover an entire state.
One of the first things you’ll look at when you pick up the map is a scale. Scales will tell you a couple of important pieces of information using a single set of numbers. The scale will tell you the size of the area the map shows and the level of detail, such as minor and major landmarks.
1:50,000 is a large scale since things appear large on the map, while 1:200,000 is considered a small scale since the information on the map appears very small.
In survival scenarios, the scale will be very important. If you’re traveling by car, then you probably won’t care too much about the level of detail a map displays. But if you’re traveling by foot then a larger scale map is a must. When you purchase a map you need to use your own judgement in terms of what type of scale size you need and what will work for you.
Legend
When you look at a map, you’ll also notice the legend. The legend is what explains the information you need to know about how the map is designed, such as what the different textures, colors, and symbols mean. The legend will also note the scale of the map, explaining how much land is covered.
If the map you’re using has topographic contour lines or grid lines, the measurements for these will be covered in the legend. As an example, the legend may specify that one of the grid blocks that’s overlaid on the map will be equal to one or two miles. It will also go over elevation and explain that any contoured lines represent one hundred feet.
When you’re shopping for a map for your camping trip, make sure you pay attention to the legend and how detailed it is. Does it include the right type of information, such as a magnetic declination, symbol charts, and map scale?
Topographic Map
These maps will come in handy, more so than a plain road map since they will show you the lay of the land and plenty of geographical features, and will also include roads and manmade features.
This is done by making the map three dimensional instead of two dimensional, using contour lines to show the features of the terrain. A contour line is a line of equal elevation. This means that every spot that a contour line touches is the same elevation. The small numbers in the lines will explain the elevation at that line.
Maps with contour lines come with a contour interval, which will be listed somewhere in the legend.
Learning How to Use a Compass
These days, navigating using a compass is now something of a lost art, thanks to GPS. With a modern GPS device, you can easily determine your location and the path that lies ahead, no skills required. But since GPS devices run on electricity and electronic devices tend to die on you when you need them the most, you need a more reliable way to navigate on your journey. Additionally, these devices can even fail on you for no obvious reason, so you’re left stuck in the middle of nowhere, with no way of knowing where you’re headed or if you’re going in the right direction.
Compasses are very accurate tools that don’t require batteries, don’t rely on software updates and don’t come equipped with delicate screens that can break from a simple fall.
But a compass can also be totally useless if you don’t know how to use one. There are many different types of compasses to choose from, so the parts they possess will mainly depend on the type you carry.
Below, you’ll find a list of common compass components.
Baseplate
This is the clear back that allows you to view the map underneath. The edges are ruled and designed to help with triangulation.
Direction Arrow
The arrow will point in the direction you’re facing.
Index Line
This is basically an extension of the direction arrow and it indicates where to read bearings.
Rotating Bezel
This is a circular shaped area that is marked with number degrees zero to three hundred and sixty.
Needle
The needle is magnetized and located inside the bezel. The needle will always point north, instead of true north.
Orienting Arrow
This arrow will help with lining up the bezel with directions on the map.
Declination Scale
These are hash marks located on the inside of the bezel and they will help with adjusting declination.
Declination Correction
One of the most challenging parts that comes with using a compass to navigate is the fact that magnetic north is different from true north. The angle that’s placed between them is referred to as declination and it will vary depending on your location. It can also change gradually over time based on the shifts of the earth’s tectonic plates. If you’re not aware of this and you fail to adjust your compass in order to compensate, then you may end up heading off in the wrong direction.
The simplest way to find the right angle of declination is to take a look at your map. Most will come with diagrams for declination, in addition to the date it was last changed. Since declination will change over time, a new map will come equipped with more accurate figures. If you have an older map, then be sure to check online. You’ll find a variety of services that will use the location you’re planning to hike through to calculate the declination. Once you have the declination, you’ll be subtracting it from the compass bearing for west, adding it for east.
Compass Types
There are many different compasses to choose from, but backpackers often use the baseplate compass. This compass consists of a face that’s liquid filled and attached to a clear, flat piece of plastic. Aside from being basic and cheap, these compasses feature a see-through design that makes them very easy to use with a map.
Lensatic compasses are also popular with backpackers because of their flip open design. These compasses will use a rear lens and a sighting wire located in the cover to take more accurate bearings. However, they’re not as beginner friendly as the baseplate compass, yet they are more accurate and durable.
Since the baseplate is more commonly used by the backpacker, I’ll focus on discussing how to use this type alone, since the lensatic compass requires different steps.
Using a Compass to Find Your Location
Figuring out your location with the help of a compass and map is pretty simple. First off, you will need to find a couple of known landmarks such as lakes or mountains. If you can find more landmarks, that’s even better. Keep in mind that you will need to adjust for declination.
With the help of your compass you will orient the map so that north will be pointing toward true north.
Next, take a bearing on one of the landmarks you have chosen, lining up your direction of travel arrow with the landmark. Next, you’ll rotate the bezel until the needle lines align with the marking for the north.
Now, take your map, placing one corner of the compass’s straightedge on the landmark, rotating the compass until the needle correctly lines up with north on the bezel. Draw a line across the edge.
Now, you’ll repeat these steps on the second landmark you have chosen. Your approximate location will be the point where all of the lines intersect.
Finding Your Bearings
You can use your compass to figure out the way to get to any point on your map if you already know your location. Once you have adjusted the declination, you can begin by orienting the map to true north.
Start by placing the corner of the baseplate on the location. Next, you’ll rotate the device until the edge forms a line between the destination and your current location. The bezel should be rotated until the grid lines on the baseplate match up to the grid lines on the map. Your bearing will be the number that’s next to the index line.
Hold the compass level in front of you, then turn until the north arrow on the bezel matches up with the needle on the compass. The travel arrow’s direction will be pointing towards the destination.
Smartphone Compass
With a smartphone, you can choose from a variety of apps, so it’s not a big surprise that you can also download a compass app. With this type of app, you can use your phone to navigate, without the use of GPS. These types of apps work by using the smartphone’s magnetometer. Calibrating the compass is a cinch, and once done, the app can do whatever a handheld compass can. It can also lock onto a bearing and tell you where you’ve gone wrong.
But there are downsides to using the compass on your phone. Just like with a GPS device, the compass app requires some juice in order to work. This defeats the purpose of using a compass as a low-tech solution. Your best bet is to ditch the phone and focus on using a traditional compass.
Final Thoughts
While it’s true that learning how to navigate with a map and a compass can seem complex in the beginning, you can practice using this navigation method way in advance, so once it’s time to head out on your latest hiking or camping trip, you can feel confident that you can easily find your way through any type of rural location. By following the steps in this guide and choosing the right type of map and compass, you can easily find your way through the backcountry, without having to rely on your failing GPS or smartphone battery. In fact, using this type of navigation can be lifesaving when you’re far from civilization and it’s definitely a more reliable way to travel through parts unknown. Even if you plan on mainly relying on your phone or GPS, learning how to utilize this navigation method will come in handy in the event your electronics fail on you and you’re left in the middle of the backcountry, with the nearest outlet miles away.
source https://readyandarmed.net/how-to-navigate-with-a-map-and-a-compass/ from Ready & Armed https://readyandarmed.blogspot.com/2020/07/how-to-navigate-with-map-and-compass.html
0 notes
Text
How to Navigate with a Map and a Compass
Learning how to navigate with a map and compass isn’t as complicated as you may think, and it can be a true lifesaver when you’re traveling through the backcountry and your phone or GPS device dies on you. In reality, nothing can be more reliable than a compass and a map. You won’t have to rely on electricity to keep your navigation devices charged. Instead, you’ll use your trusty compass and a hard copy map to get by on your next adventure.
How to Avoid Getting Lost
Backcountry camping can be scary. You’re traveling through hundreds of miles of rural land, some of which lack dedicated trails. So, do you rely on your phone or your GPS? You can, but if you don’t know how to use a map and a compass, then you’ll be totally at their mercy, with no hope in sight once the battery dies.
An experienced backpacker will have excellent navigational skills and will know how to use these very important tools.
Using a map and compass are simply the most reliable way to ensure you remain on course. Below, I’ll go over how to correctly use both of these tools, so you can have some much-needed peace of mind the next time you’re backpacking through unknown land.
Map Basics
Modern maps are easier to use compared to the maps we used just ten years ago and learning how to use one can prove invaluable in the woods. Maps will come in a variety of shapes and sizes. A couple of different maps on the same sized piece of paper may only cover a city or it can cover an entire state.
One of the first things you’ll look at when you pick up the map is a scale. Scales will tell you a couple of important pieces of information using a single set of numbers. The scale will tell you the size of the area the map shows and the level of detail, such as minor and major landmarks.
1:50,000 is a large scale since things appear large on the map, while 1:200,000 is considered a small scale since the information on the map appears very small.
In survival scenarios, the scale will be very important. If you’re traveling by car, then you probably won’t care too much about the level of detail a map displays. But if you’re traveling by foot then a larger scale map is a must. When you purchase a map you need to use your own judgement in terms of what type of scale size you need and what will work for you.
Legend
When you look at a map, you’ll also notice the legend. The legend is what explains the information you need to know about how the map is designed, such as what the different textures, colors, and symbols mean. The legend will also note the scale of the map, explaining how much land is covered.
If the map you’re using has topographic contour lines or grid lines, the measurements for these will be covered in the legend. As an example, the legend may specify that one of the grid blocks that’s overlaid on the map will be equal to one or two miles. It will also go over elevation and explain that any contoured lines represent one hundred feet.
When you’re shopping for a map for your camping trip, make sure you pay attention to the legend and how detailed it is. Does it include the right type of information, such as a magnetic declination, symbol charts, and map scale?
Topographic Map
These maps will come in handy, more so than a plain road map since they will show you the lay of the land and plenty of geographical features, and will also include roads and manmade features.
This is done by making the map three dimensional instead of two dimensional, using contour lines to show the features of the terrain. A contour line is a line of equal elevation. This means that every spot that a contour line touches is the same elevation. The small numbers in the lines will explain the elevation at that line.
Maps with contour lines come with a contour interval, which will be listed somewhere in the legend.
Learning How to Use a Compass
These days, navigating using a compass is now something of a lost art, thanks to GPS. With a modern GPS device, you can easily determine your location and the path that lies ahead, no skills required. But since GPS devices run on electricity and electronic devices tend to die on you when you need them the most, you need a more reliable way to navigate on your journey. Additionally, these devices can even fail on you for no obvious reason, so you’re left stuck in the middle of nowhere, with no way of knowing where you’re headed or if you’re going in the right direction.
Compasses are very accurate tools that don’t require batteries, don’t rely on software updates and don’t come equipped with delicate screens that can break from a simple fall.
But a compass can also be totally useless if you don’t know how to use one. There are many different types of compasses to choose from, so the parts they possess will mainly depend on the type you carry.
Below, you’ll find a list of common compass components.
Baseplate
This is the clear back that allows you to view the map underneath. The edges are ruled and designed to help with triangulation.
Direction Arrow
The arrow will point in the direction you’re facing.
Index Line
This is basically an extension of the direction arrow and it indicates where to read bearings.
Rotating Bezel
This is a circular shaped area that is marked with number degrees zero to three hundred and sixty.
Needle
The needle is magnetized and located inside the bezel. The needle will always point north, instead of true north.
Orienting Arrow
This arrow will help with lining up the bezel with directions on the map.
Declination Scale
These are hash marks located on the inside of the bezel and they will help with adjusting declination.
Declination Correction
One of the most challenging parts that comes with using a compass to navigate is the fact that magnetic north is different from true north. The angle that’s placed between them is referred to as declination and it will vary depending on your location. It can also change gradually over time based on the shifts of the earth’s tectonic plates. If you’re not aware of this and you fail to adjust your compass in order to compensate, then you may end up heading off in the wrong direction.
The simplest way to find the right angle of declination is to take a look at your map. Most will come with diagrams for declination, in addition to the date it was last changed. Since declination will change over time, a new map will come equipped with more accurate figures. If you have an older map, then be sure to check online. You’ll find a variety of services that will use the location you’re planning to hike through to calculate the declination. Once you have the declination, you’ll be subtracting it from the compass bearing for west, adding it for east.
Compass Types
There are many different compasses to choose from, but backpackers often use the baseplate compass. This compass consists of a face that’s liquid filled and attached to a clear, flat piece of plastic. Aside from being basic and cheap, these compasses feature a see-through design that makes them very easy to use with a map.
Lensatic compasses are also popular with backpackers because of their flip open design. These compasses will use a rear lens and a sighting wire located in the cover to take more accurate bearings. However, they’re not as beginner friendly as the baseplate compass, yet they are more accurate and durable.
Since the baseplate is more commonly used by the backpacker, I’ll focus on discussing how to use this type alone, since the lensatic compass requires different steps.
Using a Compass to Find Your Location
Figuring out your location with the help of a compass and map is pretty simple. First off, you will need to find a couple of known landmarks such as lakes or mountains. If you can find more landmarks, that’s even better. Keep in mind that you will need to adjust for declination.
With the help of your compass you will orient the map so that north will be pointing toward true north.
Next, take a bearing on one of the landmarks you have chosen, lining up your direction of travel arrow with the landmark. Next, you’ll rotate the bezel until the needle lines align with the marking for the north.
Now, take your map, placing one corner of the compass’s straightedge on the landmark, rotating the compass until the needle correctly lines up with north on the bezel. Draw a line across the edge.
Now, you’ll repeat these steps on the second landmark you have chosen. Your approximate location will be the point where all of the lines intersect.
Finding Your Bearings
You can use your compass to figure out the way to get to any point on your map if you already know your location. Once you have adjusted the declination, you can begin by orienting the map to true north.
Start by placing the corner of the baseplate on the location. Next, you’ll rotate the device until the edge forms a line between the destination and your current location. The bezel should be rotated until the grid lines on the baseplate match up to the grid lines on the map. Your bearing will be the number that’s next to the index line.
Hold the compass level in front of you, then turn until the north arrow on the bezel matches up with the needle on the compass. The travel arrow’s direction will be pointing towards the destination.
Smartphone Compass
With a smartphone, you can choose from a variety of apps, so it’s not a big surprise that you can also download a compass app. With this type of app, you can use your phone to navigate, without the use of GPS. These types of apps work by using the smartphone’s magnetometer. Calibrating the compass is a cinch, and once done, the app can do whatever a handheld compass can. It can also lock onto a bearing and tell you where you’ve gone wrong.
But there are downsides to using the compass on your phone. Just like with a GPS device, the compass app requires some juice in order to work. This defeats the purpose of using a compass as a low-tech solution. Your best bet is to ditch the phone and focus on using a traditional compass.
Final Thoughts
While it’s true that learning how to navigate with a map and a compass can seem complex in the beginning, you can practice using this navigation method way in advance, so once it’s time to head out on your latest hiking or camping trip, you can feel confident that you can easily find your way through any type of rural location. By following the steps in this guide and choosing the right type of map and compass, you can easily find your way through the backcountry, without having to rely on your failing GPS or smartphone battery. In fact, using this type of navigation can be lifesaving when you’re far from civilization and it’s definitely a more reliable way to travel through parts unknown. Even if you plan on mainly relying on your phone or GPS, learning how to utilize this navigation method will come in handy in the event your electronics fail on you and you’re left in the middle of the backcountry, with the nearest outlet miles away.
from https://readyandarmed.net/how-to-navigate-with-a-map-and-a-compass/
from Ready & Armed - Blog https://readyandarmed.weebly.com/blog/how-to-navigate-with-a-map-and-a-compass
0 notes
Text
Choosing the Best Handheld GPS
Choosing the Best Handheld GPS
While many people have a handheld GPS device built into their phone, they can only serve you well for so long. The last thing anybody will want to do while on a hike, lost in a forest or stuck in an unfamiliar local area will be to wear down their phone battery trying to locate themselves, and even a basic GSP device can save your skin when you’re trying to find your way home. But how do you find…
View On WordPress
0 notes
Text
Blitzwolf Cat Carrier Space Capsule Backpack Review
{ "@context":"https://schema.org", "@graph":[{ "@type":"WebSite", "@id":"https://www.furryfriendsgear.com/#website", "url":"https://www.furryfriendsgear.com/", "name":"Furry Friends Gear", "potentialAction":{ "@type":"SearchAction", "target":"https://www.furryfriendsgear.com/?s={search_term_string}", "query-input":"required name=search_term_string"} },{ "@type":"ImageObject", "@id":"https://www.furryfriendsgear.com/wp-content/uploads/2020/03/Blitzwolf-Cat-Carrier.jpg", "url":"https://www.furryfriendsgear.com/wp-content/uploads/2020/03/Blitzwolf-Cat-Carrier.jpg", "caption":"Blitzwolf Cat Carrier Backpack", "width":304, "height":300 },{ "@type":"WebPage", "@id":"https://www.furryfriendsgear.com/blitzwolf-pet-carrier-backpack-review", "url":"https://www.furryfriendsgear.com/blitzwolf-pet-carrier-backpack-review", "name":"https://www.furryfriendsgear.com/cats/carriers-travel-c", "datePublished":"2020-04-07", "dateModified":"2020-04-07", "inLanguage":"en-US", "isPartOf":{"@id":"https://www.furryfriendsgear.com#website"}, "primaryImageOfPage":{"@id":"https://www.furryfriendsgear.com/wp-content/uploads/2020/03/Blitzwolf-Cat-Carrier.jpg"}, "description":"There are a lot of different kinds of cat backpacks on the market but here we talk about the Blitzwolf Cat Carrier Space Capsule Backpack. ", "copyrightHolder":{ "@type":"Organization", "@id":"https://www.furryfriendsgear.com/", "name":"Furry Friends Gear"}, "copyrightYear":2020 },{ "@type":"Product", "@id":"https://www.furryfriendsgear.com/blitzwolf-pet-carrier-backpack-review", "url":"https://www.furryfriendsgear.com/blitzwolf-pet-carrier-backpack-review", "additionalType": [ "https://en.wikipedia.org/wiki/Backpack", "https://www.wikidata.org/wiki/Q5843" ], "gtin12":"661596538447", "sku":"B077D2CKDB", "manufacturer":"BlitzWolf", "brand":"BlitzWolf", "offers":{ "@type":"Offer", "url":"https://www.furryfriendsgear.com/blitzwolf-pet-carrier-backpack-review", "availability":"http://schema.org/InStock", "price":"39.99", "priceCurrency":"USD", "priceValidUntil":"2021-04-07" }, "name":"Blitzwolf Cat Carrier Backpack", "alternateName":"Astronaut Space Capsule Cat Carrier Backpack", "isRelatedTo":"https://www.furryfriendsgear.com/cats/carriers-travel-c", "isSimilarTo":"https://www.furryfriendsgear.com/petami-cat-carrier-backpack-review", "image":"https://www.furryfriendsgear.com/wp-content/uploads/2020/03/Blitzwolf-Cat-Carrier.jpg", "description":"There are a lot of different kinds of cat backpacks on the market but here we talk about the Blitzwolf Cat Carrier Space Capsule Backpack. ", "disambiguatingDescription":"Complete review of the BlitzWolf Space Capsule cat backpack carrier.", "aggregateRating":{ "@type":"AggregateRating", "ratingValue":"4.4", "reviewCount":"513", "bestRating":"5", "worstRating":"1" }, "review":[{ "@type":"Review", "author":{ "@type":"Person", "name":"Brett Lewis", "sameAs":[ "https://www.furryfriendsgear.com/brett", "https://www.facebook.com/brett.j.lewis" ] }, "datePublished":"2020-04-07", "description":"The Blitzwolf Cat Portable Space Carrier Backpack is made with a fully transparent outer shell and makes your pets feel more comfortable and less anxious. It is made with acrylic material that is bite resistant and abrasion-resistant.", "name":"Review Synopsis", "reviewRating":{ "@type":"Rating", "ratingValue":"4.3", "bestRating":"5", "worstRating":"1" } }], "sameAs":[ "https://amzn.to/37bqMMC", "https://www.amazon.com/gp/product/B077D2CKDB", "" ] } ]}Do you ever find yourself wanting to take your cat with you out on a walk? Maybe you have to bring him with you everywhere. If you do, what you need is a cat backpack. There are a lot of different kinds in the market but one I’d like to talk about is the Blitzwolf Cat Carrier Space Capsule Backpack. Click here to check the current pricing on Amazon.
Cat Carrier Backpack Features & Benefits
Cat backpacks are now in the market for those who love bringing their cats everywhere. Whether it be on a hiking trip, a camping trip, or any travel plans you might have. They are made available by many companies, in many different designs and functionalities. Some of them just to look good, and some for more adventurous itineraries. But for now, we’re going to take a look at a backpack that benefits the cuteness factor of your cat. A bubble backpack is a cat carrier that usually has a clear front cover or a clear spherical window in front of the bag.
With a bag like this, there are some things that you might want to consider before purchasing a backpack like this:
Design and Comfort – Will my cat have enough room? Will he feel comfortable?
Safety and Security – How safe is this backpack? Will he be able to breathe?
Functionality – Aside from carrying him outside, what else can this backpack do for us?
Choosing which backpack to acquire is not an easy task. You’ve got to choose what is best for you and your cat. If you like adventurous, outdoor activities, maybe a more functional backpack would be better. But whichever you choose, you will end up having a great time with your cat. Let’s take a look at the backpack in the spotlight.
Blitzwolf Cat Portable Space Carrier Backpack Features
Check Amazon’s Price
The Blitzwolf Cat Portable Space Carrier Backpack is made with a fully transparent outer shell and makes your pets feel more comfortable and less anxious. It is made with acrylic material that is bite resistant and abrasion-resistant. Taking your cat out in this backpack will surely get you looks from passers-by as they see your cute feline friend through the carrier.
.wp-pros-cons { background: #F9F9F9; border: dashed 2px #001a71; } .wp-pros-cons .wppc-btn-wrapper .jd-wppc-btn { color: #fff; background: #212121; } .wp-pros-cons .wppc-btn-wrapper .jd-wppc-btn { border-radius: 5px; }
Quick Glance
What’s Good
Clear front cover for those curious cats
Soft sponge padding at the bottom of the bag for maximum comfort
Comes in 2 sizes: Small and Large
Safety belt to support the weight on your shoulders and waist
Multiple air holes for air circulation
What’s Bad
Lacks any other function other than carrying your cat
Sizing issues with some customers
Some cats feel uncomfortable inside the backpack, users report
What’s Inside The Blitzwolf Cat Carrier?
There are a lot of features that this backpack has. We are going to go deeper into what makes this bag one of the top-selling backpacks in the market right now.
Design and Comfort
Right of the bat, the design of this backpack is really nice. A space Capsule design for those owners who enjoy taking their cats out in cute and fashionable products. Heads will surely turn when they see your backpack and its contents. Made of clear acrylic that is bit-resistant, and waterproof, you can be sure that this bag will last you for quite a while. Padded with a soft sponge lining at the bottom of the bag, your cat will be comfortable throughout the trip.
Check Amazon’s Price
It is also equipped with buckles that help support your back and waist while carrying it around. It comes in 2 sizes, a small and a large. The differences are that the large size is a window type bubble backpack meaning it is not a full clear cover. It looks really nice and I would want to bring this around everywhere with my cat. He doesn’t have to be alone at home anymore.
Safety and Security
This backpack is designed with a double-headed zipper that gives you a little more security and convenience. It has a handheld strap on top for when you need to carry your cat in that manner. An elastic built-in lock that prevents your cat from jumping out whenever you open the bag is also installed. Multiple air holes are there to promote proper air circulation through the backpack and allows your cat to breathe properly. Small mesh openings on the side of the bag are there to help with that too.
Functionality
Aside from it looking good, one of the things that I would like to have in a carrier is more functions. As I see, this bag is only for carrying your cat around in a nice and fashionable backpack to show off to your friends and the people around you. If that is the only thing that you are looking for in a carrier, this one might be the one you are looking for. An added feature that I like is that it comes with a dual-use grain and water cup and two collapsable bowls for use when traveling. If it weren’t for that, Functionality would have scored a little higher.
Check Amazon’s Price
What Others Think About The Blitzwolf Cat Backpack
If you are wondering what users are saying about this product, here are some reviews from those who have actually tried this item:
Cynthya’s cat doesn’t like going out much, and yet with this backpack, he became outgoing and enjoyed their trips outside.
Gabriella thinks this backpack is really awesome! Used this in a flight and her cats were really comfortable all throughout.
Chad says that this is nice for short trips. He finds the bag really sturdy and loves the bubble hole.
Check Out These Other Cat Carrier Options
If you are still undecided, here are a few more choices that are in the market right now that are similar to this product:
PetAmi Premium Cat Carrier Backpack
The PetAmi Premium Cat Carrier Backpack is an outdoor and travel backpack that is perfect for cats. Made with a mix of mesh and polyester fabrics, this breathable and lightweight cat carrier is the perfect backpack for hiking, camping, and travel. In my opinion, this is one of the most breathable backpacks I’ve seen. It is lined with sherpa fabric for maximum comfort of your cat. It is equipped with buckles for extra support on the shoulders and the waist to evenly distribute the weight of what you’re carrying. One of the best out there. It’s also very affordable.
Pecute Cat Carrier Backpack
With an expandable mesh back, expect that your cat will have more room than he’ll need for your adventures. Made with oxford fabric and mesh windows, this backpack is sure to be lightweight and not too heavy to carry even if you have a bigger cat. It has additional support with the buckles for the chest and the waist. This backpack has additional pockets that can be used for different essentials you might need on your trip. This is great for hiking and camping as well. Not as cheap as the other backpacks out there.
LEMONDA Portable Cat Backpack
This particular backpack has a lot of similarities to our featured product in this article. It is also a space capsule design with a window type bubble where your cat can peek through and si hi to their world from their tiny bubble. Aside from the type of bubble backpack, this carrier also comes in 4 different colors. Also made with high-density acrylic, it is sure to be durable. This is also the type of backpack that is for being fashionable because of its cute design. Other than that, that’s all I find interesting about this product.
Final Thoughts
If you are the type of cat owner that likes to make your cat the cutest feline out there, then this carrier is for you. This will surely catch the attention of the people passing by and compliment your cat and your bag. If you are more outgoing and love going into the woods camping and going on hikes, I would suggest another bag that would be more helpful. That is not taking away from what this cute and fashionable backpack has to offer! Click here to check the current pricing on Amazon.
The post Blitzwolf Cat Carrier Space Capsule Backpack Review appeared first on Furry Friends Gear.
Blitzwolf Cat Carrier Space Capsule Backpack Review published first on https://furryfriendsgear.tumblr.com
0 notes
Text
Blitzwolf Cat Carrier Space Capsule Backpack Review
{ “@context”:”https://schema.org”, “@graph”:[{ “@type”:”WebSite”, “@id”:”https://www.furryfriendsgear.com/#website”, “url”:”https://www.furryfriendsgear.com/”, “name”:”Furry Friends Gear”, “potentialAction”:{ “@type”:”SearchAction”, “target”:”https://www.furryfriendsgear.com/?s={search_term_string}”, “query-input”:”required name=search_term_string”} },{ “@type”:”ImageObject”, “@id”:”https://www.furryfriendsgear.com/wp-content/uploads/2020/03/Blitzwolf-Cat-Carrier.jpg”, “url”:”https://www.furryfriendsgear.com/wp-content/uploads/2020/03/Blitzwolf-Cat-Carrier.jpg”, “caption”:”Blitzwolf Cat Carrier Backpack”, “width”:304, “height”:300 },{ “@type”:”WebPage”, “@id”:”https://www.furryfriendsgear.com/blitzwolf-pet-carrier-backpack-review”, “url”:”https://www.furryfriendsgear.com/blitzwolf-pet-carrier-backpack-review”, “name”:”https://www.furryfriendsgear.com/cats/carriers-travel-c”, “datePublished”:”2020-04-07″, “dateModified”:”2020-04-07″, “inLanguage”:”en-US”, “isPartOf”:{“@id”:”https://www.furryfriendsgear.com#website”}, “primaryImageOfPage”:{“@id”:”https://www.furryfriendsgear.com/wp-content/uploads/2020/03/Blitzwolf-Cat-Carrier.jpg”}, “description”:”There are a lot of different kinds of cat backpacks on the market but here we talk about the Blitzwolf Cat Carrier Space Capsule Backpack. “, “copyrightHolder”:{ “@type”:”Organization”, “@id”:”https://www.furryfriendsgear.com/”, “name”:”Furry Friends Gear”}, “copyrightYear”:2020 },{ “@type”:”Product”, “@id”:”https://www.furryfriendsgear.com/blitzwolf-pet-carrier-backpack-review”, “url”:”https://www.furryfriendsgear.com/blitzwolf-pet-carrier-backpack-review”, “additionalType”: [ “https://en.wikipedia.org/wiki/Backpack”, “https://www.wikidata.org/wiki/Q5843” ], “gtin12″:”661596538447”, “sku”:”B077D2CKDB”, “manufacturer”:”BlitzWolf”, “brand”:”BlitzWolf”, “offers”:{ “@type”:”Offer”, “url”:”https://www.furryfriendsgear.com/blitzwolf-pet-carrier-backpack-review”, “availability”:”http://schema.org/InStock”, “price”:”39.99″, “priceCurrency”:”USD”, “priceValidUntil”:”2021-04-07″ }, “name”:”Blitzwolf Cat Carrier Backpack”, “alternateName”:”Astronaut Space Capsule Cat Carrier Backpack”, “isRelatedTo”:”https://www.furryfriendsgear.com/cats/carriers-travel-c”, “isSimilarTo”:”https://www.furryfriendsgear.com/petami-cat-carrier-backpack-review”, “image”:”https://www.furryfriendsgear.com/wp-content/uploads/2020/03/Blitzwolf-Cat-Carrier.jpg”, “description”:”There are a lot of different kinds of cat backpacks on the market but here we talk about the Blitzwolf Cat Carrier Space Capsule Backpack. “, “disambiguatingDescription”:”Complete review of the BlitzWolf Space Capsule cat backpack carrier.”, “aggregateRating”:{ “@type”:”AggregateRating”, “ratingValue”:”4.4″, “reviewCount”:”513″, “bestRating”:”5″, “worstRating”:”1″ }, “review”:[{ “@type”:”Review”, “author”:{ “@type”:”Person”, “name”:”Brett Lewis”, “sameAs”:[ “https://www.furryfriendsgear.com/brett”, “https://www.facebook.com/brett.j.lewis” ] }, “datePublished”:”2020-04-07″, “description”:”The Blitzwolf Cat Portable Space Carrier Backpack is made with a fully transparent outer shell and makes your pets feel more comfortable and less anxious. It is made with acrylic material that is bite resistant and abrasion-resistant.”, “name”:”Review Synopsis”, “reviewRating”:{ “@type”:”Rating”, “ratingValue”:”4.3″, “bestRating”:”5″, “worstRating”:”1″ } }], “sameAs”:[ “https://amzn.to/37bqMMC”, “https://www.amazon.com/gp/product/B077D2CKDB”, “” ] } ]}Do you ever find yourself wanting to take your cat with you out on a walk? Maybe you have to bring him with you everywhere. If you do, what you need is a cat backpack. There are a lot of different kinds in the market but one I’d like to talk about is the Blitzwolf Cat Carrier Space Capsule Backpack. Click here to check the current pricing on Amazon.
Cat Carrier Backpack Features & Benefits
Cat backpacks are now in the market for those who love bringing their cats everywhere. Whether it be on a hiking trip, a camping trip, or any travel plans you might have. They are made available by many companies, in many different designs and functionalities. Some of them just to look good, and some for more adventurous itineraries. But for now, we’re going to take a look at a backpack that benefits the cuteness factor of your cat. A bubble backpack is a cat carrier that usually has a clear front cover or a clear spherical window in front of the bag.
With a bag like this, there are some things that you might want to consider before purchasing a backpack like this:
Design and Comfort – Will my cat have enough room? Will he feel comfortable?
Safety and Security – How safe is this backpack? Will he be able to breathe?
Functionality – Aside from carrying him outside, what else can this backpack do for us?
Choosing which backpack to acquire is not an easy task. You’ve got to choose what is best for you and your cat. If you like adventurous, outdoor activities, maybe a more functional backpack would be better. But whichever you choose, you will end up having a great time with your cat. Let’s take a look at the backpack in the spotlight.
Blitzwolf Cat Portable Space Carrier Backpack Features
Check Amazon’s Price
The Blitzwolf Cat Portable Space Carrier Backpack is made with a fully transparent outer shell and makes your pets feel more comfortable and less anxious. It is made with acrylic material that is bite resistant and abrasion-resistant. Taking your cat out in this backpack will surely get you looks from passers-by as they see your cute feline friend through the carrier.
.wp-pros-cons { background: #F9F9F9; border: dashed 2px #001a71; }
.wp-pros-cons .wppc-btn-wrapper .jd-wppc-btn { color: #fff; background: #212121; } .wp-pros-cons .wppc-btn-wrapper .jd-wppc-btn { border-radius: 5px; }
Quick Glance
What’s Good
Clear front cover for those curious cats
Soft sponge padding at the bottom of the bag for maximum comfort
Comes in 2 sizes: Small and Large
Safety belt to support the weight on your shoulders and waist
Multiple air holes for air circulation
What’s Bad
Lacks any other function other than carrying your cat
Sizing issues with some customers
Some cats feel uncomfortable inside the backpack, users report
What’s Inside The Blitzwolf Cat Carrier?
There are a lot of features that this backpack has. We are going to go deeper into what makes this bag one of the top-selling backpacks in the market right now.
Design and Comfort
Right of the bat, the design of this backpack is really nice. A space Capsule design for those owners who enjoy taking their cats out in cute and fashionable products. Heads will surely turn when they see your backpack and its contents. Made of clear acrylic that is bit-resistant, and waterproof, you can be sure that this bag will last you for quite a while. Padded with a soft sponge lining at the bottom of the bag, your cat will be comfortable throughout the trip.
Check Amazon’s Price
It is also equipped with buckles that help support your back and waist while carrying it around. It comes in 2 sizes, a small and a large. The differences are that the large size is a window type bubble backpack meaning it is not a full clear cover. It looks really nice and I would want to bring this around everywhere with my cat. He doesn’t have to be alone at home anymore.
Safety and Security
This backpack is designed with a double-headed zipper that gives you a little more security and convenience. It has a handheld strap on top for when you need to carry your cat in that manner. An elastic built-in lock that prevents your cat from jumping out whenever you open the bag is also installed. Multiple air holes are there to promote proper air circulation through the backpack and allows your cat to breathe properly. Small mesh openings on the side of the bag are there to help with that too.
Functionality
Aside from it looking good, one of the things that I would like to have in a carrier is more functions. As I see, this bag is only for carrying your cat around in a nice and fashionable backpack to show off to your friends and the people around you. If that is the only thing that you are looking for in a carrier, this one might be the one you are looking for. An added feature that I like is that it comes with a dual-use grain and water cup and two collapsable bowls for use when traveling. If it weren’t for that, Functionality would have scored a little higher.
Check Amazon’s Price
What Others Think About The Blitzwolf Cat Backpack
If you are wondering what users are saying about this product, here are some reviews from those who have actually tried this item:
Cynthya’s cat doesn’t like going out much, and yet with this backpack, he became outgoing and enjoyed their trips outside.
Gabriella thinks this backpack is really awesome! Used this in a flight and her cats were really comfortable all throughout.
Chad says that this is nice for short trips. He finds the bag really sturdy and loves the bubble hole.
Check Out These Other Cat Carrier Options
If you are still undecided, here are a few more choices that are in the market right now that are similar to this product:
PetAmi Premium Cat Carrier Backpack
The PetAmi Premium Cat Carrier Backpack is an outdoor and travel backpack that is perfect for cats. Made with a mix of mesh and polyester fabrics, this breathable and lightweight cat carrier is the perfect backpack for hiking, camping, and travel. In my opinion, this is one of the most breathable backpacks I’ve seen. It is lined with sherpa fabric for maximum comfort of your cat. It is equipped with buckles for extra support on the shoulders and the waist to evenly distribute the weight of what you’re carrying. One of the best out there. It’s also very affordable.
Pecute Cat Carrier Backpack
With an expandable mesh back, expect that your cat will have more room than he’ll need for your adventures. Made with oxford fabric and mesh windows, this backpack is sure to be lightweight and not too heavy to carry even if you have a bigger cat. It has additional support with the buckles for the chest and the waist. This backpack has additional pockets that can be used for different essentials you might need on your trip. This is great for hiking and camping as well. Not as cheap as the other backpacks out there.
LEMONDA Portable Cat Backpack
This particular backpack has a lot of similarities to our featured product in this article. It is also a space capsule design with a window type bubble where your cat can peek through and si hi to their world from their tiny bubble. Aside from the type of bubble backpack, this carrier also comes in 4 different colors. Also made with high-density acrylic, it is sure to be durable. This is also the type of backpack that is for being fashionable because of its cute design. Other than that, that’s all I find interesting about this product.
Final Thoughts
If you are the type of cat owner that likes to make your cat the cutest feline out there, then this carrier is for you. This will surely catch the attention of the people passing by and compliment your cat and your bag. If you are more outgoing and love going into the woods camping and going on hikes, I would suggest another bag that would be more helpful. That is not taking away from what this cute and fashionable backpack has to offer! Click here to check the current pricing on Amazon.
The post Blitzwolf Cat Carrier Space Capsule Backpack Review appeared first on Furry Friends Gear.
Blitzwolf Cat Carrier Space Capsule Backpack Review published first on https://furryfriendsgear.wordpress.com
0 notes
Text
Five Fool Proof Ways to Kill Big Bulls

I love elk, elk hunting and anything there is to do with elk. I am an elk junkie through and through. There is nothing quite like hunting these four-legged, massively racked creatures. When the taste, smell, and sounds of autumn hit the high mountains, I know it is elk season. Mud flying, nostrils flaring, bugles roaring, horns racking, cows chirping, and antlers locking mean only one thing…get your gun.
Over the term of my guiding career, my hunters and I have been very fortunate to be a part of some giant bulls hitting the dirt. Team Mossback has put close to 100 – over 400” bulls on the wall. One of those is the world record “Spider Bull” taken by Denny Austed in central Utah in 2008. The bull scored an inch shy of 500”, which still is mind-boggling to me. With my obsession of the wapiti over the years I have learned a few things that help me and my team be successful.
Hunt Where They Are
Before the hunt even begins you need to know where the elk are. What I mean by that is you need to do your research. If you want a 400” bull, do not apply for units or buy tags for units where this realistically is not possible. In Utah, for example, there are several units where a 400” bull is not genetically realistic. On the other hand, there are several units in Utah that consistently produce 400” bulls. The elk units in Arizona, Nevada, Wyoming, Colorado, and New Mexico are similar to Utah in good, better, best-type quality. If you want a 400” bull, the “better” and “best” units are the units that you should pursue. If you have the money or the points, focus on the “best.”
There are several companies out there that do the research for you and will handle your hunt application process, as well as help you determine the “better” and “best” units. One of those companies is Hunting Illustrated’s own hunt application and research guru, Jon Crump of Hunter’s Trail Head. Part of their business is doing the research, state-by-state, to help their customers know where to find the elk. This will get you going in the right direction. Also, don’t be afraid to pick up the phone and call outfitters for advice on the good areas. Today’s blog sites, Facebook, and the worldwide web are phenomenal sources to help you with your research. With the limited number of tags available nowadays, you will be surprised how many hunters will tell you about their honey holes, because the fact is they may never get to hunt there.
Scout
Once that special day has come and you have been awarded a coveted, limited-entry tag, it is time to get to work. Looking at maps is a great way to learn the area without even being present. Technology has made our lives easier in this arena. Google Maps is a great place to check out your area, or even better yet, download area-specific information into your handheld GPS unit. I prefer the Garmin Rhino GPS for this. I pop in an area-specific chip that has details on everything. It tells you who owns the land that you are on and even gives you the unit boundaries. This can be crucial information when hunting units where boundaries are chopped up from several different landowners. Trust me, these little GPS units can save you a lot of trouble resulting from not knowing where you are; and they also will help you find your vehicle again when in a new area.
Once you have a good GPS handheld unit, and you are ready to go to your area, get yourself familiar with roads, 4-wheeler trails and hiking trails. The last thing you want to do is spot a trophy animal during your hunt and not know if you can get to him because you are not familiar with the area.
Now that you have scouted out the area electronically and know the road and trail system, it is time to get out your field glasses and your best scope. Late summer scouting is a great time to find big, velvet-horned muleys, as well as bachelor groups of big bulls. It’s also a great time to get the family out camping; why not camp in the area you will be hunting?
A key time to scout is right before your hunt. Take the time to scout your area a minimum of two days before the hunt starts. If you are on a guided-hunt, it would be well worth your money to pay the guides to pre-scout before you get there. Remember you’re not the only one looking for a monster animal; most likely the first hour of opening morning is going to be your best opportunity to get him. Make sure you know where he is through your scouting efforts.
Hunt the Rut
A big bull is more elusive than you think. Big, mature bulls love to stay in the cool shade of the deep forest; here you will usually find them bedded in thick patches of pine trees. Not only can the shade keep their motor cool, but the pine needles make for some pretty soft beds for the 500+ lb animals. During pre- and post-rut, bulls will lie most of the day, only getting up to eat and drink. This usually occurs at first and last light and usually once during the day, briefly.
When the mating call comes from a cow in heat, that all changes. Something clicks in the big ol’ bull’s skull and he goes absolutely crazy. They seem to go from 0 to full rut in no time; and at that time their breeding engine is wound tight. They have one thing on their mind and it is not eating or sleeping. That is why bulls can lose up to 30% of their body weight during the rut. They spend all their energy in pursuit of hot cows and many times simply forget to eat as much as they need to rebuild all the calories they are burning.
This craze makes bulls very susceptible to hunters. Not only are they giving away their location with a screaming bugle, but also they don’t seem to pay attention to anything around them besides cows. As long as you stay downwind of them, they are fairly easy to sneak up on. During this rutting frenzy even the cows, who are normally “on point” with even the slightest sound, seem to be so distracted by grunts and all the theatrics of the bulls, they seem to let their guard down much more than usual at this time of year.
What does this mean for you? Increased odds. Not only do you see more mature bulls at this time of year, you often see bulls you had no idea were around. Calling is very effective. Chirping in a big bull within mere yards is what makes elk hunting more personal and exciting than hunting any other species.
Plain and simple…hunting the rut can nearly triple your success rate. Whether you are archery, muzzleloader, or rifle hunting, you have the odds in your favor.
Use the Right Equipment
Using the right equipment can cover a variety of things from your boots, to your optics, your weapon of choice, your bullets, or broadheads. If you are hunting the rut, success could boil down to how well you blow your cow call, or how effective your elk bugle is. There have been many hunts where my hunters have wanted to call themselves. Some hunters can call much better than I; whereas others sound more like a duck, and with the squeak of their attempted call, off goes the trophy of a lifetime…never to be seen again. Some hunters buy new equipment that has never been used before until they break it out of the package opening morning; this usually ends in disaster. From breaking in new boots, to driving your family crazy from you practicing a cow chirp, it is all part of necessary preparation for the hunt.
The weapon a hunter uses, and how proficient he or she is with that weapon, ultimately seems to play the biggest factor in the outcome of a hunt. If it is an archery hunt, choose a bow that can shoot farther and faster to increase your range. The same goes for a rifle set-up. Having an accurate rifle that is packable, so you can keep up with your guide, is vital; it can mean the difference of watching a bull run over the ridge while you catch your breath, or being in position to take a 600-yard shot. If you are going to show up at hunting camp with a 10-12 long-range rig, you better be able to pack it; otherwise, you are handicapped before you leave camp. The bows seem to get better and better every year, as do the rifles. Do your research to find out what the best optics, rifle, pack, pair of boots, calls, and clothing are for the area you are hunting, within your price range.
Choose the Right Guide
This goes hand-in-hand with choosing the right gear. The reason you hunt with a guide is for their knowledge and skills. Their product knowledge is what you are paying for. Choose a guide that is experienced in the area you are hunting. An experienced outfitter will have a history of killing bulls in certain areas every year. They will have plenty of honey holes to take you to, as well.
Make sure you check previous-hunter references for the guide and outfitter. Don’t just call one; and if possible, check forums and blogs to find more information about your top candidates before you choose. You should be able to glean the good information that you receive from the misinformation that most likely will be available as well. The last thing you want is to spend your hard-earned money on a guide, only to find out that it just happens to be his first time in the area. You just paid him and are training him at the same time? Shouldn’t you be receiving a discount?
At Team Mossback, I start my guides out as spotters. After they have learned the area and have proven to me that they know it very, very well, then they are given the opportunity to guide our clients in that particular area. Like with most things in life, experience leads to success. Choose a guide/outfitter with plenty of it.
Not all can afford to pay a guide for their hunt. If this is the case, make sure you have plenty of time to scout the area so you can still be successful. If you don’t have the time or vacation days from work to scout, make sure that you are putting in for areas where you have a friend or family member who can scout for you. If you show up blind to a hunt, it will take you the first four to five days just to get your bearings straight, which can cost valuable, premium hunting time.
If you make use of these five steps for killing big bulls, you inevitably will be on your way to a trophy-of-a-lifetime.
Last thing to remember is hunt hard. I’ll see you on the mountain.
0 notes
Text
How to Acquire Garmin GPS Maps for Hiking?
A handheld GPS device is very useful for walking, climbing, and hiking as it allows you to easily find your way if the visibility is the landscape or poor and has no distinct features. Handheld GPS devices have many benefits in comparison to Smartphones which are frequently used for navigation by leisure hikers. GPS devices are more robust and have much longer battery life. Moreover, they are typically equipped with batteries that can be replaced with the throwaway batteries if recharging is not possible – for example in sparsely and remote inhabited areas.
What to Consider mainly for Best Handheld GPS for Hiking?
Size
If you’ve ever been backpacking, you know that every ounce counts when you are carrying it up a mountain, and every inch counts when trying to pack the last of your belongings into a single bag. The GPS you choose needs to balance functionality with practicality. Always check the weight of each potential unit, and consider that any backup batteries are also going to add to that number. Ensure the unit will fit comfortably in your hand and easily into your pack since some models aren’t perfect rectangles.
Battery
The battery life of your GPS is enormously significant. While handheld units have the advantage of typically use replaceable batteries rather than requiring recharging, it’s inconvenient to carry a bunch of extra sets.
Features
Technological improvements have made the handheld GPS more than a map. From the altered types of maps the unit supports to additional features such as messaging, almost every model offers a little something extra that differentiates it from the crowd. If these are necessary to you, narrow your search to higher-end models.
Interface
You should pick a border that can comfortably interact with. While some people can’t survive with the familiarity of a touch screen, others will get better use out of physical buttons. Some handhelds are offered in black and white, instead of color. These can be easier to read in direct sunlight, but harder to use.
Remember that a handheld GPS should never replace your compass and map. Electronics never guaranteed to work, and it’s not a risk worth taking. Ensure you know how to navigate both ways, especially if you’ll be hiking somewhere particularly remote. If then also needs any help, feel free to call us at our Garmin Support number.
Sofia Hanks is a self-professed security expert; she has been making the people aware of the security threats. Her passion is to write about Garmin customer service, Garmin GPS support and Garmin support.
0 notes
Text
The Best Features and Functions of the Gippro Hong Kong Portable
A lot of people use handheld GPS devices to get around, especially while travelling. While they were still relatively expensive when compared to competing models, they certainly were less expensive than backpacks. Today, many travellers carry their own Gippro HX Mega Outdoor as well as a variety of other portable GPS devices. They find them to be very handy.
The standard model of the hippo Hong Kong is a solid plastic gadget with an integrated screen and touch-sensitive buttons. You can also add additional options like a high-end heart rate monitor and a touch screen digital camera. This makes it perfect for hiking and camping trips. Most of these models can withstand falls due to a hardy rubber exterior. In fact, it can even be used underwater.
For travellers looking for more options, there's the extended range model which can cover about twice the distance. Although it's smaller than the regular version, this is still quite a large gadget. Travellers often find themselves carrying it whilst doing a lot of walking around. This then becomes more of a hassle than it's worth.
There are various other features on this model that travellers may find useful. The front touch pad allows you to scroll through menus and switch functions with just one touch. On the top is a very large button and you can use it to switch the GPS on or off. Finally, underneath the unit is a rechargeable battery. Many of these come with a built in cigarette lighter socket as well.
When choosing what model to buy, consider how often you're going to use it. If you travel regularly, it may be worth investing in a slightly larger model. The biggest difference is that most of the more expensive models are heavier. However, it should still fit into your bag easily when traveling. Most travellers find that it's comfortable enough to use on planes and trains.
The only real con with the Gippro Hong Kong model is that it's not waterproof. Waterproof models are becoming available though. However, some travellers find this to be a slight detractor. It also depends on the model, which can have an adverse effect on the sound from your phone. It's important to consider whether you need this feature as it's only a minor drawback.
The price range for these models is moderate. Most will cost between twenty and thirty dollars. For many travellers this is a good investment. Although, there are many cheaper options on the market.
If you're set on a particular colour, ensure that you're aware that the red models aren't waterproof. Some may have a warranty but it isn't standard. A red model is often more expensive because it's generally considered to be a better product. If you can afford it, however, consider all the alternatives. Most travellers will choose a relx Hong Kong over the competition. Despite the minor flaws, this model remains a firm favourite with travellers.
When buying your next portable gushing gadget, think about the water proofing options. If you're going somewhere with water or rain regularly, then invest in one of the waterproof models. Ensure that the case has an efficient air circulation system. This should prevent your device from getting wet and allow it to dry quickly after use.
It's easy to forget about the importance of battery life when taking portable electronics with you. Many people purchase their devices based purely on the amount of audio they can play or how long they'll last. However, this shouldn't be the case. Choose a model which has a long battery life. Also ensure that the device has enough memory for your latest purchases and photos.
While most people wouldn't think twice about having their latest holiday snaps on display while travelling, these devices can come in useful if you do happen to lose them. Look for a travel companion model which has built in hard drive space. This should enable you to keep copies of your pictures and videos.
The more money you pay, the higher quality and features you should expect. As with all modern gadgets, smaller manufacturers are always struggling to achieve the level of quality you would expect from the leading brands. Make sure you do your research before choosing the model you want. Look at the prices, read user reviews and consider whether the features of the model really provide a benefit. You might find that your budget doesn't stretch to purchasing the latest in digital cameras but that there are plenty of models within your price range that has all the features you need.
0 notes
Text
Selecting the Right Satellite GPS System for You
Choosing another GPS route framework can be an overwhelming endeavor. Today simple GPS route and shoddy satellite GPS for boats frameworks can be discovered on the web or in rebate retail chains all over. GPS (Global Positioning Systems) collectors are never again a costly contraption for seekers and game angler; they are a piece of our regular day to day existence and for some as critical and fundamental as a PDA. With a reasonable GPS a USA map preloaded in the recipient; a driver could without much of a stretch discover their route anyplace in the USA. The new modest GPS frameworks have produced new side interests and premiums like geocaching (electronic fortune chasing).
For a minute disregard all you think about GPS units and start with a fresh start (or bit of paper). Rundown every one of the things you need a Sat Nave framework to accomplish for you. I mean the world! Try not to stress over in the event that it is accessible or not; simply show it. This is currently your goal or objective. From here you can pursue the way back to your ideal GPS framework. You will most likely be unable to discover everything on your list of things to get in one GPS gadget, however you can attempt. For instance; you need a Sat Nave framework to take with you on your angling outing to a little yet beneficial lake in northern Wis. You have a little vessel and don't need a costly maritime GPS unit found on business water crafts. Your goal is to find fish lodgings worked by neighborhood angler and store the GPS arranges so you can pinpoint the best angling chances. Fish lodgings resemble wrecks; they pull in fish. Your rundown may resemble this.
As should be obvious by the rundown, this limits your GPS route framework determination by evacuating standard road route GPS types. Presently you can focus your inquiry on Handheld "Game" satellite GPS for boats units with an eye on any that could be utilized for road route.
An extra factor with the showcase is goals. On the off chance that your vision is not exactly perfect, at that point it might be an extraordinary idea to test the different structures to make certain that you can see the showcase. The extent of the presentation runs inseparably with clarity. More prominent goals and bigger presentation structures will be progressively costly. Illuminated presentations are decent to have too. Ultimately, you will discover a few units which have a presentation that can be intelligible in splendid sunlight.
All plans have some level of capacity. Should you wish tube ready to transfer and acquire maps; additional memory will most likely be required? Numerous units are worked with a Micros port so you can enhance your memory. Last Note: A GPS for Hiking could be a great expansion to your exploring gear, yet it's not to turn into the main bit of navigational apparatus inside your arms stockpile. Proceeding notwithstanding pondering a GPS, make sure that you see how you can decipher and utilize a compass and guide. These two things should continually be inside your pack. A GPS is extremely an innovatively propelled instrument and fundamentally hence, it can separate. Batteries can fizzle, a chip can glitch. Because you have a GPS doesn't recommend that you essentially can't get lost.
0 notes
Text
Travel the globe without losing contact with these far-reaching satellite phones Reviews
Backcountry hiking, sailing, or exploring remote areas can be freeing and exhilarating, but escaping contact with civilization doesn’t always work out as planned. Even people who decide to live off the grid often want a method of communicating with authorities or family in the event of an emergency. When you’re heading out beyond cell phone range — whether you’ll be on land, water, or ice — a satellite phone can be a two-way lifeline
for emergency calls
.
Satellite phones let you make and take calls in the field. Sat phones use one of four networks of satellites — only three of which serve the United States. Many models also send and receive text and email messages. Sat phones often include GPS and tracking functions, to use as a backup GPS or send SOS messages. Data connections come standard with most satellite phones, but don’t think you’ll use them to post photos on Instagram or browse the internet. Satellite phone data connections currently max out at 9.6 kbps.
The options from the various networks include marine, aviation, and automotive packages, special antennae, enhanced internet-quality connectivity devices (at equally-enhanced equipment and service costs), and more. We focused on the basic equipment.
Satellite phones and service plans aren’t cheap, although they’re less expensive today than they were 10 years ago. You’ll want to consider your needs and where you’ll be traveling carefully before buying or signing up for anything. The first step is to choose a network. Satellite network coverage, reliability, voice quality, and service costs vary widely. Once you’ve chosen a network (see below), you’ll then choose the phone and service plan which best fits your needs. To help you select the right phone, we’ve assembled a list of the five best satellite phones available from the three satellite networks that service the U.S. and beyond.
At a glance Product Category Iridium Extreme 9575 The best satellite phone overall Iridium Extreme 9575 PTT The best global sat phone for teams who work in the toughest conditions Iridium 9555 The best bargain global sat phone for far-ranging travelers IsatPhone 2 The best sat phone for non-polar sailors and travelers, especially if you get wet a lot Globalstar GSP-1700 The best voice quality and lowest satellite and service price
Iridium Extreme 9575
The best
Why you should buy this: True global functioning, ruggedness, integrated GPS and SOS button
Iridium's Extreme 9575 rugged satellite phone has an integrated GPS, an SOS button, and works anywhere on the globe, including polar areas.
Who it’s for: Frequent global travelers who need a phone that works anywhere, including the poles
How much it will cost: $1,157
Why we picked the Iridium Extreme 9575
You’ll soon see that three of the five phones on our list are Iridium models. Iridium is the only satellite network with truly global service — including the two poles. Iridium is also the only network that currently offers more than one phone, although earlier models still function on their respective networks. Iridium’s top-of-the-line Extreme 9575 sat phone is impressively rugged, and both dust- and water-resistant.
The 9575 has integrated GPS and an SOS button and lets you send and receive text messages and email, receive voicemail, and use it as a mobile hotspot. Maximum data speed is only 2.4 kbps, so short messages work best. If you need a rugged satellite phone to use absolutely everywhere, the Iridium Extreme 9575 is an easy choice. Talk time per battery charge is up to 4 hours.
Iridium Extreme 9575 PTT
The best global sat phone for teams who work in the toughest conditions
Why you should buy this: Global service, one-button radio messaging, extra rugged, longer battery life
Iridium's Extreme 9575 PTT satellite phone is extra rugged, works globally including the poles, and has a push-to-talk radio for teams.
Who it’s for: Teams that need dual function as a global sat phone and push-to-talk radio messaging
How much it will cost: $2230
Why we picked the Iridium Extreme 9575 PTT
Take everything great we said about the Iridium Extreme 9575, toughen it up even more, and add push-to-talk communications. This is the phone for working teams or groups that move around the area. In exchange for almost $300 more than the standard 9575, the PTT model is a true dual-purpose handheld communications tool. Fortunately, PTT minutes are free and don’t count against your satellite service plan.
The PTT’s larger battery powers just over six hours of talk time in phone mode and five hours in PTT mode. To enhance messaging in the field, the PTT button is extra rugged and the audio on this model is louder.
Iridium 9555
The best bargain global sat phone for far-ranging travelers
Why you should buy this: Global service, expedition quality without unnecessary ruggedness
Iridium's Extreme 9555 is the best satellite phone for general purpose use in non-extreme conditions anywhere on earth including both poles.
Who it’s for: World travelers who don’t travel in extreme conditions
How much it will cost: $930
Why we picked the Iridium 9555
If global sat phone connectivity is a must but you really don’t need heavy duty ruggedness or backup GPS duty and an SOS button, the Iridium 9555 is your best choice. The 9555 boasts four hours of talk time and 30 hours standby. Like the Extreme 9575, the 9555 has SMS and email capability. The 9555’s ruggedness is all most people need for truly global travel and use.
Like the other Iridium phones, you can get a signal anywhere but if you have long calls — more than 15 minutes — the constant satellite movement may cause signal dropouts. You can talk while you walk with Iridium phones, which isn’t recommended with Inmarsat phones. All Iridium phones have the same service rates. The Iridium Monthly Wave Runner Plan, for example, provides 90 minutes a month for $100. Extra minutes cost $1.54 each.
IsatPhone 2
The best sat phone for non-polar sailors and travelers, especially if you get wet a lot
Why you should buy this: Strong acquired signal, splash resistance, mid-range price, integrated GPS and SOS button
Inmarsat's Isatphone 2 is a rugged, splash-resistant satellite phone great for marine use that works worldwide except for the polar regions.
Who it’s for: World travelers who stay within the 70th parallels, especially sailors
How much it will cost: $635
Why we picked the IsatPhone 2
The Inmarsat IsatPhone 2 doesn’t work at the north or south poles but as long as you’re staying within the 70th north and south parallels, it won’t matter much. Inmarsat has only three satellites compared to Iridium’s 66, all located over the equator, so you might have to move away from obstructions to get a good signal. Once you have a signal, Inmarsat reliability is better than Iridium’s because if you stand still the signal maintains its strength.
Reflecting its maritime heritage, the IsatPhone 2 is dust, shock, and splash resistant, and withstands 95 percent humidity. Battery life provides an impressive eight hours of talk time with 160 hours standby. The phone also has voicemail, SMS, and email messaging. A built-in GPS and emergency button sends a distress text to a pre-arranged number with your location. The IsatPhone 2’s price is lower than any of the Iridium phones but service plan costs are about the same. For example, Inmarsat’s IsatPhone Mid Plan costs $65 a month for 30 minutes, with extra minutes costing $1.05.
Globalstar GSP-1700
The best voice quality and lowest satellite and service price
Why you should buy this: Best voice quality, cell phone number assignment, low price
Globalstar's GSP-1700 low-priced, regional coverage satellite phone has great voice quality and low operating costs.
Who it’s for: Anyone who travels within Globalstar regional coverage zones and doesn’t need an extremely rugged phone
How much it will cost: $500
Why we picked the Globalstar GSP-1700
If you’re traveling or staying within one of the Globalstar regional coverage areas — much, but not all of the world — the Globalstar GSP-1700 is the bargain lover’s satellite phone. The network’s service rates, while still much more than cellular service, seem extremely reasonable compared to the others. The Globalstar Orbit 200 minute plan provides 200 minutes for $100, with extra minutes for $0.99 each. If you need any more than 200 minutes a month, the Globalstar Orbit Unlimited Plan is $150 for unlimited talk time, which seems like a wonderful deal by comparison.
Because Globalstar phones link with cell ground stations, they have far and away the clearest voice quality. With its 9.6 kbps data transfer speed, Globalstar is the speed demon of the lot but again that’s entirely relative. The GSP-1700 doesn’t send or receive SMS messages and there’s no GPS, but you can get your longitude and latitude directly from the phone while in talk mode. The Globalstar phone also has voicemail.
0 notes
Text
The Ultimate Guide To Geocaching
Spending time in the great outdoors is all of the entertainment some hikers and campers need to have a great time. Between the sights and sounds of the natural world and the relaxed pace of the natural world, many people are content to just take it all in. But some of us like having a little more to do when enjoying the wilderness. You may be delighted by the beauty surrounding you and happy to escape from the hustle and bustle of daily life, but once the tent is pitched and the campfire smoldering, you can’t help but feel a little bored.
Fortunately, there are a number of great ways to have fun while hiking or camping. Below, we’ll talk about geocaching — one of the most rewarding (and occasionally challenging) activities to enjoy during your next adventure.
What Is Geocaching?
In a nutshell, geocaching is a game-like activity in which you hunt for treasure. But, instead of using a treasure map, you will use a GPS device to find the loot. And instead of gold or riches, the treasure will usually consist of a journal and collection of interesting knick-knacks left by those who came before you.
The object of the game is to find various geocaches – typically a small to medium-sized plastic or metal box – hidden in various places all over the world. To find the cache, you’ll have to use a combination of clues and GPS coordinates. Once you find the geocache, you’ll usually sign the included journal and leave a brief note about finding the cache.
Additionally, many geocaches also contain a variety of small items other geocaching participants have left. Typically, you’ll be encouraged to take one of the items and leave a new one of your own. Some of the items may be rather random, but others will likely have some sentimental value to the person who left them.
Over time, many items will migrate from one geocache to the next, as participants collect them and then place them in other geocaches. For example, a can of beans (often called the “original can of beans,”) that was placed in one of the very first geocaches ever documented has traveled all over the U.S. Some of these types of famous items can actually be tracked, so that you can try to find them yourself.
Some geocaches are placed in relatively easily accessed areas in cities or suburbs, but most of those that outdoor enthusiasts will encounter are placed in state parks, national forests and other out-of-the-way locations. Geocaching first began around the year 2000, as GPS units became increasingly affordable and common. The activity formerly went by a variety of names, including GPSstashing, before the community settled on the term geocaching.
How Do You Participate?
The first thing you’ll want to do is to find a geocache listing site that covers your area (or the area in which you’ll be traveling). A simple Google search should produce several different listing sites from which you can choose (although geocaching.com is a good place for most novices to get their feet wet).
Be sure to familiarize yourself with the procedures and protocols of the site and follow all of the rules listed. Pick one of the caches that seems to be in your area and get to work.
Some caches will require you to solve puzzles or decode ciphers to reveal the coordinates of the cache, while others simply provide you with the coordinates right off the bat. Just select the style that most appeals to you. Some geocaching sites and societies may charge a nominal fee (or accept donations), which help to offset the costs of managing the site, but others allow you to participate for free.
What Do You Need To Geocache?
Part of the appeal of geocaching is that you don’t need much equipment to participate. Basically, you’ll need the following items:
A Handheld GPS Device
The primary piece of equipment you’ll need to geocache is a handheld GPS unit. It needn’t be especially expensive or packed with features – just about any model that will determine your location accurately will work. However, models that include tracking features and allow you to store waypoints, routes and other data are generally preferred.
Be sure that you select a model that will hold up to the rigors of trail life. You don’t want your GPS to stop working because you dropped it on a rock or because the humidity in the forest reaches saturated levels. Some GPS units are designed to stand up to these types of indignities, but others can be protected through the use of a padded, waterproof cover.
A Smartphone, Tablet or Laptop Computer
You’ll often need to check the listing site that provides coordinates and clues to a geocache’s location, and the best way to do this is with a cell phone (or, if you prefer, a tablet or laptop). A cell phone will also allow you to consult maps of the area or post messages on the listing site once you find your treasure. Cellphones also provide obvious safety value, which you should always keep in mind while exploring the wilderness.
Note that many modern cellphones provide GPS capabilities, so you may not need to carry a separate GPS and cellphone.
Basic Outdoor Equipment
The rest of the gear you’ll need will depend on where you are looking for a geocache. If you are looking for a geocache in a suburban park half a mile from your home, you won’t need much more than a pair of walking shoes and some comfortable clothing. However, your geocaching adventures may take you much further from the beaten path, thereby necessitating a bit more gear.
You should always bring water along anytime you venture into the wilderness, but you can use your own judgment when deciding what else to bring. The following items may be helpful:
Comfortable hiking clothes
Hiking boots or good walking shoes
Small first aid kit
Daypack
Snacks
Trekking poles
Camera
What Kind Of Containers Are Used For Geocaching?
A variety of different containers are used for geocaches. In fact, this is part of what makes the activity so fun and challenging – you’ll rarely know exactly what you’re looking for.
Many geocaches are stored in military ammunition boxes. Typically, these boxes are covered in official geocaching stickers and they’re occasionally painted or decorated in other ways. Ammunition boxes are ideal for larger geocaches, as they will hold a fair number of trinkets, and they protect the contents from the elements. Additionally, most ammunition boxes are built from very robust materials, which ensures they’ll last for years.
However, other geocaches utilize different types of containers. Some are comprised of a simple plastic storage box, while other participants create custom-built boxes. Some of the most challenging geocaches to find are small ones – the smallest geocaches are often about the size of a film canister!
Note that geocaches are typically partially hidden in the landscape, and the very best ones are often the most challenging to find. In fact, geocaches should always be placed in out-of-sight locations, at least with respect to the primary trails and recreational areas in the vicinity.
Where Are The Best Places To Participate?
Geocaches can be placed in a variety of places, but they should always be located on public property. This ensures that anyone can seek them out and it prevents you from having to trespass to participate. In fact, geocaches should not be placed in any place that requires you to cross private property to reach, either. Given this, national parks, national forests, state parks and small municipal parks are some of the most common places in which geocaches are hidden. Just start searching by looking in your general area, and then try to pick one or more of the most appealing caches to search for.
General Geocaching Tips
Geocaching is a pretty simple activity that doesn’t require participants to possess a lot of equipment, experience or knowledge. You can get started at any time and start having fun almost immediately. But, there are a few important things you’ll want to keep in mind to make the most of the experience and ensure you don’t get in the way of anyone else’s good time.
Some participants leave “hitchhikers” in geocaches instead of more typical trinkets. Hitchhikers are generally small items that bear the logo of a town or park. They’re designed to be carried by participants from one geocache to the next so that they eventually turn up in some exotic location. If you take a hitchhiker, be sure that you perpetuate its journey and place it in another geocache, located somewhere else.
Always bring a small trinket with you to swap out for one of the items in the geocache. Never take anything unless you have something to leave in exchange.
Remember that many children participate in geocaching, so only leave family-friendly trinkets or messages in the container.
Never move a geocache – even if it wasn’t located exactly where it was supposed to be, or you had great difficulty finding it. If you truly believe there is something wrong with the location, contact the listing site and bring it to their attention.
Always employ leave-no-trace practices when searching for a geocache. While most outdoor enthusiasts will agree that it is fine to leave an unobtrusive geocache in a natural habitat, no one wants to see litter scattered around the geocache site. This would also take some of the fun out of finding the geocache, as the trash would lead you right to it.
Never spoil the hunt for anyone else. Finding the geocache on your own is part of the appeal of the activity – nobody wants to have that ruined by someone who blurts out the location of the cache.
Make sure to note the size of the cache before you select a trinket to leave behind. Some caches are too small to leave anything behind; you’ll just have to sign the log and move on. Others are large enough to contain relatively big trinkets. You can’t always determine the size of the cache from a listing site, but many will provide clues.
Geocaching is a fun and exciting way to pass the time while you are enjoying the great outdoors, and people of all ages and experience levels can participate. So, grab your GPS, find a good listing site in your area and get out there and start looking for treasure. You never know what you’ll find inside the next geocache you open.
The post The Ultimate Guide To Geocaching appeared first on Montem Outdoor Gear.
from Montem Outdoor Gear https://montemlife.com/ultimate-guide-to-geocaching/
0 notes