#Gifset post ONLY WAAAAAY LATER after that
Explore tagged Tumblr posts
Text
Well, I guess I can say we have a rocking winner who literally skyrocketed to victory in that poll XD Next Gifset post already in the works!
#Rocky#MY BELOVED#Tho I'm about to start a class tonight and then I'll be teaching for 3h straight so#Gifset post ONLY WAAAAAY LATER after that
7 notes
·
View notes
Text
How do I do that giffing?
Basic gif tutorial
Note: English is not my native language, but I shall do my best to explain it. Also, this is my first time making a tutorial like this, so I hope ya’ll can follow it a bit.
I am tagging some people that were interested into this from me: @goramidiot @lithiumkatana17 @kidsofthekelvinhero @prynacle @moonlight-at-dawn
Summary: Here I’ll explain and show, the way how I make a basic gifset. I will talk about the way I start and what you should keep in mind when making gifs and post them on Tumblr. Again this is just a very basic tutorial. But I will cover all the basics that I start with, always.
What do you need?
- Photoshop CS6 or higher
Video footage of the scenes you want to gif (I always try and use my own captured footage via my ps4, that way the quality is much better then for example downloading a youtube video. But some video’s do come in HD)
A idea of a scene you want to gif
Some basic knowledge of how photoshop works (the way layers and frames work and adding adjustment layers for some neat effects.)
Creativity
Patience
Some good music
Beer or coffee >:D
Step 1: Preparation
Before I start making my gifs I always and mostly already have a idea in mind of what I want to gif. I am a very organised person and I keep most of my vids in separate folders on a external hard drive. (and to be honest there are also some chaos folders on my desktop)
bear in mind you don’t have to be in possession of such things but I am merely showing you again how I do it :P
Here a example of a map structure I have of my current FFXV footage folder:
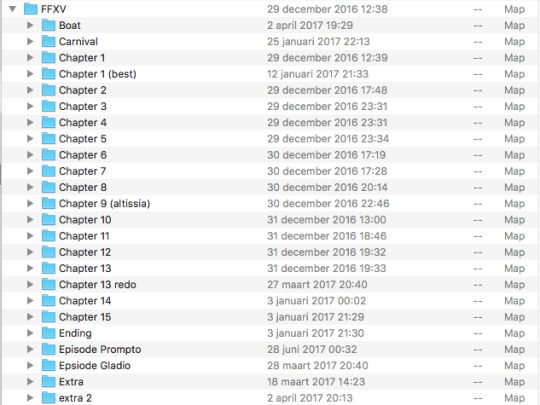
After that I usually just drag the vids I want, to my desktop. So I can easily select them from Photoshop later on, which I will explain later.
I decided to make a small gifset of older Noctis (surprise, I love him) so I’ll have that ending footage at the ready.
Alright then, next is to open Photoshop. Always be sure to have the timeline tab open: Window -> Timeline.
Step 2: Importing the footage into Photoshop and convert it into frames and layers
Well then, once we got our idea and scene, it is time to import it into Photoshop. Luckily this isn’t to much of a hassle with the latest versions of Photoshop CS6 +.
To import footage, select: File -> Import -> video frames to layers.
Then choose the footage file, and you should see this window pop up now:
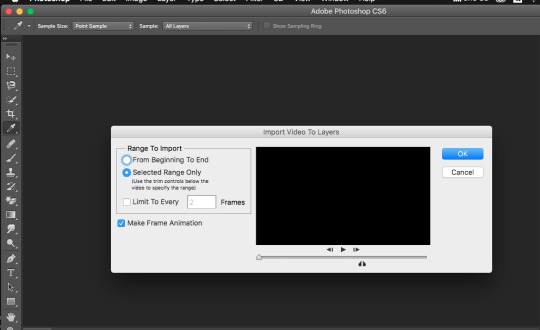
You can select which part you want of the whole video with those two black bottom arrows, be sure to have checked ‘Selected range only’. If you don’t, Photoshop will import your entire video and then it becomes Photodrama.
Hit ‘ok’ once you got the part you wanted and Photoshop does the magic now for you. sometimes you will have frames that snooped through so you want to delete those.
Important note, also be sure to delete the very same layers. Frames and layers are obviously connected to each other.
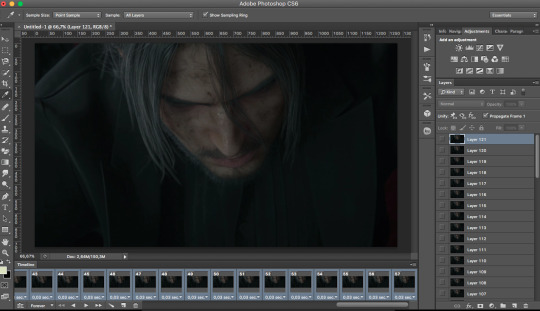
Congrats! We have imported our desired scene, and deleted the unwanted frames and layers.
This is my setup now at the moment.
Step 3: Choose your size
Next up is setting up the right size for our gif, our current one is waaaaay to big, tumblr sure is going to freak out when you post it like this (and Photoshop too) Now Tumblr comes with some standard sizes that you should be aware of (for the best quality). I will cover the sizes I myself use the most, the width is the most important, you can use whatever height you want:
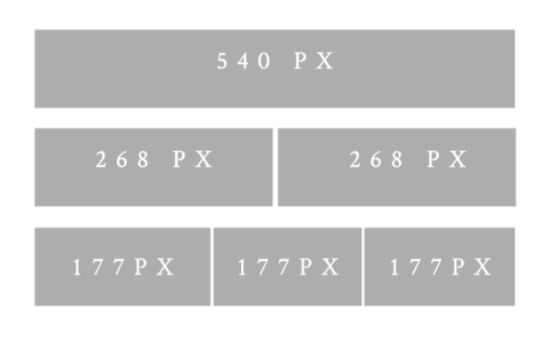
I am going to make this gif 540 px wide and 270 px in height. You do this with the crop tool:
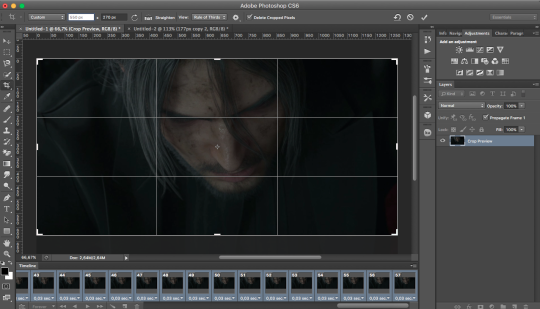
Now hit the accept button or that check button. Your gif is now turning into the right size. And once you did that also make sure to always have your view at 100%, that way you will see it sharp and clearly. There we re-sized it!
ps You can always hit the play button to see what your gif looks like so far.
Step 4: Adding adjustment layers aka MAKE IT PRETTY!
Now we arrived at the fun part, which is to make that gif stand out and make it come to life and get rid of this dull look.
You can make a huge difference already with the adjustment layer: ‘Levels’. Be sure to have the adjustment layers tab open, which you can see at my top right view (all these small pictograms.)
Select ‘levels’.
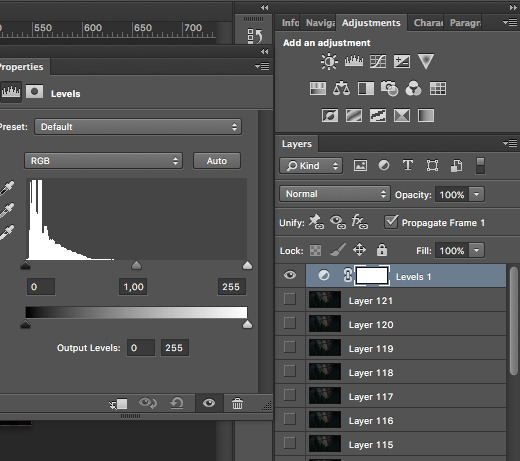
Like this. The black arrow causes our gif to get dark, while the white one will turn it brighter. Go ahead and play around with the settings to see for yourself how it pans out.
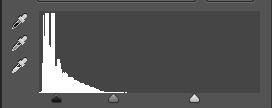
Adjust the levels in this panel not the lower one in the image above ;)
You can add as much adjustment layers as you want. I decided that I want to add a black and white adjustment layer too.
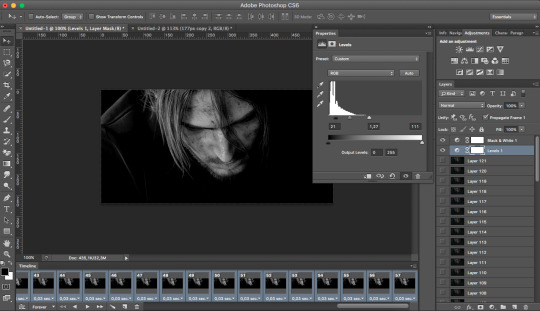
My result at the moment
Step 5: finishing up your gif
So, once you are satisfied by the way your gif looks, it is time to check out how big file it is. Tumblr will only play your gif when it is under 3 MB (and before it was under 2 MB… good lord)
Let’s check how big mine is atm: Go to file -> save for web:
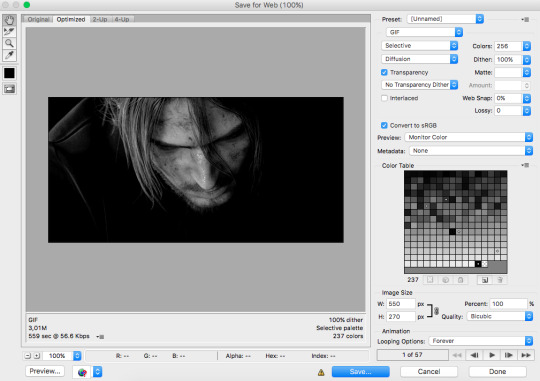
This screen pops up. It looks like my gif is too big: 3,01M to be exact.That means I will have to delete some frames, and then repeat this process until your are under 3 MB, preferably having something like: 2, 700 or 2,6 just to be safe. And do not save the gif just yet, this is just for checking.
Once you got your gif under 3 MB it is time to determine the pacing of your gif (how fast or slow you want it to play)

Under each frame you would have noticed the 0,03 sec. That function determines how fast or slow it goes. Select all frame and hit the arrow. Choose ‘other’ and set it to 0,06. That is my standard pacing. Yo can select whatever you want of course, I recommend to play around a bit.
Step 6: Sharpen your gif
I always sharpen my gifs, they will look crispy and Tumblr has the tendency to reduce your quality a little bit. To start sharpening your gifs you must first make the timeline as one:
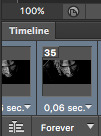
The left button, next to forever.
Your frames will turn into a timeline. Now you will notice all those eye icons left of your layers. Those are the frames included into the timeline. You want to select all the layers with the eye icon. then go to: Filter -> convert to smart filters. All of your layers have been converted into one smart object. Now go to filter -> sharpen -> smart sharpen:
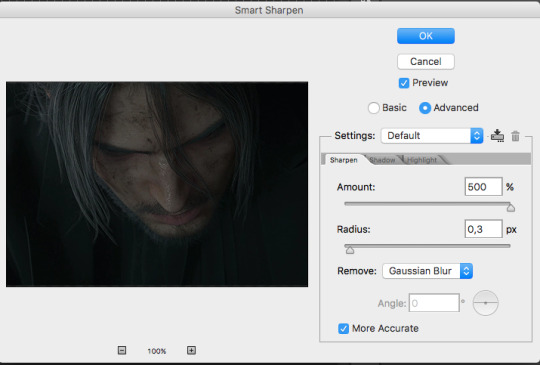
I always use these settings.
Now click ok and save your gif for the web, again check if it is under 3MB as sharping does add up some space. IMPORTANT always select loop ‘forever’.
Congrats!! you made your first gif. Now you can post it on Tumblr and share your piece of art with the world:

I hope this tutorial helps you on your way with your gifmaking skills. You have to begin somewhere, but be patient and always keep practicing! :D And I really hope you could kinda follow this... phew.
If you have any other questions feel free to ask me.
There are so many other people who have covered basic gif making tutorials. The best thing to do is to practice, practice, practice. Here is a blog page that covers tons of other tutorials, where I get my info from as well: http://chaoticresources.tumblr.com/tutorials
#ffxv#final fantasy xv#noctis lucis caelum#gif tutorial#my tutorials#oh and please like and reblog this if it was helpful#i appreciate that#mistress speaks and teaches
125 notes
·
View notes