#Edge PDF add text
Explore tagged Tumblr posts
Visit Tumblr Blog
Explore Tumblr blogs with no restrictions, modern design and the best experience.
Last Seen Tumblr Blogs


Fun Fact
Tumblr has been providing a Korean-language service since 2013.
Text
Edge瀏覽器 如何在PDF上打字 中英文版Edge切換 【教學】
客戶來電問:「我的電腦Edg可以在pdf加文字,老闆電腦edge pdf沒有新增文字功能」,有經驗的工程師心裡已經大概知道:「又是一個微軟玄學問題」但也是經過一波來回測試各種設定才知道edg如何在pdf上打字… Continue reading Edge瀏覽器 如何在PDF上打字 中英文版Edge切換 【教學】
View On WordPress
0 notes
Text
"Pet" Binding (with a twist)
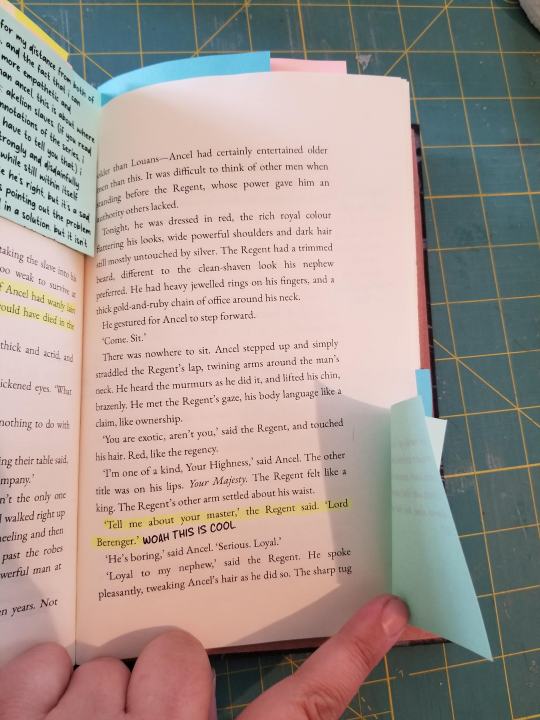
This binding is a little different than what I've done so far! This is "Pet" by C.S.Pacat, but with notes from @lucky-clover-gazette. The notes on this read along were SO funny and I knew I wanted to feature them in a bound work, but they wouldn't really make sense without the context of the original work. And so I mushed both the original work and the notes together!
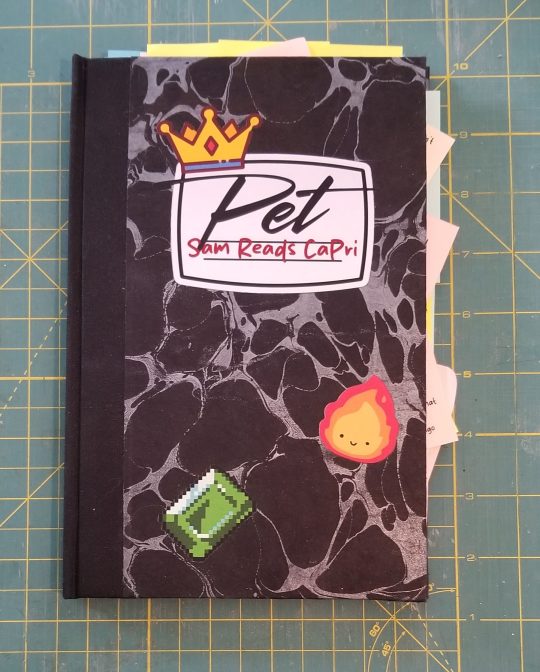
So the idea here was to make it look like a composition notebook, complete with stickers on the front and (as we'll soon see...) drawings and scrawled notes on the inside. "Sam Reads CaPri" is the tag that Lucky Clover uses for her read along notes, and so I used it here just to make it clear this wasn't just the canon work. I used black and silver marbled paper to complete the look of the composition notebook, and more direct-to-film transfers for the "stickers" on the cover. I think it turned out fantastically!
More pics and a LOT of notes under the cut.
So I thought this was a really interesting project because I wanted to use the original work but add to it. I...acquired a PDF of Pet (let me have this one, I bought 2 official english copies of the short stories AND a Polish one I can't even read!) and messed with the margins a bit to make more room for Lucky Clover's notes. Here's what it looks like inside.
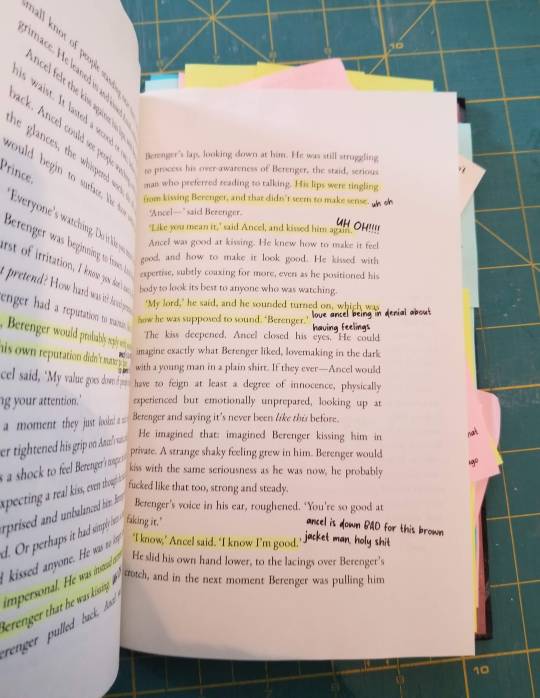
This whole thing was done in Libre Office, by the way. I'm sure there's a better program out there that would have done this WAY easier but I didn't want to have to learn how to use Adobe (or pay for it, honestly). But so the little notes are added with textboxes and placed next to their respective quotes, and the quotes themselves are highlighted with highlighters used for bibles, which is apparently a whole subset of office supplies I never knew about! I needed those highlighters specifically because I wanted to have archival color (no idea if regular highlighters are, these are just the only things that came up from a quick search) AND they're really good because they are made not to bleed through really thin bible paper. So on regular paper you can barely see them through the other side at all. They're great! Thanks bible highlighters, I know you thought you would be used for more holy purposes but really there's no better writer than Pacat, so you're in good hands!
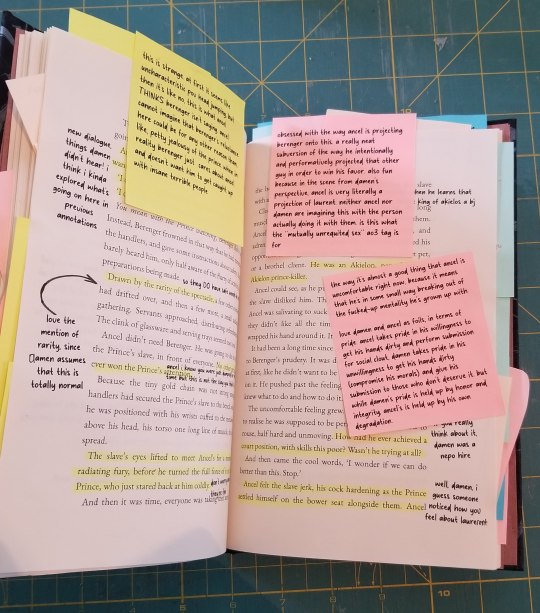
So the other problem was that some of the notes were too long to shove into the margins, even after I had made them bigger than normal. That meant post-it notes! Now these aren't actual post-it notes, obviously (I can't imagine how terrible it would be to line those up in the printer) but I used colored printer paper and cut them to size, and it worked out. I used a bit of glue to get them down, and made it so that all of them fold away from the text so that everything is still readable. And then I made some of them poke out the top and sides, because I liked the way it looked.
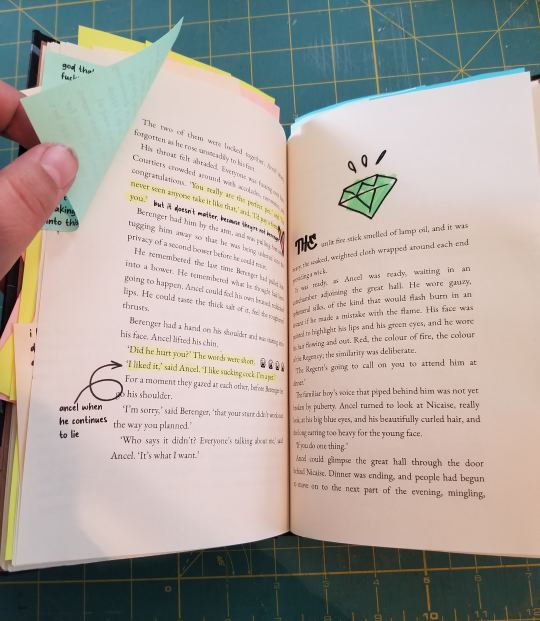
There are little doodles throughout, some of which I colored in with a highlighter, and I the first word in each section is in a scribbly font, which I thought was funny. All of the notes are likewise in a handwritten font (Amanda Rose) and slightly rotated so that they're not in line with the text.
I also did not trim any of the sides of this textblock, so it's kind of uneven (deckled edges are common on the long side of the textblock, not so much on the top and bottom) but I kind of needed all the space. No endbands in this one either, I wanted to keep it more notebooky and the uneven pages meant it would have been impossible to do anyway. Everything else was bound normally, so aside from the two thousand years it took me to typeset this it was a pretty easy bind.
Oh, and last but not least, the endpapers:
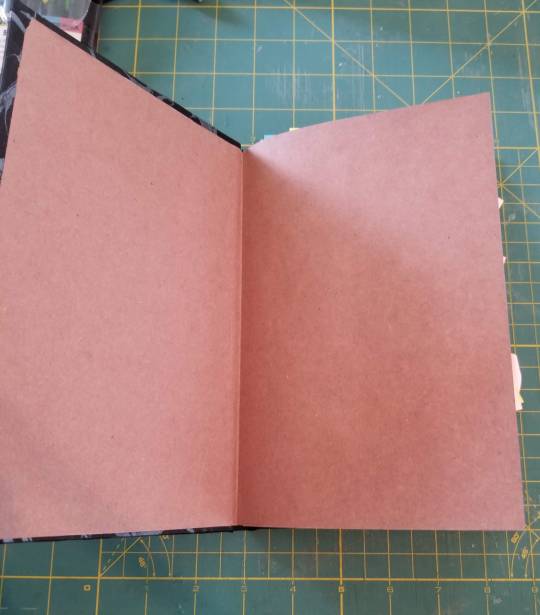
Plain brown butcher paper, in honor of Berenger.
#capri#my binding#imp press#fic binding#fanbinding#ancel#berenger#I feel like this is a true transformative work#this was SO MUCH FUN to do#there were so many problems I had to figure out how to solve#and I think it looks great#it makes me laugh every time I see it
54 notes
·
View notes
Text
I don't know how many crowdfunded tabletop RPGs I've backed where they end up producing a beautiful limited edition hardcover that's physically unreadable without breaking the spine because the inside margin is far too small and the edges of the text get lost in the binding.
Pro tip (and I don't mean that facetiously; I am a professional): if you're publishing a perfect-bound hardcover with a page size at or around digest size (i.e., 5.5" x 8.5", 6" x 9", etc.), your inside (i.e., spine-side) margin must be 0.75" at an absolute minimum, and if you don't want to oblige readers to peer into the binding, 1" is better. If your page size is at or around letter size (i.e, 8" x 10", 8.5" x 11", etc.), add a quarter-inch to both of those figures – i.e., a minimum inside margin of 1", and 1.25" is better if you can manage it.
(Note that if you're not doing a separate digital layout and your print masters are doubling as your PDF, this will typically result in a PDF with unbalanced left and right margins. If that bothers you, either be prepared to do two separate layouts, or design your border art so that it looks intentional!)
1K notes
·
View notes
Note
bookbinding question: how did you format the pages so that they read in the correct order when stacked and folded into signatures?
Hi! I use Word to create my signatures and typeset them to read like a book. I followed amazing tutorials from Hana Bobb on TikTok - I'd really recommend looking at her content but here's the bare bones! (If you use other applications this probably won't be as helpful for you, I'm sorry!)
First things first, you need to get your word document set up. From the top ribbon, go to Layout, then select Margins > Custom Margins which will open a page setup popup window. Here are the page size, margins, and layout settings I use:
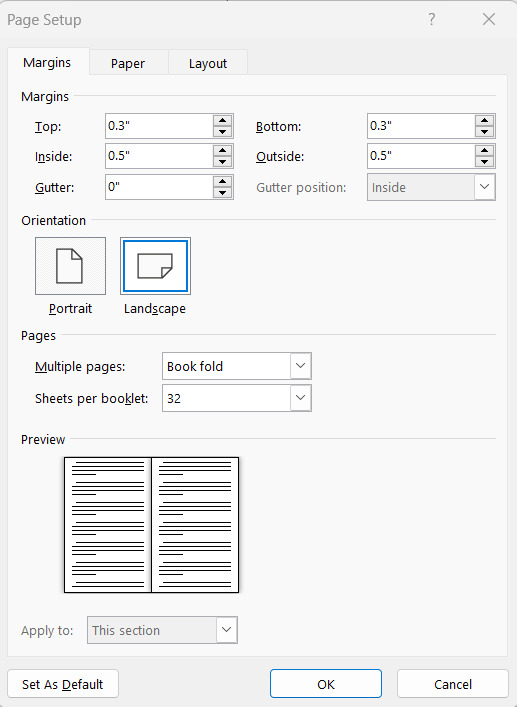
My margins are set based on US Letter sized paper. I find that they're not too big but allowed me to trim the foredges and don't eat up the text in the spine.
HOWEVER, if you're typesetting a really large fic, you're going to want to increase your side margins! For example, I am typesetting a tandem read of TRTTD/ATWT that is 900+ pages and my side margins are .65" to compensate for the deeper, rounded spine and the amount I'll have to trim off the foredge.
If you're uncertain if you like your margins, you can do test prints of the first signature to see how your margins end up looking.
Our page orientation is landscape because, although we want our individual pages to be portrait, each landscape page will have two portrait pages.
By setting the "multiple pages" setting to book fold, you will automatically print into signatures that you can then sew and glue into a book.
Sheets per booklet is really personal preference, just in mind that one sheet of paper is equal to FOUR book pages (two front and two back). So my 32 page booklets take 8 sheets of paper. Some people do 7, others do up to 10! It's harder to punch holes in 8+ pages of signatures, but easier to sew in my opinion.
From here, you can input your text! You can post the raw html from AO3 into the document which which bring over the text and general formatting, and you can format chapters, headings, title pages, etc. from there. This is a time consuming process but is really helpful when familiarizing yourself with how typesetting works. If you do go with this option, I'd again recommend Hana Bobb's detailed tutorials - she goes over incredible info for newbies and I wouldn't be half as good as I am without her guidance.
If you're not interested in deep diving on typesetting, you can do what I do now which is use a Word macro from the macro mommy herself - Blak Books Bindery.
She has some incredible macros which allow you to quickly and easily add text dividers, drop caps, and so much more to your typesets! The one I use the most is her "Raw-Text Formatting" macro which allows you to copy raw text directly from AO3 into the word document and turn it into a formatted typeset through computer magic. I usually just use this as a starting point and heavily adjust the aesthetics from there, but it saves so much time moving author notes, formatting chapters into sections, adding title and publishing pages, etc.
After your typeset is formatted how you want it, you can print it! I typically go into File > Print and select "Print to PDF."
This allows you to save the document as a PDF. You can print directly from Word but I haven't tried it since people say it really messes up the formatting.
Your finished typeset file should look something like this:

Just print this double sided with "flip on the short edge" selected, and start folding! Even if you're super confident about your typeset, I would highly recommend test printing your first signature on paper you don't care about. I've caught misaligned page numbers, margin issues, and other problems this way and saved myself the headache and reams of paper.
That's it! I hope this answered your question, I went probably went overboard but I'm not sure what knowledge you're working with so I wanted to be thorough. If you or anyone else has any other questions, feel free to reach out through asks or DMs!
#my stuff#fanficbookbinding#fic binding#bookbinding#tutorial#typesetting#asks#bookbinding tutorial#typesetting tutorial
14 notes
·
View notes
Note
🌺
hello rai, I’m ready to review bloodily safe, game on and psycho including the patreon bonuses. due to my work schedule, I copy fics in a pdf so I can take them to work and read when I’m offline and I did order the story in chronological order. congratulations on your 33.4k words.
this post might be a bit long. I’m writing this with the fic in front of me so I can remember which parts I wanted to talk about and revise my notes about it. by the way, I’m the person who advised a little rest before posting the fic and here I’m gonna talk about it because it has played a significant part in the quality of the sequel. I want to add that I’m an editor myself, I revise, edit and proofread texts so I will also talk about betas. this is an informal review, don’t take it to heart just because I usually do this.
I’m speaking from the perspective of a person that has been reading fanfics for over 10 years, although I’ve started reading real people fics just a couple months ago and I can only read about wonwoo, so I’ve read almost everything.
let’s get into it now.
first I gotta say that bloodily safe is a work of art. I loved the idea of a psychotic wonwoo and I loved how you fleshed it out from start to finish. I was really interested in the story and how the story is about wonwoo and blackmailing his victim… I thought it was amazing and it’s exactly what makes this fic so unique and why it attracted interest.
from the idea of y/n reading erotica online while keeping her identity a secret, to nerdycatboy being able to discover her true identity and how he took advantage of it. y/n weakness playing a role in the story, forcing her not to quit because of the debt she’s in with her mother’s treatment was also great.
I think my favorite part is the relationship between cherry and nerdycatboy, or y/n and nerdycatboy. I think that’s the most intriguing part of the story. the games he forces her to play are very well written and you really were swimming in a pool of fantastic ideas. as a reader, I was sad it ended so soon because of how edging it was but the way it ended in the guided masturbation was excellent. you did a very good job in maintaining character for wonwoo as nerdycatboy there, and I think the meeting was also well written. his backstory was a hard one to read and I really liked how you went into detail with it.
I have to confess that I didn’t like how quick y/n fell for wonwoo during the smut part. I thought there would be a small timeskip with a few days of tension between both knowing each other’s identities and y/n having to see his stalker during class.
I understand that y/n has a crush on wonwoo, the it boy, but I thought y/n’s inner thoughts about coming to terms that the man of his dreams was, in fact, a psycho, would play a more prominent role. she could separate both concepts when she met nerdycatboy as wonwoo, so I had expectations to use psychology on y/n’s feelings. how he knows how to manipulate and how y/n is gaslighted seems a bit rushed to me. y/n’s feelings about getting closer to her blackmailer don’t really play a significant role or it is properly explained.
she does acknowledge the fact that wonwoo is not a good man but finds herself accepting the bare minimum from him.
I think the idea that she also adopts some of wonwoo’s eccentric taste in pain and other perverted things is a must when y/n fits in the role of the victim, but it all happens too soon. not in the sense that she does share some kinks like being dominated by a man or a stranger at first, but in the following segments when both are together.
so the way y/n was just begging wonwoo to kiss her, but knowing he has odd intentions of sleeping with her while being a virgin… I thought it was all a bit quick.
I was expecting a conflict of interests there too.
nonetheless, I think the smut was great, the idea of wonwoo being turned on by y/’s virginity and adding blood to the scheme was really good and I really enjoyed seeing that part of his persona playing into the act. very in tune with the theme of the fic. I also liked the second smut scene of wonwoo denying release, the idea was immaculate.
then, adding to wonwoo’s way of forcing people to be with him by using sick methods, there is also a possessive side to him and how you wrote that part about jacob and his need to exert dominance. the interaction was interesting.
I liked the idea, the concept was good, but personally, I can’t really come to terms with jacob also adopting this behavior and discovering wonwoo and y/n… like I’m not entirely convinced. I can’t exactly explain why or how but it wasn’t my thing.
I did enjoy the fight between both men and the ending, wonwoo killing jacob and the segment was good.
I had problems with how it got to that point rather than the idea itself.
to be honest, I have nothing bad to say about game on, it was perfect. It was the perfect sequel. really.
personally, I loved that you made wonwoo a streamer and it made me smile because even in fiction, there are things certain characters can’t be written without. diving into worldbuilding (which I love and look for a lot in stories) I appreciated the part about his new family and the whole inheritance was something I didn’t expect but I welcomed; I did want more information about how his life changed but he didn’t move on from his trauma but I thought maybe you found it superfluous to the main point.
even the patreon bonus with joshua was interesting (while arranging the story chronologically I did cut game on to add bonus). poor joshua. I think it fit perfectly with how wonwoo would cross boundaries in order to protect what he considers his property. I’m still surprised he’s never been caught.
now, as a reader, I could tell that you were very invested in writing both parts and it’s reflected in the quality of the story. I could tell that you enjoyed writing and your ideas were flowing, you were inspired and you had energy.
these are things I didn’t see in psycho and the bonus. you were excited because people were encouraging you to write more but it really wasn’t the right time for you to do so. I could see that you were a bit rushed to make it to the deadline so I suggested that you take a break and finish it when you were feeling better.
I found that the idea I gave you helped you a lot with writing, but the writing style and quality were quite different from bloodily safe and game on, and as writers and artists do improve with time, this time it wasn’t really an improvement.
so, as editor, I did have a difficult time reading through some segments. for example, I noticed that you abused the word “as” which is a connector and conjunction. same way I noticed that you do tend to use formal speech when writing, which makes me question why as this is fiction and the speech is standard. I understand if you use it as part of a character’s personal speech to add to their personality but not as the narrator.
your fatigue really found itself in the story, whether people are able to notice it or not. you tried hard to deliver the best story possible and I’m sure it would’ve been the case had you had help.
nonetheless I found the idea and how you also added some elements of your own quite appealing. I like thriller and dark romance so my original idea was a bit darker by just straight up doing it by the corpse so I laughed when you just changed it.
the murder scene is quite good. I have to confess I wanted to know how wonwoo disposed of the body but we’ll never know.
gotta say that the chasing scene, when the black figure was chasing y/n, I’m not entirely convinced by it and you tried to make it as suspenseful as possible but luckily it’s not that important for the fic.
my favorite part is the conflict between wonwoo and y/n about wonwoo’s personality and his “lack of professional help” that will always be and issue for him but will never be fixed. I was hopeful that the whole therapeutic aspect would play a role since your summary is therapist!reader but it lacked a psychological pov. I guess it’s because y/n has kinda become like wonwoo. it’s a worldbuilding issue that I also found would be interesting if told in part 1 with the new family.
and finally, as I did talk a lot about speeding things up, the ending didn’t quite click. it was completely unexpected. I was taken aback by y/n’s confession of her vows in the wedding and how she’s kinda living the perfect life with her blackmailer but never quite getting to the reasoning behind it or addressing the elephant in the room.
it culminated in psycho wonwoo being more like an accessory rather than a real issue and how it affected y/n. but maybe I’m here trying to get as many details from a piece of fiction so just don’t pay much attention.
it could’ve had more psychological logic but it’s fine. obviously I'm asking too much for a fic but if it were an idea for a book it would be a best seller in dark erotica. not even joking.
I still think the entire fic from bloodily safe to game on to psycho is incredible. it’s really one of the best pieces of fanfiction I’ve seen and the idea is brilliant.
now that I’m reading sibilance I could study your fatigue when writing psycho. sibilance is much more your current preference and style, and I can tell you’re confident and comfortable. if you ever need a source of inspo or an editor, I’m happy to help you and I can message you. I did notice some double spaces so I just knew you didn't have anyone to back you up.
take care and thank you for the ride that was psycho wonwoo.
Let me just begin by saying sorry for the humongous delay in reply. Also, this is the longest message I ever got so thank for for taking the time to write all this, I really appreciate it!
Okay so tbh I don't even remember the plot of Bloodily safe and game on entirely so I won't comment on them. For psycho, I agree that it wasn't the best piece in terms of quality of writing. I just want to address one part, that is the ending. So, cherry living happily with Wonwoo and not addressing the elephant in the room is because she is delulu, literally. Idk how much of that I was able to convey but she's purely delusional. She knows Wonwoo is toxic, she knows their relationship is not a good one but she chooses to romanticize it. That was how I imagined her from the get go. She is someone that ignores the red flags waving right in front of her, especially when it comes to Wonwoo. My intention with that ending was to show her as someone purposefully ignorant. There was no real romance there and it was just her and her delulu self romanticizing a toxic relationship.
Which brings me to an interesting point, I purposefully made Wonwoo never confess his "feelings" towards her. If you go through the entire series, you'll see words like love is used for cherry but never for Wonwoo. In fact, we never see anything hearfelt or emotional from him. Because in my mind, Wonwoo doesn't really love cherry. He cares about her, he is obsessed with her but he doesn't love her.
Anyway, I'll stop the rant here. This feedback was very valuable and I kept in the mind the pointers you shared here while writing sibilance 3. In future, I may reach out to you for proofreading and edits. Once again, thank you so much for writing such an extensive review. Have a lovely day! <3
2 notes
·
View notes
Text
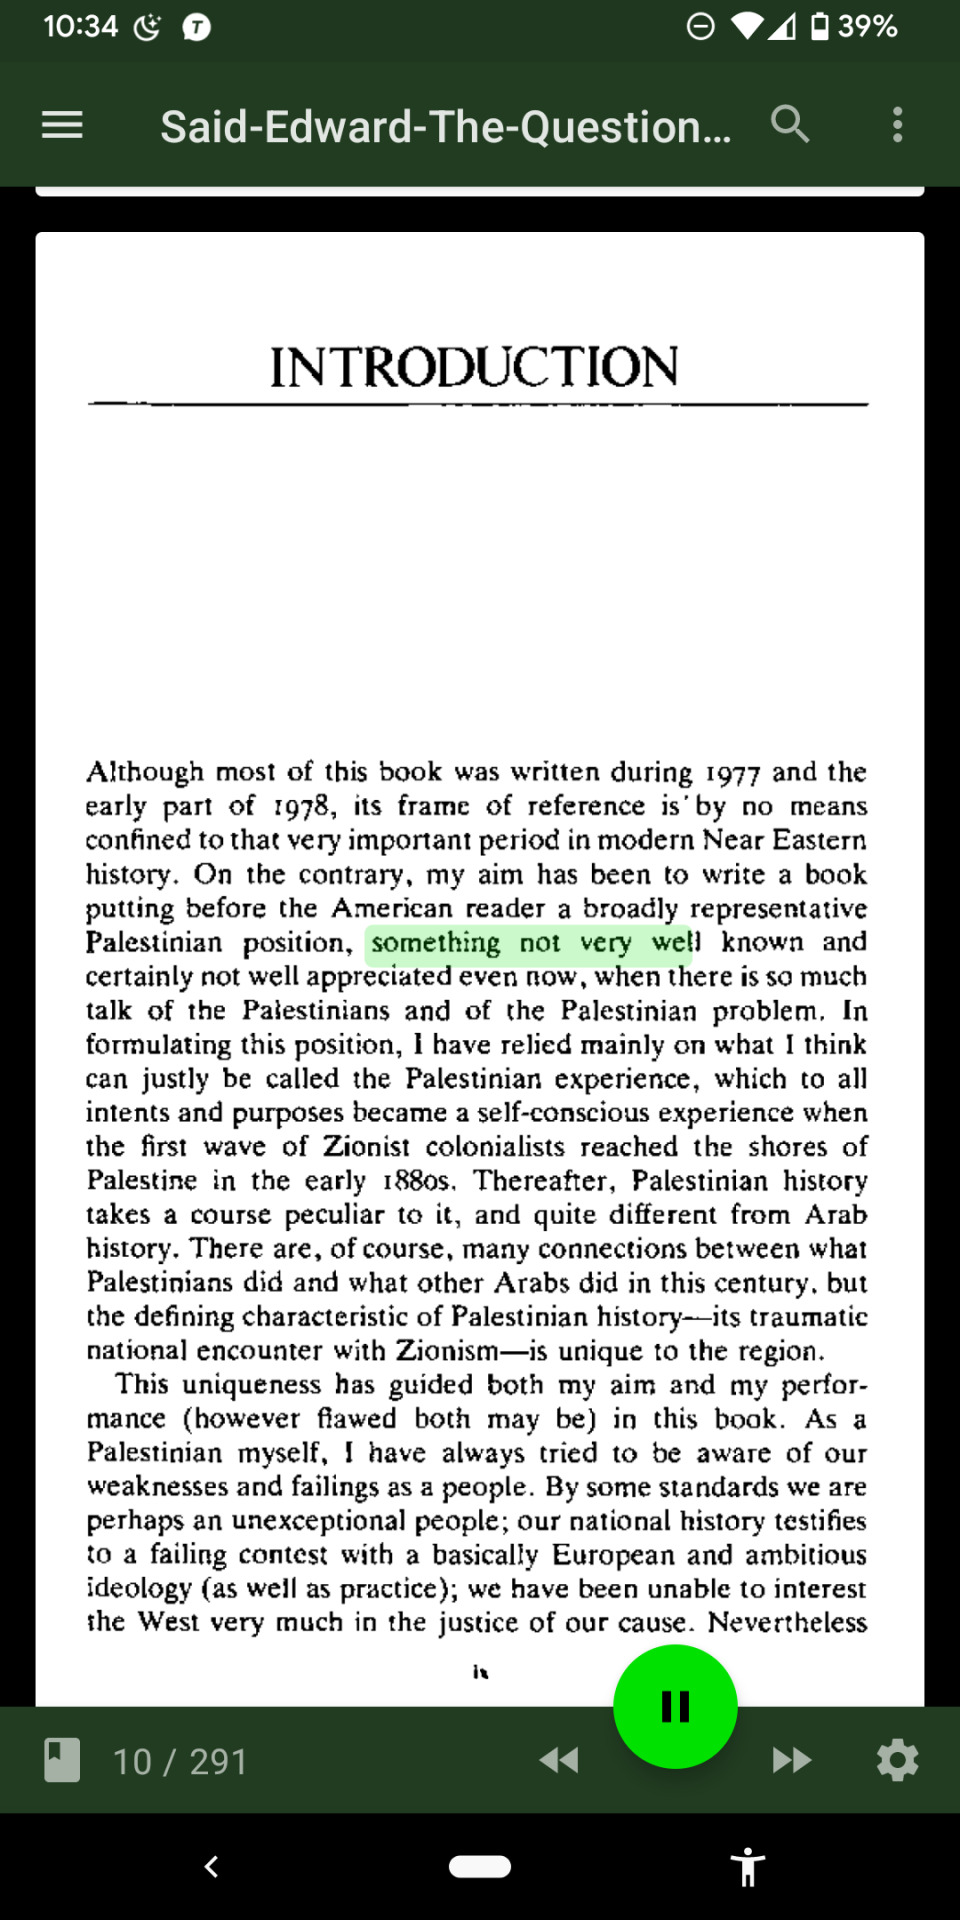
If you struggle with reading, a text-to-voice reader can be really helpful
Here are text to voice programs I use in my every day life.
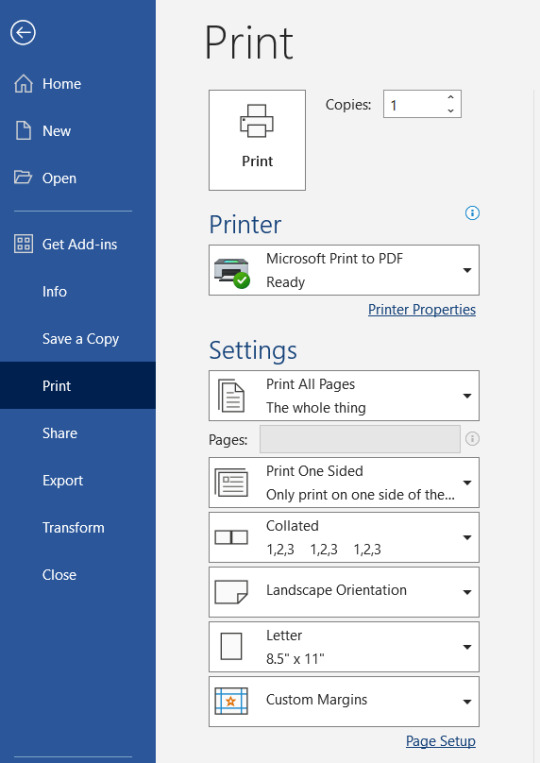
>>>>>Microsoft Edge Browser.
Edge has probably one of the best text-to-voice readers that I can find for free. You get to pick from a variety of different voices, and the voices sound natural.
The best part is that you don't even need to install any add-ons or widgets to use this feature. It is a default part of Edge.
To use it, you can click the A))) symbol that appears on the right side of the URL bar, or you can right click anywhere in the text and select "read aloud from here."
If you have a PDF file, you can download the PDF, and then in your file explorer, right click on the pdf and select "open with..." and select microsoft edge.
Edge does sometimes struggle a bit with PDFs in that it will pause at the end of every line break, but it works extremely well for basic websites.
This is an option that is available for use on a windows PC or any other PC compatable with Edge
There is an Edge mobile app, but I have found it buggy and a bit tricky to use.
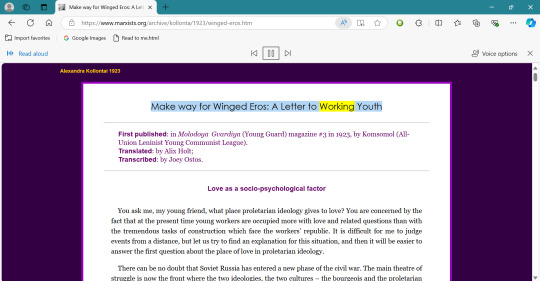
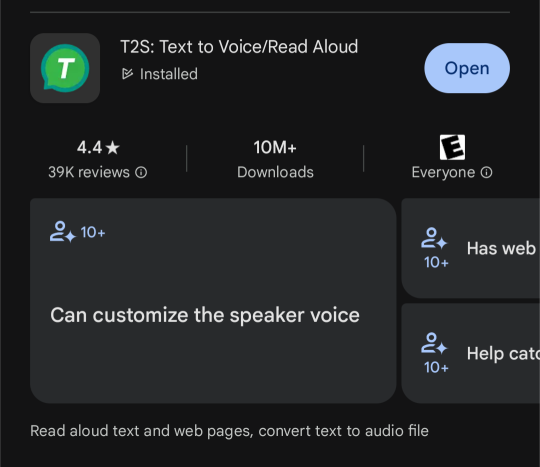
>>>>>>>Microsoft Word
I promise I'm not a shill for Microsoft, people. :*-(
Make sure you are using the most up-to-date version of Word.
You can access the read aloud feature under the "review" tab, or once again, you can right click on a highlighted word in the text and select "read aloud."
It has a male and female voice, which sound fairly natural. You can only use the "natural" voices when connected to the internet. When you are offline, it will read with a much clunkier robot voice instead.
Here I was actually able to open a PDF of a whole book, convert it into an editable word document, and then Word actually began reading it for me.
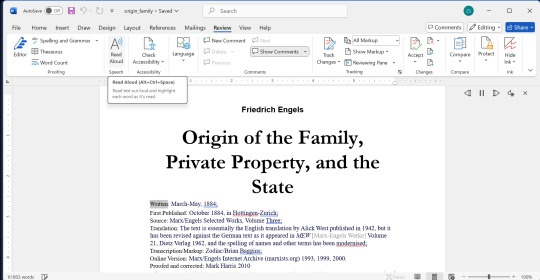
>>>>>>>> t2s: text to voice / read aloud
This is a mobile app. I have tried multiple text to speech mobile apps and this is the one that I like the best.
Above is the icon as it appears on your phone and in the Google Play store, and below is what the document reader looks like.
This app is pretty awesome because it comes with both a document reader and a web browser! You do not have to copy and paste text into the reader, and it can read pretty much any PDF or regular web page.
It had a robot voice and not a "natural voice" but I have gotten used to the robot voice of this app and it doesn't particularly bother me. You can adjust the pitch and speed of the voice too.
I use this app literally all the time. It is perfect for "reading" books while driving or working.
It's important to note that no text to speech reader is perfect. The technology has come a long way. But whatever program you use, there are always going to be words that it misinterprets, documents it can't process, or formatting that it finds confusing.
Another thing to note is that if you struggle with reading on your own or you struggle with attention problems, you do actually need to practice reading unassisted. You will get better at reading unassisted as you practice. You will train up your attention span slowly as you read more and more. So if reading is difficult I highly encourage you to not put EVERYTHING you read into a text to speech app. I am speaking as someone who has ADHD and I know that reading difficulties are not just something that magically goes away. But you can improve your reading abilities and you should try to improve your reading skills for your own wellbeing.
However that doesn't mean you have to struggle unassisted. Text to speech readers can absolutely expand the amount of texts that are accessible to you and better yet, they can give you more time to read because you can multitask as you absorb literature.
Happy reading!
3 notes
·
View notes
Text
Visily: Redefining Collaborative Brainstorming for Modern Teams
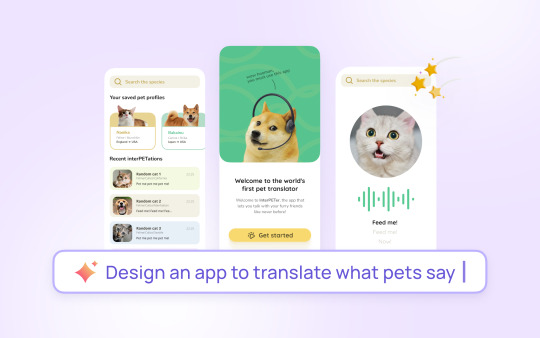
In today’s fast-paced world, effective brainstorming is the backbone of innovation and problem-solving. With hybrid and remote work becoming the norm, teams need tools that allow them to brainstorm seamlessly, regardless of location. Visily, a cutting-edge platform designed for collaborative brainstorming, is revolutionizing how teams come together to generate ideas, solve challenges, and create impactful solutions.
Visily offers an intuitive and interactive experience that helps individuals and teams unlock their creativity, streamline discussions, and turn ideas into actionable plans. This article explores how Visily is reshaping the brainstorming process with its innovative features and user-centric design.
The Importance of Effective Brainstorming
Brainstorming is the foundation of creativity, innovation, and collaboration. It provides teams with the opportunity to explore ideas, think outside the box, and identify solutions to pressing challenges. However, traditional brainstorming methods often face limitations such as:
Lack of structure, leading to disorganized sessions.
Inefficient communication in remote or hybrid setups.
Difficulty in capturing and refining ideas effectively.
Visily addresses these challenges by providing a robust platform that empowers teams to collaborate, organize, and innovate in real time.
What is Visily?
Visily is a next-generation brainstorming tool tailored for modern teams. Designed with simplicity and functionality in mind, it combines advanced features with an easy-to-use interface, making it accessible for professionals across various industries.
Whether your team is brainstorming for product design, marketing campaigns, or strategy development, Visily enhances the creative process by fostering collaboration and ensuring that no idea goes unnoticed.
Key Features of Visily
1. Interactive Whiteboards
Visily’s digital whiteboards allow teams to brainstorm visually, using shapes, text, images, and more to organize their thoughts. This feature replicates the traditional brainstorming experience while enhancing it with digital capabilities such as drag-and-drop components, color-coded elements, and layering options.
2. Real-Time Collaboration
Collaboration is at the heart of Visily’s design. Teams can work together in real-time, regardless of their location. Participants can add ideas, make edits, and provide feedback instantly, fostering a sense of inclusivity and teamwork.
3. Templates for Structured Brainstorming
Visily offers a variety of templates tailored to specific use cases, such as mind mapping, SWOT analysis, and problem-solving frameworks. These templates help teams structure their brainstorming sessions, ensuring that discussions remain focused and productive.
4. Easy Idea Capture and Organization
With Visily, capturing ideas is effortless. Users can jot down thoughts, drag and drop elements, and group related concepts with ease. The platform’s intuitive design ensures that even the most complex brainstorming sessions remain organized.
5. Integrations and Export Options
Visily integrates seamlessly with popular tools such as Slack, Trello, and Microsoft Teams, making it easy to transfer brainstorming outputs to project management systems. Export options allow teams to share their work in formats like PDFs and images for further use.
6. AI-Powered Assistance
Visily leverages artificial intelligence to enhance brainstorming sessions. Features such as automated grouping, smart suggestions, and pattern recognition help teams streamline their ideas and identify actionable insights.
Conclusion
Visily is redefining brainstorming by providing a modern, collaborative, and efficient platform for teams to generate and organize ideas. Its intuitive design, advanced features, and focus on inclusivity make it an invaluable tool for businesses, educators, and creative professionals alike.
In an era where innovation drives success, Visily empowers teams to break through barriers and unlock their full creative potential. Whether you’re brainstorming a new product, tackling a complex problem, or planning your next big strategy, Visily ensures that your ideas are captured, refined, and ready to make an impact.
0 notes
Text
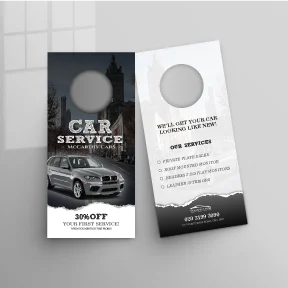
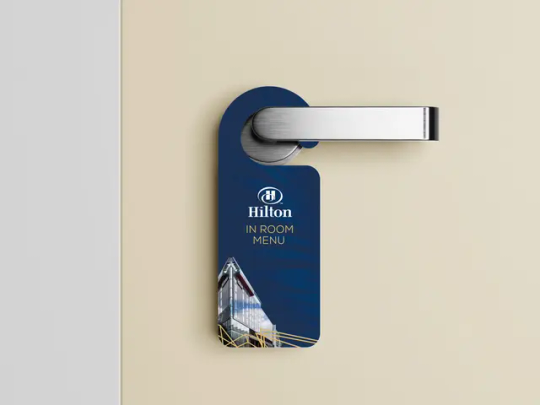
What Is Bleed in Printing? A Guide to Perfect Door Hanger Designs
When it comes to creating professional and visually appealing door hangers, understanding printing techniques is key. One essential concept to master is bleed. If you’re wondering what bleed means or why it’s important, you’re in the right place. In this guide, we’ll dive into the basics of bleed in printing and how it ensures flawless door hanger designs. Let’s get started!
What Does Bleed Mean in Printing Terms?
Bleed explained simply refers to the area of your design that extends beyond the final trim size. It’s a small margin, usually about 3mm, added to ensure your design runs all the way to the edge of the printed piece without leaving unwanted white borders.
Here’s why it matters: during the cutting process, even the most precise printers can have slight misalignments. Bleed ensures that these tiny errors don’t leave white slivers around the edges of your door hanger. Instead, your design will seamlessly extend to the edge, giving it a professional and polished finish.
Why Bleed Is Crucial for Door Hanger Designs
Door hangers are designed to grab attention. Whether you’re advertising a sale, promoting a service, or announcing an event, the visual appeal of your door hanger is everything. Bleed plays a huge role in achieving this:
No Distracting White Edges: Without bleed, there’s a risk of thin white borders appearing on your design, especially after trimming. These borders can ruin the look of your door hangers.
Polished and Professional Finish: Bleed ensures that your design looks clean and well-thought-out. It signals quality and professionalism to your audience.
Enhanced Visual Impact: By extending your design beyond the trim lines, you create a seamless look that’s far more engaging.
Whether it’s for hotels, real estate, or local businesses, door hangers with proper bleed create a lasting impression. This is why understanding bleed is crucial when designing for door hangers applications.
How to Set Up Bleed for Door Hanger Designs
Setting up bleed might sound complicated, but it’s quite simple with the right tools. Here’s a step-by-step guide:
Choose the Right Software: Programs like Adobe Illustrator, Photoshop, or InDesign are great for setting up bleed. Most design software allows you to add a bleed margin when creating a new document.
Add Bleed Margins: Typically, you’ll need to add 3mm of bleed around all sides of your design. This means the total size of your document will be slightly larger than your actual door hanger.
Keep Important Content Safe: Make sure text, logos, or key design elements are within the "safe zone" and not too close to the bleed area. This ensures they won’t get trimmed off.
Export Correctly: When exporting your design for print, ensure the bleed is included. Most printers require PDF files with bleed settings intact.
Tips for Perfect Door Hanger Printing with Bleed
Want your door hangers to look top-notch? Here are some extra tips to keep in mind:
Use High-Resolution Images: Blurry or pixelated graphics can ruin even the best designs. Make sure the images are sharp and appropriate for the size of your door hanger.
Communicate with Your Printer: Make sure your printer knows you’ve added bleed to your design. Clear communication ensures a smooth printing process.
Check Margins Twice: Take the time to double-check that all your important elements are within the safe zone and not too close to the bleed edges.
Conclusion: Get Flawless Door Hanger Designs with Proper Bleed
In the world of printing, paying attention to small details like bleed can make a huge difference. Bleed ensures your door hangers look polished, professional, and ready to impress. So, the next time you’re creating a design for door hanger applications, don’t skip this step.
Need expert help? At Printed Door Hangers, we specialise in creating high-quality, eye-catching door hangers that are perfectly printed with bleed. Trust us to help you deliver the best designs every time!
0 notes
Text

How to make a mylar bag template
Designing a mylar bag template opens doors to a world of personalization and precision in packaging, giving your creations a vibe that’s all your own. But where to begin? It's not as intimidating as it sounds. This guide will walk you through each step, peppered with insights and a few clever tricks along the way. Let’s dive in, and who knows? You might even find yourself reveling in the simplicity of building something so unique.
What's a Mylar Bag Template, Anyway?
A mylar bag template isn’t some high-tech contraption—it’s a straightforward, blank design, often whipped up in a graphic program, that maps out the dimensions of your bag. Think of it as your staging area for all those snazzy logos, eye-popping colors, and clever text you want splashed across your packaging. Having a go-to mylar bag template means you’re setting yourself up for an easy, fuss-free production that’ll stay consistent every time. No second-guessing. No surprises.
Step 1: Measure Twice, Cut Once (Metaphorically, of Course)
First thing’s first: get those dimensions right. Grab a ruler, caliper, or whatever measuring doodad you have on hand and take down every little detail. Learn more on how to make a mylar bag template here.
Height – from top-seal to bottom edge (don’t cheat; every millimeter counts).
Width – side-to-side, hugging the edges.
Seal Space – that upper lip reserved for sealing.
Gusset (if it exists) – a fold at the base to keep things sturdy and upright.
Got all that? Great. Scribble it down somewhere handy—you’ll be reaching for these numbers a lot as we go.
Step 2: Choose Your Creative Arsenal
Here comes the fun part. Which tool will you wield? The big guns like Adobe Illustrator and CorelDRAW, or maybe a freebie like Inkscape? Any of these design powerhouses will let you craft your masterpiece with the precision of a seasoned pro. Vector design’s the name of the game here. Why? Because it scales up (or down) without a single pixel out of place.
Step 3: Lay Down Your Canvas
Set up a new document with the measurements you lovingly jotted down.
Add a snug little margin around the edges for “bleed”—about 0.125 inches (3mm). Bleed is your safety net, helping you dodge any nasty surprises if your print job wobbles slightly.
Example time: If your custom mylar bag measures a humble 5 by 8 inches, set your canvas to 5.25 by 8.25 inches. Simple? Absolutely. Necessary? You bet.
Step 4: Outline the Framework
Now, here’s where it all comes together. Draw a rectangle to match the width and height of your custom mylar bag. Voila! You’ve just made the skeleton of your mylar bag template. If your custom mylar bag’s got a gusset (a little stand-up bottom fold), toss in an extra box at the bottom to mark that territory.
Mark the sealing area with a horizontal line.
Include a guideline for any folds or gussets.
Double-check everything; it doesn’t hurt to be cautious here.
Step 5: Drop In the Placeholders (for Logos, Text, and Such)
This is your playground. Adding placeholders for brand elements ensures every custom mylar bag will flaunt your style. Toss in some boxes for the logo, text, or any eye-candy you want to slap on there.
Front Panel: Place main artwork, a logo, or a bold product name front-and-center.
Back Panel: Typically, this is where the nuts-and-bolts info goes—nutrition facts, barcodes, or maybe even a quirky tagline.
One little trick? Think about readability. Don’t cram the design; leave a little breathing room. Crowded text isn’t just ugly; it’s hard to read.
Step 6: Save Your Masterpiece
Finally, save this mylar bag template as your secret weapon for future designs. Adobe Illustrator lets you save it as an AI file, or PDF if you need to pass it off. The beauty here? Once you’ve crafted this baby, it’s rinse and repeat for any design you can dream up.
Step 7: Test Run Your Mylar Bag Template
Before you send your precious work off to the printer, do a trial run. Create a mock-up with actual branding elements, then print a draft copy. Hold it in your hands. Squint at it. Imagine it on the shelf. Does it hit all the right notes? Make adjustments as you go, fine-tuning your layout until every inch of it feels just right. See how brandmydispo is changing custom mylar bags and flexible packaging.
Tips for Rocking Your Template
Stick to Your Guns: Consistency’s your friend. This mylar bag template will make all your custom mylar bags look sharp and on-brand.
Time Saver Extraordinaire: Imagine shaving hours off each project because you’ve got a template at the ready.
Make It Look Pro: A thoughtfully made template means a polished, professional look that people will notice.
Wrapping It All Up (Pun Fully Intended)
Setting up a mylar bag template might seem like an ordeal, but the payoff is real. With a little time and a few personal touches, you’ve got a template that’ll make every project after this one a whole lot easier. So, go ahead—craft a template that screams “you” every time.
Now, aren’t you glad you took the plunge?
0 notes
Text
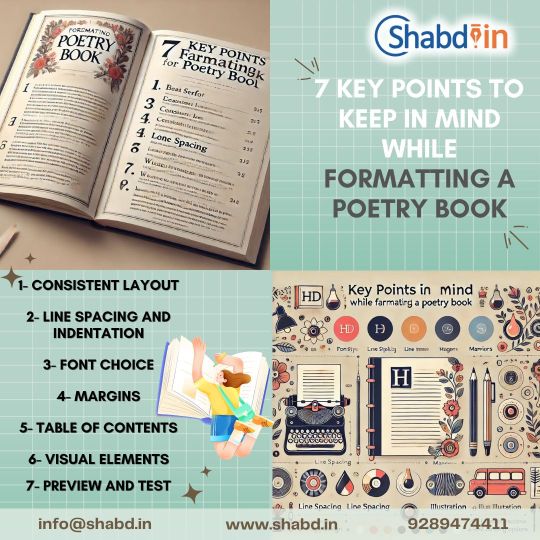
7 Key Points to Keep in Mind while Formatting a Poetry Book
Here’s a breakdown of each key point to keep in mind when formatting a poetry book:
1- Consistent Layout
Maintaining a uniform structure across all pages is essential for a professional look. Keep header, footer, and page number placements consistent, and ensure each poem title is formatted uniformly. A consistent layout not only makes the book aesthetically pleasing but also enhances readability.
2- Line Spacing and Indentation
Poetry often relies on specific line spacing and indentation to convey rhythm and emphasis. Standardize your line spacing throughout the book, usually between 1.15 and 1.5, depending on your style. Indentations or hanging indents can be used for stanza breaks or special formatting effects, but keep these choices uniform to create a cohesive flow.
3- Font Choice
Choose a font that is easy to read yet complements the tone of your poetry. Serif fonts, like Times New Roman or Garamond, are traditional and provide a classic feel, while sans-serif fonts, like Helvetica or Arial, can give a modern look. Avoid elaborate or hard-to-read fonts, as clarity is crucial for the reader’s experience.
4- Margins
Generous margins provide whitespace around the text, giving each poem room to breathe on the page. Aim for wider margins (around 1 inch or more) to prevent crowding, especially on the binding edge, and to improve readability. This also leaves space for any visual elements or annotations you may want to add.
5- Table of Contents
A Table of Contents is essential for ease of navigation, especially in longer collections. List each poem by title, and include page numbers to guide readers. A clear, well-organized table of contents enhances the book’s usability and allows readers to revisit favorite poems easily.
6- Visual Elements
Integrate visual elements, like illustrations, photographs, or decorative flourishes, thoughtfully. Make sure these images or designs complement rather than overpower the text, as the poetry should remain the focal point. Consider the placement and alignment of visual elements to maintain harmony with the text layout.
7- Preview and Test
Before finalizing, thoroughly review the book in multiple formats—print, PDF, and ebook—to ensure the design holds up in each. Testing across different formats can reveal formatting issues that aren’t immediately obvious and ensures a quality reader experience regardless of medium.
Source -
https://shabd.in/blog/7-key-points-to-keep-in-mind-while-formatting-a-poetry-book/
#poetry#poetry book#writing#writers#publishers#book publishing#self publishing#ebook#book formatting
1 note
·
View note
Text
Ngl the only good thing about the edge browser is that you can add text to PDFs really easily and change the kerning and size easily. Firefox still is better, though.
microsoft, several times a week: PLEASE please use the edge browser its so so good now we prommy. we use chromium now so we can back door your data to advertisers JUST like chrome we're basically chrome at this point so you may as well use ours. it's faster than chrome i prommy. BTW did you know we make a browser called edge
26K notes
·
View notes
Text
Samsung’s Flagship Tablet Galaxy Tab S10 Ultra & Tab S10+
Samsung Galaxy S10 Ultra Tab
The Galaxy Tab S10 Ultra and Galaxy Tab S10+, Samsung’s first tablets designed with artificial intelligence in mind, were presented today by Samsung Electronics. High-end hardware includes 14.6-inch and 12.4-inch Dynamic AMOLED 2X panels, appropriate for the S Pen that comes with both variants. The Galaxy Tab S10 Ultra has an 18% CPU increase, 28% GPU increase, and 14% NPU increase over the Galaxy Tab S9 Ultra.
With the new Galaxy AI Key on the Book Cover Keyboards, users can quickly configure their AI assistant with written prompts, making faster and more responsive AI features possible. Sophisticated software comes with tablet-optimized capabilities like Note Assist and Drawing Assist. With a 3D Map View that provides a visual picture of the house and all connected devices to simplify device management throughout the SmartThings ecosystem, the Galaxy Tab S10 series also functions as a home AI device. Strong Samsung Knox security guarantees control and privacy over data, while cutting-edge materials highlight Samsung’s dedication to a more sustainable future.
The Galaxy Tab S10 series is Samsung’s first tablet featuring AI advancements out of the box “Said MC Lee, vice president and head of the Galaxy Ecosystems Business Team at Samsung Electronics’ Mobile experience business. The Galaxy Tab S10 series’ power and portability add to Samsung seamless network of connected devices, providing varied experiences only an AI can provide. tablet can offer.”
Galaxy Tab S10 Ultra 2024
The Galaxy Tab S10 Ultra and Galaxy Tab S10+, which are built on Samsung’s tradition of offering strong experiences, take use of notable advancements in AI processing power to provide a supercharged, lag-free experience. In comparison to the Galaxy Tab S9 Ultra, the Galaxy Tab S10 Ultra boasts a CPU boost of over 18%, a GPU increase of 28%, and an NPU increase of 14%. The Galaxy Tab S10 series has Super-Fast Charging, a long battery life, and the ability to operate the tablet without charging.
Beautifully crafted, captivating display
Galaxy Tab S10 Plus
The 14.6-inch display on the Galaxy Tab S10 Ultra and the 12.4-inch display on the Galaxy Tab S10+ both have state-of-the-art Dynamic AMOLED 2X technology and provide a vivid yet natural viewing experience even outside. Thanks to cutting-edge anti-reflective technology, which minimizes annoying glare and lowers reflection rate, every detail is visible from any angle and in any setting. The AI-powered Dialogue Boost feature of the series improves the quad speaker arrangement even further by amplifying voices over background noise to produce incredibly clear sounds. Additionally, the IP68 rating and improved Armor Aluminium, designed to withstand knocks and scrapes, provide the Galaxy Tab S10 series with unmatched durability for use on-the-go.
Work More Wisely, Reach Genuine Creativity
The Galaxy Tab S10 series provides an effective experience that boosts productivity and is the perfect platform for expressing your creativity.
Taking notes on the tablet’s big display is a breeze with Note Assist and the user-friendly S Pen. AI-provided automatic transcriptions and summaries make note-taking, schoolwork, and personal journaling more productive. The Galaxy Tab S10 series can also easily convert PDFs using an on-screen overlay thanks to PDF Overlay Translation. Handwriting Aid also neatens messy handwritten notes.
The Galaxy Tab S10 Ultra is the ultimate creative helper for overcoming mental hurdles, thanks to Galaxy AI’s Sketch to Image feature, which allows you to transform your thoughts into reality.
On the Galaxy Tab S10 series, Circle to Search with Google allows you to Circle to search anything without switching apps. Use Google to instantly translate everything you view on your iPad. You can translate any image, video, or text with just two touches, without having to switch apps. Get the information you require quickly, then resume your work. Even the processes for resolving math and physics puzzles can be identified and summarized by Circle to Search.
You can instantly access Galaxy AI Assistant capabilities with the Galaxy S Pen’s Air Command with AI, eliminating the need to navigate between menus. The Book Cover Keyboard’s Galaxy AI Key makes it simple to start AI Assistant apps with written commands, allowing users to select between Google’s Gemini and Samsung’s Bixby for a personalized AI experience.
Smart Home Appliance
The Galaxy Tab S10 makes device administration easier by functioning as a Galaxy home AI device. It’s simple to view the status of devices that are compatible with SmartThings with the SmartThings widget, which has large screen optimization features including 3D Map View. In order to quickly monitor the energy use of their devices, users can additionally enable SmartThings Energy and AI Energy Mode. Not only can Galaxy AI improve life on the go, but it also reduces stress at home.
The Safe and Expanded Galaxy Ecosystem
Galaxy Tab S10
With the addition of new and improved apps, the Galaxy Tab S10 series broadens the galaxy’s distinctive connected experience and third-party app ecosystem. Access to popular third-party apps like as Sketchbook, Clip Studio Paint, Noteshelf 3, LumaFusion, Goodnotes, and Picsart is possible with the Tab S10 series. With LumaFusion, users can effortlessly produce material for social media and effortlessly regulate speeds and add dramatic visual effects when editing videos. Picsart offers AI design tools for similar purposes. There is something for everyone in the vast ecosystem of third-party apps available for the Galaxy Tab S10 series.
Samsung is dedicated to giving customers autonomy and choice over their gadgets and information. To guarantee that their data stays on the device, customers can opt to disable online data processing through the Advanced Intelligence settings. With Samsung Knox’s collaborative protection and real-time threat detection, users may always be protected and fully enjoy life.
Galaxy Tab S10 Ultra Price
12GB RAM + 256GB storage: $1,199.99,
12GB RAM + 512GB storage: $1,319.99,
16GB RAM + 1TB storage: $1,619.99
Galaxy Tab s10 Ultra Release Date
Starting on October 3, a few areas will be able to purchase the Galaxy Tab S10 Ultra and Galaxy Tab S10+, which come in two colors: Moonstone Gray and Platinum Silver.
Read more on govindhtech.com
#SamsungFlagshipTablet#GalaxyTab#S10Ultra#TabS10#GalaxyAI#ai#GalaxyTabS9Ultra#SamsungElectronics#socialmedia#galaxy#news#GalaxyTabS10series#GalaxyTabS10#GalaxyTabS10Ultra#technology#technews#govindhtech
0 notes
Text
Conch AI Review – Pricing, Features, Alternatives, and Ratings
Conch AI stands out as one of the most sophisticated AI-powered writing tools available, capable of generating content that avoids AI detection. Whether you're a student or a researcher, Conch AI can streamline your writing workflow, making you more productive. It offers high-quality content generation and a variety of AI tools to enhance your writing process.
About Conch AI
Imagine having a seamless, tireless assistant that perfects your writing. Technology has made this possible with Conch AI. This tool allows you to write, edit, check for plagiarism, and rewrite content while maintaining the original theme and tone. Conch AI meets various writing demands and excels at transforming sentences and paragraphs, helping you refine and rephrase your content effortlessly. It interacts with your writing, boosting productivity and ensuring high-quality output tailored to your style.
Conch AI Review Summary
Performance ScoreA+Average Load Time0.4 secQuality of ContentPasses AI Detection & PlagiarismAI-Based TechnologyMachine Learning, NLPUser InterfaceHighly Engaging and IntuitiveFeaturesRewrite & Highlight, Summarize text, Chat, Templates, Humanizer, Finder, Boost WritingPricingFree & Paid PlansAccuracy98%SupportGoogle Docs, PDFs, Gmail, LinkedIn, News Websites, etc.
Introduction to Conch AI
Conch AI is an innovative, user-friendly writing tool catering to students, professionals, and content creators. This cutting-edge AI tool helps writers produce top-notch content with ease and efficiency. It offers a range of tools to help students generate quality content for their papers. One of its standout features is its ability to rewrite sentences and paragraphs, allowing users to refine their writing effortlessly. With Conch AI, structuring essays, articles, or any written piece becomes seamless, welcoming writers of all levels.
How Does Conch AI Work?
Conch AI operates on unique algorithms that rewrite content to remain undetectable by AI systems. It assists in crafting the next sentence based on the context of previous writing, ensuring smooth idea flow and preventing creative interruptions. With Conch AI’s advanced detection tools, users can easily bypass AI detectors like GPTZero and Turnitin, adding an extra layer of protection.
Conch AI Capabilities
Here’s an overview of Conch AI’s features and specifications:
Features
Auto-completion: Utilizes Transformer-based architecture like GPT-3 for sentence auto-completion.
Summarization: Offers concise text summarization.
Paraphrasing: Uses Statistical Machine Translation or Back-Translation for paraphrasing.
Grammar & Style Checking: Removes grammatical errors and suggests improvements using NLP.
Content Generation: Generates text based on prompts using GPT-3 and Large Language Models.
AI Detection Bypass: Built-in tools to make content undetectable by AI algorithms.
How to Use Conch AI
Conch AI is a powerful writing tool that enhances productivity and engagement. Here’s a step-by-step guide on how to use it:
Download the Conch AI Extension
Visit the Conch AI official website and click "Get Chrome Extension," or directly search for Conch AI on the Chrome web store and add it to Chrome.
Open the Web Application or Chrome Extension
Access the Conch AI extension from the Chrome toolbar or through the official website.
Highlight & Rewrite Sentences & Paragraphs
Highlight the text you want to rewrite, click on the Conch AI extension, and watch the transformation.
Use Conjunction Key in Google Docs or Gmail
In Google Docs or Gmail, use Ctrl+Shift+Q to get assistance from Conch AI. Select the text and press these keys to generate content based on the previous text.
These steps demonstrate how easy it is to use Conch AI to enhance your writing. The tool also offers an incredible feature to remove AI-generated content and rewrite it to avoid detection.
Bypassing AI-Generated Text with Conch AI
Conch AI’s unique rewrite feature allows you to bypass AI-generated content detection. Here’s how:
Generate text using any AI tool like ChatGPT.
Copy the text and paste it into an AI detector tool like GPTZero to confirm it is AI-generated.
Paste the text into Conch AI, use the rewrite feature, and set the desired length and tone. The rewritten text will pass AI detection checks.
Frequently Asked Questions
What Are The Best Alternatives To Conch AI?
Alternatives include Quillbot, Writesonic, and Copy AI.
Is Conch AI Safe to Use?
Yes, Conch AI is a safe platform.
How To Create An Account On Conch AI?
Use your email address and password to create an account.
Does Conch AI Bypass AI Detection?
Yes, Conch AI can bypass AI detection with its rewrite feature.
Is Conch AI Free?
Conch AI offers free and paid subscription plans.
What Are Tokens In Conch AI?
Tokens represent the number of free words you can use. The free version offers 3000 tokens. For unlimited access, purchase a subscription.
Conclusion
Conch AI revolutionizes the writing process with advanced AI technology. It makes writing more convenient, less tedious, and faster. This guide provides a comprehensive overview of Conch AI’s features, usage, and benefits. Embrace this incredible tool to enhance your writing endeavors.
0 notes
Text
Say Goodbye to Paperwork: Make Your Life Easy with PDF Text Editor
Editing text in a PDF file can be a daunting task but using a Top PDF Editor can make your task easy. This software allows you to edit a PDF document easily without compromising the quality of the content. You can add, remove, highlight, annotate, blackout text, and more. Because Meon's sophisticated PDF Editor Online is equipped with cutting-edge OCR technology, you can also edit scanned PDF files with it.
Read More: -
0 notes
Text
OCR Technology Software Services - Piazza Consulting Group
Unlock the full potential of your documents with our cutting-edge Optical Character Recognition (OCR) technology. At Piazza Consulting Group, we specialize in transforming your paper-based and digital documents into actionable data, enhancing efficiency and accuracy across your organization.
Why Choose Our OCR Technology Software Services?
High Accuracy and Precision Our OCR solutions are designed to deliver exceptional accuracy, ensuring that every detail of your documents is captured and processed correctly. With advanced algorithms and machine learning, our technology minimizes errors and maximizes data integrity.
Versatile Document Handling Whether you have invoices, receipts, contracts, or handwritten notes, our OCR software can handle a wide range of document types. It recognizes and processes various fonts, languages, and formats, making it a versatile tool for all your document needs.
Seamless Integration Our OCR technology seamlessly integrates with your existing systems, enabling smooth data flow and easy implementation. We work with your IT team to ensure a hassle-free integration process, so you can start benefiting from our services immediately.
Enhanced Productivity Automate data entry and reduce manual processing time with our OCR solutions. By converting documents into searchable and editable formats, you can streamline your workflows, improve productivity, and focus on more strategic tasks.
Secure and Compliant Security is our top priority. Our OCR software complies with industry standards and regulations, ensuring that your data is protected throughout the processing cycle. We implement robust security measures to safeguard your sensitive information.

Our OCR Technology Services Include:
Document Digitization Convert your physical documents into digital formats for easy storage, retrieval, and sharing. Our OCR technology ensures that all information is accurately captured and preserved.
Data Extraction Extract key data points from your documents, such as names, dates, and amounts, and populate your databases automatically. This eliminates the need for manual data entry and reduces the risk of errors.
Text Recognition Recognize and convert printed and handwritten text into editable formats. Our OCR software can handle various text styles and complexities, ensuring comprehensive text recognition.
Image to Text Conversion Convert images containing text into machine-readable text. Our OCR technology processes images from different sources, such as scanned documents and photographs, to extract valuable information.
Searchable PDF Creation Create searchable PDFs from scanned documents, allowing you to quickly locate and retrieve information. Our OCR software adds a layer of searchability to your PDFs, enhancing document management.
How It Works:
Document Submission Submit your documents through our secure portal. Our OCR software begins processing them immediately.
Data Extraction and Conversion Our advanced algorithms extract and convert text from your documents, ensuring high accuracy and precision.
Integration and Output The processed data is integrated into your systems or delivered in your preferred format, ready for use.
Review and Quality Assurance We conduct a thorough review to ensure the highest quality and accuracy of the processed data.
Get Started with Piazza Consulting Group
Transform your document management processes with our state-of-the-art OCR technology. Contact Piazza Consulting Group today to learn more about our OCR software services and how we can help your organization achieve greater efficiency and accuracy.
Contact Us:
United States
115 W. Century Road Suite 130 Paramus, NJ 07652 India p.No-9./1, opp. It Raheja Park, Sector 3, HUDA Techno Enclave, HITEC City, Hyderabad, Telangana 500081, India
877-317-1680
https://www.linkedin.com/company/piazzaconsulting
0 notes
Text
Explode Traffic & Sales with AI Ebook Suite Review

Welcome to AI Ebook Suite Review post.
In today’s digital landscape, ebooks have become increasingly popular due to their convenience and economic advantages. Businesses can leverage ebooks as potent lead-generation tools by offering valuable content in exchange for contact information. Additionally, ebooks provide a cost-effective marketing solution compared to traditional advertising methods.
AI Ebook Suite simplifies the ebook creation process using cutting-edge AI technology. Let’s explore its features and benefits.
AI Ebook Suite Review : Overview
Vendor: Yogesh Agarwal
Product: AI Ebook Suite
Launch Date: 2024-May-25
Launch Time: 10:00 EDT
Front-End Price: $17
Niche: Software (Online)
Sales Page : Get AI Ebook Suite
Bonus: Yes, Huge Bonus
Guarantee: 30-day money-back guarantee!
Product Demo
vimeo
What Is AI Ebook Suite?
AI Ebook Suite is a cloud-based platform that allows users to create stunning digital publications, including:
Ebooks: Craft professional-looking ebooks effortlessly.
Flipbooks: Engage your audience with interactive flipbooks.
KidBooks: Create captivating content for young readers.
E-covers: Design eye-catching covers for your digital products.
Puzzles and Crosswords: Add an interactive twist to your content.
How Does It Work? 2
Login: Create an account with AI Ebook Suite in less than 9 seconds.
Choose a Niche: Select a keyword or niche for your content.
Publish & Profit: Within 90 seconds, generate your desired ebook, flipbook, or other digital content.
AI Ebook Suite Review : Key Features
FEATURE 1 100% Cloud-Based Software Suite :
There is no need for you to install anything. Just sign up and you can access our software from anywhere on earth, as long as there is an internet connection available you are good to go!
FEATURE 2 : 7 Unique Ways To Create Ebooks/Flip-books
With AieBookSuite you can create Ebooks/flipbooks 7 different ways. You have the power to decide between creating Ebooks/flipbooks from scratch, using existing PDFs and eBooks, or even using existing articles that are readily available in our database.
FEATURE 3 : Create Ebooks/Flipbooks with ChatGPT & OPEN AI Without Writing a Single Word
You can create Ebooks/flipbooks with our amazing ChatGPT-powered algorithm in just 1 click. No writing, no coding, no creating content from scratch! Just type the topic and let ChatGPT do the rest.
FEATURE 4 : Done For You ProfessionalEbooks/Flipbook Templates:
You don’t even have to create your own Ebooks/Flipbooks from scratch! We offer professionally designed, high-converting templates that you can use with a few clicks. Just select the template you want, customize it and hit ‘Publish’. It’s that simple!
FEATURE 5 : Customize Design & Layout In Seconds Using Our Visual Designer
Choose from different design options, adjust colors, size of your AiEBookSuite Ebook/flipbook to make it look exactly like you want it! Add texts, images, hyperlinks, videos, and more with a few clicks. Also customise your headers, footers, background images, logos and more. Keep your brand identity consistent without spending a single dime.
FEATURE 6 : AUTO Lead Gen System Built In
AIeBookSuite automatically captures leads as soon as they access your Ebook/flipbook, giving you the power to quickly and easily build an email list of hot leads interested in what you have to offer.
Or lock part of your Ebook/Flipbook content and make people subscribe to get full access.
FEATURE 7 : Monetize & Share Your Ebook/Flipbook
In 1 Click
AIeBookSuite also allows you to monetize your Ebook/flipbooks with just 1 click. You can add affiliate links, ads, and even link to your own products or services from your books. Once you’re ready, just hit the ‘Publish’ button, generate your embed code and share it anywhere you want.
FEATURE 8 : Create Stunning EBook/Flipbook Covers That Grab Attention Immediately
You can also create stunning Ebooks/Flipbook covers in just 1 click with our pre-made, eye-catching graphics. You don’t need any design skills or expensive designers to make your book stand out from the crowd. Just drag and drop your assets, add text and hit publish!
FEATURE 9 : Collect Leads With Ease & Integrate Into Your Favorite Autoresponder (Upto 25,000 Leads)
Build and grow your lists without worrying. You can keep upto 25,000 leads in your account without having to pay a single dime extra. Which is more than enough to make thousands of dollars in profit.
Or you can directly integrate your favorite autoresponder and send leads there!
FEATURE 10 : Automatic Mailer & A Done For You Sequence To Make Commissions From Every Flipbook You Create!
AIeBookSuite comes with an auto-mailer feature which allows you to send emails to subscribers in your list.
You can broadcast emails to everyone in your list or send automated emails with our pre-made sequences.
FEATURE 11 : 1-Click Social Sharing To Get More Traffic & Leads
With AIeBookSuite , you can instantly share your books to Facebook, Twitter, Linkedin, Pinterest & more. With just 1-click you can get hundreds of visitors to your books and start collecting leads immediately!
Or go viral and get thousands of visitors & leads with just 1-click.
FEATURE 12 : A Massive Library Of Over 50,000 Ready To Monetize Ebooks
In the library, you’ll find over 50,000 ready-to-publish ebooks and articles. Pick any one you want and turn it into an interactive Flipbook in just 1 click. Everything is pre-monetized with our auto lead gen system built in!
FEATURE 13 : Embed What You Create On Any Website
With just a click, you will be able to embed any ebook, flipbook, puzzle, crossword, or anything else. Just by copying one line. With zero coding
FEATURE 14 : Inbuilt Cover Creator Feature
Even that is taken care of with the power of AI…With just a click you will be able to create any cover you want, for anything you create
FEATURE 15 : Pre-Made Books In Dozens Of Niches
Can you believe it? You don’t even need to create books if you don’t want to AIeBookSuite comes with thousands of pre-made books for you to choose from.
FEATURE 16 : Unlimited One-Click Download
No restrictions, anything you create. You can download it easily with a click… without worrying about any limits
FEATURE 17 : ZERO Skills App
Yup, you don’t need any kind of skills… Or experience to work with AIeBookSuite… Just follow our dead-simple instructions, and you are good to go
FEATURE 18 : Multi-Lingual Support
AIeBookSuite works in any language you want…
Without you knowing that language… Our AI will translate it and localize it for you on autopilot…
FEATURE 19 : Commercial License Included
That means you can keep 100% of the profit… Yes, we will never charge you or share your profit with you…
FEATURE 20 : Over 1 Million Articles Inbuilt For You To Create Flipbooks Instantly
You don’t even have to search for content! We have over 1 million articles in our database that you can use to create your own flipbook. All you need to do is type in your keyword, pick the article you want, edit it and hit ‘Publish’. It’s that simple!
>>>>Get AI Ebook Suite
1 note
·
View note