#DIYCleaning
Explore tagged Tumblr posts
Visit Tumblr Blog
Explore Tumblr blogs with no restrictions, modern design and the best experience.
Last Seen Tumblr Blogs


Fun Fact
Forty percent of Tumblr users are between the ages of 18 to 25.
Text
18 Easy and Green DIY Recipes to Clean All the Things, Plus Health Benefits
Do you want to clean your home naturally while also boosting your health? Check out these easy DIY cleaning recipes that are not only green but super effective! From all-purpose cleaners to natural disinfectants, these simple homemade solutions will leave your home sparkling without harsh chemicals. Plus, they come with added health benefits like improving indoor air quality and reducing allergens. With ingredients like vinegar, baking soda, and essential oils, you can create powerful cleaners for every room in the house. It’s a win-win for your home and the environment! Ready to ditch the store-bought products and go green? Let’s dive into these DIY recipes that will make your home safe, fresh, and clean! https://www.healthline.com/health/easy-green-diy-recipes-to-clean-all-the-things-plus-health-benefits

0 notes
Text
The Hidden Smells in Your Home And How to Get Rid of Them for Good | Elder Mode
youtube
Have you ever opened the door and been hit by a weird scent you just couldn't identify? Perhaps you've cleaned, sprayed, and freshened everything up — but that stinky smell remains. The reality is that as we grow older, our sense of smell diminishes, making it more difficult to perceive the very scents our guests pick up on immediately. Here in this video, we expose the secret — and sometimes comical — origins of home smells that tend to evade seniors but are all too present to everybody else.
#homesmells#freshhome#eliminateodors#seniorlivingtips#cleaningtips#homemaintenance#smellblind#homehacks#householdtips#odorremoval#agingathome#freshstart#hiddenodors#diycleaning#cleanhomevibes#Youtube
0 notes
Text

Want clean floor tile grout without all the scrubbing? 🧽✨ Check out these easy, no-scrub tricks that really work! Your floors will shine in no time! 💧
Read more here 👉 https://blogpulseguru.com/easy-tricks-to-clean-floor-tile-grout-without-scrubbing/
#bldcleaners#grout cleaning#NoScrubCleaning#TileCleaningTips#cleaninghacks#diycleaning#CleanHomeEasy#floor cleaning#GroutSolutions#homecaretips
0 notes
Text
7 Genius Ways to Clean a Burnt Stainless Steel Pot (Without Scratching It)

this is a quick insight from the article how to clean a burnt pot Originally published March 16, 2025.
So, you got distracted for "just a second," and now your stainless steel pot looks like it barely survived re-entry from space? Don’t panic. Before you consider tossing it in the trash and pretending it never happened, try these 7 genius ways to clean a burnt pot, without scratching it!
1. The Boiling Water Trick 💦🔥
The easiest method? Let heat do the work for you.
✅ Fill the pot with water, covering the burnt areas.
✅ Bring it to a boil and let it simmer for 10–15 minutes.
✅ Once the burnt bits loosen, use a soft sponge to scrub.
(Bonus tip: Adding a splash of vinegar helps break down tough stains!)
2. Baking Soda Magic 🧪✨
Baking soda = the ultimate cleaning hero.
✅ Sprinkle a generous amount of baking soda over the burnt spots.
✅ Add a little hot water to create a paste.
✅ Let it sit for 30 minutes (or overnight for extreme cases).
✅ Scrub gently with a non-scratch sponge.
This method is cheap, easy, and scratch-free!
3. Vinegar & Baking Soda Volcano 🌋
This is the science experiment your pot needs.
✅ Pour white vinegar into the pot (enough to cover the burnt area).
✅ Bring it to a simmer, then remove from heat.
✅ Add baking soda and watch it fizz like a volcano!
✅ Let it sit for 10 minutes, then scrub with a sponge.
It’s satisfying and effective!
4. The Lemon & Salt Scrub 🍋🧂
No vinegar? No problem. Try this fresh-smelling trick!
✅ Cut a lemon in half and dip it in salt.
✅ Scrub the burnt areas in circular motions.
✅ Let the lemon juice sit for 10 minutes before rinsing.
The acidity of the lemon and the abrasiveness of the salt work wonders together!
5. Bar Keepers Friend: The Cheat Code 🏆🧼
Want pro-level cleaning power for just a few bucks?
✅ Sprinkle Bar Keepers Friend Powder onto the burnt spots.
✅ Add a little water to create a paste.
✅ Let it sit for 15 minutes, then scrub with a soft sponge.
(Pro tip: Wear gloves, this stuff is strong!)
6. The Dishwasher Tablet Hack 🫧
You know those little dishwasher tablets? They’re not just for dishes!
✅ Fill the pot with hot water.
✅ Drop in a dishwasher tablet and let it dissolve.
✅ Let it sit for 1–2 hours, then scrub.
It’s effortless, perfect if you're feeling lazy!
7. Drill Brush Power Scrubber 🔧⚡
For the laziest (or most impatient) people, let a power tool do the work!
✅ Attach a non-abrasive brush head to a drill.
✅ Apply a baking soda paste or dish soap to the burnt area.
✅ Let the drill do the scrubbing for you!
Just go easy, you want to clean your pot, not destroy it.
Final Thoughts: Save Your Pot Like a Pro 👨🍳✨
Burnt pots happen to the best of us. But now, instead of panicking, you’ve got 7 foolproof ways to clean them, without scratches!
Next time, maybe set a timer. 😏
Got a favorite cleaning hack? Share it in the comments!
0 notes
Text
🧽✨ Which one is better for cleaning— 👉 Baking Powder or Baking Soda? and why?
💥Baking soda is better than baking powder for cleaning.
✴️ Baking soda (sodium bicarbonate) is a pure, natural substance that works as a gentle abrasive and a powerful deodorizer. It helps scrub away stains, neutralizes odors, and can break down grease and grime. It’s commonly used to clean sinks, countertops, ovens, and even freshen up carpets and drains.
✴️ Baking powder, on the other hand, is made from baking soda plus cream of tartar (an acid) and a starch. It’s meant for baking and doesn’t have the same cleaning power. The added ingredients in baking powder dilute its effectiveness as a cleaner.

#houseorial#kitchenhacks#kitchenorganization#cleankitchen#cleaninghacks#Bakingsoda#BakingSodaHacks#BakingSodaMagic#CleaningTips#cleaningtipsandhacks#diycleaning#housecleaning#baking powder
1 note
·
View note
Text
How to Clean Stainless Steel Appliances Like a Pro: The Ultimate Guide
Stainless steel appliances are a hallmark of modern kitchens, valued for their sleek, contemporary look and impressive durability. However, keeping them spotless and smudge-free can be a challenge. The glossy finish of stainless steel easily reveals fingerprints, grease, and dirt, making regular cleaning essential to maintaining their appearance.
Even though they’re called "stainless," these appliances aren’t immune to buildup. A closer look at a refrigerator handle, often covered in fingerprints, highlights just how quickly grime can accumulate.
In this guide, we’ll share expert tips and proven techniques for keeping your stainless steel appliances gleaming. With the right methods, you can preserve their beauty while extending their lifespan.
Why Stainless Steel is So Popular
A survey by HomeLight, which polled 435 top real estate agents across the United States, found that 75% of agents consider stainless steel the most in-demand finish for kitchen appliances. Its resistance to rust, sleek design, and compatibility with various kitchen styles make it a top choice for homeowners.
Understanding Stainless Steel for Effective Cleaning
Before diving into cleaning techniques, it's important to understand what makes stainless steel unique. Known for its corrosion resistance and strength, stainless steel is widely used in kitchen appliances because it withstands daily wear and tear. However, despite its resilience, this material is sensitive to harsh chemicals and abrasive tools, which can dull its shine and damage its surface.
To maintain both its appearance and longevity, it's crucial to use gentle yet effective cleaning methods that won’t compromise the protective layer on your appliances.
Best Tools and Materials for Cleaning Stainless Steel
For a safe and effective clean, gather the following supplies:
Tools:
✔️ Microfiber cloths ✔️ Soft sponges or non-abrasive brushes ✔️ Rubber gloves ✔️ Spray bottle (optional)
Materials:
✔️ Mild dish soap ✔️ White vinegar ✔️ Baking soda ✔️ Olive oil or mineral oil ✔️ Warm water
Using these items will help keep your stainless steel appliances looking polished without the risk of scratches or discoloration.
How Often Should You Clean Stainless Steel Appliances?
Maintaining a cleaning routine is key to keeping stainless steel appliances in top condition. Here’s a recommended cleaning schedule:
Daily: Wipe down surfaces with a microfiber cloth and warm water to remove smudges and light spills.
Weekly: Use a mild soap or vinegar solution to tackle grease, fingerprints, and tougher stains.
Monthly Deep Clean: Apply baking soda paste or a stainless steel cleaner to restore shine and remove any built-up grime.
As Needed: Address spills and stains immediately to prevent permanent marks.
Sticking to this schedule ensures your stainless steel appliances remain spotless and free from streaks or buildup.
DIY Stainless Steel Cleaning Solution
A homemade cleaning solution is a budget-friendly, chemical-free way to keep stainless steel surfaces looking pristine. Here’s how to make one:
Ingredients:
✔️ 2 cups warm water ✔️ ½ cup white vinegar ✔️ 2 tablespoons baking soda ✔️ A few drops of mild dish soap (optional)
Instructions:
Mix Water and Vinegar: In a spray bottle, combine warm water and vinegar. This solution effectively cleans without damaging the surface.
Add Baking Soda: Slowly mix in the baking soda (it will fizz). This acts as a gentle abrasive for stubborn stains.
Include Dish Soap (Optional): For greasy surfaces, add a few drops of mild dish soap to break down residue.
Shake the Bottle: Mix the solution well before use.
Apply and Wipe: Spray the solution onto a microfiber cloth and wipe in the direction of the grain.
Rinse and Dry: Wipe with clean water, then use a dry microfiber cloth to prevent water spots.
This simple, eco-friendly cleaner helps maintain a streak-free shine without using harsh chemicals.
10 Essential Tips for Cleaning Stainless Steel Appliances
Follow these expert tips to keep your stainless steel appliances in top condition:
1️⃣ Gather the Right Supplies – Always use microfiber cloths, mild dish soap, vinegar, and baking soda for gentle yet effective cleaning. 2️⃣ Remove Surface Dirt First – Wipe down appliances with a damp cloth to remove dust before deep cleaning. 3️⃣ Use a Gentle Soap Solution – Warm water and mild dish soap are perfect for daily cleaning. 4️⃣ Treat Stubborn Stains with Baking Soda – Make a baking soda paste for tougher spots, then rinse thoroughly. 5️⃣ Vinegar for Streak-Free Shine – White vinegar removes fingerprints and leaves a polished finish. 6️⃣ Dry and Polish Properly – Always dry stainless steel immediately to avoid water marks, then buff with olive or mineral oil for extra shine. 7️⃣ Maintain Regularly – Prevent buildup by cleaning frequently rather than waiting for grime to accumulate. 8️⃣ Clean Hard-to-Reach Areas – Use a soft-bristled brush for crevices where dirt tends to gather. 9️⃣ Final Touch-Up – Give appliances a last wipe with a dry cloth for a spotless look. 🔟 Deodorize Naturally – For fridges and dishwashers, wipe surfaces with diluted lemon juice or baking soda to eliminate odors.
Best Cleaning Methods for Stainless Steel Appliances
There are multiple ways to clean stainless steel effectively. Here are some tried-and-tested methods:
✔️ Soap and Water: A mild dish soap and water solution is safe for daily cleaning. Wipe in the direction of the grain for the best results.
✔️ Vinegar for Fingerprints: Spray diluted vinegar on the surface and wipe with a microfiber cloth to remove smudges.
✔️ Baking Soda for Stains: Apply a baking soda paste to tough stains, let it sit for a few minutes, then wipe clean.
✔️ Oil for Polishing: Use a small amount of olive or mineral oil to restore shine and protect against fingerprints.
✔️ Steam Cleaning: A steam cleaner can remove grime without chemicals, making it an eco-friendly alternative.
✔️ Avoiding Hard Water Stains: If you have hard water, dry appliances immediately after cleaning to prevent mineral deposits.
What to Avoid When Cleaning Stainless Steel
🚫 Harsh Chemicals: Avoid bleach and ammonia-based cleaners, which can damage the finish. 🚫 Abrasive Scrubbers: Steel wool and rough sponges can scratch the surface. Use microfiber cloths instead. 🚫 Chlorine-Based Cleaners: These can cause pitting and corrosion. 🚫 Hard Water: Leaves streaks and mineral deposits; use distilled water when possible. 🚫 Leaving Cleaners on Too Long: Always rinse and dry promptly to prevent stains. 🚫 Contact with Other Metals: Avoid leaving cast iron or copper in contact with stainless steel to prevent rust.
Professional Stainless Steel Cleaning Services
If you prefer expert care, Amenify offers professional cleaning services for stainless steel appliances. With over 2 million homes served and 50,000+ five-star reviews, their trained professionals use eco-friendly products to ensure your appliances stay spotless.
Final Thoughts
Stainless steel appliances add elegance to any kitchen, but they require the right cleaning techniques to maintain their luster. By using gentle, effective cleaning methods and avoiding common mistakes, you can keep your appliances looking brand new for years to come.
Source - https://www.amenify.com/blog/the-ultimate-guide-to-cleaning-stainless-steel-appliances
#CleaningHacks#HomeCleaning#DeepCleaning#CleaningTips#Housekeeping#DIYCleaning#HomeCare#EcoFriendlyCleaning#StainlessSteel#StainlessSteelCare#StainlessSteelCleaning#ShinyAppliances
0 notes
Text
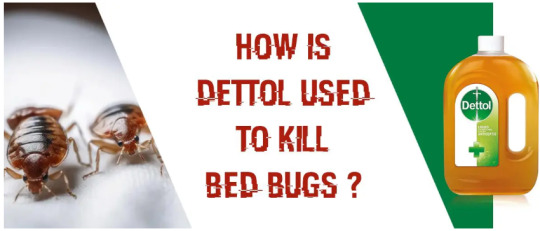
🐛 Say Goodbye to Bed Bugs with Dettol! 🏡✨
Did you know that Dettol can be used as a DIY solution to tackle bed bugs? While it may not be a complete extermination method, its antiseptic properties can help disinfect and repel these tiny invaders!
🛏️ How to Use Dettol for Bed Bugs? ✔️ Mix Dettol with water in a spray bottle ✔️ Target infested areas like mattresses, furniture, and corners ✔️ Maintain regular cleaning to prevent reinfestation
Want to know how effective Dettol really is against bed bugs? 🧐 Read our full blog here 👉 https://dirt2tidy.com.au/blog/dettol-used-to-kill-bed-bugs/
#BedBugSolution#DIYCleaning#ecofriendlycleaning#dirt2tidy#BugFreeHome#BedBugInfestation#Disinfecting
0 notes
Text
Eco-Friendly Homemade Cleaner Instructions
Eco-Friendly Homemade Cleaner Instructions - #HomemadeCleaner #EcoFriendly #DIYCleaning #AllPurposeCleaner #NaturalCleaning #GreenLiving #SustainableCleaning #HouseholdTips #CleanHome #NonToxic #EcoFriendlyProducts #CleanerRecipes #CleaningHacks #OrganicC
Homemade All-Purpose Cleaner Creating your own all-purpose cleaner at home is not only economical but also allows you to control the ingredients you’re using. This homemade cleaner is effective for a variety of surfaces and is gentle on the environment. Ingredients Water: The primary base for the cleaner, helping to dilute the other ingredients. Rubbing Alcohol: Effective for disinfecting…
#All Purpose Cleaner#clean home#Cleaner Recipes#cleaning hacks#DIY Cleaning#Eco Friendly#Eco Friendly Products#Green Living#Homemade Cleaner#Homemade Solutions#House hold Tips#Natural Cleaning#Non-Toxic#Organic Cleaning#Sustainable Cleaning#Eco-Friendly Homemade Cleaner Instructions -#HomemadeCleaner#EcoFriendly#DIYCleaning#AllPurposeCleaner#NaturalCleaning#GreenLiving#SustainableCleaning#HouseholdTips#CleanHome#NonToxic#EcoFriendlyProducts#CleanerRecipes#CleaningHacks#OrganicC
0 notes
Text
Why Dubai Homes Need Professional Deep Cleaning: DIY isn't Enough
DIY cleaning might seem sufficient, but it often misses hidden dirt and bacteria. Dubai homes, with their unique environmental factors, require professional deep cleaning for thorough sanitation and health. Eco Guardians' Deep Cleaning Services Dubai ensures every corner is spotless, providing a healthier, cleaner living environment for your family. Book us(+971 56 752 6970) for Deep Cleaning Services Near Me.
#EcoGuardians#DeepCleaningDubai#ProfessionalCleaning#DeepCleaning#DubaiHomes#DIYCleaning#CleaningServicesDubai#HomeCleaning#DeepCleaningServices#HealthyLiving#EcoFriendlyCleaning
0 notes
Text
Your Cleaning Efforts May Be Vain - Do The House Cleaning Right!
#HouseCleaning#CleaningTips#HomeHygiene#DeepCleaning#SurreyCleaning#VancouverCleaning#SpotCleaning#HomeCare#CleaningMistakes#VacuumingTips#CleanHome#HealthyLiving#CleaningServices#DIYCleaning#HomeMaintenance#CleaningGuide
0 notes
Link
#CutleryMarks#PlateCleaning#HomeCleaningTips#StainRemoval#CleaningHacks#DishwasherTips#PlateCare#HomeOrganization#DIYCleaning#CleaningMethods
1 note
·
View note
Text
5 Quick Tips for Stress-Free Post-Construction Cleaning 🧹✨
Just wrapped up a construction project? Before you kick back and admire the new space, there’s one last job—post-construction cleaning! Don’t worry, it doesn’t have to be a headache. Here are 5 fun tips to make it easier!
Tackle the Big Stuff First 🛠️ Clear out the debris! Pick up leftover wood, nails, and other junk before anything else. It’s like a treasure hunt—minus the treasure.
Conquer the Dust Monsters 🧽 Dust loves to settle EVERYWHERE. Wipe down surfaces, then wet-clean to catch what’s left. Bonus: you’ll breathe easier when the air is cleaner!
Windows Deserve Love Too 🌞 Don’t forget those shiny new windows! Use a soft cloth and gentle cleaner to avoid scratches, and let the sunlight flood in like a movie scene.
High Spots Are Hiding Spots 🕵️♀️ Dust loves top shelves and ceiling fans. So grab a ladder and get those hard-to-reach spots. The more places you check, the more you’ll discover.
Take Your Time ⏳ Don’t rush it! Doing it right means fewer surprises (like random screws in your couch). Plus, there’s something super satisfying about a spotless new space!
Now you’re all set! Clean up, kick back, and enjoy that fresh new vibe. 😊

#SparklingClean#DIYCleaning#RenovationLife#CleanSpaces#ConstructionLife#HomeImprovement#CleaningInspo#FreshStart#CleaningJourney#CleaningMotivation#ConstructionComplete
0 notes
Text
0 notes
Text


Top On Sale Product Recommendations! Original For Karcher Accessories Upholstery Nozzle Handle Puzzi 8/1 10/1 Adv 30/4 4.130-001 Robot Vacuum Cleaner Spare Parts Original price: USD 17.92 Now price: USD 17.92 Click&Buy:
#KarcherLove#UpholsteryNozzle#CleanWithKarcher#PuzziPower#RobotVacuumLife#SpareParts#HomeCleaningHacks#VacuumAccessories#DeepCleanDreams#KarcherAccessories#CleaningEssentials#DIYCleaning#HomeCareTips#VacuumUpgrade#SpotlessHome#EffortlessCleaning#CleanHomeHappyHome#KarcherFans#GadgetGoals#UpholsteryCare#VacuumMaintenance#CleanLiving#HouseholdHacks#KarcherCommunity#HomeGadgets#CleaningMadeEasy#VacuumLife#SmartCleaning#KarcherVibes#GetItClean
0 notes
Text
How to Clean Carpet with Hydrogen Peroxide
Looking for an effective and affordable way to clean your carpet? Hydrogen peroxide might be the solution you need! Here’s a step-by-step guide on how to clean carpet with hydrogen peroxide. 🧼🧪
Materials Needed:
Hydrogen peroxide (3% concentration)
Spray bottle
Clean cloths or paper towels
Water
Dish soap (optional)
Vacuum cleaner
Step-by-Step Guide:
1. Test a Small Area: 🔬 Safety First: Before applying hydrogen peroxide to a large area, test a small, inconspicuous spot on your carpet to ensure it doesn’t cause discoloration or damage.
2. Prepare the Solution: 🧪 Mixing: Fill a spray bottle with hydrogen peroxide. For tougher stains, you can add a few drops of dish soap to the solution.
3. Apply the Solution: 🚿 Spraying: Lightly spray the hydrogen peroxide solution onto the stained area of the carpet. Avoid soaking the carpet, as too much liquid can damage the backing.
4. Let It Sit: ⏳ Waiting: Allow the hydrogen peroxide to sit on the stain for about 10-15 minutes. This gives it time to break down the stain particles.
5. Blot the Stain: 🧻 Blotting: Use a clean cloth or paper towel to blot the stain. Avoid rubbing, as this can spread the stain and damage the carpet fibers. Blot from the outside of the stain toward the center.
6. Rinse with Water: 💧 Rinsing: Dampen a clean cloth with water and blot the area to remove any remaining hydrogen peroxide and soap residue. This helps prevent any potential bleaching effect.
7. Dry the Carpet: 🚿 Drying: Use dry cloths or paper towels to blot the area until it’s mostly dry. You can also place a fan nearby to speed up the drying process.
8. Vacuum the Area: 🧹 Final Touch: Once the carpet is completely dry, vacuum the area to restore the carpet’s texture and remove any loosened dirt or debris.
Additional Tips:
Use Sparingly: Hydrogen peroxide can lighten the color of your carpet if used excessively. Always start with a small amount and apply more if needed.
For Tough Stains: For particularly stubborn stains, repeat the process or consider using a carpet cleaner specifically designed for tough stains.
Regular Maintenance: Regular vacuuming and prompt stain treatment can help keep your carpet looking fresh and clean.
For more detailed information and additional cleaning tips, visit: How to Clean Carpet with Hydrogen Peroxide
0 notes
Text

Hey neighbors! 👋 Tired of mopping and still seeing streaks? 🧹 Ditch those old methods and mop like a pro with these 5 easy steps:
1️⃣ Prep your floors: Sweep or vacuum to remove loose dirt.
2️⃣ Mix your solution: Dilute your favorite cleaner in COLD water.
3️⃣ Wring it out: No dripping mops allowed!
4️⃣ Figure 8 magic: Ditch the push/pull for a streak-free shine.
5️⃣ Rinse & repeat: Keep your mop head clean for the best results.
Bonus tip: Start from the farthest corner and work your way towards the exit to avoid walking on wet floors! 🚪
Happy cleaning! ✨
0 notes