#DIYCalligraphy
Explore tagged Tumblr posts
Text
Learn to write Happy Dhanteras in elegant calligraphy and cursive with ease! This video tutorial breaks down each stroke, guiding you step-by-step to create beautiful lettering, perfect for greeting cards, gifts, and festive decorations. Plus, discover the benefits of practicing calligraphy—improve focus, develop patience, and add a personal artistic touch to your Dhanteras celebrations. Ideal for beginners and anyone looking to enhance their writing skills. Watch now and make your holiday greetings truly unique!" @advaitamelearning
https://youtube.com/shorts/sj71YNK39Dg?feature=share
#CursiveWritingTutorial #youtubeshorts #HandwritingPractice #FestiveCalligraphy #LetteringArt #DhanterasGreeting
#DIYCalligraphy #BeginnerCalligraphy #HandwrittenCards #DhanterasCelebration
#festival #india
youtube
#HappyDhanteras Dhanteras2024 DhanterasCalligraphy advaitamelearning CursiveWriting FestivalCalligraphy IndianFestival#Youtube
1 note
·
View note
Video
instagram
Sharing this again because it's Valentine's day! When I did this, I used a cereal box. Cut it and voila! How's that for paper conservation! ✌️😅 #diycalligraphy . . . #calligraphy #calligraphyvideo #valentine #instavideo #zigphilippines #freehandcalligraphy #calligraphypractice #hyperlapse #valentine #brushcalligraphy #handtype #handmadetype #bftype #letteringco #typematters #goodtype #typism #love #kiligraphy #design #designspiration #typedesign #type #lettering #handlettering #kayelligraphy #karlangelikaye
#hyperlapse#typedesign#love#valentine#handtype#zigphilippines#lettering#designspiration#calligraphypractice#typism#design#karlangelikaye#bftype#freehandcalligraphy#diycalligraphy#handlettering#typematters#brushcalligraphy#goodtype#kiligraphy#type#handmadetype#calligraphyvideo#instavideo#calligraphy#kayelligraphy#letteringco
4 notes
·
View notes
Text
MUJI Canada is Hosting a Series of Virtual Workshops This Month
To help keep Canadians busy and entertained during this trying time, MUJI Canada has launched a series of virtual workshops running online throughout the month of July.
Designed to help audiences learn new things in inspiring and creative ways, MUJI has partnered with Canadian experts to showcase tips and tricks on a range of hobbies from urban farming and calligraphy to matcha recipes and floral arrangements. The free workshops will be hosted over Zoom, and registration is mandatory. Read about this month’s lineup below.
Urban Farming 101 Workshop – Garden Problems
Vancouver-based organic farmer Mik Turje, of the non-profit organization Renfrew Collingwood Food Security Institute, will be instructing viewers on the basics of planting and growing a vegetable garden. This workshop will focus on weeds, pests, and diseases that may ail plants. July 4, 3 to 3.40pm EDT. Details here.
Matcha Recipes Workshop Follow along with Pedro Villalon of Vancouver’s O5 Rare Tea and Kombucha Bar as he shares his journey with tea, and learn how to make three easy refreshing iced matcha drinks. During the workshop, viewers will learn how to whisk a bowl of matcha (usucha) at home, create an iced matcha soda/tonic, and pour a matcha Americano. July 8, 7 to 7.40pm. Details here.
View this post on Instagram
Matcha Americano. . Designed for our upcoming workshop with @mujicanada on July 8. Details and registration on their website. . Need some matcha? Please pop by our tea bar or check out our online store. . #matcha #maccha #抹茶#🍵#日本茶 #matchaamericano
A post shared by O5 RARE TEA + KOMBUCHA BAR (@o5tea) on Jun 28, 2020 at 9:36pm PDT
Urban Farming 101 Workshop – Most Popular Vegetable Plant Families
Renfrew Collingwood Food Security Institute’s Mik Turje returns with another gardening workshop, this one on the most common vegetable plant families and how to properly grow them. Learn what each of your favourite veggies needs to grow well and how to tell the difference between the major vegetable plant families: Brassicas, Alliums, Nightshades, Umbels, Chenopods, and Curcubits. July 18, 3 to 3.40pm. Details here.
Summer Floral Arrangement Workshop
Toronto-based wedding and floral designer Sarah of @DelightFloralDesign will be showing viewers how to utilize MUJI household products as vessels for floral arrangements. Toronto residents will also have the option to order a floral arrangement kit from DeLight Floral at an extra cost. July 22, 7 to 8pm EDT. Details here.
View this post on Instagram
We are over the moon to be announcing our Virtual Workshop brought to you by @mujicanada happening on July 22nd! Join us as I’ll be teaching the basics of flower arranging using our fresh florals. If you’d like to purchase a flower kit from us, please click the link in bio 🔗 Also registry with Muji is mandatory. https://www.muji.com/ca/events/3289/ Can’t wait to see you all 🌸 #partner #ad
A post shared by DeLight Floral + Design (@delightfloraldesign) on Jun 27, 2020 at 12:01pm PDT
Folded Pen Calligraphy Workshop
Toronto-based hand letterer and creator Sarah Trafford of @SarahTypes will be teaching viewers how to make and use a folded pop can pen for different forms of calligraphy. July 29th, 2020
View this post on Instagram
🚨 FREE VIRTUAL WORKSHOP 🚨 I’m doing a virtual workshop with @mujicanada on July 29th at 7pm EST. I’m going to show you how to make and use a folded pop can pen 🖊. . I’m so excited! You can click the link in my bio to sign up or check out my story highlights for the swipe up link. . Let me know if you plan on joining me! 😀😀 . #foldedpencalligraphy #foldedpen #popcanpen #handmadepen #diycalligraphy #diycalligraphypen #handletteringlove #calligraphyworkshop #calligraphypractice #womenwhodraw #type #typeeverything #typism #thedailytype #typegang #customtype
A post shared by Toronto Letterer & Artist (@sarahtypes) on Jun 29, 2020 at 5:27am PDT
The post MUJI Canada is Hosting a Series of Virtual Workshops This Month appeared first on FASHION Magazine.
MUJI Canada is Hosting a Series of Virtual Workshops This Month published first on https://borboletabags.tumblr.com/
0 notes
Link
0 notes
Text
DIY Calligraphy Place Cards: Special Touch for Gatherings

DIY Calligraphy Place Cards: Transform Your Gatherings with This Special Touch
DIY Calligraphy Place Cards are a beautiful way to add a special touch to your gatherings, whether it's a holiday dinner or a wedding reception. These personalized place cards are easy to create and will impress your guests. With just a few supplies and some beginner calligraphy tips, you can create stylish and elegant place cards that will elevate your table setting. Key Takeaways: - Create personalized and stylish place cards with DIY Calligraphy Place Cards - Impress your guests with elegant hand-lettered place cards - Add a special touch to your table setting with just a few supplies - DIY Calligraphy Place Cards are a cost-effective alternative to hiring a professional calligrapher - Showcase your creativity and attention to detail
Supplies for DIY Calligraphy Place Cards
To create your DIY Calligraphy Place Cards, you'll need some basic supplies. These include white cardstock, eucalyptus stems (real or faux), ribbon, a hole punch, scissors, and a writing utensil of your choice. You can use ink, a nib, and a dip pen for pointed pen calligraphy, or a brush marker for brush lettering. These supplies will allow you to create beautifully hand-lettered place cards that will be a standout feature of your table setting. A table is provided below to showcase the necessary supplies for creating your calligraphy place cards: Supplies Description White cardstock Thick paper for sturdy place cards Eucalyptus stems (real or faux) Natural element for added elegance Ribbon Decorative touch for tying the eucalyptus to the place card Hole punch Creates two small holes for threading the ribbon Scissors Used for cutting the cardstock and trimming the ribbon Writing utensil Choose between ink, nib, dip pen, or brush marker for hand-lettering With these supplies on hand, you can begin your DIY Calligraphy Place Cards project and showcase your creativity and attention to detail.
Step-by-Step Instructions for DIY Calligraphy Place Cards

Follow these step-by-step instructions to create your DIY Calligraphy Place Cards. Creating these personalized place cards is a simple and enjoyable process that will impress your guests and add a special touch to your table setting. Gather Your Supplies Before you begin, gather all the necessary supplies. You will need: - White cardstock - Eucalyptus stems (real or faux) - Ribbon - Hole punch - Scissors - Writing utensil (ink, nib, dip pen, or brush marker) Prepare the Place Cards Start by cutting the white cardstock into small rectangles, approximately 3 inches by 2 inches. These dimensions can be adjusted based on your preference. Once you have cut the cardstock, use a hole punch to create two small holes on one side of each card. Assemble the Place Cards Take a piece of ribbon and thread it through the holes on each place card, then tie it into a bow. You can choose a ribbon color that complements your table setting or event theme. Trim the ends of the ribbon as needed for a neat finish. Next, take a eucalyptus stem and place it on top of each place card, securing it with the bow. This adds a natural and elegant touch to your place cards. Create the Calligraphy Finally, use your chosen writing utensil to hand-letter the names on each place card. If you are new to calligraphy, take it slow and practice on scrap paper before lettering on the actual place cards. You can experiment with different calligraphy styles to find the one that suits your preference. Once you have completed the calligraphy, your DIY Calligraphy Place Cards are ready to enhance your table setting and impress your guests!
Different Variations for DIY Calligraphy Place Cards

When it comes to DIY Calligraphy Place Cards, there is a wide range of variations that you can explore to add a unique touch to your table setting. Here are some creative ideas to inspire you: 1. Colorful Cards: Instead of using plain white cardstock, experiment with different colored papers to match the theme of your event. Consider using pastel shades for a soft and elegant look, or vibrant colors for a bold and eye-catching effect. 2. Mixed Materials: Combine different materials to create a visually interesting and textured place card. For instance, you can incorporate elements like fabric, lace, or glitter to add a touch of glamour and sophistication to your table setting. 3. Modern Calligraphy: Give your place cards a contemporary twist by using modern calligraphy styles. Opt for sleek and minimalistic lettering, or experiment with different fonts and letter shapes to create a unique and artistic look. Remember, the key is to let your creativity shine and customize your place cards to reflect your personal style or the theme of your event. Whether you choose to play with colors, materials, or calligraphy styles, the variations are endless, allowing you to create place cards that are truly one-of-a-kind. Variation Description Colorful Cards Experiment with different colored papers to match the theme of your event Mixed Materials Combine different materials like fabric, lace, or glitter for a textured look Modern Calligraphy Use modern calligraphy styles for a contemporary and artistic touch "The variations are endless, allowing you to create place cards that are truly one-of-a-kind."
Benefits of DIY Calligraphy Place Cards
DIY Calligraphy Place Cards offer several benefits for your gatherings. Firstly, they add a personalized touch that shows your attention to detail and care for your guests. By taking the time to hand-letter each place card, you create a sense of thoughtfulness and create a more intimate experience for your guests. Secondly, DIY Calligraphy Place Cards can be a cost-effective alternative to hiring a professional calligrapher for your wedding or special event. By creating your own place cards, you can save money without compromising on style and elegance. This DIY approach allows you to invest in other aspects of your event while still having beautifully hand-lettered place cards. Lastly, DIY Calligraphy Place Cards allow you to express your creativity and create a cohesive look for your table setting. You have the freedom to choose the colors, materials, and styles that match your personal taste and the theme of your event. Whether you prefer classic calligraphy or modern lettering, you can customize your place cards to make them truly unique. Table Benefits of DIY Calligraphy Place Cards Personalized touch Cost-effective alternative Expression of creativity
Importance of Place Cards in Wedding Decor

Place cards play a crucial role in wedding decor, particularly for sit-down dinners. They not only help guests find their seats smoothly but also add a touch of elegance and sophistication to the reception. DIY Calligraphy Place Cards offer a personal and intimate element to your wedding stationery, making each guest feel valued and special. By incorporating hand-lettered place cards into your wedding decor, you create a cohesive and stylish look that complements your overall aesthetic. When it comes to planning your wedding decor, every detail counts. Place cards serve as a visual cue for guests, guiding them to their designated seats and ensuring a smooth flow of the event. Not only do place cards eliminate the chaos of finding a seat, but they also add a sense of order and organization to your reception. Moreover, DIY Calligraphy Place Cards bring a personalized touch and create a lasting impression. Hand-lettering each guest's name adds a sense of care and thoughtfulness, making them feel valued and appreciated. The beauty of calligraphy enhances the overall aesthetic of your wedding stationery and complements the theme and style of your event. Table: Benefits of Place Cards in Wedding Decor Benefits Description Seating Organization Place cards ensure a smooth flow, eliminating confusion and chaos for guests trying to find their seats. Elegance and Sophistication Hand-lettered place cards add a personalized touch and enhance the overall aesthetic of your wedding decor. Personalized Experience Each guest feels valued and special with their name beautifully hand-lettered on their place card. By incorporating DIY Calligraphy Place Cards into your wedding decor, you create an inviting and visually appealing atmosphere for your guests. This attention to detail showcases your dedication to creating a memorable experience and sets the tone for your entire wedding celebration.
Unique Hand Calligraphy Place Card Ideas for Weddings

When it comes to adding a personal and elegant touch to your wedding stationery, unique hand calligraphy place cards are a perfect choice. These personalized place cards not only help guests find their seats but also serve as cherished keepsakes and add a touch of sophistication to your special day. Here are some inspiring ideas for creating one-of-a-kind hand calligraphy place cards that will impress your guests: Table 1: Hand Calligraphy Place Card Ideas Theme Idea Rustic Engrave guests' names on small wooden slices for a natural and rustic look. Vintage Use vintage-inspired paper and seal each place card with a wax stamp. Minimalist Create sleek and modern place cards on transparent acrylic sheets. Botanical Add pressed flowers or small sprigs of greenery to enhance the place card design. These are just a few examples of the many hand calligraphy place card ideas you can explore. Feel free to mix and match different themes, materials, and calligraphy styles to create a unique look that reflects your personal taste and wedding aesthetic. Your hand calligraphy place cards will not only guide your guests to their seats but also become cherished mementos of your special day. Remember to plan ahead and allocate enough time for creating these hand calligraphy place cards. The attention to detail and personal touch they bring will make your wedding stationery truly remarkable.
When to Order Wedding Place Cards and What to Include
https://www.youtube.com/watch?v=ywVmTeXaVwU Planning a wedding involves many details, and one important aspect to consider is ordering wedding place cards. By planning ahead and ordering in advance, you can ensure a seamless and stress-free process. When should you order your wedding place cards? It is recommended to order them at the same time as your invitation suite, as this will allow for a cohesive look and design throughout your wedding stationery. When ordering your wedding place cards, it's essential to consider what to include on them. Typically, including the first name of each guest is sufficient. However, for formal weddings, you may choose to include both the first and last names. This will depend on personal preference and the formality of your event. Additionally, you can add decorative elements, such as wax seals or pen and ink illustrations, to make each place card truly special and unique. Ordering wedding place cards in advance and carefully considering what to include will help create a cohesive and beautiful table setting for your big day. By paying attention to these details, you can ensure that every guest feels valued and that your wedding stationery reflects your unique style and vision. When to Order Wedding Place Cards What to Include Order at the same time as your invitation suite Include first names of guests Plan ahead to allow for a stress-free process For formal weddings, consider including first and last names Ensure a cohesive look and design Add decorative elements for a personalized touch
Conclusion
DIY Calligraphy Place Cards offer a simple and elegant way to add a personal touch to your gatherings and weddings. By using basic calligraphy supplies, you can create beautifully hand-lettered place cards that will impress your guests and elevate your table setting. With DIY Calligraphy Place Cards, you have the freedom to customize and personalize each card according to your style and event theme. Whether it's a holiday dinner or a wedding reception, these place cards are a cost-effective alternative that allows you to showcase your creativity and attention to detail. By creating personalized place cards, you make your guests feel valued and create a memorable experience. These hand-lettered cards serve as cherished keepsakes, reminding your guests of the special day they celebrated with you. So why wait? Get your calligraphy supplies and start creating your own DIY Calligraphy Place Cards today!
FAQ
What supplies do I need for DIY Calligraphy Place Cards? You will need white cardstock, eucalyptus stems, ribbon, a hole punch, scissors, and a writing utensil such as ink, a nib, and a dip pen or a brush marker. How do I create DIY Calligraphy Place Cards? Cut the cardstock into small rectangles, punch two holes on one side, thread a ribbon through the holes and tie it into a bow. Place a eucalyptus stem on top and secure it with the bow. Finally, hand-letter the names on the place cards. What variations can I try for DIY Calligraphy Place Cards? You can experiment with different colored ribbons, papers, and inks. You can also incorporate modern calligraphy styles for a contemporary look. What are the benefits of DIY Calligraphy Place Cards? DIY Calligraphy Place Cards add a personalized touch, can be a cost-effective alternative, and allow you to express your creativity and create a cohesive look. What is the importance of place cards in wedding decor? Place cards help guests find their seats smoothly and add elegance and sophistication to the reception. What are some unique hand calligraphy place card ideas for weddings? You can use handmade paper, incorporate wax seals or painted edges, and match them to your wedding stationery for a seamless look. When should I order wedding place cards and what should I include? It's important to plan ahead and order place cards in advance. Usually, a first name is sufficient, but you can include both names for formal weddings. Consider adding decorative elements such as wax seals or pen and ink illustrations.
Source Links
- https://www.ecletters.com/blog/2020/11/15/simple-amp-elegant-place-card-diy - https://www.brides.com/best-diy-place-cards-wedding-day-7096923 - https://www.mirabellemakery.com/blog/beautiful-calligraphy-wedding-place-card-ideas Read the full article
0 notes
Text
DIY Calligraphy Photo Frames: Capture Memories
DIY Calligraphy Photo Frames: Unleash Your Creativity and Capture Precious Memories Today!
Create personalized DIY calligraphy photo frames to capture and display your cherished memories. These handmade frames add a touch of elegance to any space and can be customized to suit your style and decor preferences. With just a few simple materials and some creativity, you can create unique and beautiful frames that will showcase your favorite photos in a special way. Key Takeaways: - DIY calligraphy photo frames are a creative way to capture and display your memories. - These personalized frames add elegance and can be customized to suit your style and decor. - Create unique and beautiful frames with just a few simple materials and some creativity. - Showcase your favorite photos in a special way with DIY calligraphy photo frames. - Bring your cherished memories to life with these handmade frames.
Meet Valerie Akkerman: A Calligraphy Lover and DIY Enthusiast
Valerie Akkerman is a talented calligraphy lover and a passionate DIY enthusiast. Her journey into the world of calligraphy began when her son gifted her a calligraphy pen, igniting her creativity and fueling her love for this art form. Inspired by the beauty and elegance of calligraphy, Valerie decided to pursue her passion further by studying Graphic Design. Today, she is known for her expertise in calligraphy crafts and her ability to create stunning and personalized pieces. Valerie's love for calligraphy extends beyond just the art itself. She enjoys exploring different calligraphy projects and is always eager to try new and innovative ideas. With her background in Graphic Design, Valerie brings a unique perspective to her DIY calligraphy photo frames. Her attention to detail, understanding of color and composition, and creative flair make her an excellent source of inspiration for both beginners and experienced crafters alike. Valerie believes that calligraphy is not just a creative outlet, but a way to express oneself and capture moments in a unique and artistic manner. She is dedicated to sharing her knowledge and inspiring others to explore the world of calligraphy through easy yet meaningful projects. Whether you're looking to create personalized gifts, enhance your home decor, or simply explore a new hobby, Valerie Akkerman's expertise in calligraphy crafts is sure to inspire and guide you every step of the way. The Journey of a Calligraphy Lover Valerie's love for calligraphy began with a simple gift from her son, a calligraphy pen. This small gesture ignited her passion for the art form and set her on a journey of self-discovery and creativity. Through dedication and hard work, Valerie honed her skills and expanded her knowledge of calligraphy, ultimately leading her to study Graphic Design. Today, she is well-versed in various calligraphy styles and techniques, and her expertise shines through in her DIY calligraphy photo frames. Crafting with Calligraphy Valerie believes that calligraphy is not just about writing beautifully; it's also about creating unique and meaningful pieces. She loves experimenting with different materials, combining calligraphy with other crafting techniques to add depth and dimension to her projects. From adding embellishments to incorporating mixed media elements, Valerie's creativity knows no bounds. Her easy calligraphy projects are designed to inspire others to explore their own creativity and discover the joy of crafting with calligraphy.
Materials Needed for DIY Calligraphy Photo Frames
Creating your own DIY calligraphy photo frames requires a few essential materials. These tools will help you bring your creative vision to life and make stunning personalized frames: - Calligraphy Pen: A high-quality calligraphy pen is essential for achieving elegant and precise lettering. It allows you to create beautifully curved lines and varying thickness in your designs. Invest in a pen that suits your comfort and style preferences. - Brush Pens: Brush pens are excellent for adding flair and variation to your lettering. They have flexible tips that mimic the strokes of a brush, allowing you to create thick and thin lines effortlessly. Experiment with different brush pen sizes to achieve different effects. - Fineliners: Fineliners are perfect for adding intricate details and fine lines to your calligraphy photo frames. They come in various sizes, allowing you to create precise outlines, shadows, and embellishments. - Paper Pad: A good quality paper pad will provide a smooth surface for practicing your calligraphy and creating your final artwork. Choose a pad with suitable thickness to prevent ink bleed-through. - Pencil: A pencil is essential for sketching and planning your layout before starting the calligraphy. It allows you to make adjustments and ensure a well-balanced design. - Eraser: An eraser is handy for removing any graphite marks or mistakes made during the sketching process. It helps you achieve clean and polished final artwork. Having these materials on hand will set you up for success in creating your own DIY calligraphy photo frames. They are readily available at art supply stores or online retailers, allowing you to easily gather everything you need to get started on your creative journey.
Step-by-Step Guide to Creating DIY Calligraphy Photo Frames
Creating your own DIY calligraphy photo frames is a fun and rewarding project that allows you to showcase your creativity while preserving cherished memories. Follow this step-by-step guide to transform simple materials into beautiful and personalized frames: Step 1: Trace a Circle Begin by tracing a circle on your paper using a bowl or circular object as a guide. This will serve as the base for your calligraphy lettering and design. Make sure the circle is centered and evenly drawn. Step 2: Select Your Lettering Styles Next, start placing your words inside the circle using a variety of calligraphy lettering styles. Alternate between brush pens and fineliners to create variation and visual interest. Experiment with different sizes, thicknesses, and flourishes to find a style that suits your taste. Step 3: Add Embellishments and Small Details To enhance the design of your DIY calligraphy photo frame, consider adding embellishments and small details. This could include decorative elements such as floral motifs, borders, or small illustrations. Pay attention to the overall composition and balance of your design as you add these elements. Step 4: Erase and Frame Once you are satisfied with your calligraphy and design, carefully erase any visible pencil marks. This will give your frame a clean and polished look. Finally, frame your finished piece and proudly display it to showcase your creativity and the special memories it holds. With these simple steps, you can create stunning DIY calligraphy photo frames that capture the essence of your most cherished moments. Experiment with different techniques, lettering styles, and embellishments to add your own personal touch to each frame. Remember, the joy of DIY calligraphy photo frames lies in the process of creation. Let your imagination run wild as you explore different designs and techniques. These handmade frames will not only add a touch of elegance to your home decor but also serve as a constant reminder of the special moments and people in your life.
Explore Creative Ideas for DIY Calligraphy Photo Frames

When it comes to DIY calligraphy photo frames, the possibilities for creativity are endless. In addition to incorporating beautiful lettering, you can add decorative elements, doodles, illustrated elements, and custom shapes to make your frames truly unique. Let your imagination run wild and experiment with different ideas to create personalized and visually stunning frames. To add decorative elements to your calligraphy photo frames, consider drawing wavy circles around words or phrases to create a whimsical and artistic touch. You can also use shadows to give your frames depth and dimension. Another idea is to incorporate arrows or other shapes to point to special moments or highlight important details in your photos. If you have a knack for doodling, why not incorporate your drawings into your calligraphy photo frames? You can create intricate patterns, flowers, or other designs that complement your lettering and add a playful and artistic twist. These doodles can be placed around the words or used as borders to frame your photos. For those who enjoy illustration, illustrated elements can take your calligraphy photo frames to the next level. Consider adding small images or icons that represent the memories captured in your photos. These illustrations can be placed strategically throughout the frame or used as accents to enhance the overall design. Table: Creative Ideas for DIY Calligraphy Photo Frames Decoration Element Description Wavy Circles Create a whimsical touch by drawing wavy circles around words or phrases. Shadows Add depth and dimension to your frames by incorporating shadows. Arrows and Shapes Point to special moments or highlight important details in your photos with arrows or other shapes. Doodles Let your creativity shine by incorporating doodles, such as patterns or flowers, into your frames. Illustrated Elements Add small images or icons that represent the memories captured in your photos.
Capture Memories with Elegance: Photo Frame Wax Seal Head
Elevate your DIY calligraphy photo frames with a Photo Frame Wax Seal Head. This high-quality brass head creates a stunning 3D vintage frame effect, adding elegance and sophistication to your photo frames. Choose from various sizes and designs, and pair them with your calligraphy lettering to create a unique and personalized touch. The durable construction ensures that your photo frames will stand the test of time. With a Photo Frame Wax Seal Head, you can achieve a vintage frame effect that adds a touch of glamour to your DIY calligraphy photo frames. The brass construction not only provides durability but also gives the frames a timeless appeal. Whether you're creating frames for yourself or as gifts for loved ones, the wax seal head will take your projects to the next level. By incorporating the Photo Frame Wax Seal Head into your designs, you can create photo frames that exude elegance and charm. The 3D effect adds depth and visual interest, making your frames truly stand out. Whether you're displaying cherished family photos, wedding memories, or capturing everyday moments, the vintage frame effect will enhance the overall aesthetic and create a captivating display in your home. Table: Photo Frame Wax Seal Head Features Feature Description Material High-quality brass construction for durability and longevity. Design Various sizes and designs available to suit different frame styles. Application Compatible with a wide range of frame materials, including wood, glass, and metal. Easy to Use Simple and straightforward process for creating the vintage frame effect. Customization Pair with different calligraphy lettering styles and colors for personalized frames. Versatility Ideal for both beginner and experienced crafters looking to enhance their photo frames. Enhance your DIY calligraphy photo frames with a Photo Frame Wax Seal Head and bring an extra touch of elegance to your cherished memories.
DIY Calligraphy Photo Frames for the Holidays
Take your DIY calligraphy photo frames to the next level by incorporating them into your holiday decorations. Whether you're looking to create custom photo ornaments, design a festive gallery wall, or even make a DIY advent calendar, there are plenty of creative and fun ways to incorporate calligraphy frames into your holiday decor. Custom Photo Ornaments One way to add a personalized touch to your Christmas tree is by creating custom photo ornaments with calligraphy frames. Simply print out wallet-sized photos of your loved ones and insert them into small frames. You can then hang these frames on your Christmas tree or even on holiday garlands throughout your home. This adds a sentimental touch and allows you to showcase cherished memories during the holiday season. Festive Gallery Wall If you're looking to create a statement piece for your holiday decor, consider designing a festive gallery wall using calligraphy photo frames. Choose frames of different sizes and styles to create visual interest, and fill them with holiday photos or artwork. You can mix and match calligraphy frames with other holiday-themed frames for a cohesive and eye-catching display. Hang your gallery wall in a prominent area of your home to spread the holiday cheer. DIY Advent Calendar Add some excitement to the countdown to the New Year by transforming a calligraphy frame into a DIY advent calendar. Attach rows of string or ribbon to the back of the frame, and hang numbered photos or small gifts from each string. Each day, you or your family can open a new photo or gift, creating a fun and interactive holiday tradition. The calligraphy frame adds an elegant touch to the advent calendar and makes it a beautiful focal point in your home. By incorporating DIY calligraphy photo frames into your holiday decor, you can create unique and personalized pieces that capture the spirit of the season. Whether you choose to make custom photo ornaments, design a festive gallery wall, or create a DIY advent calendar, these frames will add a touch of elegance and sentimentality to your holiday celebrations.
Spread Holiday Cheer with Holiday-Themed Frames
https://www.youtube.com/watch?v=SwQfT8dp-EY Enhance the festive spirit in your home by creating holiday-themed frames that feature quotes, sayings, or artwork related to the season. These frames add a touch of holiday cheer and make for excellent decorative accents. Design your own frames with holiday quotes using calligraphy or apply vinyl decals for a clean and modern look. These frames can be placed on mantels, displayed on walls, or given as unique gifts to loved ones. If you're looking to involve your children in the holiday preparations, consider using holiday-themed frames to display their artwork. Create a gallery wall using frames of different sizes and styles, showcasing their festive drawings and crafts. This not only makes them feel proud of their creations but also contributes to the overall festive decor of your home. Your child's art display will add a personal touch and become a centerpiece of holiday memories. By incorporating holiday-themed frames with quotes, vinyl decals, and displaying children's art, you can spread joy and holiday cheer throughout your home. Whether it's a stylish quote frame on a mantel or a gallery wall filled with your child's creations, these frames add warmth and character to your holiday decor. Get creative and let the holiday spirit shine through with these festive frames. So, unleash your creativity and infuse your home with holiday cheer using holiday-themed frames. Whether you opt for quotes, vinyl decals, or kid's art display, these frames will bring a festive ambiance while showcasing your personal style. Let your imagination run wild and create unique, eye-catching frames that will elevate your holiday decorations to the next level.
Conclusion
DIY calligraphy photo frames offer a creative and personal way to showcase your cherished memories. These custom photo frames add a unique touch to your home decor, and with a few simple materials and a dash of creativity, you can create beautiful and meaningful pieces. Whether you're a beginner or an experienced crafter, DIY calligraphy photo frames are a fulfilling project that allows you to express your creativity and create special mementos. From capturing everyday moments to celebrating holidays, these frames offer endless possibilities for customization and personalization. So why wait? Start your own DIY calligraphy photo frame project today and bring your cherished memories to life. With their elegance and personal touch, these frames will not only display your favorite photos but also become a statement piece in your home. Explore different lettering styles, add decorative elements, and let your creativity shine. The result will be a unique and beautiful custom photo frame that captures the essence of your memories. Get ready to transform your home decor with these creative DIY frames. Whether you're looking for a way to personalize your space or searching for a thoughtful handmade gift, DIY calligraphy photo frames are the answer. Let your imagination run wild and create custom photo frame ideas that reflect your style and personality. Happy crafting!
FAQ
What materials do I need for DIY calligraphy photo frames? You will need a calligraphy pen or brush pens, fineliners of various sizes, a paper pad, a pencil, and an eraser. How do I create DIY calligraphy photo frames? Start by tracing a circle on your paper, then place your words inside the circle using different lettering styles. Experiment with embellishments and details, erase any pencil marks, and frame your finished piece. How can I add a personal touch to my DIY calligraphy photo frames? Get creative by adding decorative elements such as doodles, illustrated elements, and custom shapes. Experiment with different designs and let your creativity shine through. What is a Photo Frame Wax Seal Head? A Photo Frame Wax Seal Head is a high-quality brass head that creates a 3D vintage frame effect. It adds elegance and sophistication to your photo frames. How can I use DIY calligraphy photo frames for the holidays? You can create custom photo ornaments, design a festive gallery wall, or transform a frame into a DIY advent calendar. Spread holiday cheer and showcase your favorite holiday photos or artwork. How can I spread holiday cheer with holiday-themed frames? Design frames with holiday quotes using calligraphy or vinyl decals. Display kid's holiday-themed artwork in gallery wall frames. Use them as decorative accents or unique gifts. Read the full article
#CalligraphyArt#CaptureMemories#CraftProjects#CustomizedKeepsakes#DIYCalligraphy#HandmadeDecor#HomeDecor#MemoryPreservation#PersonalizedFrames#PhotoFrames
1 note
·
View note
Text
DIY Calligraphy Projects: Fun and Easy!

DIY Calligraphy Projects: Unleash Your Creativity with These Fun and Easy Ideas!
Welcome to the world of DIY calligraphy projects! Whether you're a beginner or an experienced calligrapher, exploring these fun and easy projects will unleash your creativity and impress everyone with your skills. In this section, we will guide you through various DIY calligraphy projects, from creating beautiful calligraphy greeting cards to making your own homemade calligraphy ink. Get ready to embark on a creative journey that will leave you inspired and proud of your creations. Key Takeaways: - DIY calligraphy projects are a great way to express yourself creatively and showcase your calligraphy skills. - From calligraphy greeting cards to homemade calligraphy ink, there are plenty of fun and easy projects to explore. - Create personalized and impressive gifts with your calligraphy skills. - DIY calligraphy projects offer endless opportunities for practicing and honing your skills. - Let your creativity shine as you embark on the world of DIY calligraphy.
Calligraphy Wall Art: Add a Touch of Elegance to Your Home
Spruce up your home decor with stunning calligraphy wall art. Use your calligraphy skills to create personalized pieces that add a touch of elegance to any room. Whether you're a beginner or an experienced calligrapher, this DIY project allows you to showcase your creativity and artistic flair. With calligraphy wall art, you have the freedom to choose your favorite quotes, meaningful words, or even names and initials to create unique and personalized designs. The beauty of calligraphy lies in its versatility, allowing you to experiment with different lettering styles, colors, and layouts to suit your aesthetic preferences. One popular idea is to create calligraphy canvases featuring wedding vows or special quotes that hold sentimental value. These pieces make for beautiful displays in bedrooms or living rooms, reminding you and your loved ones of cherished memories and values. Another creative use for calligraphy wall art is to design DIY wedding invitations. Incorporating your calligraphy skills into your wedding invites adds a personal touch and sets a tone of elegance for your special day. Your guests will be impressed by the attention to detail and the thoughtfulness reflected in your hand-lettered invitations. For additional creative inspiration, you can also make calligraphy gift tags using your calligraphy skills. Whether you're wrapping presents for birthdays, holidays, or special occasions, adding a calligraphy gift tag instantly elevates the presentation and shows the recipient that you went the extra mile. Table: Calligraphy Wall Art Ideas Calligraphy Wall Art Ideas Description Personalized Quote Canvases Create custom canvases with your favorite quotes and phrases to showcase in your home. Wedding Vow Art Design beautiful calligraphy pieces featuring your wedding vows or special quotes to commemorate your special day. DIY Wedding Invitations Incorporate calligraphy into your wedding invitations to add a touch of elegance and personalization. Calligraphy Gift Tags Create unique gift tags using calligraphy to enhance the presentation of your gifts.
Hand-Lettered T-Shirts and Customized Calligraphy Mugs: Wear Your Calligraphy
Take your calligraphy skills beyond paper and create wearable art. Design hand-lettered T-shirts that showcase your unique calligraphy style. Choose your favorite quotes, phrases, or names to create personalized designs that reflect your personality. Whether you want to make a fashion statement or give a one-of-a-kind gift, hand-lettered T-shirts are a creative and stylish option.

Customized calligraphy mugs are another fantastic way to wear your calligraphy. Personalize your own mugs with beautifully hand-lettered names, monograms, or inspiring messages. Each time you sip your favorite hot beverage, you'll be reminded of the artistry and creativity behind your unique creation. Customized calligraphy mugs also make thoughtful gifts for birthdays, weddings, or any special occasion. Create Stunning Calligraphy Place Cards Calligraphy place cards add an elegant touch to any event or gathering. Whether you're hosting a wedding, dinner party, or corporate event, beautifully hand-lettered place cards are sure to impress your guests. Use your calligraphy skills to create intricate designs or opt for a simple and classic style. Each guest will feel special and appreciated as they find their assigned seat with a personalized calligraphy place card.
Handmade Calligraphy Bookmarks and Journal Covers: Combine Art and Functionality
Take your calligraphy skills to the next level by creating unique and personalized handmade calligraphy bookmarks and journal covers. These projects not only allow you to showcase your creative style but also combine art with functionality. Handmade Calligraphy Bookmarks With handmade calligraphy bookmarks, you can add a touch of elegance to your reading experience. Use your calligraphy skills to create beautiful designs on high-quality paper or cardstock. Personalize each bookmark with inspiring quotes, intricate patterns, or even names. You can also experiment with adding decorative elements such as ribbons, tassels, or charms to make your bookmarks even more special. Handmade calligraphy bookmarks are perfect for avid readers or as thoughtful gifts for book lovers. They not only serve as placeholders but also add a touch of sophistication to any book. You can create a set of bookmarks to match different genres or themes, allowing you to customize your reading experience. Calligraphy Journal Covers Transform your ordinary journals into works of art with customized calligraphy covers. Whether you're journaling for personal reflection, taking notes, or sketching, adding a calligraphy cover can elevate the entire experience. Design a cover that represents your unique style and personality. Use calligraphy to write inspiring quotes, personal mantras, or even your name. Experiment with different calligraphy styles, colors, and embellishments to create a cover that truly stands out. A handmade calligraphy journal cover not only protects your journal but also provides a beautiful visual representation of your thoughts and ideas. It adds a personal touch to your writing and serves as a constant source of inspiration. "Handmade calligraphy bookmarks and journal covers allow you to combine art and functionality, making them perfect for both personal use and gifting." - Calligraphy enthusiast
Calligraphy on Canvas Bags and Fabric: Wearable Art and Home Decor
Expand your calligraphy skills beyond paper and incorporate them into wearable art and stylish home decor. By adding calligraphy to canvas bags and fabric, you can create unique and personalized accessories that showcase your creative flair. Additionally, experimenting with calligraphy on fabric allows you to incorporate it into your home decor, adding a touch of elegance to any space. Calligraphy on Canvas Bags: With calligraphy, you can transform ordinary canvas bags into personalized accessories that make a statement. Whether you're carrying groceries or heading to the beach, a calligraphy-designed bag adds a touch of style and uniqueness to your look. Create your own calligraphy design using fabric markers or paint, or explore online marketplaces for pre-designed calligraphy bags that suit your taste and personality. Calligraphy on Fabric: Take your home decor to the next level by incorporating calligraphy on fabric. Design personalized throw pillows, wall hangings, or even table runners with beautiful calligraphy designs. Use fabric paint or markers to create your own calligraphy masterpiece, or consider using iron-on transfers for a professional-looking finish. Whether you prefer bold and modern or elegant and delicate calligraphy, there are endless possibilities to explore. Table: Comparing Different Techniques for Calligraphy on Canvas Bags Technique Pros Cons Hand-painted - Allows for complete customization - Can achieve intricate details - Requires a steady hand and precision - Time-consuming process Fabric markers - Easy to use and control - Quick drying time - Limited color options - May fade or wash off over time Iron-on transfers - Provides a professional-looking finish - Easy to apply - Limited design options - Requires access to a printer or transfer paper Captivate others with your creative calligraphy skills by incorporating it into your accessories and home decor. Whether you choose to create personalized canvas bags or add calligraphy to fabric items, you'll be able to wear your art and bring a touch of elegance to your living space.
Hand-Lettered Quotes and Calligraphy Birthday Cards: Spread Joy with Your Words
Spread joy and inspiration with hand-lettered quotes and calligraphy birthday cards. With your calligraphy skills, you have the power to create meaningful and personalized messages that will brighten someone's day. Whether you want to uplift the spirits of a loved one or convey your heartfelt wishes on their special day, hand-lettered quotes and calligraphy birthday cards are the perfect way to do it. Imagine the smile on their face when they receive a beautifully crafted card, adorned with elegant calligraphy and a heartfelt message. Your words will have a lasting impact and create a cherished memory. It's a wonderful opportunity to showcase your creativity and showcase the power of calligraphy in conveying emotions. In addition to spreading joy through handwritten quotes and birthday cards, calligraphy can also find its place in scrapbooking. Scrapbooking is a creative way to preserve memories and capture life's special moments. By incorporating calligraphy into your scrapbook pages, you can add a unique touch that enhances the visual appeal and tells the story behind each photograph. Whether it's a heartfelt quote, a date, or a personalized caption, calligraphy in scrapbooking adds a touch of elegance and creativity to your cherished memories. The art of calligraphy allows you to spread joy and happiness with your words. Hand-lettered quotes and calligraphy birthday cards have a personal touch that goes beyond ordinary greetings. Whether it's a thoughtful quote or a heartfelt message, the beauty of calligraphy brings an extra layer of meaning and sophistication. So, whether you're crafting hand-lettered quotes, creating calligraphy birthday cards, or exploring calligraphy in scrapbooking, embrace the beauty of calligraphy and let your words bring joy to others. The Power of Hand-Lettered Quotes Hand-lettered quotes have a way of capturing the essence of a thought or feeling. They can inspire, motivate, and evoke emotions. With calligraphy, these quotes come to life, transforming simple words into stunning works of art. Whether you want to create wall art, gift tags, or even personal mantras, hand-lettered quotes allow you to make a statement and share your unique perspective with the world. Personalized Calligraphy Birthday Cards A calligraphy birthday card is more than just a piece of paper; it's a heartfelt expression of love and celebration. By adding your calligraphy skills to the mix, you can create one-of-a-kind birthday cards that truly stand out. From elegant script to playful designs, your calligraphy will make the recipient feel special and appreciated on their big day. Reasons to Use Hand-Lettered Quotes and Calligraphy Birthday Cards Benefits Expressing emotions Conveys heartfelt messages in a unique and personal way Showcasing creativity Allows you to showcase your artistic skills and create beautiful, customized designs Creating memorable experiences Makes the recipient feel special and creates lasting memories Spreading joy and inspiration Brings happiness and motivation to the recipient
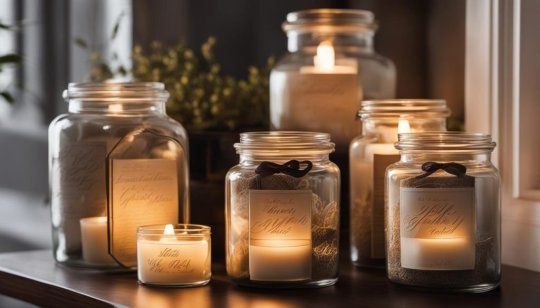
Calligraphy on Glass Jars and Candles: Add a Touch of Elegance to Your Home Decor
If you're looking to elevate the ambiance of your home decor, consider adding calligraphy to glass jars and candles. This simple yet elegant touch can transform ordinary items into unique pieces that catch the eye and create a soothing atmosphere. When it comes to calligraphy on glass jars, the possibilities are endless. You can write meaningful quotes, names, or even draw intricate designs that reflect your personal style. Whether you use them as decorative storage jars or as candle holders, the calligraphy adds a touch of sophistication and beauty to any space. Similarly, incorporating calligraphy on candles can create a stunning centerpiece or accent piece for your home. Write words like "love," "serenity," or "harmony" to infuse positive energy into your environment. Alternatively, you can personalize candles with names or special dates for a thoughtful and unique gift idea. "The beauty of calligraphy on glass jars and candles lies in its simplicity. It's a versatile way to add elegance to your home decor and create a serene ambiance." - Home Decor Enthusiast Table: Examples of Calligraphy on Glass Jars and Candles Glass Jars Candles Personalized storage jars for kitchen ingredients Customized scented candles for special occasions Unique bathroom storage jars with calligraphy labels Decorative pillar candles with calligraphy patterns Beautiful vases for fresh flowers with calligraphy details Rustic-style candles with handwritten quotes No matter how you choose to incorporate calligraphy on glass jars and candles, this simple addition will add an elegant and personal touch to your home decor. Let your creativity flow and enjoy the beauty and serenity that calligraphy brings to your living space.
DIY Calligraphy Practice Sheets and Stencils: Hone Your Skills
As you continue to explore the world of DIY calligraphy, it's important to continuously practice and refine your skills. DIY calligraphy practice sheets and stencils are invaluable tools that can help you improve your technique and develop your own unique style. Whether you're a beginner or an experienced calligrapher, dedicating time to practice will take your skills to new heights. Creating your own DIY calligraphy practice sheets allows you to customize your practice sessions according to your specific needs. You can focus on letterforms, spacing, or even work on specific words or phrases. By practicing consistently, you'll build muscle memory and improve your precision and control. Remember to start with basic strokes and gradually move on to more complex letterforms. Another useful tool for honing your calligraphy skills is DIY calligraphy stencils. Stencils provide a guided framework for creating consistent and precise letterforms. You can create your own stencils using a stencil cutting tool or download printable stencil templates from online resources. Stencils are especially helpful for beginners who are still mastering letterforms and need assistance with consistency and alignment. DIY Calligraphy Practice Sheets Example: Letter Uppercase Lowercase A

B
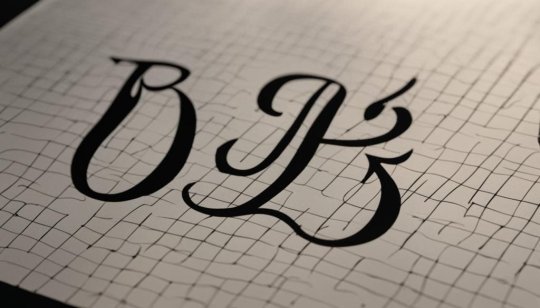
C https://www.youtube.com/watch?v=Pl1VwEBJLh0 DIY Calligraphy Stencils Example: Here's an example of how you can use DIY calligraphy stencils to create beautiful designs on wooden plaques: "With a DIY calligraphy stencil and some acrylic paint, you can easily transform a plain wooden plaque into a personalized work of art. Simply secure the stencil onto the plaque, apply the paint using a brush or sponge, and carefully remove the stencil to reveal your calligraphy design. Allow the paint to dry completely before displaying your masterpiece." So, whether you choose to create your own DIY calligraphy practice sheets or use stencils, these tools will help you refine your skills and create stunning calligraphy pieces. Practice regularly, experiment with different styles, and most importantly, enjoy the journey of becoming a master of the art of calligraphy.
Conclusion
In conclusion, DIY calligraphy projects provide a fantastic opportunity to unleash your creativity and showcase your calligraphy skills. Whether you're a beginner or an experienced calligrapher, these projects offer a fun and fulfilling way to express yourself. From creating personalized gifts to adding a touch of elegance to your home decor, there is a wide range of possibilities for DIY calligraphy projects. You can explore calligraphy on glass jars, transforming them into beautiful and unique pieces that will enhance any space. Additionally, practicing your calligraphy skills is crucial for growth and improvement. Using calligraphy practice sheets allows you to hone your technique and develop your own signature style. Don't be afraid to experiment and push your boundaries. So, dive into the world of DIY calligraphy and let your creativity shine. Whether you're making personalized gifts or enhancing your home decor, these projects offer endless opportunities for self-expression and growth. Enjoy the journey!
FAQ
Are these DIY calligraphy projects suitable for beginners? Absolutely! Whether you're a beginner or a seasoned calligrapher, these projects are designed to be fun and easy to follow along, allowing you to unleash your creativity and improve your skills. What materials do I need for these DIY calligraphy projects? The materials you'll need will vary depending on the specific project, but some common items include calligraphy pens or brushes, ink or paint, paper or other surfaces, and any additional decorations or embellishments you'd like to add. Where can I find practice sheets and stencils for calligraphy? You can create your own practice sheets or find printable ones online. There are also many resources available for calligraphy stencils, which can be used to create beautiful designs on various surfaces. Can I personalize the DIY calligraphy projects for specific events or occasions? Absolutely! Read the full article
#ArtisticWriting#CalligraphyProjects#calligraphytechniques#creativecrafts#DIYCalligraphy#EasyCalligraphy#FunProjects#HandLettering#HomeArtProjects#personalizedstationery
0 notes