#Craft and Art Kits
Explore tagged Tumblr posts
Text
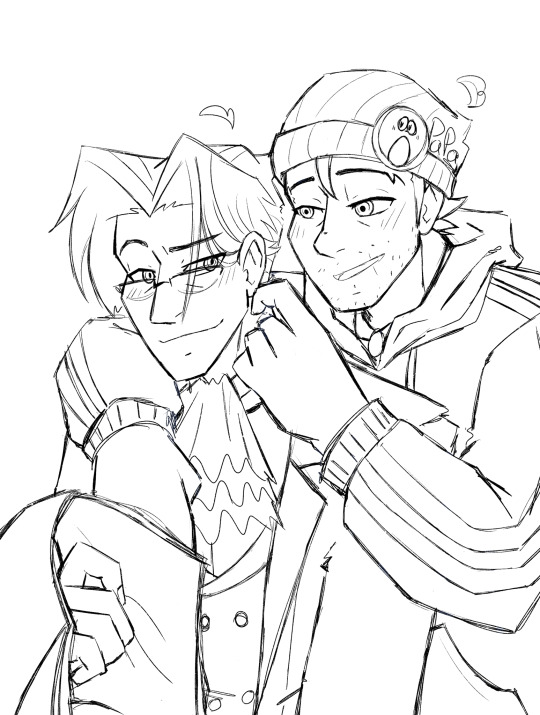

7yg narumitsu collab with Kit @wr1ghtw0rth! He did the sketch and i did the colors ^^
The other half of the trade is here 💜
#narumitsu#wrightworth#7yg#miles edgeworth#beanix#EVERYONE GO LOOK AT THE OTHER PART KIT DID SUCH A GOOD JOB!!!!!!!!!!!!#also this was so fun to do! kit’s art is like paper crafting to me. so shapey and crunchy!!! nyam#fan art#aa#art trade#almost forgor egdeworth’s glasses sorry chat#wr1ghtw0rth#rendevok
514 notes
·
View notes
Text


I added more things to Lotus Tower! Can you spot them all? To be honest, I can't pick anything I'm the most proud of. I'm so pleased to see all of it come together like this. Perhaps my brain will finally let me put the project to rest 😂
Breakdown of all the new fun decorations and modifications below.
You can see the first part of my model build here, or more of my art and my craft projects in my pinned post, where you can also find a link to my INPRNT store and my ko-fi if you would like to support my creative projects in any way 💛
So, the first thing I wanted to do was utillise some spare parts from my Life of Su Dongpo booknook kit to make Li Lianhua a small tea tray:


I cut tiny planks of wood from a strip of basswood to form the sides, but the base and teapot come from the Su Dongpo kit. I was also able to make the goodest girl Hulijing a stand from the same piece that makes the base of the tea tray. Now she can sit in Lotus Tower anywhere she wants to instead of being stuck into the wood outside her kennel!
To hold the tea tray, I also made a table and stool similar to the one in the show, and created some tiny baskets out of beige cross-stitch aida to replicate the many baskets and storage Li Lianhua has hanging from the Tower:


In that same vein, I used thread to make a net for some more storage beneath the stairs:


And used part of a bamboo place-mat and some dried flowers to create a herb drying rack on the upper level.


One of the more complex pieces I created was a second sail to hang under the eaves of the gourd door:


It was difficult trying to get this sail to hold a good final shape as, just as with the other sail in my first build, I had to guess how much material would be needed and how to gather it. But I'm pleased with how it turned out in the end! It, like the herb rack, is hung from the eaves with small pieces of metal wire, bent into hooks and stuck into the reinforced card.
You can also see in the pictures above that I added "rope" and a fake hook to the shelf on the side of the Tower to make it a bit more accurate to the show's design.
(You will also see in the very first picture that I made a set of removable stairs for the porches - unfortunately, I didn't take any pictures of their building process and kept forgetting to move them back into the big picture.)
The biggest addition, though, is of course the lanterns:

I am so proud of these. I made them from paper and basswood, and they are ridiculously tiny (about 1.5cms). I wasn't going to put lights in them to start with, but when I bought the tiny bulbs (I was planning to try and put them inside Lotus Tower at the time) and shone them behind one of the lanterns - it looked so good I knew I just had to try it.
So here's how I pulled it off:

I first carefully slotted the bulbs and their wires through the beams of the sail awning, twisting the red and blue cables around each other to give them more structure and make sure they were hanging at the right length. I made sure the wires both led back to the side of the Tower I was going to store the battery pack on, and fastened them to one of the supports of the awning so that the wires would discretely trail down to the floor of the upper level. (I also painted them at this time.)


As for the battery pack, I stuck a small piece of wood underneath the porch where Hulijing's kennel sits for the battery to sit on. I tidied up the wires as neatly as I could and fastened them to the side of the Tower with a spare U-shaped piece from the Su Dongpo kit, wedged into the window slats of the ground level (making sure there's plenty of slack for me to unfasten it and change the battery without struggle). I then joined the wires as best I could and painted it all a yellow-brown colour.


As you can see, it looks a bit crude, but once the roof is back on over the door, the wires all but disappear!
I am so sooo happy with how it's turned out. Please let me know what you think! Is there anything else you would add? Anything you would do differently?
#my builds#lotus tower#莲花楼#lianhua lou#mysterious lotus casebook#mlc merch#mlc fanart#nikkidraws#model building#model kit#iqiyi merch#mysterious lotus casebook merch#arts and crafts
224 notes
·
View notes
Text
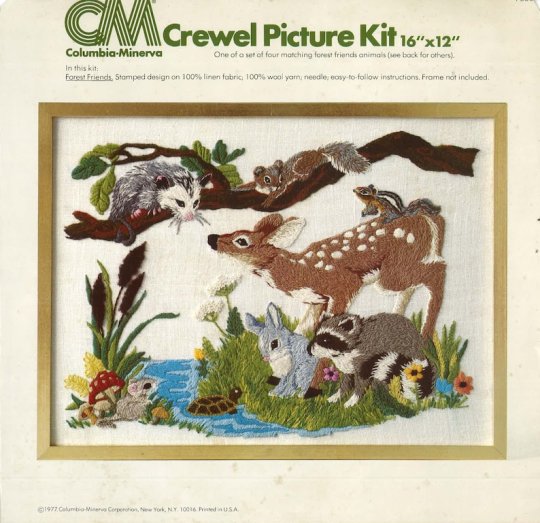
Vintage Crewel Embroidery from HappyGoRetro
#HappyGoRetro#vintage#vintage embroidery#embroidery#embroidery art#embroidery kit#vintage embroidery kit#vintage craft
387 notes
·
View notes
Text
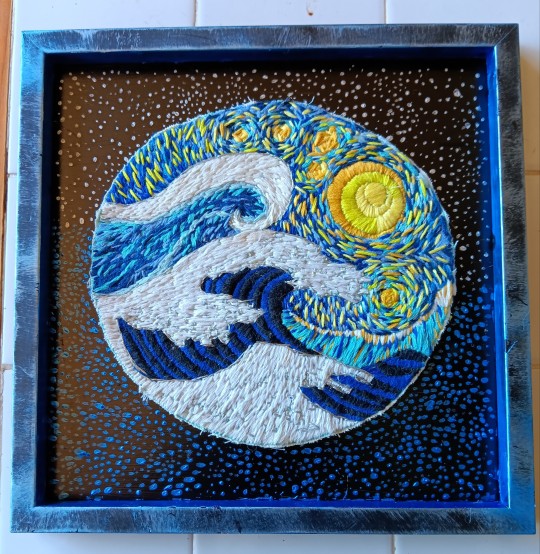
Had to frame it (and paint the frame) because idk what else I'm supposed to do with it 😂
#sirenstella#penguinonfire#art#embroidery#needlework#van gogh#crafting#crafts#diy craft#embroidery kit
209 notes
·
View notes
Text

#kirby#daily kirby#my art#digital#hal laboratory#nintendo#so like aliexpress used to have a terrible reputation in terms of like quality and truth in advertising and such right#but like. amazon and etsy are swamped with bootleggers and dropshippers now too#so I figured like. can't be any worse right?#besides I know how to double check descriptions and measurements and examine images critically#I've shopped shady sites before like back when banggood was the only place to get those cute diy miniature kits#(now you can get them at regular craft store chains which is Wild to me)#but I have never opened aliexpress because everyone was always just like 'Never Go There'#(but then again these days folks are doing massive temu hauls left and right)#(so clearly norms have changed even if common perception of aliexpress has not)#I open it up and I immediately find the rug I spent an entire day hunting for unsuccessfully earlier in the month.#and a ton of incredible bootleg kirbs.#and a style of hair clip I've been hunting for for *years*.#soooo I spent the entire day in a pastel fugue lol#(I have not spent any money yet but I'm probably gonna)#(so like I can't confirm that you're not gonna get scammed or whatever just like. use common sense.)#(don't trust sale prices read descriptions/reviews when available and try to avoid work stolen from independent artists)#(that's usually gonna be on printed stuff like phone cases and posters)#(and tbh I have no qualms with stolen official art as long as the quality is as advertised)#(but there's a big difference between stealing from Multinational Corporation and stealing from Some Guy)#anyway done rambling now <3#favorites
148 notes
·
View notes
Text

Finished another piece! This is a cross stitch kit by Kikkerland.
I think cross stitching is becoming a new hyper fixation 😅
#cross stitching#cross stitch kit#cross stitch#crafting#craftblr#crafty stuff#fiber crafts#fiber arts#fiber art#flowers#sunflower
78 notes
·
View notes
Text

Hey! My friend made this drawing of Mychael, I'm sending for him! He was thinking.. what If MC had brought some hair clips in his backpack? If he was there with Mychael, he would put the hair clips in his hair, he thinks Mychael has beautiful eyes (◍•ᴗ•◍)
#mushroom oasis vn#fanart#submission#WAAA SO CUTE!#decorate him like an arts and crafts kit!!!#he'll be happy about it!!!!
173 notes
·
View notes
Text

some Kit Kittredge stickers I want to make at some point :D (Also, if anyone has any advice [check my og tags] I'd appreciate it!!)
#my art#strawberridraws#fanart#american girl#ag#kit kittredge#I can't figure out how to make stickers lol#aka most online places either have huge quantities or big shipping costs#like vograce and sticker app (and I won't use sticker mule because I've heard not great things)#and people say that making them yourself is cheaper in the long run anyways#but I need a cricut for that#and it seems like all the cheaper options don't do kiss cut sheets?? or are able to sense the page (?)#tbh the whole lists of them just confuse me on what I'd want to get if I just wanted to make vinyl kiss cut sticker sheets#as especially I don't really want a super bulky machine either#so yeah :') if anyone knows any good sites or has home making advice id really appreciate it!!!!#stickers#craft#art#sticker making#arts and crafts#cricut
45 notes
·
View notes
Text

18th November 2023 - 3rd October 2024
Finished my first landscape cross stitch! (I mainly do animal/mythical creatures)
I used a pre-stamped kit and I'm really pleased with how it came out! ^.^ My curse of running out of thread seems to have continued though, had to substitute similar colors a lot >.< (luckily it's just messy enough for it to have worked)
#cross stitch#crafts#sewing#decorative sewing#hand stitching#cross stitch landscape#textile art#fiber crafts#cross stitch stamped kit#spring landscape#blossoms#ponds#darke faerie sews
40 notes
·
View notes
Text

I think Kit would be a great at those goldfish scooping games at festivals and also would look cute in a yukata
180 notes
·
View notes
Text
Ok I had good luck with responses last time I asked the great and mighty fiber craft community things via the void of tumblr so I’m going to try a gain!
So I’m hoping to teach myself knitting! I found a site online (sheepandstitch .com) that had some tips and videos for beginners. I followed their advice and got some thicker yarn (number 6 extra bulky) and thicker bamboo needles (9mm, also accidentally some 5.5mm needles but those are like 13in long, the joys of online buying 😅).
So I have some beginning supplies but I haven’t started yet. I know it’s going to be different for everyone but is it generally better to learn from a book/patterns or watch videos teaching you? I can have trouble visualizing directions in 3D so I will probably have to do a little of both regardless but I don’t want to shoot myself in the foot and miss out on early pattern learning.
Does anyone have any recommendations for starting books/websites/videos? I did make an account on Ravelry awhile back but I’m not really sure what I’m doing :P I did try teaching myself once when I was a teenager but I didn’t have much luck. I’m hoping to have better luck (and more patience) this time! And I’m totally also interested in like actual, physical paper books too if people have recommendations. I assume most craft stores have beginner books but I’m also sure mileage probably varies on those…
Thanks in advance for any advice :3 If/when I eventually make something, I will post it! :D
#tabby talks#knitblr#knitting#fiber art#fiber crafts#learning to knit#the first time I got one of those beginner kits from like meijers#I couldn’t even do like a scarf I accidentally kept making everything tighter and tighter until I couldn’t even get stitches on anymore :(#i tried really hard to get looser but alas#I also held one needle between my knees and moved the other one which is weird but on my last post someone said that was a real technique!#so hooray!#tabby learns to knit
27 notes
·
View notes
Text

#Barbie#egg decorating kit#easter#vtg#vintage#retro#throwback#old school#rare#happy easter#nostalgic#eggs#arts and crafts#art
47 notes
·
View notes
Text
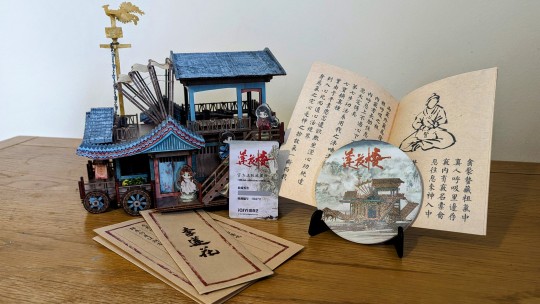
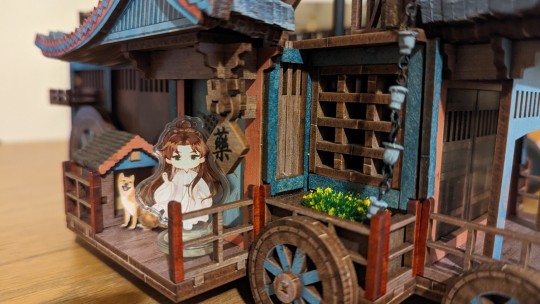

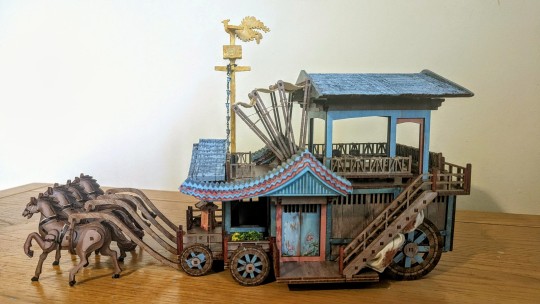
Sooo, I bought the Lotus Tower model kit and, of course, I went overboard making it as accurate as possible to the show. To no one's surprise, I'm guessing? 😅
For reference, this is what the completed model (sans horses) looks like without most* of my alterations:
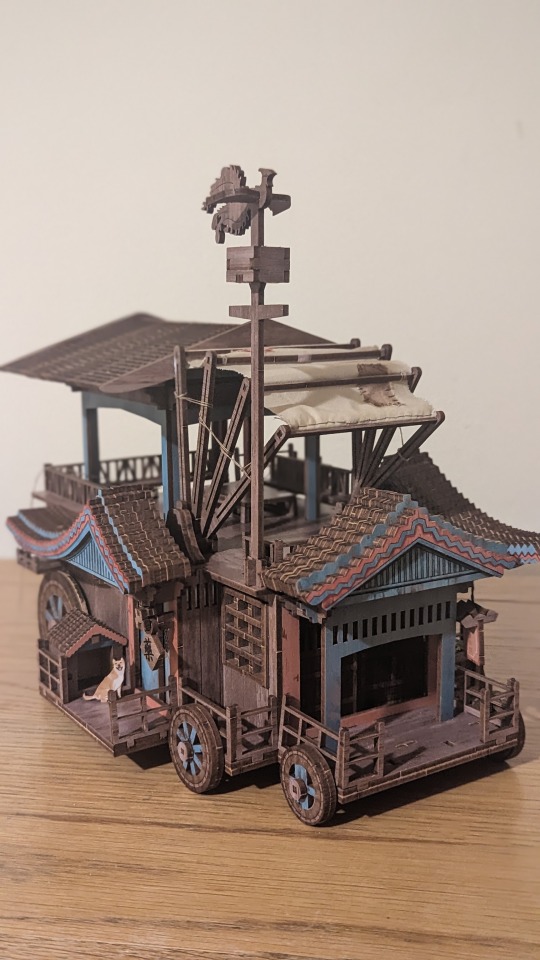
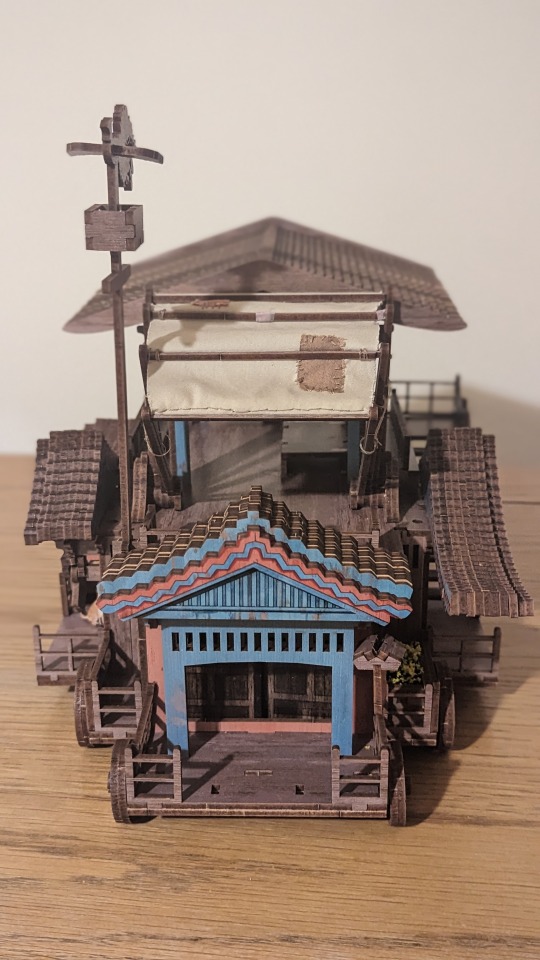
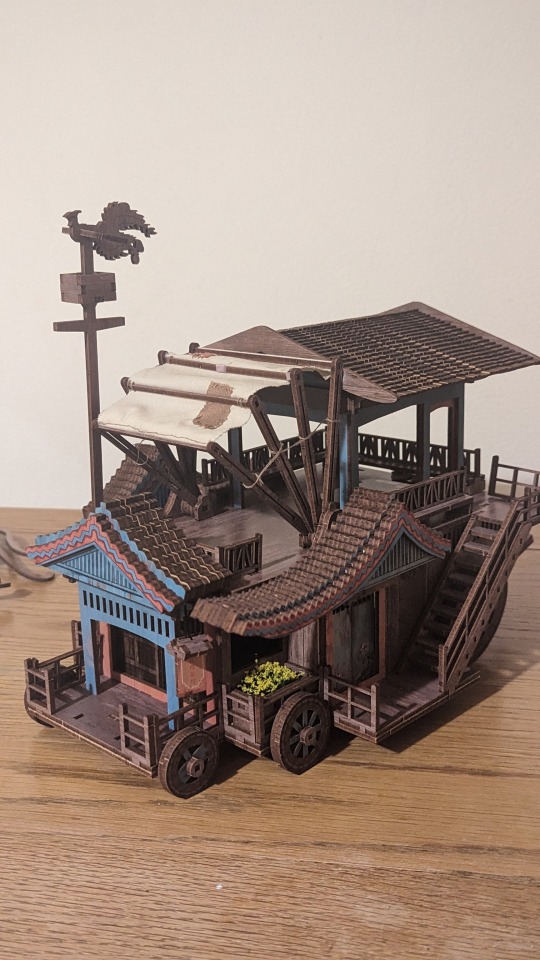
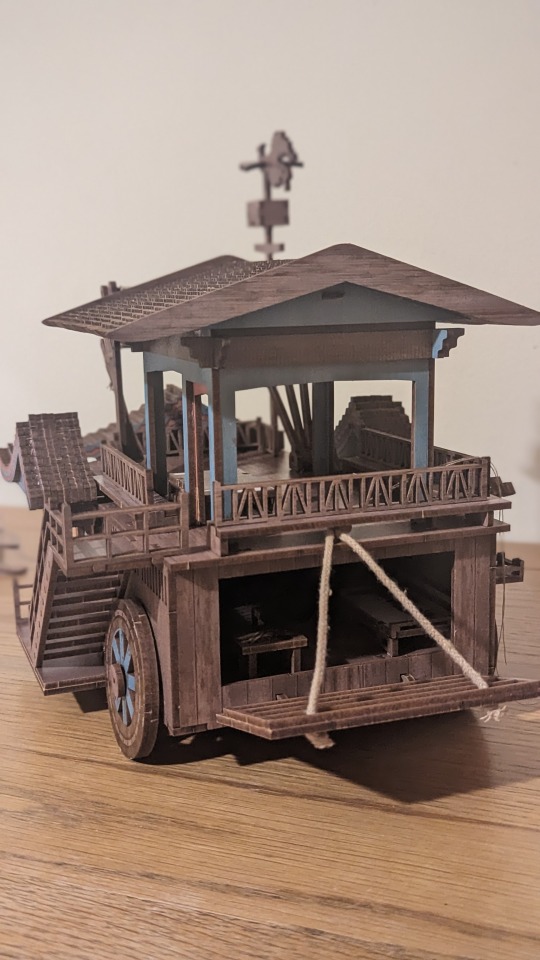
*The awning material and decoration is my only alteration at this point, as I didn't like the fabric they included with the kit.
I had so much fun with this model! It is well-made, has moving parts, and is actually fairly easy to put together, with most parts just clicking into place. It even has furniture details inside!
Let me know what you think! Have you got the kit? How are you finding the building process to be? If you want to hear a more detailed review of it and see my progress shots and details of my own creative additions, click below:
UPDATE: I've now added even more things to Lotus Tower! Find them here.
First, unboxing!
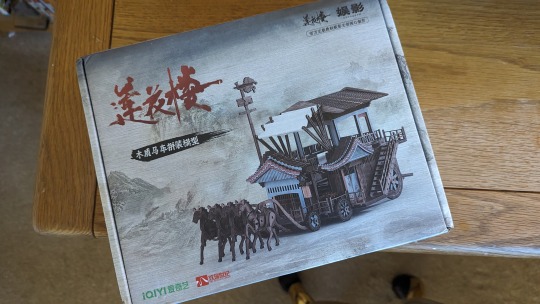
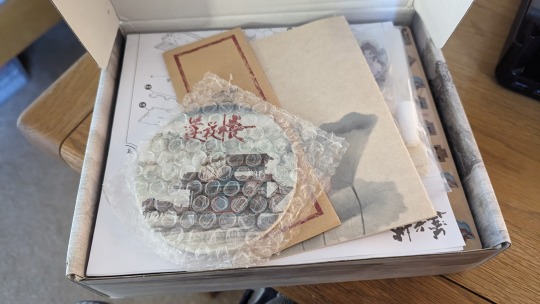
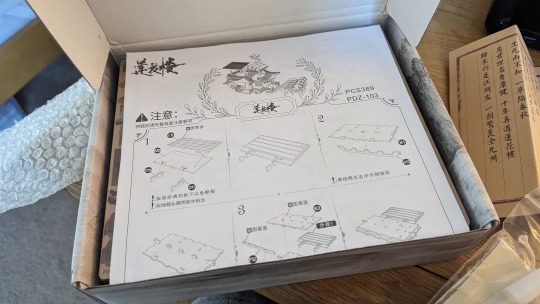
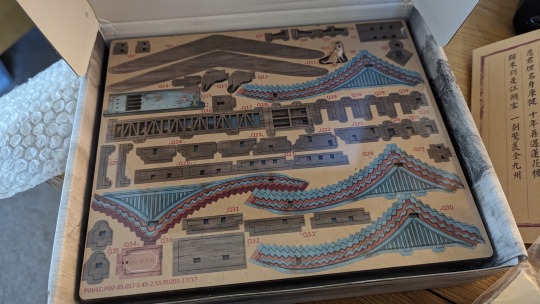
This is how the box arrives. I ordered it from CPOP Universe and it arrived well-packaged and undamaged within a matter of weeks.
Along with the kit itself - which as you can see consists of a stack of laser-cut sheets coded from A-Q, and numbers detailing the specific parts - you receive a coaster (ceramic, backed with cork, and very pretty), little standees of difanghua, a letter styled after the ones difang recieve from Li Lianhua, and a replica of the booklet of yangzhouman techniques.
The process:
The first floor came together pretty quickly:
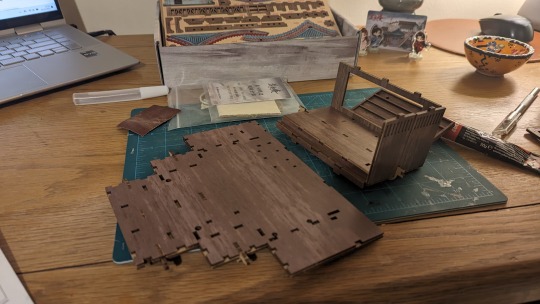
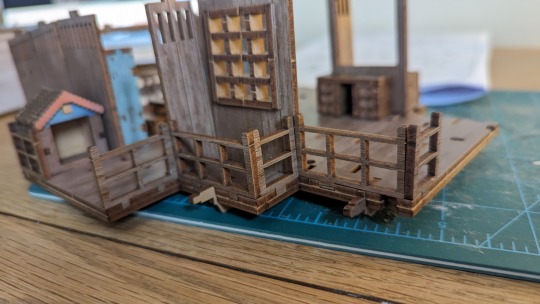

Glue is provided, but isn't necessary for a lot of the pieces, as I found the measurements for a lot of the joints to be pretty snug and able to hold together themselves. Glue is necessary for some parts, though, particularly for areas such as the step up to the rear sleeping area. Strong glue. Here is what the fist floor looks like:

Fitting on the ceiling turned out to be the hardest part of most of the build. All of the holes on the second floor had to line up with every joint on top of the walls and doors.
The next big step I encountered was a curiosity. How to make the rear wall work? There was a curious piece clearly meant to anchor the rope, and a round hole that - much like the doors - meant that this piece was supposed to rotate - and even lock. But I received no instructions on how to achieve that. I found this puzzle (which I like to think was an intentional challenge, given the gadget-orientated FDB) to be a fun challenge. So I won't show you the inner workings and spoil it, but I'll show you the working product:
Next was the rather fiddly job of creating the sail awning. I imagine this will be quite difficult for some as there's no clear indication of how to fix the material in place.
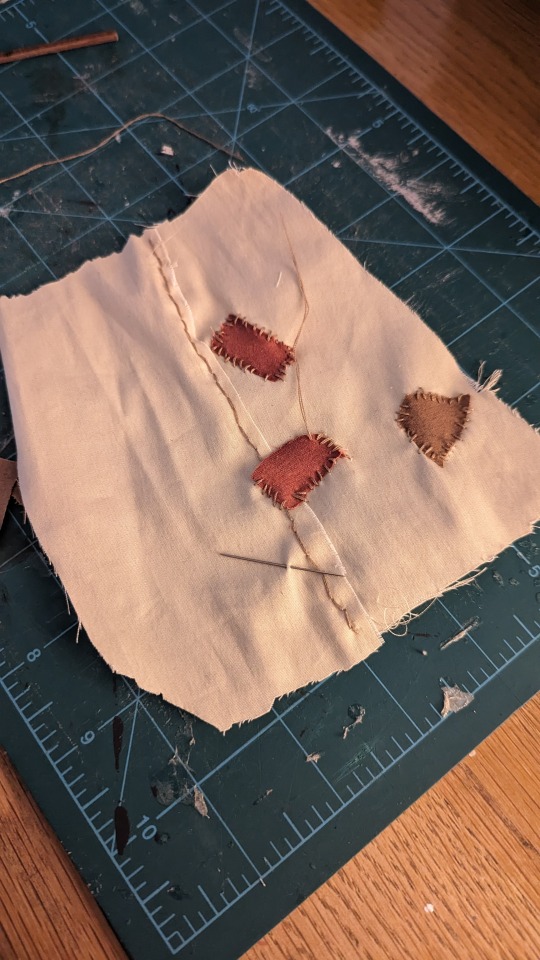
My instinct was to sew it as that is also a craft I have practice in, though granted not everyone who buys this kit will be as comfortable with a sewing needle. The two swatches of fabric provided is also quite prone to fraying, and is quite thick and canvas-like. So, knowing that the awning is a big feature of Lotus Tower, I decided I could do better:
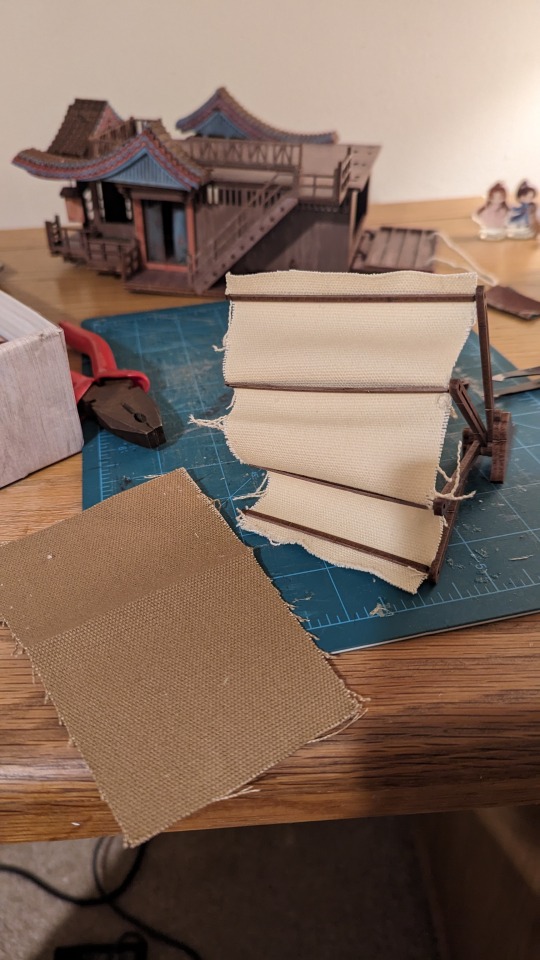
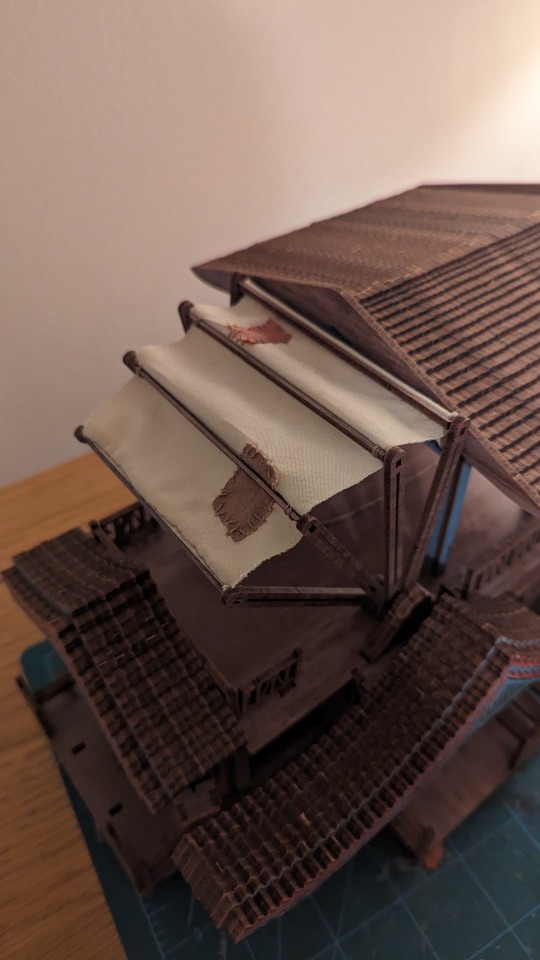
On the left is the provided fabric, and on the right is my own material (an old blouse that I never wore, with patches dyed with my promarker pens).
After that, things should've been an easy home run, as all I had to do was affix the wheels to their axis points and put the horses together. However, quite unfortunately, one of the wheels hadn't been cut out in my kit. I had to cut it out myself with a coping saw, a Stanley knife and much patience😅

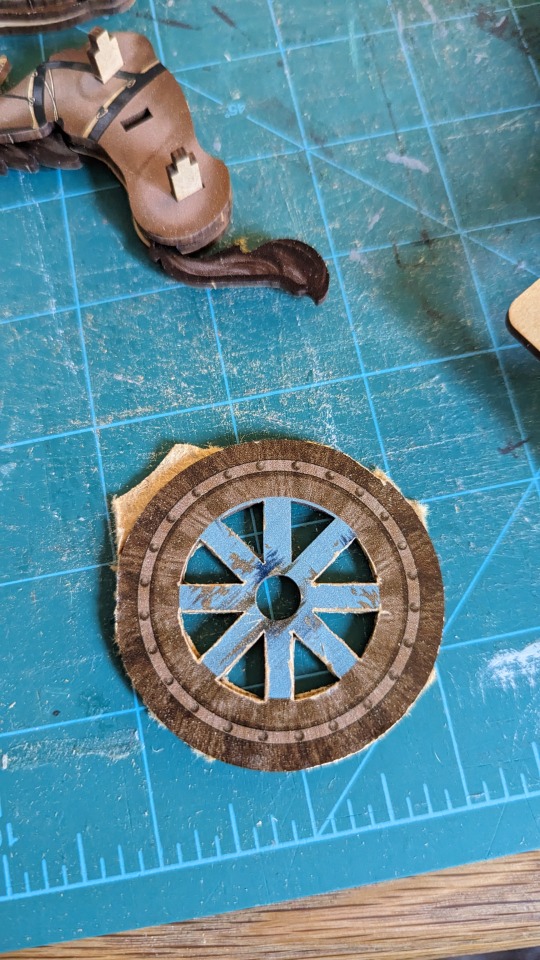
It came out looking rough, but nothing a little sanding and a touch up with my promarkers couldn't fix. I also eventually glued the wheel caps to the axis to prevent the wheels popping off every time I touched it, and they all still spin fine (minus the one I had to cut myself, that one's a little sticky😅). Then came the horses, and I was done!
Or so I thought. "Don't you think it looks a little too brown?" said my detail-obsessed brain. "We could do... more...."
And so I did.
My additions:
I used scraps coloured by my blue marker to create the beams of the house, and later coloured the fence posts red.
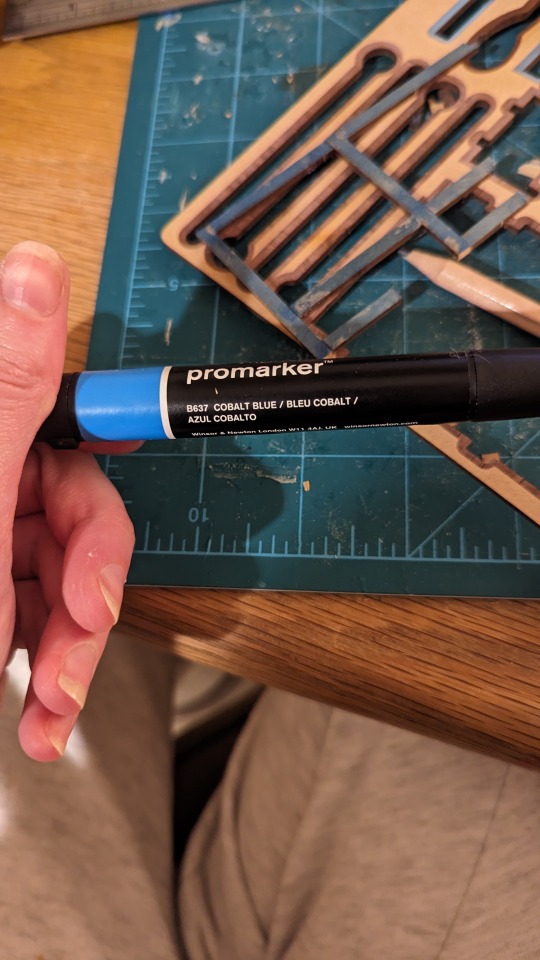
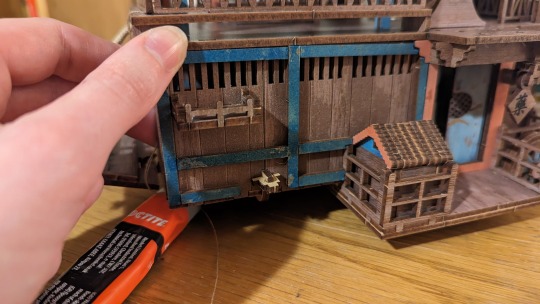
I made a second sail to hand under the stairs.

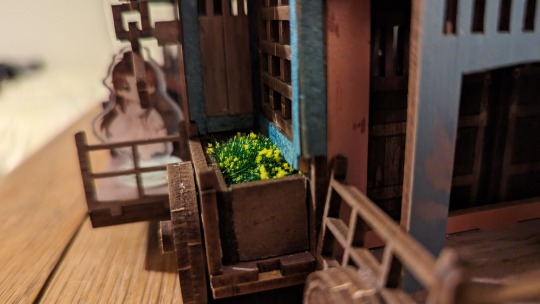
I created a second planter box (again, from the scraps and coloured with promarkers - two sets of flowers were included in the kit, so I could put one in each planter.)

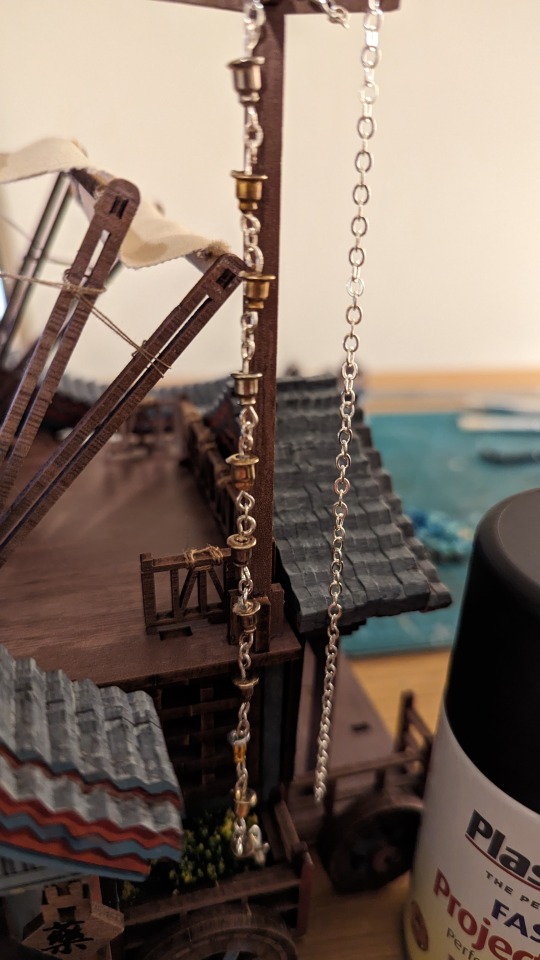
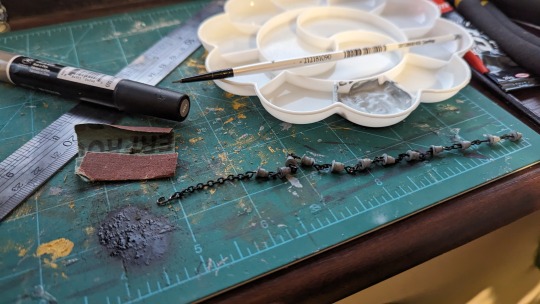
And I even created a rain chain using old earring backs, jewellery findings and a chain, spray painted matte black and then painted blue-grey.
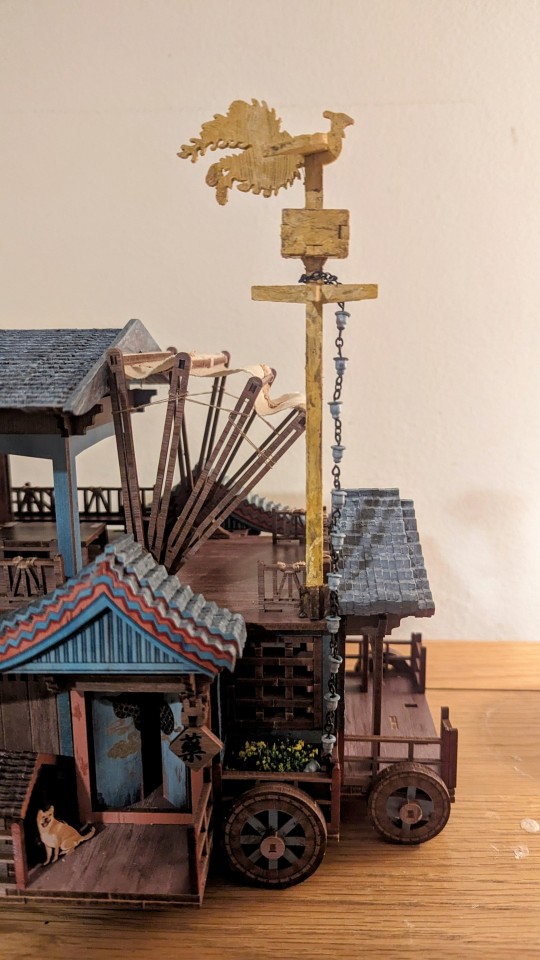
To colour the roofs, I likewise painted them a light blue-grey (/brown for Hulijing's kennel), then used a darker blue promarker to roughly add in texture.
I painted the weather vane, and used scraps to add in its missing two cardinal points.
And then finally, I made a winch for the rear wall! It's also easy to turn with the roof on, so I'm very pleased even though it's a little rough looking 😅
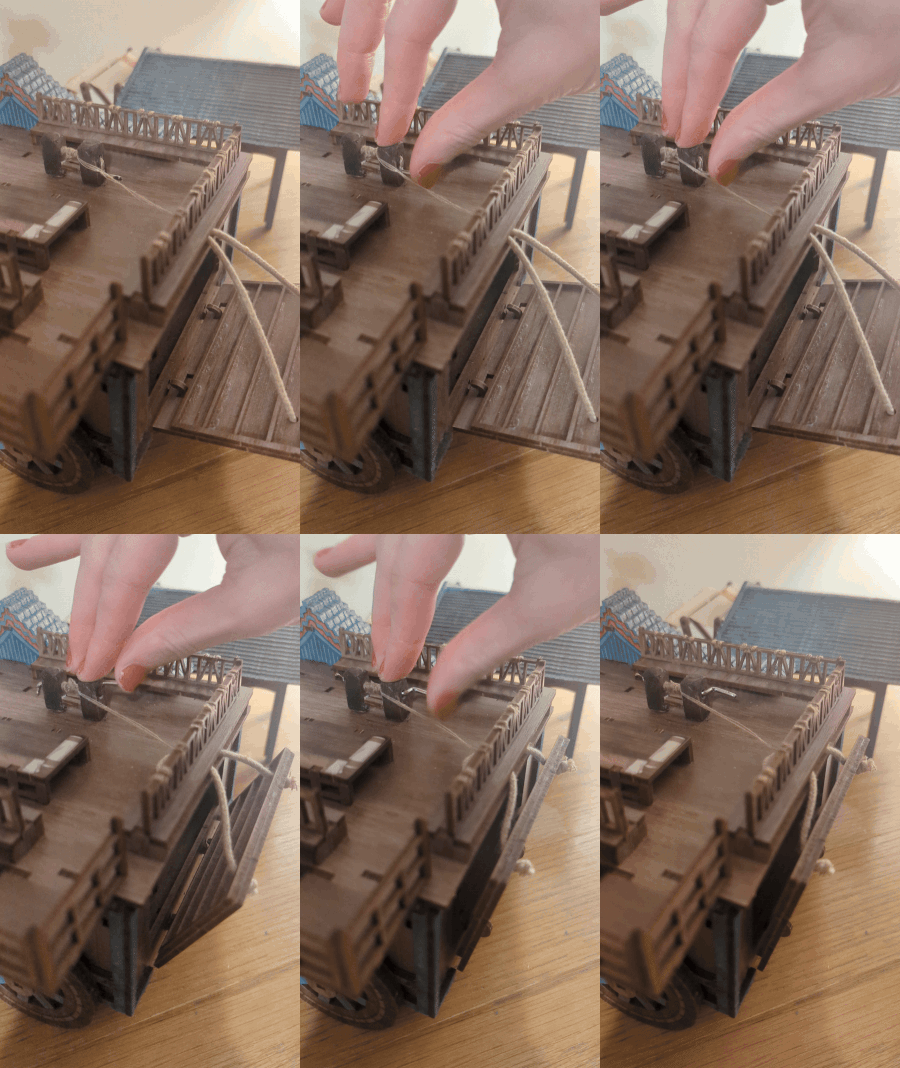
Had to gif my video clip because tumblr said boo no to more than one :(
And that's it, that's my latest build! I found this kit very fun, loved the process and seeing Lotus Tower come to life. I also loved adding in all the details to make it just that bit more accurate to the show. My only true criticisms are 1) small design oversights with the base wood colour being a tad too dark imo; the missing arms on the weather vane; and no second flowerbed (although I may be being a tad too pedantic about it 😅). 2) The fact that one of the wheels in my kit didn't get cut out properly (a quality check issue).
Obviously, I made the choice to use a different material than the fabric included so I can't speak to how satisfactory it is. However, if I were ever in the position to give IQiYi direct feedback, I'd suggest they include thinner fabric, and paint (or paint suggestions, as I know model paints aren't usually allowed through customs in these kinds of kits) for the roofs, because (by way of how they're constructed) they're just raw edges of the reinforced card parts - completely uncoloured, despite being a very visual element of the piece.
Thank you for reading this far lol Keep an eye out for more art and craft posts! (I have a Siji Manor set update coming shortly 👀)
#mysterious lotus casebook#lotus tower#莲花楼#lian hua lou#model kit#model building#my builds#nikkidraws#iqiyi merch#mlc merch#mysterious lotus casebook merch#arts and crafts#li lianhua#li xiangyi#lian hua lou merch#lhl merch#now where do i keep this thing
255 notes
·
View notes
Text
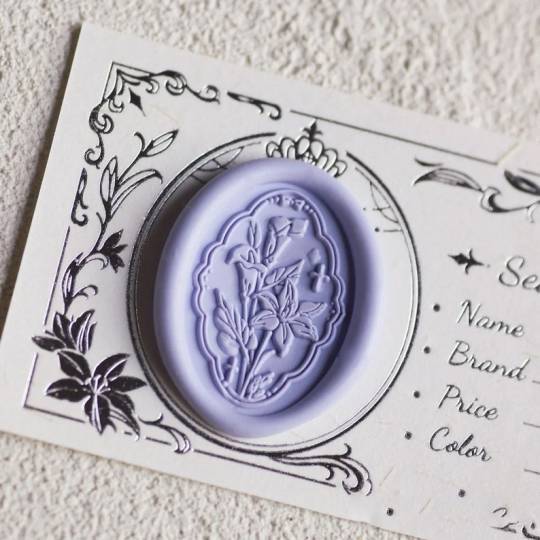
Calla lily Wax Seal Stamp Kit by Livelifeandworld
#Livelifeandworld#wax seal stamp#wax seal stamp kit#craft kit#calla lily#flower#stationery#craft supplies#art supplies#craft#letter writing#letter
109 notes
·
View notes
Text

I did more embroidery 💖 I'm still working on the beading before I mount it in a frame.b
#sirenstella#penguinonfire#art#van gogh#embroidery#embroidery kit#crafting#crafts#craft#hobbies#hobbycollector#my hobby#beadwork#needlework
125 notes
·
View notes
Text
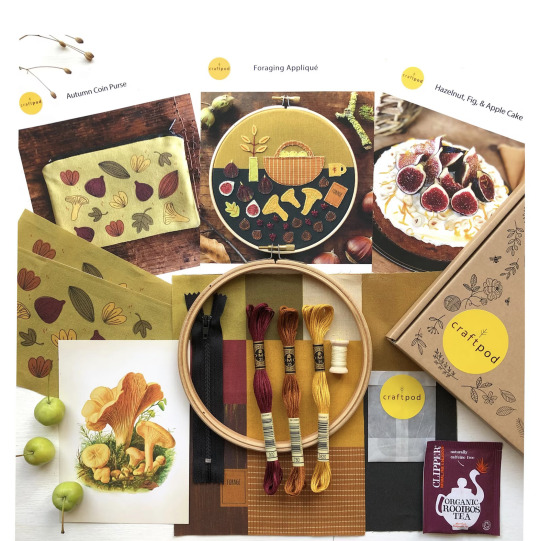
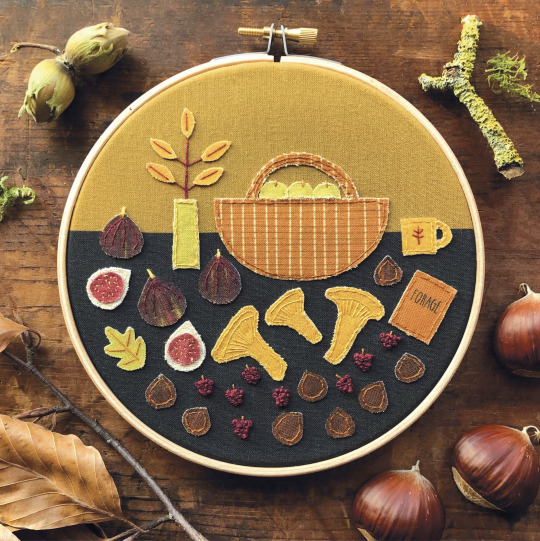

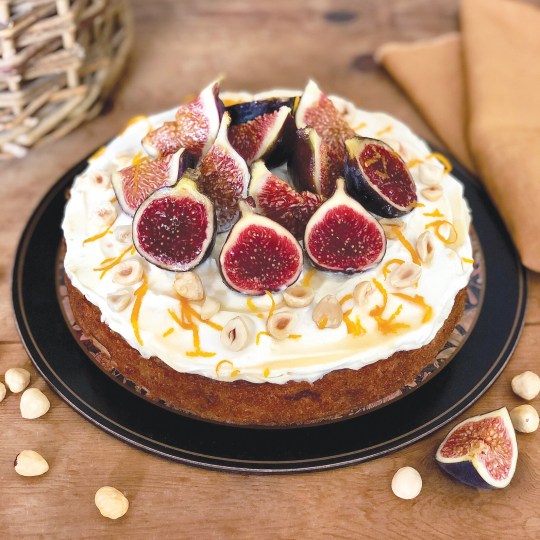
Autumn Foraging Themed Embroidery Kit from CraftpodExtras
The theme for the Autumn 2022 Craftpod is ‘FORAGE’. You will receive two cosy stitching projects to nourish you as the nights draw in. The design of the first project is of a foraging basket, and the food and foliage which has been collected in it. This project uses appliqué and embroidery which is stitched in a 6 inch hoop onto organic printed calico. We’ve included colours and textures for you to cut out to arrange on your foraging table and in your basket. You can have fun with this and come up with your own designs, or follow the suggested pattern shown. In addition, you could stitch little pieces of found twigs or dried foliage onto your hoop. The second project is a handy little lined zip-up coin purse made from printed fabric designed by Immi especially for this box. It becomes just the right size for coins and a payment card to fit inside. We’ve also included a recipe card for a yummy Hazelnut, Fig, and Apple Cake. This is a deliciously moist and nutty autumnal cake. You could add a teaspoon of ginger if you like a little extra warmth, or swop the figs out for pears. The recipe uses a cream cheese frosting, but you could alternatively enjoy it warm with custard, or a dollop of Greek yoghurt drizzled with honey. You’ll also find a gorgeous vintage Chanterelle mushroom postcard, and of course tea to enjoy with your cake!
#autumn#fall#embroidery#embroidery kit#sewing#sewing kit#crafts#crafty#autumn art#fall art#fall baking#autumn baking#foraging
82 notes
·
View notes