#Cpu stress test temperature
Text
Cpu stress test temperature

Cpu stress test temperature android#
Cpu stress test temperature software#
Cpu stress test temperature windows 7#
However, since Intel validates their thermal specifications at a steady 100% TDP, it's most appropriate to select utilities that don't overload or underload the CPU. This article provides some excellent comparisons.
Cpu stress test temperature software#
Since most users test their rigs without a sense of scale for power and temperature, they can't compare apples to apples, especially when combined with major variables such as differences in ambient temperature, hardware configurations and software utilities. Otherwise, great work! I was very pleased to read this article!Ģ0741319 said:As the author of the Intel Temperature Guide - I can fully appreciate how much work went into creating this outstanding article, which has been sorely needed! The only utilities I've ever found that come as close as possible to 100% TDP are Prime95 v26.6 Small FFT's as a steady workload for thermal testing, and Asus RealBench as a fluctuating workload for stability testing.Īlthough the topic of Prime95 (with and without AVX) was covered, I would like to have seen RealBench included in your test suite,since it's widely accepted as an excellent utility for testing overall system stability, and uses a realistic AVX workload. Nevertheless, our results are very similar. The Intel Temperature Guide differs in its approach toward the topic of processor Core temperatures and cooling with respect to Intel's TDP specifications, and distinguishes between steady workloads for thermal testing versus fluctuating workloads for stability testing. This article provides a perspective and some excellent comparisons. In addition it also displays the memory utilization.As the author of the Intel Temperature Guide - I can fully appreciate how much work went into creating this outstanding article, which has been sorely needed! It allows you to view information from Core Temp rightįrom the Media Center interface using your remote.
Cpu stress test temperature windows 7#
You can download Core Temp Gadget and CoreTempMC from the Add Ons page.ĬoreTempMC is a Windows Media Center add-on for Windows 7 and Vista. Among these improvements the gadgetĬan be resized and the information text above the readings can be hidden if so desired. The readings are now color coded and they are user adjustable from the Options screen. The new version includes a graph view, listing processor load or temperature as well as memory utilization. Recently I've released a new version of the Core Temp Gadget, completely overhauled.
Cpu stress test temperature android#
If you have an Android or Windows Phone device, now you can! Click here for more information.Ĭore Temp Gadget and Windows Media Center addon for Windows 7 and Vista. Have you ever wished that you could keep an eye on your systems while you were out of home or the office? Processor: Intel, AMD or VIA x86 based processor. Operating System: Microsoft Windows XP, Vista, 7, 8, 10, 2003 Server, 2008 Server, 2012 Server, 2016 Server. If you are a developer and you are interested in creating your own addition, please see the developer's page. You can find our plug-ins and add-ons here. A complete list of supported processors is available.Ĭore Temp is easy to use, while also enabling a high level of customization and expandability.Ĭore Temp provides a platform for plug-ins, which allows developers to add new features and extend its functionality. Processors by Intel, AMD and VIA are supported. This feature is supported by all recent x86 processors. The DTS provides more accurate and higher resolution temperature readings than conventional onboard thermal sensors. All major processor manufacturers have implemented a "DTS" ( Digital Thermal Sensor) in their products.
0 notes
Text
Cpu stress test temperature

#Cpu stress test temperature Pc
#Cpu stress test temperature download
This is a cooling system built with low core overclocking in mind. Turning on Cryo mode we watched the stress test run for the whole five minutes without throttling while package temperatures s itting between 120 and 130 degrees Fahrenheit. In standby mode with the Peltier cooler turned off and running like a traditional CLC AIO the CPU throttled after a couple minutes under max load. Then we conducted some stress t esting using the Intel Extreme Tuning Utility. į irst we used Intel’s Extreme Tuning Utility to raise the VCore voltage to 1.35. Most of the time you will be working in Cryo mode, which takes into account ambient temperatures and makes sure to keep it above the dew point. Be careful if you decide to try this as decreasing temperatures beyond the dew point can cause condensation. To see how far below ambient temps we could achieve, we opened the Cyro Cooling Technology utility and set it to “unregulated,” for max cooling power and we saw temps dip all the way down into the thirties Fahrenheit. It does, however, have a noticeable hum – similar to that of a mini-fridge. It ensures a consistent high liquid flow rate, allowing for rapid and efficient heat dissipation. The M元60 is built with a second-generation pump, that is designed to mimic the performance of motors you’d normally see in much more complex custom loop builds, while remaining compact and easy to install.
#Cpu stress test temperature download
Intel Cryo Cooling Technology is a unique combination of hardware, software, and firmware working in unison to provide sub-ambient cooling, maximizing performance and temperature control without introducing new potential hazards. After completing a simple download you’ll have precise CPU temperature feedback and control, so you can keep your system operating at peak levels. Traditionally a cooler can’t reach sub-ambient temperatures without using liquid nitrogen or other risky strategies.
#Cpu stress test temperature Pc
Most CPU cooling solutions are limited by the ambient temperature of the room the PC is in. It ’s made with an extra-large copper plate for greater heat transfer efficiency, while also preventing fluctuations in temperature that can cause condensation. The CPU chamber is surrounded by an airtight rubber fence that allows for much greater control of the processor’s working environment to ensure steady performance. It works with a n Intel designed circuit board to monitor not only temperature but also humidity, reducing CPU temperatures while also preventing potentially catastrophic condensation. The water block is built with an integrated TEC unit to help regulate temperatures. Let’s take a look at where the rubber meets the road, or where the copper plate meets the thermal paste meets the CPU. The system itself is comprised of a 15.5” x 4.7” radiator complete with three 120mm fans, a 2 nd generation pump, and of course the highly advanced CPU water block. It comes with everything you need for a quick and easy installation. The sleek aluminum finish feels great, and looks great with just about any PC design you could imagine. It ’s been designed to give you all the effectiveness of a carefully planned open loop liquid cooling system, in the form of a compact and convenient AIO. Powered by Intel Cryo Cooling Technology, it’s the world’s first mass produced sub -ambient AIO that’s compatible with current gaming cases. For those who are looking to achieve the most from their machines, it is common knowledge that one of the great limitations your system must negotiate is heat.įor the streamers, the overclockers, the professionals, the gamers looking for every edge they can find, CoolerMaster has partnered with Intel to develop a clean effective solution, the MasterLiquid M元60 SUB-ZERO. Most users will never know the frustration, the sleepless nights spent obsessively searching for the perfect solution.
0 notes
Text
Cpu stress test temperature

#Cpu stress test temperature how to
#Cpu stress test temperature install
#Cpu stress test temperature 64 Bit
#Cpu stress test temperature software
Hopefully it is, and I just haven't been able to find it. Or any other solution that fits my four criteria would be great too!Īgain, I'm really surprised a program that fits the four criteria I listed is not widely available.
#Cpu stress test temperature how to
If anyone can provide a step-by-step guide for dummies on how to do so (or provide a built image that also includes temp monitoring software), that would be ideal building it with BartPE would not work because BartPE is 32 bit.
#Cpu stress test temperature 64 Bit
There is a native 64 bit version of intelburntest for winpe ( ), but despite some searching, I have no clue how to build a winpe image that includes this program. I would prefer to use something based on linpack (e.g., intelburntest) because it seems to do a great job in a short amount of time. I am very surprised the sort of tool I am looing for is not widely available it seems like an analogue to memtest86+ for cpu testing.
#Cpu stress test temperature install
I have tried several bootable cd/dvds without success including, inquisitor, ubuntu 圆4 live cd (couldn't install prime95, various errors, I'm far from fluent in linux), ultimate boot cd (doesn't do multicore does multiprocessor, not helpful for me), and a bartpe build that included prime95 (no temp monitoring software, not 64bit, can't run multiple instances). I have been scouring the internet for the past 2 days and have not been able to find anything that fits all of these criteria. I really need to be able to stress test multicore pcs prior to installing operating systems. The only utilities I've ever found that come as close as possible to 100% TDP are Prime95 v26.6 Small FFT's for thermal testing, which is a steady workload, and Asus RealBench for stability testing, which is a fluctuating workload.Īlthough the topic of Prime95 (with and without AVX) was covered, I would like to have seen RealBench included in your test suite, as it's widely accepted as an excellent utility for testing overall system stability, and uses a realistic AVX workload.I am looking for a cpu stress testing (burn in) program that fulfills the following criteria:ģ) accompanied by temperature monitoring program However, since Intel validates their thermal specifications at a steady 100% TDP, it's most appropriate to select utilities that don't overload or underload the CPU. This article provides some excellent comparisons.
#Cpu stress test temperature software
Since most users test their rigs without a sense of scale for power and temperature, they can't compare apples to apples, especially when combined with major variables such as differences in ambient temperature, hardware configurations and software utilities. Otherwise, great work! I was very pleased to read this article!Ģ0741319 said:As the author of the Intel Temperature Guide - I can fully appreciate how much work went into creating this outstanding article, which has been sorely needed! The only utilities I've ever found that come as close as possible to 100% TDP are Prime95 v26.6 Small FFT's as a steady workload for thermal testing, and Asus RealBench as a fluctuating workload for stability testing.Īlthough the topic of Prime95 (with and without AVX) was covered, I would like to have seen RealBench included in your test suite,since it's widely accepted as an excellent utility for testing overall system stability, and uses a realistic AVX workload. Nevertheless, our results are very similar. The Intel Temperature Guide differs in its approach toward the topic of processor Core temperatures and cooling with respect to Intel's TDP specifications, and distinguishes between steady workloads for thermal testing versus fluctuating workloads for stability testing. This article provides a perspective and some excellent comparisons. As the author of the Intel Temperature Guide - I can fully appreciate how much work went into creating this outstanding article, which has been sorely needed!
0 notes
Text
I always assumed CPU cooling was like, a best practice thing, like you could get away with no real cooling for maybe 10-15 minutes as long as you weren't really doing anything besides booting up to your desktop and clicking around, or like you could get away with light work if you had a decent heatsink, but you really need to have active cooling if you're doing any real work.
The raspberry pi is like this: you have a little baby heatsink with some fins and that's it. That's all you'll ever need unless you deliberately stress test the thing.
Turns out no: a real desktop CPU will hit "gives first degree burns on immediate contact with flesh" temperatures within about 10 seconds of sitting in the bios.
489 notes
·
View notes
Text
Overclocking the Intel Core 2 Extreme X6800 SL9S5: Tips and Tricks for Maximizing Performance
If you’re a computing enthusiast or a nostalgic techie, you might remember the Intel Core 2 Extreme X6800 SL9S5 as a groundbreaking piece of hardware from the mid-2000s. While it may seem like a relic of the past, the X6800, with its impressive 2.93 GHz clock speed and unlocked multiplier, remains a fascinating candidate for overclocking. Whether you’re looking to squeeze out a bit more performance from your old system or simply curious about overclocking an iconic processor, this guide will walk you through the steps and considerations for maximizing the potential of your Intel Core 2 Extreme X6800 SL9S5.
Understanding the Intel Core 2 Extreme X6800 SL9S5
Before diving into the overclocking process, it’s essential to understand the core features of the X6800. Released in 2006, this processor was a part of Intel’s Core 2 Extreme series and was known for its performance and flexibility. With a base clock speed of 2.93 GHz, a 4 MB L2 cache, and an unlocked multiplier, it was designed for enthusiasts who wanted to push their systems beyond standard specifications.
Preparation: What You Need to Know
1. Cooling Solutions: Overclocking generates additional heat, so a robust cooling solution is paramount. The stock cooler is generally insufficient for significant overclocking. Invest in a high-quality aftermarket air cooler or, for more advanced setups, a liquid cooling system.
2. Power Supply: Ensure that your power supply can handle the increased power demands. Overclocking places additional strain on the power components, and a reliable, high-wattage PSU is crucial.
3. Motherboard: A motherboard with a strong reputation for stability and overclocking support is essential. Look for motherboards with advanced BIOS options and good cooling around the CPU socket.
4. Memory: Higher overclocks can stress your system memory. Ensure you have high-quality RAM and consider increasing its voltage or loosening its timings if necessary.
Steps to Overclock the X6800 SL9S5
1. Enter BIOS/UEFI Settings
To begin overclocking, restart your computer and enter the BIOS/UEFI settings. This is usually done by pressing a specific key during startup, such as DEL, F2, or ESC, depending on your motherboard manufacturer.
2. Adjust CPU Multiplier
The Intel Core 2 Extreme X6800 has an unlocked multiplier, which allows for more straightforward adjustments compared to processors with locked multipliers. Increase the multiplier incrementally to achieve a higher clock speed. For instance, if your base clock is 2.93 GHz and you set the multiplier to 10x, you’ll achieve a 2.93 GHz speed. Raising it to 11x will increase your speed to 3.22 GHz.
3. Modify Front Side Bus (FSB) Frequency
In addition to the multiplier, you’ll also need to adjust the Front Side Bus (FSB) frequency. Increasing the FSB will raise the overall clock speed. For example, if you set the FSB to 300 MHz, combined with a multiplier of 10x, you’ll reach a clock speed of 3.00 GHz. Be cautious with FSB adjustments, as it also affects other system components like RAM and PCIe slots.
4. Fine-Tune Voltage Settings
To maintain stability at higher clock speeds, you may need to increase the CPU voltage (Vcore). Start with small increments to avoid excessive heat and potential damage. It’s crucial to monitor temperatures closely after making changes. Higher voltages can lead to increased temperatures and stress on the processor.
5. Test Stability and Monitor Temperatures
After each adjustment, save the BIOS settings and boot into your operating system. Use stability testing software such as Prime95, AIDA64, or IntelBurnTest to stress test the CPU. Monitor temperatures with tools like HWMonitor or Core Temp to ensure they remain within safe limits (typically below 70–75°C under load).
6. Iterate and Adjust
Overclocking is often an iterative process. If your system crashes or shows instability, you may need to adjust settings or revert to previous configurations. It’s a balance between performance gains and system stability. Incremental adjustments and thorough testing are key to achieving a stable overclock.
Tips for Successful Overclocking
1. Start Small: Begin with modest increases in clock speeds and voltages. Small steps help in understanding the limits of your system and ensure stability.
2. Monitor Temperatures: Always keep a close eye on temperatures. Overheating can lead to thermal throttling, reduced performance, and potential hardware damage.
3. Stability is Key: Prioritize system stability over achieving the highest possible clock speeds. A stable system with slightly lower speeds is better than an unstable one with higher speeds.
4. Benchmark Performance: Use benchmarking tools to measure the performance improvements gained from overclocking. This helps you gauge the effectiveness of your changes.
5. Documentation: Keep detailed notes of your settings and changes. This helps in troubleshooting issues and understanding which adjustments yield the best results.
Conclusion
Overclocking the Intel Core 2 Extreme X6800 SL9S5 can be a rewarding experience, providing a tangible performance boost to a classic processor. With its unlocked multiplier and robust design, the X6800 is well-suited for enthusiasts looking to squeeze out extra performance. However, it’s crucial to approach overclocking with care, prioritizing stability and cooling to ensure a safe and successful experience.
Whether you’re reviving an old system or exploring overclocking for the first time, following these tips and guidelines will help you get the most out of your Intel Core 2 Extreme X6800 SL9S5. Enjoy the thrill of pushing the limits and relive the excitement of high-performance computing from an iconic era in tech history!
Want to buy SL9S5 (Intel Core 2 Extreme X6800) in bulk?
The Intel Core 2 Extreme X6800 (SL9S5) is a high-end processor from the Core 2 series, released in 2006. It features a 2.93 GHz clock speed, 4 MB of L2 cache, and supports a 1066 MHz front-side bus. Known for its unlocked multiplier, it allows for advanced overclocking. This processor is well-suited for enthusiasts and legacy systems. When purchasing in bulk from VSTL, ensure to verify stock availability, check compatibility with your systems, and consider the support and warranty options provided for these vintage components.
0 notes
Text
Siemens SIMATIC S7-300: Enhance your Automation Efficiency
Overview of Siemens SIMATIC S7-300
The Siemens SIMATIC S7-300 is a modular PLC system designed to cater for various kinds of automation tasks. With its modular design, one can customize it according to one's own requirements, hence making it suitable for small applications and big elaborate industrial processes at the same time. What cuts the edge about this series includes its high performance, flexibility and the fact that it is easy to integrate with other systems used in automation.

Key Features
Modularity: The S7-300 allows the user to expand or customize it easily due to its modular design. This means individuals can choose between different CPU modules, power supply modules or I/O modules, to create a system tailored to their needs.
High Performance: With some powerful processors, it’s easy for S7-300 to perform intricate industrial automation functions. This enhances efficiency and reliability due to its high processing speeds and large capacity memory.
Integrated Communication: The interface S7-300 aids different communications systems like PROFINET, PROFIBUS, MPI making it possible for the equipment to harmoniously determine and interconnect with other tools and networks in the industrial network.
Scalability: The S7-300 is intended to grow with your needs. Whether you are commencing with a small project or managing one that is large-scale, the system can be advanced through the addition of more modules to suit necessary demands.
User-Friendly Programming: The STEP 7 software from Siemens can be used to program the S7-300, providing PLC configuration, programming, testing and maintenance tools. Extensive libraries and user-friendliness facilitate simple and fast programming.
Robustness and Reliability: Made to tolerate tough industrial environments, S7-300 is highly resistant to electromagnetic interference, temperature variations and mechanical stress, so it remains dependable even in extreme conditions.
Benefits of Using Siemens SIMATIC S7-300
Enhanced Productivity: The S7-300 increases overall productivity and efficiency in industrial processes by automating complex and repetitive tasks. Its quick response times and smooth operations are guaranteed by high-speed processing capabilities.
Cost-Effective: The S7-300, being modular and scalable in design, is a cost-effective solution for many uses. Minimizing initial costs for investors, it allows a user to begin with a simple set-up before progressing to a complex one if need be.
Improved Quality Control: Using the S7-300 for automation increases accuracy and repeatability in manufacturing operations thereby improving the quality of items and decreasing fluctuation of quality.
Flexibility: Various industries such as manufacturing, chemical processing, food and beverage, automotive, and more can use S7-300 due to its versatility. It is a highly flexible automation solution because of its adaptability to different applications.
Future Proof: With continuous updates on products and software, Siemens confirms that the S7-300 continues to work well with modern technologies and industrial standards. As a result, long-term sustainability and support of your automation systems are assured.
Applications of Siemens SIMATIC S7-300
Manufacturing: The S7-300 finds widespread use in manufacturing processes for tasks that include assembly line automation, machine control, and process monitoring, and its reliability and performance make it suited to high-demand production environments.
Process Control: In sectors such as chemical processing and pharmaceuticals, the S7-300 is essential for accurate control of elaborate procedures and for protection and adherence to strict legislation.
Infrastructure: The S7-300 is used in infrastructure projects like water treatment plants, energy management systems, and building automation in which it aids in optimizing operations to enhance productivity.
Transportation: S7-300 goes from managing traffic systems to automating train control as well as it performs its function of smooth running as well as safe operation of transportation networks that contribute to enhancing some dependability and safety for passengers.
Conclusion
The Siemens SIMATIC S7-300 is a reliable and versatile Programmable Logic Controller (PLC) that is perfect for various industrial automation applications. Many industries opt for it because of its modularity, smooth integration, and superior performance than the rest. Any business investing in such a device will increase its productivity levels by far, increase the quality of products and services as well as align future operations with ever emerging technology.
#siemens simatic s7 300#simatic s7 300#siemens s7 300#plc siemens s7 300#Siemens Automation Products#Siemens Industrial Automation#Siemens
0 notes
Text
The Design Insight of A Peritoneal Dialysis Machine Based on Forlinx T113 SoM
Product Description
The peritoneal dialysis machine is an advanced medical device designed for performing peritoneal dialysis, a treatment for acute and chronic renal failure. This process involves infusing dialysate into the patient's abdominal cavity, where the peritoneum serves as a semipermeable membrane to exchange solutes and fluids, effectively removing metabolic waste and toxins while correcting fluid and electrolyte imbalances. The device comprises a main unit, control unit, and heater, available in both powered and gravity-driven models.

This technology significantly enhances the quality of life for patients, allowing them to connect the peritoneal dialysis catheter to an automated machine before sleep. The machine performs dialysis treatments overnight, typically for 8 to 10 hours. In the morning, patients can disconnect the catheter and continue their daily activities seamlessly.
Hardware Key Components
Central Control Unit: Manages the operation and data processing of the device. Modern systems feature intelligent controls that monitor and record real-time parameters, such as infusion volume, dwell time, drainage time, outflow volume, and dialysate temperature.
Heater: Ensures the dialysate is warmed to the optimal temperature, improving efficiency and patient comfort.
Power Unit: Facilitates the delivery and drainage of dialysate to and from the patient's peritoneal cavity.
Sensors and Monitoring System: Utilizes various sensors to ensure real-time monitoring and safety of the dialysis process.
User Interface: Provides an intuitive platform for setting parameters, monitoring status, and receiving alerts.
Main Challenges in Hardware Design
Precise Control and Monitoring: Demands accurate control and monitoring of parameters like temperature, pressure, and flow rate, requiring high hardware accuracy and stability.
Portability and Compact Design: Essential for home-based dialysis, necessitating a balance between size, weight, and performance.
Safety and Reliability: Critical for medical equipment, requiring thorough consideration of electrical and mechanical safety, and prevention of cross-contamination.
Cost-effectiveness: Balancing performance, safety, and reliability with reduced hardware costs to alleviate patient financial burdens and enhance market competitiveness.
Recommended Hardware Platform: Forlinx T113 SoM

The T113 SoM stands out as a highly competitive solution for addressing the hardware challenges of peritoneal dialysis machines. Here are five reasons for its recommendation:
High-Performance Computing: Integrates dual-core Cortex-A7 CPU, 64-bit XuanTie C906 RISC-V DSP with clock speeds up to 1.2GHz, providing robust computing power for precise control and real-time monitoring.
Extensive Connectivity: Offers diverse connectivity options (USB, SDIO, UART, SPI, CAN, Ethernet) for flexible data exchange and communication, enhancing compatibility and future upgrade potential.
Multimedia Support: Capable of decoding and encoding multiple formats with various display and audio interfaces, improving the user interface and feedback experience.
Stable and Reliable Performance: Undergoes rigorous testing for environmental stress and long-term stability, ensuring consistent operation and high patient satisfaction.
Cost-effective: Features compact, low-power consumption design ideal for portable devices, with competitive pricing to reduce overall machine costs and ease patient financial burdens.
In conclusion, the T113 SoM's combination of high performance, rich connectivity, multimedia support, compact size, and reliable operation makes it an excellent core hardware solution for peritoneal dialysis machines. It effectively addresses the need for control, monitoring, and user experience while reducing costs and enhancing market competitiveness.
Originally published at www.forlinx.net.
0 notes
Text
How to build a Desktop PC for Home?

Building a desktop PC for home use can be a fun and rewarding experience. Here's a basic guide to help you get started:
Define Your Needs: Determine what you'll primarily use the PC for. Is it for web browsing, office work, gaming, or content creation? Your needs will dictate the components you choose.
Select Components: Here are the key components you'll need:
Processor (CPU): Choose a CPU from Intel or AMD based on your budget and performance requirements.
Motherboard: Ensure compatibility with your chosen CPU and other components. Consider factors like expansion slots, RAM support, and connectivity options.
Memory (RAM): Aim for at least 8GB for general use. For more demanding tasks like gaming or video editing, consider 16GB or more.
Storage: Decide between a traditional Hard Disk Drive (HDD) or a Solid State Drive (SSD). SSDs offer faster performance but are typically more expensive per GB.
Graphics Card (GPU): Necessary for gaming or graphics-intensive tasks. For basic home use, integrated graphics on the CPU might suffice.
Power Supply Unit (PSU): Choose a reliable PSU with sufficient wattage to power your components.
Case: Select a case that fits your motherboard and has good airflow for cooling.
Additional Components: Consider peripherals like a monitor, keyboard, mouse, and speakers if you don't already have them.
Assembly:
Start by installing the CPU and CPU cooler onto the motherboard according to the manufacturer's instructions.
Install RAM into the appropriate slots on the motherboard.
Install storage drives (HDDs/SSDs) and connect them to the motherboard.
Install the motherboard into the case and connect all necessary cables (power, data, front panel connectors, etc.).
Install the GPU, if you have one, into the appropriate PCIe slot on the motherboard.
Install the PSU into the case and connect all power cables to the motherboard, GPU, and other components.
Double-check all connections and ensure everything is securely fastened.
Operating System Installation: Once your hardware is assembled, you'll need to install an operating system (e.g., Windows, Linux). Follow the installation instructions provided with your chosen OS.
Drivers and Updates: After installing the OS, download and install the latest drivers for your hardware components from the manufacturers' websites. Also, ensure your OS is up to date with the latest patches and updates.
Testing: Boot up your PC and ensure everything is functioning correctly. Run some stress tests to check for stability and monitor temperatures to ensure your cooling solution is adequate.
Personalization: Customize your desktop with your preferred settings, software, and applications.
Remember to take your time during the build process and consult guides or tutorials if you encounter any difficulties. Building a PC can be a learning experience, so don't hesitate to ask for help if needed!
0 notes
Text
Arctic Liquid Freezer III: Powerful Cooling for CPUs
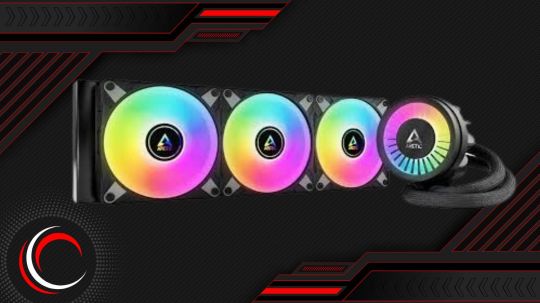
Ready Right Out of the Box – Simple to Install
The Arctic Liquid Freezer III comes with push-style radiator fans already mounted, making it ready for use right away. There is just one cable that has to be attached to the motherboard since the fan cables are incorporated into the hose jackets. You will get the MX-6 thermal compound with your order, so everything you need for a simple and rapid installation.
Arctic Liquid Freezer III, Future-Proof Accordance
Both AMD and Intel sockets are compatible with the Arctic Liquid Freezer III. In the future, Intel plans to introduce the new Arrow Lake CPUs on the LGA1851 socket. Customers in the Arctic don’t have to worry about buying new cooling in addition to the new CPUs. Complete compatibility is what we promise. With Intel’s new LGA1851 socket, everything Liquid Freezer III is compatible without restriction.Image credit to Arctic
Superb Work
The Liquid Freezer III clearly outperforms the competitors in all price ranges according to independent testing, especially given its exceptional performance. The Arctic Liquid Freezer III demonstrates its full strength in noise-normalized testing, beating several rivals with its strong but silent performance.Image credit to Arctic
Intel LGA1700 and LGA1851 Contact Frame
The CPU is distorted by Intel’s Independent Loading Mechanism (ILM), which presses the CPU into the socket twice with more than 40 kg of force. Pressure builds up as a result of the PCB, die, and solder layer between the die and integrated heat spreader (IHS). When the heat load is significant, this might cause long-term issues. The ARCTIC mounting frame is fast and simple to install, significantly lowers the mechanical pressure on the CPU, prevents the CPU from deforming, and enables the cooler to be bolted into the CPU’s backplate. This minimises mechanical stress on the CPU and mainboard, maintains constant cooling performance, and makes installation simple and fast.
Strong and Quiet VRM Fan
When coupled with CPUs that use a lot of power, motherboard voltage converters often operate at their highest temperature. The updated VRM fan on the Arctic Liquid Freezer III makes up for the absence of airflow from a tower cooler. When there is inadequate VRM cooling, poor airflow, or overclocking, the 60 mm PWM-controlled fan provides almost quiet cooling of the socket region. This gives the voltage converters a longer service life and allows for a continually greater load.
Enhanced, Internally Developed Water Pump
A newly designed PWM-controlled water pump that has been further tuned for both performance and noise level comes installed in the Liquid Freezer III. With its longer fin surface and optimised water pipes, the Arctic Liquid Freezer III has an enhanced coldplate that boosts performance without sacrificing silent operation.
Total Command or Basic Command
Two control choices – two connecting cords
Separate regulation:
The radiator fan, VRM fan, and pump may all be operated separately by utilizing a splitter wire with three different connectors. For instance, this makes it possible to manage the VRM fan’s speed separately from the CPU and to use PWM to modify it analogous to the voltage converters’ temperature.
One-stop shop:
Similar to the Liquid Freezer II, this enables one connection to operate the whole machine, with the radiator fans’ speed serving as the output. This makes it simple to manage the pump, VRM, and radiator fans with a single PWM setting.
Installing Native AMD Offset
AMD has been producing Ryzen desktop CPUs utilising a multi-die chiplet architecture for a number of generations. In contrast to Intel CPUs, these processors have a slightly offset hotspot that is situated somewhat below the IHS (Integrated Heat Spreader). Thus, to achieve optimal heat dissipation, the AMD mounting option includes a 5 mm offset.
Better Design for Radiators
By lengthening the fin stack, the 38 mm thick radiator’s cooling surface has been increased by 23%. This permits increased liquid volume in addition to better heat dissipation. As a result, the water cooling system’s heat buildup is slowed down, allowing power and temperature peaks to be efficiently controlled over an extended period of time.
Elevated Static Pressure
ARCTIC is dependent on the well-established P fans, who have won several accolades for their exceptional work. High fin density heat sinks and radiators are an ideal application for the P series. When compared to fans designed for high air circulation, they perform noticeably better because of their high static pressure.
Limited Support for a Small Number of Motherboards
Because certain motherboards include excessive SSD coolers in the M.2_1 slot, they cannot be used with the Arctic Liquid Freezer III. For impacted motherboards, we provide an appropriate M.2 cooler without charging you anything.
Extensive Variety
Image credit to Arctic
The Liquid Freezer III comes in three variations and four distinct sizes, all offering exceptional cooling performance. The A-RGB variants come in both black and white, with digitally programmable lighting for the radiator fans and pump head, while the Black version is entirely black. The Arctic Liquid Freezer III delivers the perfect blend of performance, technology, and style for everyone, with radiator sizes ranging from 240 to 420!
Dependability in Quality
In order to guarantee the durability of their goods, they conduct extended testing in various, sometimes quite harsh environments. They discover ways to continuously enhance their goods for their clients in this manner. Furthermore, the exceptional outcomes of extended testing provide them with the certainty that their goods are exceptional not only in terms of quality but also in terms of longevity. They are glad to transfer this assurance to their clients, which is why they provide a 6-year manufacturer’s warranty.
Read more on govindhtech.com
0 notes
Text
Overclocking Marvels: CPU Coolers for Ryzen 7 58
In the dynamic world of computer hardware, the Ryzen 7 5800X stands out as a powerhouse processor, capable of delivering exceptional performance. However, to unlock its full potential, overclocking becomes a tempting endeavor. In this article, we delve into the realm of overclocking marvels, specifically exploring CPU coolers tailored for the Ryzen 7 5800X.
Understanding Overclocking
Definition and Purpose
Overclocking, the practice of pushing a CPU beyond its factory settings, has gained popularity among enthusiasts seeking enhanced performance. It involves adjusting the clock multiplier and voltage to achieve higher speeds, translating to increased processing power.
Risks and Benefits
While overclocking can yield impressive performance gains, it comes with risks. Increased temperatures and potential hardware damage are concerns. However, with the right cooling solution, these risks can be mitigated.
The Marvels of Ryzen 7 5800X
Key Features
The Ryzen 7 5800X boasts a robust architecture, featuring eight cores and sixteen threads. Its Zen 3 architecture ensures efficiency, making it a top choice for gamers and content creators alike.
Performance Benchmarks
Before diving into CPU coolers, understanding the baseline performance of the Ryzen 7 5800X is crucial. Benchmarks reveal its capabilities and provide a reference point for overclocking gains.
Significance of CPU Coolers
Temperature Management
Efficient cooling is paramount in overclocking. High temperatures can lead to thermal throttling, reducing the effectiveness of overclocking. A reliable CPU cooler ensures temperature stability.
Impact on System Stability
A well-cooled system is a stable system. CPU coolers not only manage temperatures but also contribute to overall system stability, preventing crashes and performance hiccups.
Top CPU Coolers for Ryzen 7 5800X
Air Coolers
Cooler Master Hyper 212 RGB
Known for its affordability and performance.
Direct contact heat pipes for efficient heat dissipation.
Noctua NH-D15
Renowned for exceptional cooling.
Dual tower design with two NF-A15 fans.
Liquid Coolers
NZXT Kraken X63
AIO liquid cooler with customizable RGB lighting.
Advanced pump for efficient heat transfer.
Corsair iCUE H115i RGB Pro XT
High-performance liquid cooling with a 280mm radiator.
Zero RPM mode for silent operation during low loads.
Installation Tips
Air Cooler Installation
Proper installation ensures optimal performance. Follow manufacturer guidelines, ensuring a secure fit and thermal paste application.
Liquid Cooler Installation
AIO liquid coolers require careful installation. Mount the radiator appropriately and secure the pump block, preventing leaks and ensuring longevity.
Overclocking Guide
Step-by-step Process
Adjusting the multiplier and voltage.
Incremental overclocking for stability testing.
Monitoring temperatures during stress tests.
Precautions and Best Practices
Overclocking demands caution. Incremental adjustments, monitoring temperatures, and avoiding excessive voltage are essential for a safe overclocking experience.
Balancing Act: Performance vs. Temperature
Finding the Sweet Spot
Achieving the right balance between performance and temperature is key. Stress testing helps identify stable overclocks without compromising system integrity.
Monitoring Tools and Software
Utilize monitoring tools like HWMonitor or Ryzen Master to keep an eye on temperatures, voltages, and system stability during overclocking.
Real-world Results
User Testimonials
Enthusiasts share their experiences, detailing performance gains and the impact of overclocking on their Ryzen 7 5800X systems.
Before and After Overclocking Comparisons
Visual representations of performance improvements provide a tangible understanding of the benefits of overclocking.
Maintenance Tips
Cleaning and Upkeep
Regular cleaning prevents dust buildup, ensuring optimal heat dissipation. Check for loose fittings and address any issues promptly.
Troubleshooting Common Issues
Be prepared to troubleshoot issues such as system crashes or overheating. Ensure all components are functioning correctly.
Overcoming Challenges
Addressing Overheating
Adjust fan curves, reapply thermal paste, or consider more robust cooling solutions to address overheating issues.
Dealing with System Crashes
Stable overclocks are achieved through careful testing. If crashes occur, revert to default settings and troubleshoot the cause.
The Future of Overclocking
Technological Advancements
As technology evolves, overclocking methodologies will adapt. Stay informed about emerging trends and advancements in cooling solutions.
Emerging Trends
Explore potential developments in cooling technologies, such as improved materials and more efficient heat dissipation methods.
Conclusion
In the pursuit of maximizing the Ryzen 7 5800X's potential, overclocking paired with the right CPU cooler is a compelling journey. From air coolers to liquid solutions, users can tailor their systems for optimal performance. As technology advances, overclocking will continue to be a captivating aspect of the computing experience.
0 notes
Text
Ok my stress test of my current CPU cooler with two fans mounted temperatures equalise to 83C. Don't know If I"ll consider mounting water cooling or use my cooler with out fans once I unmount it to connect my pwn2 cables.
0 notes
Text
Top cpu stress test

#Top cpu stress test install
#Top cpu stress test Pc
#Top cpu stress test professional
#Top cpu stress test free
#Top cpu stress test mac
#Top cpu stress test mac
It's compatible with both Intel and Apple silicon architectures so it's ready for all current and future Mac models. We wanted to make a simple to use utility that was useful to the Mac community at large, for everyone to use. No purchase, no in-app purchase and no ads. There's no cost for Endurance: CPU Stress Test. In addition to stress testing, it also shows the current CPU load, battery level, time elapsed for the test, along with all data logged to a CSV file. In fact, it's the perfect companion to TG Pro, which displays all internal temperatures such as the CPU, GPU, battery, etc along with fan speed and control. It's the easiest app for benchmarking how the Mac reacts to increased thermal pressure, along with the battery life. It's easy to customize from between 1-64 threads. Need to test at 50% CPU usage? Choose half the number of threads compared to cores and click run. It will keep the CPU busy from a low percentage or all the way to 100% for as long as it's needed. Instead of opening up Terminal, typing in cryptic commands, or trying to find outdated apps to test the CPU, it's as simple as choosing the number of threads to run and clicking start.
Use Disk Cleanup and defragmentation.Endurance: CPU Stress Test solves the problem of having a way to test the thermal limits or battery life of a Mac.
Here are seven ways you can improve computer speed and its overall performance. In short, 3.5 to 4.2 GHz is a good speed for processor. What is a good CPU speed?Ī good processor speed is between 3.50 to 4.2 GHz, but it is more important to have a single-thread performance. Under higher load, such as when playing a game, rendering a video, or other intensive tasks, your CPU consumes more power and, thus, runs at a higher temperature. When the CPU is idle, or not being used by any program, a healthy temperature is anything under or around 50 degrees Celsius (122 degrees Fahrenheit). No amount of key pressing or mouse clicking will get a response from the PC. You may hear the fans and disk drive running, but the screen may remain completely blank. A computer with a bad CPU won't go through the usual "boot-up" process when you turn the power on. In raytracing, an image is generated by tracing the path of light as pixels in an image plane and simulating its effects with virtual objects. It is an online multicore CPU Stress test tool to benchmark computer performance using raytracing. Select the CPU graph and look at the top right corner. SilverBench is another CPU Stress Test created under the project available for Windows. The easiest way to check for an Intel CPU is by looking for an 'Intel Inside' sticker on your computer, or by going to the Performance tab in Task Manager.
#Top cpu stress test Pc
If you need a PC for complex rendering, real-time graphics, or gaming, we recommend using our popular 3DMark benchmark to measure and compare system performance. We recommend a PCMark 10 Digital Content Creation score 3450 or higher. What is a good CPU benchmark?įor editing photos, video, or other digital content. There are numerous things you can do to keep your PC cool, including: Keep your PC well-ventilated. Your processor shouldn't be hotter than 75☌/167☏, nor significantly colder than 20☌/68☏. If your CPU hits its critical limits, the PC will shut down before any harm can be done. Is stress testing safe? Unless you're running these stress tests for a month, you're probably fine.
#Top cpu stress test install
You do not need to install or configure anything - the test works directly in the browser. “CPU Benchmark Online” is a processor performance test allowing you to test online your CPU speed and to find out how fast is your processor in comparison to others.
#Top cpu stress test professional
The professional edition comes with various additional tests, including USB ports, webcams, microphones, and tape drives. It tests CPU, GPU, RAM, SSDs, hard disk drives, optical drives, printers, network ports, and sound cards.
Keeping this tab in the background (don't close it), switch to other applications or tabs, and do what you do as usual. PassMark BurnInTest allows you to stress test all the major subsystems for endurance, stability, and reliability.
Start the CPU Stress Test at maximum load and wait 30-60 seconds.
So, to run a CPU stability test you have to: CoreTemp, AIDA64, and IntelBurn Test are the best CPU Stress test software. PCMark10, BurnIn Test, HeavyLoad, and Intel Extreme Tuning Utility are the top tools for stress testing of PC. Prime95 is useful in CPU and RAM stress testing. Adia64 is another tool used to carry out CPU stress testing.Ĭinebench can be used for CPU and GPU stress testing.
#Top cpu stress test free
IntelBurnTest is a free stress test tool that will push your processor to the limit while simultaneously showing you how stable your component is. Various tools exist to carry out stress testing on CPUs.
How do I stress test my CPU Windows 10?.
0 notes
Text
Opengl extensions viewer portable

OPENGL EXTENSIONS VIEWER PORTABLE INSTALL
OPENGL EXTENSIONS VIEWER PORTABLE DRIVERS
OPENGL EXTENSIONS VIEWER PORTABLE UPDATE
OPENGL EXTENSIONS VIEWER PORTABLE PORTABLE
View useful information about the current OpenGL 3D accelerator.
OPENGL EXTENSIONS VIEWER PORTABLE PORTABLE
This kind of report is useful for developers who need an outline of the customer graphics system (for support purposes for example). Download Windows Tweaker Portable for Windows to tweak your Windows with several tools and options. These links are regularly updated.įull report in text and XML format.
OPENGL EXTENSIONS VIEWER PORTABLE DRIVERS
List of links related to your graphics card: graphics drivers and graphics cards reviews. For NVIDIA cards, the GPU temperature is also displayed. You can open as many 3D views as you want to make your graphics card working to the maximum. GPU Burner: allows to make the GPU temperature climb to test the graphics card stability. Very handy for graphics developers!ĭisplay of the system configuration: CPU type and speed, the amount of system memory, operating system Furthermore, this software will allow you to view extensive reports in text or XML format. For each extension, you can open its description web page available at the OpenGL Extension Registry or NVIDIA's OpenGL Extensions spec. The specification includes GPU type, the amount of VRAM, OpenGL API support level, OpenGL API extensions database and general system configuration, as well as a GPU-Stress-Test functionality (GPU-Burner). You can search for other models of portable computers that use the same. Quick view of the graphics configuration (graphics card / GPU type, amount of video memory, drivers version)ĭisplay of the main OpenGL capabilities (OpenGL version, texture size, number of texture units, etc.)ĭisplay of the OpenGL extensions supported by your graphics card or display of all existing OpenGL extensions no matter what graphics card you have. I downloaded realtech VR OpenGL extensions Viewer, it also reports OpenGL 1.1. The specification includes GPU type, the amount of VRAM, OpenGL API support level, OpenGL API extensions database, and general system configuration, as well as a GPU-Stress-Test functionality (GPU-Burner).
OPENGL EXTENSIONS VIEWER PORTABLE UPDATE
You need to see if you can get update to your 2.0 system.GPU Caps Viewer Portable is a feature-rich tool that quickly specifies the essential capabilities of your video card/GPU. GLEW currently supports a variety of operating systems, including Windows, Linux, Darwin, Irix, and Solaris. I have an older graphics card and although spec at 3.3 it test at higher than 4.0. The OpenGL Extension Wrangler Library is a simple tool that helps C/C++ developers initialize extensions and write portable applications. About same time a review board was established to allow users special changes to avoid that major step change. MACs did that at about 3.3 and caused some problems with their users. About OpenGL V 3.0 it was decided to no longer require its backward comparability. Suggest you download and run Fresh Diagnoses ( )and it audit your total system and make report of what you actually have ĭownload and run OpenGL ( OpenGL Extensions Viewer 6 | realtech VR | realtech VR )viewer and that will do same type of test. Long time ago I decided to find out what is really in my system independent of what seller are pushing The openGL version that Trimble quotes for it is 3.3 but worded some thing at least, what they really test to ?. Thimngs work fine now, crossing fingers.
OPENGL EXTENSIONS VIEWER PORTABLE INSTALL
I just yesterday deleted my old version of SU2017 make M2 because of some of the things broke in that release and was able to install and older version and did not lose anything. Sorry for the trap one would think checks are done before the old version is deleted. Now it wont open because my system isn’t OpenGL 3 compatible My SketchUp complained about needing to update to version 2017, so I did. OpenGL Extensions Viewer is an awesome, free multiplatform program (also available for Mac), belonging to the category Software utilities with subcategory.
0 notes
Text
Acer predator helios 300 ports

#Acer predator helios 300 ports 1080p
On Geekbench 5, an overall performance test focused on the CPU, the Predator earned a single-core score of 1,727 and a multi-core score of 10,164. Although the Predator shares the same processor as the competition in most cases, it didn't perform as well on benchmarks. We tested the Acer Predator Helios 300 with an Intel Core i7-12700H, 16GB of DDR5 RAM, and 1TB of SSD storage. Productivity Performance on the Acer Predator Helios 300 The temperature of the CPU averaged 73.6 degrees Celsius (164.48 degrees Fahrenheit) while the GPU ran at an average of 1,231 MHz and a temperature of 78.89 degrees Celsius (172 degrees Fahrenheit). The game ran at an average of 68 frames per second, starting out at 72 fps before settling into the high 60s.ĭuring the stress test, CPU speeds came in at an average of 2.8 GHz on the performance cores and 2.3 GHz on the efficiency cores. We stress-test gaming laptops by running the Metro Exodus benchmark on RTX settings 15 times, simulating about half an hour of gameplay.
#Acer predator helios 300 ports 1080p
The Legion 5i Pro earned 99 fps at 1080p and 67 fps at 1440p, the Razer Blade got 76 and 58 fps, and the Aero hit 78 fps and 28 fps. Once again, the Legion 5i Pro had the best results by a slim margin (110 and 69 fps, respectively), with the Razer Blade and Gigabyte Aero not too far behind the Predator.įinally, on the Borderlands 3 benchmark (badass settings), the Predator managed 87 fps in 1080p and 60 fps at 1440p. When we ran the Shadow of the Tomb Raider benchmark (highest settings), the Predator achieved 98 fps at 1080p and 65 fps at 1440p. As usual, the Legion had slightly better performance, while the Razer and Aero underperformed. On the Red Dead Redemption 2 benchmark (medium settings), we saw the Predator output 72 fps at 1080p and 50 fps at 1440p. However, the Gigabyte Aero 16 had a higher 89 fps at 1080p. The Legion 5i Pro hit 88 fps at 1080p and 70 fps at 1440p, and the Razer Blade 15 was just a few frames behind it. However, the Gigabyte Aero 16 and its RTX 3070 Ti (with 16 GB VRAM) underperformed with 101 fps at 1080p and 28 fps in its native 4K resolution.ĭuring the Far Cry 6 (ultra settings) benchmark, the Predator reached 82 fps at 1080p and 67 fps at 1440p. The Legion 5i Pro outperformed the Helios with 131 fps at 1080p and 78 fps at 1440p, while the Razer Blade 15 reached 104 fps at 1080p and 67 fps in its native resolution. When we ran Grand Theft Auto V’s benchmark at very high settings, the Acer Predator Helios 300 played at 117 fps at 1080p and 77 fps in native 1440p. With DLSS and V-Sync turned on, the game jumped to a more consistent 145 fps. As I stalked a Tigrex, exhausted after the beating I gave it with my Hunting Horn, the game fluctuated between 119 and 129 fps. While playing Monster Hunter Rise (high setting) with unlocked frame rates at the Helios’ native resolution, the game ran at 139 frames per second. Even though its competitors have the same GPU, the Helios didn't top our tests. Our configuration of the Acer Predator Helios 300 came with an Intel Core i7-12700H CPU, alongside an Nvidia GeForce RTX 3070 Ti that has 8GB of GDDR6 VRAM, a 150W max graphics power, and a 1,410 MHz boost clock. Gaming and Graphics on the Acer Predator Helios 300 Nvidia GeForce RTX 3070 Ti Laptop GPU (8GB GDDR6) 1,410 MHz Boost Clock, 150W Max Graphics PowerĢx USB 3.2 Gen 2 Type-A, USB 3.2 Gen 1 Type-A, Thunderbolt 4, HDMI 2.1, Ethernet, 3.5mm headphone jack, Mini DisplayPort, lock slot
0 notes
Text
Top cpu stress test

TOP CPU STRESS TEST SOFTWARE
TOP CPU STRESS TEST PC
TOP CPU STRESS TEST WINDOWS
Just open the AIDA64 System Stability Test, only enable (tick) the FPU subtest there, and press the Start button. You can either check the temperature in BIOS or you can use third-party applications.
TOP CPU STRESS TEST WINDOWS
There is no such option to check CPU temperature in Windows 10. You can adjust performance parameters for the active cores, integrated graphics frequency and adjust memory timings. What is Ryzen master?ĪMD Ryzen Master Advanced View provides for up to four profiles to store custom user-defined configurations for both the Ryzen CPU, integrated Radeon graphics and DDR4 memory. I think that AMDs Athlon 64s start to get the cold bug at -40 C or so as the material properties of the silicon-on-insulator substrate change enough to hinder normal transistor operation. There are manufacturers though who have made processors which can tolerate higher temps (for example 110 degrees C).ĬPUs can get too cold but the temperatures are impossible to reach indoors and on air or water cooling. Ideal CPU Temperature for Gaming A good CPU temperature range for gaming stands between 70 to 80 degrees Celsius (158-176☏). What is a CPU burner?Ī CPU burn-in test is simply running a computer under very heavy load for an extended period of time, to check if anything fails. Or youll receive a drug that mimics the effects of exercise. But youre unlikely to need such a prolonged test.Ī stress test usually involves walking on a treadmill or riding a stationary bike while your heart rhythm, blood pressure and breathing are monitored. If you need to make sure everything is stable and working properly, let the CPU load test run for 24 hours. How long should I stress test a CPU? You should stress test your CPU for at least one hour thats plenty of time for your CPU to reach its maximum temperature.
TOP CPU STRESS TEST PC
Select the Performance tab to see how many cores and logical processors your PC has. Press Ctrl + Shift + Esc to open Task Manager. No amount of key pressing or mouse clicking will get a response from the PC. You may hear the fans and disk drive running, but the screen may remain completely blank. A computer with a bad CPU wont go through the usual boot-up process when you turn the power on. It should be noted that 1.1 GHz is a low speed today, but that does not mean that it is bad. If your graphics card is going to crash or start tossing out funky visual artifacts, it will do so within 15 to 30 minutes. To access Resource and Performance Monitor, open Run and type PERFMON. You can use its reporting feature to determine whats causing your PC to slow down. It can review your computers activity in real time or through your log file. Windows has a built-in diagnostics tool called Performance Monitor. Its safe to perform a stress test on a GPU. Cinebench works by rendering a complex 3D scene using only the CPU. The new release is supposed put modern CPUs through their paces, but it also ditches the GPU test from previous versions. Maxon has released a new version of its processor benchmarking tool, Cinebench, dubbed Cinebench R20. If your CPU heats up beyond about 200?, your computer can experience glitches, or simply shut down. If youre using a laptop, you should look for CPU temperatures between 140? and 190?. However, the PSU test puts max load on the PSU by doing both CPU and GPU loading at the same time.Ī good temperature for your desktop computers CPU is around 120? when idle, and under 175? when under stress. OCCT has both CPU and GPU tests in the same interface, but you do run them separately. Can you stress test CPU and GPU at the same time? Here you can find your processor type and speed, its amount of memory (or RAM), and your operating system. Some users will have to select System and Security, and then select System from the next window. Stress testing does not normally damage a component unless the component was on the verge of failure anyway. The purpose of stress testing is to force the CPU to handle a maximum load to discover the beginnings of testing to see if your overclock is stable or not. MemTest86 and Stress-ng are the tools for RAM stress testing. CoreTemp, AIDA64, and IntelBurn Test are the best CPU Stress test software. PCMark10, BurnIn Test, HeavyLoad, and Intel Extreme Tuning Utility are the top tools for stress testing of PC.
TOP CPU STRESS TEST SOFTWARE
Prime95 is another great software for stress testing CPU under an extreme workload. OCCT is one of the best tools for stress testing CPU and various hardware components.
Can you stress test CPU and GPU at the same time?ġ0 Best Tools to Stress Test CPU in 2019 OCCT.
0 notes
Last Seen Blogs

essentialnature
Essential Nature

bbcffmblkpa
Sexy Fun Ass Married Couple

stallionbaby875
Kasey Keii 🍒💙


cineuy
Cine de Uruguay