#Bootstrap 5 Ui Framework
Explore tagged Tumblr posts
Visit Tumblr Blog
Explore Tumblr blogs with no restrictions, modern design and the best experience.
Last Seen Tumblr Blogs


Fun Fact
BuzzFeed published a report claiming that Tumblr was utilized as a distribution channel for Russian agents to influence American voting habits during the 2016 presidential election in Feb 2018.
Text
The Power of Bootstrap 5 Admin Panel with Software Dashboard
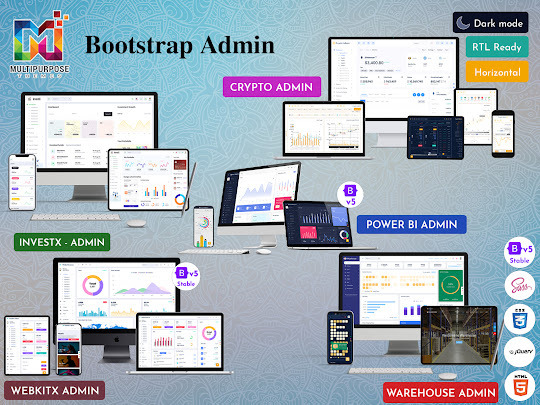
As web applications become more complex, developers need better ways to create intuitive, feature-rich admin interfaces. This is where Bootstrap 5 Admin Panel and Software Dashboard come in handy. These pre-built solutions can save developers countless hours and allow them to focus on building core application functionality rather than reinventing the wheel.
What is a Bootstrap 5 Admin Panel?
Bootstrap 5 Ui Kit provide an excellent starting point for creating a fully functional backend interface. They include dozens of UI components like charts, tables, forms, authentication flows, and more out of the box. Many also come with multiple color schemes, layout options, and example pages to showcase common use cases. This enables developers to choose a template that matches their vision and customize it rather than coding an entire admin from scratch.
Bootstrap 5 Admin Dashboard take this a step further by providing live data views and interactions specifically tailored for web admins and other internal users. These include pages like user analytics, sales reports, server monitoring, and more. The best Bootstrap 5 Admin Templates are modular, allowing developers to use what they need rather than a rigid all-in-one solution. They may also integrate with popular frameworks like Angular, React, and Vue, giving developers maximum flexibility.
#Responsive Bootstrap 5 Admin#Bootstrap 5 Admin Template#Bootstrap 5 Admin Dashboard#Bootstrap 5 Dashboard#Bootstrap 5 Admin Panel#Bootstrap 5 Admin Templates#Bootstrap 5 Ui Kit#Bootstrap 5 UI Framework
0 notes
Note
woah! just saw your bio change to software engineer. how did you transition? is it any different than web dev?
i also went on a TikTok rabbit hole and people are saying it’s useless to learn html/css and it’s not an actual language. honestly idk why I thought it would be easy to learn html > css > javascript > angular > react and somehow land a good paying job…
it’s gonna take YEARS for me to have a career, i feel old… especially with no degree

Hiya! 🩶
This is a long reply so I answered your question in sections below! But in the end, I hope this helps you! 🙆🏾♀️

🔮 "How did you transition?"
So, yeah my old job title was "Junior Web Developer" at a finance firm, and now my new title is "Frontend Software Engineer"! In terms of transition, I didn't make too much of a change.
After I quit my old job, I focused more on Frontend technologies that were relevant, so I focused on React.js and Node.js. I used YouTube, books, and Codeacademy. My first React project was >> this Froggie project <<~! Working on real-life projects such as the volunteering job I did (only for a month) where they used the technologies I was learning. So basically I did this:
decides to learn react and node 🤷🏾♀️
"oh wait let me find some volunteering job for developers where they use the tech I am learning so I can gain some real-life experience 🤔"
experienced developers in the team helped me with other technologies such as UI tools, and some testing experience 🙆🏾♀️
I did the volunteering work for both fun and learning with experienced developers and... I was bored and wanted to feel productive again... 😅
So for transitioning, I focused on learning the new technologies I wanted to work in and got some work experience (though it was volunteering) to back up if I can work in an environment with the tech. I still live with my family so I could do the volunteering job and have time to self-study whilst being okay financially (though I was tight with money haha) 😅👍🏾
🔮 "Is it any different than web dev?"
The old job was focused on using C# and SQL (including HTML, CSS, and JavaScript but fairly small) to make the websites, they were fairly basic websites for clients to use just to navigate their information needed. They weren't fancy cool web design because they didn't need to be, which was what made me bored of the job and wanted a change.
I am only a week into the job and have been working on small tickets (features for the site), but I think after a month or two into the job I will make a proper judgment on the difference~! So far, it's kind of the same thing I did in my old job but with new workflow tools, React-based projects, and funny people to work with 😅🙌🏾
🔮 "People are saying it’s useless to learn HTML/CSS and it’s not an actual language."
Yes HTML is a markup language and CSS is a stylesheet but they are the foundation of like 90% of the websites on the internet, I wouldn't ever call them "useless". Frameworks such as React, Django, Flask, etc still require HTML and CSS code to make the website's structure and styling. CSS frameworks like Tailwind and Bootstrap 5 still use CSS as their base/foundation. Not useless at all.
Don't focus on what other people are doing and focus on your own learning. I repeat this all the time on my blog. Just because one or a couple people online said one technology is useless doesn't mean it is (this is applied to most things in tech). Someone told me jQuery was entirely useless and no bother learning it - I did it anyway and it helped me better understand JavaScript. Anyhoo, try things YOURSELF before listening to what people say - make your own judgment. Not going to let a random Tech bro online whine about how annoying Python or C or whatever is to ruin my want to learn something. (This is all coming from a girl who loves web development very much's point of view :D)
🔮 "I thought it would be easy to learn html > css > javascript > angular > react and somehow land a good paying job"
Web Dev route, I love it! That's literally the same steps I would have taken if I had to start again~! For each new tech you learn, make a bunch of projects to 1) prove to yourself that you can apply what you've learned 2) experience 3) fill that portfolio~! 😎🙌🏾
With Angular and React, I would pick one or the other and focus on being really good at it before learning another framework!
I also recommend volunteering jobs, freelancing, helping a small business out with free/paid m
Lastly, you do not need a degree to get a job in Web Development. I mean look at me? My apprenticeship certificate is the same value as finishing school at 18, so in the UK it would be A-Levels, and I completed it at the ripe age of 21! I have no degree, I applied for university and got a place but I will give that space up for someone else, I'm not ready for university just yet! haha... (plus erm it's expensive at the end, what? even for the UK...). Sure, I used to avoid the job postings that were like "You need a computer science degree" but now if I were job searching I would apply regardless.
People switching careers in their 40s going into tech instead are making it, you can switch anytime in your lifetime if you have the means to! (everyone's situation is different I understand).
I'm not too good at giving advice but I hope in the rambling I made some sense? But yeah that's all! 😎
#my asks#codeblr#coding#progblr#programming#studyblr#studying#computer science#tech#comp sci#programmer#career advice#career#career tips
19 notes
·
View notes
Text
Top 10 Front-End Frameworks and Libraries for 2024
As the web development landscape continues to evolve, staying updated with the latest front-end frameworks and libraries is crucial for any developer. Whether you're a seasoned pro or just starting out, knowing which tools to use can significantly impact your productivity and the quality of your projects. In this post, we’ll explore the top 10 front-end frameworks and libraries that are set to dominate in 2024.
1. React
React remains one of the most popular front-end libraries, known for its simplicity and flexibility.
Key Features of React
Component-Based Architecture: Reusable components make development efficient and manageable.
Virtual DOM: Enhances performance by minimizing direct DOM manipulation.
Strong Community Support: A vast ecosystem of tools, libraries, and tutorials.
2. Angular
Angular, backed by Google, is a powerful framework for building dynamic single-page applications (SPAs).
Why Choose Angular?
Two-Way Data Binding: Synchronizes data between the model and the view.
Dependency Injection: Improves code maintainability and testability.
Comprehensive Documentation: Extensive resources for learning and troubleshooting.
3. Vue.js
Vue.js has gained popularity due to its gentle learning curve and versatility.
Advantages of Vue.js
Reactive Data Binding: Simplifies state management.
Single-File Components: Encapsulate HTML, CSS, and JavaScript in one file.
Flexibility: Can be used for both large-scale and small-scale applications.

4. Svelte
Svelte is a relatively new player that compiles components into highly efficient vanilla JavaScript at build time.
Svelte’s Standout Features
No Virtual DOM: Directly manipulates the DOM for better performance.
Less Boilerplate: Cleaner code with minimal overhead.
Ease of Use: Intuitive and straightforward syntax.

5. Bootstrap
Bootstrap is a front-end framework that provides pre-designed components and a responsive grid system.
Benefits of Using Bootstrap
Responsive Design: Ensures your site looks great on all devices.
Pre-Styled Components: Saves time with ready-to-use UI elements.
Customizable: Easily customize with Sass variables and Bootstrap’s extensive options.
6. Tailwind CSS
Tailwind CSS is a utility-first CSS framework that allows for rapid UI development.
Tailwind CSS Features
Utility-First Approach: Use utility classes directly in your HTML.
Customizable: Extensive configuration options to suit your project’s needs.
Consistency: Enforces a consistent design language across your project.

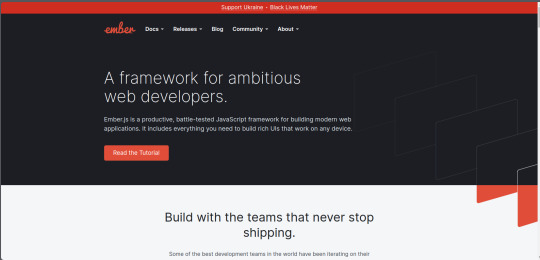
7. Ember.js
Ember.js is a robust framework for building ambitious web applications.
Why Ember.js Stands Out
Convention over Configuration: Reduces the amount of decision-making and boilerplate code.
Strong Routing: Powerful routing capabilities for managing application state.
Productivity: Focuses on developer productivity with built-in best practices.
8. Alpine.js
Alpine.js offers a minimal and lightweight way to add interactivity to your websites.
Key Features of Alpine.js
Lightweight: Small footprint with only a few kilobytes.
Declarative Syntax: Similar to Vue.js, making it easy to understand and implement.
Ease of Integration: Can be easily integrated into existing projects.

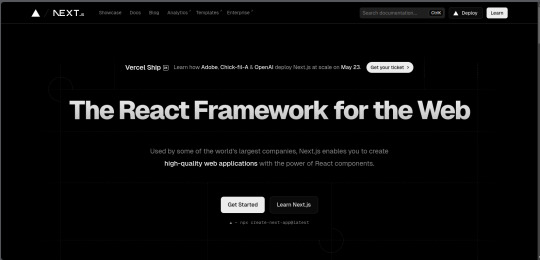
9. Next.js
Next.js is a popular React framework that enables server-side rendering and static site generation.
Benefits of Using Next.js
Server-Side Rendering (SSR): Improves performance and SEO by rendering pages on the server.
Static Site Generation (SSG): Pre-renders pages at build time for fast load times.
API Routes: Allows you to create API endpoints within your application.
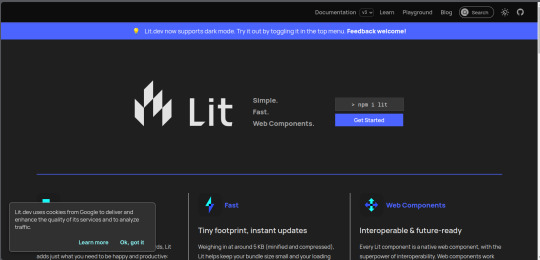
10. Lit
Lit is a simple library for building fast, lightweight web components.
Advantages of Lit
Web Components: Embraces the web components standard for reusable, encapsulated HTML elements.
Performance: Lightweight and highly performant.
Simple API: Easy to learn and use with a minimal API surface.
Conclusion
Choosing the right front-end framework or library can significantly impact your workflow and the quality of your projects. Whether you prefer the flexibility of React, the structure of Angular, or the simplicity of Svelte, there's a tool out there to suit your needs.
Final Tips for Selecting a Framework or Library
Project Requirements: Consider the specific needs of your project.
Community and Support: Look for frameworks with strong community support and documentation.
Learning Curve: Choose a tool that matches your current skill level and the time you have available to learn.
By staying informed about the latest tools and trends, you can ensure that your skills remain relevant and that you can deliver the best possible results in your projects. Happy coding!
Remember, the best tool is the one that helps you get the job done efficiently and effectively. So, dive into these frameworks and libraries, and take your front-end development skills to the next level!
Share Your Thoughts
I'm curious to know your thoughts on these front-end frameworks and libraries. Have you used any of them in your projects? Which one is your favorite, and why? Share your experiences and insights in the comments below.👇
2 notes
·
View notes
Text
How to Begin Your Web Design Journey: A Step-by-Step Guide in Simple Terms
Understanding the Basics:
Learn about HTML, which is like a web page’s skeleton.
Understand CSS, which is like makeup for web pages.
Know how to make websites look good on different screens.
2. Choose your tools:
Start with simple text editors like Notepad (for Windows) or TextEdit (for Mac).
Later, try fancier editors like Visual Studio Code.
For making pictures, try Adobe Photoshop or Illustrator.
3. Learn HTML and CSS:
Use websites like W3Schools or Codecademy.
If you want to learn more about web design with certification and placement, ACTE Institute offers comprehensive machine learning training courses that can give you the knowledge and skills necessary to excel in this field. Consider the infinite possibilities for data analysis, automation, and decision-making that machine learning may create.
YouTube: There are many video tutorials covering HTML and CSS for beginners.
They teach you how to make web pages and make them look nice.
You can also learn from courses on Coursera or edX.
4. Practice your skills.
Besides learning, make simple web pages to get better.
Try harder projects as you get more confident.
Make your own website to practice lots.
5. Responsive Web Design:
Make sure your websites work well on phones and computers.
Learn about media queries (they help your design fit different screens).
6. Master CSS Layouts:
Get really good at arranging web stuff using CSS (like making boxes and arranging them nicely).
7. Web Design Frameworks:
Think about using ready-made kits like Bootstrap.
They have pre-made pieces to help you design faster.
8. UI/UX Design:
Learn to make websites easy to use and nice to look at.
Think about how people will use your site.
9. Web Hosting and Domain:
To show your website to people, you need a place to put it (hosting) and a name for it (domain).
Lots of companies can help with this, like Bluehost or HostGator.
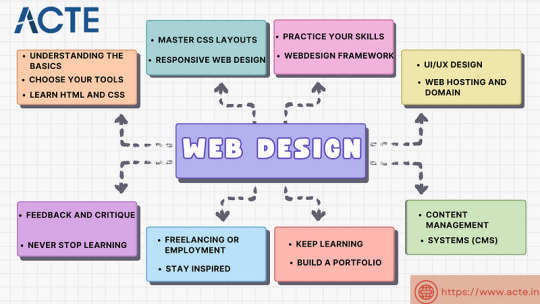
10. Content Management Systems (CMS):
Consider using tools like WordPress to manage your website easily.
11. Keep Learning:
Web design keeps changing, so keep learning new stuff.
Read blogs, watch webinars, and take more advanced classes.
12. Build a portfolio.
Make a collection of your best work to show others.
People who might hire you want to see what you can do.
13. Freelancing or employment:
Decide if you want to work alone or with a company.
Both ways have good things and not-so-good things, so pick what you like.
14. Networking:
Join groups of web designers to meet others like you.
Learning from others can help you become better.
15. Feedback and criticism:
Don’t be shy to ask for advice on your work.
When people give you tips, it helps you improve.
16. Launch your projects:
When you’re good enough, work on real websites.
Offer to make websites for friends or local businesses.
17. Stay Inspired:
Be creative and get ideas from different places.
Nature, art, and other designers can help you think of cool stuff.
18. Never Stop Learning:
Web design always changes, so keep learning new things.
Stay curious and open to learning more tricks and tools.
The secret to success in web design is to start with the fundamentals and gradually advance your abilities. Keep in mind that on this trip, patience and practice are the keys to success. As your skills advance, you’ll have the imagination needed to realise your ideas for websites. So put your hands in your pockets, launch your preferred coding editor, and start your web design experience!
4 notes
·
View notes
Text
Leading Mobile Website Design Company in Delhi – Result-Driven Solutions
In today's digital era, a mobile-friendly website is no longer an option—it’s a necessity. With over 60% of global traffic coming from mobile devices, businesses must ensure seamless user experiences on smartphones and tablets. If you're looking for the best mobile website designing services in Delhi, this guide will help you understand why choosing the right service provider is crucial for your success.
Why Mobile Website Designing Matters?
A well-designed mobile website ensures:
Better User Experience: Faster load times and easy navigation.
Higher Search Rankings: Google prioritizes mobile-friendly sites in search results.
Increased Conversion Rates: More mobile users mean higher engagement and sales.
Competitive Advantage: Stand out from competitors with an engaging design.
Features of a High-Quality Mobile Website
To deliver a smooth and engaging user experience, a mobile website must have:
1. Responsive Design
Adapts to all screen sizes (smartphones, tablets, desktops).
Eliminates the need for separate mobile and desktop websites.
2. Fast Loading Speed
Optimized images and minified code for quicker response times.
Google recommends a load time of under 3 seconds for better rankings.
3. Mobile-Friendly Navigation
Clickable buttons and easy-to-use menus.
Avoid pop-ups that frustrate mobile users.
4. SEO Optimization
Implementing mobile-specific SEO techniques.
Using structured data to improve visibility in search results.
5. Touch-Friendly Design
Large, easy-to-click buttons.
Smooth scrolling and gesture-based navigation.
Benefits of Hiring a Mobile Website Design Company in Delhi
1. Expertise in Mobile UI/UX Design
Professional designers create visually appealing and user-friendly layouts.
2. SEO-Optimized Web Development
Google rewards mobile-optimized websites with higher rankings.
3. Custom Design Solutions
Tailored websites to match your brand identity.
4. E-commerce Mobile Solutions
Seamless shopping experiences with fast checkout and secure payments.
5. Ongoing Maintenance & Support
Regular updates and performance enhancements.
Choosing the Right Mobile Website Design Company in Delhi
Before selecting a design agency, consider the following:
1. Portfolio & Experience
Check previous projects and client testimonials.
Look for companies with experience in diverse industries.
2. Technology & Tools
Ensure they use the latest frameworks like Bootstrap, React, and WordPress.
3. SEO & Performance Optimization
Ask about their approach to mobile SEO.
Verify their speed optimization techniques.
4. Cost & Customization
Compare pricing models and ensure you get value for your money.
The Future of Mobile Website Designing
With advancing technology, mobile website design trends are evolving. Some future trends include:
AI-Driven UX Personalization – Websites that adapt based on user behavior.
Voice Search Optimization – Ensuring content is optimized for voice assistants.
Progressive Web Apps (PWAs) – Faster and more engaging web experiences.
Dark Mode UI – Enhancing readability and saving battery life.
Conclusion
A mobile-friendly website is essential for business success. Investing in professional mobile website designing services in Delhi ensures your site meets industry standards, enhances user experience, and ranks higher on Google. If you want cutting-edge mobile design solutions, work with experts who understand the latest trends and SEO techniques.
Get Started Today!
Need a high-performance mobile website? Contact the leading mobile website design company in Delhi to build an innovative, user-friendly, and SEO-optimized website that drives results.
Frequently Asked Questions (FAQs)
1. Why is mobile website design important? A mobile-friendly website enhances user experience, boosts SEO rankings, and improves conversion rates.
2. What is the cost of mobile website designing in Delhi? The cost varies depending on features, design complexity, and customization requirements.
3. How long does it take to develop a mobile-friendly website? A standard website takes 2-4 weeks, while complex designs may take longer.
4. What technologies are used in mobile website design? Popular technologies include HTML5, CSS3, JavaScript, Bootstrap, and WordPress.
5. How can I ensure my mobile site ranks on Google? By implementing mobile SEO techniques, optimizing loading speed, and providing high-quality content.
This SEO-optimized article is designed to rank on Google while providing valuable insights to businesses seeking mobile website designing services in Delhi.
0 notes
Text
Responsive Design 101: Creating Websites for Every Screen Size

In today’s digital age, users access websites from a variety of devices, including desktops, tablets, and smartphones. Ensuring a seamless experience across all screen sizes is crucial for user engagement and retention. This is where responsive design comes in. Responsive design allows websites to adapt dynamically to different screen sizes, ensuring readability, usability, and aesthetic appeal on any device. In this guide, we’ll cover the fundamentals of responsive web design and best practices for creating adaptable websites.
What is Responsive Design?
Responsive design is an approach to web development that ensures a website’s layout and content adjust fluidly to different screen sizes and orientations. Instead of designing multiple versions of a site for various devices, a single responsive design adapts to the user’s screen.
Key Principles of Responsive Design
1. Fluid Grid Layouts
Rather than using fixed-width layouts, responsive design employs fluid grids that proportionally resize based on the user’s screen. This approach ensures elements remain in relative positions regardless of screen dimensions.
2. Flexible Images and Media
Images, videos, and other media should be able to scale and resize to fit different screen sizes without losing quality or breaking the layout.
3. Media Queries
Media queries are CSS rules that apply styles based on device characteristics, such as screen width. These allow designers to set different styles for desktops, tablets, and mobile devices.
4. Mobile-First Approach
Designing for mobile devices first ensures a streamlined, efficient experience. It involves building the smallest screen version of a site first and then scaling up for larger screens.
5. Touch-Friendly Elements
For mobile users, buttons and interactive elements should be easy to tap. Spacing should be adequate to avoid accidental clicks.
Best Practices for Responsive Design
1. Use a Responsive Framework
CSS frameworks like Bootstrap and Foundation provide pre-built responsive grids and components, making it easier to create flexible designs.
2. Optimize Typography
Text should be easily readable on all devices. Use relative units like em or rem for font sizes and maintain appropriate line spacing.
3. Test Across Multiple Devices
Regularly test your website on different devices and screen sizes to ensure a consistent user experience. Tools like Chrome Developer Tools and BrowserStack can help simulate various screen sizes.
4. Minimize Load Times
A responsive design should not compromise performance. Optimize images, use lazy loading, and minimize CSS/JavaScript to ensure fast load times.
5. Ensure Cross-Browser Compatibility
Different browsers render styles differently. Test your website on multiple browsers to ensure consistency in design and functionality.
Conclusion
Responsive web design is essential for providing a seamless experience across devices. By implementing fluid grids, flexible media, and media queries, and following best practices, you can create a website that adapts beautifully to any screen size. Embracing a mobile-first approach and optimizing performance ensures user satisfaction and improved engagement.
Devoq Design is a leading UI/UX design agency in UI/UX Design Agency in New Jersey and UI/UX Design Agency in New Mexico , specializing in crafting innovative, user-centric digital experiences for businesses of all sizes. Our expert team focuses on creating seamless, aesthetically appealing, and highly functional designs that enhance user engagement and drive conversions. Whether it’s web design, mobile app interfaces, or complete digital transformations, Devoq Design ensures that every project aligns with the latest industry trends and user expectations. With a commitment to cutting-edge design strategies and user-first principles, we help brands establish a strong digital presence and deliver exceptional user experiences.
0 notes
Text
The Ultimate Guide to Building a Website: From Planning to Launch

Building a website is an exciting yet complex process that requires careful planning, execution, and maintenance. Whether you're creating a personal blog, an e-commerce store, or a corporate website, this guide will walk you through every step—from planning to launch—to ensure your website is functional, user-friendly, and optimized for success.
1. Planning Your Website
Before diving into design or development, it’s crucial to lay a solid foundation for your website. Here’s how to get started:
Define Your Goals and Target Audience
Identify the purpose of your website (e.g., selling products, sharing information, building a community).
Understand your target audience’s needs, preferences, and behaviors.
Choose a Domain Name and Hosting Provider
Select a domain name that is short, memorable, and relevant to your brand.
Choose a reliable hosting provider that offers good speed, uptime, and customer support.
Create a Sitemap and Wireframe
A sitemap outlines the structure of your website, including all pages and their hierarchy.
A wireframe is a visual blueprint of your website’s layout, helping you plan the placement of elements like headers, images, and buttons.
2. Choosing the Right Platform
The platform you choose will determine how your website is built and managed. Here are some popular options:
Content Management Systems (CMS)
WordPress: Highly customizable and beginner-friendly, ideal for blogs, portfolios, and business websites.
Wix: Drag-and-drop builder, perfect for small businesses and personal websites.
Squarespace: Known for its stunning templates, great for creatives and small businesses.
Shopify: Designed for e-commerce, offering robust features for online stores.
Custom Development
If you need a highly unique or complex website, consider hiring a web development company in Kochi to build a custom solution tailored to your needs.
3. Designing Your Website
Design plays a critical role in user experience (UX) and engagement. Follow these tips to create a visually appealing and functional design:
Responsive Design
Ensure your website looks great on all devices (desktop, tablet, mobile).
Use a mobile-first approach to prioritize mobile users.
User Interface (UI) and User Experience (UX)
Keep the design clean and intuitive, with easy navigation.
Use consistent fonts, colors, and styles to maintain brand identity.
Visual Elements
Use high-quality images and videos to enhance your content.
Optimize visuals for fast loading times.
4. Development Process
Once the design is finalized, it’s time to bring your website to life. Here’s what the development process involves:
Front-End Development
Focuses on the visual and interactive aspects of your website.
Uses languages like HTML, CSS, and JavaScript.
Back-End Development
Handles the server-side functionality, such as databases and user authentication.
Uses languages like PHP, Python, or Ruby.
Frameworks and Libraries
Use frameworks like Bootstrap (for front-end) or Laravel (for back-end) to streamline development.
Leverage libraries like React or Angular for dynamic, interactive features.
5. Adding Functionality
Your website needs more than just a pretty design—it needs functionality to meet user needs. Here’s how to enhance your site:
Plugins and Widgets
Add features like contact forms, social media integration, and SEO tools using plugins.
Use widgets to display dynamic content, such as recent posts or testimonials.
E-Commerce Features
If you’re building an online store, integrate payment gateways, product catalogs, and shopping carts.
Platforms like WooCommerce (for WordPress) or Shopify make this process easier.
SEO Best Practices
Optimize your website for search engines by using proper meta tags, alt text, and structured data.
Ensure your site is fast, mobile-friendly, and secure (HTTPS).
6. Testing and Debugging
Before launching, thoroughly test your website to ensure it works flawlessly:
Cross-Browser and Cross-Device Testing
Check how your website performs on different browsers (Chrome, Safari, Firefox) and devices (desktop, tablet, mobile).
Performance Optimization
Use tools like Google PageSpeed Insights or GTmetrix to identify and fix performance issues.
Compress images, minify CSS/JavaScript, and enable caching.
Debugging
Fix any bugs or errors that could affect user experience.
Test forms, links, and interactive elements to ensure they work as intended.
7. Launching Your Website
Once your website is ready, it’s time to go live. Follow these steps for a smooth launch:
Final Checks
Review all content for accuracy and consistency.
Test all functionalities, including forms, buttons, and navigation.
Set Up Analytics
Install tools like Google Analytics and Google Search Console to track traffic, user behavior, and performance.
Submit to Search Engines
Submit your sitemap to Google and Bing to ensure your site is indexed quickly.
8. Post-Launch Maintenance
Your work doesn’t end after the launch. Regular maintenance is essential to keep your website running smoothly:
Content Updates
Regularly publish new content or update existing pages to keep your site fresh and relevant.
Security
Use security plugins or services to protect your site from threats.
Regularly update your CMS, plugins, and themes to patch vulnerabilities.
Backups
Schedule regular backups to prevent data loss in case of technical issues.
Why Choose Professional Web Development Services?
While DIY website builders are great for beginners, professional services offer unparalleled expertise and customization. If you’re looking for web development in Kochi, consider partnering with a trusted agency like SvaHub Media. Their team of experts can help you design, develop, and launch a website that meets your unique needs.
For businesses in Kochi, web development services in Kochi provide end-to-end solutions, from planning and design to post-launch support. Whether you need a simple blog or a complex e-commerce platform, professional developers can deliver a high-quality website that drives results.
Final Thoughts
Building a website is a multi-step process that requires careful planning, execution, and ongoing maintenance. By following this guide, you can create a website that not only looks great but also performs well and meets your goals. Whether you choose to build your site yourself or hire a professional team, the key to success lies in understanding your audience, optimizing for usability, and staying committed to continuous improvement.
If you’re ready to take your online presence to the next level, consider partnering with a web development company in Kochi to bring your vision to life. With the right strategy and expertise, your website can become a powerful tool for growth and success.
0 notes
Text
من أين أبدأ بتعلم تصميم المواقع؟
تعلم مع شركة تصميم مواقع خطوة بخطوة يحتاج إلى منهجية مدروسة تجمع بين المعرفة النظرية والتطبيق العملي. إذا كنت مبتدئًا، إليك خطة شاملة لتبدأ في هذا المجال:
1. فهم أساسيات تصميم المواقع
قبل الغوص في الأدوات واللغات، عليك فهم المبادئ الأساسية:
ما هو تصميم المواقع؟: تعلم الفرق بين التصميم الجرافيكي (Graphic Design) وتصميم تجربة المستخدم (UI/UX Design).
مكونات الموقع: واجهة المستخدم (Front-End) وتشمل التصميم التفاعلي، والخلفية (Back-End) التي تعالج البيانات.
2. تعلم أساسيات البرمجة والتصميم
أ) HTML (HyperText Markup Language)
لغة أساسية لإنشاء الهيكل الأساسي لأي موقع.
مصادر للتعلم:
W3Schools
FreeCodeCamp
ب) CSS (Cascading Style Sheets)
تستخدم لتنسيق وتصميم مظهر الموقع.
تعلم كيفية:
اختيار الألوان.
��بط الخطوط.
تصميم التخطيطات (Layouts).
أدوات لتجربة CSS: CodePen
ج) JavaScript (JS)
تضيف التفاعلية للمواقع، مثل القوائم المنسدلة والنوافذ المنبثقة.
مصادر للتعلم:
MDN Web Docs
JavaScript.info
3. تطوير مهارات التصميم (UI/UX)
أ) مبادئ التصميم
تعلم عن التباين، التوازن، التسلسل الهرمي، والمساحات البيضاء.
دراسة كيفية تحسين تجربة المستخدم من خلال تصميم بسيط وسهل الاستخدام.
ب) أدوات التصميم
أدوات شائعة لتصميم واجهات المستخدم:
Figma: أداة تصميم تعاونية.
Adobe XD: أداة لتصميم النماذج الأولية.
Sketch: تُستخدم بكثرة في تصميم التطبيقات والمواقع.
ج) تعلم عن قابلية الاستخدام
اقرأ عن تجربة المستخدم (UX) وكيفية تصميم مواقع مريحة وسهلة التصفح.
مصدر: Nielsen Norman Group
4. تعلم إطار عمل (Framework)
أ) إطارات Front-End
تساعدك على تسريع عملية تصميم المواقع:
Bootstrap: إطار عمل CSS يجعل تصميم المواقع أسهل.
Tailwind CSS: إطار عمل CSS قابل للتخصيص.
ب) إطارات JavaScript
تعلم أساسيات React.js أو Vue.js إذا كنت تريد إنشاء مواقع ديناميكية.
5. الممارسة العملية
أ) مشاريع صغيرة لتطبيق المهارات
صمم صفحات بسيطة مثل صفحة هبوط (Landing Page) أو معرض صور.
قم بإنشاء محفظة شخصية (Portfolio) لعرض أعمالك.
ب) مواقع للتطبيق العملي
Frontend Mentor: يقدم تحديات تصميم مواقع.
Codewars: لتحسين مهاراتك في البرمجة.
6. استكشاف الأدوات المتقدمة
أ) نظام إدارة المحتوى (CMS)
تعلم كيفية إنشاء مواقع باستخدام WordPress.
تعرف على أدوات مثل Webflow أو Wix إذا كنت تريد منصات بدون كود (No-Code).
ب) Git وGitHub
استخدم Git لتتبع تغييرات الكود.
ارفع مشاريعك على GitHub لعرضها كمحفظة أعمال.
7. الانضمام لمجتمعات التصميم
شارك في مجتمعات مثل:
Reddit: Subreddits مثل r/web_design.
Discord: قنوات خاصة بمطوري ومصممي المواقع.
LinkedIn: تواصل مع محترفي المجال.
8. إنشاء مشاريع واقعية
أعد تصميم مواقع موجودة كتدريب.
قدم خدمات تصميم مجانية للأصدقاء أو المنظمات الصغيرة لاكتساب الخبرة.
9. تعلم تحسين محركات البحث (SEO)
ادرس كيفية تحسين المواقع لمحركات البحث لضمان أن تصميمك متوافق مع السيو.
10. بناء مسار وظيفي أو عمل حر
إذا كنت تسعى لوظيفة، جهز محفظة أعمال قوية.
للعمل الحر، استخدم منصات مثل Upwork أو Fiverr.
مصادر إضافية للتعلم
YouTube: قنوات مثل "Traversy Media" و"The Net Ninja".
كورسات مدفوعة: منصات مثل Udemy أو Coursera.
ابدأ الآن بخطوة صغيرة، مثل تعلم HTML، وواصل بناء معرفتك تدريجيًا. إذا كنت بحاجة لنصائح إضافية، لا تتردد في طلب المساعدة!
0 notes
Text

Investment Platforms: Investment UIUX Bootstrap 5 Admin Dashboard
Preview LearningUIUX now!
In today's dynamic financial landscape, user-friendly and intuitive interfaces are crucial for the success of any investment platform. Investment UIUX offers a powerful solution, providing a collection of high-quality Bootstrap 5 HTML templates specifically designed for investment and mutual fund management software.
Key Features of Investment UIUX:
Bootstrap 5 Foundation: Built on the robust and responsive Bootstrap 5 framework, ensuring seamless adaptability across all devices.
Investment-Specific Design: Includes pre-built pages tailored for investment tracking, portfolio management, transaction history, risk assessment, and more.
User-Centric Interface: Features intuitive dashboards, clear data visualizations, and easy-to-navigate menus for a seamless user experience.
Enhanced Data Visualization: Enables users to easily track investment performance, analyze market trends, and gain valuable insights into their portfolios.
Streamlined Development: Accelerates development with pre-built components, reusable code modules, and a well-structured codebase.
Customization Options: Offers extensive customization options to tailor the templates to your specific brand and design requirements.
Integration with Third-Party Services: Seamlessly integrates with popular financial APIs and data providers.
Benefits of Using Investment UIUX:
Reduced Development Time: Leverage pre-built components and a robust framework to significantly reduce development time and costs.
Improved User Experience: Enhance user engagement and satisfaction with a visually appealing and intuitive interface.
Enhanced Data Analysis: Empower users with powerful data visualization tools to make informed investment decisions.
Competitive Advantage: Gain a competitive edge by offering a modern and user-friendly platform to your clients.
Increased Efficiency: Streamline operations and improve productivity with automated workflows and streamlined data management.
Key Features:
50+ Ready-to-Use Pages: Includes a wide range of pre-built pages for dashboards, transactions, portfolio management, user profiles, and more.
14+ Customizable Styles: Offers a variety of pre-defined styles and color schemes to match your brand identity.
100+ UI Components: Provides a rich library of UI components, including charts, graphs, tables, and more.
Checkout now our product and portfolio 🏄♀️
💌 Email Us: [email protected]
😍 Social media : Instagram | Linked In | X/Twitter
🛍️ Adminuiux Product: Themeforest | Gumroad
Preview LearningUIUX now!
#mobile app company#mobile app development#mobile app developers#mobileapp#mobile application development#bootstrap#Bootstrap themes#bootstrap templates#admin#admin dashboard#admin templates#html5 css3#dashboard html
1 note
·
View note
Text
Comprehensive Guide to Java Full Stack Development Training at AchieversIT
In the rapidly evolving tech industry, the demand for skilled full-stack developers continues to grow. As a Java Full Stack Developer, you can handle both front-end and back-end development, making you a highly valuable asset in the job market. If you’re considering building a career in this field, AchieversIT in Hyderabad offers one of the most comprehensive Java Full Stack Development training programs. This guide explores everything you need to know about the training and how it can help shape your career.
1. What is Java Full Stack Development?
Java Full Stack Development involves working on both the client side (front-end) and the server side (back-end) of an application using Java as the core technology. A full-stack developer is responsible for creating dynamic user interfaces, managing databases, and ensuring seamless functionality of the application.
At AchieversIT, the training program covers the full spectrum of skills required to excel as a full-stack developer, from mastering programming languages to learning modern frameworks and tools.
2. Why Choose AchieversIT for Java Full Stack Development Training?
Expert Trainers: Learn from experienced industry professionals with hands-on expertise in full-stack development.
Practical Approach: The program emphasizes real-world application through live projects and practical assignments.
Flexible Learning Options: Attend classes in-person or online, with flexible schedules to suit working professionals and students.
Placement Support: AchieversIT provides dedicated placement assistance, helping you secure job opportunities with top companies.
3. Course Curriculum: A Deep Dive
AchieversIT’s Java Full Stack Development Training is designed to provide end-to-end learning. Here’s a breakdown of the key modules:
Module 1: Core Java and Object-Oriented Programming
Basics of Java programming
Object-Oriented Programming concepts
Exception handling and multithreading
Collections framework
Module 2: Front-End Development
HTML, CSS, and JavaScript: Building responsive and interactive user interfaces.
Frameworks: Introduction to Angular, ReactJS, and Bootstrap for advanced UI development.
Module 3: Back-End Development
Java Servlets and JSP: Learn to build dynamic web applications.
Spring Framework: Explore Spring Boot for creating robust back-end systems.
Hibernate: Understand ORM (Object-Relational Mapping) and database integration.
Module 4: Databases and APIs
SQL: Learn database management using MySQL.
RESTful APIs: Understand how to create and consume APIs.
Module 5: Tools and Deployment
Version control with Git and GitHub
DevOps basics: CI/CD pipelines
Deploying applications on cloud platforms
Module 6: Real-Time Projects
Students work on live projects to apply their learning, including building e-commerce websites, management systems, and API-driven applications.
4. Key Features of the Training Program
Industry-Relevant Projects: Gain experience by working on projects that simulate real-world challenges.
Small Batch Sizes: Personalized attention ensures better understanding and interaction with trainers.
Interactive Learning: Engage in discussions, coding exercises, and group projects for an enriched learning experience.
5. Placement Support at AchieversIT
AchieversIT takes pride in its robust placement assistance program, which includes:
Resume Building: Craft a professional resume tailored to full-stack development roles.
Mock Interviews: Prepare for technical and HR interviews through practice sessions.
Job Referrals: Access opportunities with top IT companies and startups in Hyderabad and beyond.
6. Who Can Enroll in the Program?
This course is ideal for:
Fresh graduates aiming to build a career in full-stack development.
Working professionals looking to upskill or switch to a developer role.
Individuals with a basic understanding of programming and an eagerness to learn.
7. Benefits of Joining AchieversIT
Holistic learning experience covering all aspects of full-stack development.
Access to the latest tools and technologies in the industry.
Affordable fees with installment options.
Networking opportunities with peers and industry experts.
How to Get Started?
Joining the Java Full Stack Development Training at AchieversIT is simple:
Visit the AchieversIT website or contact their admissions team.
Choose a suitable batch schedule (weekday or weekend).
Complete the enrollment process and begin your journey to becoming a certified Java Full Stack Developer.
Conclusion:
AchieversIT’s Java Full Stack Development Training is a perfect launchpad for anyone aspiring to excel in the IT industry. With its industry-aligned curriculum, hands-on learning, and dedicated placement support, the program equips you with the skills and confidence to build a successful career as a Java Full Stack Developer.

#java full stack training in hyderabad#java full stack institute in hyderabad#best java full stack developer course in hyderabad
1 note
·
View note
Text
Essential Tools to Take Your Web Development to the Next Level
To take your web development skills to the next level, here are some essential tools that can help:
1. Code Editors and IDEs:
VS Code: A powerful, extensible code editor that supports a wide range of languages, extensions, and debugging tools.
Sublime Text: A fast and feature-rich editor with support for multiple programming languages and a sleek interface.
Atom: An open-source, customizable text editor, ideal for web development.
2. Version Control Systems:
Git: A version control tool to track changes in code and collaborate efficiently with other developers.
GitHub/GitLab/Bitbucket: Platforms for hosting Git repositories and collaborating with teams.
3. Front-End Frameworks:
React.js: A JavaScript library for building dynamic and interactive user interfaces.
Vue.js: A progressive JavaScript framework for building web interfaces.
Angular: A robust framework for creating scalable and structured web apps.
Tailwind CSS: A utility-first CSS framework for building custom designs quickly.
Bootstrap: A popular CSS framework for building responsive and mobile-first websites.
4. Back-End Frameworks:
Node.js: A JavaScript runtime for building scalable server-side applications.
Express.js: A minimal web framework for Node.js, often used for building APIs and web apps.
Django: A high-level Python web framework for building secure and maintainable websites.
Ruby on Rails: A full-stack framework built on Ruby, known for rapid development and ease of use.
5. Database Management:
MySQL: A widely used relational database management system.
MongoDB: A NoSQL database that's flexible and scalable.
PostgreSQL: A powerful, open-source object-relational database system.
Firebase: A cloud-based real-time database with simple authentication and data synchronization.
6. Package Managers:
npm: Node.js package manager for managing JavaScript libraries and dependencies.
Yarn: An alternative package manager for JavaScript with a focus on performance and reliability.
7. API Tools:
Postman: A powerful tool for testing and interacting with APIs.
Swagger: An open-source framework for API documentation, design, and testing.
8. Task Runners & Module Bundlers:
Webpack: A static module bundler for JavaScript, CSS, and other assets.
Gulp: A task runner used for automating repetitive development tasks.
Parcel: A zero-config bundler that is easy to use and fast.
9. CSS Preprocessors:
Sass: A CSS preprocessor that extends CSS with variables, nested rules, and functions.
Less: A preprocessor with features like variables and functions to make CSS more manageable.
10. Testing Tools:
Jest: A testing framework for JavaScript, commonly used for testing React apps.
Mocha: A flexible JavaScript testing framework for Node.js.
Cypress: An end-to-end testing framework for web applications.
Selenium: A tool for automating web browsers, useful for functional and UI testing.
11. Containerization & Deployment:
Docker: A platform for building, running, and shipping applications inside containers.
Kubernetes: An orchestration platform for automating the deployment, scaling, and management of containerized applications.
Netlify: A platform for continuous deployment of web apps with automatic scaling.
Vercel: A platform that provides serverless deployment and front-end hosting.
12. UI/UX Design Tools:
Figma: A collaborative interface design tool for creating web and app prototypes.
Adobe XD: A vector-based tool for designing and prototyping user experiences.
Sketch: A design tool for web and mobile interfaces, available for macOS.
13. Collaboration Tools:
Slack: A messaging platform for team communication and collaboration.
Trello: A task management tool for organizing and prioritizing tasks in a project.
Asana: A work management platform that helps teams plan, organize, and execute projects.
Using these tools effectively can streamline your workflow, help you collaborate better with teams, and enhance the quality of your web development projects.
0 notes
Text
Exploring the Power of LMS Dashboard Templates
Importance of LMS Dashboard Templates
In the modern era of education and corporate training, Learning Management Systems (LMS) have revolutionized the way we acquire knowledge and develop new skills. To effectively manage and track learner progress, educators and administrators rely on LMS Admin Panel. These templates provide a centralized hub that simplifies the process of monitoring and analysing learner data, enabling organizations to deliver a seamless and personalized learning experience. In this article, we will explore the benefits and features of LMS Dashboard templates and how they empower educators to navigate the learning landscape with ease.
Efficient Data Management
LMS dashboard templates offer a streamlined approach to data management by providing a clear and organized interface. These templates gather essential information such as learner progress, course completion rates, assessment scores, and engagement metrics into a single, easily accessible platform. Educators and administrators can quickly view and analyse this data, enabling them to identify trends, strengths, and areas for improvement. By centralizing and visualizing data, LMS dashboard templates simplify the process of data management and enable educators to make data-driven decisions that enhance learning outcomes.

Read More : LMS Dashboard Templates
Like Us


#LMS Dashboard#LMS Software Dashboard#LMS Dashboard Templates#Bootstrap 5 Ui Framework#Bootstrap 5 Admin Panel#Dashboard UI Design
0 notes
Text
Top 10 Projects to Build as a Python Full Stack Developer
Building real-world projects is one of the best ways to master Python Full Stack Development. Whether you are a recent graduate, an aspiring developer, or a professional looking to enhance your skills, working on these projects will help you gain hands-on experience and showcase your abilities to potential employers. Below, we outline 10 practical and impactful project ideas to help you grow as a Python Full Stack Developer.
1. Blog Platform
Overview: Create a blogging platform where users can register, log in, create, edit, and delete blog posts. Include features like user authentication, categories, and comments. Technologies Involved: Django for backend, HTML/CSS for frontend, SQLite or PostgreSQL for database. Skills Gained: Authentication systems, CRUD operations, and database integration. Challenges: Implementing a secure login system and designing a user-friendly UI.
2. E-Commerce Website
Overview: Build an e-commerce platform where users can browse products, add them to a cart, and checkout with payment integration. Technologies Involved: Django or Flask for backend, React for frontend, Stripe or PayPal for payment gateway. Skills Gained: API integration, session management, and frontend-backend communication. Challenges: Implementing payment gateways and managing inventory.
3. To-Do List Application
Overview: Develop a simple to-do list app where users can create, edit, and delete tasks. Add features like due dates and priority levels. Technologies Involved: Flask for backend, Bootstrap for frontend, SQLite for database. Skills Gained: RESTful APIs, data validation, and responsive design. Challenges: Ensuring smooth user experience across devices.
4. Social Media Dashboard
Overview: Create a dashboard where users can view and manage posts, followers, and analytics from multiple social media platforms. Technologies Involved: Django REST Framework (DRF), React, and Chart.js for data visualization. Skills Gained: API handling, data visualization, and advanced JavaScript frameworks. Challenges: Integrating third-party APIs and managing data consistency.
5. Online Forum
Overview: Develop a discussion forum where users can create threads, reply to posts, and vote on responses. Technologies Involved: Flask for backend, PostgreSQL for database, and Materialize for frontend. Skills Gained: Managing user-generated content, search functionality, and thread management. Challenges: Moderating content and implementing a voting system.
6. Real-Time Chat Application
Overview: Build a real-time chat application with group and private messaging features. Technologies Involved: Django Channels, WebSockets, and Redis. Skills Gained: Real-time communication, WebSocket programming, and performance optimization. Challenges: Managing real-time data and ensuring security in messaging.
7. Weather Forecast App
Overview: Create a weather application where users can search for the current weather and forecasts for their location. Technologies Involved: Flask, OpenWeather API, and Bootstrap. Skills Gained: API consumption, error handling, and responsive design. Challenges: Handling API limits and designing an intuitive UI.
8. Portfolio Website
Overview: Build a personal portfolio website showcasing your projects, resume, and contact information. Technologies Involved: Django or Flask for backend, HTML/CSS/JavaScript for frontend. Skills Gained: Deployment, personal branding, and responsive design. Challenges: Optimizing for performance and SEO.
9. Online Examination System
Overview: Develop a platform where instructors can create exams, and students can take them with automated grading. Technologies Involved: Django, React, and PostgreSQL. Skills Gained: Role-based access control, real-time grading, and database design. Challenges: Ensuring scalability and handling multiple concurrent users.
10. Expense Tracker
Overview: Create an expense tracker that allows users to log, categorize, and visualize their expenses. Technologies Involved: Flask, Chart.js, and SQLite. Skills Gained: Data visualization, CRUD operations, and user management. Challenges: Designing effective visualizations and managing user data securely.
Conclusion
These projects not only help you practice Full Stack Development but also serve as a testament to your skills when showcased in your portfolio. Start with simpler projects and gradually move to complex ones as you build your expertise.
If you want to master Python Full Stack Development and work on real-world projects, Syntax Minds is here to help!
Address: Flat No.202, 2nd Floor, Vanijya Complex, Beside VRK Silks, KPHB, Hyderabad - 500085 Phone: 9642000668, 9642000669 Email: [email protected]
#artificial intelligence#data science#deep learning#machine learning#data scientist#data analytics#Python#Python Development#Full Stack Development
0 notes
Text
8 Key Principles for Designing Interactive User Interfaces
In modern digital environment users expect easy and exciting experiences, that is why Development of interactive User Interface has become vitally important for successful product outcome. User interaction design is critical when or if concerning the general interaction of users to a concrete mobile application or website or even a certain software.
Contrary to common thinking, interactions UI design is all about creating a guise for more interaction with an interface; it encompasses concepts like how an interface appears, its entity, and the way it feels to use. For students and professionals of the institution such as the Unitedworld Institute of Design (UID), the only way to design new experiences, is by effectively understanding the concept of interaction design.
So here are eight principles that any interaction designer needs to learn to tackle IU designing with relative ease so check the detailed description here:
1. Understand Your Users
The substrate for any successful interactive UI is a profound understanding of the customer. Who are they? What is their pain? What is on their wish lists? These are questions whose answers should guide you in the case of any design decision that you are going to make.
Survey, interview, and usability test your users.
User personas are imaginary characters that represent the target consumers in their organization.
Particularly dissect out the user journey to make sure that one is aware of the points that are more sensitive in terms of user interplay.
Why It Matters: Creating your interface in a way that reflects how a user will interact with it makes it more meaningful.
2. Prioritise Usability
An interactive design must be functional above all else. Users should be able to achieve their goals with ease, whether they’re navigating a website, completing a form, or shopping online.
Simplify navigation with clear menus and intuitive pathways.
Ensure buttons, links, and icons are easily identifiable and actionable.
Avoid overcomplicating tasks; aim for simplicity.
Pro Tip: Follow established design patterns that users are already familiar with to minimize confusion.
3. Design for Responsiveness
Users interact with digital interfaces across multiple devices, from smartphones to desktops. Your interface should adapt seamlessly to different screen sizes and resolutions.
Use responsive design frameworks like Bootstrap or CSS Grid.
Ensure touch targets (buttons, links) are large enough for mobile devices.
Test the interface on various devices to ensure consistency.
Why It Matters: A responsive design improves accessibility and user satisfaction.
4. Ensure Consistency
Consistency in design elements, interactions, and functionality builds trust and familiarity with users. They should feel like they’re navigating a cohesive system rather than a disjointed experience.
Use a uniform color scheme, typography, and iconography.
Maintain consistent interaction patterns across all screens and devices.
Create a design system or style guide to enforce consistency.
Fun Fact: Apps like Instagram and Spotify are loved for their consistent design language.
5. Emphasise Visual Hierarchy
An effective UI guides users’ attention to the most important elements first. This is achieved through visual hierarchy, where size, color, and placement of elements direct the flow of user interaction.
Highlight primary actions (e.g., “Sign Up,” “Add to Cart”) with prominent buttons.
Use contrasting colors to draw attention to key areas.
Group related elements together to improve readability.
Key Insight: A well-structured visual hierarchy simplifies decision-making for users.

6. Focus on Feedback and Interaction
Interactive interfaces should feel alive, providing users with instant feedback for their actions. Feedback reassures users that their inputs have been registered and understood.
Use hover effects, animations, or color changes to indicate clickable elements.
Show loading indicators for actions that take time, like submitting a form.
Provide confirmation messages for completed tasks or warnings for errors.
Example: When you “Like” a post on Instagram, the animation of the heart provides satisfying feedback.
7. Incorporate Accessibility
Designing for all users, including those with disabilities, is essential. Accessibility in interaction design ensures that your interface is usable by the widest possible audience.
Include alt text for images to support screen readers.
Ensure color contrast ratios are sufficient for users with visual impairments.
Support keyboard navigation and voice commands.
Tools to Use: Leverage tools like WAVE or Lighthouse to test accessibility in your designs.
8. Test, Iterate, Repeat
No design is perfect in very the first time. Therefore, continuous testing and iteration are crucial to refine your interface and enhance user interaction.
Conduct usability testing with real users to identify pain points.
Collect feedback through surveys or in-app prompts.
Use analytics tools to track user behavior and optimize based on data insights.
Pro Tip: Adopt an agile design approach to make iterative improvements throughout the project lifecycle.
The Role of Interaction Design in the Future
As the digital landscape evolves, interaction design continues to shape how users experience technology. The rise of AI, voice interfaces, and augmented reality demands a deeper understanding of how users engage with emerging technologies.
At Unitedworld Institute of Design (UID), students are equipped with the skills to navigate these shifts, learning not just the principles of user interaction design but also how to innovate in a competitive industry.
Designing interactive user interfaces is both an art and a science. By adhering to these 8 key principles, designers can create interfaces that are intuitive, engaging, and effective. Whether you’re a seasoned professional or an aspiring student at UID, understanding the fundamentals of user interaction design is essential for crafting exceptional user experiences.
Read More:- 8 Key Principles for Designing Interactive User Interfaces.
0 notes
Text
Designing for Mobile: Best Practices for Responsive UI/UX

As mobile usage continues to rise, creating a seamless user experience across various devices has become essential. A responsive UI/UX design ensures accessibility, usability, and engagement. Here are the best practices for designing mobile-friendly interfaces.
1. Mobile-First Approach
Start designing with a mobile-first mindset. Prioritize content and essential functionalities for smaller screens, then scale up for larger devices. This ensures a streamlined user experience.
2. Responsive Design
Use flexible grids and layouts to adapt to different screen sizes. CSS frameworks like Bootstrap help maintain consistency across various devices, ensuring a smooth user experience.
3. Intuitive Navigation
Simplify navigation by using familiar icons, easy-to-access menus, and a well-structured layout. A hamburger menu is a common choice for mobile interfaces to save space while keeping functionality intact.
4. Optimized Touch Interactions
Design for touch gestures with adequately sized buttons and tap targets. Ensure interactive elements are easily clickable, reducing frustration for users.
5. Fast Loading Speed
Mobile users expect fast performance. Optimize images, use lightweight frameworks, and implement lazy loading techniques to reduce page load times.
6. Readable Typography
Use legible fonts with appropriate sizes and spacing. Avoid using small or overly decorative fonts that might be hard to read on small screens.
7. Minimalist and Clutter-Free Design
Keep the interface simple and focused. Eliminate unnecessary elements and prioritize essential information to enhance usability.
8. Adaptive Media and Content
Ensure images, videos, and other media adjust smoothly to different screen sizes. Use responsive images and scalable vector graphics (SVG) for better clarity.
9. Dark Mode Compatibility
Many users prefer dark mode for reduced eye strain. Provide an option to switch between light and dark themes for a personalized experience.
10. Accessibility Considerations
Design with inclusivity in mind. Use high-contrast colors, screen reader support, and alternative text for images to ensure accessibility for all users.
11. Seamless Cross-Platform Experience
Ensure a consistent design across various devices and operating systems. Users should have a uniform experience whether on a smartphone, tablet, or desktop.
12. Feedback and Microinteractions
Use animations, vibrations, and visual cues to provide feedback when users interact with elements. This enhances engagement and usability.
13. Security and Privacy
Implement secure authentication methods, data encryption, and privacy settings to protect user information. Transparency in data usage builds trust.
14. User Testing and Iteration
Regularly test your mobile design with real users to identify pain points. Gather feedback and continuously refine the UI/UX for an improved experience.
15. Progressive Web Apps (PWAs)
Consider building Progressive Web Apps for an app-like experience without requiring downloads. PWAs enhance performance and engagement.
16. Consistent Branding and Visual Hierarchy
Maintain brand consistency across all screens by using a defined color palette, typography, and design elements. A clear visual hierarchy helps users focus on key elements.
17. AI and Machine Learning in UI/UX
Leverage AI-driven UX enhancements such as chatbots, predictive text, and personalized content recommendations to create an intelligent user experience.
18. Motion Design and Animation
Micro-animations, transitions, and motion graphics add a layer of interactivity. These elements enhance engagement and guide users through their journey seamlessly.
19. Augmented Reality (AR) and Virtual Reality (VR) in UI/UX
Emerging technologies like AR and VR are changing mobile design. Integrating these elements can create immersive experiences for users.
20. Data-Driven Design Decisions
Use analytics and heatmaps to understand user behavior. Data-driven insights help designers create more effective and user-friendly interfaces.
Conclusion
Responsive UI/UX design is crucial for mobile success. By following these best practices and keeping up with emerging trends, designers can create user-friendly, efficient, and visually appealing mobile interfaces that meet modern expectations.
Devoq Design is a premier UI/UX design agency in UI/UX Design Agency in Hobart and UI/UX Design Agency in Launceston , providing top-notch digital design solutions for businesses looking to enhance user experiences. In Hobart, Devoq Design helps startups and enterprises create intuitive and visually appealing web and mobile applications that drive engagement and growth. Meanwhile, in Launceston, the agency works with businesses across industries to develop seamless, user-friendly interfaces that improve usability and accessibility. With a team of experienced designers and a data-driven approach, Devoq Design ensures that every project aligns with user expectations, brand identity, and industry best practices, delivering outstanding digital experiences.
0 notes
Text
Top 10 Features to Add to Your HTML Slot Machine Code

Introduction
Making a visually and functionally appealing slot game isn't just about basic coding. With specific additions to the slot machine HTML code, you can create an experience that is engaging, interactive, and draws in more players. Below are the top 10 features that help transform a standard slot game into an exciting immersive gaming experience.
1. Responsive Design for Multi-Device Compatibility
Why Responsive Design Matters
In the current mobile-first world, it is absolutely important to ensure that your slot game HTML code is accessible on all devices. Responsive design allows your game to adapt itself seamlessly across different screen sizes so that desktop, tablet, and mobile users will get an optimized experience.
Use CSS media queries to adjust layouts dynamically.
Test your code on different devices to make sure things work smoothly.
By using responsive design, you can make your slot game more versatile and user-friendly to reach a wider audience quite easily.
2. Reel Animation with Smooth Transitions
Enhancing Visual Appeal with Real Animations
Animations can give your slot machine life. You can incorporate smooth reel animations using CSS keyframes and JavaScript in your slot machine HTML code to keep the players hooked and engaged.
Create spinning effects for reels.
Use easing functions to make the animations feel organic and fluid.
These animations not only improve the looks but also add excitement to every spin.
3. Sound Effects and Background Music
Adding Audio Elevates User Engagement
Sound effects are the most visible user experience tweak. With the clinking of reels to huge win tones, embedding an audio component within your slot game HTML code adds an interactive ambiance.
Use the tag to add sounds for specific events of the game.
Place an option to mute or adjust the volume for the player's convenience.
With this, by sound effects alone, your slot game will become unforgettable.
4. RNG Logic
Fair and Unpredictable Gameplay
Fairness is a crucial aspect of any slot game. The RNG ensures that every spin is random and unbiased. You can apply RNG functionality to your slot machine HTML code using JavaScript's Math. random() function.
Randomize the outcomes of the reels for each spin.
Prevent patterns that may foresee results.
This is how RNG logic will have players keep believing in the fairness of your game, boosting their satisfaction and engagement.
5. User Interface Improvements
Creating a Seamless and Intuitive UI
A good UI will keep players. From your slot game HTML code, there should be intuitive buttons such as Spin, Max Bet, and Auto Play.
Maintain clear navigation and layout.
Use frameworks like Bootstrap for a professional touch.
A user-friendly interface will ensure that players are kept focused on the game with fewer distractions by the unnecessary.
6. Win/Loss Tracking and Statistics Display
Keeping Players Informed
Transparency in online gambling. Real-time statistics are incorporated into the HTML code of your slot machine so that players get an overview of their gameplay.
Display wins, losses, and payout percentages.
Update statistics dynamically on each spin.
Building confidence and involvement.
7. Progression Integration of Jackpot
Adding Emotion to the Game End
Progressive jackpots can be an excellent way to keep the users coming back for more. Develop a dynamic jackpot counter in your slot machine HTML that augments with each spin.
The jackpot amount has to be displayed prominently on the screen.
The count resets once a player wins.
This feature escalates the excitement level and keeps the stakes high.
8. Bonus Features and Free Spins
Boosting Player Retention with Bonuses
Bonus rounds and free spins are such a big deal in any game of slots. By incorporating the feature into your HTML code slot game, you can make slot gameplay more rewarding.
Use bonus rounds based on certain reel combinations.
Enable unlocking of free spins from gameplay.
These rewards can increase player retention and engagement considerably.
9. Flexible Themes and Skins
Making Options Available for Personalization by Users
Customization enhances the gaming experience by letting the players mold the imagery to their liking.
Use CSS variables to define swappable themes.
Provide many options for skins and reeled backgrounds.
Including personalization options with your slot machine HTML code creates a game that appeals to a large player base.
10. Multilingual Support
Accessibility to the World Player's Community
Including multi-language support with your slot game, HTML code expands the accessibility of your slot game to reach an impressive percentage of world players.
Integrate translation APIs or language files.
Let users switch their language easily.
This feature enables your game to attract a broad audience and make them reachable.
Conclusion
By implementing these top 10 features in your slot machine HTML code, you will get the final slot machine that stands out in a competitive market. Each characteristic adds to your gameplay, right from making it fair through the logic of RNG to engaging players through animations and sound effects. At AIS Technolabs, the development of advanced gaming solutions is our specialization. Want to get professional help in developing your ideal slot game? Contact us today!
FAQs
1. Why is RNG crucial in slot machine HTML code?
A: RNG makes the results fair and unpredictable in nature as well, thus it makes players feel satisfied with the game.
2. How can I make my slot game responsive for mobile devices?
A: Yes, using CSS media queries can allow you to optimize your slot game HTML code for any screen size.
3. How do bonus features affect gameplay?
A: Free spin and special round bonus features enhance the engagement and retention of players.
4. What animation tools can I use in my slot game?
A: CSS keyframes and JavaScript are the tools with which you can implement smoother reel animations and transitions.
5. Why should I have multi-language support?
Multi-language support will help a developer reach a global audience, thereby presenting the game to the global gaming fraternity.
Blog Source : https://joripress.com/top-10-features-to-add-to-your-html-slot-machine-code
0 notes