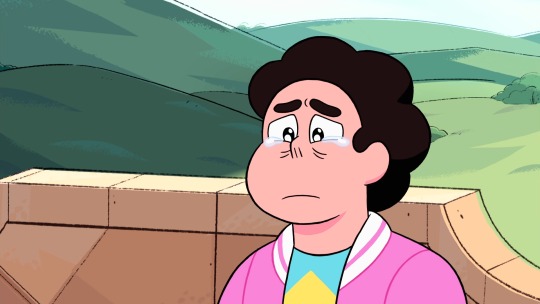
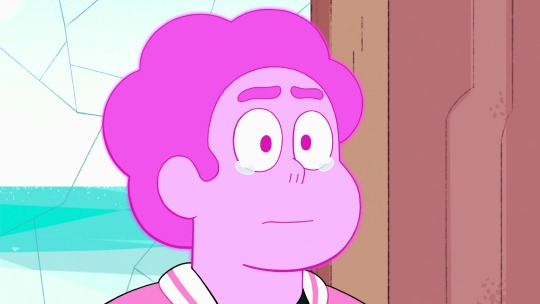
#Ahhhh I reused a picture again
Explore tagged Tumblr posts
Text
Who's ready to cry over a little cactus guy today~? Me~? You~? Us~?
Fun~! More little guys~!
Spoilers, I guess...
-Spanner gave Boruto a bad review so he got attacked by a salty Naruto fan who knew that he was right.
-MechaniChani...
-Crab...
-I wonder who exactly made Isaac.
-Awwwww
-Little guy~!
-You're gonna help us, huh Smaphone?
-Sma!
-Funny enough, Faiz and Kaixa have Ride Chemy Cards just like you in the toyline. You'd fit in great~!
-He caught something~!
-Gotta think the way they think!
-Think fast, chucklenuts!
-Hi, MechaniChani :)
-These're just the most
-Delightful little guys
-Ah, there's our conflict for today.
-No teamwork today, huh?
-Rinne didn't really do anything, but-
-Hello there, kiddo.
-"Can you... please take care of this guy?"
-Filling up a flask, eh? I see this is Labyrinth rules. Where's the Fresh PreCure crew when you need 'em?
-Lachesis again today, eh?
-Okay, have fun, be home before dinner.
-Riku, huh?
-Ahhhh, dads.
-This poor kid...
-Yeah, wiping these innocent people's memories isn't a good thing at all. This is probably the first thing that's gonna go.
-Thinking ahead, are we?
-I concur with Rinne here. I don't think that just because he's a kid means he'll be immune to becoming a Malgam. If Malice in Gotchard works the same way it does in Zero-One, I think just one bad fight with his parents can turn him into a Cacturne. And those bastards are terrifying on Sandstorm teams.
-"Too slow, mine now."
-You get graded based on Chemy catches? Oh, that's concerting.
-C
-Church, I didn't even register that this was a church.
-A bit ironic, considering that alchemy can be traced back through Islamic tradition and Ptolemaic Egypt.
-Easy there buddy, I know you're kneeling before Lachesis in a nun habit, but-
-Oh hey there, Mama. Hotaro ran out and... apparently Sabimaru teleported out, but we can help~!
-"MONEY!"
-"Oh... hey. Get outta here."
-Hotaro does know what people want, at least.
-Ohhhh, steel drums~! Enhance the comedy~!
-Hotaro, if you fail at fifth grade math, I swear.
-Oh
-Cram schoolers, man.
-Poor kid...
-"Round 2! Kick the can! I happen to know a can, I know all their weakpoints!"
-Fight bugs with bugs!
-Ohhhhhhh, seems like Sabimaru's a bit of a stool pigeon.
-Don't lie to me, Kurogane. You've got your own favorite little guys, and they go vroom!
-"This guy seriously sucks. >:("
-"And who am I to tell him he's wrong?"
-It's extremely difficult to win without capturing any pieces... but it's extremely easy to lose without capturing any pieces.
-I see Spanner doesn't trust Minato-sensei either.
-How the fuck can he snipe so hard
-"SPEAK UP MAN, I'M IN A WARZONE!"
-Tea time :)
-Rinne's overwhelmed.
-Oh, hey Atropos, what's up?
-Might wanna choose a less conspicuous outfit
-Tonbo~!
-"Just so you know, this'll be on the quiz later. You might want to take out a notepad or take a picture of the screen with your pet smartphone."
-I live for these costumes
-HE ATE THE NEEDLE
-Shoot him! Shoot him!
-Beefed his jump.
-Hawkstar~!
-Hotaro once again relies upon his understanding of elementary school math.
-NeedleHawk!
-Those shoulders are definitely reused from Bravo.
-SABO!?
-Et tu, cactus friend?
-WHERE
-RINNE???
-ATROPOS???
-Well fuck, man! Guess I gotta watch the next episode now!
#Pull Another Gotcha! 101 Dreams to Catch!#kamen rider#kamen rider gotchard#kr gotchard#gotchard spoilers
2 notes
·
View notes
Photo
#Steven Universe#Steven Universe Future#Steven Universe the movie#big sad#:'(((#a sad lad makes me big sad#Ahhhh I reused a picture again#It's hard to prevent repeats sometimes lol sorry
351 notes
·
View notes
Note
O D D N U M B E R S
EM YOU ABSOLUTE MADWOMAN I LOVE YOU SO FREAKING MUCH THANK YOU!! X’D
1: Spotify, SoundCloud, or Pandora?
None of them work on my computer but I have a feeling when I get a phone, it’ll be Spotify.
3: what color are your eyes?
The most boring shade of brown you could possibly imagine! :D
5: what is your relationship status?
Ahhhhh single but I also have a crush so I can’t see anyone else in a romantic way??? AHHHH HELP??????
7: what color hair do you have?
Dark brown.
9: where do you shop?
Target/Kmart/Big W… we’re pooooor. XD
11: favorite social media account
YA LOOKIN AT IT :D for real tho I gotta stop wasting my life on this gotdamn website
13: any siblings?
Yeah. An asshole big brother. I hate him. :)))
15: favorite snapchat filter?
Never had a snapchat, no idea. XD
17: how many times a week do you shower?
Pretty much all 7 days. Occasionally I only shower every other day, especially when The Depression is kicking my ass. But I normally shower at LEAST 4 days a week.
19: shoe size?

21: sandals or sneakers?
SNEAKERS. God I hAtE sandals with a fiery passion. >:(((
23: describe your dream date
adopting a shelter dog :D Getting take out and curling up on the couch watching a movie or show.
25: what color socks are you wearing?
Not wearing any. Too hot.
27: do you have a job? what do you do?
Not yet!! But we should be moving back home this year and I’m going to get one then!! :DDDD
29: whats the worst thing you have ever done?
I used to be on another site. I left that site to dedicate all my time to this one (abusive) friend, and I left all my other friends on there with only a mediocre explanation for 9 months of silence. I was in a bad place mentally and wasn’t thinking too clearly, but I still feel guilty to this day. I apologized to all of them and explained myself after I left that bad friend but it was never the same again and honestly I don’t blame them for not trusting me again. I wish I’d never done it.
31: 3 favorite boy names
Uhhhhhhhh I really don’t know? Aaron, Ben, Zephyr??????? First three that pop to mind, don’t even know if I really like them or not. XD
33: favorite actor?
T E R R Y C R E W S :DDDD
35: who is your celebrity crush?
Don’t have one.
37: do you read a lot? whats your favorite book?
YES!! Tho I do have a bad attention span when I’m bored so only books I really enjoy grab me. My all-time favourite book is Bird by Crystal Chan. It’s beautiful.
39: do you have a nickname? what is it?
Matt and Math(s) mostly! :D My parents call me Bubba bc I’m the baby of the family. XD
41: top 10 favorite songs
(in no paticular order)
Favourite song ever
Coward
Somebody Else
Take me to Church
God Put a Smile on Your Face
Light
Mr. Blue Sky
Dust and Light
Give It Up
Gorgeous
43: what is your skin type? (oily, dry, etc)
Dry AF with brief and confusing bouts of Grima Wormtongue. XD
45:how many kids do you want?
Me??? A responsible parent who wouldn’t accidentally fuck up their child’s life??? *hysterical laughter* Idk. Depends on how future-me is and if my partner wants kids, I guess??
47: what type of house do you live in? (big, small, etc)
Small!! Big houses just mean more cleaning. Besides, I like feelin cozy n my parents do to. XD
49: what was the last compliment you received?
I can’t remember? Not that it was that long ago, I just tend to disregard compliments?? bc I don’t think I deserve them?? I mean don’t get me wrong I love them and appreciate them and they’re super nice but.. idk, I don’t let them soak in. :’)
51: how old were you when you found out santa wasn’t real?
………………………………………………………………….. 14. i wAS HOMESCHOOLED AND DIDN’T HAVE ACCESS TO THE INTERNET AND WAS BASICALLY COMPLETELY OUT OF CONTACT FROM THE WORLD AND REALITY OKAY SHUT UP. X’D
53: opinion on smoking?
If you wanna slowly and painfully kill yourself, it’s your choice, go nuts. But don’t do it around me bc my lungs flat out don’t work at the best of times. (fun fact but I actually blackmailed/guilted/manipulated my Granddad into stopping smoking when I was 6 lmao.)
55: what is your dream job?
Waiter at a li’l cafe thing I used to go to when I was little. Also, author! :D
57: do you take shampoo and conditioner bottles from hotels?
……………. ye. :) XD I know they won’t reuse them so I may as well have ‘em.
59: do you smile for pictures?
Yeah but I look stupid. XD
61: have you ever peed in the woods?
Multiple times. XD
63: do you prefer chicken nuggets from Wendy’s or McDonalds?
Neither. My brain doesn’t let me eat fast food. The only thing I can eat from there = chips/fries.
65: what do you wear to bed?
My birthday suit. 👀 (occasionally just briefs… but mostly nothing lmao)
67: what are your hobbies?
Writing. Walking. Daydreaming. Doodling. Playing with animals. Playing Pokemon. And watching Netflix atm. :D
69: do you play an instrument?
NO BUT I WANNA LEARN!! :D
71: tea or coffee?
TEA!!
73: do you want to get married?
I really don’t care either way??? So it’d depend entirely on what my partner wanted, I’d be happy to do anything for them. a lightning bolt might strike me at the holy alter tho just a warning XD
75: are you going to change your last name when you get married?
Again, it’d depend on what my partner wanted. But I guess I’d prefer not to? Or I could hyphenate the names?? :D
77: do you miss anyone right now?
Yep.
79: do you believe in ghosts?
ABSO-FUCKING-LUTELY!!!
81: last person you called?
Can’t remember.
83: regular oreos or golden oreos?
I’ve only ever had regular ones so I can’t really say! :D
85: what shirt are you wearing?
I’m not wearing one. Too hot. I’m wearing my binder tho (even tho I should really be bc it’s too hot and I can’t breathe properly lmao) and it’s black. :D
87: are you outgoing or shy?
I guess I’m shy? But really I’m just socially anxious. XD With people I know, I’m more outgoing.
89: do you like your neighbors?
I like the ones on our left, they’re a nice old couple.
91: have you ever been high?
No. I’ve had close people in my family addicted to drugs. Not even gonna go there.
93: last thing you ate?
BANANA CHIPS. :D🍌
95: summer or winter?
WINTER WINTER WINTER GOD I HATE SUMMER SO MUCH AAAAAAAAAA
97: dark, milk, or white chocolate?
Yes! :D
99: what is your zodiac sign
Pisces!
WHEW. THANK YOU SO MUCH FOR ASKING, EM!! XD :’D
#about me#if you wanna get to know me more read this#X'D#so. many.#this felt like an interview#I love it!!#got paranoid I was gonna hit the wrong button and delete the whole thing at the end tho#XD#asks#Matt speaks#get to know me
3 notes
·
View notes
Text
The Joker x Reader- “Without Wings”
Each villain gets a protective spirit, kind of like a guardian angel but…not really. The Joker is a handful, that’s why nobody wants the job. Lucky him you love challenges so you’ll take him under your wings (so to speak since you don’t have any; it just sounds nice).
When the Ace Chemicals incident happened, The Joker’s guardian just left him, fed up with the difficult task of keeping him out of danger so there was nobody watching over The Clown Prince of Crime. You felt the urge to help and stepped in right away because you absolutely love tough assignments.
He almost drowned in that vat but you pulled him out in time. J didn’t see too much before he lost consciousness: just a shadow he assumed it was one of his henchmen (not too much to see anyway since you’re shapeless). You felt so bad about his misfortune – no villain is supposed to be without protection at any given time. You tried to make it up to him by making his eyes a more intense blue and blessed him with a lot of eerie beauty. A guardian spirit is not allowed to change anything about a villain’s personality so you didn’t.
Holy crap, is it hard to keep him out of trouble or what? He’s so reckless, impulsive and temperamental now you realize why nobody wanted him. But you never lost a villain on your watch and you’re not going to start now.
At the present moment you are very concerned about his girlfriend: she was actually sent to assassinate him and he has no clue. For once somebody got under his skin and it worries you. Things are really getting out of hand: she already tried to kill him twice last week.
When she gave The Joker the poisoned grape juice, you tripped him and he spilled it all over his new suit. Man, he had such a fit and it was fun to watch: you always enjoy his tantrums. When she tried to inject him with the toxin in his sleep, you slapped her hand and she dropped the syringe. You broke it to pieces and she was so intrigued: how can plastic shatter like that?!
Bitch, don’t mess with someone under my safekeeping!!
Tonight she will try again and you are so done! You are seriously considering taking over her body, this way you can watch J all the time: he certainly needs extra care and attention. Last time you did this for somebody was about 200 years ago and you recall you didn’t enjoy your mortal adventure too much. Plus, if you decide to do it, you’ll be stuck like that for a year, then you have only a two days window to go back to the Shadow World. If not, you’ll be confined in the body until it dies.
Not very nice options but it’s nighttime and she will make her move soon.
Shit, might as well.
You materialize by their bed and float there for a while, considering all the alternatives and finally determine:
HERE WE GO!
You open your eyes and blink a few times, adjusting to your new status. The Joker senses you’re wiggling around and moves his hand from your waist to your breasts, mumbling something in his sleep.
Watch it, mortal! And you move his hand lower. J feels that and slides his fingers down your tummy, trying to get inside your bikini.
Seriously, human, keep your hands at home. You move his hand away.
A very low growl and he shoves himself into you, opening his eyes for a few seconds. Since you can see in the dark, you have to congratulate yourself: you did such an amazing job on that shade of blue!
“Why are you still awake, Princess?” J yawns, snoozing shortly after.
I just got here, you want to say but you don’t. You never sleep anyway. You turn towards your protégé and carefully remove the blanket off him to admire that eerie beauty you blessed him with a while ago. Yep, you did very good: that pale skin is flawless and all those tattoos amplify the whole ensemble gorgeously.
The Joker is such a light sleeper: you were cautious yet he felt you move the cover and woke up, reaching over to kiss you.
How weird, you back out a bit and he wraps you in his arms.
“What is it, Doll? Wanna go again? I am tired as hell but I can make an exception for you,” he grins, taking a deep breath.
Go where?! It’s in the middle of the night.
“Nooooo,” you mutter because you can tell he needs to rest. Why would he want to get up and go somewhere?!
“OK then, Pumpkin, just let Daddy know if you change your mind, I’m not gonna let my girl hanging,” he stretches, groping you and placing your arms around his neck, this way his head rests on your cleavage.
“U-hum,” you agree, confused, not having a clue what he’s referring to.
He suddenly kisses you one more time and it irritates you: keep your lips at home, mortal! Such a strange sensation; it’s been forever since you’ve been inside a human body. Very interesting, what is it really?! Without even noticing you kiss him back and he moans, groping you again.
“You’re such a naughty girl, Y/N; come on, let’s go again then, you’re making Daddy all worked up,” he purrs, breaking apart from your lips with his eyes closed.
Where does he want to go?! He’s worn out and it shows.
“We can go tomorrow, um… baby,” (that’s how that woman addressed J and it appeared he liked it).
What’s the rush? Just sleep and you can take me wherever you want in the morning.
“Are you sure, Doll?” he nuzzles in your long hair (well, hers), not really wanting to give up on the opportunity.
“Of course I’m sure, we can go tomorrow, you’re exhausted,” you reply, playing with his green locks, completely oblivious at the meaning of his statement. All these things you feel are overwhelming but so far it’s not as bad as you remember. Probably need to get reused to everything.
“You know we will!” he promises, cuddling to your chest while you keep on caressing that green hair and you have to admit you’re happy he’s going to take you somewhere fun on your first day as a mortal.
********************
He keeps on staring at you all day, intrigued.
“What is it?” mortal, you want to add but decide to skip it.
“Something about you changed, Doll. You look sooooo beautiful,” he licks his lips, enticed.
Of course I’m beautiful since I blessed this body with my presence, duh. “Did you change your hair?” he evaluates your assets, trying to guess on what it is.
“Nahhh,” you keep on playing with her cellphone, mesmerized. Wow, this is absolutely fabulous! This piece of technology must be the greatest invention ever on the planet!
“Did you change your makeup?” The Joker insists and walks on the street, trying to get in the limo and you follow, scrolling down all those interesting pages on Google, catching up with what’s going on with humanity these days.
“No, baby, I didn’t.”
“What is it then? Drives me nuts! What changed?” J is not even paying attention to the cars passing so close by and he still stands there, keeping the door opened so you can get in.
“Watch out,” you calmly warn, yanking him close to you just in time before a car almost hits him.
“Jesus, that was close!” he cracks his neck and slaps your butt as an encouragement to enter the limousine. “Thank you, Pumpkin.”
“It’s my job”, you admit, not taking your gaze off your phone.
“What was that?” he grins once he gets in the car by you.
“I said no problem,” you repeat, changing your tune. J takes the cell out of your hand and hides it in his jacket.
“Stop playing with it, Princess, and pay attention to me.”
You whimper, unhappy your toy is gone for the moment.
“Tonight you’re in for some special treatment, Doll,” he winks and you lean your head on his shoulder, bored. “I’m in the mood for some crazy stuff.”
“You’re taking me to that place you wanted to go last night?” you innocently inquire.
“Ahhhh, I love it when you tease me, Kitten,” The Joker roars in your ear, biting it.“Daddy will take you to places you’ve never been before,” he slaps your thigh, aroused.
How cool, my human will take me somewhere awesome tonight.
“You swear?” you double check, excited, unaware of what’s in store for you.
“Always,” J pulls on your bottom lip and you move closer to him. “Lemme take a picture of you, Y/N,” he takes out his phone, “I need a new screen saver… … … Hm, I think there’s something wrong with my phone,” he frowns at the image and tries again. “I need a new one,” he puckers his lips, unhappy. “Look!” he shows you the image and you see the dark shadow covering half of your face.
That’s me, silly, you smile and encourage him to take another picture, making sure your ethereal being doesn’t show this time.
“See? I told you there is nothing wrong with your phone,” you giggle and he is very content with the new screensaver of his pretty Doll.
********************
Ohhhhhhhhh, so that’s what your villain meant when he said he’ll take you places: probably an understatement anyway. Wow, that was really wild! It seemed he enjoyed himself immensely and you don’t know where you stand yet; can’t say you disliked it though. I guess something else to get used to in a human body, no big deal.
Your head is resting on his abs, your feet high on all the pillows while you examine all the bites and hickeys on your body, not pleased with what J did.
“My God, Y/N, you were so feral !!! You scratched me quite badly, look!” he proudly shows you the marks you left on his pale skin.
You asked for it mortal; you can’t do that to me and get away with it!
The Joker messes with your hair for a little bit, then you try to get up and he won’t let you.
“Hey, Pumpkin, wanna go again?” he purrs, attempting to snatch you but his left hand is still handcuffed to the bed so he can’t move too much.
“Go where?” you pout, not in the mood to get out of the penthouse.
“I love it when you tease me, com’ere!” J signals you with his finger and you crawl on top of him because he seems to like that along with the kissing thing. “You can take advantage of me, hm? Go crazy, I’ll let you!” he lifts his head to bite your neck and you dodge his lips, annoyed:
“You’ll let me??! I don’t need your permission, mortal!” you snarl at him, biting his shoulder, calling him that out loud.
“That’s a good one, Y/N; are we playing roles? I can be the mortal and you can be…”
“Kind of like your guardian angel, no wings though,” you give him an evil glance, actually saying the truth but he wouldn’t know.
“Oh, goody, yeah, that works,” he moans, too horny to concentrate on what just came out of your mouth.
Ohhhhhhh, so that’s what your villain meant by “going again.” You really need to get up to speed with all this earthling talk that seems way to unnecessary complicated sometimes. As soon as you get your cell phone back, you’re on it!
** He wakes up in the middle of the night and distinguishes your body shape by the window, mumbling words he can’t understand and softly chuckling to yourself.
“Prinnncessss,” J whines, rubbing his eyes, “what are you doing?”
“Nothing, go back to sleep, I’ll be there in a minute!” you urge him, taking a deep breath, not thrilled you got interrupted.
You are actually communicating with another protective entity; I guess in human words you could call IT best friend and IT is assigned to safeguard Jonny Frost.
“My mortal needs me, “ you whisper in the Shadow World’s language not meant for human ears anyway. Your “friend” understands and vanishes, not that anybody can see IT to start with; only you have the ability since you’re the same.
You crack a few bones and go to bed, which is dull because you never doze off.
“I can’t sleep without you,” The Joker grumbles, and you oblige, taking him in your arms and squeezing him really tight. You even have one leg around his waist and you cling to his body like there’s no tomorrow.
I like my human, he gets so needy but he can’t help it, you reckon, placing soft kisses all over his forehead; you know he enjoys this kind of stuff. You hug him even tighter and he chokes, coughing a few times.
“Baby Doll, I can’t breathe,” he complains, half gone, and you loosen your embrace a bit.
“You’re a great villain,“ you praise in a very low voice but he can’t really understand since he’s snoozing.
“That’s nice, Kitten,” he mutters and you crush him in your arms again.
I really like my mortal, you smirk with such a devilish smile he cannot see and protectively watch him like a hawk all night, even if you don’t really have to.
*************************
“Watch out,” you smoothly move J with your finger just an inch to his right and the bullet shrieks by his ear, ricocheting in the wall behind.
“What… the hell?!” he snaps at the hostages, pulling his gun out and shooting the rebel officer that dared commit such atrocity. “Anybody else wants to be a hero?!” he screams and has the worst temper tantrum ever during the heist.
Wow, you think, bedazzled. This is even more fun to witness from so close, certainly one of the greatest villains ever.
“Y/N, “ he comes in front of you, panting, super pissed from what just happened, “remind me to thank you tonight, yes? We can go as many times as you want,” J winks at you before restarting his rant and wreaking some havoc he makes sure they’ll never forget.
I know what that means, you gasp, proud you learned the difficult subtleties of this planet’s vocabulary.
*******************
“Batsy’s coming, we should go right now,” you tell him, raising your voice so The Joker can hear you over the deafening music in the club.
“No, he’s not, he has no clue about this place,” he keeps you in his lap when you alert of the imminent danger.
“Batsy’s here,” you emotionlessly speak, bored to the maximum and you push him on the floor.“Watch out,” and the explosion in the front of the club makes the ground shake, a few pieces of sharp glass falling right on the spot where he sat a few seconds ago.
“Holy shit, Doll,” J gets all startled, both of you carefully creeping out of the VIP room and take the back exit before things worsen. Batsy really raided the place on a tip from an anonymous source but the evasive King of Gotham was nowhere to be found. AGAIN. How irritating!
**Nothing is going to happen to him under your watch, no way!
His impulsiveness and recklessness gets him in trouble very often, but you can manage: you’ve protected worse before.
One year will just fly by, half is already gone. YOU GOT THIS! **
******************
“Check out my new tattoo, Princess,” J uncovers his shoulder and you gulp, taken by surprise. He got two angel wings on top of your name tattooed on his collarbone. He likes to joke you’re his guardian angel because you bring him good luck. Pretty close, but not quite.
“I …I don’t have wings…but I like it,” you stutter, telling the truth, but The Joker believes you’re being funny.
“Since it seems you are my lucky charm, I thought you would appreciate this more than anything else, am I right?” he licks his lips when he notices how hypnotized you are with his new ink.
“Are you going to be ok when I’m gone?” the unexpected question comes and he rolls his eyes, scoffing.
“Bad mood again?” he wants to know and forcefully pulls you in his arms. “Look what I did for you, be grateful! You’re not going anywhere. Got it?”
I have to, my year will be up tomorrow and I don’t want to be stuck in this body until it dies. You really wish you could explain to The Joker but he won’t understand nor is allowed to know anyway.
“Stop talking nonsense, Doll, you’re making Daddy mad.”
“Why do you keep on calling yourself that?!” you inquire, gazing in his blue eyes.
You really, really did a great job with that shade!
“Because I’m your Daddy and you should call me that more often, you naughty little minx,” he kisses you roughly, grossly groping your butt.
The arrogance this human has! But he’s a good villain, that’s his forte.
*******************************
“Pumpkin, I can’t breathe,” he moans in his sleep and you loosen your embrace again.
You kiss the tattoo he got for you and he squirms a bit, ticklish.
My mortal likes me, you caress his green hair, getting ready to flee the body. She will take over again but won’t remember too much. That woman won’t have a memory of her mission to kill him so J should be safe. Plus, you’ll always watch over him since you are determined not to fail at your task.
“I’m going now,” you whisper and peck his cheek, ready to get out. “Don’t make my assignment of keeping you secure too hard… Daddy,” you softly laugh and he nuzzles in the crook of your neck, growling.
“You’re not going anywhere,” The Joker barely manages to hum.
“You’re awake?” you test the waters, intrigued.
“Nope,” he sniffles because he just heard bits and pieces, being so tired he can’t even wake himself up to properly talk to you.
Batsy chased him for a full hour around Gotham but he managed to escape since you were in the car also. Yeah, strange how he gets away when you are around; a real mystery!
“I have to go but…”
“No,” he opens one eye and since you can see in the dark, you notice.
“Sleep… you won’t even realize I’m gone,” you trace his Damaged tattoo with your index finger and he closes his eye, purring under your touch.
“I would notice…” J yawns, more awake but having a hard time focusing.
“You don’t even know what I’m talking about,” you giggle, amused he’s such a stubborn mule.
“I need my guardian angel,” he grumbles and you squeeze him really hard again, contemplating your choices.
“I don’t even have wings,” you widely smile but he’s in his trance and really speaks without knowing at this point.
“That’s fine…” and then tugs on your t-shirt. “Pumpkin… I can’t breathe…”
Right, you keep on forgetting you hold him too tight. Just being overprotective, that’s all. It’s your job.
I like my human, you grin, wanting to stay because he’s a good villain and I guess won’t be too bad being trapped alongside him in this body.
Heaven knows The Joker needs all the help he can get.
Even if the help doesn’t have any wings.
Also read-MASTERLIST
http://diyunho(dot)tumblr(dot)com/post/153664676321/joker-x-reader-masterlist
#the joker x reader#the joker imagine#the joker fanfiction#the joker jared leto#the joker suicide squad#the joker#jared leto#jared leto fanfiction#jared leto imagine#the suicide squad#puddin#dc#dc comics#mister j#mistah j#mr. j#sexy villain
210 notes
·
View notes
Text
A Tiny House Makeover (Ok, It’s A Dollhouse)
I was surprised how many questions I got about the little dollhouse sneak peeks I’ve shared on IG stories over the last few weeks as I fixed this up with the kids. And then I polled you guys to see if you wanted a post about it, and 91% of you voted yes, so here it is!
You can read more about how these came to be on this podcast from a few weeks back, but the gist is that the kids really wanted super detailed dollhouses to fix up, and we got two of them secondhand on Facebook marketplace to “renovate” together.
This little makeover was lots of fun for us all, since the kids were at the wheel picking all the colors and helping me paint and glue and arrange stuff, and although this technically lives in our son’s room, both kids definitely had a hand in making it over (we have another one that lives in our daughter’s room that we’re also working on together – which you can see below on the left of the photo). The lesson: even tiny houses take a village to fix up.
The quick pic I snapped below shows what this one looked like when we got it (I barely remembered to snap the before photo, hence that dash of white paint on the facade since we had already started painting).
Our son was adamant that he wanted it to be white with light blue shutters and gold trim along the peak (this is the gold I used – be sure to shake this thoroughly for the best coverage). The kid knew what he wanted and was unwavering. Ha! So his vision came to fruition thanks to a whole lot of painting.
We just used simple craft paint from Michael’s and we all pitched in (we had the entire interior and exterior to do). The kids could easily do things like the floor, walls, and exterior house color and I helped with the more detailed jobs, like the trim (I just used a small craft brush). Also we made up a song as we went, which went a little something like this: “Ahh, don’t get paint on the roof! Go slow! Whew! We can do this! Ahhhh, avoid the roof!” Catchy, eh? If you’re super worried you can cover it with plastic and tape it off, but our song seemed to work for the most part.
Oh and that decorative trim around the peak came with the dollhouse, it just broke off and I re-glued it back on with wood glue (this glue works great – I just taped them in place while they dried so I didn’t have to stand there holding them for an hour).
I loved getting to reuse some things we’ve had for ages (way back from our daughter’s first dollhouse), like those topiaries that you see on the front porch. The funny thing is that I found those in the wedding aisle at Michael’s 6 years ago, and they’re actually meant to be place cards (there’s a small wire loop at the top to stick name cards in). Cute miniature things are EVERYWHERE if you look close enough.
As for the “greenery” in the window boxes above, I just bought this small faux plant “mat” from Michael’s (don’t forget your 50% off coupons – they saved me so much money when I was grabbing the acrylic paint, craft glue, and the little faux green mat).
Here’s a Burger-for-scale shot for ya. He was VERY INTO trying to help, but sadly dogs can’t paint very well. Oh and we have since fixed the steps, so I’ll have to share a little update video on Instagram stories about how we did it. Super simple – you just slice thin craft wood (like this) with an exacto knife to make the steps, glue them into place with wood glue, and paint them to match. Truly so easy! Like 10,000% easier than building a human-sized staircase ;)
This is where this dollhouse lives, right in the corner of our son’s room. For those who listened to the podcast about “Operation Acquire Two Dollhouses”, you may remember that I thought this was a much smaller dollhouse (like shoebox sized) and was shocked when it was almost as big as his extra high dresser – and then we picked up the one for our daughter… and… well… it was massive. Ha! But they LOVE them, so I guess it all worked out. Even if dollhouses now make up 8% of our actual house’s contents now.
As for how we fixed things up inside, this is what we started with. All the furniture in each house was collected over two bulk purchases on Facebook Marketplace (we spent around $30 total for enough furniture to fill TWO houses!). This before shot of the back of the house and the furniture isn’t completely congruent with the next after shot since I took this photo on Christmas Eve, and then the kids came down on Christmas morning and had all sorts of furniture swaps and rearranging parties.
But you get the general gist that the floors were wood, the walls were sort of a cream-white color and a lot of the furniture was wood, deep red, green and cream, etc. Once again our tiny homeowner knew exactly what he wanted for the inside: white walls and light blue floors – just like the shutters and trim (this is the exact blue color we used by the way).
We all got to work painting those (again, just with craft paint from Michael’s) and once the floor & walls were dry we had some fun painting the beds gold, adding a pink top to the table and two of the chairs – whatever the kids wanted – we did! And the funny thing is that they both said the sink and the fridge had to be pink like the stove at the pink house! You know I didn’t argue with that ;)
The little pillows were things our daughter already had from a small doll she had gotten ages ago, and even the “bedding” on the two beds were cloth bags I had saved in our gift wrapping closet (one is from Kendra Scott jewelry and it’s the perfect “sleeping bag” size and the other is a plain blue cloth bag that something else came in).
There were a few special purchases that we made with the kids. They had an Amazon gift card and some Christmas money to spend, so after a loooooooong deliberation they decided that two plates of pancakes (you can see those on the right of the photo above) and a little gingerbread making kit (seen below) were the best things to buy, along with this set of pots & pans (you can see them in the photo above on the fridge). They’ve never been so excited to check the mail every day until they arrived.
Oh and that little candlestick has real wax candles! It came with one of the sets of old dollhouse furniture we bought secondhand – and you might remember those round wire chairs from our daughter’s first dollhouse too (originally they were little decorative chairs meant as shelf decor from West Elm years ago).
You know it super bugs me that I took all these photos like a day before I fixed those stairs, right? #TypeA
Along with DIYing the greenery in the window boxes, I also made a few house plants from scratch. It was really simple and fun, I just took small clippings from the same faux green mat thing I bought for the window boxes, and I glued them into various small things that look like pots. One was a wood bead (see that one on the top of the toilet in the picture below?) and one was a small white flowerpot I found at the craft store.
I also used a clear bead + a brown flat button to make the little plant you see in the photo below. Just glue the bead and the button together and it looks like a little glass vase sitting on a brown coaster – and then add the small clipping to the bead with another small dab of glue.
Another fun added touch is to dump some colorful beads or large sequins into the bath tub and the sink to create some “fake water.” I found some blue ones a little later on, but already had these pink sequin things from a jewelry kit we had around the house, so I tossed them in and the kids had a lot of fun “bathing” their little dolls and teddy bears in ’em. Much better than them putting real water in their tub and sink ;)
You can see it a little better in this photo below, along with my homemade potted plant.
The kids also especially like “interactive” additions to their houses, like the rocking horse & rocking chair, which both get a lot of use from their little figures. Our daughter’s house also has a Christmas tree and some tiny fake wrapped presents to go around the base of it – and they LOVE that too. Anything they can weave a story around seems to be a real hit – and stuff that moves like drawers that come out and chests that open add excitement-factor too (they also love that the toilet cover goes up and down).
So that rounds out the tour of House #1 for ya. We hope to eventually share our larger and more detailed renovation of the bigger house for our daughter’s room someday. She wants electricity and all that good stuff, so it might take a while, but hopefully I’ll be back with all the details in the next year or two. You never know how long these whole-house renos are gonna take ;)
Also dollhouses are not just for girls. So many little guys who come over to play run right up to them and LOVE it.
Psst – To check out how to make a much less detailed dollhouse for younger kids, here’s how we built one, and how we decorated it. And to hear more of the story about how we came across these two dollhouses that we’re fixing up now, you can tune into this podcast (all the details are in the first 10 minutes or so).
*This post contains affiliate links*
The post A Tiny House Makeover (Ok, It’s A Dollhouse) appeared first on Young House Love.
A Tiny House Makeover (Ok, It’s A Dollhouse) published first on https://ssmattress.tumblr.com/
0 notes
Text
A Tiny House Makeover (Ok, It’s A Dollhouse)
I was surprised how many questions I got about the little dollhouse sneak peeks I’ve shared on IG stories over the last few weeks as I fixed this up with the kids. And then I polled you guys to see if you wanted a post about it, and 91% of you voted yes, so here it is!
You can read more about how these came to be on this podcast from a few weeks back, but the gist is that the kids really wanted super detailed dollhouses to fix up, and we got two of them secondhand on Facebook marketplace to “renovate” together.
This little makeover was lots of fun for us all, since the kids were at the wheel picking all the colors and helping me paint and glue and arrange stuff, and although this technically lives in our son’s room, both kids definitely had a hand in making it over (we have another one that lives in our daughter’s room that we’re also working on together – which you can see below on the left of the photo). The lesson: even tiny houses take a village to fix up.
The quick pic I snapped below shows what this one looked like when we got it (I barely remembered to snap the before photo, hence that dash of white paint on the facade since we had already started painting).
Our son was adamant that he wanted it to be white with light blue shutters and gold trim along the peak (this is the gold I used – be sure to shake this thoroughly for the best coverage). The kid knew what he wanted and was unwavering. Ha! So his vision came to fruition thanks to a whole lot of painting.
We just used simple craft paint from Michael’s and we all pitched in (we had the entire interior and exterior to do). The kids could easily do things like the floor, walls, and exterior house color and I helped with the more detailed jobs, like the trim (I just used a small craft brush). Also we made up a song as we went, which went a little something like this: “Ahh, don’t get paint on the roof! Go slow! Whew! We can do this! Ahhhh, avoid the roof!” Catchy, eh? If you’re super worried you can cover it with plastic and tape it off, but our song seemed to work for the most part.
Oh and that decorative trim around the peak came with the dollhouse, it just broke off and I re-glued it back on with wood glue (this glue works great – I just taped them in place while they dried so I didn’t have to stand there holding them for an hour).
I loved getting to reuse some things we’ve had for ages (way back from our daughter’s first dollhouse), like those topiaries that you see on the front porch. The funny thing is that I found those in the wedding aisle at Michael’s 6 years ago, and they’re actually meant to be place cards (there’s a small wire loop at the top to stick name cards in). Cute miniature things are EVERYWHERE if you look close enough.
As for the “greenery” in the window boxes above, I just bought this small faux plant “mat” from Michael’s (don’t forget your 50% off coupons – they saved me so much money when I was grabbing the acrylic paint, craft glue, and the little faux green mat).
Here’s a Burger-for-scale shot for ya. He was VERY INTO trying to help, but sadly dogs can’t paint very well. Oh and we have since fixed the steps, so I’ll have to share a little update video on Instagram stories about how we did it. Super simple – you just slice thin craft wood (like this) with an exacto knife to make the steps, glue them into place with wood glue, and paint them to match. Truly so easy! Like 10,000% easier than building a human-sized staircase ;)
This is where this dollhouse lives, right in the corner of our son’s room. For those who listened to the podcast about “Operation Acquire Two Dollhouses”, you may remember that I thought this was a much smaller dollhouse (like shoebox sized) and was shocked when it was almost as big as his extra high dresser – and then we picked up the one for our daughter… and… well… it was massive. Ha! But they LOVE them, so I guess it all worked out. Even if dollhouses now make up 8% of our actual house’s contents now.
As for how we fixed things up inside, this is what we started with. All the furniture in each house was collected over two bulk purchases on Facebook Marketplace (we spent around $30 total for enough furniture to fill TWO houses!). This before shot of the back of the house and the furniture isn’t completely congruent with the next after shot since I took this photo on Christmas Eve, and then the kids came down on Christmas morning and had all sorts of furniture swaps and rearranging parties.
But you get the general gist that the floors were wood, the walls were sort of a cream-white color and a lot of the furniture was wood, deep red, green and cream, etc. Once again our tiny homeowner knew exactly what he wanted for the inside: white walls and light blue floors – just like the shutters and trim (this is the exact blue color we used by the way).
We all got to work painting those (again, just with craft paint from Michael’s) and once the floor & walls were dry we had some fun painting the beds gold, adding a pink top to the table and two of the chairs – whatever the kids wanted – we did! And the funny thing is that they both said the sink and the fridge had to be pink like the stove at the pink house! You know I didn’t argue with that ;)
The little pillows were things our daughter already had from a small doll she had gotten ages ago, and even the “bedding” on the two beds were cloth bags I had saved in our gift wrapping closet (one is from Kendra Scott jewelry and it’s the perfect “sleeping bag” size and the other is a plain blue cloth bag that something else came in).
There were a few special purchases that we made with the kids. They had an Amazon gift card and some Christmas money to spend, so after a loooooooong deliberation they decided that two plates of pancakes (you can see those on the right of the photo above) and a little gingerbread making kit (seen below) were the best things to buy, along with this set of pots & pans (you can see them in the photo above on the fridge). They’ve never been so excited to check the mail every day until they arrived.
Oh and that little candlestick has real wax candles! It came with one of the sets of old dollhouse furniture we bought secondhand – and you might remember those round wire chairs from our daughter’s first dollhouse too (originally they were little decorative chairs meant as shelf decor from West Elm years ago).
You know it super bugs me that I took all these photos like a day before I fixed those stairs, right? #TypeA
Along with DIYing the greenery in the window boxes, I also made a few house plants from scratch. It was really simple and fun, I just took small clippings from the same faux green mat thing I bought for the window boxes, and I glued them into various small things that look like pots. One was a wood bead (see that one on the top of the toilet in the picture below?) and one was a small white flowerpot I found at the craft store.
I also used a clear bead + a brown flat button to make the little plant you see in the photo below. Just glue the bead and the button together and it looks like a little glass vase sitting on a brown coaster – and then add the small clipping to the bead with another small dab of glue.
Another fun added touch is to dump some colorful beads or large sequins into the bath tub and the sink to create some “fake water.” I found some blue ones a little later on, but already had these pink sequin things from a jewelry kit we had around the house, so I tossed them in and the kids had a lot of fun “bathing” their little dolls and teddy bears in ’em. Much better than them putting real water in their tub and sink ;)
You can see it a little better in this photo below, along with my homemade potted plant.
The kids also especially like “interactive” additions to their houses, like the rocking horse & rocking chair, which both get a lot of use from their little figures. Our daughter’s house also has a Christmas tree and some tiny fake wrapped presents to go around the base of it – and they LOVE that too. Anything they can weave a story around seems to be a real hit – and stuff that moves like drawers that come out and chests that open add excitement-factor too (they also love that the toilet cover goes up and down).
So that rounds out the tour of House #1 for ya. We hope to eventually share our larger and more detailed renovation of the bigger house for our daughter’s room someday. She wants electricity and all that good stuff, so it might take a while, but hopefully I’ll be back with all the details in the next year or two. You never know how long these whole-house renos are gonna take ;)
Also dollhouses are not just for girls. So many little guys who come over to play run right up to them and LOVE it.
Psst – To check out how to make a much less detailed dollhouse for younger kids, here’s how we built one, and how we decorated it. And to hear more of the story about how we came across these two dollhouses that we’re fixing up now, you can tune into this podcast (all the details are in the first 10 minutes or so).
*This post contains affiliate links*
The post A Tiny House Makeover (Ok, It’s A Dollhouse) appeared first on Young House Love.
A Tiny House Makeover (Ok, It’s A Dollhouse) published first on https://carpetgurus.tumblr.com/
0 notes
Photo
A Tiny House Makeover (Ok, It’s A Dollhouse) http://bit.ly/2Ryn9x0
I was surprised how many questions I got about the little dollhouse sneak peeks I’ve shared on IG stories over the last few weeks as I fixed this up with the kids. And then I polled you guys to see if you wanted a post about it, and 91% of you voted yes, so here it is!
You can read more about how these came to be on this podcast from a few weeks back, but the gist is that the kids really wanted super detailed dollhouses to fix up, and we got two of them secondhand on Facebook marketplace to “renovate” together.
This little makeover was lots of fun for us all, since the kids were at the wheel picking all the colors and helping me paint and glue and arrange stuff, and although this technically lives in our son’s room, both kids definitely had a hand in making it over (we have another one that lives in our daughter’s room that we’re also working on together – which you can see below on the left of the photo). The lesson: even tiny houses take a village to fix up.
The quick pic I snapped below shows what this one looked like when we got it (I barely remembered to snap the before photo, hence that dash of white paint on the facade since we had already started painting).
Our son was adamant that he wanted it to be white with light blue shutters and gold trim along the peak (this is the gold I used – be sure to shake this thoroughly for the best coverage). The kid knew what he wanted and was unwavering. Ha! So his vision came to fruition thanks to a whole lot of painting.
We just used simple craft paint from Michael’s and we all pitched in (we had the entire interior and exterior to do). The kids could easily do things like the floor, walls, and exterior house color and I helped with the more detailed jobs, like the trim (I just used a small craft brush). Also we made up a song as we went, which went a little something like this: “Ahh, don’t get paint on the roof! Go slow! Whew! We can do this! Ahhhh, avoid the roof!” Catchy, eh? If you’re super worried you can cover it with plastic and tape it off, but our song seemed to work for the most part.
Oh and that decorative trim around the peak came with the dollhouse, it just broke off and I re-glued it back on with wood glue (this glue works great – I just taped them in place while they dried so I didn’t have to stand there holding them for an hour).
I loved getting to reuse some things we’ve had for ages (way back from our daughter’s first dollhouse), like those topiaries that you see on the front porch. The funny thing is that I found those in the wedding aisle at Michael’s 6 years ago, and they’re actually meant to be place cards (there’s a small wire loop at the top to stick name cards in). Cute miniature things are EVERYWHERE if you look close enough.
As for the “greenery” in the window boxes above, I just bought this small faux plant “mat” from Michael’s (don’t forget your 50% off coupons – they saved me so much money when I was grabbing the acrylic paint, craft glue, and the little faux green mat).
Here’s a Burger-for-scale shot for ya. He was VERY INTO trying to help, but sadly dogs can’t paint very well. Oh and we have since fixed the steps, so I’ll have to share a little update video on Instagram stories about how we did it. Super simple – you just slice thin craft wood (like this) with an exacto knife to make the steps, glue them into place with wood glue, and paint them to match. Truly so easy! Like 10,000% easier than building a human-sized staircase ;)
This is where this dollhouse lives, right in the corner of our son’s room. For those who listened to the podcast about “Operation Acquire Two Dollhouses”, you may remember that I thought this was a much smaller dollhouse (like shoebox sized) and was shocked when it was almost as big as his extra high dresser – and then we picked up the one for our daughter… and… well… it was massive. Ha! But they LOVE them, so I guess it all worked out. Even if dollhouses now make up 8% of our actual house’s contents now.
As for how we fixed things up inside, this is what we started with. All the furniture in each house was collected over two bulk purchases on Facebook Marketplace (we spent around $30 total for enough furniture to fill TWO houses!). This before shot of the back of the house and the furniture isn’t completely congruent with the next after shot since I took this photo on Christmas Eve, and then the kids came down on Christmas morning and had all sorts of furniture swaps and rearranging parties.
But you get the general gist that the floors were wood, the walls were sort of a cream-white color and a lot of the furniture was wood, deep red, green and cream, etc. Once again our tiny homeowner knew exactly what he wanted for the inside: white walls and light blue floors – just like the shutters and trim (this is the exact blue color we used by the way).
We all got to work painting those (again, just with craft paint from Michael’s) and once the floor & walls were dry we had some fun painting the beds gold, adding a pink top to the table and two of the chairs – whatever the kids wanted – we did! And the funny thing is that they both said the sink and the fridge had to be pink like the stove at the pink house! You know I didn’t argue with that ;)
The little pillows were things our daughter already had from a small doll she had gotten ages ago, and even the “bedding” on the two beds were cloth bags I had saved in our gift wrapping closet (one is from Kendra Scott jewelry and it’s the perfect “sleeping bag” size and the other is a plain blue cloth bag that something else came in).
There were a few special purchases that we made with the kids. They had an Amazon gift card and some Christmas money to spend, so after a loooooooong deliberation they decided that two plates of pancakes (you can see those on the right of the photo above) and a little gingerbread making kit (seen below) were the best things to buy, along with this set of pots & pans (you can see them in the photo above on the fridge). They’ve never been so excited to check the mail every day until they arrived.
Oh and that little candlestick has real wax candles! It came with one of the sets of old dollhouse furniture we bought secondhand – and you might remember those round wire chairs from our daughter’s first dollhouse too (originally they were little decorative chairs meant as shelf decor from West Elm years ago).
You know it super bugs me that I took all these photos like a day before I fixed those stairs, right? #TypeA
Along with DIYing the greenery in the window boxes, I also made a few house plants from scratch. It was really simple and fun, I just took small clippings from the same faux green mat thing I bought for the window boxes, and I glued them into various small things that look like pots. One was a wood bead (see that one on the top of the toilet in the picture below?) and one was a small white flowerpot I found at the craft store.
I also used a clear bead + a brown flat button to make the little plant you see in the photo below. Just glue the bead and the button together and it looks like a little glass vase sitting on a brown coaster – and then add the small clipping to the bead with another small dab of glue.
Another fun added touch is to dump some colorful beads or large sequins into the bath tub and the sink to create some “fake water.” I found some blue ones a little later on, but already had these pink sequin things from a jewelry kit we had around the house, so I tossed them in and the kids had a lot of fun “bathing” their little dolls and teddy bears in ’em. Much better than them putting real water in their tub and sink ;)
You can see it a little better in this photo below, along with my homemade potted plant.
The kids also especially like “interactive” additions to their houses, like the rocking horse & rocking chair, which both get a lot of use from their little figures. Our daughter’s house also has a Christmas tree and some tiny fake wrapped presents to go around the base of it – and they LOVE that too. Anything they can weave a story around seems to be a real hit – and stuff that moves like drawers that come out and chests that open add excitement-factor too (they also love that the toilet cover goes up and down).
So that rounds out the tour of House #1 for ya. We hope to eventually share our larger and more detailed renovation of the bigger house for our daughter’s room someday. She wants electricity and all that good stuff, so it might take a while, but hopefully I’ll be back with all the details in the next year or two. You never know how long these whole-house renos are gonna take ;)
Also dollhouses are not just for girls. So many little guys who come over to play run right up to them and LOVE it.
Psst – To check out how to make a much less detailed dollhouse for younger kids, here’s how we built one, and how we decorated it. And to hear more of the story about how we came across these two dollhouses that we’re fixing up now, you can tune into this podcast (all the details are in the first 10 minutes or so).
*This post contains affiliate links*
The post A Tiny House Makeover (Ok, It’s A Dollhouse) appeared first on Young House Love.
0 notes
Text
A Tiny House Makeover (Ok, It’s A Dollhouse)
I was surprised how many questions I got about the little dollhouse sneak peeks I’ve shared on IG stories over the last few weeks as I fixed this up with the kids. And then I polled you guys to see if you wanted a post about it, and 91% of you voted yes, so here it is!
You can read more about how these came to be on this podcast from a few weeks back, but the gist is that the kids really wanted super detailed dollhouses to fix up, and we got two of them secondhand on Facebook marketplace to “renovate” together.
This little makeover was lots of fun for us all, since the kids were at the wheel picking all the colors and helping me paint and glue and arrange stuff, and although this technically lives in our son’s room, both kids definitely had a hand in making it over (we have another one that lives in our daughter’s room that we’re also working on together – which you can see below on the left of the photo). The lesson: even tiny houses take a village to fix up.
The quick pic I snapped below shows what this one looked like when we got it (I barely remembered to snap the before photo, hence that dash of white paint on the facade since we had already started painting).
Our son was adamant that he wanted it to be white with light blue shutters and gold trim along the peak (this is the gold I used – be sure to shake this thoroughly for the best coverage). The kid knew what he wanted and was unwavering. Ha! So his vision came to fruition thanks to a whole lot of painting.
We just used simple craft paint from Michael’s and we all pitched in (we had the entire interior and exterior to do). The kids could easily do things like the floor, walls, and exterior house color and I helped with the more detailed jobs, like the trim (I just used a small craft brush). Also we made up a song as we went, which went a little something like this: “Ahh, don’t get paint on the roof! Go slow! Whew! We can do this! Ahhhh, avoid the roof!” Catchy, eh? If you’re super worried you can cover it with plastic and tape it off, but our song seemed to work for the most part.
Oh and that decorative trim around the peak came with the dollhouse, it just broke off and I re-glued it back on with wood glue (this glue works great – I just taped them in place while they dried so I didn’t have to stand there holding them for an hour).
I loved getting to reuse some things we’ve had for ages (way back from our daughter’s first dollhouse), like those topiaries that you see on the front porch. The funny thing is that I found those in the wedding aisle at Michael’s 6 years ago, and they’re actually meant to be place cards (there’s a small wire loop at the top to stick name cards in). Cute miniature things are EVERYWHERE if you look close enough.
As for the “greenery” in the window boxes above, I just bought this small faux plant “mat” from Michael’s (don’t forget your 50% off coupons – they saved me so much money when I was grabbing the acrylic paint, craft glue, and the little faux green mat).
Here’s a Burger-for-scale shot for ya. He was VERY INTO trying to help, but sadly dogs can’t paint very well. Oh and we have since fixed the steps, so I’ll have to share a little update video on Instagram stories about how we did it. Super simple – you just slice thin craft wood (like this) with an exacto knife to make the steps, glue them into place with wood glue, and paint them to match. Truly so easy! Like 10,000% easier than building a human-sized staircase ;)
This is where this dollhouse lives, right in the corner of our son’s room. For those who listened to the podcast about “Operation Acquire Two Dollhouses”, you may remember that I thought this was a much smaller dollhouse (like shoebox sized) and was shocked when it was almost as big as his extra high dresser – and then we picked up the one for our daughter… and… well… it was massive. Ha! But they LOVE them, so I guess it all worked out. Even if dollhouses now make up 8% of our actual house’s contents now.
As for how we fixed things up inside, this is what we started with. All the furniture in each house was collected over two bulk purchases on Facebook Marketplace (we spent around $30 total for enough furniture to fill TWO houses!). This before shot of the back of the house and the furniture isn’t completely congruent with the next after shot since I took this photo on Christmas Eve, and then the kids came down on Christmas morning and had all sorts of furniture swaps and rearranging parties.
But you get the general gist that the floors were wood, the walls were sort of a cream-white color and a lot of the furniture was wood, deep red, green and cream, etc. Once again our tiny homeowner knew exactly what he wanted for the inside: white walls and light blue floors – just like the shutters and trim (this is the exact blue color we used by the way).
We all got to work painting those (again, just with craft paint from Michael’s) and once the floor & walls were dry we had some fun painting the beds gold, adding a pink top to the table and two of the chairs – whatever the kids wanted – we did! And the funny thing is that they both said the sink and the fridge had to be pink like the stove at the pink house! You know I didn’t argue with that ;)
The little pillows were things our daughter already had from a small doll she had gotten ages ago, and even the “bedding” on the two beds were cloth bags I had saved in our gift wrapping closet (one is from Kendra Scott jewelry and it’s the perfect “sleeping bag” size and the other is a plain blue cloth bag that something else came in).
There were a few special purchases that we made with the kids. They had an Amazon gift card and some Christmas money to spend, so after a loooooooong deliberation they decided that two plates of pancakes (you can see those on the right of the photo above) and a little gingerbread making kit (seen below) were the best things to buy, along with this set of pots & pans (you can see them in the photo above on the fridge). They’ve never been so excited to check the mail every day until they arrived.
Oh and that little candlestick has real wax candles! It came with one of the sets of old dollhouse furniture we bought secondhand – and you might remember those round wire chairs from our daughter’s first dollhouse too (originally they were little decorative chairs meant as shelf decor from West Elm years ago).
You know it super bugs me that I took all these photos like a day before I fixed those stairs, right? #TypeA
Along with DIYing the greenery in the window boxes, I also made a few house plants from scratch. It was really simple and fun, I just took small clippings from the same faux green mat thing I bought for the window boxes, and I glued them into various small things that look like pots. One was a wood bead (see that one on the top of the toilet in the picture below?) and one was a small white flowerpot I found at the craft store.
I also used a clear bead + a brown flat button to make the little plant you see in the photo below. Just glue the bead and the button together and it looks like a little glass vase sitting on a brown coaster – and then add the small clipping to the bead with another small dab of glue.
Another fun added touch is to dump some colorful beads or large sequins into the bath tub and the sink to create some “fake water.” I found some blue ones a little later on, but already had these pink sequin things from a jewelry kit we had around the house, so I tossed them in and the kids had a lot of fun “bathing” their little dolls and teddy bears in ’em. Much better than them putting real water in their tub and sink ;)
You can see it a little better in this photo below, along with my homemade potted plant.
The kids also especially like “interactive” additions to their houses, like the rocking horse & rocking chair, which both get a lot of use from their little figures. Our daughter’s house also has a Christmas tree and some tiny fake wrapped presents to go around the base of it – and they LOVE that too. Anything they can weave a story around seems to be a real hit – and stuff that moves like drawers that come out and chests that open add excitement-factor too (they also love that the toilet cover goes up and down).
So that rounds out the tour of House #1 for ya. We hope to eventually share our larger and more detailed renovation of the bigger house for our daughter’s room someday. She wants electricity and all that good stuff, so it might take a while, but hopefully I’ll be back with all the details in the next year or two. You never know how long these whole-house renos are gonna take ;)
Also dollhouses are not just for girls. So many little guys who come over to play run right up to them and LOVE it.
Psst – To check out how to make a much less detailed dollhouse for younger kids, here’s how we built one, and how we decorated it. And to hear more of the story about how we came across these two dollhouses that we’re fixing up now, you can tune into this podcast (all the details are in the first 10 minutes or so).
*This post contains affiliate links*
The post A Tiny House Makeover (Ok, It’s A Dollhouse) appeared first on Young House Love.
A Tiny House Makeover (Ok, It’s A Dollhouse) published first on https://novaformmattressreview.tumblr.com/
0 notes
Text
A Tiny House Makeover (Ok, It’s A Dollhouse)
I was surprised how many questions I got about the little dollhouse sneak peeks I’ve shared on IG stories over the last few weeks as I fixed this up with the kids. And then I polled you guys to see if you wanted a post about it, and 91% of you voted yes, so here it is!
You can read more about how these came to be on this podcast from a few weeks back, but the gist is that the kids really wanted super detailed dollhouses to fix up, and we got two of them secondhand on Facebook marketplace to “renovate” together.
This little makeover was lots of fun for us all, since the kids were at the wheel picking all the colors and helping me paint and glue and arrange stuff, and although this technically lives in our son’s room, both kids definitely had a hand in making it over (we have another one that lives in our daughter’s room that we’re also working on together – which you can see below on the left of the photo). The lesson: even tiny houses take a village to fix up.
The quick pic I snapped below shows what this one looked like when we got it (I barely remembered to snap the before photo, hence that dash of white paint on the facade since we had already started painting).
Our son was adamant that he wanted it to be white with light blue shutters and gold trim along the peak (this is the gold I used – be sure to shake this thoroughly for the best coverage). The kid knew what he wanted and was unwavering. Ha! So his vision came to fruition thanks to a whole lot of painting.
We just used simple craft paint from Michael’s and we all pitched in (we had the entire interior and exterior to do). The kids could easily do things like the floor, walls, and exterior house color and I helped with the more detailed jobs, like the trim (I just used a small craft brush). Also we made up a song as we went, which went a little something like this: “Ahh, don’t get paint on the roof! Go slow! Whew! We can do this! Ahhhh, avoid the roof!” Catchy, eh? If you’re super worried you can cover it with plastic and tape it off, but our song seemed to work for the most part.
Oh and that decorative trim around the peak came with the dollhouse, it just broke off and I re-glued it back on with wood glue (this glue works great – I just taped them in place while they dried so I didn’t have to stand there holding them for an hour).
I loved getting to reuse some things we’ve had for ages (way back from our daughter’s first dollhouse), like those topiaries that you see on the front porch. The funny thing is that I found those in the wedding aisle at Michael’s 6 years ago, and they’re actually meant to be place cards (there’s a small wire loop at the top to stick name cards in). Cute miniature things are EVERYWHERE if you look close enough.
As for the “greenery” in the window boxes above, I just bought this small faux plant “mat” from Michael’s (don’t forget your 50% off coupons – they saved me so much money when I was grabbing the acrylic paint, craft glue, and the little faux green mat).
Here’s a Burger-for-scale shot for ya. He was VERY INTO trying to help, but sadly dogs can’t paint very well. Oh and we have since fixed the steps, so I’ll have to share a little update video on Instagram stories about how we did it. Super simple – you just slice thin craft wood (like this) with an exacto knife to make the steps, glue them into place with wood glue, and paint them to match. Truly so easy! Like 10,000% easier than building a human-sized staircase ;)
This is where this dollhouse lives, right in the corner of our son’s room. For those who listened to the podcast about “Operation Acquire Two Dollhouses”, you may remember that I thought this was a much smaller dollhouse (like shoebox sized) and was shocked when it was almost as big as his extra high dresser – and then we picked up the one for our daughter… and… well… it was massive. Ha! But they LOVE them, so I guess it all worked out. Even if dollhouses now make up 8% of our actual house’s contents now.
As for how we fixed things up inside, this is what we started with. All the furniture in each house was collected over two bulk purchases on Facebook Marketplace (we spent around $30 total for enough furniture to fill TWO houses!). This before shot of the back of the house and the furniture isn’t completely congruent with the next after shot since I took this photo on Christmas Eve, and then the kids came down on Christmas morning and had all sorts of furniture swaps and rearranging parties.
But you get the general gist that the floors were wood, the walls were sort of a cream-white color and a lot of the furniture was wood, deep red, green and cream, etc. Once again our tiny homeowner knew exactly what he wanted for the inside: white walls and light blue floors – just like the shutters and trim (this is the exact blue color we used by the way).
We all got to work painting those (again, just with craft paint from Michael’s) and once the floor & walls were dry we had some fun painting the beds gold, adding a pink top to the table and two of the chairs – whatever the kids wanted – we did! And the funny thing is that they both said the sink and the fridge had to be pink like the stove at the pink house! You know I didn’t argue with that ;)
The little pillows were things our daughter already had from a small doll she had gotten ages ago, and even the “bedding” on the two beds were cloth bags I had saved in our gift wrapping closet (one is from Kendra Scott jewelry and it’s the perfect “sleeping bag” size and the other is a plain blue cloth bag that something else came in).
There were a few special purchases that we made with the kids. They had an Amazon gift card and some Christmas money to spend, so after a loooooooong deliberation they decided that two plates of pancakes (you can see those on the right of the photo above) and a little gingerbread making kit (seen below) were the best things to buy, along with this set of pots & pans (you can see them in the photo above on the fridge). They’ve never been so excited to check the mail every day until they arrived.
Oh and that little candlestick has real wax candles! It came with one of the sets of old dollhouse furniture we bought secondhand – and you might remember those round wire chairs from our daughter’s first dollhouse too (originally they were little decorative chairs meant as shelf decor from West Elm years ago).
You know it super bugs me that I took all these photos like a day before I fixed those stairs, right? #TypeA
Along with DIYing the greenery in the window boxes, I also made a few house plants from scratch. It was really simple and fun, I just took small clippings from the same faux green mat thing I bought for the window boxes, and I glued them into various small things that look like pots. One was a wood bead (see that one on the top of the toilet in the picture below?) and one was a small white flowerpot I found at the craft store.
I also used a clear bead + a brown flat button to make the little plant you see in the photo below. Just glue the bead and the button together and it looks like a little glass vase sitting on a brown coaster – and then add the small clipping to the bead with another small dab of glue.
Another fun added touch is to dump some colorful beads or large sequins into the bath tub and the sink to create some “fake water.” I found some blue ones a little later on, but already had these pink sequin things from a jewelry kit we had around the house, so I tossed them in and the kids had a lot of fun “bathing” their little dolls and teddy bears in ’em. Much better than them putting real water in their tub and sink ;)
You can see it a little better in this photo below, along with my homemade potted plant.
The kids also especially like “interactive” additions to their houses, like the rocking horse & rocking chair, which both get a lot of use from their little figures. Our daughter’s house also has a Christmas tree and some tiny fake wrapped presents to go around the base of it – and they LOVE that too. Anything they can weave a story around seems to be a real hit – and stuff that moves like drawers that come out and chests that open add excitement-factor too (they also love that the toilet cover goes up and down).
So that rounds out the tour of House #1 for ya. We hope to eventually share our larger and more detailed renovation of the bigger house for our daughter’s room someday. She wants electricity and all that good stuff, so it might take a while, but hopefully I’ll be back with all the details in the next year or two. You never know how long these whole-house renos are gonna take ;)
Also dollhouses are not just for girls. So many little guys who come over to play run right up to them and LOVE it.
Psst – To check out how to make a much less detailed dollhouse for younger kids, here’s how we built one, and how we decorated it. And to hear more of the story about how we came across these two dollhouses that we’re fixing up now, you can tune into this podcast (all the details are in the first 10 minutes or so).
*This post contains affiliate links*
The post A Tiny House Makeover (Ok, It’s A Dollhouse) appeared first on Young House Love.
A Tiny House Makeover (Ok, It’s A Dollhouse) published first on https://landscapingmates.blogspot.com
0 notes
Text
A Tiny House Makeover (Ok, It’s A Dollhouse)
I was surprised how many questions I got about the little dollhouse sneak peeks I’ve shared on IG stories over the last few weeks as I fixed this up with the kids. And then I polled you guys to see if you wanted a post about it, and 91% of you voted yes, so here it is!
You can read more about how these came to be on this podcast from a few weeks back, but the gist is that the kids really wanted super detailed dollhouses to fix up, and we got two of them secondhand on Facebook marketplace to “renovate” together.
This little makeover was lots of fun for us all, since the kids were at the wheel picking all the colors and helping me paint and glue and arrange stuff, and although this technically lives in our son’s room, both kids definitely had a hand in making it over (we have another one that lives in our daughter’s room that we’re also working on together – which you can see below on the left of the photo). The lesson: even tiny houses take a village to fix up.
The quick pic I snapped below shows what this one looked like when we got it (I barely remembered to snap the before photo, hence that dash of white paint on the facade since we had already started painting).
Our son was adamant that he wanted it to be white with light blue shutters and gold trim along the peak (this is the gold I used – be sure to shake this thoroughly for the best coverage). The kid knew what he wanted and was unwavering. Ha! So his vision came to fruition thanks to a whole lot of painting.
We just used simple craft paint from Michael’s and we all pitched in (we had the entire interior and exterior to do). The kids could easily do things like the floor, walls, and exterior house color and I helped with the more detailed jobs, like the trim (I just used a small craft brush). Also we made up a song as we went, which went a little something like this: “Ahh, don’t get paint on the roof! Go slow! Whew! We can do this! Ahhhh, avoid the roof!” Catchy, eh? If you’re super worried you can cover it with plastic and tape it off, but our song seemed to work for the most part.
Oh and that decorative trim around the peak came with the dollhouse, it just broke off and I re-glued it back on with wood glue (this glue works great – I just taped them in place while they dried so I didn’t have to stand there holding them for an hour).
I loved getting to reuse some things we’ve had for ages (way back from our daughter’s first dollhouse), like those topiaries that you see on the front porch. The funny thing is that I found those in the wedding aisle at Michael’s 6 years ago, and they’re actually meant to be place cards (there’s a small wire loop at the top to stick name cards in). Cute miniature things are EVERYWHERE if you look close enough.
As for the “greenery” in the window boxes above, I just bought this small faux plant “mat” from Michael’s (don’t forget your 50% off coupons – they saved me so much money when I was grabbing the acrylic paint, craft glue, and the little faux green mat).
Here’s a Burger-for-scale shot for ya. He was VERY INTO trying to help, but sadly dogs can’t paint very well. Oh and we have since fixed the steps, so I’ll have to share a little update video on Instagram stories about how we did it. Super simple – you just slice thin craft wood (like this) with an exacto knife to make the steps, glue them into place with wood glue, and paint them to match. Truly so easy! Like 10,000% easier than building a human-sized staircase ;)
This is where this dollhouse lives, right in the corner of our son’s room. For those who listened to the podcast about “Operation Acquire Two Dollhouses”, you may remember that I thought this was a much smaller dollhouse (like shoebox sized) and was shocked when it was almost as big as his extra high dresser – and then we picked up the one for our daughter… and… well… it was massive. Ha! But they LOVE them, so I guess it all worked out. Even if dollhouses now make up 8% of our actual house’s contents now.
As for how we fixed things up inside, this is what we started with. All the furniture in each house was made up of two bulk purchases on Facebook Marketplace (we spent around $30 total for enough furniture to fill TWO houses!). This before shot of the back of the house and the furniture isn’t completely congruent with the next after shot since I took this photo on Christmas Eve, and then the kids came down on Christmas morning and had all sorts of furniture swaps and rearranging parties.
But you get the general gist that the floors were wood, the walls were sort of a cream-white color and a lot of the furniture was wood, deep red, green and cream, etc. Once again our tiny homeowner knew exactly what he wanted for the inside: white walls and light blue floors – just like the shutters and trim (this is the exact blue color we used by the way).
We all got to work painting those (again, just with craft paint from Michael’s) and once the floor & walls were dry we had some fun painting the beds gold, adding a pink top to the table and two of the chairs – whatever the kids wanted – we did! And the funny thing is that they both said the sink and the fridge had to be pink like the stove at the pink house! You know I didn’t argue with that ;)
The little pillows were things our daughter already had from a small doll she had gotten ages ago, and even the “bedding” on the two beds were cloth bags I had saved in our gift wrapping closet (one is from Kendra Scott jewelry and it’s the perfect “sleeping bag” size and the other is a plain blue cloth bag that something else came in).
There were a few special purchases that we made with the kids. They had an Amazon gift card and some Christmas money to spend, so after a loooooooong deliberation they decided that two plates of pancakes (you can see those on the right of the photo above) and a little gingerbread making kit (seen below) were the best things to buy, along with this set of pots & pans (you can see them in the photo above on the fridge). They’ve never been so excited to check the mail every day until they arrived.
Oh and that little candlestick has real wax candles! It came with one of the sets of old dollhouse furniture we bought secondhand – and you might remember those round wire chairs as being from our daughter’s first dollhouse too (originally they were little decorative chairs meant as shelf decor from West Elm).
You know it super bugs me that I took all these photos like a day before I fixed those stairs, right? #TypeA
Along with DIYing the greenery in the window boxes, I also made a few house plants from scratch. It was really simple and fun, I just took small clippings from the same faux green mat thing I bought for the window boxes, and I glued them into various small things that look like pots. One was a wood bead (see that one on the top of the toilet in the picture below?) and one was a small white flowerpot I found at the craft store.
I also used a clear bead + a brown flat button to make the little plant you see in the photo below. Just glue the bead and the button together and it looks like a little glass vase sitting on a brown coaster – and then add the small clipping to the bead with another small dab of glue.
Another fun added touch is to dump some colorful beads or large sequins into the bath tub and the sink to create some “fake water.” I found some blue ones a little later on, but already had these pink sequin things from a jewelry kit we had around the house, so I tossed them in and the kids had a lot of fun “bathing” their little dolls and teddy bears in ’em. Much better than them putting real water in their tub and sink ;)
You can see it a little better in this photo below, along with my homemade potted plant.
The kids also especially like “interactive” additions to their houses, like the rocking horse & rocking chair, which both get a lot of use from their little figures. Our daughter’s house also has a Christmas tree and some tiny fake wrapped presents to go around the base of it – and they LOVE that too. Anything they can weave a story around seems to be a real hit – and stuff that moves like drawers that come out and chests that open add excitement-factor too (they also love that the toilet cover goes up and down).
So that rounds out the tour of House #1 for ya. We hope to eventually share our larger and more detailed renovation of the bigger house for our daughter’s room someday. She wants electricity and all that good stuff, so it might take a while, but hopefully I’ll be back with all the details in the next year or two. You never know how long these whole-house renos might take ;)
Also dollhouses are not just for girls. So many little guys who come over to play run right up to them and LOVE it.
Psst – To check out how to make a much less detailed dollhouse for younger kids, here’s how we built one, and how we decorated it. And to hear more of the story about how we came across these two dollhouses that we’re fixing up now, you can tune into this podcast (all the details are in the first 10 minutes or so).
*This post contains affiliate links*
The post A Tiny House Makeover (Ok, It’s A Dollhouse) appeared first on Young House Love.
A Tiny House Makeover (Ok, It’s A Dollhouse) published first on https://aireloomreview.tumblr.com/
0 notes
Text
A Tiny House Makeover (Ok, It’s A Dollhouse)
I was surprised how many questions I got about the little dollhouse sneak peeks I’ve shared on IG stories over the last few weeks as I fixed this up with the kids. And then I polled you guys to see if you wanted a post about it, and 91% of you voted yes, so here it is!
You can read more about how these came to be on this podcast from a few weeks back, but the gist is that the kids – especially our daughter – really wanted super detailed dollhouses to fix up, and we got two of them secondhand on Facebook marketplace to “renovate” together).
This little makeover was lots of fun for us all, since the kids were at the wheel picking all the colors and helping me paint and glue and arrange stuff, and although this technically lives in our son’s room, both kids definitely had a hand in making it over (we have another one that lives in our daughter’s room that we’re also working on together – which you can see below on the left of the photo). The lesson: even tiny houses take a village to fix up.
That photo above and the quick pic I snapped below show what they looked like when we started (I barely remembered to snap the before photo below, hence that dash of white on the facade since we had already started).
Our son was adamant that he wanted it to be white with light blue shutters and gold trim along the peak (this is the gold I used – be sure to shake this thoroughly for the best coverage). The kid knew what he wanted and was unwavering. Ha! So his vision came to fruition thanks to a whole lot of painting.
We just used simple craft paint from Michael’s and we all pitched in (we had the entire interior and exterior to do). The kids could easily do things like the floor, walls, and exterior house color and I helped with the more detailed jobs, like the trim (I just used a small craft brush). Also we made up a song as we went, which went a little something like this: “ahh, don’t get paint on the roof! Go slow! Whew! We can do this! Ahhhh, avoid the roof!” Catchy, eh? If you’re super worried you can cover it with plastic and tape it off, but our song seemed to work for the most part.
Oh and that decorative trim around the peak came with the dollhouse, it just broke off and I re-glued it back on with wood glue (this glue works great – I just taped them in place while they dried so I didn’t have to stand there holding them for an hour).
I loved getting to reuse some things we’ve had for ages (way back from our daughter’s first dollhouse), like those topiaries that you see on the front porch. The funny thing is that I found those in the wedding aisle at Michael’s 6 years ago, and they’re actually meant to be place cards (there’s a small wire loop at the top to stick name cards in). Cute miniature things are EVERYWHERE if you look close enough.
And as for the “greenery” in the window boxes above, I just bought this small faux plant “mat” from Michael’s (don’t forget your 50% off coupons – they saved me so much money when I was grabbing the acrylic paint, craft glue, and the little faux green mat).
Here’s a little Burger-for-scale shot for ya. He was VERY INTO trying to help, but sadly dogs can’t paint very well. Oh and we have since fixed the steps, so I’ll have to share a little update video on Instagram stories about how we did it. Super simple – you just slice thin craft wood (like this) with an exacto knife to make the steps, glue them into place with wood glue, and paint them to match. Truly so easy! Like 10,000% easier than building a human-sized staircase ;)
This is where this dollhouse lives, right in the corner of our son’s room. For those who listened to the podcast about “Operation Acquire Two Dollhouses”, you may remember that I thought this was a much smaller dollhouse (like shoebox sized) and was shocked when it was almost as big as his extra high dresser – and then when we picked up the one for our daughter… and… well, it was massive. Ha! But they LOVE them, so I guess it all worked out. Even if dollhouses now make up 8% of our actual house’s contents now.
As for how we fixed things up inside, this is what we started with. All the furniture in each house was made up of two bulk purchases on Facebook Marketplace (we spent around $30 total for enough furniture to fill TWO houses!). This before shot of the back of the house and the furniture isn’t completely congruent with the next after shot since I took this photo on Christmas Eve, and then the kids came down on Christmas morning and had all sorts of furniture swaps and rearranging parties.
But you get the general gist that the floors were wood, the walls were sort of a cream-white color and a lot of the furniture was wood, deep red, green and cream, etc. Once again our tiny homeowner knew exactly what he wanted for the inside: white walls and light blue floors – just like the shutters and trim (this is the exact blue color we used by the way).
We all got to work painting those (again, just with craft paint from Michael’s) and once the floor & walls were dry we had some fun painting the beds gold, adding a pink top to the table and two of the chairs – whatever the kids wanted – we did! And the funny thing is that they both said the sink and the fridge had to be pink like the stove at the pink house! You know I didn’t argue with that ;)
The little pillows were things our daughter already had from a small doll she had gotten ages ago, and even the “bedding” on the two beds were cloth bags I had saved in our gift wrapping closet (one is from Kendra Scott jewelry and it’s the perfect “sleeping bag” size and the other is a plain blue cloth bag that something else came in).
There were a few special purchases that we made with the kids. They had an Amazon gift card and some Christmas money to spend, so after a loooooooong deliberation they decided that two plates of pancakes (you can see those on the right of the photo above) and a little gingerbread making kit (seen below) were the best things to buy, along with this set of pots & pans (you can see them in the photo above on the fridge). They’ve never been so excited to check the mail every day until they arrived.
Oh and that little candlestick has real wax candles! It came with one of the sets of old dollhouse furniture we bought secondhand – and you might remember those round wire chairs as being from our daughter’s first dollhouse too (originally they were little decorative chairs meant as shelf decor from West Elm).
You know it super bugs me that I took all these photos like a day before I fixed those stairs, right? #TypeA
Along with DIYing the greenery in the window boxes, I also made a few house plants from scratch. It was really simple and fun, I just took small clippings from the same faux green mat thing I bought for the window boxes, and I glued them into various small things that look like pots. One was a wood bead (see that one on the top of the toilet in the picture below?) and one was a small white flowerpot I found at the craft store.
I also used a clear bead + a brown flat button to make the little plant you see in the photo below. Just glue the bead and the button together and it looks like a little glass vase sitting on a brown coaster – and then add the small clipping to the bead with another small dab of glue.
Another fun added touch is to dump some colorful beads or large sequins into the bath tub and the sink to create some “fake water.” I found some blue ones a little later on, but already had these pink sequin things from a jewelry kit we had around the house, so I tossed them in and the kids had a lot of fun “bathing” their little dolls and teddy bears in ’em. Much better than them putting real water in their tub and sink ;)
You can see it a little better in this photo below, along with my homemade potted plant.
The kids also especially like “interactive” additions to their houses, like the rocking horse & rocking chair, which both get a lot of use from their little figures. Our daughter’s house also has a Christmas tree and some tiny fake wrapped presents to go around the base of it – and they LOVE that too. Anything they can weave a story around seems to be a real hit – and stuff that moves like drawers that come out and chests that open add excitement-factor too (they also love that the toilet cover goes up and down).
So that rounds out the tour of House #1 for ya. We hope to eventually share our larger and more detailed renovation of the bigger house for our daughter’s room someday. She wants electricity and all that good stuff, so it might take a while, but hopefully I’ll be back with all the details in the next year or two. You never know how long these whole-house renos might take ;)
Also dollhouses are not just for girls. So many little guys who come over to play run right up to them and LOVE it.
Psst – To check out how to make a much less detailed dollhouse for younger kids, here’s how we built one, and how we decorated it. And to hear more of the story about how we came across these two dollhouses that we’re fixing up now, you can tune into this podcast (all the details are in the first 10 minutes or so).
*This post contains affiliate links*
The post A Tiny House Makeover (Ok, It’s A Dollhouse) appeared first on Young House Love.
0 notes
Text
A Tiny House Makeover (Ok, It’s A Dollhouse)
I was surprised how many questions I got about the little dollhouse sneak peeks I’ve shared on IG stories over the last few weeks as I fixed this up with the kids. And then I polled you guys to see if you wanted a post about it, and 91% of you voted yes, so here it is!
You can read more about how these came to be on this podcast from a few weeks back, but the gist is that the kids really wanted super detailed dollhouses to fix up, and we got two of them secondhand on Facebook marketplace to “renovate” together.
This little makeover was lots of fun for us all, since the kids were at the wheel picking all the colors and helping me paint and glue and arrange stuff, and although this technically lives in our son’s room, both kids definitely had a hand in making it over (we have another one that lives in our daughter’s room that we’re also working on together – which you can see below on the left of the photo). The lesson: even tiny houses take a village to fix up.
The quick pic I snapped below shows what this one looked like when we got it (I barely remembered to snap the before photo, hence that dash of white paint on the facade since we had already started painting).
Our son was adamant that he wanted it to be white with light blue shutters and gold trim along the peak (this is the gold I used – be sure to shake this thoroughly for the best coverage). The kid knew what he wanted and was unwavering. Ha! So his vision came to fruition thanks to a whole lot of painting.
We just used simple craft paint from Michael’s and we all pitched in (we had the entire interior and exterior to do). The kids could easily do things like the floor, walls, and exterior house color and I helped with the more detailed jobs, like the trim (I just used a small craft brush). Also we made up a song as we went, which went a little something like this: “Ahh, don’t get paint on the roof! Go slow! Whew! We can do this! Ahhhh, avoid the roof!” Catchy, eh? If you’re super worried you can cover it with plastic and tape it off, but our song seemed to work for the most part.
Oh and that decorative trim around the peak came with the dollhouse, it just broke off and I re-glued it back on with wood glue (this glue works great – I just taped them in place while they dried so I didn’t have to stand there holding them for an hour).
I loved getting to reuse some things we’ve had for ages (way back from our daughter’s first dollhouse), like those topiaries that you see on the front porch. The funny thing is that I found those in the wedding aisle at Michael’s 6 years ago, and they’re actually meant to be place cards (there’s a small wire loop at the top to stick name cards in). Cute miniature things are EVERYWHERE if you look close enough.
As for the “greenery” in the window boxes above, I just bought this small faux plant “mat” from Michael’s (don’t forget your 50% off coupons – they saved me so much money when I was grabbing the acrylic paint, craft glue, and the little faux green mat).
Here’s a Burger-for-scale shot for ya. He was VERY INTO trying to help, but sadly dogs can’t paint very well. Oh and we have since fixed the steps, so I’ll have to share a little update video on Instagram stories about how we did it. Super simple – you just slice thin craft wood (like this) with an exacto knife to make the steps, glue them into place with wood glue, and paint them to match. Truly so easy! Like 10,000% easier than building a human-sized staircase ;)
This is where this dollhouse lives, right in the corner of our son’s room. For those who listened to the podcast about “Operation Acquire Two Dollhouses”, you may remember that I thought this was a much smaller dollhouse (like shoebox sized) and was shocked when it was almost as big as his extra high dresser – and then we picked up the one for our daughter… and… well… it was massive. Ha! But they LOVE them, so I guess it all worked out. Even if dollhouses now make up 8% of our actual house’s contents now.
As for how we fixed things up inside, this is what we started with. All the furniture in each house was made up of two bulk purchases on Facebook Marketplace (we spent around $30 total for enough furniture to fill TWO houses!). This before shot of the back of the house and the furniture isn’t completely congruent with the next after shot since I took this photo on Christmas Eve, and then the kids came down on Christmas morning and had all sorts of furniture swaps and rearranging parties.
But you get the general gist that the floors were wood, the walls were sort of a cream-white color and a lot of the furniture was wood, deep red, green and cream, etc. Once again our tiny homeowner knew exactly what he wanted for the inside: white walls and light blue floors – just like the shutters and trim (this is the exact blue color we used by the way).
We all got to work painting those (again, just with craft paint from Michael’s) and once the floor & walls were dry we had some fun painting the beds gold, adding a pink top to the table and two of the chairs – whatever the kids wanted – we did! And the funny thing is that they both said the sink and the fridge had to be pink like the stove at the pink house! You know I didn’t argue with that ;)
The little pillows were things our daughter already had from a small doll she had gotten ages ago, and even the “bedding” on the two beds were cloth bags I had saved in our gift wrapping closet (one is from Kendra Scott jewelry and it’s the perfect “sleeping bag” size and the other is a plain blue cloth bag that something else came in).
There were a few special purchases that we made with the kids. They had an Amazon gift card and some Christmas money to spend, so after a loooooooong deliberation they decided that two plates of pancakes (you can see those on the right of the photo above) and a little gingerbread making kit (seen below) were the best things to buy, along with this set of pots & pans (you can see them in the photo above on the fridge). They’ve never been so excited to check the mail every day until they arrived.
Oh and that little candlestick has real wax candles! It came with one of the sets of old dollhouse furniture we bought secondhand – and you might remember those round wire chairs as being from our daughter’s first dollhouse too (originally they were little decorative chairs meant as shelf decor from West Elm).
You know it super bugs me that I took all these photos like a day before I fixed those stairs, right? #TypeA
Along with DIYing the greenery in the window boxes, I also made a few house plants from scratch. It was really simple and fun, I just took small clippings from the same faux green mat thing I bought for the window boxes, and I glued them into various small things that look like pots. One was a wood bead (see that one on the top of the toilet in the picture below?) and one was a small white flowerpot I found at the craft store.
I also used a clear bead + a brown flat button to make the little plant you see in the photo below. Just glue the bead and the button together and it looks like a little glass vase sitting on a brown coaster – and then add the small clipping to the bead with another small dab of glue.
Another fun added touch is to dump some colorful beads or large sequins into the bath tub and the sink to create some “fake water.” I found some blue ones a little later on, but already had these pink sequin things from a jewelry kit we had around the house, so I tossed them in and the kids had a lot of fun “bathing” their little dolls and teddy bears in ’em. Much better than them putting real water in their tub and sink ;)
You can see it a little better in this photo below, along with my homemade potted plant.
The kids also especially like “interactive” additions to their houses, like the rocking horse & rocking chair, which both get a lot of use from their little figures. Our daughter’s house also has a Christmas tree and some tiny fake wrapped presents to go around the base of it – and they LOVE that too. Anything they can weave a story around seems to be a real hit – and stuff that moves like drawers that come out and chests that open add excitement-factor too (they also love that the toilet cover goes up and down).
So that rounds out the tour of House #1 for ya. We hope to eventually share our larger and more detailed renovation of the bigger house for our daughter’s room someday. She wants electricity and all that good stuff, so it might take a while, but hopefully I’ll be back with all the details in the next year or two. You never know how long these whole-house renos might take ;)
Also dollhouses are not just for girls. So many little guys who come over to play run right up to them and LOVE it.
Psst – To check out how to make a much less detailed dollhouse for younger kids, here’s how we built one, and how we decorated it. And to hear more of the story about how we came across these two dollhouses that we’re fixing up now, you can tune into this podcast (all the details are in the first 10 minutes or so).
*This post contains affiliate links*
The post A Tiny House Makeover (Ok, It’s A Dollhouse) appeared first on Young House Love.
A Tiny House Makeover (Ok, It’s A Dollhouse) published first on https://bakerskitchenslimited.tumblr.com/
0 notes
Note
💫💛
trash aesthetic ratehumor category thing: memes / dad jokes / sarcasm / awkward pauses and rambles one of these: …wtf / *cries* / m8 / fight me a piece of kiwi slang (this is mia’s fault): chur / shot gee / yeah nah / cuzzies / GC one line of trash: when u catch up with family friends (aka ur parents friends) and there is that awkward small talk phase and it just always comes down to ‘what are u goin to do with ur life?’ or whatever rendition of that they can think of and u sorta just memorise the same ramble and reuse it but are also really tempted to break out the ‘well ya know i’m planning to marry rich’ or ‘i think i have a calling in bank robbery’ or something like that (cause small talk dulls the brain and ur rly trying to wake it back up again) compliment: ahhhh camille ur the sweetest and honestly ur always on my dash filling it up with that a+ content (so tysm) also i just love ur blog is so lovely and simple and it features a dramatic picture of harry (what more could be desired?) basically i just love u and ur blog (ty)no more please
1 note
·
View note
Text
A Tiny House Makeover (Ok, It’s A Dollhouse)
I was surprised how many questions I got about the little dollhouse sneak peeks I’ve shared on IG stories over the last few weeks as I fixed this up with the kids. And then I polled you guys to see if you wanted a post about it, and 91% of you voted yes, so here it is!
You can read more about how these came to be on this podcast from a few weeks back, but the gist is that the kids really wanted super detailed dollhouses to fix up, and we got two of them secondhand on Facebook marketplace to “renovate” together.
This little makeover was lots of fun for us all, since the kids were at the wheel picking all the colors and helping me paint and glue and arrange stuff, and although this technically lives in our son’s room, both kids definitely had a hand in making it over (we have another one that lives in our daughter’s room that we’re also working on together – which you can see below on the left of the photo). The lesson: even tiny houses take a village to fix up.
The quick pic I snapped below shows what this one looked like when we got it (I barely remembered to snap the before photo, hence that dash of white paint on the facade since we had already started painting).
Our son was adamant that he wanted it to be white with light blue shutters and gold trim along the peak (this is the gold I used – be sure to shake this thoroughly for the best coverage). The kid knew what he wanted and was unwavering. Ha! So his vision came to fruition thanks to a whole lot of painting.
We just used simple craft paint from Michael’s and we all pitched in (we had the entire interior and exterior to do). The kids could easily do things like the floor, walls, and exterior house color and I helped with the more detailed jobs, like the trim (I just used a small craft brush). Also we made up a song as we went, which went a little something like this: “Ahh, don’t get paint on the roof! Go slow! Whew! We can do this! Ahhhh, avoid the roof!” Catchy, eh? If you’re super worried you can cover it with plastic and tape it off, but our song seemed to work for the most part.
Oh and that decorative trim around the peak came with the dollhouse, it just broke off and I re-glued it back on with wood glue (this glue works great – I just taped them in place while they dried so I didn’t have to stand there holding them for an hour).
I loved getting to reuse some things we’ve had for ages (way back from our daughter’s first dollhouse), like those topiaries that you see on the front porch. The funny thing is that I found those in the wedding aisle at Michael’s 6 years ago, and they’re actually meant to be place cards (there’s a small wire loop at the top to stick name cards in). Cute miniature things are EVERYWHERE if you look close enough.
As for the “greenery” in the window boxes above, I just bought this small faux plant “mat” from Michael’s (don’t forget your 50% off coupons – they saved me so much money when I was grabbing the acrylic paint, craft glue, and the little faux green mat).
Here’s a Burger-for-scale shot for ya. He was VERY INTO trying to help, but sadly dogs can’t paint very well. Oh and we have since fixed the steps, so I’ll have to share a little update video on Instagram stories about how we did it. Super simple – you just slice thin craft wood (like this) with an exacto knife to make the steps, glue them into place with wood glue, and paint them to match. Truly so easy! Like 10,000% easier than building a human-sized staircase ;)
This is where this dollhouse lives, right in the corner of our son’s room. For those who listened to the podcast about “Operation Acquire Two Dollhouses”, you may remember that I thought this was a much smaller dollhouse (like shoebox sized) and was shocked when it was almost as big as his extra high dresser – and then we picked up the one for our daughter… and… well… it was massive. Ha! But they LOVE them, so I guess it all worked out. Even if dollhouses now make up 8% of our actual house’s contents now.
As for how we fixed things up inside, this is what we started with. All the furniture in each house was collected over two bulk purchases on Facebook Marketplace (we spent around $30 total for enough furniture to fill TWO houses!). This before shot of the back of the house and the furniture isn’t completely congruent with the next after shot since I took this photo on Christmas Eve, and then the kids came down on Christmas morning and had all sorts of furniture swaps and rearranging parties.
But you get the general gist that the floors were wood, the walls were sort of a cream-white color and a lot of the furniture was wood, deep red, green and cream, etc. Once again our tiny homeowner knew exactly what he wanted for the inside: white walls and light blue floors – just like the shutters and trim (this is the exact blue color we used by the way).
We all got to work painting those (again, just with craft paint from Michael’s) and once the floor & walls were dry we had some fun painting the beds gold, adding a pink top to the table and two of the chairs – whatever the kids wanted – we did! And the funny thing is that they both said the sink and the fridge had to be pink like the stove at the pink house! You know I didn’t argue with that ;)
The little pillows were things our daughter already had from a small doll she had gotten ages ago, and even the “bedding” on the two beds were cloth bags I had saved in our gift wrapping closet (one is from Kendra Scott jewelry and it’s the perfect “sleeping bag” size and the other is a plain blue cloth bag that something else came in).
There were a few special purchases that we made with the kids. They had an Amazon gift card and some Christmas money to spend, so after a loooooooong deliberation they decided that two plates of pancakes (you can see those on the right of the photo above) and a little gingerbread making kit (seen below) were the best things to buy, along with this set of pots & pans (you can see them in the photo above on the fridge). They’ve never been so excited to check the mail every day until they arrived.
Oh and that little candlestick has real wax candles! It came with one of the sets of old dollhouse furniture we bought secondhand – and you might remember those round wire chairs from our daughter’s first dollhouse too (originally they were little decorative chairs meant as shelf decor from West Elm years ago).
You know it super bugs me that I took all these photos like a day before I fixed those stairs, right? #TypeA
Along with DIYing the greenery in the window boxes, I also made a few house plants from scratch. It was really simple and fun, I just took small clippings from the same faux green mat thing I bought for the window boxes, and I glued them into various small things that look like pots. One was a wood bead (see that one on the top of the toilet in the picture below?) and one was a small white flowerpot I found at the craft store.
I also used a clear bead + a brown flat button to make the little plant you see in the photo below. Just glue the bead and the button together and it looks like a little glass vase sitting on a brown coaster – and then add the small clipping to the bead with another small dab of glue.
Another fun added touch is to dump some colorful beads or large sequins into the bath tub and the sink to create some “fake water.” I found some blue ones a little later on, but already had these pink sequin things from a jewelry kit we had around the house, so I tossed them in and the kids had a lot of fun “bathing” their little dolls and teddy bears in ’em. Much better than them putting real water in their tub and sink ;)
You can see it a little better in this photo below, along with my homemade potted plant.
The kids also especially like “interactive” additions to their houses, like the rocking horse & rocking chair, which both get a lot of use from their little figures. Our daughter’s house also has a Christmas tree and some tiny fake wrapped presents to go around the base of it – and they LOVE that too. Anything they can weave a story around seems to be a real hit – and stuff that moves like drawers that come out and chests that open add excitement-factor too (they also love that the toilet cover goes up and down).
So that rounds out the tour of House #1 for ya. We hope to eventually share our larger and more detailed renovation of the bigger house for our daughter’s room someday. She wants electricity and all that good stuff, so it might take a while, but hopefully I’ll be back with all the details in the next year or two. You never know how long these whole-house renos are gonna take ;)
Also dollhouses are not just for girls. So many little guys who come over to play run right up to them and LOVE it.
Psst – To check out how to make a much less detailed dollhouse for younger kids, here’s how we built one, and how we decorated it. And to hear more of the story about how we came across these two dollhouses that we’re fixing up now, you can tune into this podcast (all the details are in the first 10 minutes or so).
*This post contains affiliate links*
The post A Tiny House Makeover (Ok, It’s A Dollhouse) appeared first on Young House Love.
A Tiny House Makeover (Ok, It’s A Dollhouse) published first on https://ssmattress.tumblr.com/
0 notes
Text
A Tiny House Makeover (Ok, It’s A Dollhouse)
I was surprised how many questions I got about the little dollhouse sneak peeks I’ve shared on IG stories over the last few weeks as I fixed this up with the kids. And then I polled you guys to see if you wanted a post about it, and 91% of you voted yes, so here it is!
You can read more about how these came to be on this podcast from a few weeks back, but the gist is that the kids really wanted super detailed dollhouses to fix up, and we got two of them secondhand on Facebook marketplace to “renovate” together.
This little makeover was lots of fun for us all, since the kids were at the wheel picking all the colors and helping me paint and glue and arrange stuff, and although this technically lives in our son’s room, both kids definitely had a hand in making it over (we have another one that lives in our daughter’s room that we’re also working on together – which you can see below on the left of the photo). The lesson: even tiny houses take a village to fix up.
The quick pic I snapped below shows what this one looked like when we got it (I barely remembered to snap the before photo, hence that dash of white paint on the facade since we had already started painting).
Our son was adamant that he wanted it to be white with light blue shutters and gold trim along the peak (this is the gold I used – be sure to shake this thoroughly for the best coverage). The kid knew what he wanted and was unwavering. Ha! So his vision came to fruition thanks to a whole lot of painting.
We just used simple craft paint from Michael’s and we all pitched in (we had the entire interior and exterior to do). The kids could easily do things like the floor, walls, and exterior house color and I helped with the more detailed jobs, like the trim (I just used a small craft brush). Also we made up a song as we went, which went a little something like this: “Ahh, don’t get paint on the roof! Go slow! Whew! We can do this! Ahhhh, avoid the roof!” Catchy, eh? If you’re super worried you can cover it with plastic and tape it off, but our song seemed to work for the most part.
Oh and that decorative trim around the peak came with the dollhouse, it just broke off and I re-glued it back on with wood glue (this glue works great – I just taped them in place while they dried so I didn’t have to stand there holding them for an hour).
I loved getting to reuse some things we’ve had for ages (way back from our daughter’s first dollhouse), like those topiaries that you see on the front porch. The funny thing is that I found those in the wedding aisle at Michael’s 6 years ago, and they’re actually meant to be place cards (there’s a small wire loop at the top to stick name cards in). Cute miniature things are EVERYWHERE if you look close enough.
As for the “greenery” in the window boxes above, I just bought this small faux plant “mat” from Michael’s (don’t forget your 50% off coupons – they saved me so much money when I was grabbing the acrylic paint, craft glue, and the little faux green mat).
Here’s a Burger-for-scale shot for ya. He was VERY INTO trying to help, but sadly dogs can’t paint very well. Oh and we have since fixed the steps, so I’ll have to share a little update video on Instagram stories about how we did it. Super simple – you just slice thin craft wood (like this) with an exacto knife to make the steps, glue them into place with wood glue, and paint them to match. Truly so easy! Like 10,000% easier than building a human-sized staircase ;)
This is where this dollhouse lives, right in the corner of our son’s room. For those who listened to the podcast about “Operation Acquire Two Dollhouses”, you may remember that I thought this was a much smaller dollhouse (like shoebox sized) and was shocked when it was almost as big as his extra high dresser – and then we picked up the one for our daughter… and… well… it was massive. Ha! But they LOVE them, so I guess it all worked out. Even if dollhouses now make up 8% of our actual house’s contents now.
As for how we fixed things up inside, this is what we started with. All the furniture in each house was collected over two bulk purchases on Facebook Marketplace (we spent around $30 total for enough furniture to fill TWO houses!). This before shot of the back of the house and the furniture isn’t completely congruent with the next after shot since I took this photo on Christmas Eve, and then the kids came down on Christmas morning and had all sorts of furniture swaps and rearranging parties.
But you get the general gist that the floors were wood, the walls were sort of a cream-white color and a lot of the furniture was wood, deep red, green and cream, etc. Once again our tiny homeowner knew exactly what he wanted for the inside: white walls and light blue floors – just like the shutters and trim (this is the exact blue color we used by the way).
We all got to work painting those (again, just with craft paint from Michael’s) and once the floor & walls were dry we had some fun painting the beds gold, adding a pink top to the table and two of the chairs – whatever the kids wanted – we did! And the funny thing is that they both said the sink and the fridge had to be pink like the stove at the pink house! You know I didn’t argue with that ;)
The little pillows were things our daughter already had from a small doll she had gotten ages ago, and even the “bedding” on the two beds were cloth bags I had saved in our gift wrapping closet (one is from Kendra Scott jewelry and it’s the perfect “sleeping bag” size and the other is a plain blue cloth bag that something else came in).
There were a few special purchases that we made with the kids. They had an Amazon gift card and some Christmas money to spend, so after a loooooooong deliberation they decided that two plates of pancakes (you can see those on the right of the photo above) and a little gingerbread making kit (seen below) were the best things to buy, along with this set of pots & pans (you can see them in the photo above on the fridge). They’ve never been so excited to check the mail every day until they arrived.
Oh and that little candlestick has real wax candles! It came with one of the sets of old dollhouse furniture we bought secondhand – and you might remember those round wire chairs from our daughter’s first dollhouse too (originally they were little decorative chairs meant as shelf decor from West Elm years ago).
You know it super bugs me that I took all these photos like a day before I fixed those stairs, right? #TypeA
Along with DIYing the greenery in the window boxes, I also made a few house plants from scratch. It was really simple and fun, I just took small clippings from the same faux green mat thing I bought for the window boxes, and I glued them into various small things that look like pots. One was a wood bead (see that one on the top of the toilet in the picture below?) and one was a small white flowerpot I found at the craft store.
I also used a clear bead + a brown flat button to make the little plant you see in the photo below. Just glue the bead and the button together and it looks like a little glass vase sitting on a brown coaster – and then add the small clipping to the bead with another small dab of glue.
Another fun added touch is to dump some colorful beads or large sequins into the bath tub and the sink to create some “fake water.” I found some blue ones a little later on, but already had these pink sequin things from a jewelry kit we had around the house, so I tossed them in and the kids had a lot of fun “bathing” their little dolls and teddy bears in ’em. Much better than them putting real water in their tub and sink ;)
You can see it a little better in this photo below, along with my homemade potted plant.
The kids also especially like “interactive” additions to their houses, like the rocking horse & rocking chair, which both get a lot of use from their little figures. Our daughter’s house also has a Christmas tree and some tiny fake wrapped presents to go around the base of it – and they LOVE that too. Anything they can weave a story around seems to be a real hit – and stuff that moves like drawers that come out and chests that open add excitement-factor too (they also love that the toilet cover goes up and down).
So that rounds out the tour of House #1 for ya. We hope to eventually share our larger and more detailed renovation of the bigger house for our daughter’s room someday. She wants electricity and all that good stuff, so it might take a while, but hopefully I’ll be back with all the details in the next year or two. You never know how long these whole-house renos are gonna take ;)
Also dollhouses are not just for girls. So many little guys who come over to play run right up to them and LOVE it.
Psst – To check out how to make a much less detailed dollhouse for younger kids, here’s how we built one, and how we decorated it. And to hear more of the story about how we came across these two dollhouses that we’re fixing up now, you can tune into this podcast (all the details are in the first 10 minutes or so).
*This post contains affiliate links*
The post A Tiny House Makeover (Ok, It’s A Dollhouse) appeared first on Young House Love.
A Tiny House Makeover (Ok, It’s A Dollhouse) published first on https://carpetgurus.tumblr.com/
0 notes