#6 oz Plastic Jars
Explore tagged Tumblr posts
Visit Tumblr Blog
Explore Tumblr blogs with no restrictions, modern design and the best experience.
Last Seen Tumblr Blogs


Fun Fact
When “GIF” was named word of the year in 2012, Oxford Dictionaries U.S.A. credited Tumblr for pushing the word.
Text
9ML Round Concentrate Jar - Durable, Compact Storage for Concentrates and Extracts
Discover the perfect solution for storing your concentrates and extracts with our 9ML Round Concentrate Jar. Crafted from high-quality, durable materials, this compact jar is designed to keep your valuable concentrates fresh and secure. The round shape and screw-on lid ensure an airtight seal, protecting your products from moisture and contamination. Ideal for essential oils, waxes, and other concentrates, this jar offers a sleek and practical storage solution that fits easily into any bag or storage container. Whether you're a connoisseur or a professional, the 9ML Round Concentrate Jar provides the reliability and convenience you need.
For more details visit our website www.skunkjarspackaging.com
#Cannabis Jars#Premium Cannabis Packaging#Cannabis Packaging Alameda#Cannabis Packaging California#Cannabis Packaging US#Marijuana Packaging Alameda#Marijuana Packaging California#Marijuana Packaging US#2 oz Glass Jars#3 oz Glass Jars#4 oz Glass Jars#6 oz Glass Jars#10 oz Glass Jars#Pre Roll Jars#2 oz Plastic Jars#3 oz Plastic Jars#4 oz Plastic Jars#6 oz Plastic Jars#10 oz Plastic Jars#Pre Roll Tubes#Glass Pre Roll Tubes#Plastic Pre Roll Tubes#115mm Pre Roll Tubes#95mm Pre Roll Tubes#Concentrate Jars#Glass Concentrate Jars#Qube Jars#Qube Concentrate Jar#5ML Qube Concentrate Jar#9ML Qube Concentrate Jar
0 notes
Text
Salve Veneficium

Double flame candle for a client. He will get be very successful. He has already received three fat checks from the VA. For serious!! Before our ritual was complete!
What does this oleum do? It's great for chilling and opening up for psychic vision, divination - especially scrying & channeling though it makes tarot reading wild & fun, too. Veneficium just refers to 'poisoner.' To me, veneficium refers to as a person who knows much about herbs & medicine as well as the natural world. And someone who knows their plant poisons, like ME.
You will need:
Pork fat
Olive oil
Beeswax
Or, raw cocoa butter, shea butter, whatever is ok & vegan for you folks & can be melted
Fresh Foxglove
Fresh Wild Lettuce (it grows all over and probably in your yard!!! Also known as "lettuce opium")
Fresh Mugwort if you can. If not, use responsibly with fresh Wormwood. If you want an Artemisia, like Mugwort or Wormwood, for erring on the side of caution, you can try Tarragon. Dragonwort, or Tarragon, is a very spiritual herb, it smells heavenly & it's a culinary herb. The other Artemisias are not, like Southernwood, for example.
Belladonna flowers - if you have access to the little purple flowers with the yellow middles, get some, carefully. Don't squeeze. If brave, you can get berries, but its more risky & messy.
Onto the SALVE!!
Remember to take out your beeswax to soften.
To begin, if there are dried herbs, it is best to boil them in the fat and Olive oil for no more than 15 minutes, under *constant* supervision. Use only 1/2 cup of oil to about 1 tablespoon of each of the herbs (yes DRIED!!! I'll keep repeating!!) Do NOT boil on high! Use your stove's lowest boil setting. The Salve should be a bit colored, but not dark. If there's no herbal trace, put in some more herbs and oil & boil for 12 minutes over medium boil. If too fast, turn down.
If the dried herbs suck, either the herbs are old, or well, get fresh ones! It ain't supposed to be easy!! 😉
If the herbs are fresh, use 1 cup of oil to 1/2 cup of herbs. Boil for 5 minutes and check every 5 minutes until it looks done (like the color or odor has changed). Boil no longer than 14 minutes.
Drain herbs out of the oil carefully. Do NOT let cool!!! This is time to add to the pork fat, Olive oil, and beeswax together (microwave beeswax very carefully). Do the same with cocoa butter, shea butter & other vegan options. I cannot stand by the vegan recipes though, because these options have not been tested by me. Only pork fat, Olive oil & beeswax.
Add a scent if desired. My recipe for Demonic Sight oil is perfect! Or try Cajeput, Juniper and Lavender for a invigorating and focusing scent!
Make sure you have tins or other packaging for your salve to go into!!
For those who want just a simple tincture to be scary or dangerous or get a mild high with, here's the basics with the measurements!
Potion Veneficium
Pint jar (or larger, make your recipe!)
Fresh herbs - fill jar 2/3
Dry herbs - fill jar 1/2
Alcohol (80 proof; brandy, vodka, rum)
Put the herbs in loose, do NOT pack in. Pour in alcohol. Place parchment (kitchen paper) or plastic at lid so it doesn't rust. Close it well. Put it in a dark & cool place. Check for mold & the alcohol level & shake every couple of days. You may have to add a bit more alcohol to the brew.
It is done at 8 weeks, but it can go longer, though carefully check the fluid level and for mold.
Strain the herbs from the finished tincture. I still prefer cheesecloth. I'll never like metal strainers. I'd likely put my finished tincture into Amber or Blue Boston round bottles for protection from light (UV).
A note about tincturing roots - Length of time depends and ratio as well. I used 1 cup Orris root with 16 oz of rum - potent, I also used 1 large High John root with 16 oz. rum - very potent smell. They each took on odor in about 6 months, but my High John is still keeping after 10 years!
Remember, I'm not a licensed health professional of any kind and these recipes call on poison plants. Please use your discretion and wisdom before wearing or imbibing anything you see here. I am just a curious wanderer among the plants, a veneficium sharing my knowledge with others. - HexeHaus 💀
5 notes
·
View notes
Text

[ID: A bowl full of fried rice, peas, carrots, and seared chicken. End ID.]
Chinese 'chicken' fried rice / 鸡肉炒饭
Soy sauce, toasted sesame oil, white pepper, and kala namak produce a rich, savory, umami base for whatever vegetables you have on hand in this vegan version of a classic fried rice recipe. I give instructions for adding marinated 'chicken' and/or 'egg', but this recipe is just as delicious when made only with carrots and peas.
Mush often comes of attempting to make fried rice from rice that's been cooked according to package directions; crowded pans or unevenly heated woks also lead to underwhelming results. This recipe specifies the perfect ratio of rice to water by weight (though volumetric measurements are also provided), and gives a few tips for producing even, separated, well-fried rice grains.
Patreon | Tip jar
Serves 8.
INGREDIENTS:
For the chicken (optional):
250-300g unbreaded vegan chicken substitute (I used Gardein)
2 tbsp Chinese-style light soy sauce
1 Tbsp Shaoxing wine (or substitute dry sherry or mirin, or a "mirin-style condiment" for a version with less alcohol)
1 tsp cornstarch
Crack of black pepper
For the dish:
285g (1 1/2 cup) long-grain white rice
95g (1/2 cup) jasmine rice
About 608g (2 1/2 cups) water
2 carrots, diced
3 scallions, sliced
1/2 cup peas
3 shallots, diced
1-inch chunk ginger (10g), crushed and chopped
6 cloves garlic, julienned
1/4 cup Chinese-style light soy sauce
1 tbsp toasted sesame oil
1 Tbsp vegetarian oyster sauce (optional)
1 tsp kala namak (black salt; for an eggy taste, if you're not using a scrambled egg substitute)
Several Tbsp refined peanut oil or untoasted sesame oil
2 tsp white peppercorns, toasted and ground
1/2 Tbsp MSG (optional)
10 fl. oz (300 mL) vegan scrambled egg substitute (optional)
About 4 cups of leftover rice may be substituted for the dry rice in this recipe. You can also make this recipe with frozen mixed vegetables or any other vegetables you happen to have on hand (sliced celery, napa cabbage ripped into bite-sized pieces, etc.). Mixing long-grain white and jasmine rice yields a mixture with the firm, separated texture of white and the nutty aroma of jasmine rice; but 380g of long-grain white rice or of jasmine rice may be used instead of a blend of both.
Refined peanut oil (which has a higher smoke point than unrefined) and untoasted sesame oil are standard in Chinese cooking; they have high smoke points, which is a must in oils that will be used at high heats, and impart a pleasant nutty flavor to the final dish.
Chinese-style soy sauce (likely to be sold as "light" or "thin" soy sauce in the US) is distinct from Japanese-style soy sauce (such as Kikkoman's); it uses wheat flour only to aid in fermentation, while Japanese soy sauces owe more of their flavor to toasted wheat. Pearl River Bridge, Amoy, Lee Kum Kee, and Koon Chun's "light" versions are examples of Chinese-style soy sauces--but note that all-purpose soy sauces produced by these brands for export may be Japanese-style.
INSTRUCTIONS:
For the chicken:
1. Mix all marinade ingredients (soy sauce, wine, cornstarch, and black pepper) in a large mixing bowl. Add thawed chicken and stir to coat. Cover and refrigerate while you prep the vegetables.
For the rice:
1. Measure out rice into a large bowl. Rinse it 3-4 times in cool water until the water runs mostly clear to remove excess starch: you can do this by transferring the rice to a mesh strainer that fits closely inside a mixing bowl; filling the bowl with water and lowering the strainer into it, agitating the rice to release excess starch; then lifting the strainer and changing the water.
I always rinse my rice when making rice not intended to be sticky; you may be able to get away with skipping this step, though, if you buy your rice in plastic bags (not permeable cloth ones) and are careful not to add too much water.
2. Add rice and water to a large pot (remove 1 Tbsp from the water measurement per cup of rice if you rinsed it, to account for the water still clinging to the recipe; for this recipe, you'll need 2 1/4 cup + 2 Tbsp).
I recommend using a kitchen scale, if you have one; it enables you to be more precise with the rice to water ratio. Tare out your bowl; weigh your rice (380g total), then rinse it; return it to the bowl (without re-taring) and add water until you reach a total weight of 988g (1.6 times as much water as rice by weight). This automatically and exactly accounts for the amount of water clinging to the rinsed rice.
3. Heat the rice on high until the water begins to boil; reduce the heat to low (or whatever is required to maintain a low simmer), cover the pot, and cook the rice for 15 minutes.
4. Remove the rice from heat without lifting the lid and allow to steam for another 5 minutes.
5. Fluff the rice with a fork or wooden spoon. Spread it out in a single layer on one or two baking trays and leave them uncovered until they cool to room temperature, to allow rice to let off excess steam.
6. For best results, cover and refrigerate the rice for a few hours, or overnight.
For the dish:
1. If you're using a wok on a Western stove, heat it on medium for 10-15 minutes while you prepare your vegetables to encourage even heating (Western stoves are not usually capable of quickly bringing woks to the temperatures best for making fried rice; if the bottom is much hotter than the sides, your rice may not fry well). Otherwise, use a large skillet.
2. Prepare your vegetables. This dish comes together quickly once cooking begins, so it's a good idea to have all your prep work done first.
3. Mix soy sauce, toasted sesame oil, oyster sauce, and kala namak in a small bowl.
4. Add peanut or untoasted sesame oil and raise heat to high. Once wisps of smoke appear, add chicken (leave any extra marinade in the bowl) and sear on both sides. Remove chicken from pan and scramble egg mixture by pouring it into the pan and immediately beginning to stir it, scraping the bottom of the pan occasionally, until firm. Set aside.
5. Add another Tbsp oil to pan and allow to heat. Add as much rice as will just about fit in a single layer (you may need to do this in a few batches) and fry for about five minutes, stirring often, until fragrant and a shade darker. Add more oil and allow it to heat up in between batches of rice.
Having patience during this step (neither crowding the pan nor under-frying the rice) is essential to the flavor and texture of the final dish!
6. Remove rice from pan. Add shallots, ginger, and garlic and cook for about 30 seconds until fragrant.
7. Add rice, chicken, and egg back into pan. Add vegetables and soy sauce mixture and continue to fry until the sauce has thickened and coated the rice, about five minutes.
8. Add white pepper, MSG, and scallions and mix to combine.
Serve hot. Leftovers will keep in the fridge for several days and may be re-fried or microwaved.
#fried rice#vegan#vegan recipe#Chinese#cooking#carrots#shallots#peas#rice#egg#chicken#gluten free#(without the chicken)
55 notes
·
View notes
Text
Ocean Vuong, "Amazon History of a Former Nail Salon Worker" [POEM]
Mar.
Advil (ibuprofen), 4 pack
Sally Hansen Pink Nail Polish, 6 pack
Clorox Bleach, industrial size
Diane hair pins, 4 pack
Seafoam handheld mirror
“I Love New York” T-shirt, white, small
Apr.
Nongshim Ramen Noodle Bowl, 24 pack
Cotton Balls, 100 count
“Thank You For Your Loyalty” cards, 30 count
Toluene POR-15 40404 Solvent, 1 quart
UV LED Nail Lamp
Cuticle Oil, value pack
Clear Acrylic Nail Tips, 500 count
May
Advil (ibuprofen), 4 pack
Vicks VapoRub, twin pack
Portable Electric Nail Drill
Salonpas Heat-Activated muscle patch, 40 count
Lipstick, “Night Out Red”
Little Debbie Chocolate Zebra Cakes, 4 boxes
Jun.
Large faux-clay planter pots, value set
Carnation Condensed Milk, 6 pack
Clear Nail Art Acrylic Liquid Powder Dish Bowl, 2 pcs
Birthday Card—Son—Pop-up Mother and Son effect
Nike Elite Basketball Shorts, men’s small
Jul.
Saviland Holographic Gold Nail Powder, 6 colors
Nescafé Taster’s Choice Instant Coffee
Advil (ibuprofen), 4 pack
PIXNOR Pedicure Double-Sided Callus Remover
Bengay Medicated Cream, 3 pack
Aug.
Newchic Ochre Summer Dress Floral Print, sz 6
Wrigley’s Doublemint Gum, 8 pack
Plastic Adirondack Lawn Chair, colonial blue
Sep.
Nail buffers and files, 10 pcs
Coppertone Sunblock, 6 oz
Oct.
CozyNites Fleece Blanket, pink
Sleep-Ease Melatonin caps, 90 count
Icy Hot Maximum Strength pain relief pads
Nov.
Tampax, 24 count
Faux-Resin Hair clips, 3 pack
Dec.
Advil (ibuprofen) Maximum Strength, 4 pack
True-Gro Tulip Bulbs, 24 pcs
Jan.
Feb.
Healthline Compact Trigger Release Folding Walker
Yankee Candle, Midsummer’s Night, large jar
Mar.
Chemo-Glam cotton head scarf, sunrise pink
White Socks, women’s small, 12 pack
Apr.
Chemo-Glam cotton scarf, flower garden print
“Warrior Mom” Breast Cancer awareness T-shirt, pink and white
May
Mueller 255 Lumbar Support Back Brace
Jun.
Birthday Card—“Son, We Will Always Be Together,” Snoopy design
Jul.
Eternity Aluminum Urn, Dove and Rose engraved, small
Perfect Memories picture frame, 8 x 11 in, black
Burt’s Bees lip balm, Honey, 1 pc
Aug.
Sep.
Easy-Grow Windowsill herb garden
Oct.
YourStory Customized Memorial Plaque, 10 x 8 x 4 in
Winter coat, navy blue, x-small
Nov.
Wool socks, grey, 1 pair
- From the collection Time is a Mother
1 note
·
View note
Text
Necessary Home Products, Kitchen Edition
There are quite a few products that would greatly improve our day to day lives. But, as we currently live in a small house with my parents, it's impossible to store and keep track of these things when they are... you know, how they are... So when we get a place of our own and organize how we want and need, I definitely want to make space for these. In no particular order, here are products that will make our kitchen experience better.
Glam Gloves/ Reusable Gloves
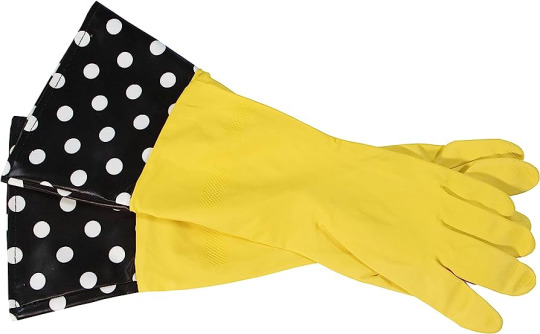


I only say glam gloves in particular, because they are the most easily recognizable of this variation of product. A separate pair for dishwashing and then cleaning, because it is unbearable to wash dishes barehanded. Touching wet soggy food? No thank you. And we shouldn't be cleaning things hand directly to chemical cleanser.
Currently $2.97 on Walmart.com
Bottle Scrubber

This product, already in our arsenal has been a savior when washing. First, better reach and clean for cups and bottles, and also great to scrub plates and bowls with! Also creates another barrier when putting in some gloveless hand-washing.
Currently $1.25 at Dollar Tree
Coconut Oil (Butcher Boy)
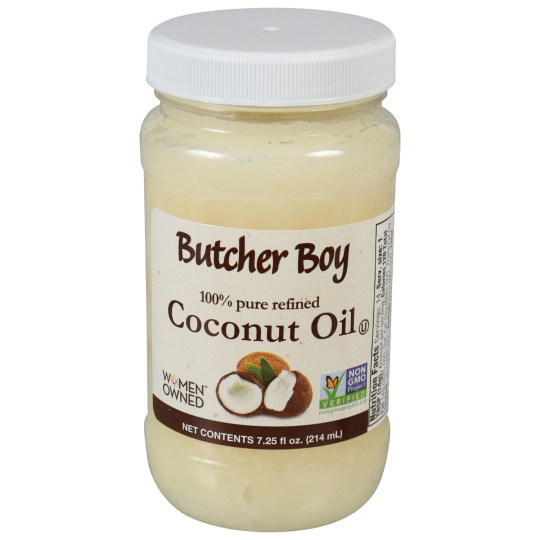
This coconut oil is not only coconut oil, a beautiful, versatile product that I mostly use for skin and hair care, but is affordable too. Places like walmart and other stores have larger containers, but they start at around $6. These smaller, can-sized bottles last me a very long time at only $1.25.
Currently $1.25 at Dollar Tree
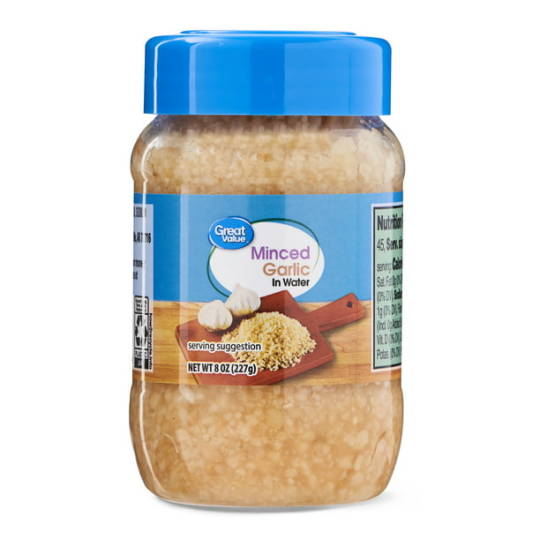
Basic Seasonings: Morton's Season All Salt, Garlic Powder/Jar-lic, Onion Powder
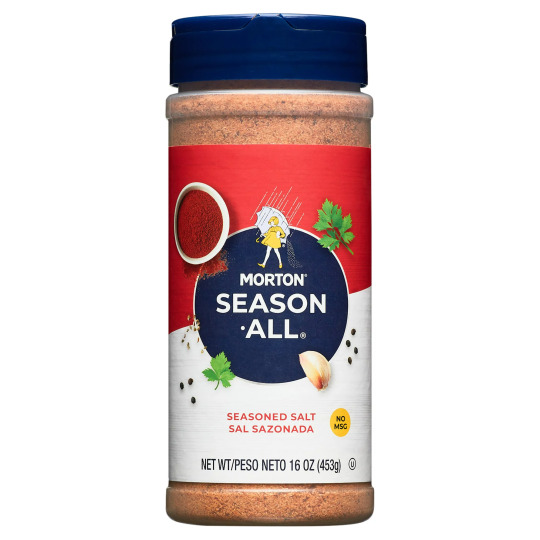
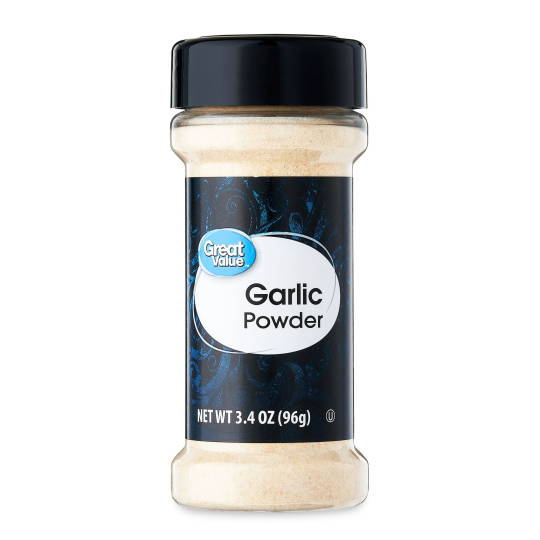
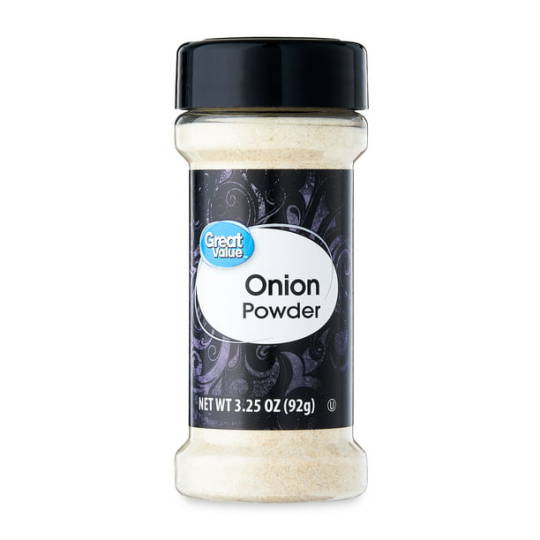
Nothing more to say, these are the basics that need to be incorporated when cooking.
Onion Powder 3.25 oz - $1.12 Morton's Season All Salt 16 oz - $3.54 Garlic Powder 3.4 oz - $1.12 Jar-lic 8 oz - $2.16 (All Available at Walmart)
Dale's Steak Seasoning

Phenomenal product for beef. Love to use this when making pot roast. I've also tried making oven jerky with this and ground beef before and it wasn't perfect jerky, but it was close and it was AMAZING. We've never made steaks before, but if we did get into steak-ing, this probably would be used too.
Currently $3.77 at Walmart
Mini Moonpies (Dollar Tree)

Nice snack that comes with 6 for $1.25. I love the taste, the chewy marshmallow, the multitude, and the price. Also the banana ones are yummy as well.
Currently $1.25 at Dollar Tree
Bees Wrap/ Plastic Wrap Replacement
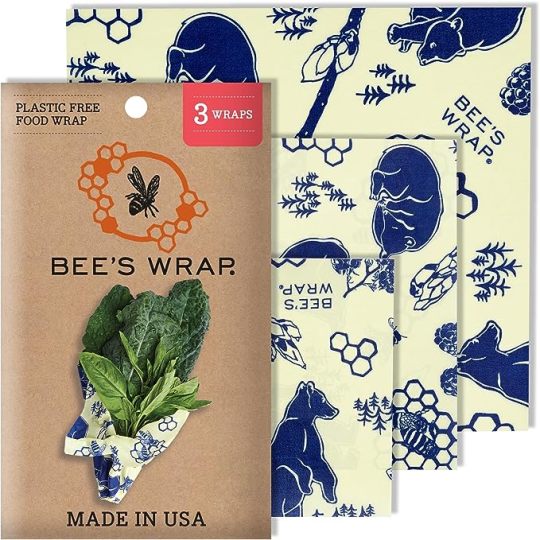
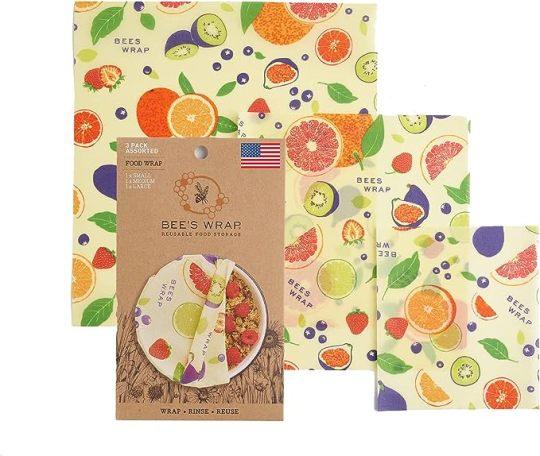
Wonderful products that hold and preserve better than plastic wrap, is reusable and better for the environment. When I stored things such as chicken or rice, I noticed they are actually sealing better and they don't get dried out after a few days like when using cheapo plastic. It could possibly be because it is easier to accidentally move the plastic wrap than the wax wrap because the plastic warps and stretches when hot, while the wax hardens when cold. Either way, lest pfas touching your food, the better.
A cute, pink floral 3-pack is available on Amazon for $7.99
Kitchen Thermometer

Something that would be super useful for a novice chef like me who is expanding my palate. My boyfriend likes seafood and softer cooked meats, while I am from an immigrant mother who is used to cooking meat till it is a bit charred or slow cooking overnight. I'm not even confident cooking sunny side up or soft-boiled eggs. There was also that time where I was trying to fry oreos and used a stick in meat thermometer to measure the heat and instantly burned the outside of the batter while the inside was still gooey.
Currently available on Amazon for $13.88
Reusable Paper Towels/Rags
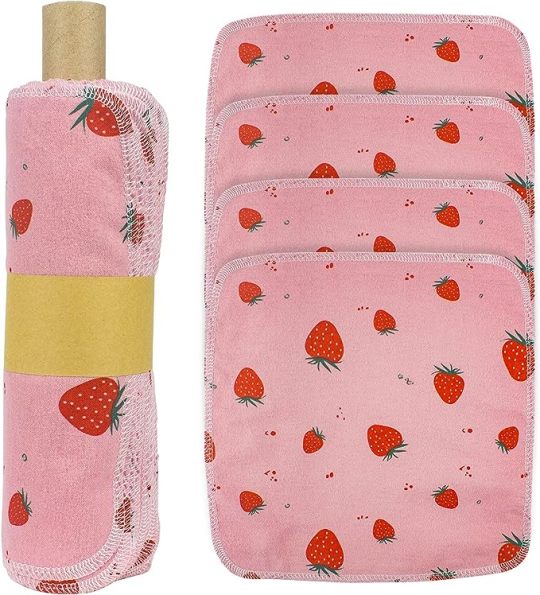
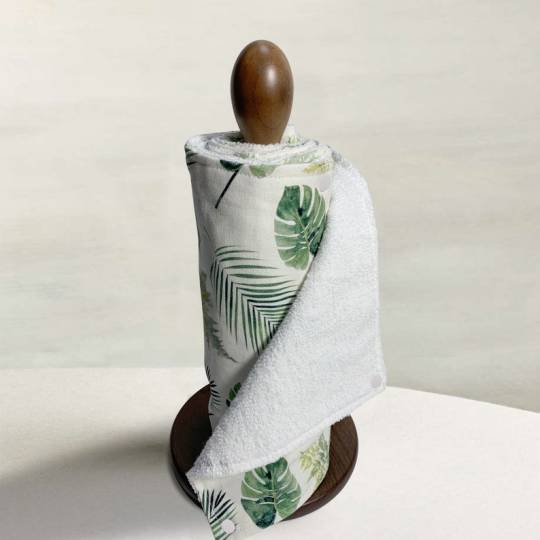

Another product that is good for the environment and cost effective. Instead of barreling through paper towels and filling up trashcans, spending more and more on something that could just be washed and reused, BOOM. These bad boys.
Temu has some really cool Wood-Pulp based cloths that dry hard, but soften when wet starting at $3.98
Kitchen Scissors
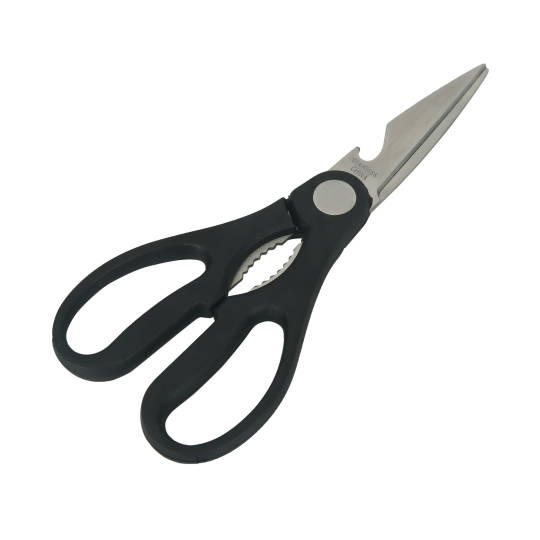
Having devoted scissors that aren't contaminated by craft materials is a necessity. Also not contaminating crafting supplies with meat juice or saucy scissors is a necessity as well. Available at Walmart for $0.97
Strainer

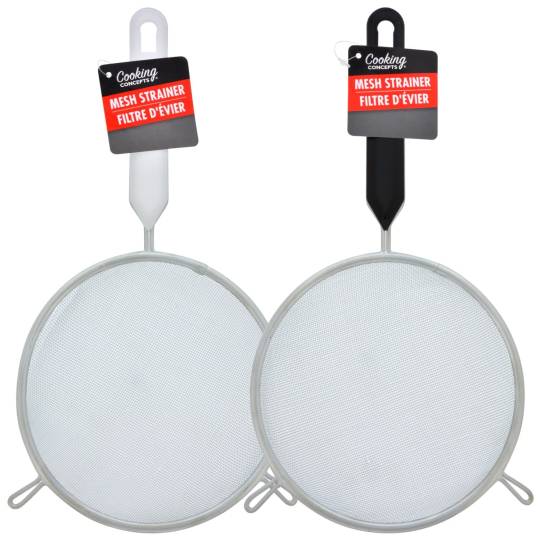
I've made pasta and homemade apple cider this past week and a trainer/colander is a big must have. Having to search for the one in my mom's kitchen was an atrocious process and I will have a dedicated hook or corner for mine in my home. Available at Dollar Tree for $1.25
0 notes
Link
Check out this listing I just added to my Poshmark closet: New - 32 oz Ball wide mouth metal canning lids- new, never used 10 per lot..
0 notes
Link
Check out this listing I just added to my Poshmark closet: Fragranced Wick Candle Blue Skies Scent.
0 notes
Text
15 Gifts for Mom From Daughters
1. BEST GIFT FOR MOM ON AmazON Softies Ultra-Soft Marshmallow Hooded Lounger These lounge hoodies are soft, pull-on ones that you can't help but love.
2. MoCuishle Neck Massager Pillow with Heat This handy, portable deep-tissue massage pillow is perfect for giving the gift of relaxation. This pillow uses gentle heat and kneading to ease aching muscles. You can bring the spa to her if she is unable to go.
3. Modern Sprout Mason Jar Indoor Herb Garden This gift keeps giving: The planters bring everything a mom needs to set up an indoor herb garden. She'll be able to grow herbs for her family, including fixings for pasta, cocktails, and cilantro.
4. Girlfriend Collective Please Recycle Your Fanny Pack For moms with busy schedules: This stylish, minimalist accessory is perfect for you. It has three pockets to store your keys, wallet, and sunglasses. The body is made of recycled plastic bottles, and the strap reminds people to recycle.
5. Monica Vinader Diamond Essential Bangle
Best Gifts for Mom Who doesn't like jewelry? You can make it a guaranteed thing by adding a diamond. This sterling silver bracelet is made with 100% recycled 18ct Gold Vermeil and solid Sterling Silver. This bangle is as beautiful as it looks, thanks to the ethically sourced diamond.
6. Uncommon Goods: Birth Month Flower Heart Necklace This is a fun and thoughtful way to use birthstone jewelry for sentimental moms who love flowers.
7. I Love Coloring Custom Pet Watercolor Portraits This is a thoughtful and unique tribute to the most loyal pet parent.
8. Charriol Infinity Zen necklace A beautiful piece of jewelry is more meaningful than any other thing. This unique necklace by Charriol will be treasured and loved by every woman. The silver-toned rope details contrast with the gold-tone piece for a sophisticated look.
9. Josephine's Feast Four Holiday Preserves This crate contains artisanal jams that will sweeten your morning or tea.
10. Dear Ava's Mother's Bracelet This simple bracelet symbolizes your forever bond and is a unique Mother-Daughter Gift.
11. Rifle Paper Co 20 oz. Sport Canteen Although it may not be the most exciting gift, this reusable water container, created in collaboration with Corkcicle, will help the environment (sorry, single-use plastic bottles), and your mom will look stylish.
12. Kate Spade New York Heart of Gold Bangle We bet she is a "heart full of gold," just like the bracelet. You'll be close to her heart. Or her wrist.
13. BEST WATCH GIFT Charriol Slim quartz 34mm Watch When gifting something to a mom special, nothing less than extraordinary will do. Charriol's slim quartz watch is a Swiss timepiece that blends modern and minimalistic design. The watch's face features a sparkling white mother-of-pearl dial and dazzling diamonds that give off a radiant glow every time mom glances at it.
14. BEST GARDENING GIFTS GardenHOME Garden Tool Set With Canvas Bag and Apron This 11-piece gardening tool set will be a hit with any mom with a green thumb. The bag doubles as a gardening apron and is lightweight. Genius!
15. TruMedic Shiatsu Foot Massager With Heat Do you have a mom who swears by taking a long, strenuous daily walk? This highly-rated shiatsu foot masseur will pamper your mom with a luxurious spa treatment. It even includes toasty heat!
0 notes
Text
The Essential Guide to Pre-Roll Jars: Everything You Need to Know
In the world of cannabis, pre-rolls have become an incredibly popular choice for consumers seeking convenience and consistency. But while pre-rolls offer an easy and efficient way to enjoy cannabis, their storage is equally important to maintain quality and freshness. Enter pre-roll jars—a practical solution designed to keep your pre-rolls in perfect condition. In this blog, we'll explore what pre-roll jars are, why they're important, and how to choose the right one for your needs.
What Are Pre-Roll Jars?
Pre-roll jars are specialized containers designed specifically to hold pre-rolled cannabis joints. These jars come in various sizes and materials, but their primary function is to protect pre-rolls from damage, moisture, and other environmental factors that could affect their quality. Typically, pre-roll jars are made from materials like glass, plastic, or acrylic, each offering different benefits.
Why Are Pre-Roll Jars Important?
Preservation of Freshness: One of the main reasons to use pre-roll jars is to preserve the freshness of the cannabis. Exposure to air can lead to the degradation of cannabinoids and terpenes, which are essential for the flavor and potency of the pre-roll. A well-sealed jar helps to keep the pre-rolls fresh and flavorful for longer periods.
Protection from Physical Damage: Pre-roll jars protect your joints from physical damage. Whether it's from being jostled around in a bag or accidentally crushed, a sturdy jar provides a barrier against impacts that could ruin the shape and quality of your pre-rolls.
Prevention of Contamination: By keeping pre-rolls in a sealed jar, you also protect them from contaminants like dust, dirt, and other particles. This ensures that your pre-rolls stay clean and safe to smoke.
Odor Control: Cannabis can have a strong odor that might not be desirable in certain situations. Pre-roll jars with airtight seals help to contain the smell, making it easier to transport or store your pre-rolls discreetly.
Choosing the Right Pre-Roll Jar
When selecting a pre-roll jar, there are a few key factors to consider:
Material: Pre-roll jars come in different materials. Glass jars are popular for their aesthetic appeal and ability to provide an airtight seal. Plastic jars are lightweight and less likely to break, making them a practical choice for on-the-go use. Acrylic jars offer a balance between durability and visibility. Choose the material that best fits your needs based on your lifestyle and preferences.
Size: Pre-roll jars are available in various sizes, from single-joint containers to larger jars that can hold multiple pre-rolls. Consider how many pre-rolls you typically carry or store at once and choose a jar size that accommodates your needs.
Seal Type: The effectiveness of a pre-roll jar in preserving freshness depends on its seal. Look for jars with airtight or child-resistant lids to ensure that your pre-rolls are well-protected.
Design: While functionality is crucial, the design of the jar can also be important. Some pre-roll jars come with additional features like UV protection, which helps to shield the contents from harmful light. Others may have sleek, minimalist designs or vibrant colors to suit your style.
Conclusion
Pre-roll jars are an essential accessory for anyone who values the quality and longevity of their pre-rolls. By choosing the right jar, you can ensure that your pre-rolls remain fresh, protected, and ready for enjoyment whenever you are. Whether you prefer the classic elegance of glass or the practicality of plastic, there's a pre-roll jar out there to meet your needs. Invest in a high-quality pre-roll jar today and experience the difference it makes in preserving your cannabis enjoyment.
For more details visit our website www.skunkjarspackaging.com

#Cannabis Jars#Premium Cannabis Packaging#Cannabis Packaging Alameda#Cannabis Packaging California#Cannabis Packaging US#Marijuana Packaging Alameda#Marijuana Packaging California#Marijuana Packaging US#2 oz Glass Jars#3 oz Glass Jars#4 oz Glass Jars#6 oz Glass Jars#10 oz Glass Jars#Pre Roll Jars#2 oz Plastic Jars#3 oz Plastic Jars#4 oz Plastic Jars#6 oz Plastic Jars#10 oz Plastic Jars#Pre Roll Tubes#Glass Pre Roll Tubes#Plastic Pre Roll Tubes#115mm Pre Roll Tubes#95mm Pre Roll Tubes#Concentrate Jars#Glass Concentrate Jars#Qube Jars#Qube Concentrate Jar#5ML Qube Concentrate Jar#9ML Qube Concentrate Jar
0 notes
Text
Friends, I am trying to be so normal about this but I cannot because a) panna cotta is one of my favorite desserts and b) it is so easy to make. You can make panna cotta. It looks fancy and it feels fancy - people will be impressed when you serve it to them - but it does not require fancy cooking because it is basically milk jello. It is so simple and so easy to customize - you should make some immediately.
My recipe template for panna cotta is under the cut:
You will need:
1 packet of unflavored gelatin. It's in the grocery store near the jello and comes in boxes with multiple packets, so you can make multiple panna cottas. (You can also use agar agar, but I haven't done that, so I can't give you instructions.)
1/2 cup of sugar
1 cup of milk - any milk! Cow, goat, coconut, almond, oat, whatever milk you like
1 cup of heavy cream or 1/2 and 1/2 or more milk, whatever - the point is now you have 2 cups
1 cup of other dairy options/liquid flavors - up to half a cup can be things like tea, coffee, fruit juice, etc. Other dairy options include things like buttermilk, yogurt, sour cream, goat cheese, whatever. If you want to use something semi solid like cream cheese, use half a cup and beat it with 1/2 a cup of whatever other liquid you're using. Or you can just do more milk again, but now you have 3 cups.
other optional flavor stuff, like herbs or spices, flavor extracts (1/2 tsp is a good starting amount)
a pinch of salt
5 containers that will hold ~6 oz of panna cotta, like small ramekins or jars
What to do:
First, decide what kind of flavors you want to add. If it's something like herbs or whole spices, take 1/2 cup of the cream, put it in a pot, heat till just simmering, then remove it from the heat and add your herbs or whatever. Cover it and let it steep for about 30 minutes. (If you don't want to steep anything, you can skip this step.)
Put your cup of milk in a pot and sprinkle the gelatin evenly over the top. Let it sit for about five minutes, until the surface of the milk looks wrinkled.
Heat the milk on low and whisk to dissolve the gelatin. I mean it about low heat - the milk should never get hot enough that you can't comfortably stick your finger in it. Dissolving the gelatin should only take about two minutes. You can tell if it's dissolved either by rubbing some milk between your fingers and seeing if you can still feel granules or dipping a metal spoon in and seeing if you can see granules on the back. If you can't, the gelatin is dissolved.
Add the sugar and whisk until it too is dissolved. This will only take another couple minutes. Once the sugar is dissolved, turn off the heat.
Whisk in the salt, cream, other dairy option, and any juice etc you want to add. If you steeped anything in the cream, strain the steeped cream into the pot and whisk that in too.
Pour the mixture into your containers. Cover these with foil/plastic wrap/jar lids, and refrigerate for at least 2 hours. They'll keep in the fridge for a week or so.
Once they're set, you can eat them out of the containers, or unmold them for extra fanciness. To do that, dip the containers into hot water for 15-30 seconds, then invert over a bowl or plate and gently shake. It should shlorp out pretty easily, but if it doesn't, just dip it again.
Go now and eat panna cotta!

286 notes
·
View notes
Text
mar.
advil (ibuprofen), 4 pack
sally hansen pink nail polish, 6 pack
clorox bleach, industrial size
diane hair pins, 4 pack
seafoam handheld mirror
"i love new york" t-shirt, white, small
apr.
nongshim ramen noodle bowl, 24 pack
cotton balls, 100 count
"thank you for your loyalty" cards, 30 count
toluene por-15 40404 solvent, 1 quart
uv led nail lamp
cuticle oil, value pack
clear acrylic nail tips, 500 count
may
advil (ibuprofen), 4 pack
vicks vapor rub, twin pack
portable electronic nail drill
salonpas heat-activated muscle patch, 40 count
lipstick, "night out red"
little debbie chocolate zebra cakes, 4 boxes
jun.
large faux-clay planter pots, value set
carnation condensed milk, 6 pack
clear nail art acrylic liquid powder dish bowl, 2 pcs
birthday card - son - pop up mother and son effect
nike elite basketball shorts, men's small
jul.
saviland holographic gold nail powder, 6 colors
nescafe taster's choice instant coffee
advil (ibuprofen), 4 pack
pixnor pedicure double-sided callus remover
bengay medicated cream, 3 pack
aug.
newchic ochre summer dress floral print, sz 6
wrigley's doublemint gum, 8 pack
plastic adirondack lawn chair, colonial blue
sep.
nail buffers and files, 10 pcs
coppertone sunblock, 6 oz
oct.
cozynites fleece blanket, pink
sleep-ease melatonin caps, 90 count
icy hot maximum strength pain relief pads
nov.
tampax, 24 count
faux-resin hair clips, 3 pack
dec.
advil (ibuprofen) maximum strength, 4 pack
true-gro tulip bulbs, 24 pcs
jan.
feb.
healthline compact trigger release folding walker
yankee candle, midsummer's night, large jar
mar.
chemo-glam cotton head scarf, flower garden print
"warrior mom" breast cancer awareness t-shirt, pink and white
may
mueller 255 lumbar support back brace
jun.
birthday card - "son, we will always be together," snoopy design
jul.
eternity aluminum urn, dove and rose engraved, small
perfect memories picture frame. 8 x 11 in, black
burt's bees lip balm, honey, 1 pc
aug.
sep.
easy-grow windowsill herb garden
oct.
yourstory customized memorial plaque, 10 x 8 x 4 in
winter coat, navy blue, x-small
nov.
wool socks, grey, 1 pair
-- ocean vuong, amazon history of a former nail salon worker
#ocean vuong#i cried while reading this for the first time and just now when typing it up in the middle of the library#long post#tw long post
21 notes
·
View notes
Photo
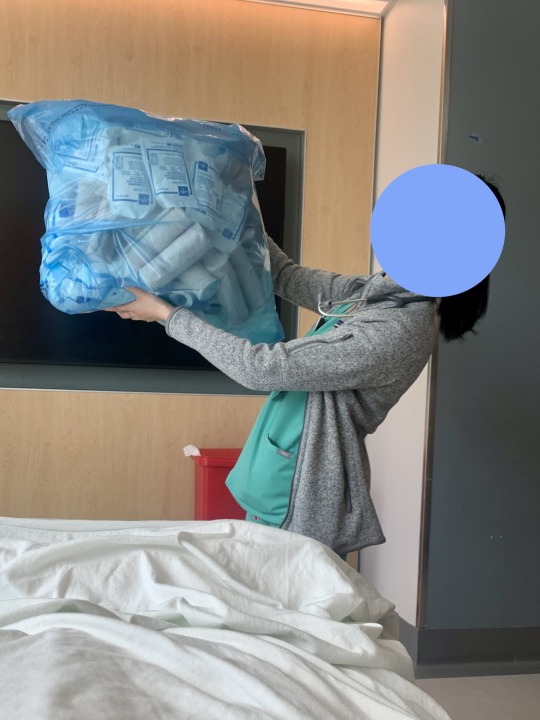
[Image description: A nurse brings a large blue plastic bag of various supplies to my hospital bed. Her face has been censored out by a large circle. /End ID]
Lee says:
This is going to be another entry in my series of post-phallo supplies posts, but tonight I’m breaking the usual format of writing about a specific individual item. Instead, I'll just list all the key wound care-related supplies I was provided with (or told to buy) as one big group!
Sometimes the hospital will provide supplies like they did for me, and sometimes you have to buy supplies yourself. On occasion, the surgeon will order supplies for you using a company like Edgepark or Byram, and they'll bill your insurance and mail the items to your home.
Unlike most of the items in my post phallo supplies reviews which you can (and probably should) buy while you're still pre-op to prepare for your surgery date, I wouldn't reccomend buying wound care related supplies before surgery without discussing it with your surgeon first.
Different surgeons have different supplies that they reccomend, and what you need and how many of of each item you need depends on what you've had done in that particular stage.
So while I am not necessarily reccommending that you buy these particular items right now without checking with your surgeon, I did include links to the items that I was given by the hospital so you can click and see a visual of what type of item I'm talking about if it sounds unfamiliar.
Supplies:
Antibacterial Soap [This is just soap because I should wash my hands before and after I touch my penis.]
Aquacel Ag Advantage [This one is made with real silver so it can run on the expensive side. I place it over the open tip of my penis while it heals]
Aquaphor Healing Ointment (14 oz jar) [A thick layer of Aquaphor is used to cover my split thickness graft site and applied twice daily]
Aquaphor Ointment Body Spray (3.7 oz can) [The Aquaphor spray is great for adding a little moisturization touch up during the day]
Bandage Roll Gauze (6-Ply 4-½” x 4-⅛yd sterile) [The Kerlix bandage rolls are used to prop up my penis too, and I go though a lot of these]
Disposable gloves [I use gloves when I touch any open wounds]
Disposable mesh underwear [I cut a hole in the mesh to stick my penis though to help prop it up]
Disposable underpads [The Chux pads go on my bed to catch any blood]
Flushable wipes [I still have a Lot of painful swelling in my original anatomy so isn't comfortable to wipe with toilet paper yet]
Gauze sponges (4x8" 12-ply sterile) [I use gauze squares to help prop up my penis]
Gentle Foaming Cleanser [This can be used to clean my thigh in my daily shower]
Medical tape [This helps secure the Adaptic and Aquacel]
Non-adhering Dressing (5x9") [The Adaptic goes over my donor site which has been covered by a split thickness skin graft]
Non-Adherent Dressing (8x3”) [I use Tefla to cover my leg when I need to put pants on to travel to my post-op apointments]
Petrolatum Dressing [Xeroform can be used like Adaptic or placed under the glans ridge, but I didn't have glansplasty in this stage]
Other reviews:
Reacher/grabber
Lap desk
Resistance bands
#Lee says#phalloplasty#phallo#alt phalloplasty#alt phallo#bottom surgery#lower surgery#srs#grs#sex reassignment surgery#genital reassignment surgery#trans#transgender#wound m#surgery m
107 notes
·
View notes
Photo

Refrigerator or Freezer Blackberry Jam Preparation Time 30 Minutes Total Time 90 Minutes Yield: Makes 2 6-ounce jars.
Ingredients
4 cups fresh blackberries (remove stems, wash) 1 cup white sugar (granulated) Optional: 1 tbsp lemon juice
Instructions
In sauce pan, mix together mashed berries, sugar and lemon juice. Bring entire berry mix to a boil over medium heat, stirring occasionally, until jam is thickened and reaches gel stage, about 20 minutes. Prepare your canning jars by heating them in a pot of simmering water (180°F). Keep them hot until ready to use or wash and dry Ball® plastic jam and jelly jars (8 oz). Ladle the hot jam into the hot canning jars leaving ¼ inch headspace. Clean the rims and put caps on after jam has cooled, and you can handle the jars. Allow the jam to cool completely before moving the jam to the fridge or freezer Store in the refrigerator for 1-2 weeks or freeze for up to 6 months.
3 notes
·
View notes
Text
Everything You Need To Know About UV Resin
I thought I would make this post because of how much Amazon pesters me to answer questions regarding UV resin and I know many of you were able to learn and benefit from my other craft posts which focused more on epoxy. Today I'm going to cover all the things I have learned using UV resin, which is something I use almost exclusively for many of the items you see in my Etsy shop.
What is UV resin?
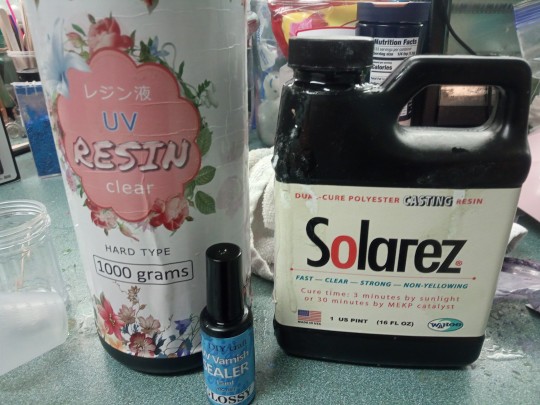
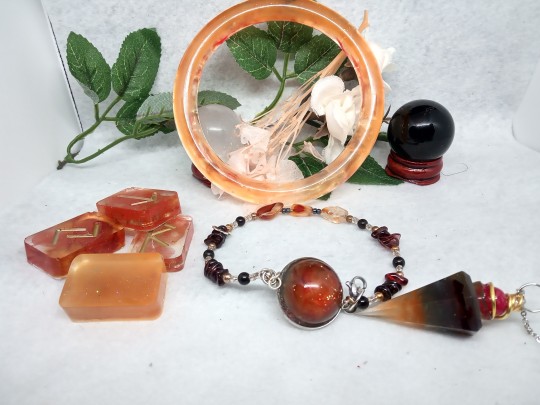
UV resins are photochemicals that react to different wavelengths of UV (sunlight) to cure. This allows for a much shorter cure time and longer work time than epoxy resin, as UV resin will not begin to cure / harden until it is exposed to UV light. In the photos above, you can see the two main types/brands of UV resin I typically use for the creation of my projects, Solarez and Limino, both of which can be purchased on Amazon (Solarez has its own website, but shipping is not free though Amazon only has some of their products). While Solarez is known for surfboard creation and repair, boat repair, etc. It is one of the few UV resins that can be used to create larger projects such as these Fairy Garden Jars you see below.
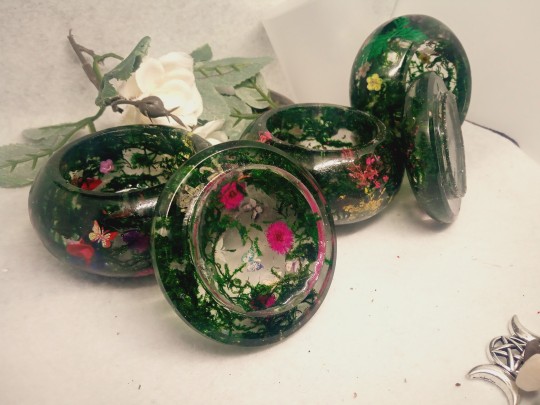

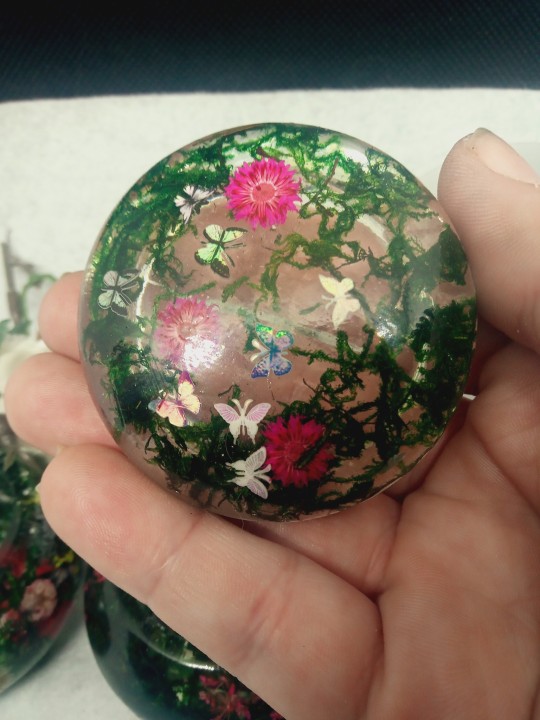
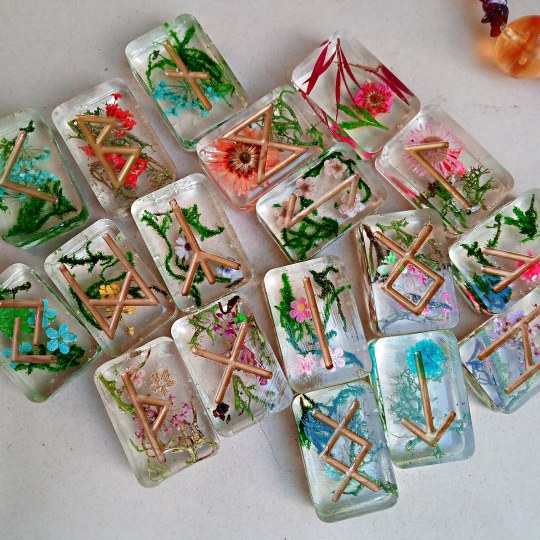
Normally, however, UV resin is used for smaller projects - jewelry, coating, small casts, and the like. It is practically the same chemical combo found in UV nail polish. These chemicals may be triggered to harden using the same UV lamps one would see at a nail salon, though not all UV lamps or torches cover the full spectrum of UV wavelengths as sunlight (more on this later). I rely on UV resin for the creation of my popular rune sets, as they require more detail and time to fully create than the 30-45 minute work time one typically has with epoxy. Below are some examples of items I have in the shop made primarily with UV resin.


UV resins are typically non toxic and are not harmful to the environment when cured or uncured. The resin itself shares similar properties to epoxy but can have a much lower viscosity in general, making it more ideal for casting and coating than doming. UV resin does give off an odor when curing (Solarez is the WORST even when not curing), much more so than epoxy.

Pros & Cons of UV resin
Pros:
No mixing. UV resins are ready to go from the bottle.
Longer work time, shorter cure time. Great for making multiple projects at once or highly detailed, smaller projects. UV resin fully cures in approx 5 mins in full sunlight.
Great for clear casts and adding a glossy finish to any project.
Bonds to metal, wood, plastic, etc. Making it great for quick fixes.
Most are self degassing and self leveling.
Easier to handle. No component mixing means you can't possibly ruin your project from the get go.
Accepts most Inclusions / pigments one would use with epoxy
Waterproof when cured.
Cons:
Expensive. UV resin will average $65+ (for 1000g) USD for the equivalent of a 32oz epoxy combo for $20+. Solarez is on the cheaper side, but harder to work with.
Fickle. UV resin will produce bubbles that don't want to surface, must be used in very thin layers, prone to shrinkage, and cannot cure if using opaque or dense Inclusions or pigments.
Can only be used with clear silicone molds. Plastic molds tend to adhere / melt to UV resin. Solarez may be used with an MEKP catalyst to get around this, but not foolproof.
May only be used for small projects.
Must purchase UV lamp / torch to cure, but some only cure with certain wavelengths or sunlight itself. Can over cure and become brittle or undercure and be tacky.
Even clear but detailed molds may not cure correctly.
So, you may notice there are more cons than there are pros when it comes to UV resin. This is absolutely true- for cost effectiveness alone, unless you are looking to mass produce something or need more potability / work time for your project (as I do), I recommend avoiding UV resin and going with epoxy which will usually even yield better overall results.
If you DO decide to try UV resin or have tried UV resin, you may run into a few problems initially that will cause you to trash projects and become frustrated. Never curing resin is a popular complaint, this next portion of this post is entirely dedicated to troubleshooting UV resin in order to better help you achieve the results you are looking for.
Using & Troubleshooting
There are many different brands of UV Resin available. Save for Solarez, the ones that come in the big or small tubes like the Limino resin shown (I've used brands Miraclekoo, Decoroom, DIY, Let's Resin, Solarez, SooKoo, and Limino) are pretty much the same product selling for around the same price per milligram / fluid oz. They all have about the same viscosity and will generally yield the same results and have the same average cure time.
Note: Solarez is more of a polyester based resin or can be acrylic based depending on which of their products you purchase. It has a very strong odor and is more liquid than these others. It is also fairly cheaper (Almost half the price) and can be purchased in larger quantities. Unfortunately, even though the price tag is enticing, I really don't recommend it. It is very fickle with the UV wavelengths used to cure it. If you are trying to do any indoor project using a UV torch or lamp, you are going to want to even then drop an extra $20-$60 on a multi spectrum UV lamp to cure your project. You will find that you have to intermittently expose the resin to light or it gets an orange peel/puckered texture- sometimes the light will even literally burn right through your project. It can even burn or damage your mold, as Solarez gets very hot when curing even though it is formulated to not get as hot or combust when using UV light to cure, which is something, I guess.
However, Solarez can be used with an MEKP catalyst, allowing you to dual cure it using sunlight / UV light. This allows Solarez to be used with opaque pigments and can be used for larger projects. The catalyst was not initially included with the resin, but the manufacturer began including it for some reason. The ratio is 6 drops of MEKP mixed into 1 fluid ounce of Solarez. 6:1. With the MEKP catalyst, your project will fully cure in 30 mins (using sunlight or UV light to help it along) but it is prone to becoming overheated, still requiring small layers to be cured one at a time to avoid combustion.
If you're going to try UV resin, I recommend trying any of the brands above, save for Solarez. Grab a 50-120g bottle to try and see if you like it. I recommend beginning making something simple like a pendant or earrings using a clear silicone mold or open back bezel. Mica pigments and most alcohol inks will work with UV resin the same way they work with epoxy and UV resin also creates a super clear glossy finish that may be used to gloss and spruce up cured epoxy projects.
So you took the dive and purchased your UV resin? You've got problems? Yea, tell me about it.
•My Project is Super Tacky! What do?
This is common and will vary from product to product, but usually isn't the product. So before you go flaming the foreign manufacturer who doesn't understand you anyway, ask yourself the following and try these methods to solve the inevitable tacky problem:
How long did you cure? The average cure time shown on the bottle is just that, an average. This doesn't mean that your project will cure in five minutes under your UV lamp. Not all UV lamps are made equal. For starters, check the packaging, but most UV resins require your lamp to be 36w+, so write that off immediately. If your lamp is producing less wattage, than it's not going to cure your UV resin. If you're using a lamp that is 36w+ or your UV resin claims to cure under 36w, then take a look at your lamp itself. Most nail salon UV lamps are either table shaped or dome/cave shaped. If you're using a table shaped lamp on a 3D mold / project, the light is unable to penetrate the sides and back of the mold. This style lamp will only work to cure projects in open back bezels or free hand, flat coatings. If using a dome shaped lamp then the majority of the UV light is found at the back of the lamp. If you have your project at the front or sides, it is unable to be fully penetrated by UV light at all angles.
Try turning your project,curing it for a minimum of 5 minutes on each side. Using finger cots, remove your project and let it cure free form. It shouldn't be so tacky that it sticks to your work area at this point, but if it is, then there is only one solution:
Let it cure in actual sunlight for 10-20 minutes, turning it so that every angle sees light. Typically, your UV lamp doesn't offer the same UV light wavelengths as pure sunlight, and you can buy new lamps or torches to test, but sunlight is free.
If your project is still tacky after all these measures, you've tried adding a new layer of clear resin to it and allowing it to cure in sunlight.
If this doesn't work, think about your Inclusions, your glitter, your pigments etc. If your project is nearly opaque, then you'll need to tone it down if you're going to use UV resin.
If NOTHING else, your product may indeed be a dud or became contaminated in some way. Unfortunately, it's not always easy to get in touch with the manufacturer, but if you order your product from Amazon, they'll more than likely allow you to return it.
My project is all bubbly? What do?
Bubbles are always a problem, whether you're using UV resin or epoxy. Little tiny bubbles always form, especially around the edges of the mold or embedded within details in the design. Don't forget, you have infinite work time with UV resin. This means that you have as long as you want to work out the bubbles.
Use a toothpick to pop tiny bubbles at the bottom of the mold or dislodge them to bring to the surface. Be careful though because you don't want to leave little scratches on your mold or puncture it.
Use a torch to pop bubbles on the surface. A grill lighter, regular lighter, or whatever will do the trick. Make sure you hold the flame a good inch or so away from the surface. It will catch fire and your mold possibly will too. Do so carefully! I run the torch across the top layer every time I add something to the resin to remove any bubbles it gives off. This also works for epoxy.
Blow on it. Some people claim the heat of your breath will pop surface bubbles, but I have had no success with this method.
Warm your resin. Stick your UV resin in a plastic bag or something air tight. Allow some water to heat to near boiling on the stove before pouring it over your resin bottle in a bowl or basin. Do not stick your resin in the microwave or oven or anything crazy.
Stir slowly. Stir inclusions like glitter and pigments slowly, scraping the sides and bottom. This will prevent air bubbles kicking up into your mix and oxygen being introduced into your pour.
Try pigments. For some weird reason (most likely due to changes in viscosity), resin projects with pigments, glitter, and the like have less tendency toward bubbling than clear casts.
Are your bubbles huge? This may be because your pouring super thick layers of resin and all sides have not cured properly. Your layers should only be 1mm thickness maximum when using UV resin.
My project has come out warped, not even, has divots , etc.
If you are curing your layers quickly, your project is heating. When you add more resin over top of this hot resin in a hot mold, this will not only cause more bubbles but also lend to shrinkage. Allow your project to cool to room temp and have some downtime between curing. This will also protect your molds that will become damaged from overuse / overheating and cooling.
With Solarez, this is key to having a beautiful project at the end of the day. Even though it is formulated to not overheat if exposed to sunlight, Solarez will get this orange peel like texture on the surface layer if overexposed.
Yes, there is such thing as overcuring as well, and it will make your project brittle and even flakey, but this is normally not the biggest complaint with UV resin.
So why even buy UV resin?
UV resin has its perks. In a pinch, it makes for a clear, glossy finish that will cure / harden quickly in the sun or with a UV lamp that one would be waiting 24-48 hours for with epoxy. It can be used to repair epoxy projects and fill small divots as well as the ability to bond to pretty much anything makes it useful to have around. It is convenient to use due to the fact that you don't have to mix it, it is easy to pour and compatible with most inclusions. It is also ideal for its extended work time as it will not cure until exposed to UV light. This allows you to create highly detailed clear cast jewelry and other projects you wouldn't be able to assemble and detail before epoxy would begin to cure.
I hope this helps everyone who is having trouble with UV resins or those who have considered using UV resin as an alternative to epoxy. If you have any other questions you would like answered or are someone adept with UV resin that would like to share, please do so! Good luck!
~Samantha
Owner/ Designer/Creator blursedbaubles.etsy.com
#etsyshop#witches of etsy#witches of tumblr#resin art#resin tutorial#uv resin#handmade#uvresin#uvresin for beginners#epoxy resin for beginners#diy#resin for beginners#resin jewelry#how to use epoxy for crafts#one of a kind#beginners guide#epoxy resin tutorial#resin art tutorial#resin#uv resin guide#uv resin troubleshooting#uv resin art#uv resin tutorial#how to use uv resin#resin tricks#resin tips#female artists#female artist#uv resin help
119 notes
·
View notes
Text
Cakes for the Evans Part One: The Kai Cake Disaster
Today, dear followers, I began the first step of a long journey that I hope to share with you. Today, I baked a cake.

I had a whole lot of free time this afternoon with a whole lot of nothing to do, so I was hanging out with my sister. We were watching AHS when suddenly, out of nowhere, I had an idea. A “brilliant” idea. I was going to bake a cake.
The original plan was pretty simple. I’d find some ingredients in the cupboard, bake a little cake, and call it a day, but shortly after I gathered up a recipe and an idea for the flavor I though ‘huh, I could make a series out of this!’ So, I did.
From today, whenever I have the time and can gather the ingredients, I’m going to start baking a cake for each Evan (all the Evans in AHS, Warren Lipka, Peter Maximoff, and Ralph Bohner). Today I started with Kai Anderson.
It was, to be fully honest, a fucking disaster, so it being Kai’s cake is fitting.
At first things went well. I had a whole bag of tangerines in the fridge, as well as a few cartons of berries that were going to go bad soon. Me and my sister modified a few family recipes, and soon enough we had our idea.
Originally, the cake was supposed to be a two layer tangerine cake, with blackberry frosting in the middle and an orange blueberry glaze on top. As you can see, that didn’t happen.
We made the cakes themselves with little error. It was delightful to have something work out with no kinks. We took that for granted. With all our success, our egos had soared. There was no way this could go wrong after starting on such a bright note, right? Wrong.
First, the blackberry frosting just... didn’t turn into frosting. Like, we followed the instructions but the berries had a looot of water in them, so it sort of just turned into a sugary mess. We ended up just tossing it in a mason jar and plan to use it for crepes tomorrow.
Then, while I was zesting tangerines, my sister watched in horror as the cakes just... fell apart. Neither of them made it out of the pan fully formed despite the fact that we had greased them with a ridiculous amount of butter. One was salvageable... the other, not so much. We rolled with it, found a can of frosting in the pantry, and made some extra cake pops.
The cake pops.... well, we’ll get to that later.
The tangerine blueberry glaze ended up.... well, it was too thin, so we cooked it down and ended up with another weird sugary syrup slop, only this time it had chunks! Delightful! It ended up tasting pretty good, but took more steps and improv than initially intended.
Once all was said and done, we fetched the cake pops from the freezer only to find they had cemented themselves to the wax paper, and refused to budge. At this point, I was close to tears.
I would not, in all honesty, recommend this process to anyone. It was time consuming, took way too many bowls, and the ending product was kind of a mess. The only thing I can say is that it was, in the end, very delicious.
So, here is a full recipe and guide on how to make Kai Anderson’s Disaster Cake (and bonus cake pops). Good luck, you’re going to need it.

Ingredients*:
Tangerine Syrup
1 1/2 cups (about 4) tangerines, fully peeled
1/2 cup water
1 1/4 cups white sugar
The Cake
1/2 cup butter
1 cup white sugar
2 eggs
Tangerine syrup (measurements above)
1 1/2 cups all-purpose flour
1 3/4 teaspoons baking powder
1/2 cup of milk
Tangerine Berry Glaze
2 tangerines, zested and fully peeled
6 oz. (one carton) blackberries
6 oz. (one carton) blueberries
1 1/2 cups of sugar, food processed but not powdered
4 tablespoons of butter, softened
4 tablespoons of milk
1/3 cup agave syrup
Cake Pops
1 9″ round tangerine cake
1/2 cup Pillsbury cream cheese frosting
Cake Pop Frosting
Remaining Pillsbury cream cheese frosting
1/2 cup tangerine berry glaze
* - These are pretty good, but general approximations of the ingredients I actually used because this cake threw me for a loop and tested my imagination. Nothing worked like it was supposed to... literally.
Now, on to the disaster.
Instructions:
The Cake
First, peel 4 tangerines. Separate each of the sections of fruit and peel the skin off of the small sections.
Add the peeled pieces of tangerine to a medium saucepan with half a cup of water and 1 1/4 cups of white sugar.
Bring the mixture to a boil, stirring continuously to prevent burning. Once a boil has been reached, lower the temperature and bring the mixture down to a simmer.
Use a tool of your choice to mash the fruit as the syrup simmers. Once the fruit is mashed, continue stirring the mixture as it thickens and boils down. This process will take about ten minutes.
After ten minutes, pour the mixture into a food processor and blend until there are no large chunks of pulp left. Then, set the mixture aside to cool as you prepare the batter.
Before starting your batter, set the oven to 350 degrees fahrenheit and allow it to heat up as you work.
Add half a cup of butter, cold, to a bowl with one cup of white sugar. Use a mixer to cream the sugar and butter together.
Once it’s been creamed, add two eggs and mix again with the mixer until the ingredients have been evenly incorporated.
Next, add the flour, baking power, and now-cooled tangerine syrup to the bowl. Fold the ingredients together until there are no chunks of flour and the syrup is fully integrated. Then, fold in the milk.
Pour the batter evenly into two, nine inch round cake pans that have been greased thoroughly with butter or a baking grease of your choice. Crisco is a great alternative!
Bake the cakes at 350 degrees fahrenheit for 30 to 40 minutes. Ours were brown at the edges and cooked all the way through at 35 minutes, but based on your oven the time may vary.
Allow the cakes to cool in their pans, and then carefully turn one of them onto a plate for glazing. If it breaks, no problems! You can just use the other one.
If both cakes survive their trips out of the pan, you can use the tangerine berry glaze both between the layers and on top of the cake. If only one survives, simply put the glaze over top, and set the other, broken cake aside for cake pops.
The Glaze
Take one cup of white sugar and put it in a food processor. Blend it, but don’t do it enough for it to be fully powdered. Be impatient. Cut corners. In the end, you should have sugar with granules that are smaller than normal, but not quite small enough to be considered powdered sugar.
Zest two tangerines. Once you’ve collected all the zest you can, peel them, section them, and take the skin off of the small sections.
Put the tangerine zest and peeled tangerine sections in a food processor, and add your blueberries and blackberries. Next, add your slightly powdered sugar, your melted butter, and your milk.
Use the food processor to combine the ingredients. The mixture, when fully processed, should be slightly chunky, kind of like a jam! Transfer the mixture from the food processor into a sauce pan.
Bring the mixture to a boil, stirring regularly to prevent burning. Once it is at a boil, add your agave syrup. From there, lower the heat and allow the mixture to simmer for 15 minutes as you continue to stir.
If you are only making the cake, pour the glaze over the first cake, put the second layer on top, finally topping the whole cake with the remaining glaze. If you are making cake pops, set aside half a cup of glaze and use the rest to top your single layer cake.
The Cake Pops
If your cake, like ours, came out of the pan in five separate pieces, not to worry! There’s still hope for you yet, unlike Kai.
Put the crumbled pieces of your ruined cake in a bowl with 1/4 of a cup of pillsbury canned cream cheese frosting, preferably one that has sat in your cupboard for a few months after another failed baking experiment.
Get your hands dirty! Crush the cake with your hands to combine it with the frosting and turn it into a thick, doughy substance.
Once the frosting and cake are combined, add half a cup of your tangerine berry glaze to the dough and mix it in by hand again. The ending product will look kind of grey-ish???? and will have little bits of tangerine and blueberry skin throughout.
Roll the completed dough into balls. It should make about ten large pops, but more if you make them smaller.
Set the rolled balls onto a plate covered with wax paper, and add a cake pop skewer to each ball. Toothpicks would work too, I’m not one to judge. Even chopsticks might work if you really have no other options.
Put the newly skewered balls in the freezer until they harden enough to withstand being dipped in hot frosting. While they cool, prepare that.
Melt the remaining cream cheese icing in the microwave. I put it in for about 45 seconds after ripping the label off the plastic container and it worked well.
Add half a cup of your glaze into the icing and mix until they are fully combined.
Once your cake pops have hardened, take them out of the freezer and dip them into the liquid frosting, returning them to their plate to cool. Once they’re all frosted, return the plate to the freezer until the frosting forms a shell around the cake pop.
When it comes time to enjoy your cake pops, remove them from the freezer and then cry, as you find that they’ve become very stuck to the wax paper and refuse to come off. Use a knife and your fingers to try to pry them off, only to smash them a little in the process. Even better, do this while the icing is still slightly tacky! It will make it all the more frustrating.
Then, viola! You have a cake and some cake pops to share with your divine ruler!

In Conclusion
This cake was an experience.
It’s hard to rate this, because I haven’t made any of the others yet, but I’m extremely sure that it will be at the back of the pack. I can only hope none of the others are as terrible as this one was. I give it a 3/10.
On the bright side, it was tasty.
I like to think that this entire process is very reminiscent of Kai himself. It looks like a mess on the outside, and it’s a mess on the inside too. The only redeeming factor to both of them is that they’re yummy...
If I had to assign benign meaning to the actual parts of the cake, the blueberry glaze represents Kai’s awful blue dye job, while the tangerine cake is orange like the president he loves so much. A big thank you to @oublierlegarcon for giving me the idea of making this Kai’s cake. It’s extremely fitting
I have no clue who will come next, only time will tell, but I hope you enjoyed this disaster as much as I did. Until next time, goodbye!

#evan peters#peter maximoff#james patrick march#ahs#kai anderson#kit walker#warren lipka#jimmy darling#kyle spencer#rory monahan#ralph bohner#baking
21 notes
·
View notes
Note
oooo ok so how long do u keep the onions in the jar until u think they’re Sufficiently Pickled bc u said don’t push three weeks and im trying to figure out how much onion i should put in
- anon who’s never pickled anything before
i normally make mine in 32. oz plastic containers and just fill them up to the top!! so that's normally 2-3 large red onions or 4-6 smaller ones and 2-3 cups of liquid total (so 2 cups of water and 2 cups of vinegar)
after u pour the liquid on them, just wait until the container goes cool to the touch and then u can put them in the fridge!! after that they're basically completely ready to eat
5 notes
·
View notes