
Don't wanna be here? Send us removal request.
Statistics
We looked inside some of the posts by nightlyresources and here's what we found interesting.
Average Info
Notes Per Post
1K
Likes Per Post
1K
Reblog Per Post
326
Reply Per Post
0
Time Between Posts
12 hours
Number of Posts By Type
Text
3
Photo
7
Last Seen Tumblr Blogs


Fun Fact
Tumblr has been providing a Korean-language service since 2013.
Text
Coming Soon! Ju Jing Ye Part 02 EP 2 The Blooms At Ruyi Pavilion Currently Iconing -Dance of Phoenix -The Blooms At Ruyi Pavilion - The Untamed - The Blue Whisper -The Moon Brightens For You -Miss the Dragon
0 notes
Photo


These are 100x100 icons (100 count ) the only alteration that has been made is sharpen. You may take them and use them. Feel free to resize don’t go to much bigger due to details. I do not require credit for these please just leave a like. Thank you!. --Lucky
Actor/Actress/Scene -Ju Jing Ye
Character- Fu Rong Drama- The Blooms at Ruyi Pavilion EP 2 Link- GMail Drive Part One.
1 note
·
View note
Text
TUTORIAL: HOW TO RESHAPE A PSD AND ADD BLOCKQUOTES.
In other words, how to go from this…

To this…

Alright, so since I’ve seen a few people on my dash wonder how you add blockquotes to your icons, or resize / reshape your icons while using a psd, I figured I’d make a little tutorial on how I do it. Now, I am using a paid for PhotoShop, but I imagine the concept will be fairly similar in other, non-paid versions or other photo editing programs as well. Anyways, let’s get into it.

INTRODUCTIONS: Above, you see a screencapture of photoshop, with an image of Eeyore open, and my PSD slapped on it. The image is 100x100 px, but let’s change it so that there are some colored blockquotes to the left, as well as reshaping the icon so it’s a rectangle shape rather than a square shape.
To do this, you’re going to know how to use a few tools.
1) CROPPING TOOL 2) RECTANGULAR MARQUEE TOOL 3) HOW TO FILL IN SELECTED AREAS WITH COLOR 4) HOW TO ADD A NEW LAYER
PART 1: HOW TO RESHAPE A PSD.

In the ‘Layers’ area as seen above, PSD’s usually have this little, white square next to the top folder (circled out in the image,) which if you hover over it with your cursor, should say ‘layer mask thumbnail’. This area shows a thumbnail of which parts of your image is going to be visible (shown with white) and which parts are going to be transparent (shown with black). As you can see, right now, the area is only white, as with a lot of PSDs out there.

But let’s say you want to change it into a rectangle shape instead. So let’s look over at the work area (circled out above) where your current icon you want to change is (in this example, the image of Eeyore).

First, you’re going to want to use the Rectangular Marquee Tool (image above). Basically, click and drag the rectangle over the area you want to make transparent. (You can move around the image of your icon later to fit into your new shape.)

After marking out the part you want to make transparent (image above), it will look a little like the image above, with a dashed square marking out the area that we’re going to turn transparent.

Next, you’re going to want to click the white square of the layer mask thumbnail. Once you’ve clicked the white square, you can easily turn the area you just selected transparent by hitting ctrl + i, which will invert the selected area.

The layer mask will then look a little something like the image above, with parts of it being black.

And in the work area, it will now look a little something like the image above. Now, you can click the layer with your icon image (Layer 1 in the image of the ‘layer area’ seen earlier) and use the move tool to move it around to fit into the new rectangle shape if you need to adjust it….

so it looks more like the image above.
HOW TO ADD BLOCKQUOTES.
Now, with the shape edited how we want, we can start adding in some blockquotes. But how do you do that? Well, first, we’re going to have to make enough transparent space on the left of your icon to have however many blockquotes you want in.

First, you’re going to use the crop tool (image above)

And make sure the ratio area (image above) is cleared by clicking the ‘clear’ button.

Now you can use the crop tool in the work area to stretch out the side left of your icon however wide you want it to be. (Example above) Remember, this is where your blockquotes is going.
( This might make the new added space on the left of your icon turn ‘white’ in the layer mask thumbnail. If so, just turn that space black, like previously shown.)

Now, you want to add a new layer, using the button circled out in the bottom of the image, and move that layer at the very top of all the other layers, above the PSD folder, etc.
With that done, you want to go back to your Rectangle Marquee Tool (image above) …

And in the work area, select where you want to have your first blockquote, how wide and long you want it to be. (Example above has the blockquote be 100px in height, same as the icon, and 5px wide)

Now, I personally tend to just fill in that space with a brush tool and the color I want, by choosing a color in the ‘color’ area at the top right, above the ‘adjustment’ and ‘layers’ area. However, you can also do it by selecting the color you want, and then clicking ‘edit’ - ‘fill…’ (image above)

and make sure contents is set to ‘foreground color’, blending mode ‘normal’ and opacity ‘100%’, then click ok.

And it should look something like above.

Now that you have a blockquote in the ‘new blockquote’ layer you made earlier, you can right click on the new blockquote layer (image above. click where the text is, not the thumbnail), then click ‘Duplicate layer’ and click the ‘Ok’ button.
Then, with the ‘Move tool’ (in the work area) you can position the second blockquote however far away from the first you want it to be.

And it’ll look a little something like the image above. I kept it at 8px between the blockquotes.
Now you can continue doing this until you have all the blockquotes you want. (Once you have two blockquotes next to each other, when you move the next ones around after that, and position them, there should be some purple arrows and lines showing up, letting you know when there’s the same amount of space between your new blockquote and the previous ones (in this case 8px) However, if it doesn’t, you can always check by using the Rectangle Marquee Tool, and mark out the space between each blockquote, which should show you the height and width)

With that done, you’ll have something like this. Save it as a ‘png’ file to keep the transparent background transparent, and not filled in with color.
And the finished, saved product should look something like the image above.
64 notes
·
View notes
Photo
* simplistic flower / free non-contained all-in-one multimuse theme.
This is a simplistic / non-contained version of the flowered sky theme. This theme includes:
A tab for the askbox.
A tab for rules.
A tab for a canon muse list with short summaries of each muse, including links to a tabs page for each individual muse page, with stats, verses, and mains / exclusives.
A tab for ocs with the same tabs pages for each individual muse.
A tab for links and tags.
I used various free base codes to make this, so I do not claim to have made this from scratch. You can see the credits below, as well as in the code of the actual theme! I have, however, put a lot of time to customize all the base codes to make it functional for a multimuse blog, and I have made the background and links and the PSD I used on those myself.
You’re going to need a bit of html coding knowledge to customize / use this theme, although I have tried to leave in enough tutorials within the code to help you with the most important things. If you’re still having trouble, I recommend checking out the plenty of tutorials on how to customize themes and html coding created by others! On the off-chance that I should’ve forgotten to give credit to someone, or have credited the wrong person, please kindly let me know so I can update the code as fast as possible to include the right credits! Same goes if you find any errors with the theme that makes it not work as it should.
BASE CODE AND TUTORIAL CREDITS:
All-in-One Base Code by neonbikethemes
Customizing tutorials and bouncing links from octomoosey
Basic tooltips tutorial from this post
Editing of base codes / design, creation of the theme background and bouncy link images and creation of the PSD by yours truly, @vampiremakes
TERMS OF USE:
Do not remove any of the credits at the top of the code.
Don’t remove the credits in the bottom right corner of the theme.
Do not claim as your own.
Other than that, feel free to customize and use as you wish! Have fun!
LIVE PREVIEW. | CODE.
671 notes
·
View notes
Photo


These are 100x100 icons (20 count ) the only alteration that has been made is sharpen. You may take them and use them. Feel free to resize don’t go to much bigger due to details. I do not require credit for these please just leave a like. Thank you!. --Lucky Actor/Actress/Scene -Ren Jia Lun Character- Chang Yi Drama- Blue Whisper. EP 1 Link- GMail Drive
3 notes
·
View notes
Photo

RED REBORN ICON AND PSD RESOURCE.
icon template inspired by the new wave of icon style. inspired by a lot of the new aesthetic and comes with different shapes for one of the sides. they can also be deleted and add your own, they are just to show how they look. this template includes clipping mask, a folder with where to put the psd and images. includes an exclusive PSD named RED REBORN. must use the adjustment folder to adjust light and color to get the preferred desire.
this icon template is 4 DOLLARS OR FREE. if you want to donate, you are free to do so, please help me with a donation if you like my content and would like to see more. LINK TO DOWNLOAD IN THE SOURCE.
if you use, please find it in your heart to give credit somewhere in your graphics or roleplay blog or just a little shoutout! if you find things I do useful and want to lend a hand for my future studies,consider donating through paypal or buy me a coffee through ko-fi or buying my stuff on payhip as I set things. it truly helps me a lot. you must credit me if you use them, or just hmu and tell me if you do use them.
ALSO FOUND ON DEVIANART.
UNDER THE CUT EXAMPLES OF THE COLORING.
Keep reading
58 notes
·
View notes
Photo


minimalist border 002. i’ve seen some people opt for a rectangular icon instead of square ones so i made a simple border with a rectangle option.
this is free. “pay what you want” option is enabled if you’d like to leave a tip.
change the accent color layers to the color of your choosing.
the square option is 50x50px and the rectangle one is 100x50, adjust the sizes if needed!
the canvas size is 540x70. the long width makes the icons look true to size on mobile.
single blockquote option to mimic tumblr’s blockquote, the grey shade is an exact match.
all options are separated by folders and named appropriately for easier navigation :)
download here.
487 notes
·
View notes
Photo
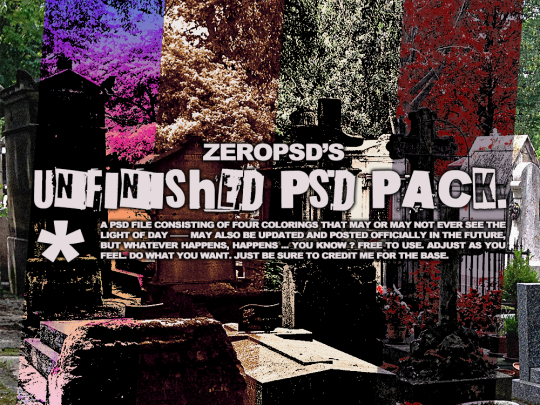
UNFINISHED BUSINESS : A FREE PSD PACK.
a free psd file consisting of four colorings that I never finished. will I at some point ? maybe. who’s to say. but for now, they just rot in my WIP folder. whatever happens, happens … you know ? tweak these as much as you want. I don’t care. as long as you don’t repost / resell, claim as your own, or try to pass of as your own, go crazy. also, please, for the love of god, credit me somewhere for the base. otherwise, free game. if you decide to use / find this helpful, please give this a like ( and perhaps a friendly reblog ) <3 free download link in the source.
192 notes
·
View notes
Photo


These are 100x100 icons (70 count ) the only alteration that has been made is sharpen. You may take them and use them. Feel free to resize don’t go to much bigger due to details. I do not require credit for these please just leave a like. Thank you!. --Lucky Actor/Actress/Scene - Dilraba Dilmurat Character- Ji Yun He Drama- Blue Whisper. EP 1 Link- Gmail Drive
3 notes
·
View notes
Text
Welcome
Hi I am Lucky I like to watch Asian Dramas and I make base icons. I do this for free because I want to give more resources for Asian Face Claims. You can find the list of Icon's I have done below. If you would like to request icons bases don't hesitate to send me a note. Understand I will only do up to 100 at a time. It depends what I have to work with. This is currently the only resource I offer. I will however, reblog memes and resources.
0 notes