
matthew-macfadyens
he has risen babygirl
mahroash ⟡ gifmaker ⟡ #usermahroash ⟡the proposal.
1573 posts
Last active 4 hours ago
Don't wanna be here? Send us removal request.
Last Seen Blogs

mattnagin
NAGIN
oaklandshameless-blog1
oaklands hameless

williamkettler
Untitled

baby69sworld
baby69
punching-today-in-the-dick
Confessions Of An Office Worker
Text


The Avengers 2012 || Deadpool & Wolverine 2024
1K notes
·
View notes
Note
hello. it’s me again who asked for the ripped paper tutorial. i can’t wait to try it out later!! are you able to make a tutorial on how you put the text on the ripped paper? thank you so much ☺️
hello! sure! i'll explain how i made the ripped paper effect from this gifset in more details under the cut 😊 (it’s a different method than what i did on my previous tutorial here)
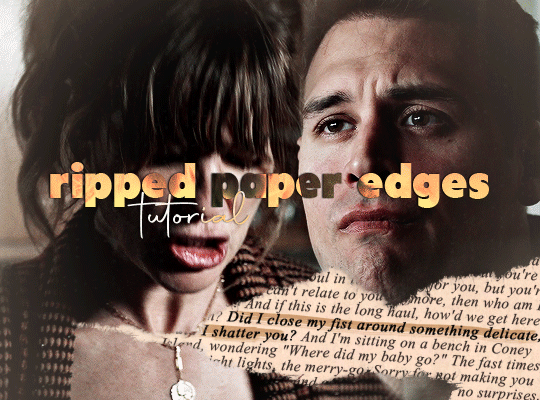
i apologize in advance for my lack of coherence, i’m not always the best at explaining stuff, especially not in english haha
first things first: make your gif, color it, sharpen it etc etc, and put all of it's layers in a group. i called mine “blended gifs”. oh and make sure you are in timeline mode, not frame animation!

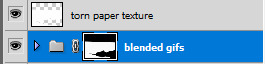
then you want to import the ripped paper texture(s) you want to use onto your canvas and position them the way you want them to be on top of your gif, like this:
(i am using these textures for most of this gifset)

what you want to do next is create a mask of this torn up area so the gif layers only show up around the "hole". to do that, select the texture layer and press "ctrl" while clicking on the texture's thumbnail. this will create a selection of your ripped paper texture (you'll see a flashing dotted line showing your selection).

btw: the ctrl + click method works only if the image/texture has transparency like this texture does.
[if you want yo create your own torn/ripped shape with 2 or more textures, you can place them on top of each other and create a mask by doing ctrl + selecting the thumbnail of the first one, then while still holding ctrl, also hold the shift key and click on the second texture’s thumbnail (and the third, fourth, etc). this will add the shapes to the same selection and then you can create one layer mask with all of the shapes selected together.]
with that selection still active, you want to select your gif's folder you created earlier and click on the add layer mask button.
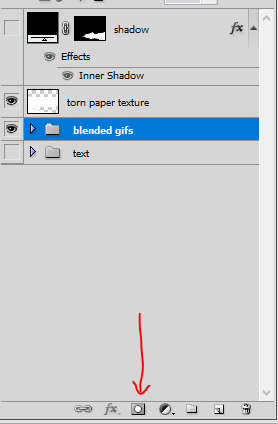
this will create a mask for the ripped paper edges on your gif, the group layer should look like this:
now disable the torn paper texture (by clicking on the eye next to it, you won’t need that torn paper texture layer again), and your gif should look like this so far:
as you can see, there's a transparency issue, and we're losing the top part of the gif. to fix that, you need to brush some white color onto the mask.
to do that, hit ctrl and select the group's mask thumbnail again, you will see the same selection as earlier show up. with the selection ready, select the brush tool in the color white (and 100% opacity), and go brush/paint some white over the whole layer mask. this should fix the transparency issue and the gif should look like this:
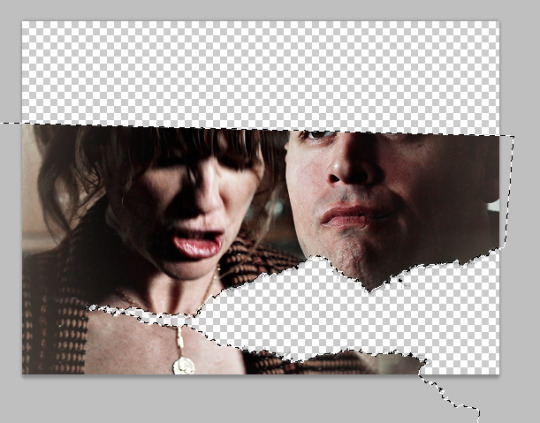
once you're done, hit ctrl + D to make the selection disappear, and still with the layer mask selected on the gif's group, with the brush tool paint some white at the top so we get the top of the image back. it should look like this:


(you can also brush more white or black to add/remove parts to this layer mask if you want to, it’s what i did for the original gif, actually.)
now you should be ready to put whatever you want in that ripped edges “hole” you’ve created.
what i did for this gifset is i found a random paper texture on google and used it as a background for my text. make sure you put this background texture under the gif folder, so it will only show up in the “hole”. (i put my texture in a group i renamed “text” because i love my psd compositions to be tidy lol)


then i just typed the text i wanted and positioned it the way i wanted it to look. the text layer should be over the paper texture but still under the gif folder:


to finalize the look I color corrected the paper to be a bit more bright and added some highlight on the text, here you can do whatever you want to make the text look the way you want it to look.
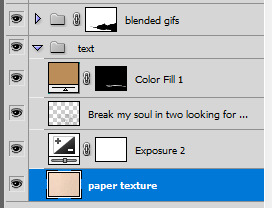
i also added a bit of dropped shadow on the edges of the ripped paper. to do that I selected the mask (ctrl + click the smart mask thumbnail), created a new color fill layer (the color is not important). this will create a layer with a layer mask of the selection. i then selected the smart mask thumbnail and hit ctrl + i to invert it, so my mask is not only the inside of the “hole”. then i put this layer on top of everything, and the fill at 0%. finally i added an inner shadow in the layer style options (by double clicking on that color fill layer).


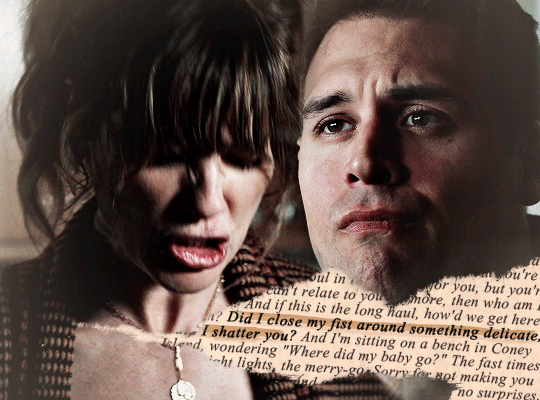
and that is the final result!
i hope that wasn’t all too over the place or not too detailed? i wasn’t sure how familiar with photoshop you are 😊
@nightmaarebeforechristmas here u go!
693 notes
·
View notes
Text


across the multiverse!!

26K notes
·
View notes
Text


Cause I wonder, will I always wonder?
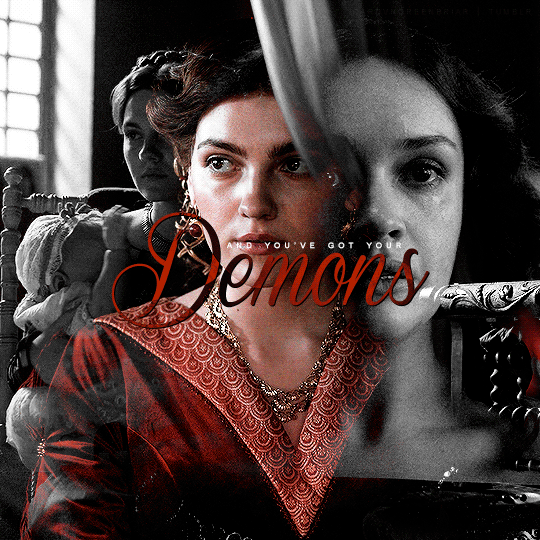
RHAENICENT APPRECIATION WEEK
day 2 → lyrics
345 notes
·
View notes
Text


THE TOWER: change, upheaval, revelation // KNIGHT OF SWORDS: extremes, aggression, defiance // THE DEVIL: entrapment, restriction, emptiness // 5 OF CUPS: regret, disappointment, despair // DEATH: ending, change, grief // 10 OF SWORDS: loss, collapse, inevitability
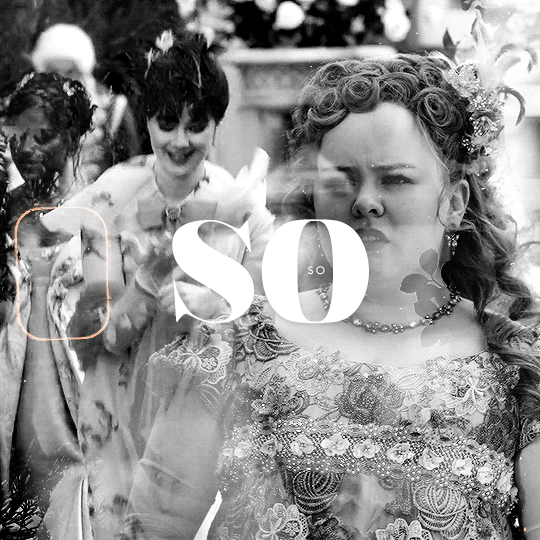
RHAENICENT APPRECIATION WEEK
DAY FIVE ▸ tragedy
276 notes
·
View notes
Text


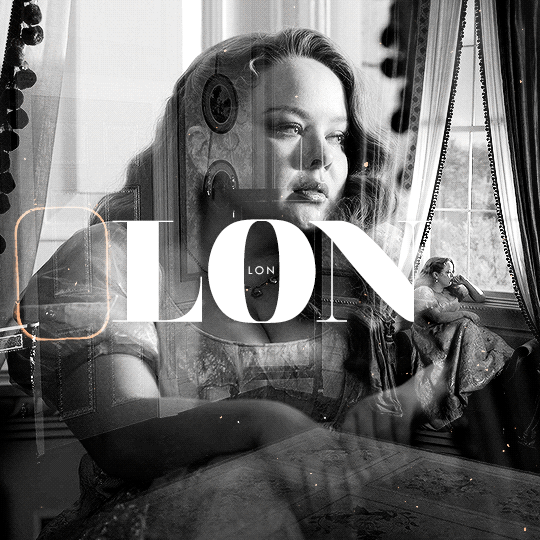
RHAENICENT APPRECIATION WEEK:
day #3 — quote
332 notes
·
View notes
Text


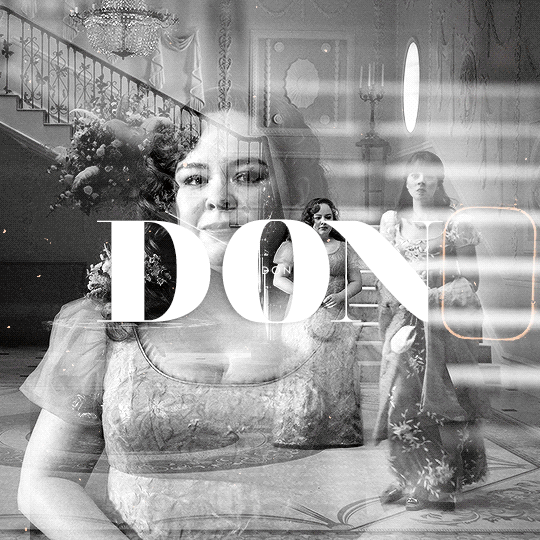
HOUSE OF THE DRAGON APPRECIATION WEEK:
day 7: free choice
― dream girl evil, florence & the machine
560 notes
·
View notes
Text


rhaenicent week | day 5: tragedy
⤷ if it's love, it must be more than most. (x)
296 notes
·
View notes
Text


RHAENICENT APPRECIATION WEEK 2024
[2/7] lyrics: sad beautiful tragic by taylor swift (x)
339 notes
·
View notes
Text


RHAENICENT APPRECIATION WEEK:
day #4 — tropes
293 notes
·
View notes
Text


#matthew always come back
31 notes
·
View notes
Text


I am at last myself.
RHAENICENT APPRECIATION WEEK
DAY FOUR ▸ past and present
341 notes
·
View notes
Text


Before & after coloring challenge!
Tagged by @matthew-macfadyens and @lengthofropes!
Thank you both for tagging me! Love doing these 💙 These are a few gifs from sets I've made/posted recently :)
Tagging (no pressure): @danesdehaan @vinmauro @miwtual @jonathanbiers @teddylobo
@muldery @leothil @fabines @carlotocotta @shawnee-smith
@sunflowersmoon @blueskiesandstarrynights @barrowsteeth @miss-lauryn-hill @clarasoswinsoswald
@daisjohnsons @kizzys @dqmeron @hayaomiyazaki
@atwocd @tanneradell
Linking the sets below the cut:
El Hopper — found here
Robin/Nancy — found here
Evelyn Carnahan — found here
Evan Buckley — found here
Nancy Wheeler — see #1
Erica Sinclair — see #1
Rick O'Connell — found here
Evan Buckley — found here
33 notes
·
View notes
Text

and i'm just getting colour back into my face
i'm just mad as hell, cause i loved this place for
(insp.)
850 notes
·
View notes
Text


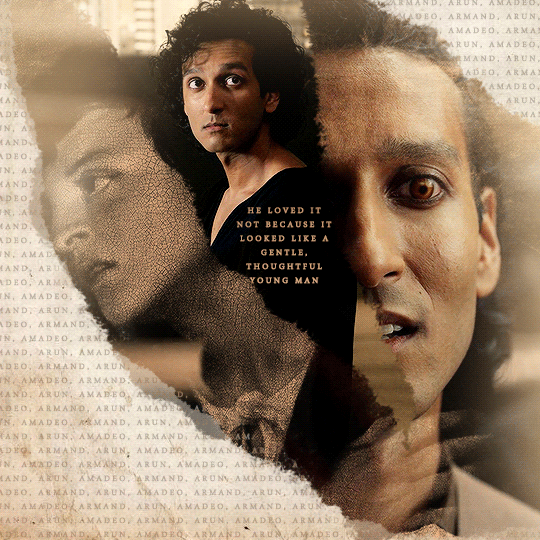


— anne rice, queen of the damned
766 notes
·
View notes
Text


it's never right, but you just can't move on
for @hakurasakura ♡ happy birthday, yash!
[insp]
317 notes
·
View notes
Text


char's 2k celebration
⤷ 🫐 + seaside glow for @nataliescatorccio | happy birthday becca!!
insp
323 notes
·
View notes