1st Year / B-Ed Fine Arts & Design Teaching / Comforting and Calming Movement with Ceramics, Photography and Print
Don't wanna be here? Send us removal request.
Text
Movement Brief
Final Presentation
Thur/2nd/Mar
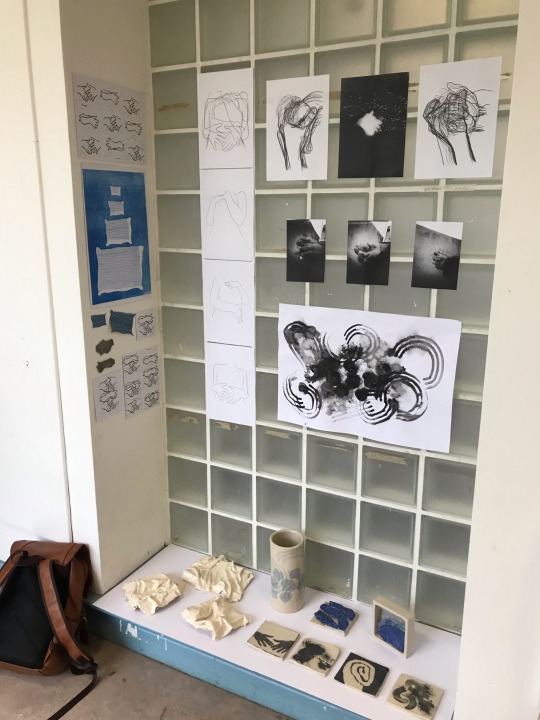
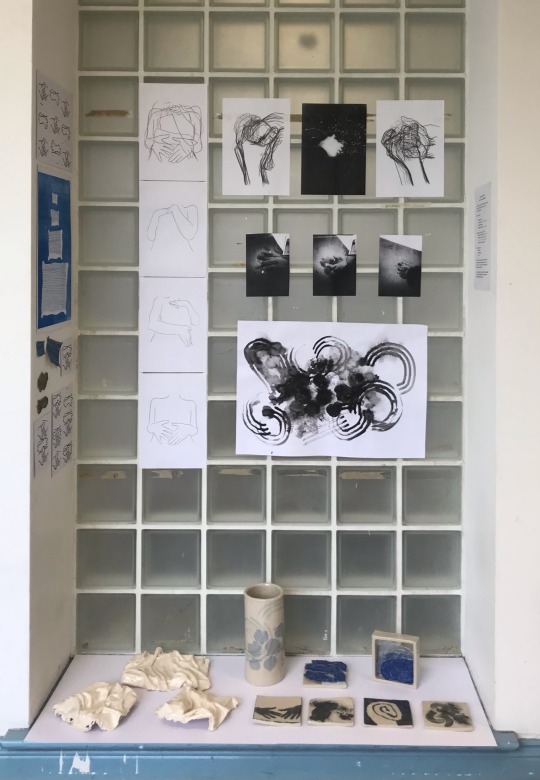
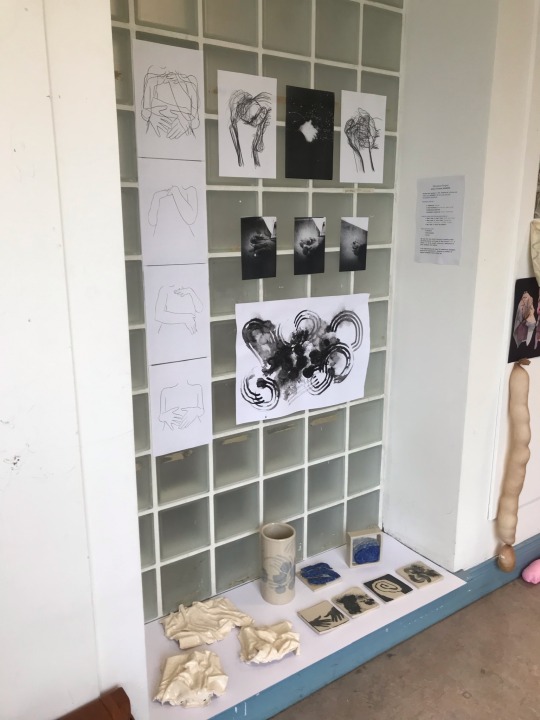
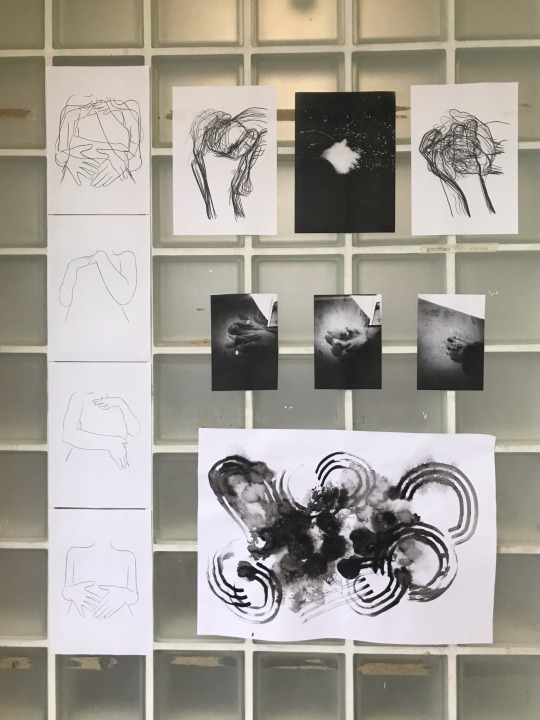
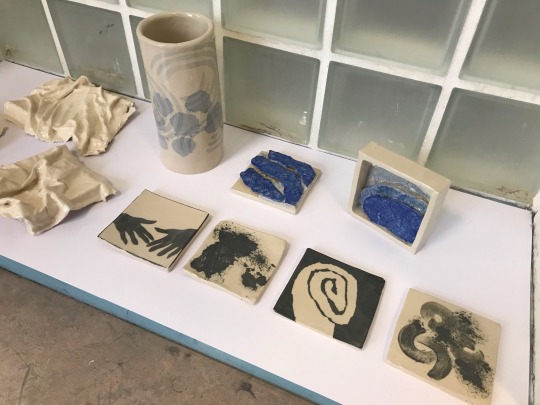
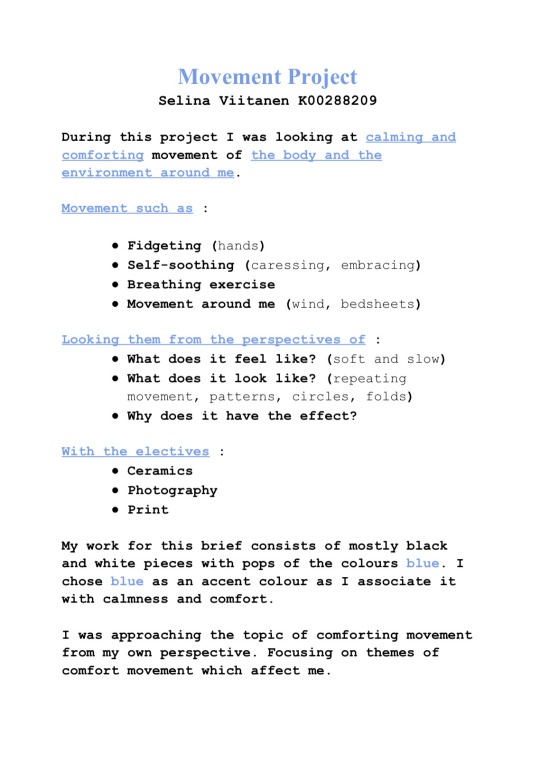
Artist Statement
13 notes
·
View notes
Text
Lino Print
Mon/20th/Feb - Print
Doing my first ever lino (linoleum) carving and print. The lino is a way easier medium compared to wood-block print, as it is a softer medium and this makes the carving process faster and easier.
Just like I planned, I am using my primary research and sketches as my inspiration for the prints.
Looking at :
Self-Soothing touch/movement
Breathing Experience


Carving process


Completed Lino Stamps. Here I should have been a bit smarter and clean off the surroundings of the stamps to eliminate the possibility of unnecessary mess around the stamp. I would go on to do this later.

Printing process, the stamps were glued onto a wooden block, one one each side. For the process it is also important to place a soft surface underneath the paper, this way when printing, adding pressure onto the stamp would be easier and the print will come out even.

Results


Experimenting with composition


Experimenting with the overlapping of the prints inspired by my primary research
1 note
·
View note
Text
Mono-Print
Mon/20th/Feb
I have previously done mono-print on my first week of the first semester.
For these prints I wanted to explore more the comforting movement of a comforting place, my bed.
The theme is my pillows so I cut out pillow like shapes of the textures I wanted to use for the prints.


The flower texture reminds me of my pillow case.


Using this wallpaper that has a texture like fabric folds, which is perfect for the pillow prints.


Pillow towers

Close up for the textures
0 notes
Text
Secondary Research
Tiles
from the book ‘The Tile - making, designing and using’ by Kenneth Clark MBE
Researching colour and texture.
The texture of ceramics fascinated me after the completion of the ceramics workshops. I wanted to look at other materials and processes which I could have used for the creation of texture and colour on tiles (taking into consideration my topics of movement and my chosen accent colour of blue) .

Raku tiles with white and turquoise glaze by Rosalie Dodds (page 87)
On the demonstrative tiles above, Rosalie Dodds uses the technique of raku firing to create a cracking and crumbling, ‘broken’ texture on her tiles.
In raku firing the piece of ceramics is removed from the low temperature firing (around 1800F) and removed mid firing from the kiln and plunged into a “cooling chamber” of combustible materials. The cooling of the very hot ceramics piece will cause the clay surface to craze.

To bring out the craze texture of the raku clay, Dodds has stained the cracks with blue. (page 132)

Raku tile, stained, by Amabis Tiles (page 132)
More on the Raku technique:
1 note
·
View note
Text
Paper Release Print - Finished
Mon/27th/Feb - Print & Ceramics


Fired and glazed tiles.
1 note
·
View note
Text
Complete Clay Models
Mon/27th/Feb


Now both of these pieces are all complete. I finished the piece bellow last week as I wasn’t able to complete it during my two weeks of ceramics. The later piece has gone through the same process of under-glaze and firing as the previous one.
0 notes
Text
Artist Research - Ceramics
Jong Jin Park

Park’s creation process consists of dipping tissue into clay slip and stacking the tissues, creating this illusion of a soft tissue pile.
“My practice explores the remarkable ability of ceramics to deceive the eye… my practice asks us to think what is real.” - Jong Jin Park

1000 sheets of tissue paper, porcelain with cobalt


Artistic Stratum, porcelain, stain, clay slip on 600 tissues (left)
His practice takes extreme care and patience and no doubt it all pays of at the end. His pieces are eye catching and definitely make you curious of the process that it takes to create them.
I used closely the same process as he has used for these pieces, only by dipping fabric into clay slip to create the illusion of soft material and folded texture.

My piece, simulating the soft folds of a blanket
More amazing works by Park :
1 note
·
View note
Text
Fabric and Clay - Glaze Results
Mon/27th/Feb


Very pleased with the results and the fact that none of these pieces broke as they’re very thin and delicate.
I was able to capture the look of my blankets and the softness of the fabric.
0 notes
Text
Clay Work in Progress
Mon/27th/Feb - print & ceramics


The vase is out of the kiln now.
The colour turned out so beautiful! However, I am expecting the shades of the blues to change again after the vase has been glazed and fired.
360 ْ

Glazed
Glaze Results after Firing :

I am very pleased with the ending result! The colours stayed soft and over lapped which was my main concern when getting the piece glazed.
13 notes
·
View notes
Text
Fabric and Clay - Firing Results
Fri/24th/Feb - Ceramics
All of the fabric and clay pieces survived the firing.
The fabric has burnt away in the kiln and left these molded pieces of clay. They’re very delicate and the details in the folds are easy to see.


Taking close up shots of the clay folds just like I did of my blanket. It’s almost hard to tell that the folds are off clay.


Comparison with the clay and the primary source blanket
I prefer the smaller square pieces (above) to the bigger piece (bellow) because on the bigger piece the clay is uneven.
This may be because I took too long to work the wet and heavy fabric into folds after dipped it into the clay slip, causing it to dry on me. As on the smaller pieces I just quickly covered the cardboard base with the dipped fabric, as if making a bed, giving the smaller pieces a much nicer even results with the clay slip.

The unevenness breaks the illusion.


But otherwise this piece isn’t too bad either.
These will be glazed with transparent glaze and fired by Thursday this week.
4 notes
·
View notes
Text
Clay Work in Progress
Fri/24th/Feb - print & ceramics
the results of cleaning the base of the vase
working the screen printed clay into a vase shape.
Over the weekend it will be fired and then I will be glazing it with transparent glaze on Monday.
I am very excited to see the results in the blue colours as the result of the firing.
3 notes
·
View notes
Text
Screen Printing on Clay
Fri/10th/Feb - print & ceramics
This experimental crossover of ceramics and print was a lot of fun to take part in and perfect as I am in both electives.
I have worked with screen printing techniques before. However, last time I worked with silk screen printing which uses UV-sensitive photo emulsion which essentially acts as the stencil. So using only paper stencils is new to me.
For the prints I decided to take inspiration right from the mark making from the first week of ceramics.

I wanted to do two prints layered with darker and lighter shades of blue. The plan was to separate the lines and the drops of ink to copy the results of mark-making.


The two stencils I will be using for the prints
Screen Printing Process :
The stencils were placed over the clay and underneath the printing screen, on which the paint would go on top of. This way only the cut out parts of the stencil would be exposed to the paint.
The print turned out beautifully.

I am planning on working this piece of clay into a flower vase. It’ll be gorgeous!
2 notes
·
View notes
Text
Fabric and Clay
Thur/9th/Feb - Ceramics

Finally going through with my concept of simulating the comfort and movement of blankets with ceramics clay.
By dipping pieces of fabric into clay slip and manipulating the slip fabric into shape


I built a cardboard base for me to place the clay slip dipped fabric onto so that it will keep a shape that can hold itself up. This way it will also be easier for me to work the slip fabric into clean folds.
Primary Research :


As primary research for this concept I used the blanket of my own bed, documenting its shapes and folds after getting out of bed.
Process with Clay :


Fabric dipped into clay slip, placed onto the cardboard base and worked into folds.
4 notes
·
View notes
Text
Paper Resist Print on Clay
Thur/9th/Feb - Print & Ceramics
Printing on clay using black glaze clay slip and the paper resist technique.
Paper Resist :
Using pieces of paper as resist to create contrast between the dyed and non dyed areas.
First by wetting the clay base and placing the paper stencils on top of the damp clay. With a slightly damp sponge the paper stencil is also wetted. This way the stencil will be well against the clay base and it will prevent any clay slip from getting underneath the stencil giving clean lines as a result.


I am using my primary research on self soothing touch and breathing techniques as my inspiration for the prints. I wanted to focus on the embracing and quiding hands.


Here I experimented with paper ripped edges (inspired by my earlier mark making paper models). The texture of the ripped edge is still strong and visible after the paper stencil is removed.
Glazed Results :


Glazed with transparent glaze
This experimental interdisciplinary work was a lot of fun and I am excited to see the results.
9 notes
·
View notes
Text
Ceramics - Week 2
Tue/7th/Feb
We were shown how to create shapes with this clay compression machine which results into hollow shapes.
These shapes could be used for example to create cups and mugs or pencil holders, which I am planning on using my my piece of clay as a pencil holder.
The Process :


Using molds and compression the clay is shaped into long tubes of the desired shape. The shape would be cut into pieces by wire and then worked afterwards.
Results :

The worked piece of shaped clay.
I proceeded to clean up the sides and edges of the piece let it be fired as it is.
After the firing i under-glazed the piece with patters of blue plants and over-glazed it with transparent glaze.
Glaze Results :


The blue plants are tilting and swaying as if by the wind. Even the clay piece itself is slightly tilted which gives it a fun illusion of movement.
2 notes
·
View notes
Text
Glazing
Tue/7th/Feb - Ceramics Week 2
The second week of ceramics (a.k.a the glazing week).
I had only two pieces done and fired and ready to be glazed.
First I started with the clay study of mark making. I was looking to do a slightly more complex coloring for this piece as I wished to further enhance the layers and the texture. For this I was shown how to under glaze.


Under glazing is when the ceramic piece is painted and decorated with colored paints before it is glazed.


Working with shades of blue. I chose blue for that one pop of colour in my ceramics work as I connect the color blue with comfort and calmness. By using different shades I can play with the depth of the piece and more drastically bring out the different layers.
Black Glaze :

Demonstration of dipping ceramics in clay and the details and results of the black glaze.
However, for the under-glazed piece I chose to use transparent glaze to keep the under-glaze visible.
Glaze Results :


With the transparent glaze the piece is brought to life. The colours are beautiful and especially the darker blue pops out much more. Even the textures of the fabric are more visible after the glaze.
4 notes
·
View notes
Text
Throwing Clay
Thur/2nd/Feb - Ceramics Week 1


Last week I had the chance to try throwing. It was really challenging especially with my longer nails but also very enjoyable. I got this ugly little pot out of it.
On the 7th this week I glazed the pot with some black glazing.


The pot will be nice for holding jewelry, bookmarks ext.
A very short clip of the process
7 notes
·
View notes