This is a Premium Tumblr Theme made for writing. It features a clean, minimalist design to allow the content to shine and keep distractions to a minimum.
Don't wanna be here? Send us removal request.
Photo

.. happy New Year, y’all ❤️
2 notes
·
View notes
Photo
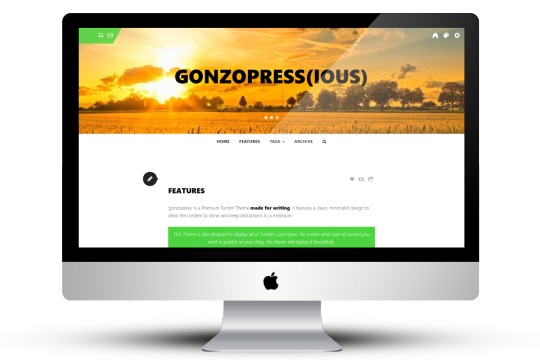



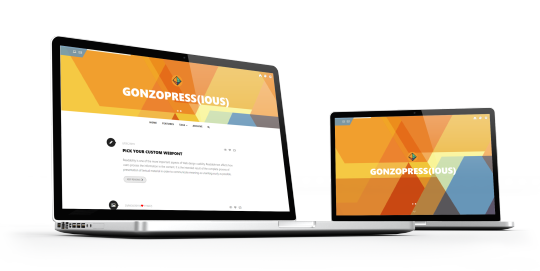
Premium Tumblr Theme: gonzopress(ious)
‘gonzopress(ious)’ is a Premium Tumblr Theme made for writing. It features a clean, minimalist design to allow the content to shine and keep distractions to a minimum.
gonzopress(ious) is also designed to display all of Tumblr’s post types. No matter what type of content you want to publish on your blog, this theme will display it beautifully.
Customization
STANDARD TUMBLR CUSTOM OPTIONS
FULLY RESPONSIVE + RETINA-READY
CHANGE ALL COLORS
SET BREAKPOINT NAVIGATION
USE CUSTOM WEB FONTS
SHOW YOUR SOCIAL PROFILES
ENABLE SOCIAL MEDIA SHARING
DISQUS COMMENTS
GOOGLE ANALYTICS
FULL HEIGHT or FIXED HEIGHT HEADER
SLIDER FOR MULTIPLE HEADER IMAGES
INFINITIVE SCROLL OR PAGINATION
SHOW YOUR INSTAGRAM FEED IN THE FOOTER
PREFAB STYLED HTML ELEMENTS
3RD PARTY INTEGRATION
1 note
·
View note
Photo

To Slide or not to Slide, that is the Question.
Another Built-in Option of gonzopressious is a PhotoSlider in your Header. You can upload up to 5 images in total in this premium Tumblr theme and turn them into a carousel.
First make sure to upload the ‘standard’ Header Image and then you can add more Header Images via the ‘Edit Theme’ sidebar. You don’t need to upload all 5 Header Images, just upload 3 images if you want to display 3 images in the Slider. Last but not least, toggle the option to ‘Show Slider’.
It goes without saying that if you want just the Header Image, make sure to switch off the ‘Show Slider’ option in the ‘Edit Theme” sidebar and your primary Header Image will get all the attention .. 😏
0 notes
Audio
(Claptone)
.. Some good ol’ fashioned chill music while coding this premium Tumblr theme 🤓
0 notes
Text
Infinitive Scroll or Pagination?
This Tumblr Theme has an built-in option to use an Infinitive Scroll or a standard Pagination. You can toggle this option in the ‘Edit Theme’ Sidebar to show an Infinitive Scroll with a ‘Load More’ button.

The Infinitive Scroll option has a ‘Load More’ button to get the best UX pattern to display more posts. At Baymard Institute, they’ve conducted several year-long large-scale usability studies of more than 50+ leading (e-commerce) websites.
They tested three design patterns for loading products (read: posts), both on desktop and mobile. Pagination is still the most popular way to load new items on a website because it ships by default in almost every single platform.
They also found that infinite scrolling (eg. how Twitter does Infinite Scrolling) can be downright harmful to usability — in particular, for search results and on mobile.
However, their usability test sessions found “Load more” buttons in combination with Infinite Scroll to be a superior implementation, resulting in a more seamless user experience. Also this way you can let your Footer shine .. 🤟
0 notes
Photo
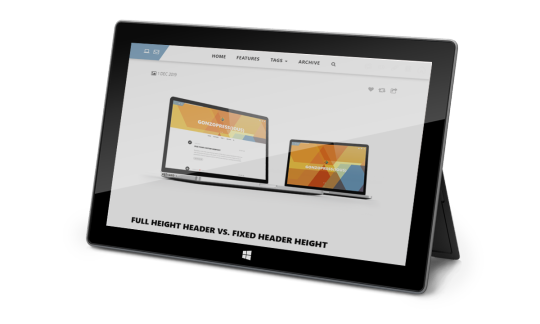
Full Height Header vs. Fixed Header Height
I made an option to show a full height Header if you want to make an impact with your header image. In the 'edit theme' sidebar you can toggle this option (Header Full Height).
If you want the fixed height version of the header (380px), then switch the toggle to be gray and you have a fixed height of your header. Easy as pie 😎
0 notes
Photo

.. best way to start the day ツ
0 notes
Text
How to get your Instafeed displayed in the footer
Another option to personalize this Tumblr Theme is to place your Instagram Feed into the Footer. There are 3 steps to take to make this happen ..
First of all, you need to fill in your Instagram Token into one of the text fields in the ‘Edit Theme’ sidebar. How to get your Instagram Token? There’s a simple tool to do that.
Get IG Token
Click the above button to open the tool in your browser. Your Instagram Token should be displayed on screen. This tool is made by the great folks at Pixel Union.
If - for any reason - this tool doesn’t work properly, you can follow the steps as written in this article.
Second step is to fill in our InstaGram Username in the 'Edit Theme' sidebar and last but not least .. you can choose what you want to show. If you don't toggle the 'Show Instagram Thumbnails', you will see your latest Instagram photo with the caption. If you toggle this option, you will see your last 6 photo's (as thumbnail) in the footer.
Important Note
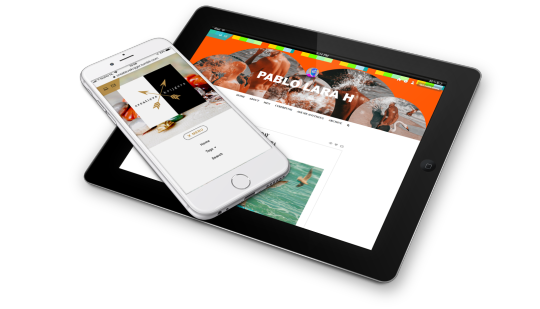
BTW: I found out, with the help of one of my UX testers for this theme @pablolarah, that copying the IG Token in the Text Input doesn't work in FireFox?! So, please, if you want to set up this feature do this in preferably in Chrome.
0 notes
Photo
Reblogging this cool shit 😲

120K notes
·
View notes
Text
Prefab styled HTML Elements
You can insert some standard HTML codes but also one or two prefab CSS class names I created in the stylesheet. You first need to click the gear icon in the upper right corner of the text-editor, then select HTML in the 'Text editor' field. Now you can write your post in plain HTML, how frickin’ cool is that ツ.
Code is Poetry
In this Tumblr Blog you can also use <pre></pre> to write code examples for your readers. You can now write tutorials with code examples, if you feel an urge to do so 😉. Use the <pre> .. your code here ..</pre> HTML tag to show your codes ..!
Example:
<a href="#"></a> /* simple link */ <code>Q</code> /* show codes */ <pre></pre> /* show more codes */ <p></p> /* Paragraph */ <br /> /* Linebreak */ .. etc., etc.
Insert Blockquote in any Post
If you want to insert a blockquote on any other page then the ‘quote post’, .. well, you can! To insert a blockquote in a text post you have to go into HTML mode. Now you need to type the following into the HTML code, preferably on a new line and adjust the text from this example:
<blockquote> "Insert your quote here" <cite> Name </cite> </blockquote>
The <cite>Name</cite> part is needed when you also want to publish the name of the person being quoted.
Result:
"Insert your quote here"Name
Prefab Buttons
But there are also some more goodies hidden in the jar, yay! Let's say you want to link to an internal/external URL, but you wanna do it with a fancy button .., okay, done:
<p> <a class="linkbutton" href="YourURL">Button Text</a> </p>
The magic starts when you insert class="linkbutton" to a normal link when you click the 'Insert/Edit Link' menu button in your text editor.
But there are more PreFab Styled Buttons in this theme:
<p> <a class="read_more" href="YourURL">Button Text</a> </p> <p> <a class="external" href="YourURL">Button Text</a> </p> <p> <a class="download" href="YourURL">Button Text</a> </p>
Result:
Button Text Button Text Button Text Button Text
The HTML <p> element defines the start of a paragraph, the closing </p> element will assure you the button will be the only element in this paragraph. The example below is NOT using the <p></p> HTML elements, hence the position .. right after the text!
Example: Online Portfolio
Extra Typographic Styles
Also included are some HTML elements you can use to spice up the typography of your theme, you can use these throughout your posts and pages.
<h1></h1> /* Heading H1 - Main Title */ <h2></h2> /* Heading H2 - Paragraph Title */ <h3></h3> /* Heading H3 - Subparagraph Title */ <small></small> /* font-size: 12px */ <big></big> /* font-size: 18px */ <sup></sup> /* Superscript */ <sub></sub> /* Subscript */
Result:
Heading H1
Heading H2
Heading H3
Knock yaself OUT!
Superscript
Subscript
A CTA (Call-to-action) Block
Want more email subscribers? Contest entries? Conversions? You won’t get them without the right call to action. No matter what you’d like to accomplish with advertising and marketing, you won’t do it without the right CTA.
Here's the code to make a great CTA block, using the same colors (background, text and link colors) as your Footer, so it looks consistent with the colors of your Blog.
<div class="cta-block"> <h3>Spicy CTA Title</h3> <p>Here comes your CTA text, you can also insert a Prefab Button here as well, if you want to make your link <a href="Your-URL-here" target="blank" class="external">Click Me</a> stand out.</p> </div>
Example:
Catchy CTA Title
Here you can insert some catchy text, to make your readers click this button below!
Click Me
0 notes
Quote
IF YOU THINK GOOD DESIGN IS EXPENSIVE, YOU SHOULD LOOK AT THE COST OF BAD DESIGN
Dr. Ralf Speth, CEO Jaguar
0 notes
Photo
We are all born ignorant, but one must work hard to remain stupid.Benjamin Franklin

3 notes
·
View notes
Video
youtube
Keane ~ Under Pressure (Live V Festival 2009) (High Quality video) (HD)
0 notes
Text
Pick Your Custom Webfont
Readability is one of the more important aspects of Web design usability. Readable text affects how users process the information in the content. It is the intended result of the complete process of presentation of textual material in order to communicate meaning as unambiguously as possible.
Out of the box, systemfonts are already installed in this Theme. If you don't pick any WebSafe Fonts in the 'edit appearance' > 'Edit Theme' Dashboard, import Google Fonts nor set TypeKit, your blog typography will look great!
Adding a custom font to your Tumblr theme
It is understandable that, for one reason or another, your project needs a font that is not available by default within this theme – whether it's for branding reasons, or your own aesthetic choices.
Tumblr's Websafe Fontpicker
Tumblr provides a set of web-safe fonts that users can select from. I've included special meta font tags in this theme, so you can easily change fonts using your Customize page. You can choose a web-safe font for your body text as well as your heading tags (h1, h2, h3).
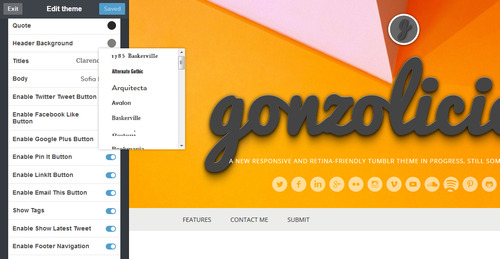
Import Google Webfonts
You can also import Google Web Fonts. There are a few steps, but it will let you override all the fonts. For my example, I will use the font Open Sans (To use a Google font, first find the font you wish to use from their font library, click the ‘Quick-use’ button, and copy the code).
In your Customize page, you can add some custom CSS styles, by clicking the 'Advanced options' button at the bottom of the main menu. In the Advanced Option menu you can see the section 'ADD CUSTOM CSS' where you can copy/paste your custom CSS styles
@import url(http://fonts.googleapis.com/css?family=Open+Sans); /* CHANGE ONLY BODY TEXT FONT */ body { font-family: 'Open Sans', sans-serif; } /* CHANGE ONLY FONT H1, H2, H3 HEADING TAGS */ h1,h2,h3 { font-family: 'Open Sans', sans-serif; } /* CHANGE ONLY FONT HEADER TITLE */ #title h1, #title h1 a { font-family: 'Open Sans', sans-serif; } /* CHANGE ALL FONTS IN THEME */ * { font-family: 'Open Sans', sans-serif; }
Typekit
Typekit is a great service that lets you choose one of their many neat fonts and apply them to your blog or website. Their trial account type lets you use their service forever, but limits how many fonts are available to you and how many websites you can use them with. They have great documentation and make the process super easy.
Changing Font-size of the Title
The font-size of the title (the Blogname) can be adjusted as well, it all depends on the amount of characters that your Blogname will have. I've set up an default font-size best for 12-15 characters.
If you have more characters you might want to change the default font-size .. place this piece of code in the section 'ADD CUSTOM CSS' and change the font-size to what 'fits' best!
0 notes
Note
.. hi gonzopress(ious), damn .. you look great! I like your theme, any chance I can buy it? Please tell me .. with kind regards, Jan Rajtoral
Hi Jan, thank you so much ❤️ Well, I really hope to offer this theme to Tumblr some time before Xmas 2019! Will keep ya posted, with love, gonzopress 🤟
0 notes