a blog full of textures, fonts, and moretracking #foryourportrait
Don't wanna be here? Send us removal request.
Text

As a thank you for so many new followers, here's a brand new edition of my editing resources masterposts ✨ (you can find the previous editions here). Make sure you like or reblog the posts below if they’re from other blogs to support their creators! A friendly reminder that some of these are free for personal use only, so be sure to read the information attached to each resource to verify how they can be used.
Textures & Things:
Collage Kits from @cruellesummer that I find myself using basically every single day
Taylor Swift Wax Seals from @breakbleheavens that I also use literally every day
Rookie Magazine Collage Kits (1, 2, 3, 4, 5, 6, 7, 8, 9, 10)
Scribble Textures & Cross-Outs (1, 2, 3)
GIF Overlays (1, 2, 3)
Film Grain & Noise Textures (1, 2, 3)
Paper Textures (1, 2, 3, 4, 5, 6, 7, 8)
PNG Overlays (Paper, Flowers, Clouds, Stickers, Lips, Vintage Paper, Misc. Symbols)
Halftone, Scan Line, & VHS Noise Textures (1, 2, 3, 4)
VHS Tape Textures by @cellphonehippie
Misc. Texture Packs (1, 2, 3, 4, 5, 6, 7, 8)
Photoshop Effects (Halftone Text Effect, Chrome Effect, Glitch Effect, Ink Edge Effect, Photo Morph Effect)
Fonts:
Badass Fonts (free fonts designed by womxn 🤍)
Open Foundry Fonts
Free Faces
Uncut Free Typefaces
Some Google Fonts I Like: Instrument Serif, DM Sans, EB Garamond, Forum, Pirata One, Imbue, Amarante
Some Adobe Fonts I Like: New Spirit, Ambroise, Filmotype Yukon, Typeka, Big Caslon CC (TTPD Font!)
Some Pangram Pangram Fonts I Like: Editorial Old, Neue World Collection, Eiko, PP Playground
Fonts In The Wild (font-finding resource)
Tutorials & Resources:
Comprehensive Rotoscoping Tutorial (Photoshop + After Effects, great for beginners!) by @antoniosvivaldi
Rotoscoping & Masking Tutorial (After Effects) by @usergif
Texture Tutorial for GIFs by @antoniosvivaldi
Color Control PSD by @evansyhelp (to enhance, isolate, or lighten specific colors)
Cardigan Music Video PSD by @felicitysmoak
Picspam Tutorial by @kvtnisseverdeen
Moving GIF Overlay Tutorial by @rhaenyratargaryns
GIF Overlay Tutorial (+ downloadable overlays!) by @idsb
Icon & Header Tutorial by @breakbleheavens
GIF Blending Tutorial by @jakeperalta
Split GIF Tutorial by @mithrandirl
Guide to Coloring Yellow-Tinted Shots by @ajusnice
Slow Motion After Effects Tutorial (useful for GIFs!)
Gradient Map Tutorial by me!
Misc:
How to Make Your Own Textures by @sweettasteofbitter
How to Report Tumblr Reposts of Your Work by @fatenumberfor
Tips for Accessible Typography
768 notes
·
View notes
Text

FALLING LETTERS ANIMATION tutorial
hello! @kimmomi asked for a tutorial on how i made the letters "fall" in this gifset and so i figured i would make it and post here! this effect isn't hard to achieve but it might get a little tedious if you have a lot of letters.
note: you will need photoshop with a timeline!
STEP ONE: create your base gif! be mindful of number of frames in your gif. the number of frames doesn't really matter here, altho the longer the gif the better the effect. i'd say try to limit it to 60-70 frames, depending on how big your final gif will be.
STEP TWO: make your text the way you want it to look. this effect is basically the last step of your gif making process. (i will be using the typography from my set as an example as i already have that psd saved)
this is what my typography looks like now.

STEP THREE: i would recommend that the word at the bottom be the word that "falls". for me that is forever.
now, you will have to duplicate the "forever" layer and make your non-copy forever invisible.
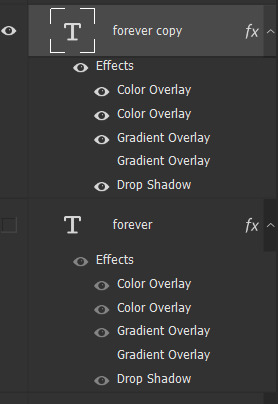
what you will want to do now is delete all the letters but the first one in the duplicated layer. for me that is f. then you just duplicate the f layer and write your second letter instead of it, in my case o. you will have to do this for all letters. also as you do that make sure to move them a bit away from each other.

now, what helps to align those letters where they start off, is making your non-copy layer to be visible again.

after you've aligned your letters, make the non-copy layer invisible again.
STEP FOUR: so now we come to a bit of a tedious part.
what you will do now is move the playhead (blue timeline arrow) a bit further from the beginning of the gif (this allows for the text to stay still a bit before it starts "falling") and click on the first letter.
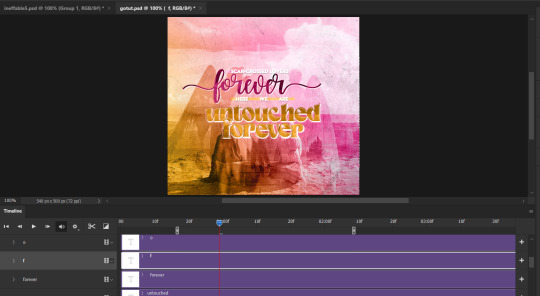
next step is to click on the little arrow next to your letter and clicking on the stopwatch next to Transform.

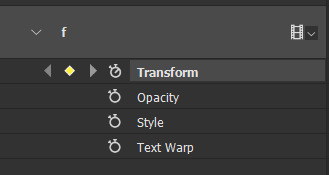
then, you will take the playhead and drag it to the end of the gif where you will start with transforming your letter with Free Transform tool (shortcut ctrl+T on windows). and what you will do is, while in Free Transform mode, drag your letter to the bottom of your gif while also rotating it a bit. when you're happy with your placement of the letter, hit enter. see below gif for how i did it.

you will have to do this for every letter, but make sure to rotate some in the other direction. also make sure that the beginning of the stopwatch mark is the same for every letter.
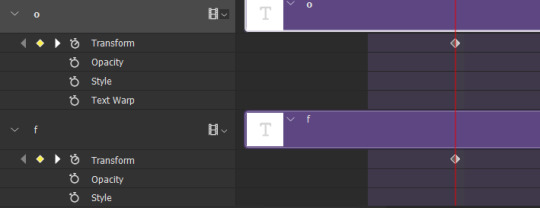
and that is basically it! after you transform every letter, you can go and save your gif.
this is my final result:

for some extra dramatic look, you can duplicate your initial layer with the whole word on it, drag it above all layers, clear layer style and add a stroke and make sure its FIll is at 0% where you will get the outline text that stays behind.

i hope this was helpful and understandable. if you have any questions, feel free to send me an ask or dm me <33
609 notes
·
View notes
Photo

BUMKEYZ TUTORIAL I: RETRO COLORING.
it’s been a hot minute since i did an in depth tutorial on something. i was never good in the first place so i’m sure i didn’t loose any skill when it comes down to explaining things lmao. but anyway earlier i was asked how i achieved my coloring in my current graphics. it’s from an old trend on tumblr way back when. i’m sure hidden in the depths of this website there’s already a tutorial on this but i couldn’t find it so ! yikes ! i’ll be showing how y’all can go from this to that. if you found this useful please like or reblog. thnx !

BEFORE YOU BEGIN:
this tutorial is written with the intention that you already know how to navigate photoshop. this tutorial isn’t complicated if you already know the basics to photoshop. the version of photoshop i will be using is ps6 extended. before beginning please prepare a png, textures, and some patience. for easy viewing please put /mobile at the end of this posts’ url.
Keep reading
204 notes
·
View notes
Photo

TEXTURE PACK – by cavalierfou
This pack comprises 15 simple textures.
I made all of these from scratch. You do not have to credit me when using them but please do not steal, redistribute or claim them as your own.
Please consider liking or reblogging this post if you use this resource.
I hope you enjoy them! ♡ DOWNLOAD HERE
769 notes
·
View notes
Photo

the long awaited updated icon tutorial in which i will show you how i make all of the different icons that i make. (it’s a bit long so… you have been warned)
Keep reading
544 notes
·
View notes
Photo

an anon wanted me to make a tutorial on how i made my headers, so ill be showing you how to make the headers from my banner
Keep reading
522 notes
·
View notes
Text

June Collage Kit
download link and more information under read more :)
Here is my 6th, light academia inspired themed collage kit 💗
What are collage kits?
Basically they are a compilation of backgrounds, textures, stickers, etc. that you can use to create collages (and of course other type of graphics and edits!) I got inspired by the collage kits created by Rookie Mag, an online magazine that unfortunately isn’t active anymore but regularly posted really fun materials for people to use.
You can download the kits either as a complete pack as zip file or each asset individually as png file meaning that you should be able to use them no matter what program or app you’re using to edit. You could even print out the assets and use them to create analog collages.
You can use the assets within the kit as you wish (for both personal and commercial projects) but please do not share them individually or claim them as your own :)
PLEASE tag me if you end up using all or some of the assets from my kits, I’d love to see your creations. You can also use the hashtag #cruellesummerkits I will share all of your beautiful works every month :)
download the zip file here
download the individual assets here
159 notes
·
View notes
Text

January Collage Kit
download link and more information under read more :)
May I introduce you to my first collage kit 🎉
When I first got into digital collages I had a hard time finding resources and materials to use so eventually I had to start making them myself and realized how much fun that is. This is why I decided to share materials in form of collage kits with you guys!
Now what are collage kits?
Basically they are a compilation of backgrounds, textures, stickers, etc. that you can use to create collages (and of course other type of graphics and edits!) I got inspired by the collage kits created by Rookie Mag, an online magazine that unfortunately isn’t active anymore but regularly posted really fun materials for people to use.
From now on you can expect a new collage kit by me every 1st day of a new month, so the next one will be posted on February 1st (spoiler alert: the theme is Valentine’s Day inspired 👀)
You will be able to download the kits either as a complete pack as zip file or each asset individually as png file meaning that you should be able to use them no matter what program or app you’re using to edit. You could even print out the assets and use them to create analog collages.
You can use the assets within the kit as you wish (for both personal and commercial projects) but please do not share them individually or claim them as your own :)
PLEASE tag me if you end up using all or some of the assets from my kits, I'd love to see your creations. You can also use the hashtag #cruellesummerkits I will share all of your beautiful works every month :)
download the zip file here
download the individual assets here
354 notes
·
View notes
Photo

Rotoscoping Tutorial by @antoniosvivaldi
Hi everyone! I’m excited to announce my long-delayed Rotoscoping Tutorial - requested by a number of people over the past calendar year.
In this tutorial, I will show you how to create the cutout gifs like this (and seen in most of my gifsets under this tag) with Rotoscoping on After Effects. I’ll also provide additional examples and a number of things that I do to optimise my giffing / Rotoscoping workflow (e.g. useful shortcuts & other things to be aware of).
This is the structure of the tutorial:
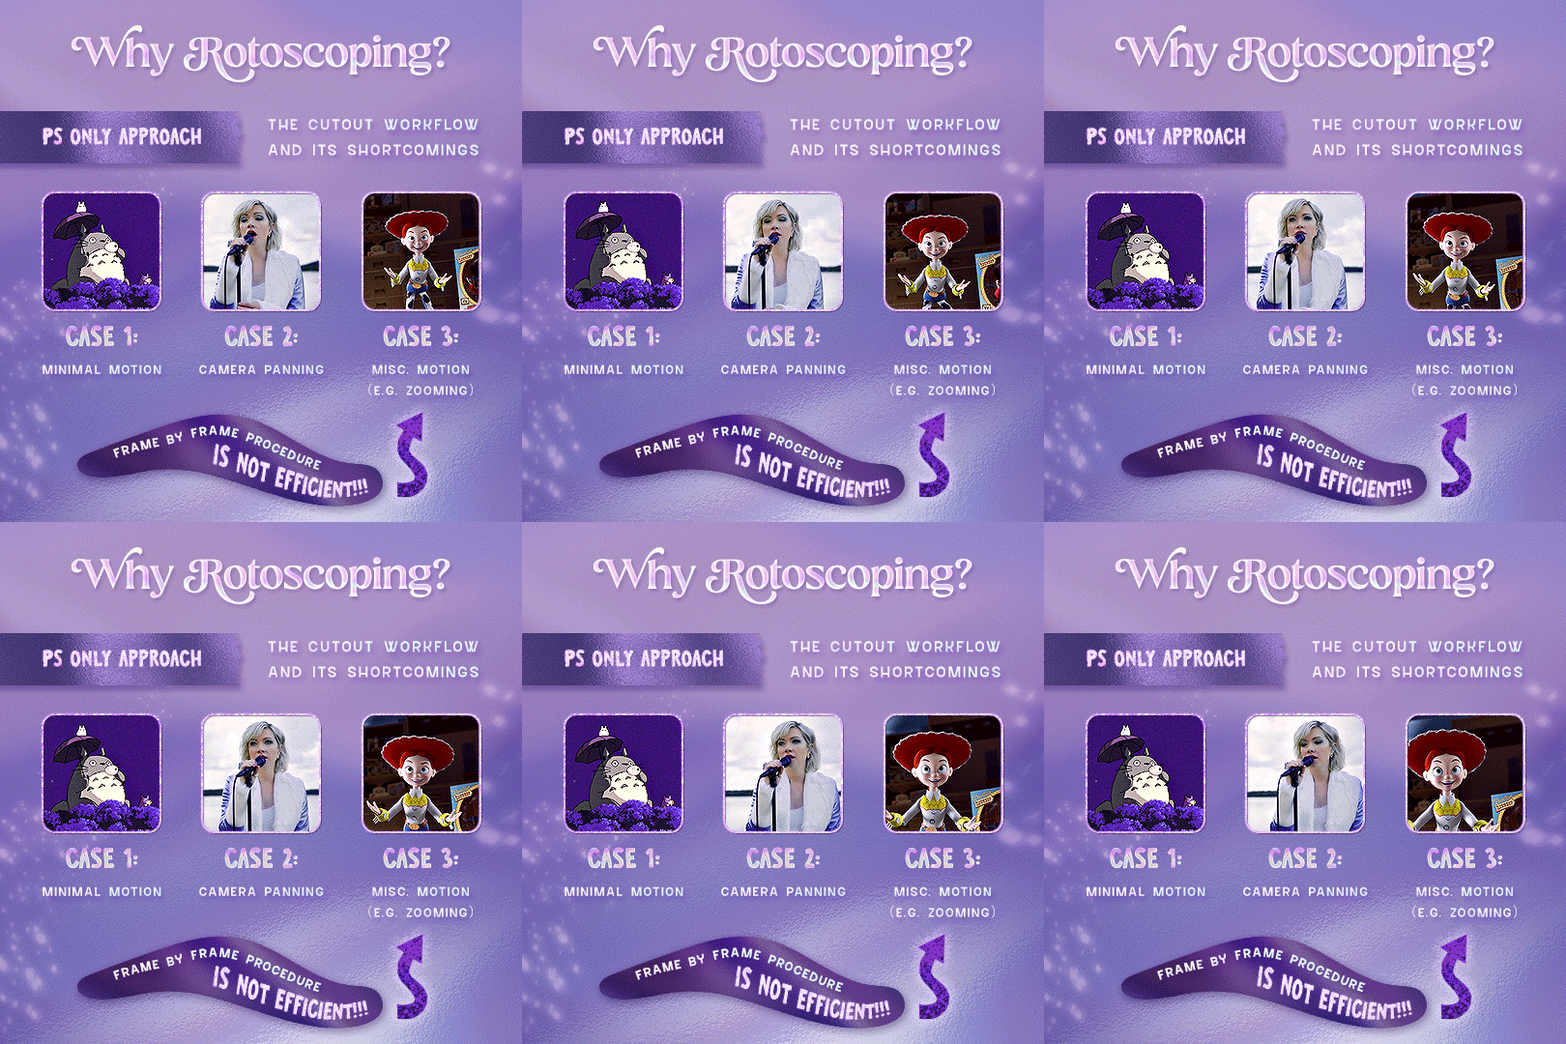
Why Rotoscoping? Photoshop video timeline’s limitations
Photoshop workflow pt 1: Preparing your gif
After Effects workflow: Interface, shortcuts, and Rotoscoping tools
Photoshop workflow pt 2: Assembling your gif; with multiple examples
Bonus content: Rotoscoping tips* & workarounds to common issues
For quick reference, here are example gifsets (and where Rotoscoping is used in the posts) that I will mention in the tutorial:
Example 1: Cutout gif effect | panels 2 + 4
Example 2: Changing a gif’s background colour | all panels
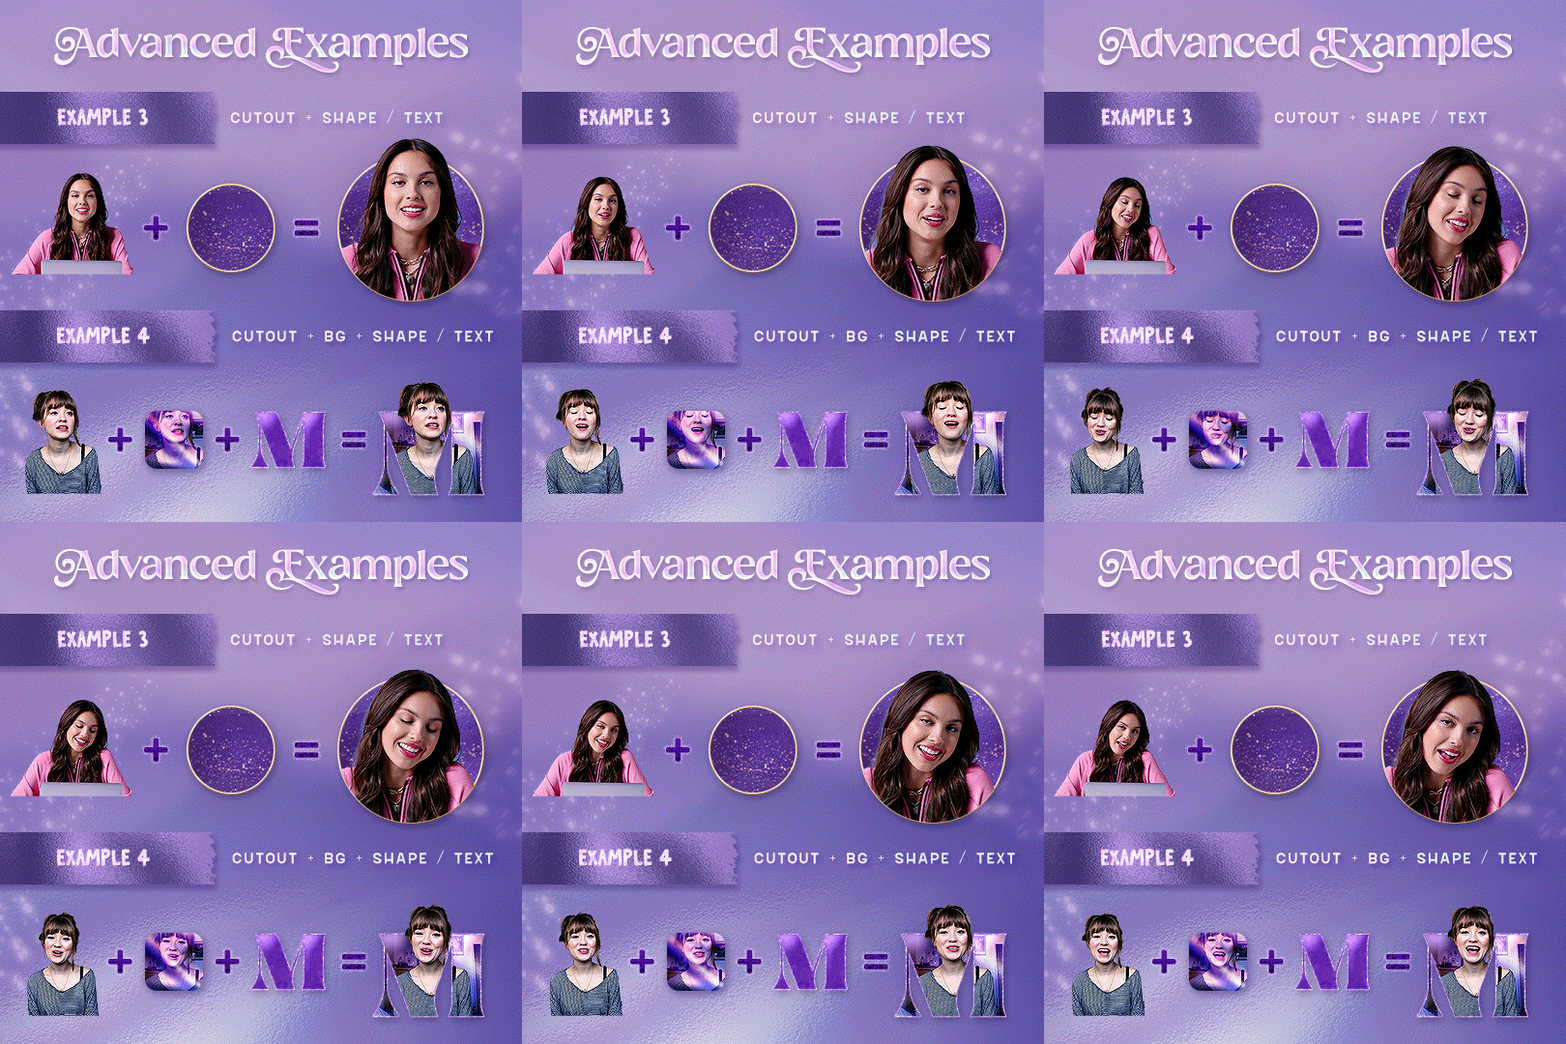
Example 3: Cutout gif effect in a shape | all panels
Example 4: Putting it all together | panels 1, 3, & 5
What you need & need to know:
Software: Photoshop & After Effects (After Effects 2021 or later for Rotobrush 2.0)*
Hardware: 16GB RAM required to run later versions of AE*
Difficulty: Advanced; Knowledge in making gifs, applying layer masks, and using video timeline interface assumed
Key concepts: Rotoscoping (AE) / Video Timeline (AE+ PS) / Layer Masks & Groups (PS)
Supplementary files: tutorial resources
*I’m currently running the latest version of PS & AE on an M2 Mac, but I’ve also used older versions (CC 2015 & 2020) on Intel-based Macs. I’ll outline some known compatibility & performance issues, and workarounds later in this tutorial that could help streamline your giffing workflow.
Tutorial under the cut. Like / Reblog this post if you find this tutorial helpful. Linking this post / the example gifsets in your post caption, will be greatly appreciated if you read this to create effects seen in Examples 3 + 4.
Keep reading
2K notes
·
View notes
Photo

♥ valentine resource pack ♥
icon textures // header textures // overlays // brushes // pngs // icon & header templates
textures and pngs in the preview are all from the pack
please do not edit or claim as your own
credit is appreciated, but not required
download // deviant
if you download them please reblog/like!
hope you like them (⊃。•́‿•̀。)⊃
196 notes
·
View notes
Text
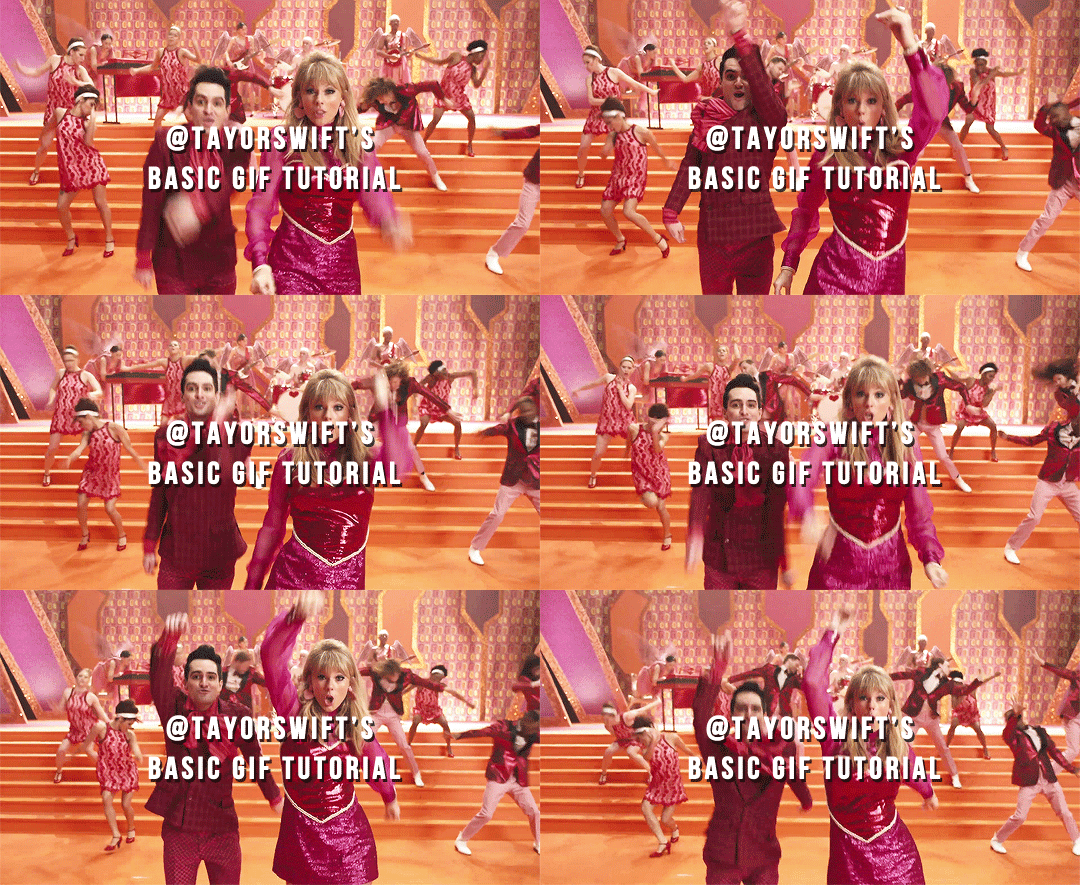
Hello! I got asked a few days ago if I would make a git tutorial and I had the time so I thought I’d give it a try. If you are left with any confusion or have any questions please feel free to send them to my inbox and i’ll try to help!
Keep reading
166 notes
·
View notes
Photo
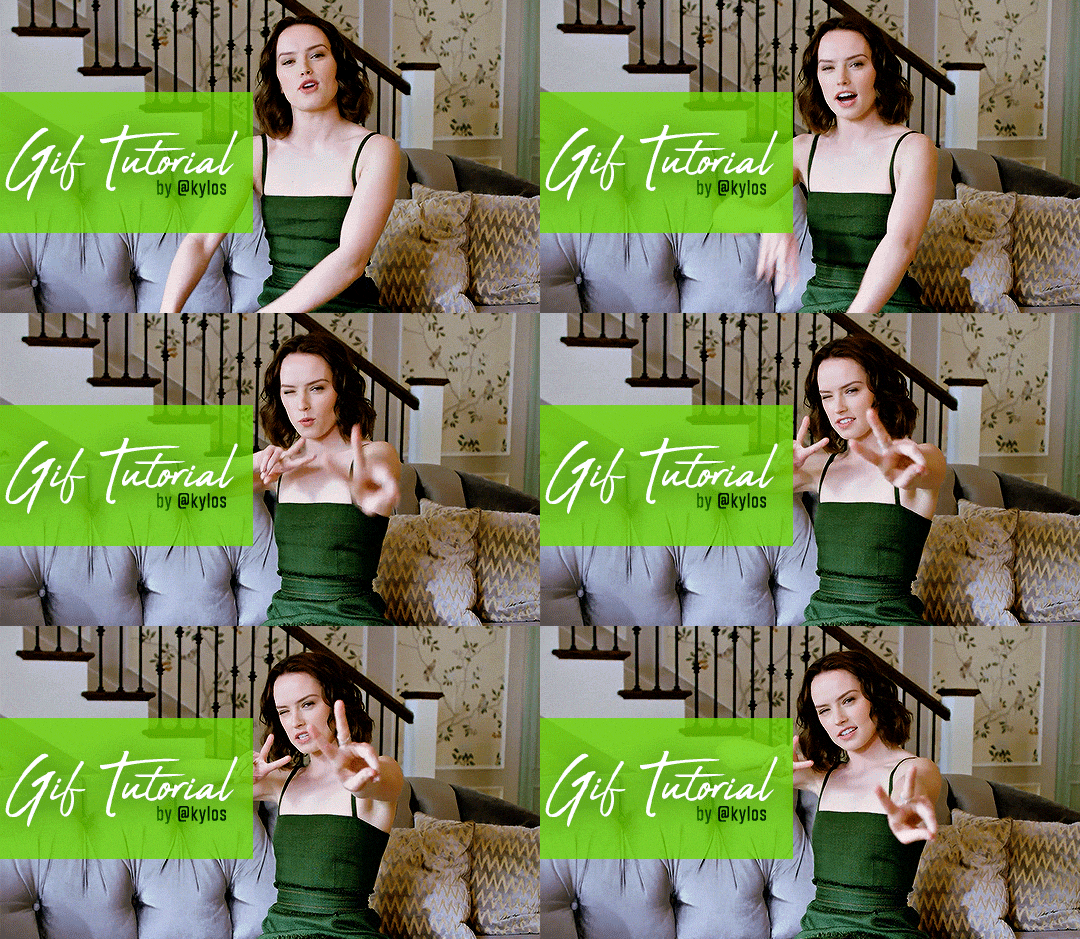
Back due to popular demand!! Here’s a reupload of my gif making tutorial! 🤗After my blog @stefani-germanotta/@pixelrey was terminated by tumblr for copyright reasons, this tutorial was deleted along with it because it had a “keep reading” cut :( That really bummed me out because I spent HOURS working on this. BUT I recently managed to find an archive of the tutorial (thanks to the wayback machine archive site - a LIFESAVER), so here it is again! ♥︎ So without further ado, here’s a tutorial on how I make my gifs (including how to take screencaps) 🎉 I noticed that it’s kind of hard to find a thorough step-by-step tutorial out there so I hope this helps!
You’ll need:
Photoshop CS6 or higher. I use PS CC 2017, but as long as you have the video timeline feature you should be fine.
A video player that takes continuous screenshots.
I personally use mpv on my mac and gom player on my pc.
Keep reading
3K notes
·
View notes
Note
OMG your gifs are so sharp! i would really love to know what sharpening action you use, if you don't mind telling, it's just so good!
hi, it’s no problem! this is my sharpening action. and thank you so much ❤️
37 notes
·
View notes
Photo

As requested by a recent anon, here is a quick tutorial on my gifmaking process! I will be using the newest version of Photoshop as of November 2022 to make my gifs, as well as mpv to take screencaps before importing to Photoshop - I recommend this tutorial to get started on installing mpv and take screencaps of the scene you want to gif.
Keep reading
169 notes
·
View notes
Photo

Some of my lovely friends asked to show how I do my blending, so here is a very long tutorial! I will explain how to:
Blend GIFs with lots of movement
Blend three or more GIFs on one canvas
You will need:
Any version of Photoshop with a timeline
Basic-intermediate knowledge of GIF making (including cropping, how to use adjustment layers for color correction, applying layer masks, and placing multiple GIFs on one canvas)
Since the way I blend depends on the footage I’m able to work with, I often end up going in a different direction than I first planned. So this isn’t a strict step-by-step guide that can be applied to everything you make. These are just some tips!
Read the rest under the cut.
Keep reading
2K notes
·
View notes
Note
hi can you make a tutorial on how you sharpen your gifs? i especially love the black and white ones you make
Hi Nonnie! Sorry you've had to wait a little bit, I've just been really insanely busy with a thousand things 😅 Anyway, I'm not sure how exactly to do this, but hopefully this makes sense!
We'll be doing this scene, to go from the top gif to the bottom gif:
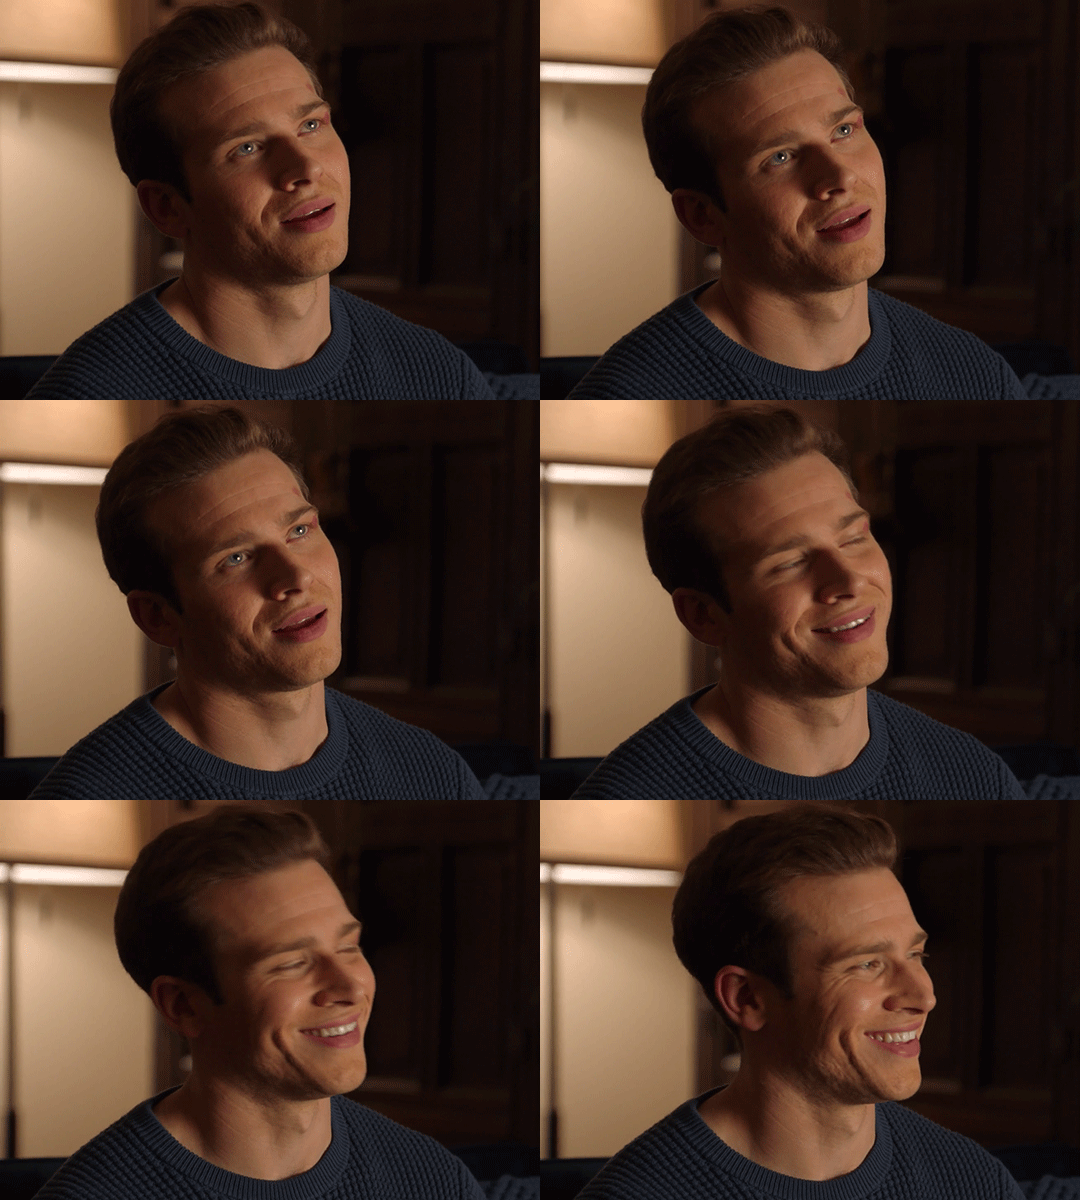
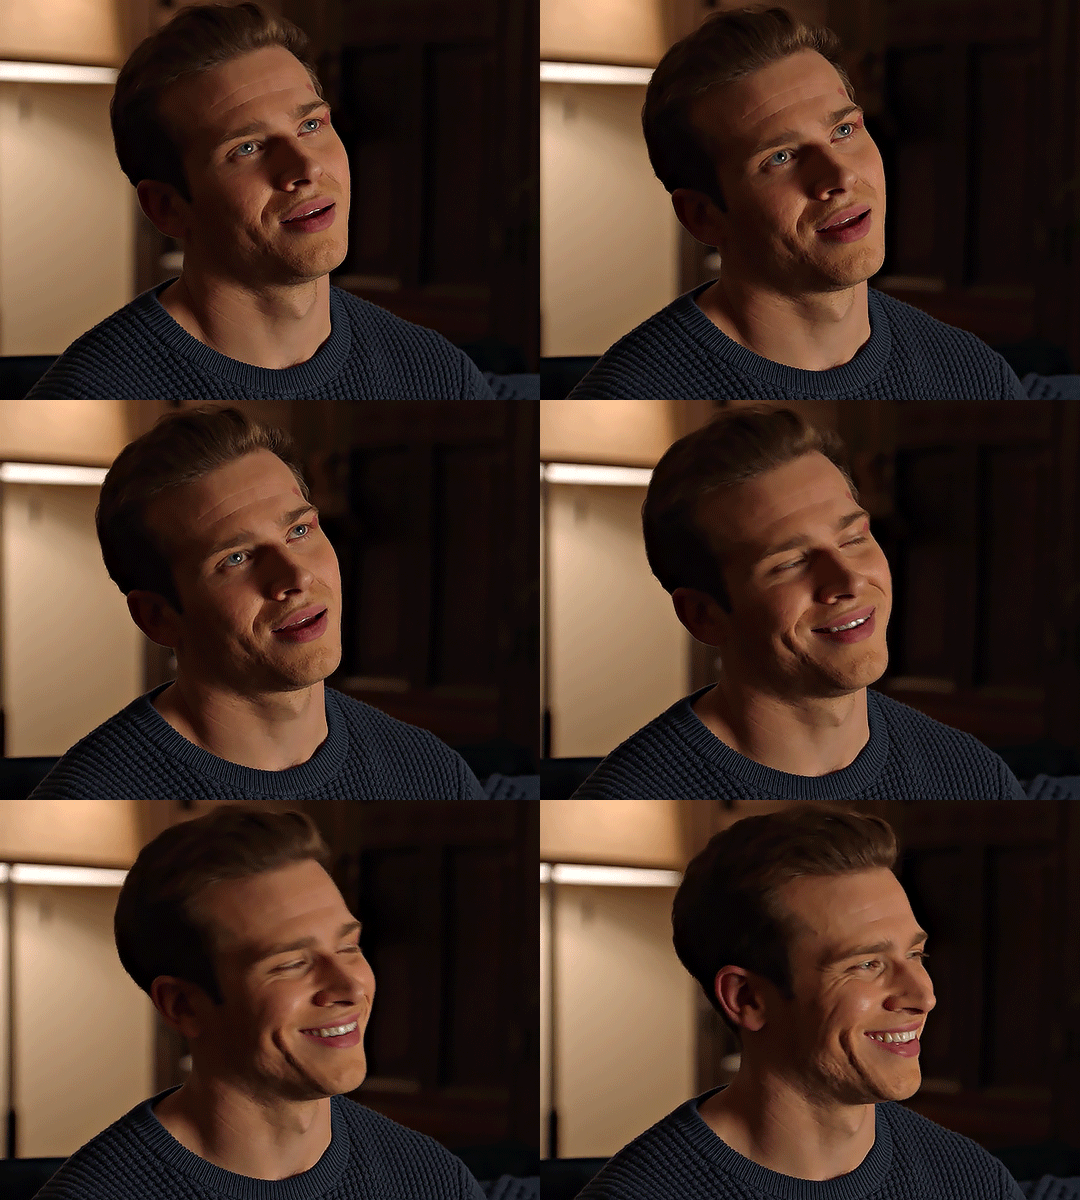
(This tutorial assumes basic knowledge of gif-making and smart filters, and is probably long-winded because I haven't been making gifs for very long, but this is the way I do mine.)
Tutorial under the cut:
Couple things to note that make a huge difference before you even start:
Use high-quality videos! I try not to go below 1080p for anything, and sometimes that means downloading bigger files.
Make sure that whatever application you use to get your frames isn't distorting them, or skipping frames. I use MPV player.
Make sure your gif size is correct when you crop it, if you're posting it somewhere). For example, if you're making a single gif on a row, Tumblr's optimum width is 540px. If you make it 500px, or 550px or whatever, it's going to look super crunchy and weird after you post it, so stick to their sizes.
We're gonna begin at this page (if you need a tutorial on how to get here, let me know, but I'm assuming you know!)
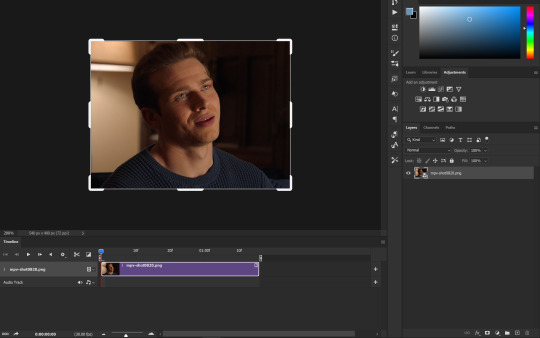
First, make sure your gif is a smart object! If your gif isn't a smart object, you won't be able to apply the smart filters. If it is, you'll see this symbol next to it. To convert all your layers to a smart object, select them all, right-click, and select "convert to smart object."

Next, duplicate your gif layer so you have two. Hide the top layer and select the bottom layer. Your layers should look like this:
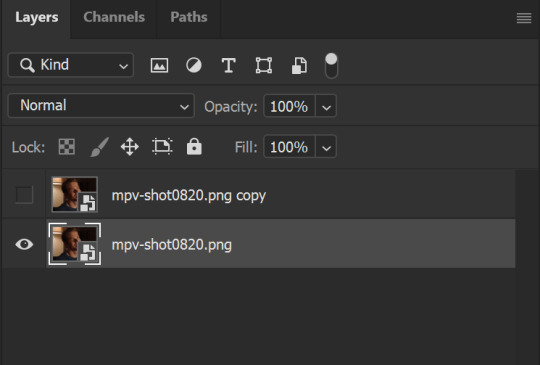
Remember we're working on the bottom layer first! Go to Filter > Sharpen > Smart Sharpen. Use these settings, depending on what looks best for your gif/video quality:
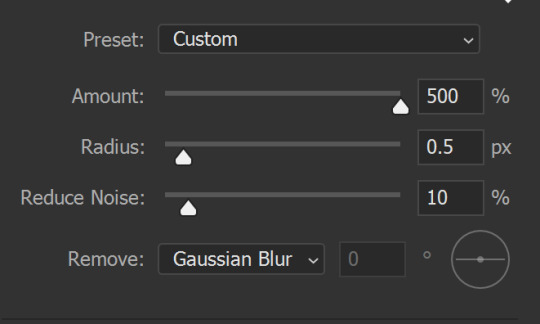
The radius can be set to 0.2px to 0.5px depending on your quality/preference. You can also choose to remove Lens Blur instead of Gaussian Blur but these are my preferred settings. (I don't do anything with the Shadows and Highlights section)
Next, do another Smart Sharpen, but this time, use these settings:

(a popular choice for this second smart sharpen is 10%-10px, but I like the clarity 20% gives just a little bit more.)
This is what my layers look like right now:
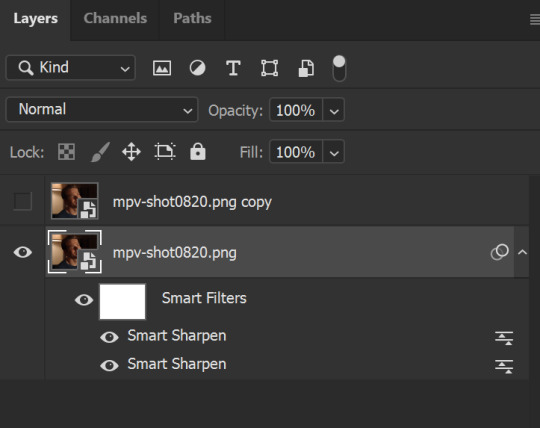
And this is what my gif looks like. I removed the sharpening from the right side of the image, and while it's not super obvious like this, I think you can see the difference best in Buck's eyes. The eye on our left has much more detail and depth, while the one on our right isn't as clear:
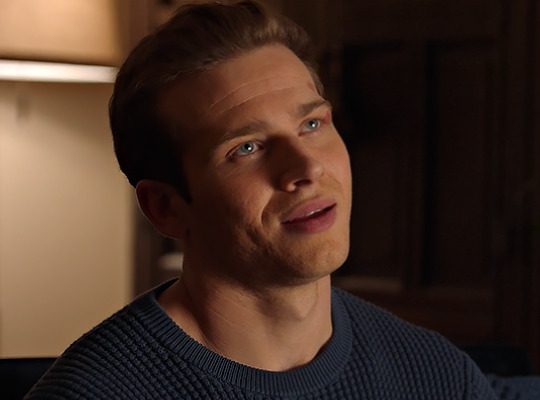
You can stop right here if you want to, if you're happy with the way your gif looks. However, my preference is always to soften the crisp edges just a little so it doesn't look over-sharp, and also give it some clarity, which is where that second layer comes in.
Select that top layer and un-hide it. Remember that there are no filters on this layer so far. Go to Filters > Blur > Gaussian Blur. Choose a radius of 0.4-0.7px, and click enter. The gif will look like this:
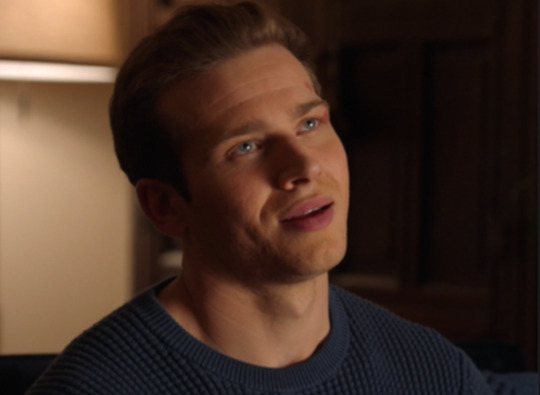
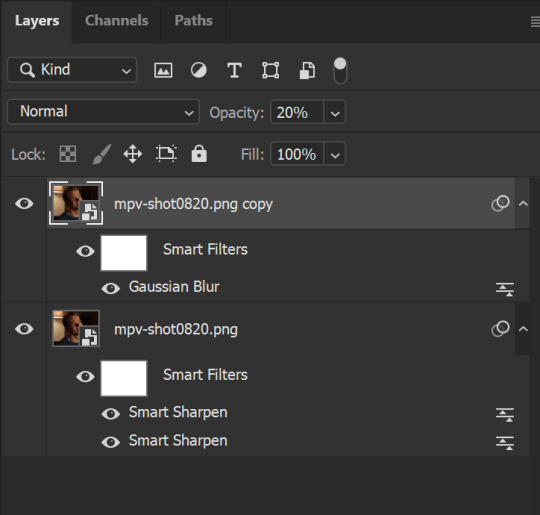
Next, change the opacity of this top layer to 20-25%. You should have your sharpened gif back, but it will look just a little softer and less harsh along the edges. You can change this opacity depending on your scene, so it's really like a slider you can control to go back and forth.
Your layers will look like this:
Then, one more optional step that I like to do is add a noise layer. This seems counter-intuitive, but when you have big blocks of color, the noise helps disperse them just a little bit.
Go to Filter > Noise > Add Noise. Use these settings:
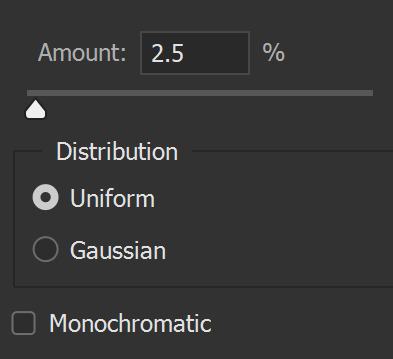
Then, in your Layers pane, right-click where it says Add Noise, and in the menu, click Edit Smart Filter Blending Options. You should get this dialogue box, where you can change the opacity of that filter to 50%.

I know it kind of seems like "what's the point?" when this particular layer is already low-opacity, but it does make a difference (to me, at least) in some gifs where there's a lot of color/light, especially after you color the gif in!
This is what your layers should look like:
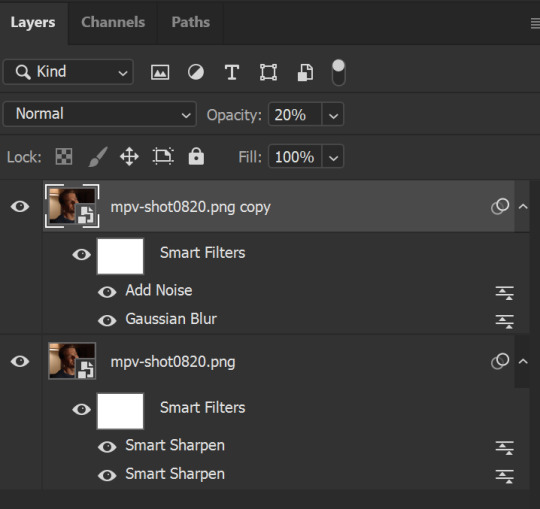
And this is what my gif looks like after I run it through the frame animation, all sharpened!

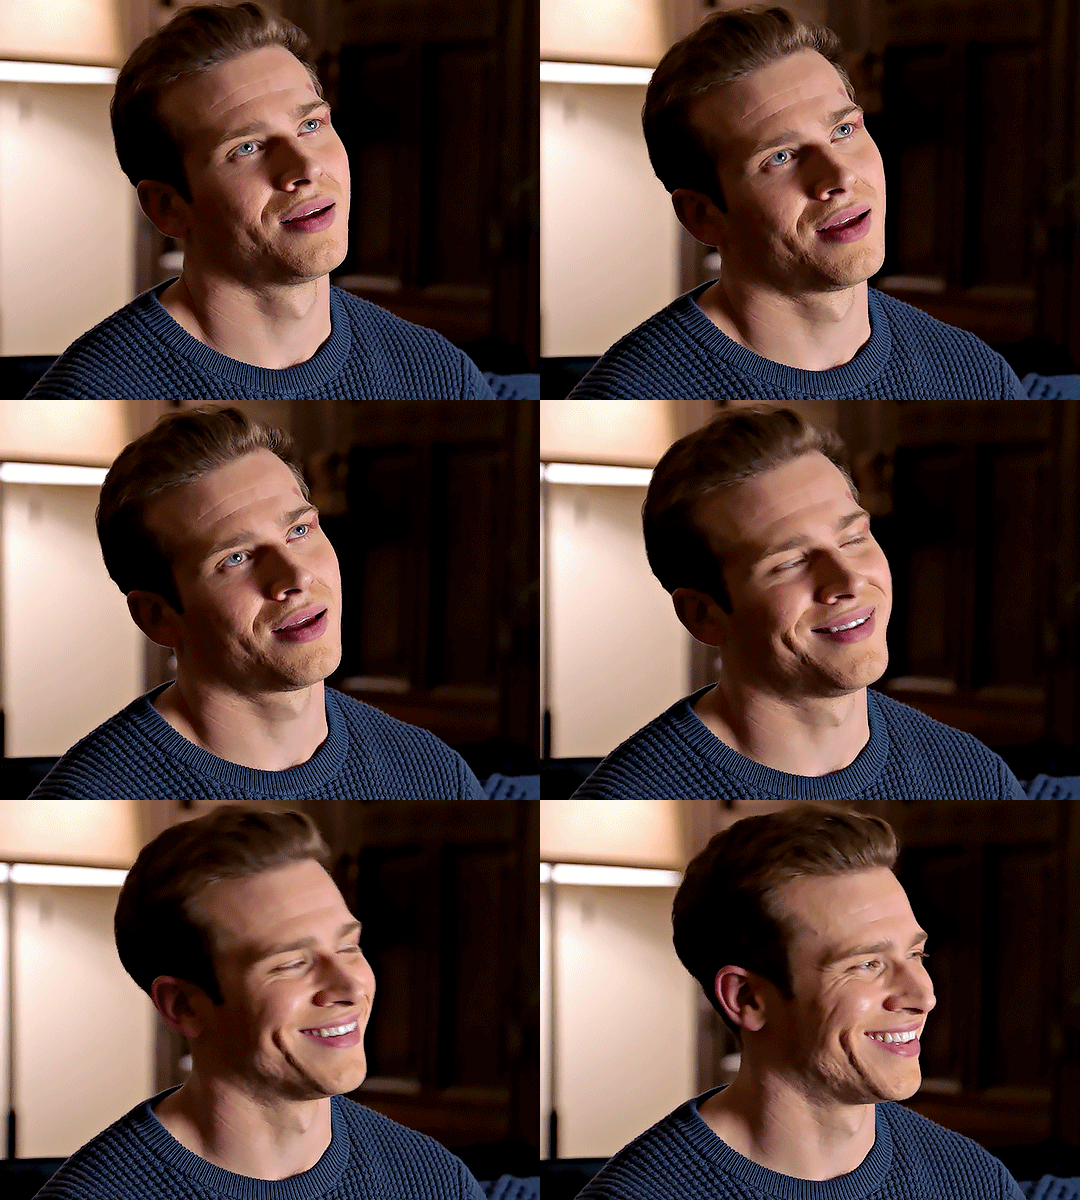
Here it is colored the way I color my gifs xD (and also slightly slowed down):
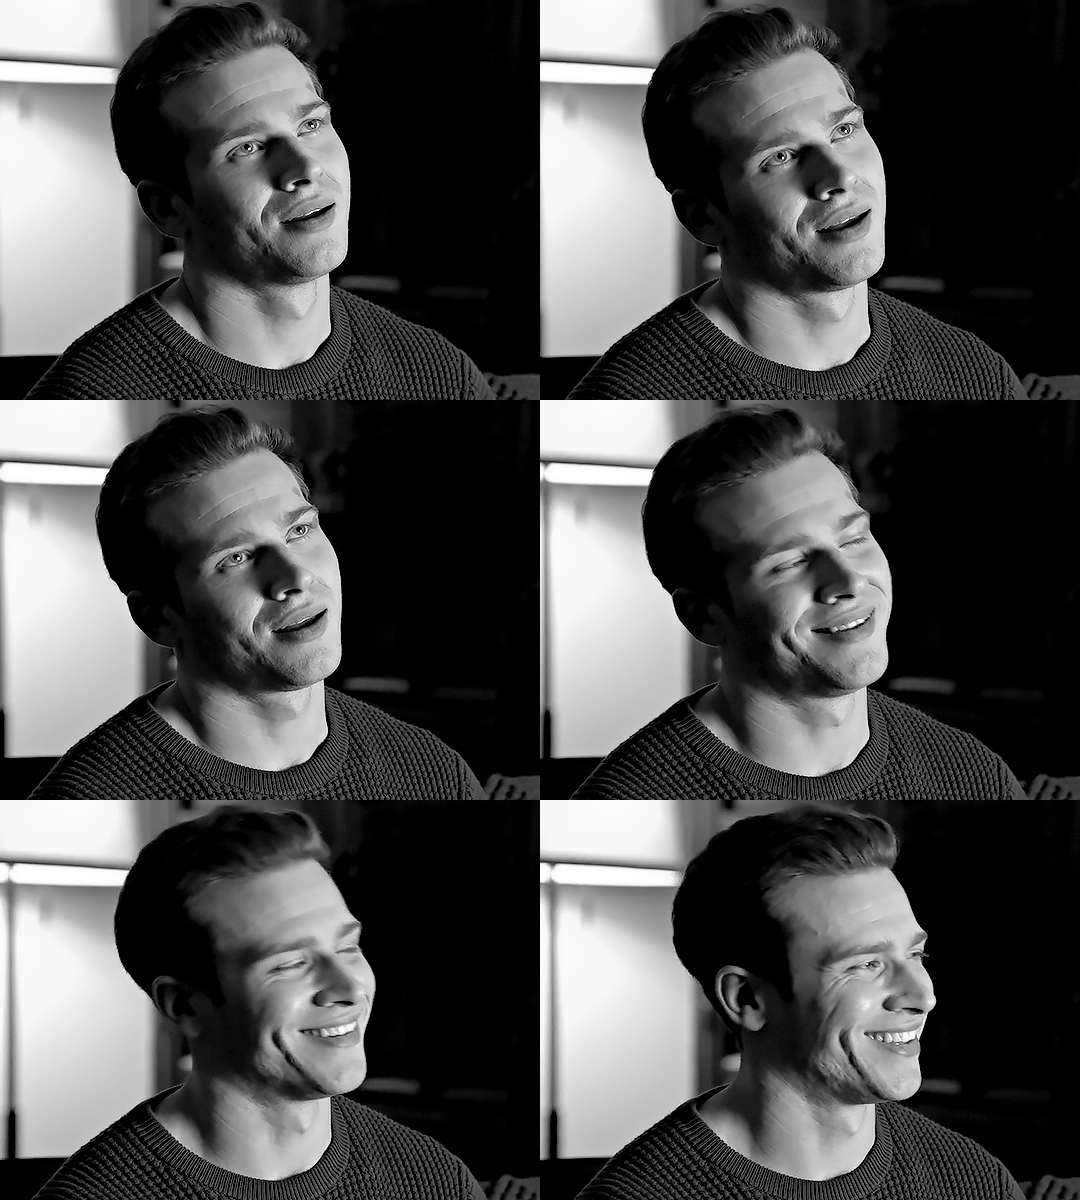
And here it is in black and white (I love black and white, too xD):
I hope this helps, Nonnie! Feel free to drop me an ask if something here doesn't make sense.
Last tips:
Don't be afraid to play around with multiple settings until you find the one that works best for you.
Make. An. Action. I can't tell you how much actions save time when I'm working because then I don't have to remember every last detail. The first few times, just get in practice of doing it yourself, but after that, actions are amazing. Some people on tumblr have actions you can download and use, too.
Different scenes/lighting will result in different outcomes of your sharpening, so you might have to play around with it. Sometimes, I add an extra Smart Sharpen layer to that bottom layer to help clarify some of the details, and other times, I just change the existing settings to fit the scenes.
Sharpening tends to be a personal preference thing, so just play around with all the settings until you find one that works best for you.
Happy giffing!
303 notes
·
View notes
Text

hello! an anon asked me to do a tutorial on how i do my gifs, so here is my attempt to do that but i'm so bad at explaining so bear with me
this tutorial is image heavy!
vapoursynth
i think it's good to first off all mention that i use vapoursynth to resize my gifs and for like the 'first part' of sharpening. i've learned how to use vapoursynth from this tutorial if you're intrested in using it (the tutorial also explains how to set it up). with time i've started using different sharpening settings than the ones that are mentioned in the tutorial (these are my usual settings). also you can download vapoursynth from here
i use photoshop 22 to make my gifs
i'll start with th very basics of my gif proces, so if you know the basics of gif making, you can skip these few steps.
first of all you go to file>import>video frames to layers
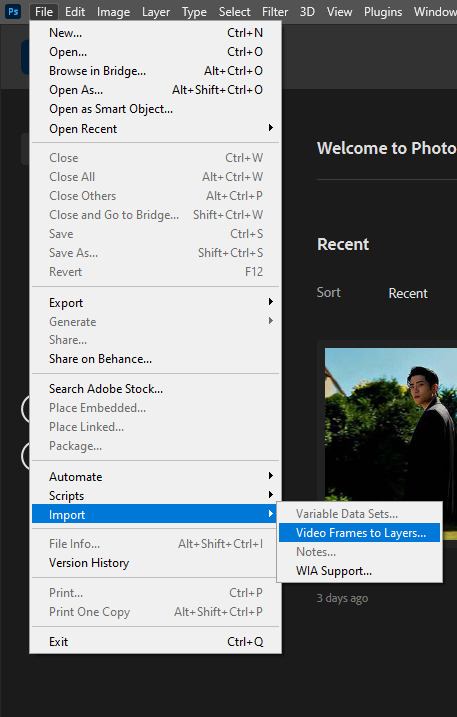
once you choose the video, a box will pop out (if you've chosen a video that has been encoded in vapoursynth you can just click OK if you're uploading a downloaded youtube video you'll haev to trim the video with those two slides to your desired length)
i use the timeline to do my gifs (if you don't have it already opened go to window>timeline)
once your video is loaded, choose the amount of frames you want in your gif and then delete the unnecessary ones, to delete them choose the linear menu and then delete frames

after deleting the unnecessary frames choose that menu and this time choose select all frames

once the layers are selected, click on the little chevron down to set the delay of the gifs. i choose other on the pop out menu and my delay setting is 0,04s

afterwards convert it to video timeline

so that's basically it, afterwards i do my sharpening and coloring so if your intrested in that keep reading!
sharpening
select all your layers (hold shift and then scroll to the last layer that is visible, it has the little eye next to it, and the delete the ones you don't need)
then go to filter>convert to smart filters

go to filter again, then select sharpen>smart sharpen
these are my first sharpening settings

then i add another smart sharpen filter but this time i set all the settings to 10.
i also add high pass and sometines noise, but only to high quality, close-up scenes from mvs. in other cases those settings may ruin the quality of the gifs
to add high pass go to filter>other>high pass, i set it to 3,0, the right click on high pass in your layer panel and choose edit smart filter blending options. a window will pop out, in mode choose soft light

for noise go to filter>noise>add noise. i set the amount to 0,75
then duplicate that layer (either click ctrl+j or go to layer>duplicate layer) and go to filter>blur>gaussian blur and set radius to 1,0. then set the opacity of the layer to 15%. using gaussian blur basically softens the sharpening a bit
coloring
my usual cooring is very basic. it usually contains levels>hue/saturation>brightness/contrast>vibrance
if your intrested in a more detailed description of my colorings feel free to ask!
saving
to save your gif go to file>export>save for web (legacy)
this are my saving usual settings

122 notes
·
View notes