Statistics
We looked inside some of the posts by doxepinz and here's what we found interesting.
Average Info
Notes Per Post
58K
Likes Per Post
35K
Reblog Per Post
23K
Reply Per Post
142
Time Between Posts
4 days ago
Number of Posts By Type
Text
13
Note
4
Last Seen Tumblr Blogs


Fun Fact
Tumblr was named as a finalist in Lead411’s New York City Hot 125 in Aug 2010.
Text
So you wanna make cc?
Here's some helpful tutorials. BUT its highly suggested you start off with the donut tutorial or something similar otherwise nothing in blender will make any sense and you will be lost.
Now go make weird shit 💜 (but try to keep it low poly, sims is old 😅)
more links under the cut
youtube
youtube
youtube
youtube
317 notes
·
View notes
Text

Fit check B) I love Monster Hunter if anyone wants to play comment your Hunter ID !! 🩷
2 notes
·
View notes
Text
Please help if you can
please read! urgent
hey everyone, i need to ask for your attention to read this message because it’s really important and urgent. something has happened in my life that’s put me in a very tough spot, and i’m now in a position where i could be facing a really bad situation and potentially end up homeless. i’m honestly devastated and really struggling with this, and while i don’t want to go into specifics just yet because it’s all very raw for me, i’m reaching out for help. i need support more than ever right now so i can secure a safe and stable environment for myself. if anyone is able to help, i’d be incredibly grateful. even the smallest amount will make a huge difference. i’ve set up donation tiers on my patreon, but if you’d rather not use that platform, feel free to message me directly and i can provide other options for donations. please know that anything, no matter how small, will help me through this difficult time. thank you so much to anyone who can support me – it truly means the world to me right now
patreon link
link to all of my socials
150 notes
·
View notes
Text
Inlove with the Lala Brina armor from the new monster Hunter game 🩷 I’ll show pics when I slay the monster ofc if anyone wants to see :3
0 notes
Text
The fact I have so much cute building CC but can’t build for the life of me is something I’ll never get over 😞
2 notes
·
View notes
Note
BEAUTIFUL PERSON AWARD! Once you are given this award you're supposed to paste it in the asks of 8 people who deserve it. If you break the chain nothing happens, but it's sweet to know someone thinks you're beautiful inside and out 🌈

Thank you hun 🥺
0 notes
Text
I wanna do the couple valentine day challenge but my two girls aren’t even a sim yet ):
1 note
·
View note
Text
Wanna play The Sims 1 or The Sims 2 for free? Here you go!
The Sims 1 Starter Pack
The Starter Pack is an all-in-one source for obtaining, installing, and optimizing TS1 on modern hardware.
The Sims 2 Starter Pack
NSIS-based installer for installing & optimizing The Sims 2 Ultimate Collection. Provides the full Ultimate Collection (free Origin version from 2014 with all packs/updates) and bonus content, including fixes needed for modern systems.
10K notes
·
View notes
Text
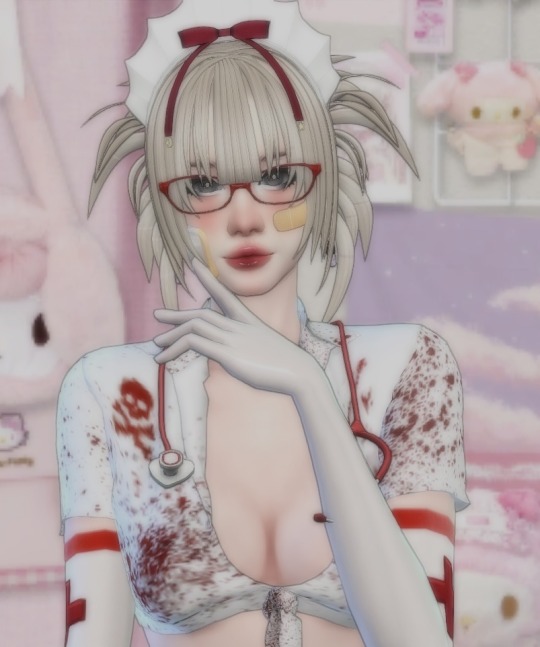
So cute 😫
. ݁₊ ⊹ . ݁˖ . ݁. ݁₊ ⊹ . ݁˖ . ݁ ౨ৎ . ݁₊ ⊹ . ݁˖ . ݁. ݁₊ ⊹ . ݁˖ .
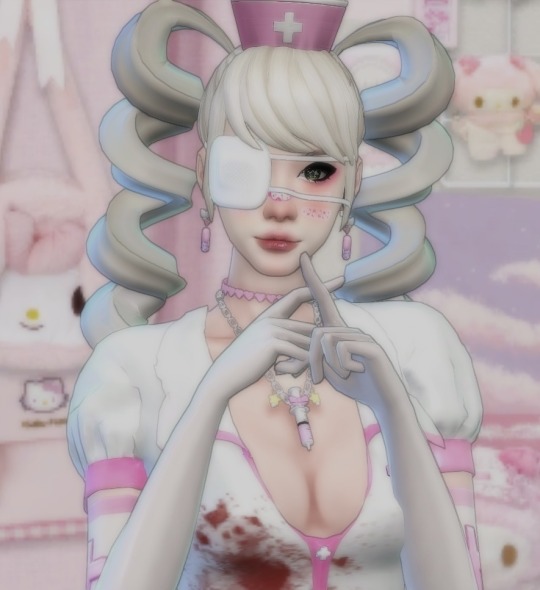
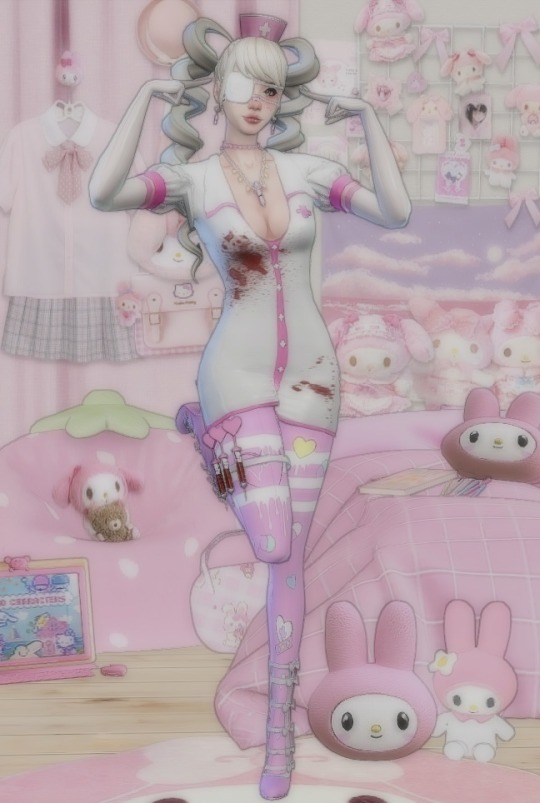
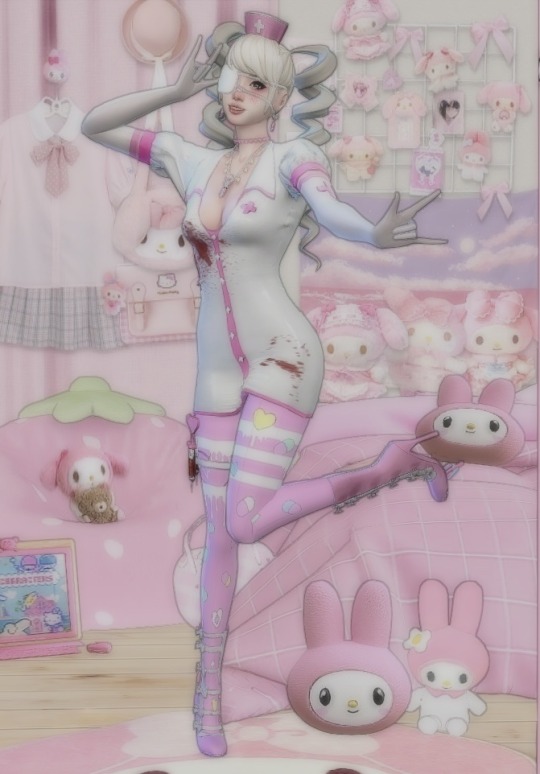
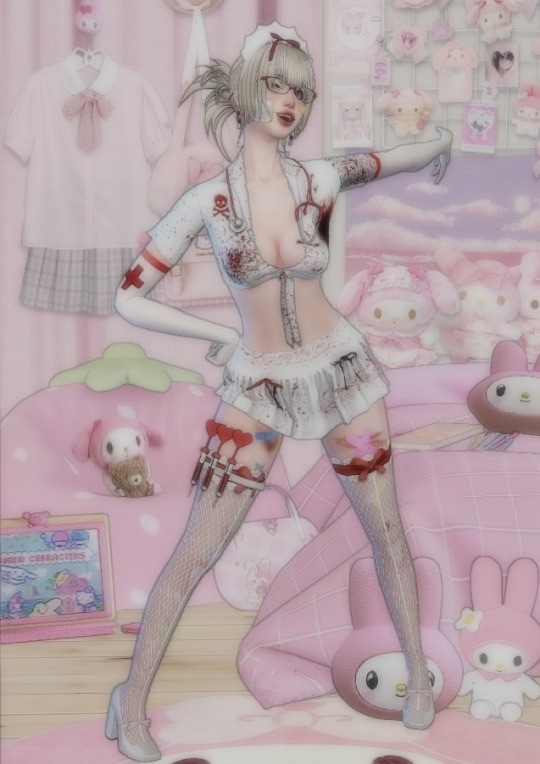
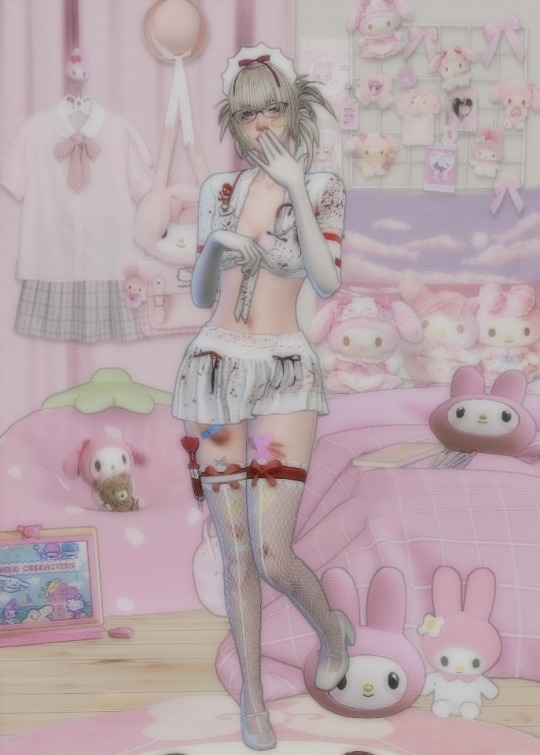
···········⋆ ˚。⋆୨୧˚ nurse outfits ˚୨୧⋆。˚ ⋆···········
⇩ cc used ⇩(If I missed anything feel free to ask)
outfit#1: │ eyes+eyeshadow+liner │ blush │ lipstick │ face bandages │ earrings │ hair │ glasses │ headband │ stethoscope+garter+gloves │ top+skirt │ stockings │ shoes │ (leg bandaids are @doxepinz ouchie bandaids)
outfit#2: │ eyes │ eyeliner │ blush │ lipstick │ necklace │ earrings │ dress+hat+gloves+garter │ tights │ shoes │
poses: @nsves anime poses ♡ thank you to all creators ♡ ····················································
65 notes
·
View notes
Note
Thank you for the little things you do for the community and make it so cute and special 💕 have an amazing day!
Tysm Anon this means a lot especially since I haven’t been very active in the community and sims in general. I just lose motivation when I see my posts don’t get a lot of likes makes me feel like people don’t enjoy my content 😞.
1 note
·
View note
Text
it’s funny seeing ea creators say now free like i didn’t have that shit for a month already *laughs in 🏴☠️*
9 notes
·
View notes
Note
BEAUTIFUL PERSON AWARD! Once you are given this award you're supposed to paste it in the asks of 8 people who deserve it. If you break the chain nothing happens, but it's sweet to know someone thinks you're beautiful inside and out 🌈
Tysm! I appreciate it 🥺
1 note
·
View note
Text
Hey here's some free Sims games. Don't pay for digital media in this economy.
Sims 1
Sims 2
Sims 3
Sims 4
Here is also all non-PC sims games. As well as links to a variety of emulators:
PS2
PS3
XBOX
XBOX 360
PSP
DS
Wii
GameCube
Game Boy Advance/Other emulator
25K notes
·
View notes
Text
“Unable to reblog this post.” tch… i didnt think it was that good of a post anyways…

22K notes
·
View notes
Text
I really wanna stream more Stardew and maybe Sims but it causes so much anxiety and like I don’t talk much because I’m so quiet and I feel like people wouldn’t wanna watch it ): I’d probably just play music fr
0 notes
Note
Hi! I was wondering how you did the pink glow effect on your halo render in blender a week or so ago. Ty!

Hopefully, you're asking for eevee because thats what I use for my renders!
On the object you want to have the glowing outline, do this:
Add a material! On top should be the glow. On the bottom should be the base material.
On the glow material, you can adjust the base and emission color to whatever you want. Enable Backface culling.
Change the emission strength to whatever, I normally do 10.5.
Then add the Solidify modifier. Flip the normals and change the material offset to however many mats you have. Finally, adjust the thickness until it's where you want it.
If your glow isn't glowing enough, adjust the bloom settings. Here are the ones I used for that particular render of Azra:

You can also use this for outlines :3

10 notes
·
View notes