Text
happy 600 followers ^_^ i decided to close this blog, so ill see you! have blessed days forever ♡
6 notes
·
View notes
Text
this is your random reminder to CHECK IF YOU'RE STILL HAVING FUN
are you enjoying scrolling tumblr? watching youtube? reading that book? playing that game? drawing that art? doing that activity? if not,
YOU CAN STOP AND DO SOMETHING ELSE
you don't have to stick to something that you are doing for fun if it isn't fun for you anymore. You can come back! If you've loved it before you are likely to love it again! but you can stop!
Don't get stuck in a loop of doing something that you think should be fun when it isn't! You can put it down for a bit! Maybe that's the very thing that will make it fun again later!
62K notes
·
View notes
Text

♪ __ __ 謝ったって、 ベーだ! もう死んじゃってどうぞ ✦

hi, im luella / arie !! i was inactive for quite a bit but now im finally deciding to revive this blog forrealsies! i do #editblr things such as graphics, carrd/sntry along with art + selfship things! i also wanna make buncha new mutuals! ^_^ don't b afraid 2 say hai !! :3 i also do doodle rqs and graphic rqs, both of which r open !

taglist : (unfortunately i do not have this yet.. )
75 notes
·
View notes
Note
hello!! wanted to ask, how are you making pixels? i want to make one but idk how to make the picture move in different angles, is there any website you used for this? (✿^‿^)
haii i already made a tutorial of this here - https://www.tumblr.com/chichirid/769741361590190080/sorry-if-this-was-has-been-asked-b4-but-how-did
but ill make another more in depth. this is kinda a general photopea tutorial *^_^* below the cut! (for windows laptop)

so first of all make your pixel 30x30 using photopea, like this image below

20x20 is the traditional pixel sizing, but i prefer to use 30x30 because i feel it gives a better quality product with only 10px difference. next, rotate it in photopea by clicking ctrl , alt , and T all at the same time on your keyboard.
next, ctrl and C to copy it to your clipboard. you can just ctrl and V to paste it, and it automatically deselects the image and pastes it onto a new layer. click ctrl , alt , and T again. this time move your mouse to the corner of the image to rotate it. you should get a black arrow around the side, which will rotate it to the right if you move your mouse downwards, or to the left if you move your mouse upwards.
you can also make the image bigger by placing your mouse directly on the sides of the blue cube. i drew what the arrow will look like bc my snipping tool didnt want to screenshot it... it doesnt matter if the arrow is upwards, sidewards, or diagonal (like i drew) unless you have complex settings (ill talk abt this later) so dont worry about it ^_^
dragging outwards towards the grey menu will make the image bigger, or dragging inwards towards the centre of the image will make it smaller. the bigger the change in image size, the more it will "pop" out once you animate it.


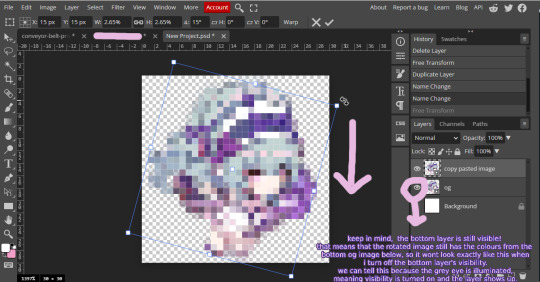


these are the basic ways to move an image in photopea! now ill talk about some more in depth ways of moving an image.
so when you first open a file, the menu up the top will be for the tool you have selected. ie, these are the settings shown at the top when i first open a file. this isnt the image settings. this is the settings for the brush tool, because this is the tool i have selected.

you can tell which tool is selected by looking at the side tool bar going downwards on the left of the screen. to get image settings, select the image by ctrl , alt , and T all at the same time.

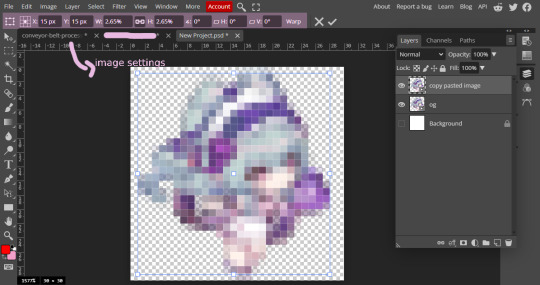


you can use these tools to directly and specifically edit your image sizing. ie by directly inputting an angle to rotate to using the angle tool. to do this click on the digit shown in the box (zero) and then type in a value. you can do the same with the pixels, and percentages.
then combine your frames in ezgif using this tool -> https://ezgif.com/maker
to save your images, click the "file" in the top left , where the tool selection and tool settings meet. then click "export as" , and finally png.
im tired so im gonna leave the tutorial at this! hope this helped

5 notes
·
View notes
Text
tmi i didnt wanna share in the og post but i just lost my passion for editing... its been slowly fading out since my slump last yr... & combined with all my school work + other responsibilities i dont have time either ... the software development course i joined earlier (maybe i already talked abt it? 🤔) completely killed what was left of my motivation & passion seeing everyone ahead of me without any real soul in their work... once again feels like i put so much effort just to be mid compared to ai bros and mindless tutorials copy pasted everywhere (ᵕ•_•)


i m gonna close requests for a while and ill probably do the hakos baelz stamps request but other than that sorry to all requesters i just really cant find the motivation to edit / write... (qiqi fallen)

2 notes
·
View notes
Text

i m gonna close requests for a while and ill probably do the hakos baelz stamps request but other than that sorry to all requesters i just really cant find the motivation to edit / write... (qiqi fallen)

2 notes
·
View notes
Text
sometimes you need dialogue tags and don't want to use the same four


156K notes
·
View notes
Note
can i request menhera chan renders ??
hii posted here! thanks for the request and im sorry for the wait.. ><
0 notes
Text


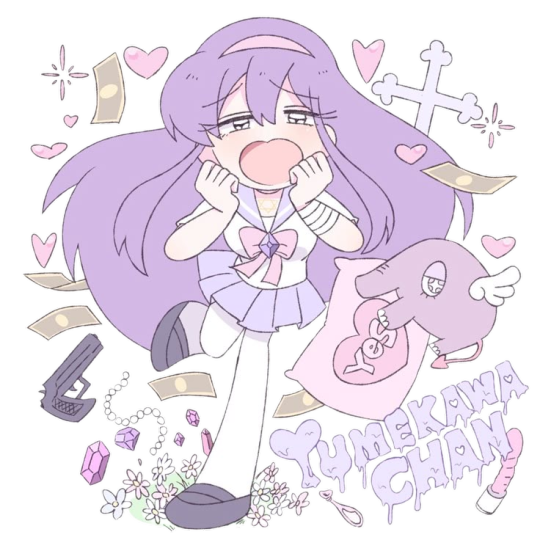


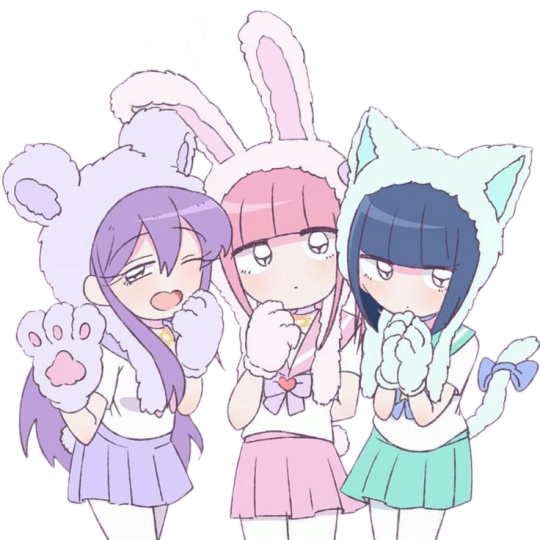


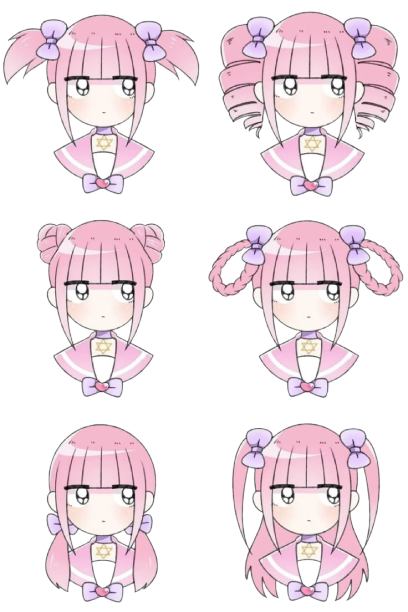

menhera chan renders
#menhera#menhera chan#yamikawaii#sabukaru chan#yumekawa chan#wrist cut warriors#ezaki bisuko#png#pngs#renders#render#transparent png#transparent#icons#png icons#himeko odakura#momoka sakurai#sumire kurauchi#wrist cut transformation#tw sh#tw self harm
23 notes
·
View notes
Text
i did try one time to start a rentry hoard with an irl but it fell apart horribly bc we werent really experienced with editing (think baby 2023 orchid) and we had a falling out so that was .. awkward..

i would luv to join one of those multi-editor blogs... bc i dont really have that much time to edit all by myself now so i feel it would be easier to manage... but i dont really talk to anyone on editblr.LOL.. i can do npts and pixels/blinkies... just dm me 🙋🙋🙋

3 notes
·
View notes
Text

i would luv to join one of those multi-editor blogs... bc i dont really have that much time to edit all by myself now so i feel it would be easier to manage... but i dont really talk to anyone on editblr.LOL.. i can do npts and pixels/blinkies... just dm me 🙋🙋🙋

3 notes
·
View notes
Text
I'm so scared to losing my family 💔💔🥺
✅ Vetted by @90-ghost -vetted link


For all kidness people and humanity please consider me as your sister that need a shelter for her husband and baby.
My baby is too little for this bad suffering.
All I need from you is to help us by donating with a little amount of money and if you can't you can share at least 🙏🙏🙏🙏🚨🚨🚨
The money for evacuation is:
$5000 for me
$5000 for my husband
$2500 for my baby
All remaining funds will go to affording Adam’s surgery and helping us survive until we find jobs and start our new life.
You can donate here
13K notes
·
View notes
