Lyyli/Astrid - 22 - she/they - ace Amateur Costumes and Cosplay Photos sometimes, mostly reblogs. I post more photos on my Instagram @blacksheepcostumes Main: @blacksheepbahh
Don't wanna be here? Send us removal request.
Photo

Long Hooded Cloak Pattern {FREE}
This long hooded cloak pattern is easy to follow and is perfectly priced at free! It’s easy to sew up ( honestly the longest part is assembling the pattern). It has a couple of different lengths and is sure to add a little drama to any costume.
Tutorial by: Fleecefun.com Tutorial Link: https://www.fleecefun.com/long-hooded-cloak-pattern-free.html
1K notes
·
View notes
Video
youtube
Make Your Own Deadpool Costume! - Homemade How-to!
Are all the voices in your head telling you to find a Deadpool costume and go get some chimichangas and tacos? Well you don’t need to spend a lot of money for to look like the merc with a mouth. We’ll show you how!
Tutorial by: CineFix Tutorial Link: https://www.youtube.com/watch?v=zEfnMG50pCc
180 notes
·
View notes
Photo
This is a cool idea for muscle suits in general!
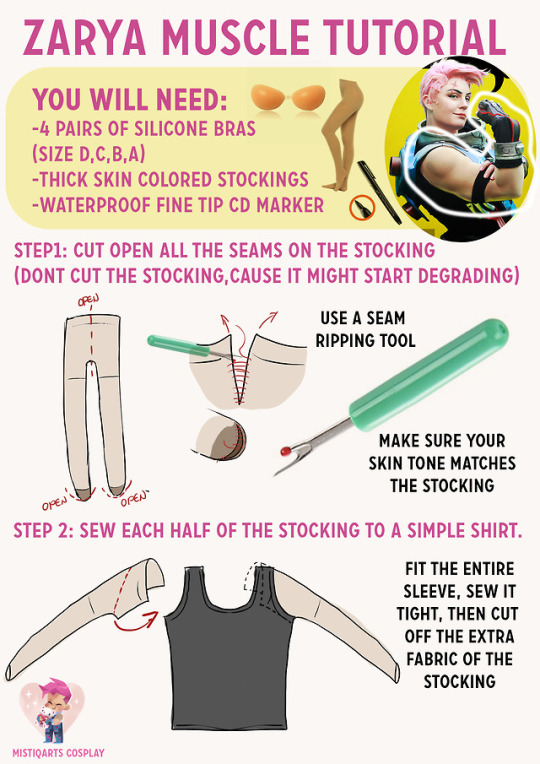
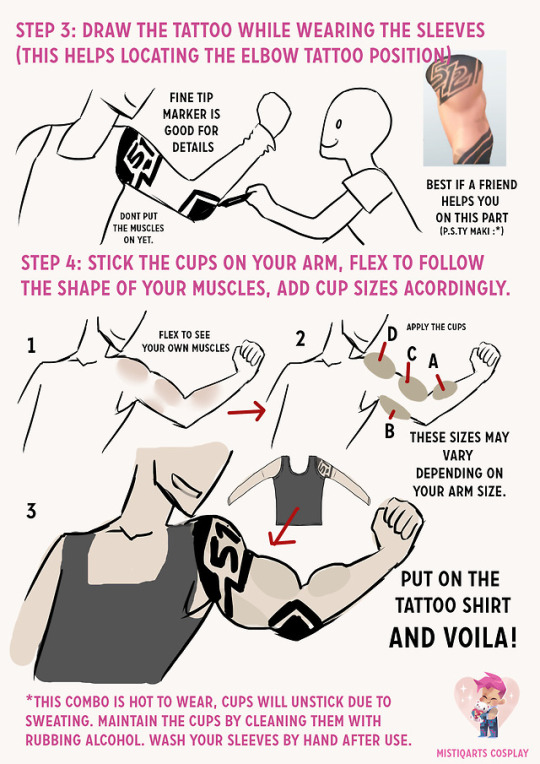
Hello loveys, a lot of ppl asked for Zarya cosplay tutorial so here it is! As seen on VIDEO: https://www.youtube.com/watch?v=72usSTAKZy0
3K notes
·
View notes
Text
This is super helpful! I'm planning to repaint the shoes on my spider suit and I think this will work a lot better than the spray paint did (it cracked like crazy).
Flexible Paint Test
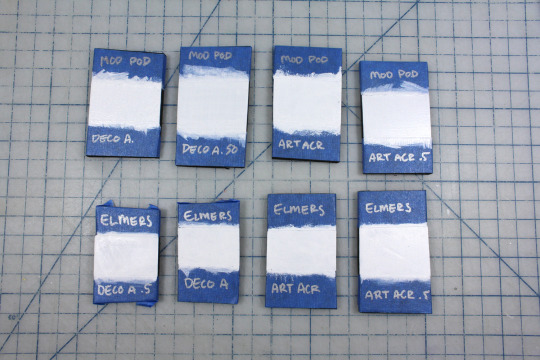
I need to do some detailing on S76′s boots, but boots are meant for walking go on feet. Feet bend, flex, run into stuff, and are generally rough on shoes. Hence whatever I use needs to be durable AND flexible. It’s not worth ordering another can of Plastidip, so I want to make my own flexible paint. A quick Google search reveals a couple strategies such as mixing acrylic paint with various substances. Since I have the materials on hand, I tried mixing paint with PVA glue to get a colorful substance capable of flexing without crazing or cracking. Read on to see the results!
Keep reading
241 notes
·
View notes
Text
Interview: Chloé
Today we’re joined by Chloé, who also goes by Chloek3. Chloé is a phenomenal cosplayer who specializes in cosplaying video game characters. She is incredibly enthusiastic and absolutely loves her art, as you’ll soon read. My thanks to her for taking the time to participate in this interview.

Photo taken by Emykitteh, Art & Cosplay (https://www.facebook.com/emykitteh.cosplay/?fref=ts)
WORK
Please, tell us about your art.
I am a cosplayer. I cosplay mainly characters from video games. I’ve been cosplaying since 2014, making one cosplay a year. So far, I have cosplayed Link and Sheik from The Legend of Zelda/ Super Smash Bros, Levy from Fairy Tail, and Henry from Fire Emblem. My next cosplays are going to be Kaden from Fire Emblem and Dead Hand from The Legend of Zelda. I cosplay for fun and have no intention of making a living out of it.
What inspires you?
I get my inspiration from the games/shows I cosplay from! When I enjoy a character and its design, I get the urge to cosplay it. Then I make plans to do it. I also get a lot of motivation from the cosplay community and the fandoms.
What got you interested in your field? Have you always wanted to be an artist?
I’ve always gotten very excited about Halloween, sometimes planning two or three costumes a year for the different Halloween events. At one point I saw a cosplay of Link on the internet and really wanted to dress as him for Halloween. While I was volunteering at a Help Center, I saw some green fabric and fingerless brown gloves and thought: ‘That’s it, I’m making this costume!“ A few years later I heard about anime/comic conventions and asked a friend if she wanted to come to one with me and make matching cosplays. She said yes but I ended up making my cosplay and going to the convention alone. I still had a blast and I’ve been going every year since then.

Photo taken by Emykitteh, Art & Cosplay (https://www.facebook.com/emykitteh.cosplay/?fref=ts)
Do you have any kind of special or unique signature, symbol, or feature you include in your work that you’d be willing to reveal?
I always include a lot of hot glue and love, but I doubt that counts as a special feature, haha!
What advice would you give young aspiring artists?
Have fun with your art! I had no knowledge in arts and crafts when I started making my own costumes. I was absolutely not prepared to make a costume, but I did it anyway because I loved the character. I had fun and as long as you have fun, that is all that really matters. Don’t let anyone tell you that you shouldn’t cosplay for any reason. Creating is so gratifying, don’t let them take that from you.

Photo taken by Yadonashi (https://www.facebook.com/yadonashi/?fref=ts)
ASEXUALITY
Where on the spectrum do you identify?
I am asexual. I don’t really know about my romantic orientation, but I do not feel the need to label it.
Have you encountered any kind of ace prejudice or ignorance in your field? If so, how do you handle it?
I don’t really go around telling other cosplayers ’'Hey, by the way, I am asexual. How do you feel about it?” Some of my cosplayer friends know and they are pretty cool with it. The only rude thing that has been said to me related to both asexuality and cosplaying was when I was making my cosplay of Henry from Fire Emblem. I had made a post on Tumblr saying that I had just realised that this character’s costume had all the Ace Pride colours and that it somehow made me happy. Someone reblogged it and commented “When you look too deep into something’.’ That was kind of rude. Can you just let me enjoy the small things that make me happy?
How I handled it? I ignored it. Those people are not worth my time. If happy people make them unhappy, that is their problem. I’ve encountered more ignorance with people who weren’t artists than with people who were. But even then, I’d say people are usually chill about it. It’s just that a lot of people don’t know what asexuality is.
What’s the most common misconception about asexuality that you’ve encountered?
The most common misconception about asexuality that I’ve encountered is that if you’re asexual, you will not have/want sex. Asexual does not mean sex repulsed or a nonexistent libido. It simply means that I am not sexually attracted to other people. An asexual individual can decide to have sex for a variety of reasons, and they might even *gasp* enjoy it. Now, some asexual individuals decide not to have sex and that is also OK!
What advice would you give to any asexual individuals out there who might be struggling with their orientation?
You are perfectly fine, and you are not alone. What are your worries? Are you worried that you can’t live a satisfying life without sexual attraction? Because you absolutely can. Are you worried that you are going to end up alone? If you want to be in a romantic relationship, you can be! You can reach out to the asexual community for a potential partner, and a lot of allosexual people are open to having a relationship with an Ace person. Those who are not are just not worth your time. You absolutely don’t have to have sex if you don’t want to. If you don’t want to be in a romantic relationships, that is also totally OK! Your life will not be less meaningful, either way. You can achieve amazing things and impact people’s lives in the best of ways without sex or romance in your life.
Finally, where can people find out more about your work?
I have a cosplay page on Facebook. That’s where I post pretty much all things related to cosplay. It’s at Chloek3 Cosplay: https://www.facebook.com/chloek3cosplay
I am at Chloek3 on WorldCosplay: https://worldcosplay.net/member/584050
I am also on Tumblr: www.chloek3.tumblr.com But this is my personal blog where I post about anything and everything, including cosplays. If there is ever enough interest, I might make a blog only for cosplays.
I have made an Instagram not too long ago at chloek3official where I will post my Cosplays but also landscapes and dogs.

Thank you, Chloé, for participating in this interview and this project. It’s very much appreciated.
72 notes
·
View notes
Photo


More pictures of my Sera cosplay for Scarborough Faire. My wig became a mess but god I really loved being Sera!
Sera: Me Anders: @lord-darth-tantrum Photographer: IG: BryonPhotography
My IG: ch3rryshortcake
19K notes
·
View notes
Text
Vortex Manipulator Tutorial
Tutorial: Captain Jack Harkness’s Vortex Manipulator
Since I did a few posts on my fem Jack Harkness cosplay recently, I figured I’d post the tutorial for the vortex manipulator. I made a pattern for it which you can find in my Etsy shop.
Materials:
brown leather or fake leather
thin craft foam
silver paint
gold paint
brown replacement watch strap (or you could make your own with more of the leather and a buckle)
clear packing tape
2 inch wide elastic
snaps
self-contained blue LED like the one shown below
Console Face
Draw out the outline of the console face and the markings on the craft foam. Don’t cut out the console face at its border. Instead, leave it as a rectangular piece slightly larger than the finished oval will be. This will make it easier to attach to the case. Score the markings on the face and cut out the two windows that will have light coming through. Heat the piece gently to accentuate the markings you scored. Cut out pieces for the buttons and glue them on. Paint the console face. Most of it is silver, with gold on the little grille area. You can also use a slightly darker silver paint to bring out some of the details. Color some clear packing tape blue with a sharpie and attach it to the back of the console face behind the windows. Even though you’ll be using a blue LED this makes the color a little more even if you don’t have the LED positioned exactly behind the windows.
Case Pieces
The case is made up of a few different pieces. The first one I’ll talk about is the one that goes directly over the console and has a window cut out of it. Cut out the window for the console to show, leaving the middle strip intact. Use a hole punch to cut out the small hole in that strip to show the light. Stitch around the edge of the console window. Fold the sides of this piece over and stitch them. As you stitch one side, tuck a smaller flap of leather into the fold and stitch that in place so that it sits behind the console window. This will help hide any light that leaks out from your LED. You also won’t see this flap in my pictures yet because I didn’t realize I needed it until later in the build. Leave the top and bottom edges unfolded, we’ll deal with them later.
You’ll also have two pieces that will go above and below the console. Fold over the sides and either the top or bottom of each of these and stitch them in place. You’ll end up with one raw edge (at the top or bottom) and three finished edges. Next, do the same thing to the flap that covers the console. Fold over the sides and the bottom and stitch them, leaving the top edge raw. If you’re using fake leather and it has a white backing, you may want to stain the back of the flap to make it less noticeable. You could also try using two layers, but it might be too thick to easily attach to the rest of the vortex manipulator.
Putting it Together
Now we’ve got most of our pieces ready to go, we can start assembling them into the finished piece.
Glue the console face to the piece with the console window, making sure everything lines up correctly.
The next thing we’ll add is the pocket for the LED that will light up the console. Take a piece of wide elastic and glue it to the back of the console to make a pocked for the LED. Glue it on three sides, with a little bit of extra room for the LED to sit. The opening should be on the same side as the flap you already stitched to the back of the console piece. This way, you can slip the LED in and out to turn it on or off or swap out the batteries. The elastic keeps the light from leaking through on three sides and the flap hides the light at the opening. Make sure the pocket is open behind the windows the light will shine through. If you glue over those the light won’t do a lot of good.
Next, we’ll attach the console face to the end pieces and the wrist strap. The strap I used was one piece, so part of it will go behind the console face. You can also use the kind of strap that comes in two pieces. I would recommend trying to find a strap that’s just one layer of leather instead of a padded one. It will make it easier to sew through all the layers here.
Fold over the bottom of the console window piece and stitch it to the top of one of the end pieces, with the watch band sandwiched between them. Make sure the watch band is centered and that you’re attaching it at a spot where there will be enough length to easily attach to your wrist. Do the same thing at the other side of the console window piece.
The last piece you need to attach is the flap. Fold over the raw edge and sew it down at the top of the console window piece. When it’s attached, you can add snaps at the bottom corners. When placing your snaps, I would recommend curving the whole piece as it would be on your wrist so that the snaps will be in the right position for when you’re wearing it.
Because the snaps I used didn’t have solid backs I cut the heads off of two thumbtacks and glued them over the snaps on the flap. Depending on what kind of snaps you use you may or may not have to do that.
This is the point where I realized I needed a flap on the back of the console to hide the light that was leaking out. Here’s a picture of the back of my vortex manipulator with that flap. It tucks nicely under the part of the strap that passes behind the console.
Finished!
The only thing left to to is turn on the LED, slip it in its pocket, and put on your new vortex manipulator.
Here are some more pictures of what mine looked like when it was done.
47 notes
·
View notes
Photo
Love this idea!!! Now all I need is space for a sewing table. 😅


I’ve mentioned this once or twice before but I want to talk about my sewing tables. My sewing tables are quite old and had dark formica tops that were cracked and damaged and used to destroy my fabrics. As a quick fix an money saver, my mom and I covered both tables in a thin layer of batting and then covered that in canvas. The result is a table you can pin directly into! (Sometimes this isn’t good because I use the whole thing as a pin cushion.) It allows me to tack down my materials if I need to do fine details and in this case it has been a life saver for these hand sewing details that need to be completely flat to avoid mistakes. It’s a quick, cheap and useful fix to a problem and I am so glad that I’ve been able to make use of it! (Also yes, I keep my pins in an old Altoids case.) Velouria is coming along and I might be able to finish her cape tonight if the scalloped edge doesn’t give me too much trouble.
110 notes
·
View notes
Photo
Please honestly I'll marry both of you


Our first ever Lewd set (General Hux, 58 photos) is available for this month’s reward on our Patreon. Or you can get it on our StoreEnvy for one-time fee at a higher price.
2K notes
·
View notes
Photo
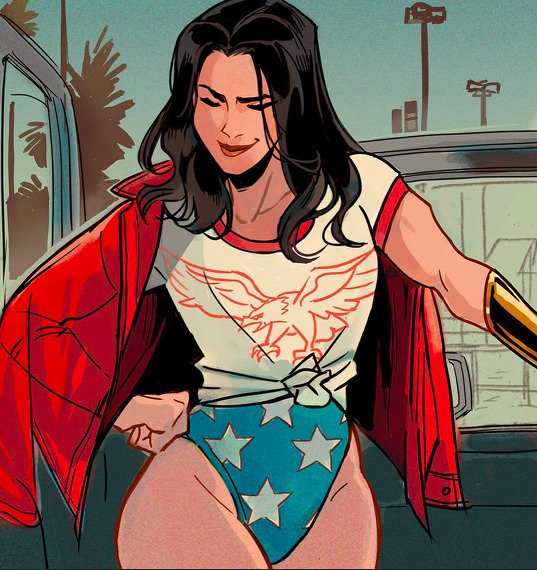


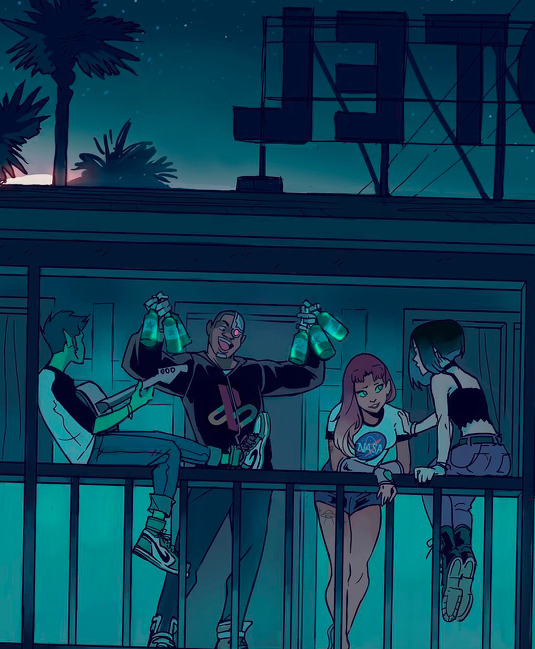

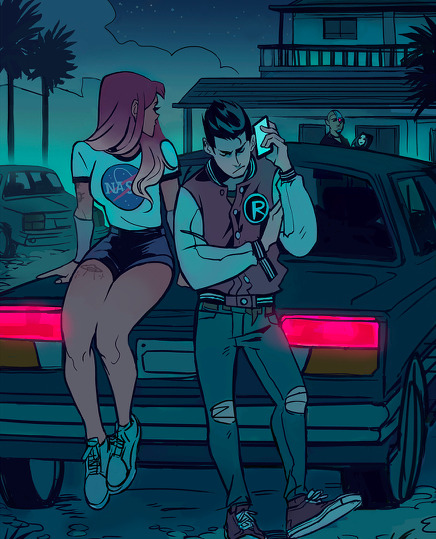
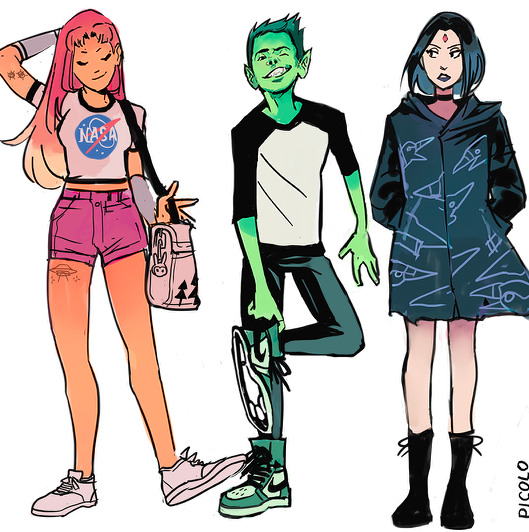
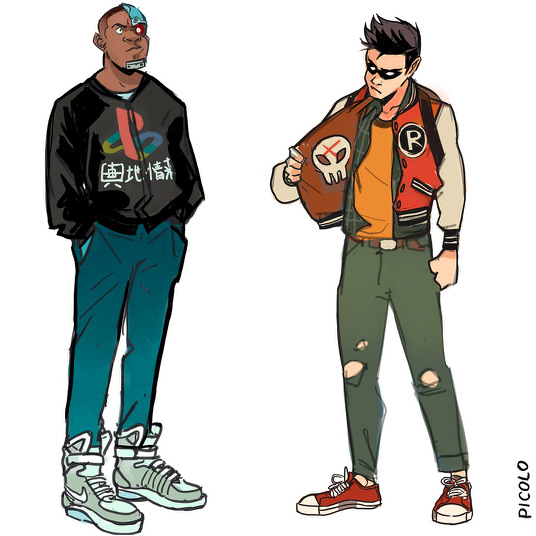
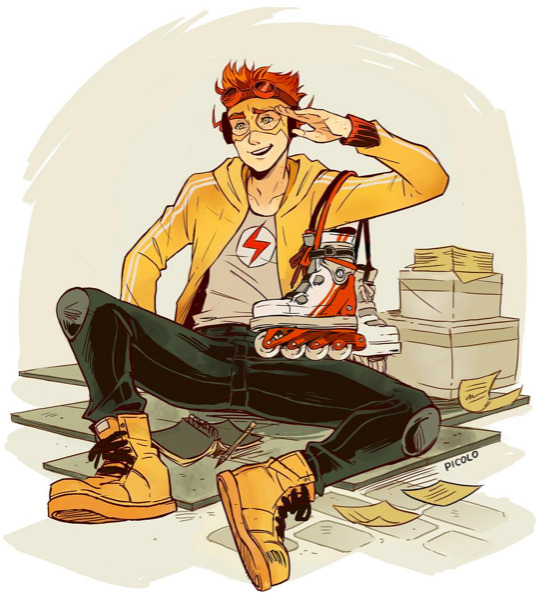

casual teen titans + wonder woman. art by picolo
232K notes
·
View notes
Photo

How to make realistic leaves with worbla.
Take small pieces of worbla and cut them in to rough leaf shape. Heat up the piece and press evenly on to the silicone mold till it takes in the motifs. Once it cools down its ready for use!
676 notes
·
View notes
Text
Sewing Needles
One thing it’s really important to remember is that not all needles are suited for all types of fabric. It can really help you out to use the right sewing needle, and keep you from potentially ruining your fabric.

Chart source: http://www.sewitworks.com/needle-guide/fabric-needle-thread/
#cosplay#tips#sewing#honestly I used to think you could sew anything with a multipurpose needle#i didnt learn until i started making my spidey suit
1K notes
·
View notes
Photo


Molding Details with Worbla Pearly Art:
A Mini-Tutorial and Review of Worbla’s New Thermoplastic
Worbla has recently added a new plastic to their lineup, and they were kind enough to send us some to play with! Pearly Art is a smooth, light-colored plastic that claims great smoothness and stretchability. I was really excited to give this a try since it sounded like a smoother version of Black Worbla, but I was surprised to find that the plastic actually handles very differently. Pearly Art is available in Europe and North America at Cosplay Supplies dot com, and will run you $91 for a Jumbo sided sheet.

Keep reading
1K notes
·
View notes
Video
youtube
“Cosplay Tutorial - How to make a cheap and cool scalemail” by Anhyra Cosplay
It’s another fake leather scale mail tutorial, but this one walks you through an exceptionally good paint job. I really though the scales actually had a ridge down the middle at first, very good.
1K notes
·
View notes
Photo


Six fingered gloves (for Ford Pines Cosplay) (could be usefull for Glossaryck too)
I’m sorry there is no really tutorial how I made these (my english is too awful and I missed to make real step by step photos), so just some progress photos, but maybe the idea is usefull for others :)
The extra trigger finger has a core from spring, cause it’s easy, flexible and safe. The gloves are made from fake leather and has little hooks and eyes between the extra finger and the real trigger finger, so it is possible to clench the fist.
To improve the haptics I replace the wool wrapper with neoprene and added sponge to the finger tips. (Some of these sponges have color and shape like Grunkles Noses!)
Few month later I adapt them to short cotton gloves cause summer kills me. For the look I glued leather and a fake fingernail on the neoprene, than added some color. (Sadly the glue makes the fingers very stiff and I should had colored them before I add the fingernail… maybe next time)

265 notes
·
View notes
Text
Hey if you’re a cosplayer and you post MOSTLY OR EXCLUSIVELY cosplay content on your blog, do me a solid and reblog this or comment. I’m looking for talented new people to follow!
89 notes
·
View notes