Upon issue, please ensure you have your Official Black Mesa Passport on your person at all times. If your passport is ever lost, damaged, stolen, or otherwise unrecoverable then you may be subject to criminal prosecution and/or execution. Your Official Black Mesa Silly Straw is no longer an acceptable alternative form of identification.
Don't wanna be here? Send us removal request.
Text
i always mean it when i say i love you btw
211K notes
·
View notes
Text
i made a tommy coolatta id for my cosplay

i used the half life fan wiki for images black mesa logo
and @black-mesa-passport-department passports for the clear image of tommy https://www.tumblr.com/black-mesa-passport-department/665623089196023808/tommy-coolatta-passport?source=share
the rest i made myself
22 notes
·
View notes
Text


@scienceteamtober day 2: passport?
this is pretty straightforward interpretation but i really wanted to do my own take on this sillay passport???
BEAUTIFUL BENRY PORTRAIT BY @perigostodick !!!! full image below. (and oh my god shout out to @black-mesa-passport-department for hlvrai passport reference. life saved forever.)

Look at him.
196 notes
·
View notes
Note
how would one go about getting a passport cover if one is doing a passport with benry's overflowng text
The one I use for my Tommy Coolatta cosplay was from Etsy. I'm sure Amazon & even some physical stores like Staples or Office Depot carry something similar. The Etsy shop I bought mine from isn't active anymore, but it looks like a bunch of shops carry the exact same foil-embossed navy passport cover! You can even personalize them if your Benny is bougie! ;) These listings look to be identical to the one I use: X X.
The nice thing about this particular cover is that the clear sleeve you slide the print-out behind has a little gap on the side that lines up
✨️perfectly✨️
with the level of the names on the passports. This was entirely a happy accident! So the floating text on the Benry passport *should* slip right through there & extend beyond the cover without modification.

However, if you have a different passport cover with a sleeve that doesn't have that open space on the side, I'd probably just razor a slit open on the edge of the clear plastic window and slide the floating text into it before taping it in place.
8 notes
·
View notes
Photo
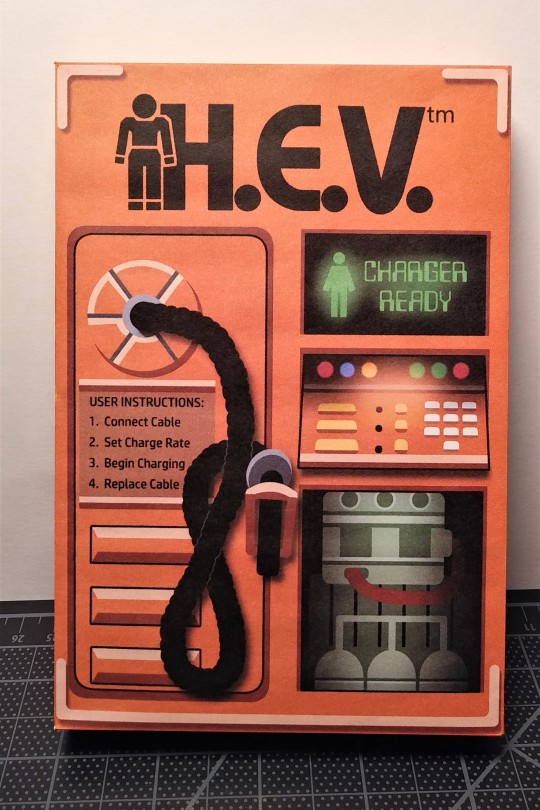
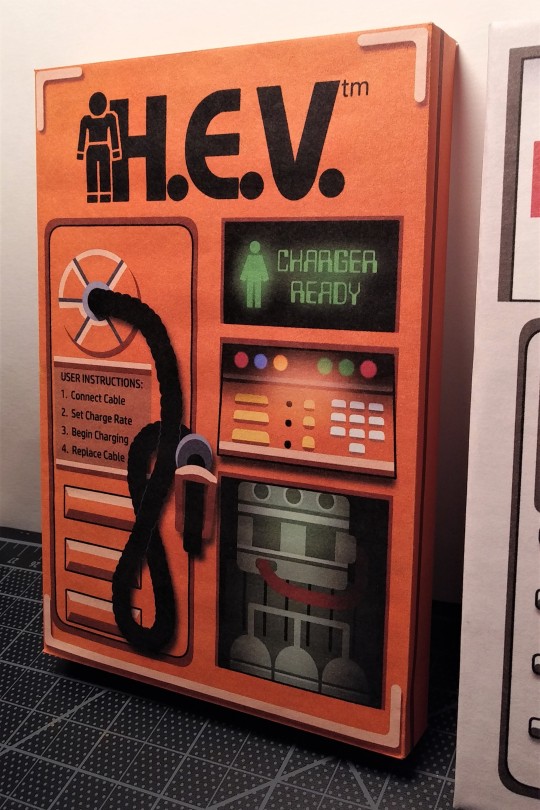
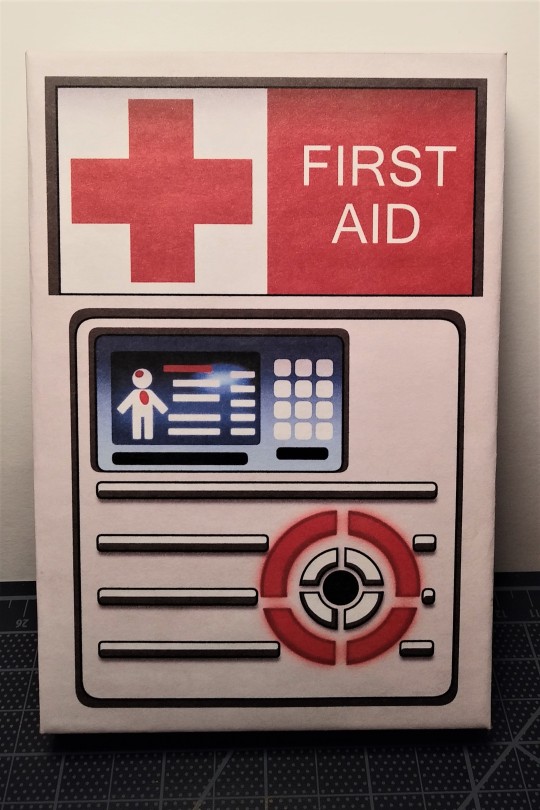
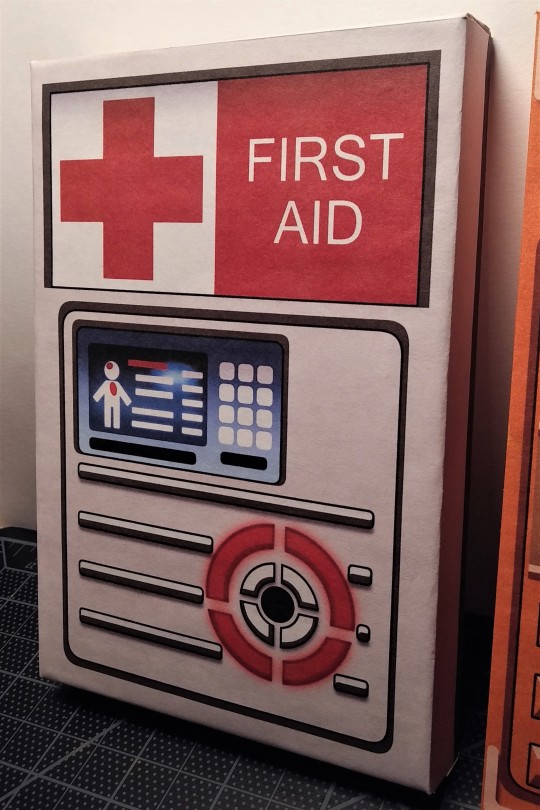

Half Life H.E.V Charger and Health Station Papercraft now in my shop!
I recreated these classic healing stations in high quality, available as png’s to print out and assemble at home!
Kofi Link: https://ko-fi.com/s/77a392eb25
#Not mine but this seems like something that folks who follow this blog may find useful!#When I get paid I’ll be grabbing these files for future cosplay set-dressing#Half Life#Herdingflowers
636 notes
·
View notes
Text
Hello [player name]! 🟢🟢🔵🔵
Welcome to the Black Mesa Passport Department & Party Center, a project with the goal of recreating the iconic passports from HLVRAI as printable props.
I’ve set out to create mostly screen-accurate versions of the passports shown in the series, and I owe a HUGE thank you to @plushmon for hooking me up with MasterGir’s original gmod passport textures (x)! I heavily based the template on those textures as well as screenshots from the series itself, and I hope you folks can get some use out of them! You’re free to edit them however you like, and I have a blank passport template in case you want to customize one for yourself or an OC!
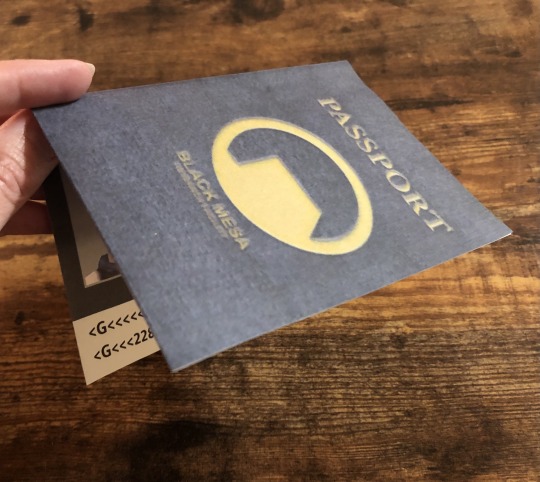

I have two versions of every passport: one with the interior pages and cover split up as separate images, and another with the cover and interior pages fused together to allow you to French-fold them into a passport. I’m calling the latter a “1-Sheet,” because you can print it out on a single sheet of paper and get a screen-accurate sized prop with just a couple folds as shown above. I also have Flickr links for all the files in each post because Tumblr decimates image quality.
Directory:
Walk-through tutorial
Blank passport: (Split) / (1-Sheet)
Gordon Freeman’s passport: (Split) / (1-Sheet)
Darnold’s passport (several versions including ones with fanon last name ‘Pepper’) ->
Dr. Darnold: (Split) / (1-Sheet)
Dr. Darnold Pepper: (Split) / (1-Sheet)
Dr. Pepper: (Split) / (1-Sheet)
Benrey’s passport (including alternatives) ->
Blank for your own text effects: (Split) / (1-Sheet)
Just Benry: (Split) / (1-Sheet)
Eldritch Edition: (Split) / (1-Sheet)
Floating Text [screen-accurate]: (Split) / (1-Sheet)
Tommy Coolatta’s passport: (Split) / (1-Sheet)
Bubby’s passport: (Split) / (1-Sheet)
Dr. Coomer’s passport: (Split) / (1-Sheet)

#HLVRAI#Half Life VR but the AI is Self Aware#HLVRAI passport#HLVRAI Cosplay#Please let me know if you have any trouble!#likewise- feel free to ask if you need clarification. I know I ramble incoherently sometimes (probably why I was drawn to cosplay as Tommy#I’m also open to requests/suggestions- I may not be able to get to them right away but I’ll try!#To those who were anticipating it- sorry this took so long to put together :(#I’d completely expected to have it done before October rolled around- how wrong I was
139 notes
·
View notes
Text
Walkthrough for making a “1-Sheet” Black Mesa Passport
Note: in the photos I’m using the ‘Benry Passport Floating Text 1-Sheet’ (x) because it takes a couple more steps to assemble than the other passports, simply because of the floating text effect. Steps 5-7 only apply to this particular version of Benrey’s passport.
1. Download or screenshot the ‘Black Mesa Passport 1-Sheet’ of your choosing from this blog (directory here). Print out on a single sheet of 8.5” x 11” printer paper or card stock. The image should take up most of the page for a fairly sceen-accurate size. [Tip: The printer option ‘scale-to-fit’ works nicely for filling the page.]
2. Trim off the unprinted margins.
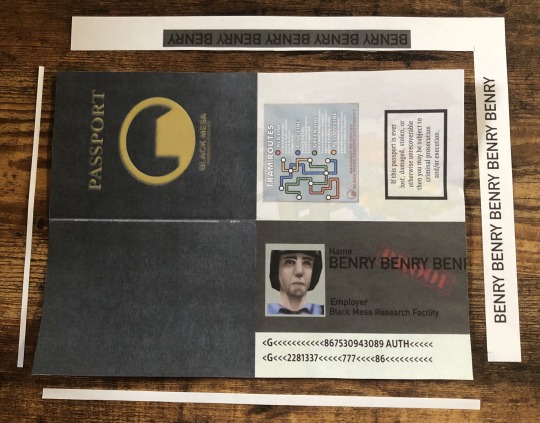
3. Fold the passport in half as shown, along the division between the cover and the interior page.
[Tip: If you want to reinforce the passport, you can cut along this same division line and sandwich the printouts around thin cardboard/card stock.]
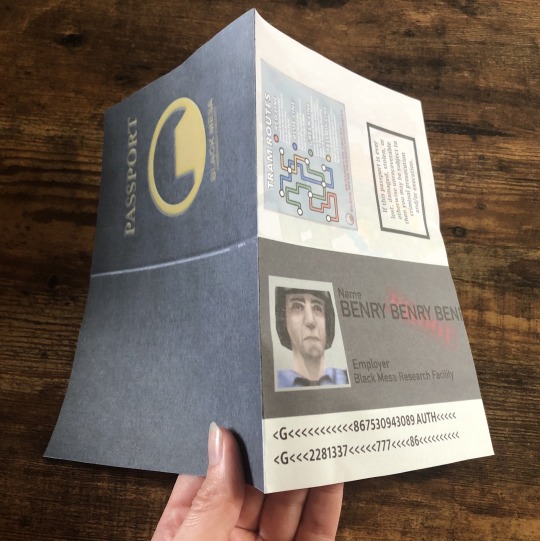

4. Next fold in half again, this time along the division between the upper & lower halves.
[Tip: If you’re using thick/reinforced paper and want to get a crisp fold, using a bone folder or letter opener to first score and then press the fold flat. Here’s a nifty video showing off the technique: (x).]
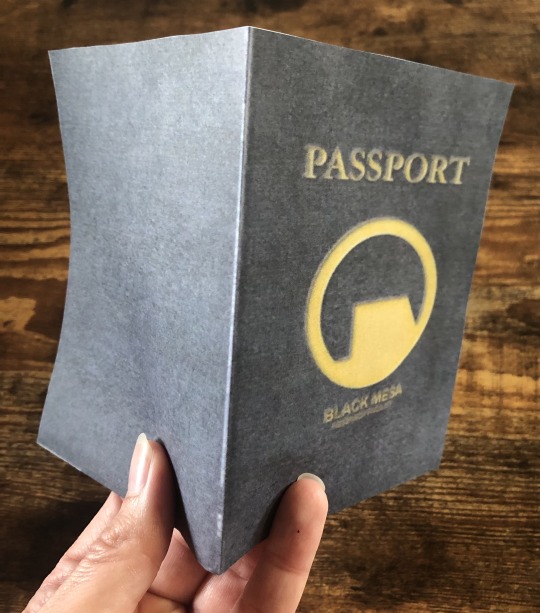

5. Steps 5-7 are only for creating the floating text effect for the Benry Floating Text passport. I made a couple versions of the floating text to suit different tastes, one that looks like an extension of the passport itself with an olive background, and another that’s just the text without a background. Cut out whichever one you want to use.
6. Place the strip of floating text directly behind the text on the passport, lining it up so all the extra BENRY’s appear to extend right off the edge. Tape/glue the floating text in place to the interior of the passport.
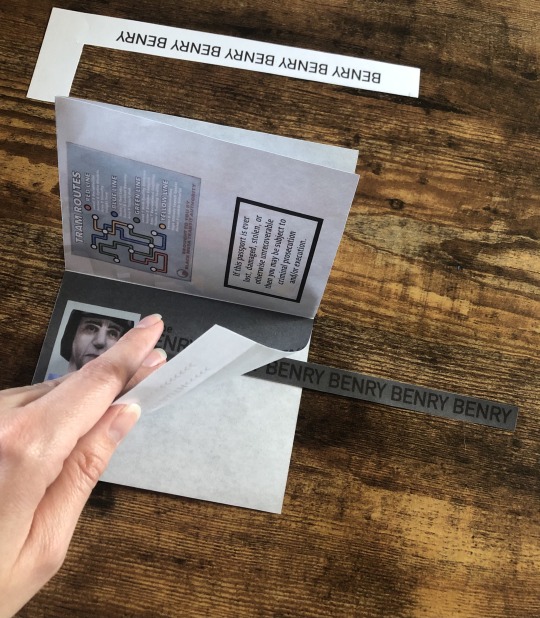
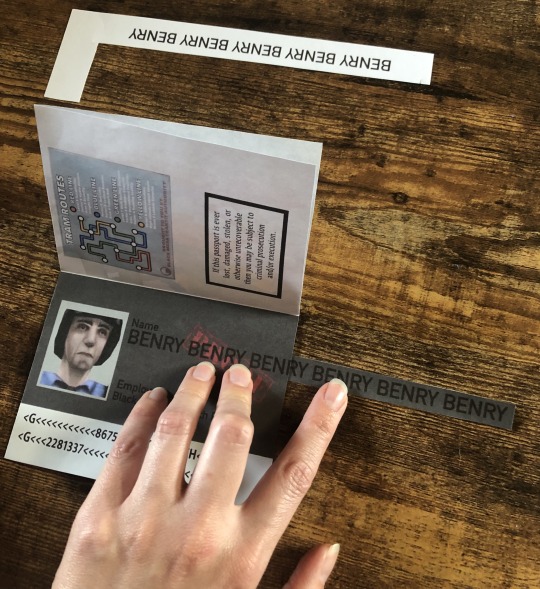
7. If you want the text to look like it’s actually floating off the page, either (A) print out a copy of the passport on a plastic transparency sheet or (B) trace over the lettering on a strip of clear plastic with a good permanent marker (bubble cases and some plastic used in package windows can be good sources of sturdy, flat clear plastic). Please be careful as the cut edges of some stiffer plastics can be sharp. Now, follow the same process as step 6, lining up the text and taping in in place to the inside of the passport.
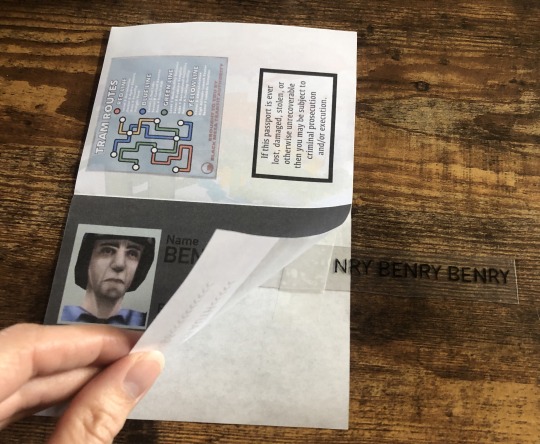

8. You could technically stop here and have a perfectly fine prop, but I’d suggest taping or gluing the open edges closed.
[Tip: double sided tape or a glue stick will work best for closing the edges as they won’t warp the paper.]
9. Trim any uneven edges.
Congratulations! Now you have your own forged (fictional) document!
#The photos use a previous draft of the passport base - I’ll probably replace them once I get the chance#I made a grevous mistake in this draft of the passport base but it’s fixed now#just keep in mind that the posted passports will have one cosmetic difference from the one used in this walkthrough#if you can spot what I screwed up on you unlock the SuperPlayer™️ Feature
45 notes
·
View notes
Text
Just throwing this out there in case anyone wants a more durable prop. When I made my first passport for a Tommy cosplay last month, I used a cheap passport cover off of Etsy and was pretty satisfied with it!

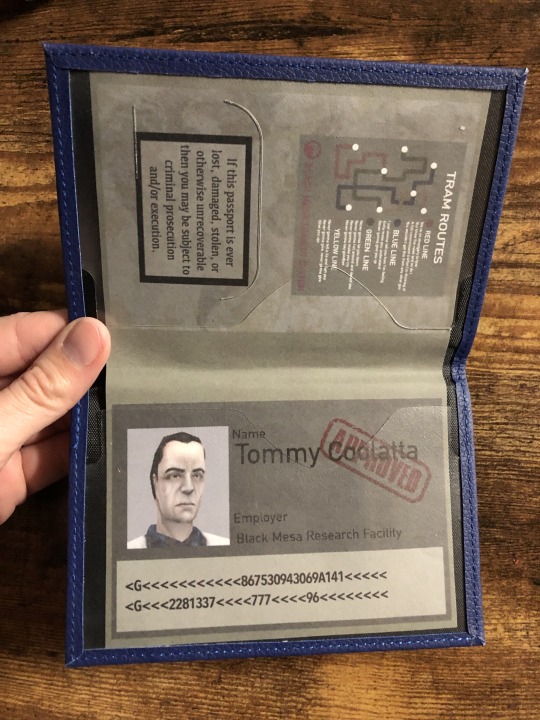
I’m not sure about some of the text on his passport so I’ll make a couple adjustments for next con (anyone know what the red stamp says on the actual model?), but I’m happier than a colony of ants in a candy factory with how the passport turned out!
#The Etsy listing isn’t active or I would have linked it#but just searching ‘Passport cover’ on Etsy brings up a bunch of options#I’m sure they can be found elsewhere for just as cheap#Since I was at a con it was also a handy stand-in wallet :)
91 notes
·
View notes
Text

When recreating the passports I wanted the graphics to be as sharp as possible, but the only image I could find for the tram routes was the blurry one off of the Black Mesa Transit System wiki page (x). I decided to remake it as best I could (right image) though I’ll admit it isn’t quite perfect. I’m providing the original (left image) in case any of you prefer it and want to edit it over my version.
1 note
·
View note
Text
Dr. Coomer Passport 1-Sheet
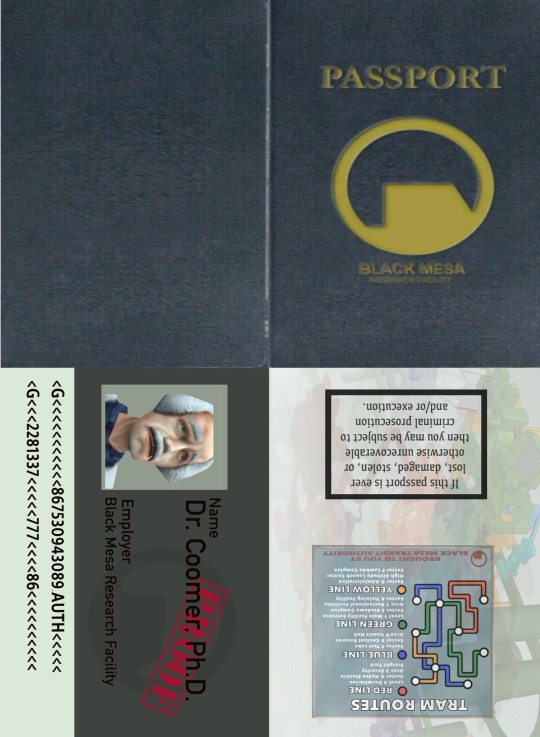
1-Sheet leveled up in HD: https://flic.kr/p/2mCQtWd
5 notes
·
View notes
Text
Dr. Coomer Passport

Interior in HOTTED HD: https://flic.kr/p/2mCPkvf

Cover in kinda-sorta HD: https://flic.kr/p/2mCQucd
0 notes
Text
Bubby Passport 1-Sheet
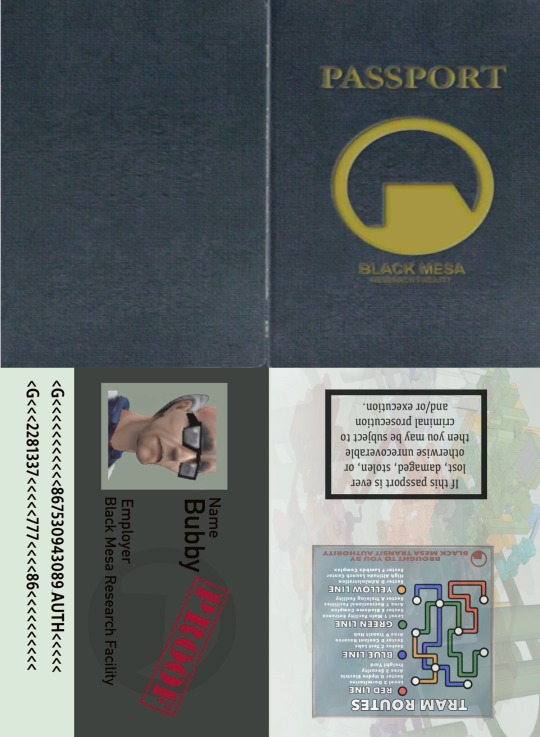
1-Sheet in lab-grown HD: https://flic.kr/p/2mCTSh1
5 notes
·
View notes
Text
Bubby Passport

Interior in alpha maleHD: https://flic.kr/p/2mCK7ab

Cover in kinda-sorta HD: https://flic.kr/p/2mCQucd
2 notes
·
View notes
Text
Tommy Coolatta Passport 1-Sheet

1-Sheet in OSHA approved HD: https://flic.kr/p/2mCSH6m
34 notes
·
View notes
Text
Tommy Coolatta Passport
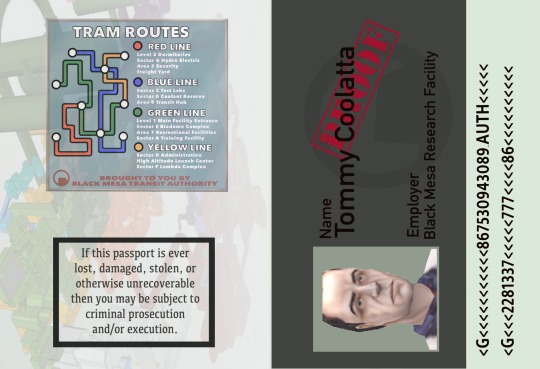
Interior in immortal HD: https://flic.kr/p/2mCTRTA

Cover in kinda-sorta HD: https://flic.kr/p/2mCQucd
4 notes
·
View notes
Text
Dr. Darnold Passport 1-Sheet
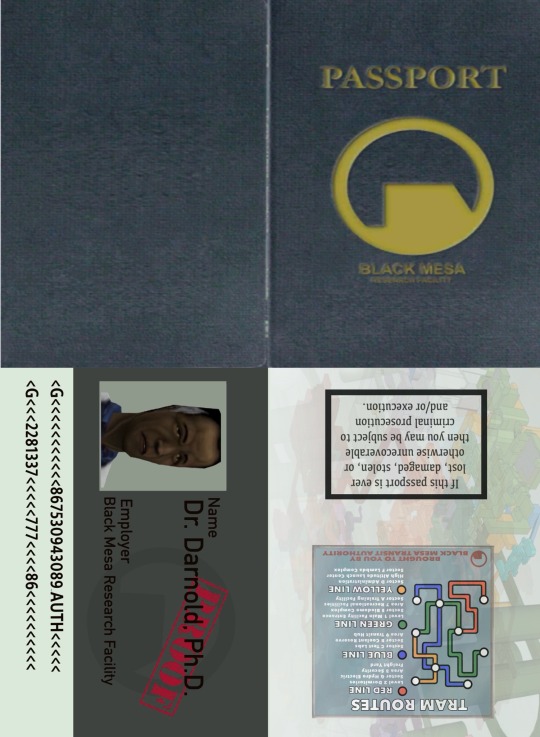
1-Sheet enhanced with HD potion: https://flic.kr/p/2mCQtPE
1 note
·
View note
