
Don't wanna be here? Send us removal request.
Statistics
We looked inside some of the posts by amberjackson-media-blog and here's what we found interesting.
Average Info
Notes Per Post
1
Likes Per Post
1
Reblog Per Post
0
Reply Per Post
0
Time Between Posts
20 hours
Number of Posts By Type
Text
5
Photo
12
Last Seen Tumblr Blogs


Fun Fact
1,644 Tumblr posts in 1 second.
Text
Photographs
As well as creating GIFs, I also have an interest for photography. With the images I have posted, I took these at different angles and levels as a form of experimentation. I also adjusted the colours, exposure and brightness schemes to make them appear more bold or interesting to look at. This links into one of my other units on this course, unit ten; digital photography. It links into one of the many careers I am considering in the future. I resized them all to 540 pixels by however long the length of the photo itself.
0 notes


Text
Car Wash GIFs
While I was in the carwash, I decided to do a timelapse on my iPhone. After this, instead of just posting the video, I decided to split the video into GIFs. Once again, using Photoshop CC, at home, I cropped and resized the video into GIFs at 268 by 375 pixels. I added an invert gradient layer as I thought it looked interesting from my previous edits. Finalizing them, I changed the speed to 0.1 seconds as I thought they played too fast. I made them into GIFs because I toughly enjoy making them. It is one of my hobbies.
0 notes


Text
For these GIFs, I used a VHS PSD (which stands for Photoshop data), to be able to use this effect. When I was young I used to watch old VHS tapes of my parents when they were young. I also studied many music videos on YouTube, such as Coldplay’s ‘A Head Full Of Dreams' and The Weekend’s 'I Feel It Coming' which use many old-style effects to manipulate the video to look older. I believed it was an interesting effect and using this PSD somebody provided here, I was able to record my own footage of the sunset and the lake outside my house. I first experimented with a short clip of 'A Head Full Of Dreams’ sourced from YouTube so I was able to fully comprehend how to use it in Photoshop. I then moved onto my own footage of the park, I limited it to eighty frames, dragged the layers across and filtered it with distortion and grain, again, to make it seem old and replayed. I then moved onto the font, which is called 'VCR Mono’, which is sourced from DaFont.com, then added the date and time that this footage was taken. On my footage, I duplicated the text layer twice and edited the blending options to blue and red, thus giving off the slight 3D effect. My final edit of the text was to reduce the opacity to seventy-five per cent. To conclude, I resized the GIFs to 268 by 151 pixels. This was to ensure they would not look blurry when uploaded to Tumblr.
0 notes
Photo


For these GIFs, I used a VHS PSD (which stands for Photoshop data), to be able to use this effect. When I was young I used to watch old VHS tapes of my parents when they were young. I also studied many music videos on YouTube, such as Coldplay's 'A Head Full Of Dreams' and The Weekend's 'I Feel It Coming' which use many old-style effects to manipulate the video to look older. I believed it was an interesting effect and using this PSD somebody provided here, I was able to record my own footage of the sunset and the lake outside my house. I first experimented with a short clip of 'A Head Full Of Dreams' sourced from YouTube so I was able to fully comprehend how to use it in Photoshop. I then moved onto my own footage of the park, I limited it to eighty frames, dragged the layers across and filtered it with distortion and grain, again, to make it seem old and replayed. I then moved onto the font, which is called 'VCR Mono', which is sourced from DaFont.com, then added the date and time that this footage was taken. On my footage, I duplicated the text layer twice and edited the blending options to blue and red, thus giving off the slight 3D effect. My final edit of the text was to reduce the opacity to seventy-five per cent. To conclude, I resized the GIFs to 268 by 151 pixels. This was to ensure they would not look blurry when uploaded to Tumblr.
1 note
·
View note
Text
Trinity Centre Analysis
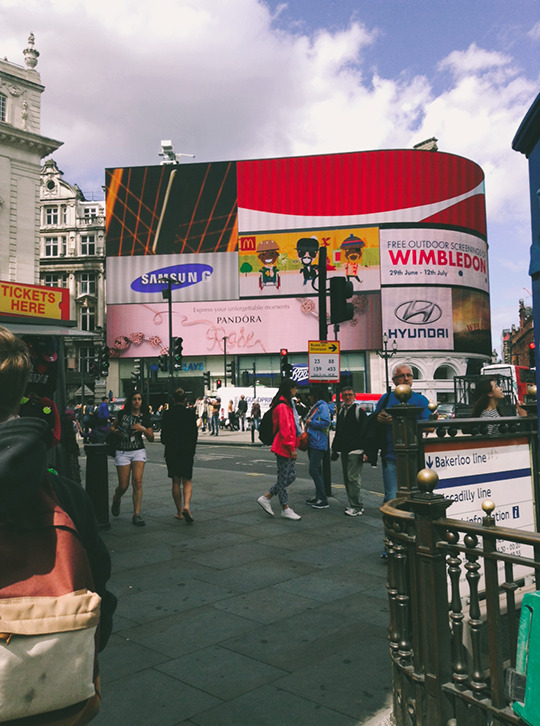
For editing these images I was inspired to give them an ‘old style’ aesthetic. I really enjoy the art of photography and I felt like these could use some touches to make them look unique. Using Photoshop CC 2017, at home, I resized the images to 268 by 357 pixels for the default Tumblr post sizes. I then sharpened them and this was when I decided to give them the aesthetic. Using the gradient tool I used the colours #A2ADAD and #FCFDFD to filter them, this gave them the old-looking style and made them look like classic photographs. In addition, I also increased the curves to increase the brightness a little.
0 notes
Photo


Sir John Tusa presents his opinions on fake news within the media at Hull Truck Theatre 🎭
0 notes
Photo


Trinity Centre, Leeds 2016
0 notes
Text
Brighton Images
While I was visiting the city of Brighton in 2015, I captured three images of the graffiti wall by the pier. For this assignment, I decided to experiment with them in the Photoshop CS6 application on the college computers, and at home. Examining the raw images, I understood the boldness and brightness of the colours and decided to use that as an advantage. In Photoshop, I increased the contrast and the saturation of the colours to make the photos more appealing. Furthermore, I edited the blending options, selected blue and red and used CTRL + left arrow to give them a slight 3D effect to emphasise the clarity. For my second image (which is the green triangle one) I thought the colour green, by itself, is quite a bold and impactful colour. I therefore made the decision to use a greyscale gradient, then by using the layer mask tool and the quick selection tool, I selected the inside triangle area (where the colour green is most present). This left a mix effect – the background of the photo remains black and white, while the foreground of the photo, the triangle remains colour.
0 notes
Photo

Brighton 2015
0 notes
Photo

Brighton 2015
0 notes
Photo

Brighton 2015
0 notes